


Inside: A tutorial on making pom pom flowers with yarn easily with a pom pom maker.
Every spring, I feel inspired to make upcycled flowers; I’ve made some DIY pom-pom flower decorations this year.
Last year, it was a denim flower bouquet; the year before, fabric flowers from bedsheets. I’ve even made beautiful map roses in the past.
I decided to craft with yarn by making the pom-pom flowers as I had many yarn scraps left over from other projects.
Note of warning, though, be careful how you stash your yarn. When digging out my yarn supplies for this craft, moths attacked some. I had to bin that yarn, as it was useless.
My knitting and crochet skills may be minimal, but I can make a mean pom-pom. I love making pom poms and find it relaxing while watching TV.
I’ve added pom poms to my denim boho pillows and large denim tassels. This time, I thought I’d get a bit more adventurous and try to make pom-pom flowers.
Marimekko Inspired Pom-Pom Flowers
If you are a regular reader of Pillarboxblue, you will have noticed I have a few obsessions besides denim and maps, which are Marimekko inspired crafts.
I love one particular Marimekko print, the Unikko poppy design. I’ve made Unikko Marimekko pillows and even painted my shed in that pattern.
I tried to channel that Marimekko inspiration with the colour and design of these pom-pom flowers. I think I nearly pulled it off, with the flowers’ colour and almost the design.
We’re a participant in the Amazon Services LLC Associates Program, an affiliate advertising program designed to provide a means for us to earn fees by linking to Amazon.com and affiliated sites. As an Amazon Associate, I earn from qualifying purchases.
What You Need
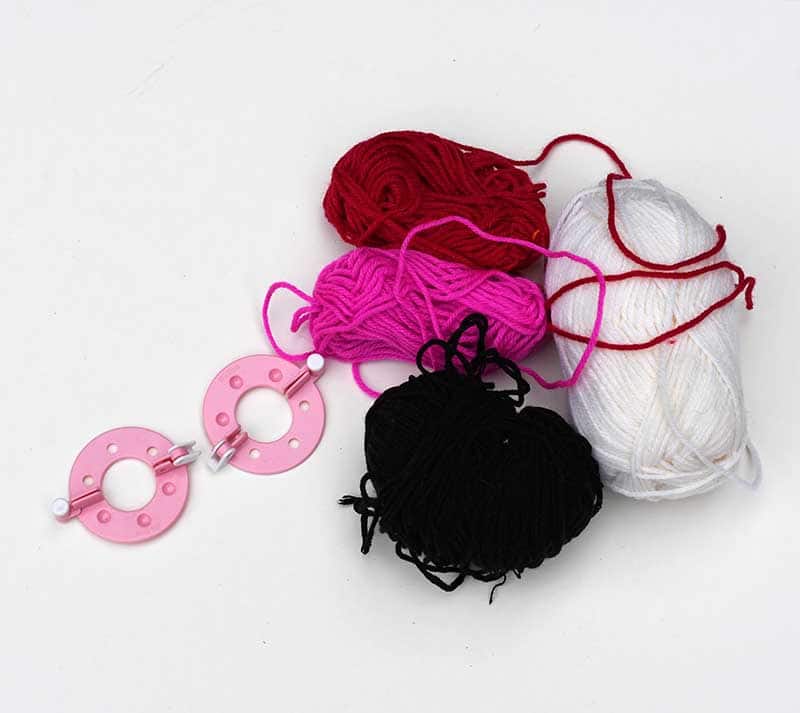
- Yarn in various colours. For each flower, you will need a small amount of black yarn for the centre of each pom-pom. Then two similar colours are red and pink, light blue and dark blue.
- Then a larger ball of yarn in a cream or off-white colour.
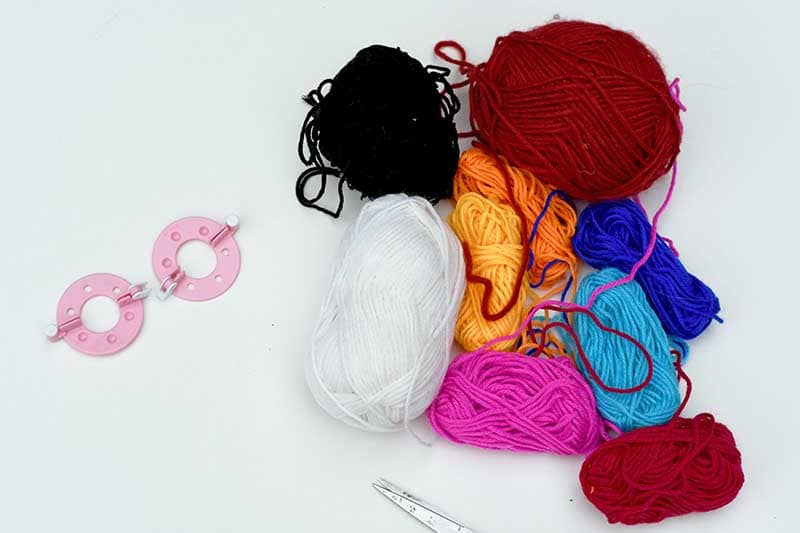

- Pom-Pom maker
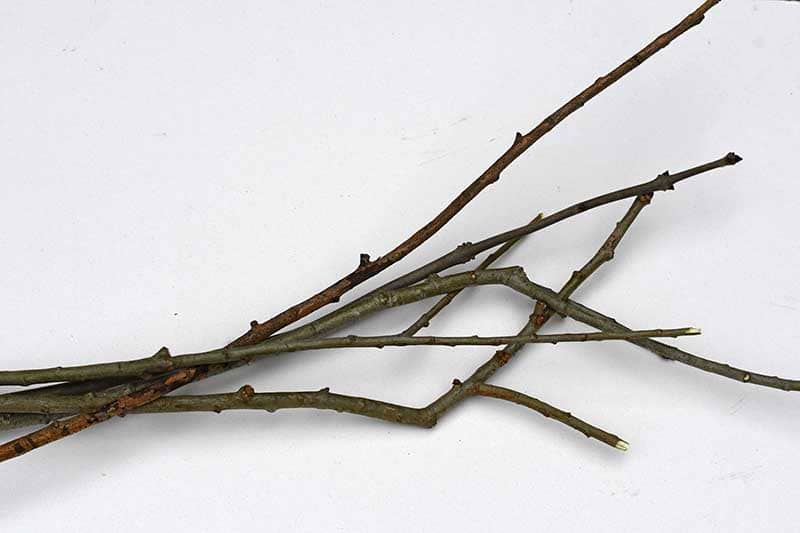
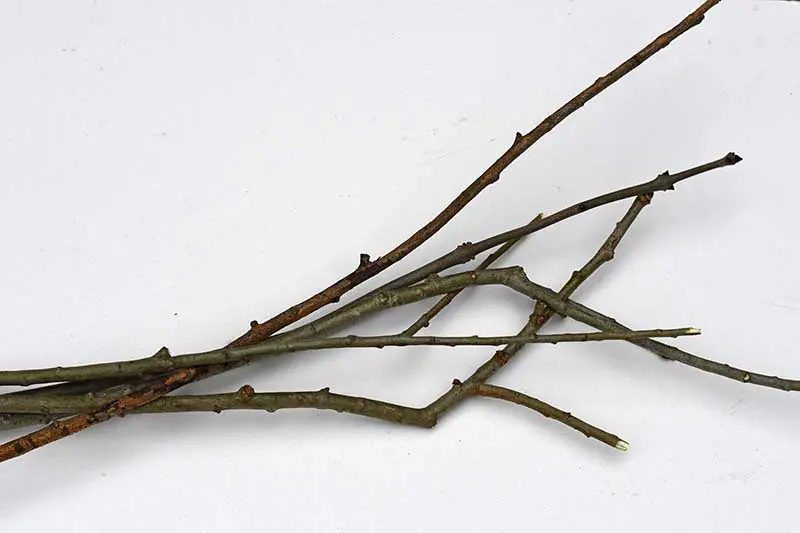
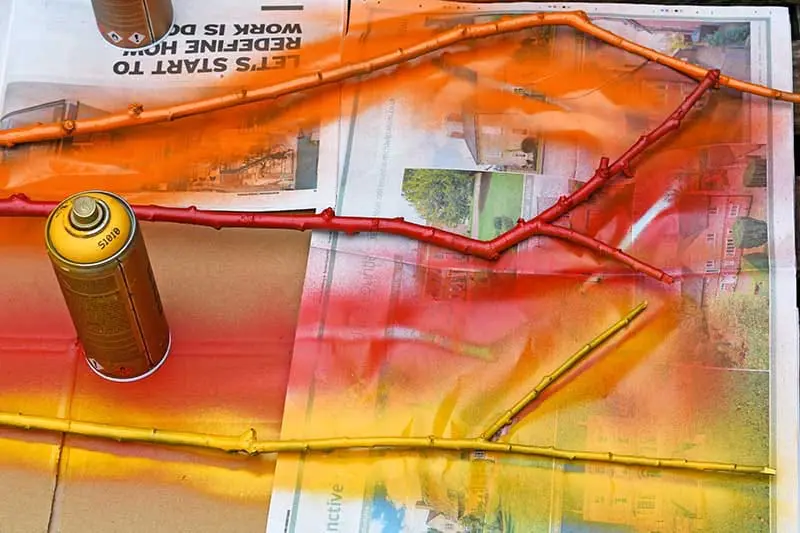
- Sticks – I just picked mine up from my local park after a particularly windy day.
- Spray paint in various colours
- Hot glue gun
How To Make Marimekko DIY Flower Pom-Poms
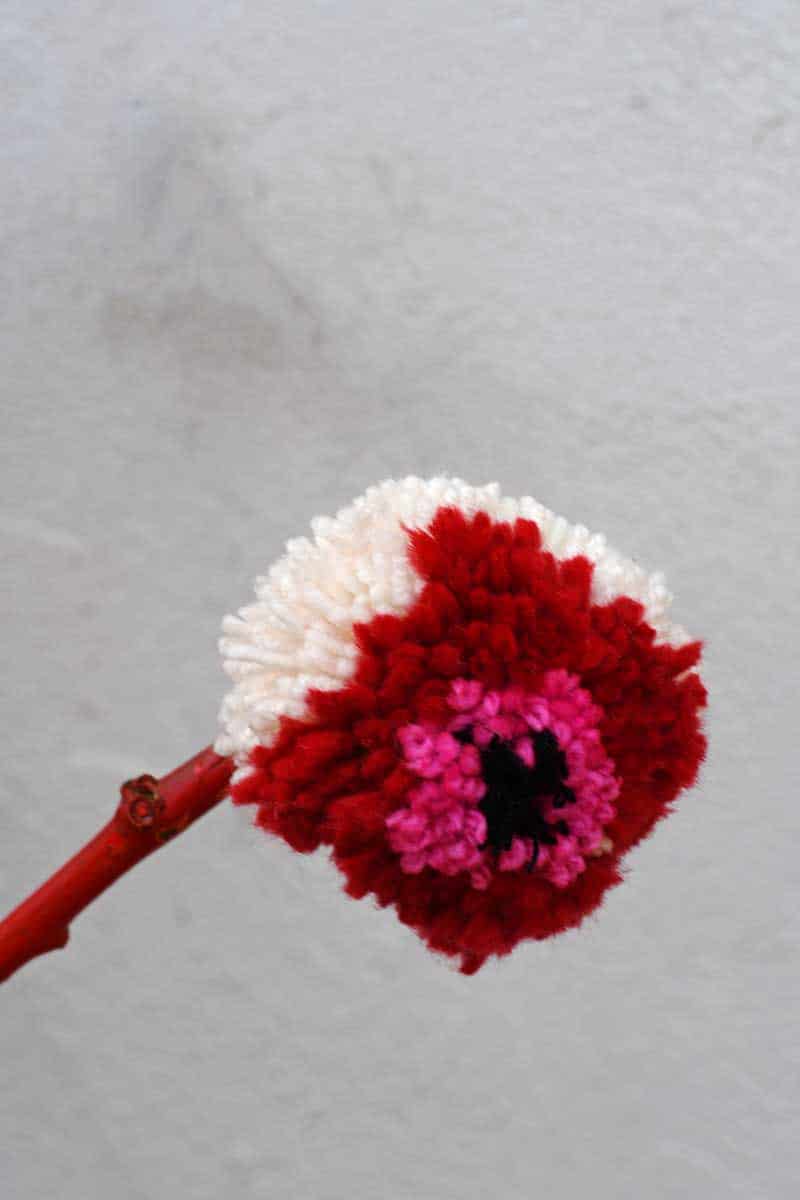
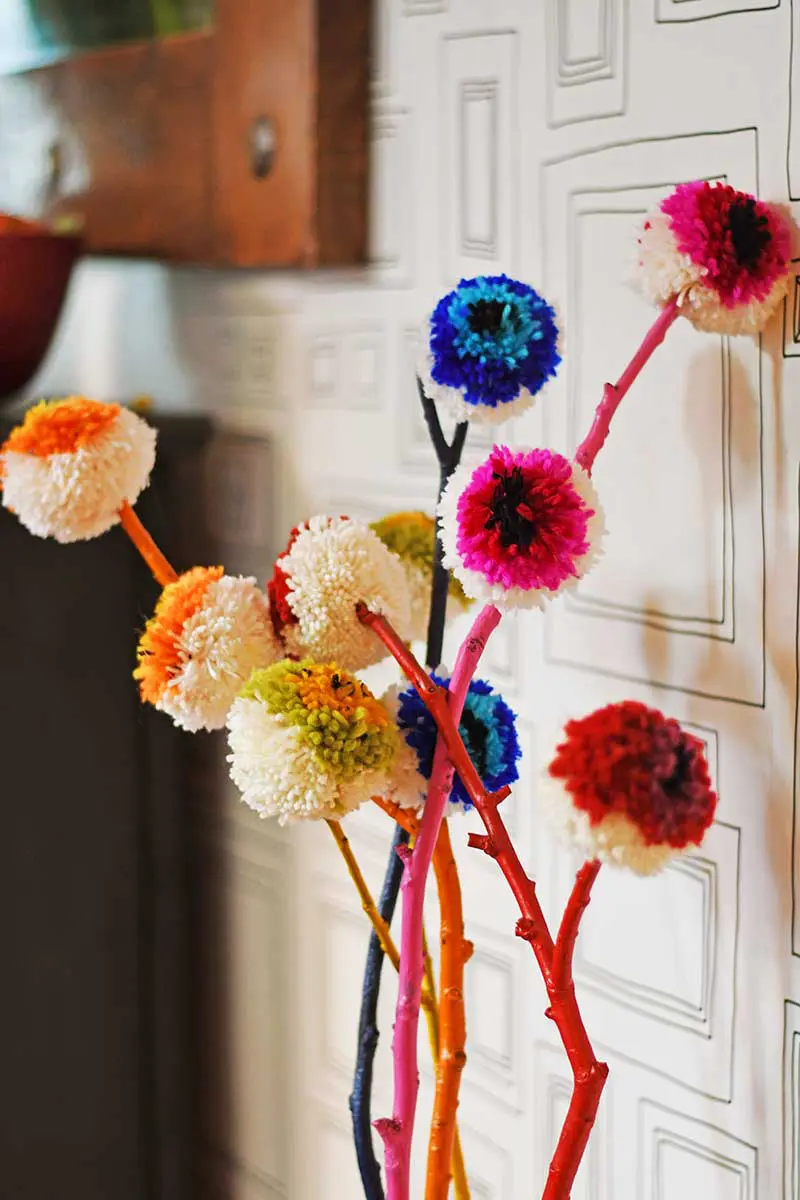
As I already mentioned, these pom-poms were based on Marimekko Unikko Poppies. So each poppy pom-pom had a black centre, two petals of similar colour, and a white/cream background.

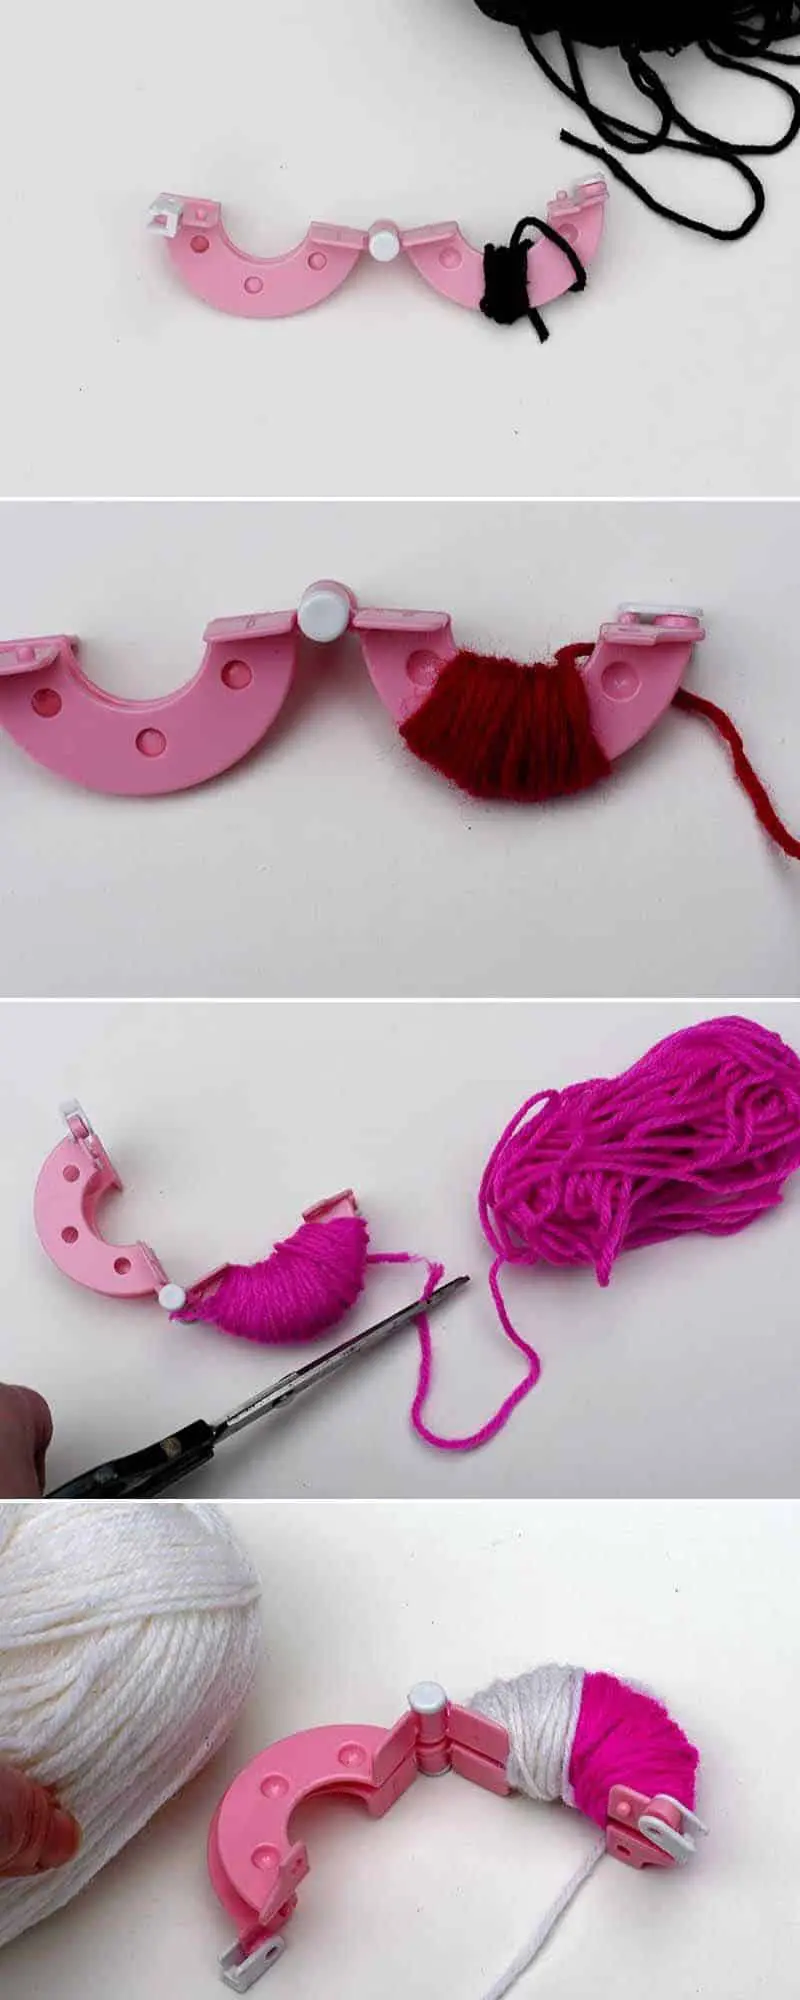
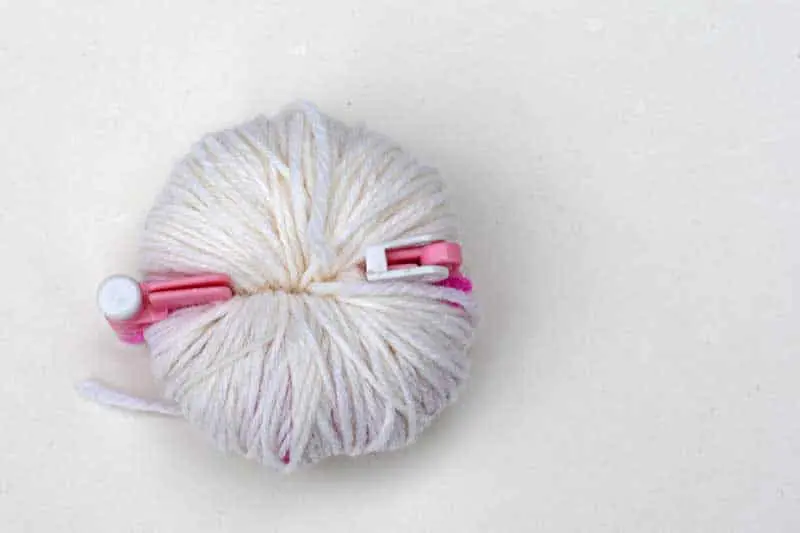
Step 1: First, open the pom-pom maker into two half-moons and slot both pieces together—one on top of the other. To start with, focus on one half-moon side of the maker.
- Wind black yarn approximately ten times around the centre of one of the pom-pom maker halves.
- Then, wind the red yarn approximately 30 times on top of the black yarn and a bit on either side.
- Then, wind the pink yarn approximately 70 times on top of the pink yarn and a bit on either side.
- Next, cover the whole side with the white yarn approximately 50 times.
- Finally, cover the other side of the pom-pom maker with white y n. You should wind the yarn around the maker the same number of times as the other side, so that would be approximately 160 times

Step 2: When you have finished winding the yarn around the pom-pom maker, close it shut.
Top Tip: The number of times you wrap the yarn around the pom-pom maker may vary by s e. Less yarn wraps for smaller pom-pom makers and more for larger pom-pom makers. Keep the proportions similar for each colour.
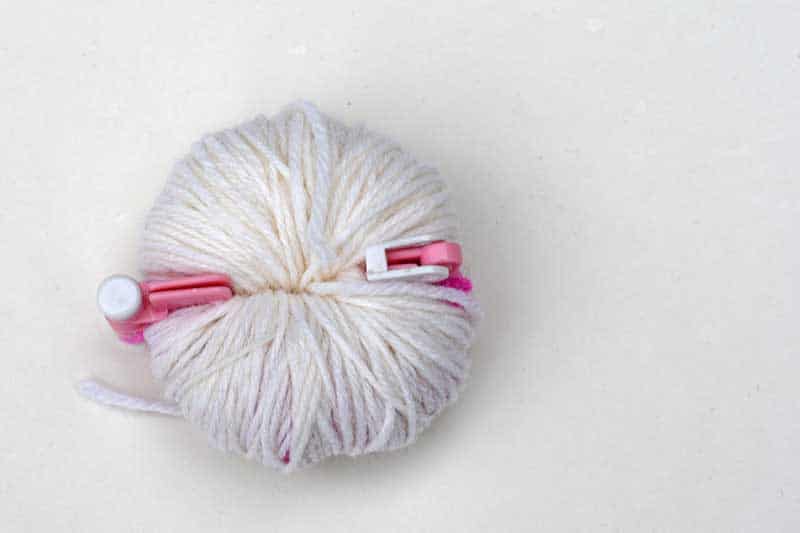
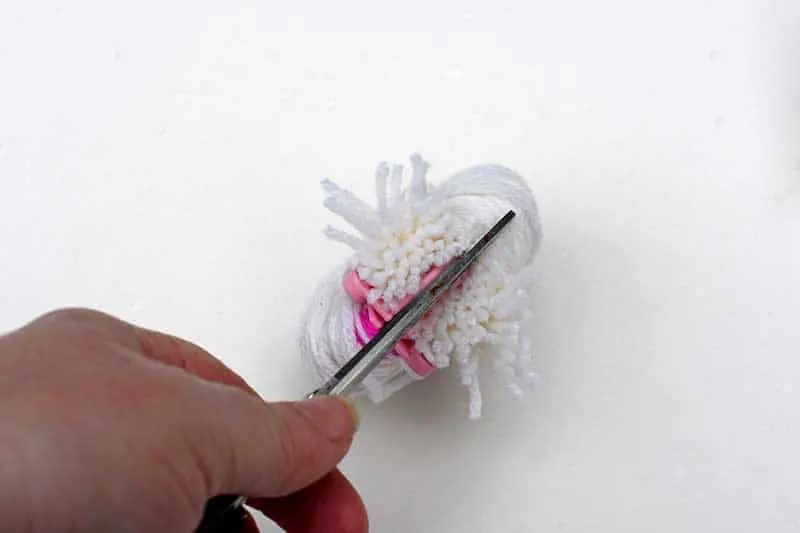
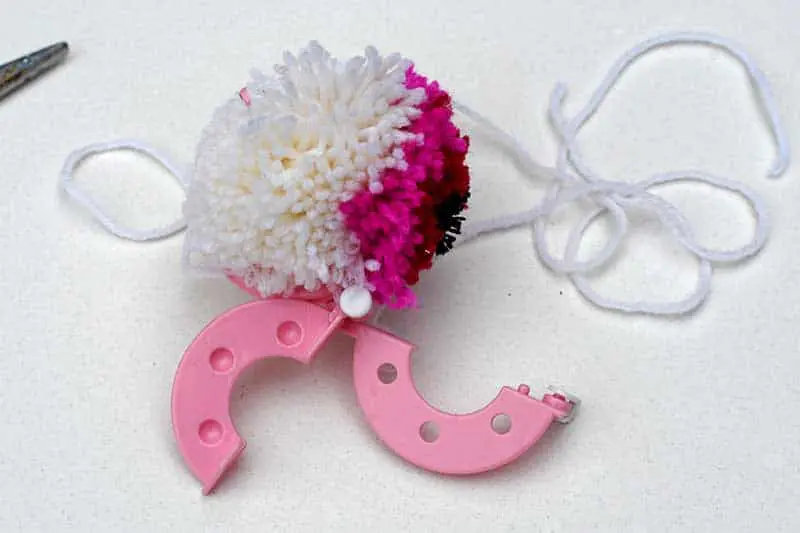
Step 3: Cut the yarn along the spine of the pom-pom maker. Cut around the spine. Then get some spare yarn and wrap it around the centre, tying it tightly to hold all the yarn together.

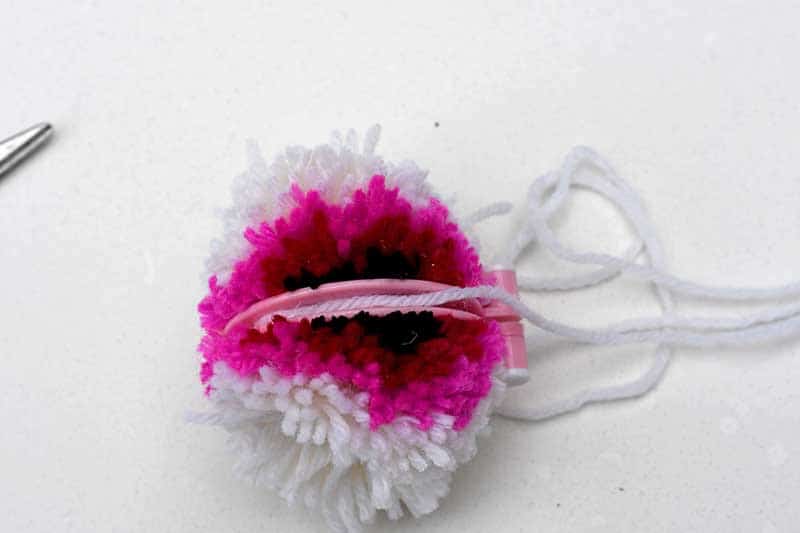
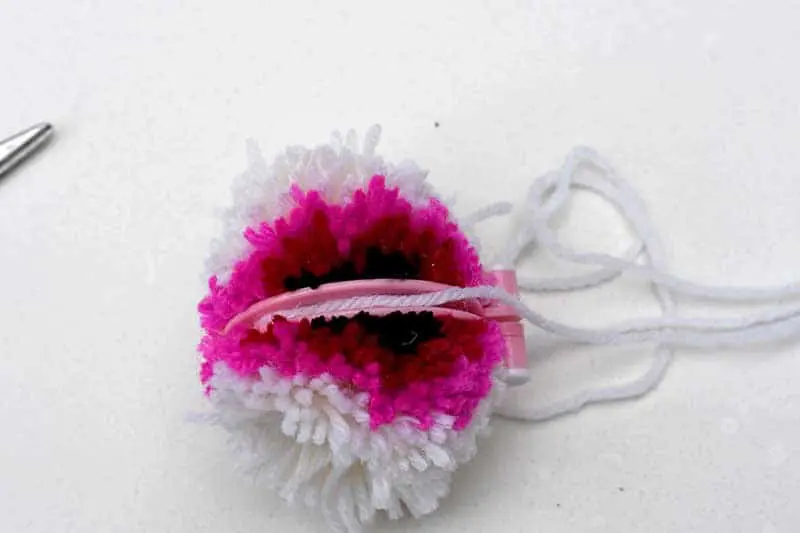
Step 4: To finish off, open the pom pom maker and remove the DIY pom-pom flower. Using scissors, trim the pom-poms to make them more fluffy and remove any stray yarns sticking up.

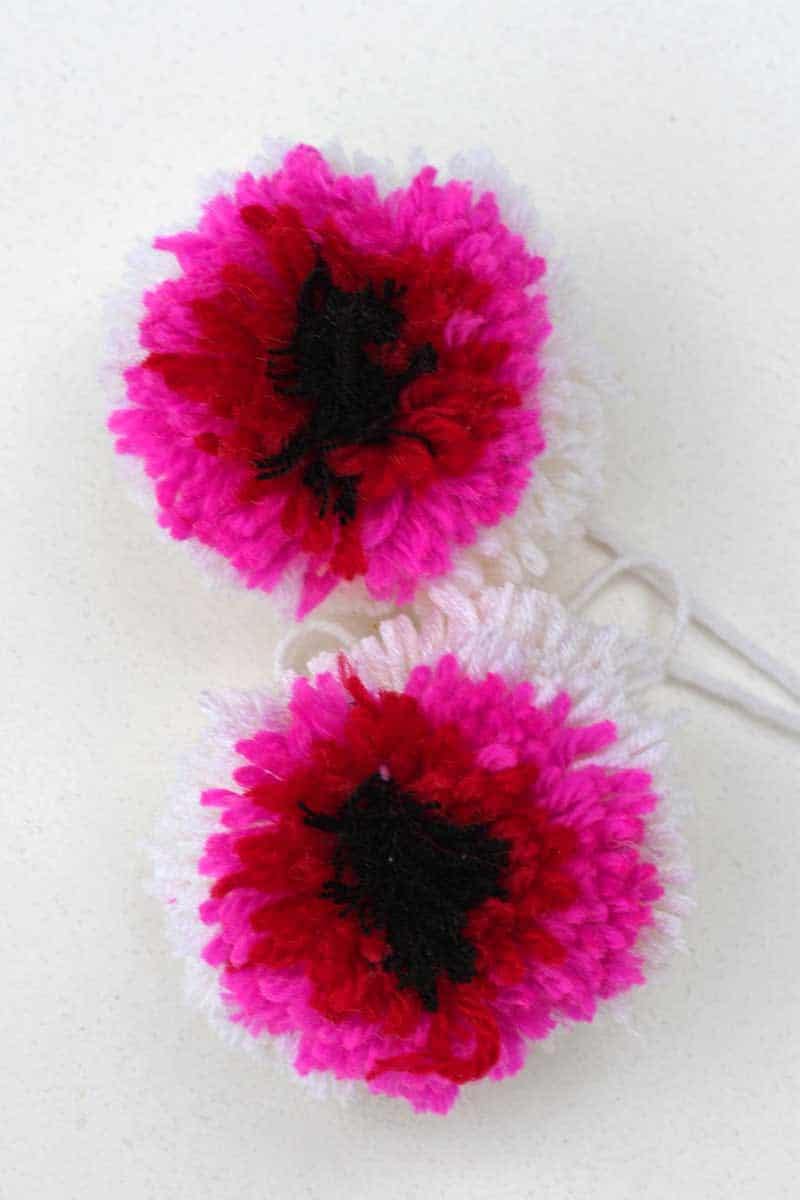

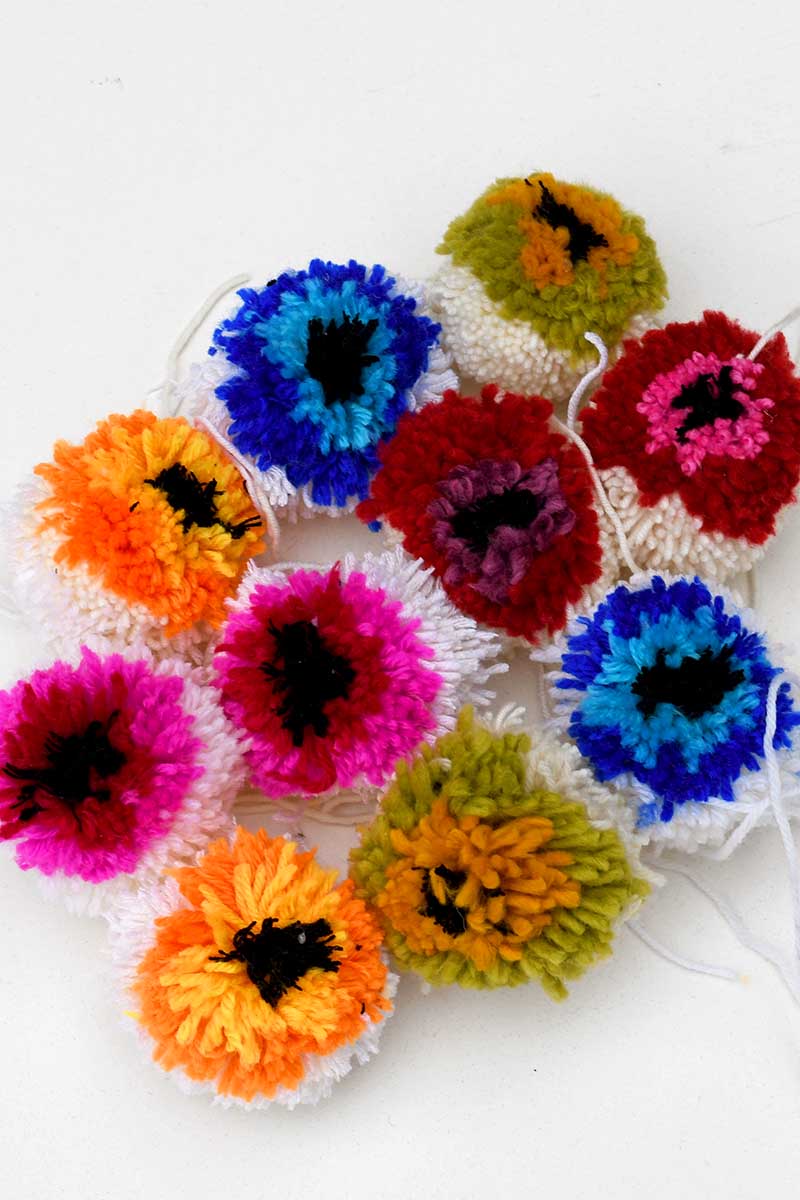
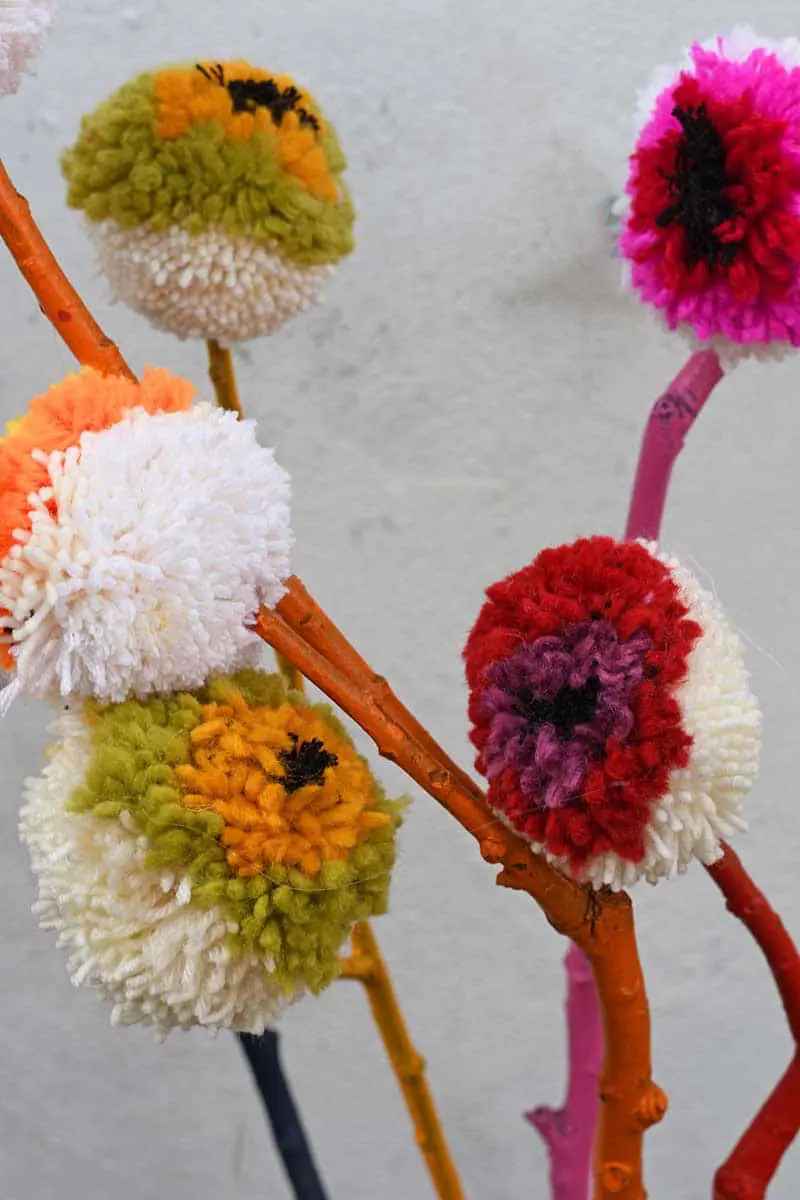
Carry on making these Marimekko DIY pom-pom flowers in various colour combinations. I made 10 in total, two flowers of each colour combination.

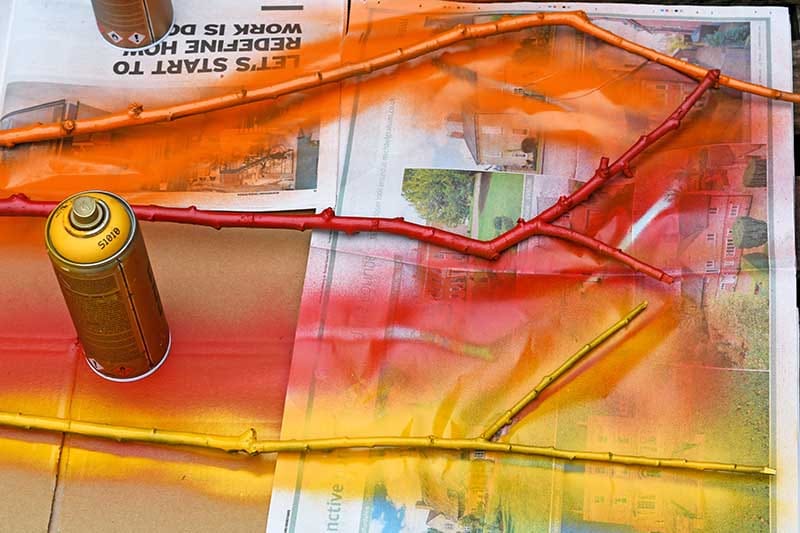
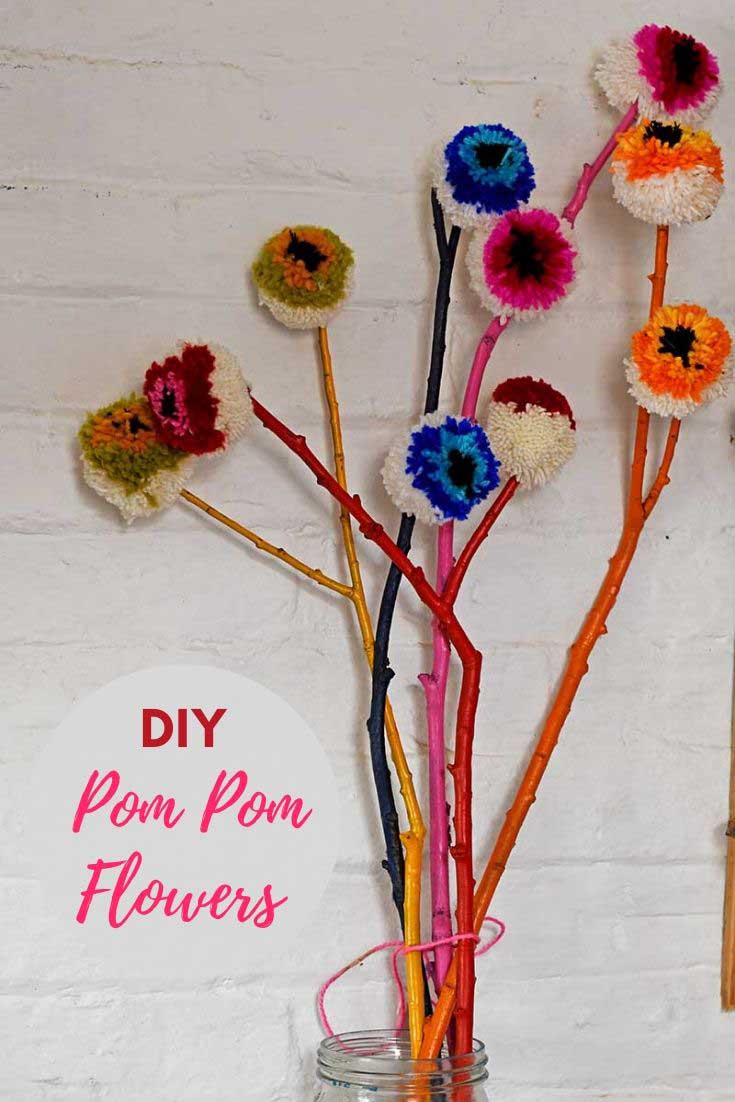
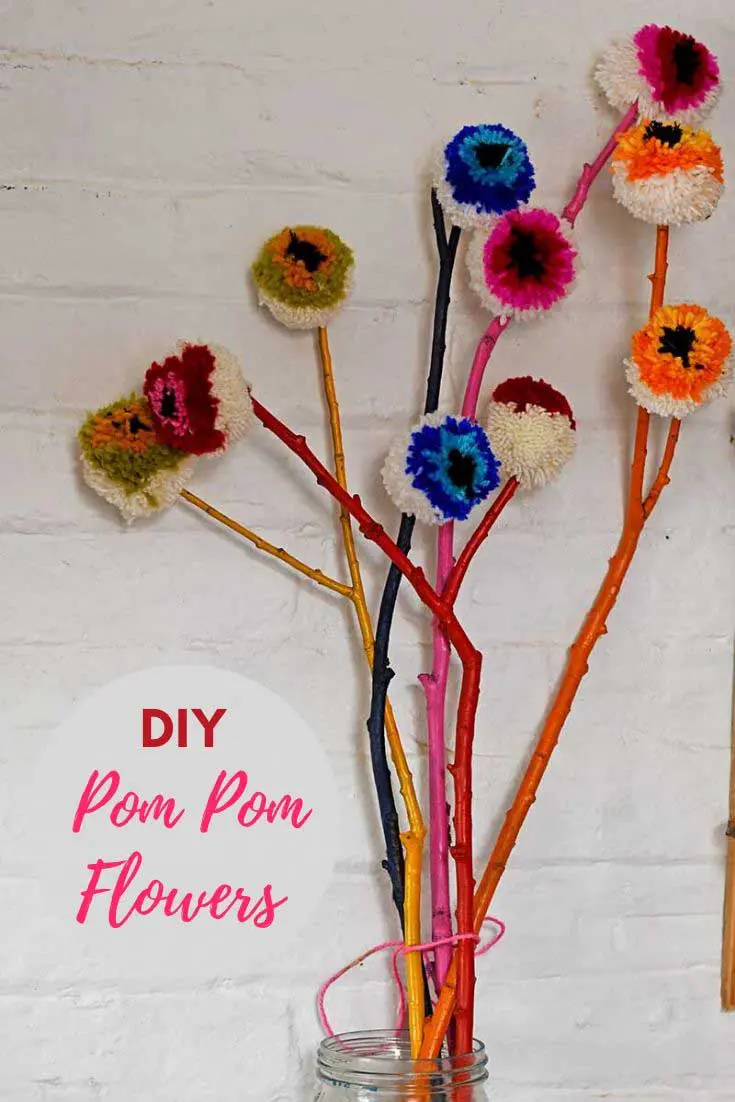
Step 5: Next, spray paint the sticks. I sprayed each colour from the rainbow, red, yellow, orange, blue and pink. These also corresponded to the colours of DIY pom pom flowers.
Step 6: Finish these colourful spring flower decorations by glueing the pom-pom flowers to the rainbow-coloured sticks. I glued two pom poms to each stick using a hot glue gun. I matched to flower colours to the stick colours.


You don’t need much yarn/wool for the colourful centres of these flowers, so this craft is a great stash buster. You could experiment by making pom-pom flowers in various sizes and colours. I made smaller colourful pom-poms for these fun hanging denim decorations.
My home is full of colour; I love to decorate with rainbows. You should check out the rainbow thistle decorations I have made. I’ve even made a rainbow spray-painted lampshade.
You should check out repurposed rainbow planters and upcycled leather pots if you prefer natural plants and flowers to faux ones.
Like these decoupage bauble flower decorations, you will find many more cool adult crafts here.
Check out these other handmade fabric flower ideas and spring craft ideas.
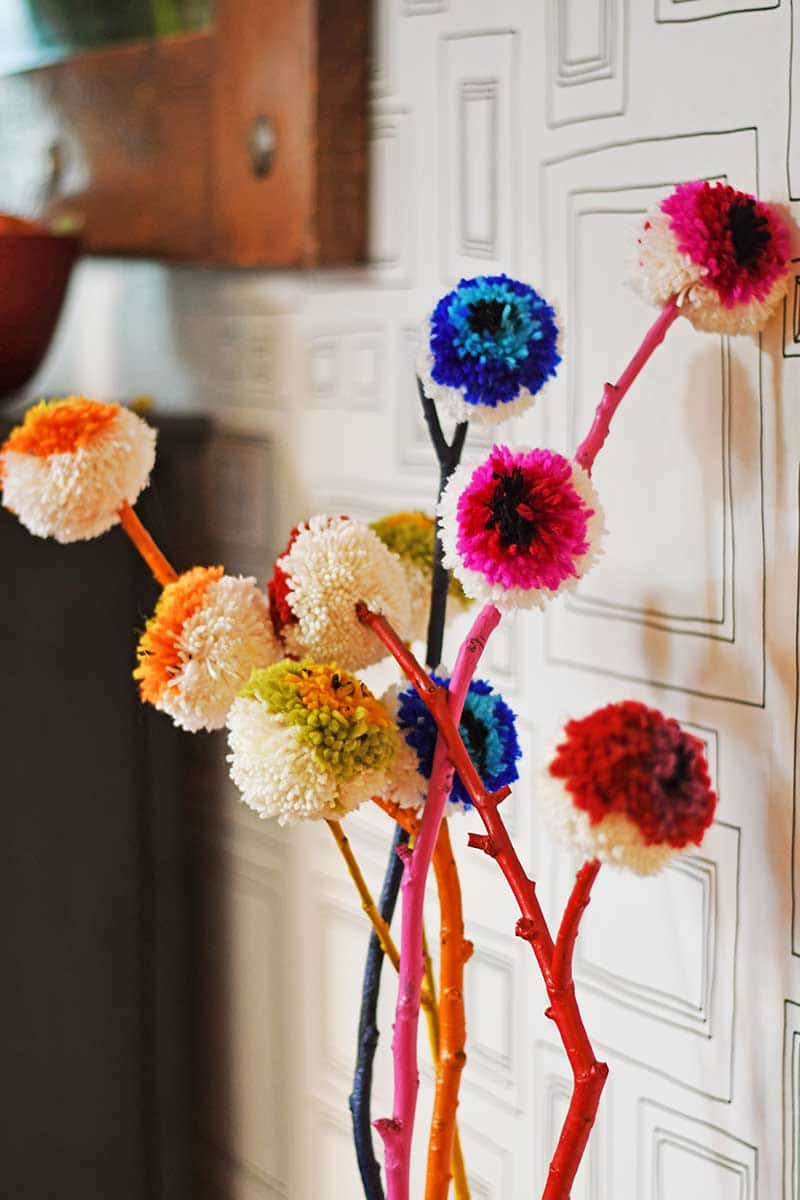
Marimekko DIY Pom-Pom Flowers


This craft is a great yarn stash buster and fun to make. The pom-pom flowers are inspired by the famous Marimekko Unikko poppy design. The colorful rainbow flowers will brighten up any home.
Materials
- Yarn/wool in various colors
- Sticks
- Spray paint
Tools
- Pom-pom maker
- Scissors
- Hot glue gun
Instructions
- Open up the pom-pom maker and slot the two pieces together.
- Wrap black yarn 10 times around the center of one half of the pom-pom maker.
- Next, wrap red yarn 30 times on top of the black yarn and to the sides a bit.
- Next, wrap the pink yarn over the red yarn and to the sides approximately 70 times
- Then, wrap the white yarn around the red yarn and completely cover the other half of the pom-pom maker with white yarn.
- Close the pom-pom maker and then cut the yarn across the spine.
- Tie the pom-pom in the middle with yarn and then remove from the pom-pom maker.
- Trim the pom-poms to make them more fluffy and round.
- Repeat making 9 more pom-poms in different color combinations
- Spray paint the sticks in the colors of the rainbow.
- Using a hot glue gun, glue 2 pom-pom flowers to each stick. Match the colors of the pom-pom flowers to the colors of the stick.
Recommended Products
As an Amazon Associate and member of other affiliate programs, I earn from qualifying purchases.

For more pom-pom craft ideas, visit favecrafts.
Tina Pocock
Thursday 16th of December 2021
These came out really well, I've been making pompoms with grandkids and wanted to try these myself before getting them to make them - even a 6 year old managed to make a lovely pompom that I made into a hairclip for her. Thank you for the clear and easy instructions.
Claire Armstrong
Monday 20th of December 2021
Thank you, I’m glad to hear they worked out well.
Ann
Monday 9th of March 2020
These are so bright and cheerful! Thank you for sharing at Party In Your PJ's, you are being featured on my blog Tuesday evening.
Claire Armstrong
Wednesday 11th of March 2020
Thank you so much, I look forward to seeing the feature.
Pamela
Saturday 7th of March 2020
These are AMAZING!! You nailed it! They are so bright and happy!
Claire Armstrong
Sunday 8th of March 2020
Thank you so much, that was the look I was going for.
creativejewishmom/sara
Thursday 5th of March 2020
love love love! A friend just gave me 2 bags of yarn odds and ends, so this would be perfect. The only problem is the majority is various navy blues, hmmmmaybe mine will have to be thistle balls and not Marrimekko flowers? thanks so much for sharing on craft schooling sunday!
Claire Armstrong
Friday 6th of March 2020
Thank you, I love the idea of thistle balls.
Julie
Thursday 5th of March 2020
I could honestly not love these more! Pom pom all the things!
Claire Armstrong
Friday 6th of March 2020
Thank you so much Julie. I do love a Pom Pom.