

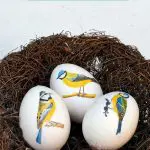


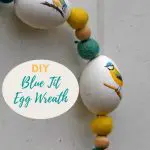
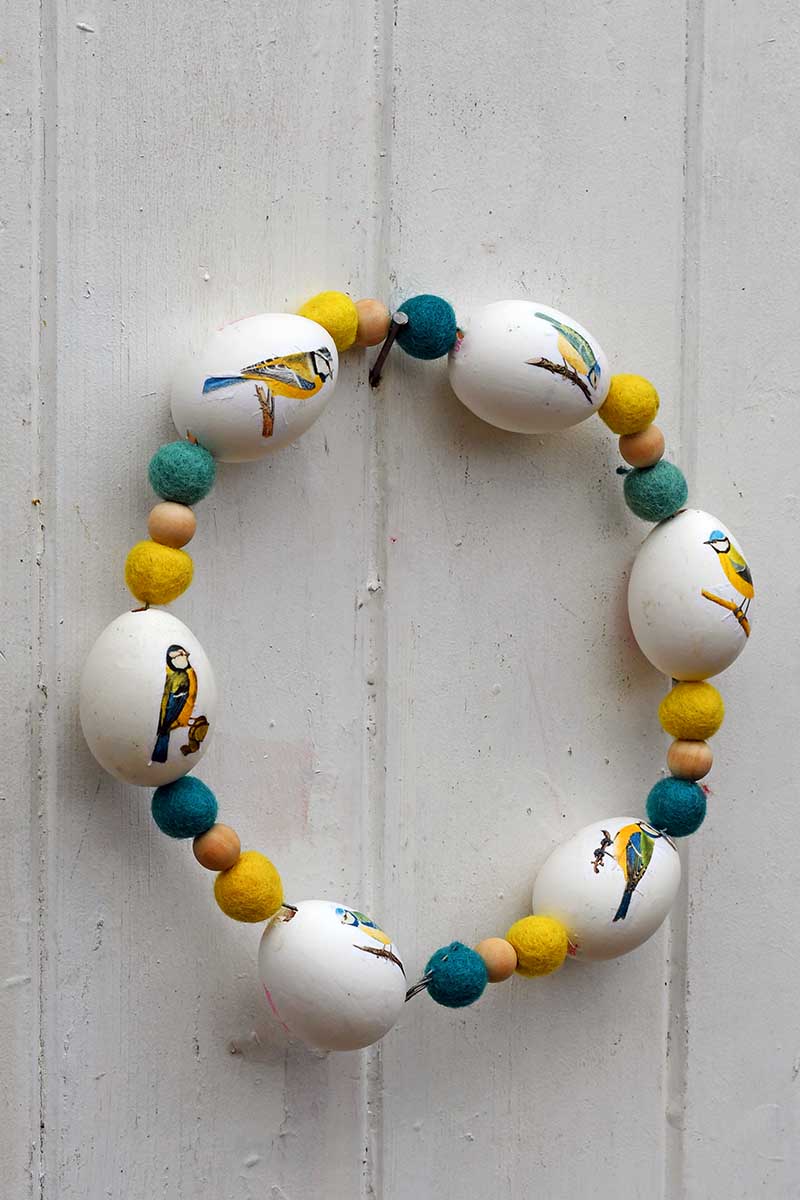
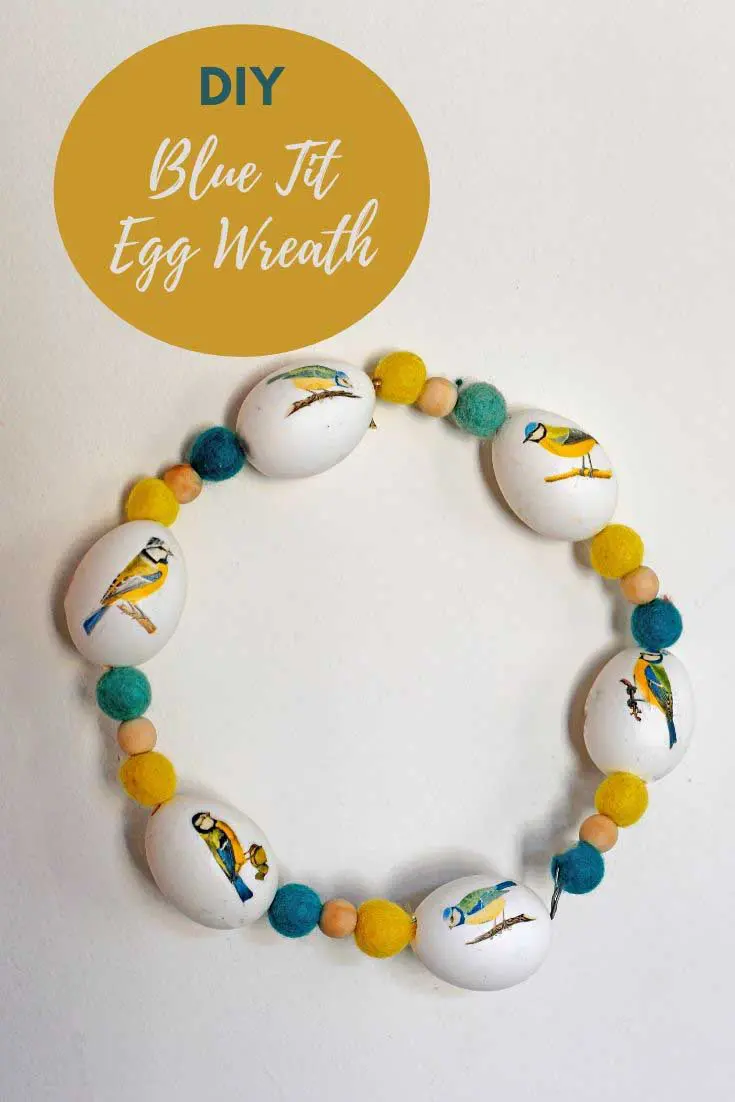
There are many symbols of spring, such as eggs, bunnies, birds and flowers. I combined two of them with this decoupage blue tit spring egg wreath decoration.
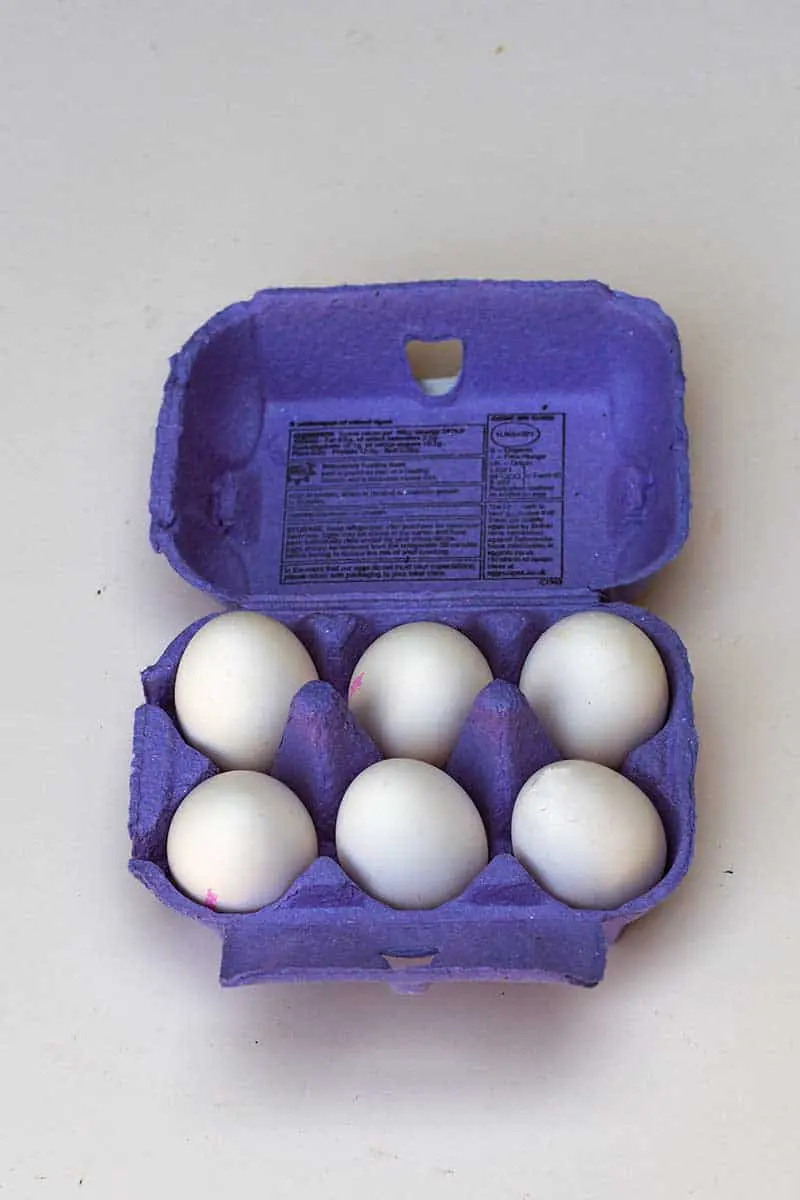
Being an upcycler I prefer to craft with real eggs rather than plastic or polystyrene craft eggs. Using real eggs is not only more affordable but also better for the environment.
Plus with the current stay at home policy, I couldn’t visit a craft store even if I wanted to. Also, I got to make one big omelette for my lunch.
In the past, I have made designer decorated eggs with Marimekko paper napkins. I even made a Marimekko Easter egg wreath. I’ve even gone the whole hog with the upcycling theme by making patchwork denim eggs.
I have opted for a bird theme with this spring egg wreath for my latest Easter craft.

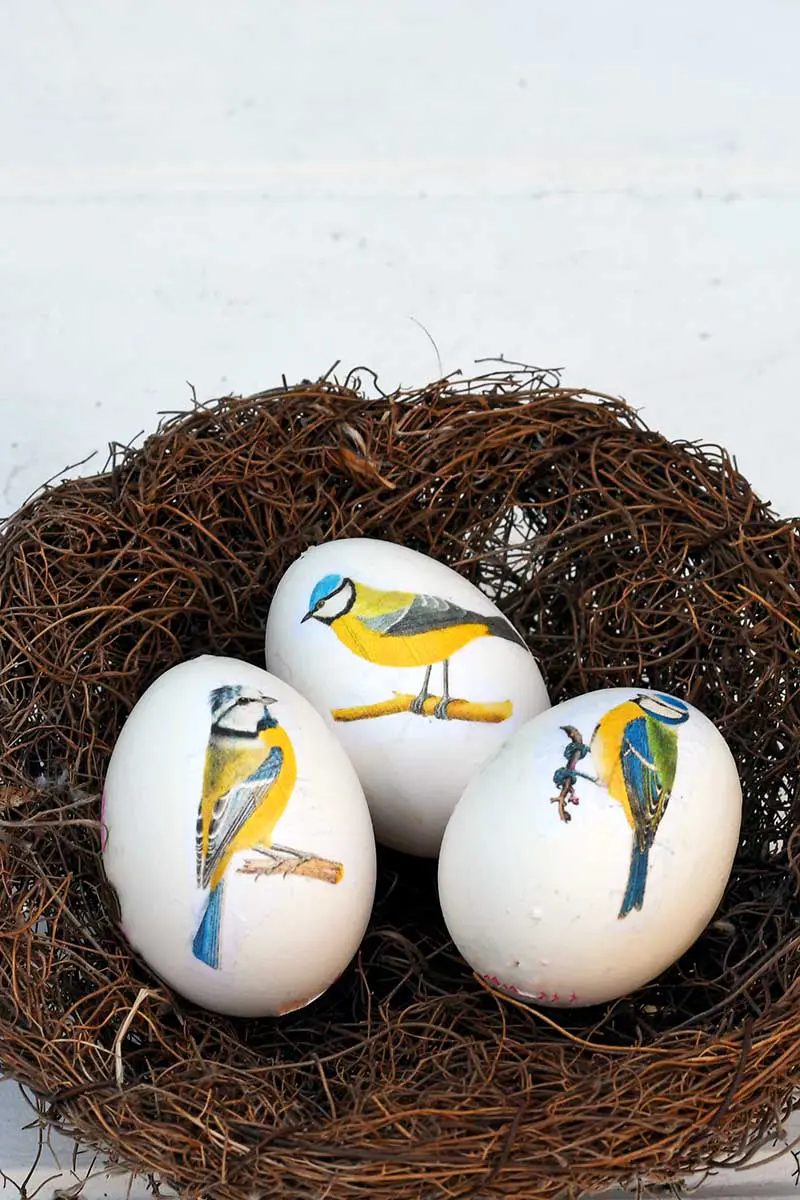
One of my favorite garden birds is a pretty and colorful blue tit. Every year the same pair of blue tits come to nest in the same bird box in the garden. I always associate these birds with spring and decided to decoupage the eggs for my wreath with vintage blue tit drawings.
We’re a participant in the Amazon Services LLC Associates Program, an affiliate advertising program designed to provide a means for us to earn fees by linking to Amazon.com and affiliated sites. As an Amazon Associate, I earn from qualifying purchases.
What You For The Spring Wreath
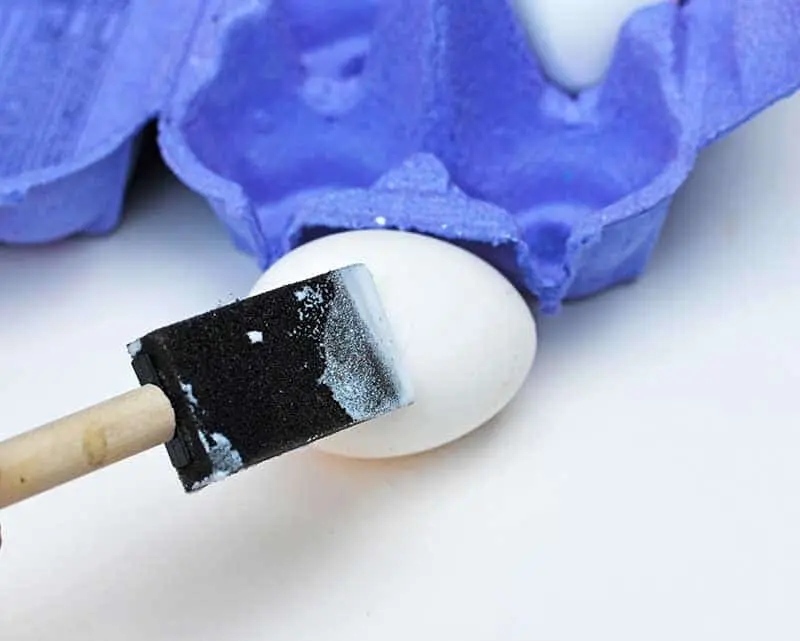
- Half a white dozen eggs – If you can’t get white eggs then use brown ones and paint them white. I know in the US most eggs are white however, in the UK most eggs are brown.
- Cocktail sticks
- Decoupage glue such as Mod Podge
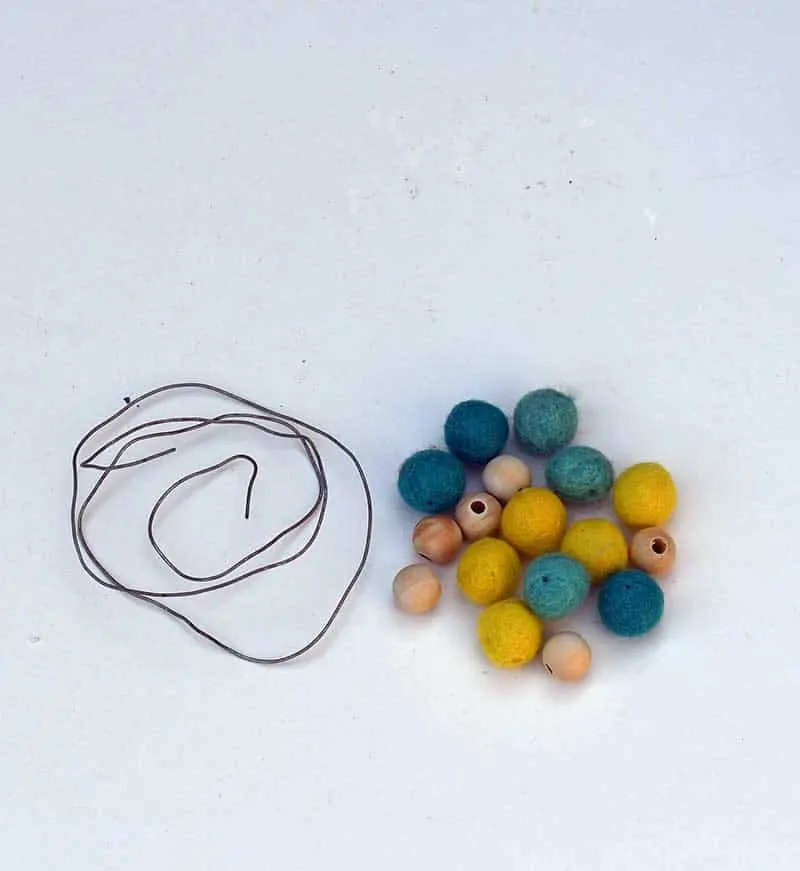
- Garden wire
- A mixture of felt balls in blue and yellow and wooden beads. If you don’t have these you could use some other beads from perhaps an old necklace.
- White tissue paper or a plain white paper napkin
- Masking tape

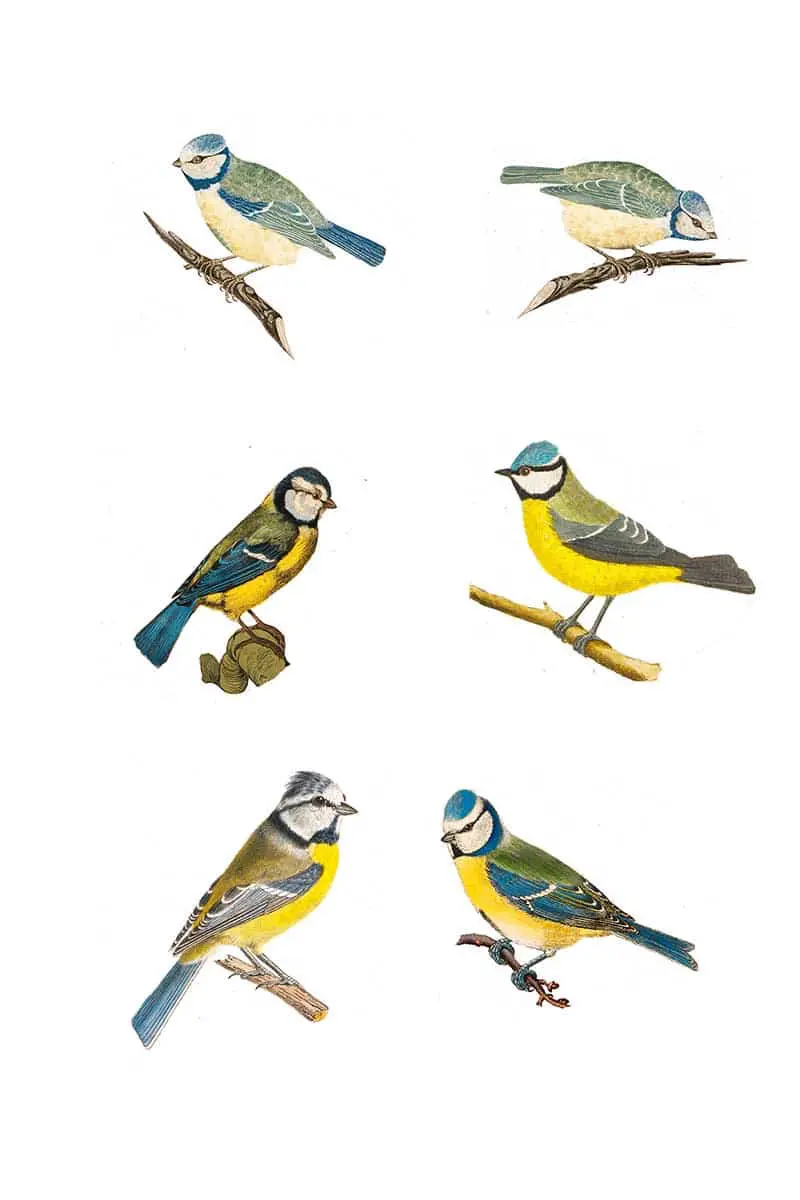
- Blue tit clip art – you can download them here for free in two sizes.

How To Make A Blue Tit Egg Wreath
Step 1: The first thing is to blow your eggs. That is to remove the egg white and yolk from the eggs. To do this using a nail punch a hole in both the top and bottom of the egg.
Then blow into the hole in the top of the eggs. The yolk and white should come out of the bottom hole. Then gently rinse the inside of the eggs by placing the top hole under a running tap.
If you need more details of egg blowing there are some here with these patchwork fabric Easter eggs.
Step 2: Next, print the blue tit clip art (link above) on the tissue paper or paper napkins if you don’t have any. You can do this on a home inkjet printer by taping the tissue paper to computer paper with masking tape.
If you need more details on printing on tissue paper there are some with this decoupage shell dish craft.

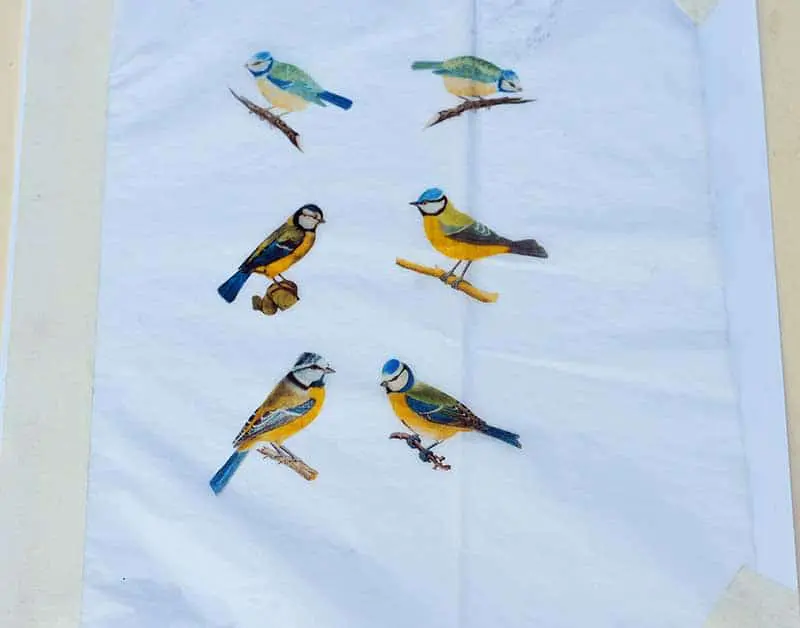
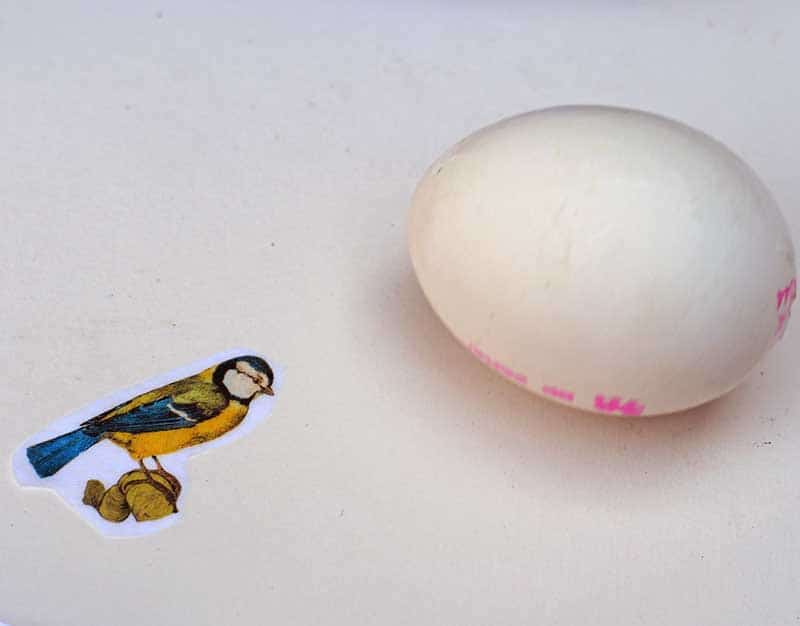
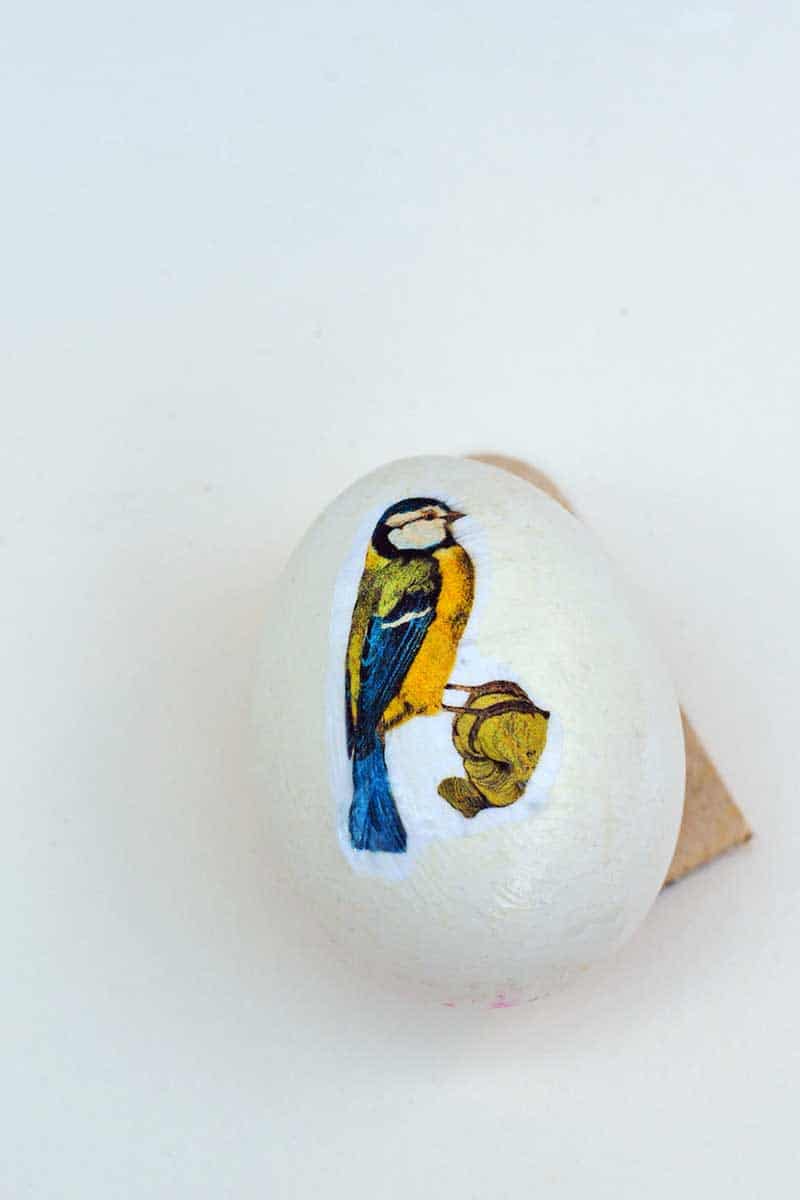
Step 3: Next, cut out the birds from the paper. You can cut out the blue tits with a border as they have been printed on white paper and will be decoupaged onto white eggs.
Using decoupage glue, stick the blue tit to the egg. Paste the glue onto the egg only and not the tissue paper.


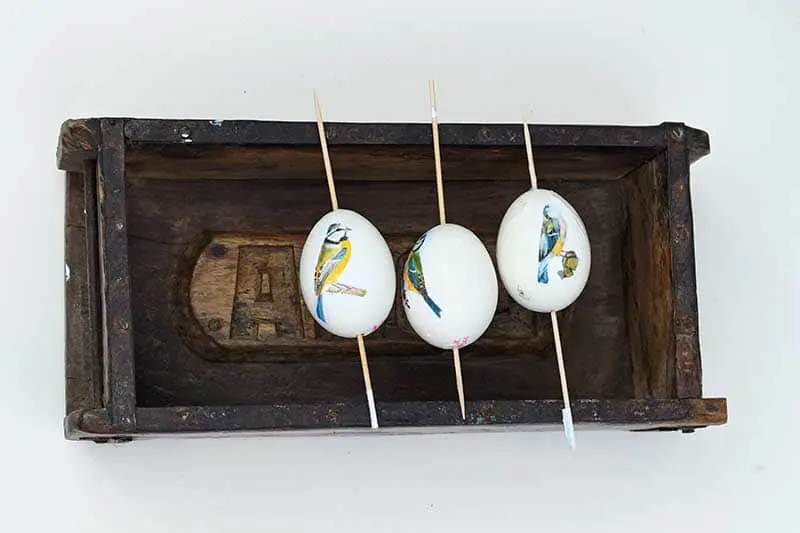
Step 4: Then, cover the whole egg in decoupage glue. Thread a cocktail stick through the holes in the egg, then rest the egg over a box. This will enable the glue to dry without touching anything else
The glue not only protects the decoupaged image but it also strengthens the fragile eggshell. In fact if you coat the eggs in two layers of glue they will make the finished egg wreath more robust.


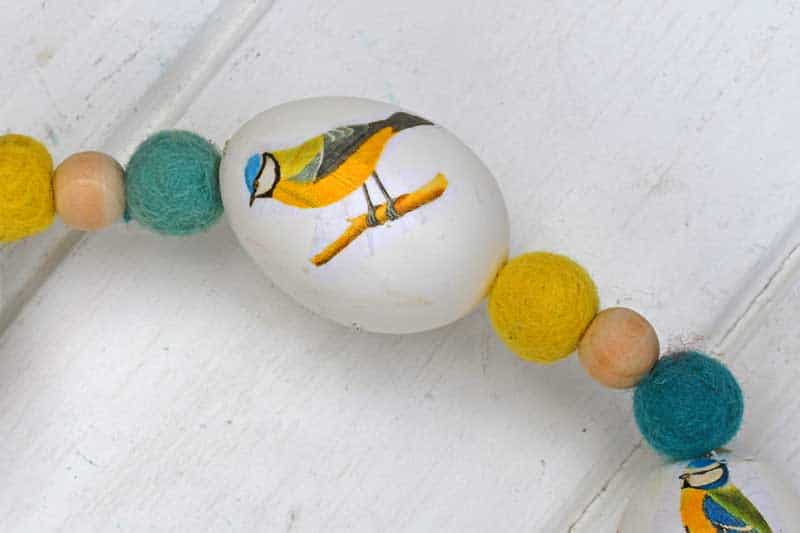
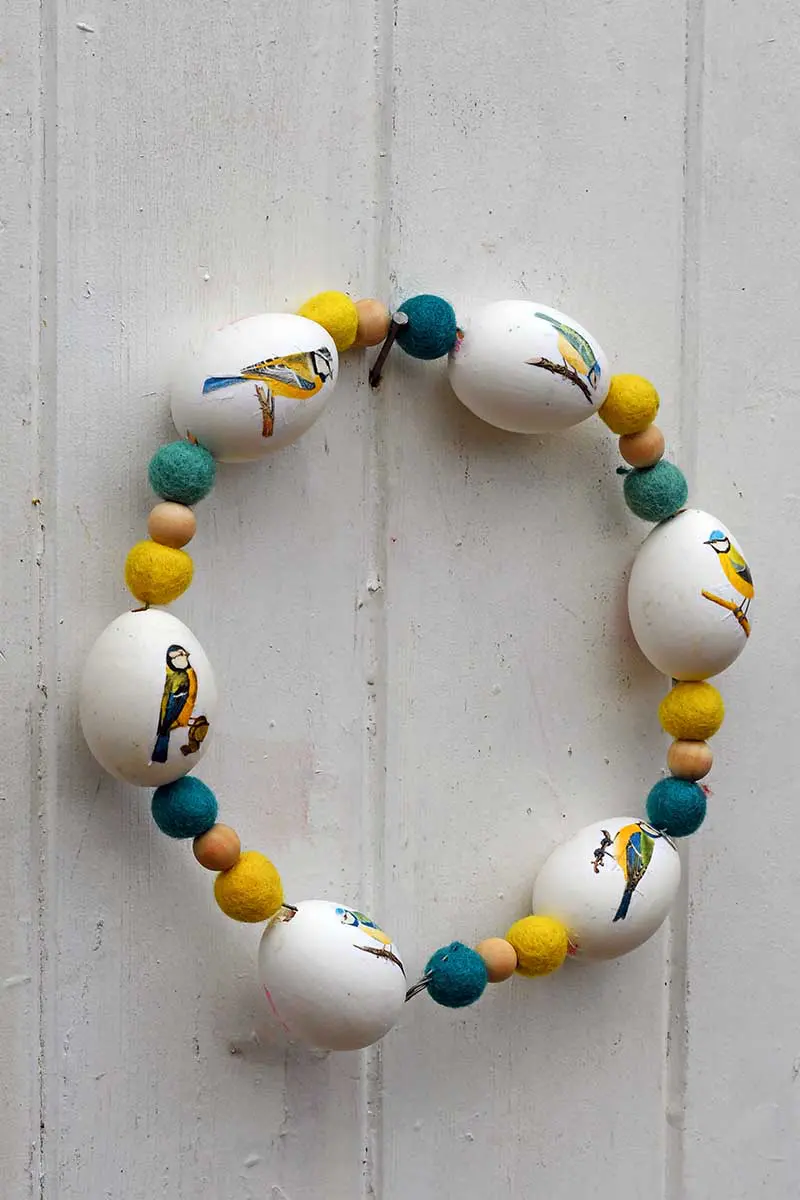
Step 5: Finally, the egg wreath is ready to assemble. First thread a blue felt ball, then a wooden bead and then a yellow felt ball onto the wire. Then carefully thread one of the blue tit decoupaged eggs.
Repeat adding more felt balls, beads and eggs until all six eggs are added. Twist the wire ends to close and carefully bend the spring wreath into a round shape.

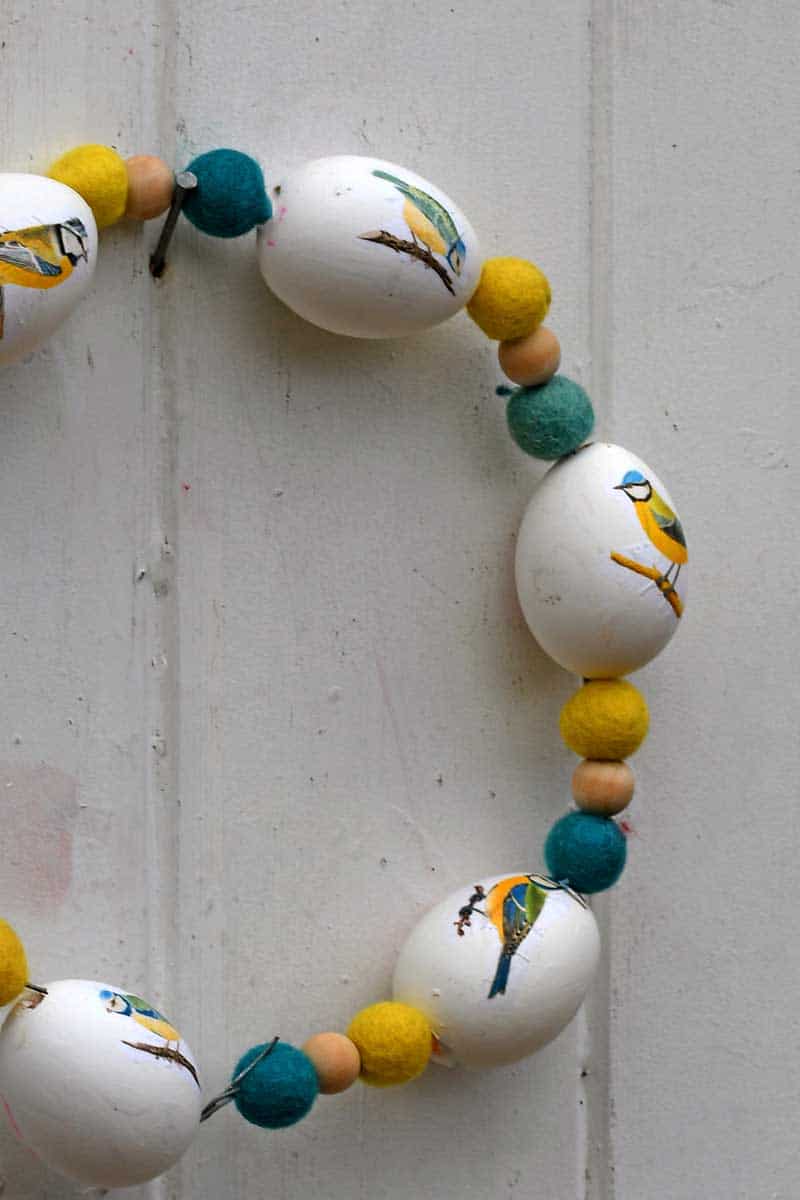
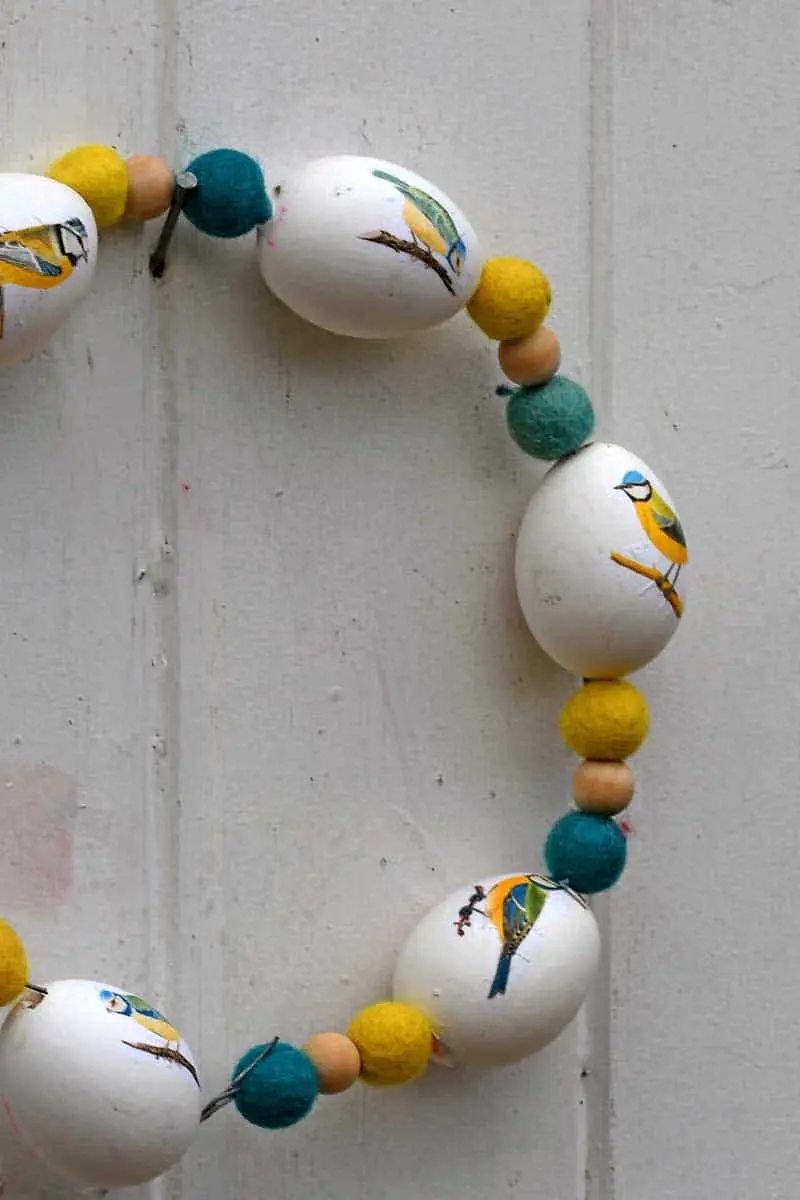
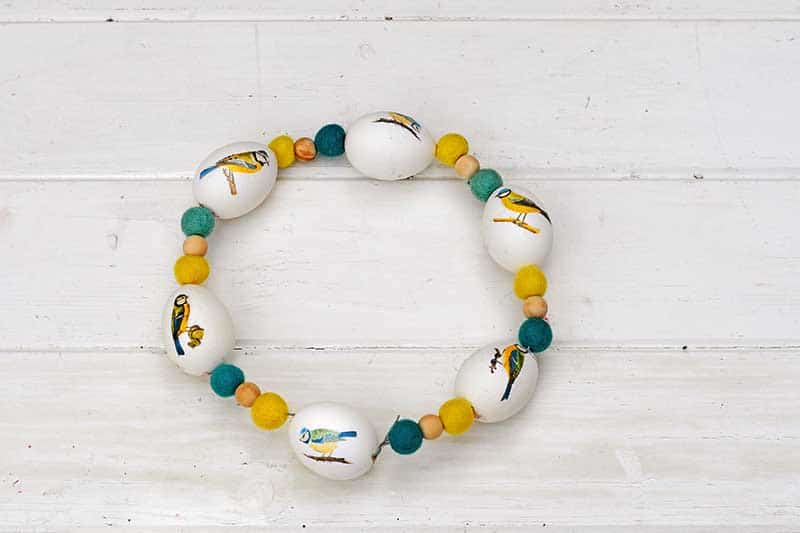
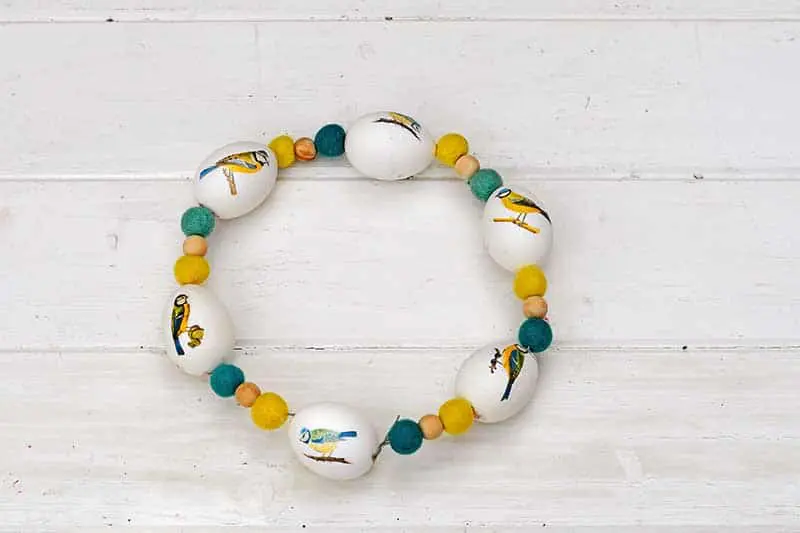
All that is left to do is to hang the wreath. It is very light and only needs a small nail to hang from.
If you want to use other birds besides blue tits, with this gorgeous decoupage tin can wind chime there is some more free songbird clip art.
For some other fun bird-related spring crafts check out these cute upcycled spring fabric birdcages and pretty handmade fabric birdhouses. Or even these cool paper mache Anthropologie rabbit head.
For more spring wreath ideas visit allfreeholidaycrafts.

I love blue tits, I even put one on the colorful DIY yarn wreath I made.
Puppy foodie
Thursday 23rd of April 2020
cool craft for kids. I like it
Claire Armstrong
Thursday 23rd of April 2020
Thank you so much
Kathy A
Sunday 19th of April 2020
I had blown out a bunch of white eggs (scrambled, baking, omelets, etc.) and made some lovely Easter eggs with napkins. Still blowing 'em out now with Easter over! But I haven't tried printing pix onto tissue yet. Need to put in a new color cartridge, too, to get true colors, too! I love birds but don't think I have seen blue tits in Maine; gorgeous colors. Thanx for the tip about "stringing" the eggs on skewers--I had been doing 1/2 at a time unsuccessfully!
Claire Armstrong
Monday 20th of April 2020
Thank you. The skewers really do help.
Ann
Saturday 11th of April 2020
Very pretty! Thank you for sharing at Party In Your PJ's.
Claire Armstrong
Sunday 12th of April 2020
Thank you and thanks for hosting.
Michelle Leslie
Saturday 11th of April 2020
That's so pretty Claire. I love how you used the colors in the blue tit for the felt balls and to pull everything together.
Claire Armstrong
Sunday 12th of April 2020
Thank you, it is a good colour combination.
Julie Briones
Friday 10th of April 2020
So pretty, Claire... and love the different craft techniques you share here. Pinned! This would make a great Easter or spring garland, too!
Claire Armstrong
Friday 10th of April 2020
Thank you, Julie. I just love crafting especially in difficult times like now it is so calming.