

Inside: A step-by-step tutorial on how to tie-dye fabric Shibori style and then turn this fabric into some cool indigo planters.
The other day a friend of mine had been Shibori dying her outdoor sofa covers and offered me the leftover bucket of indigo dye.
As it was a beautiful sunny day, I took her up on her offer and promptly searched the house for fabric to upcycle and dye.
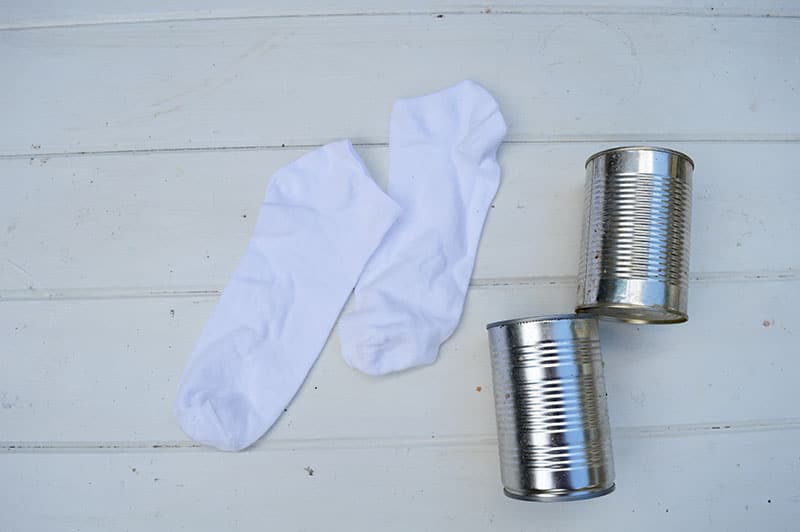
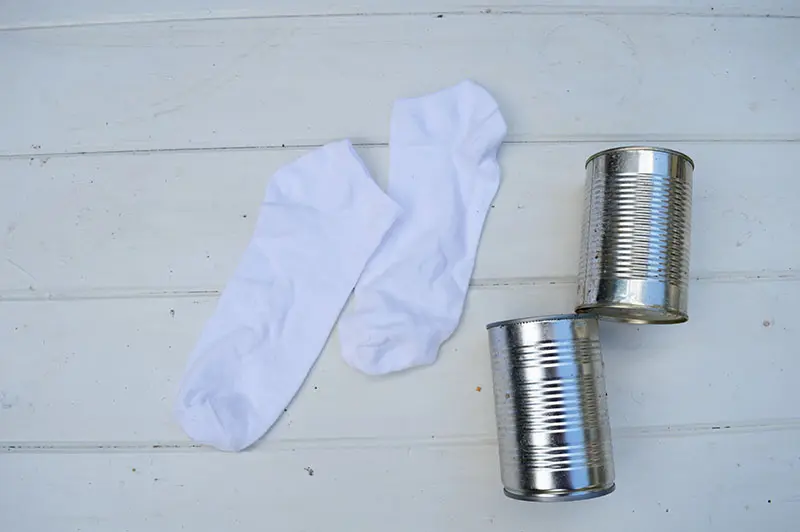
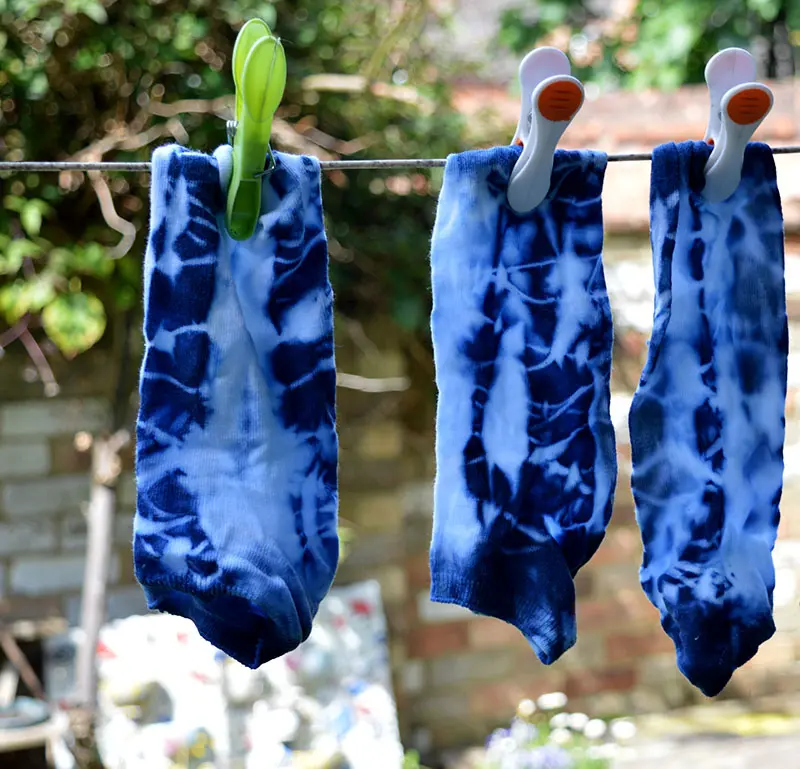
I found some white cotton socks, an old long-sleeved white t-shirt, a cotton tube bandage, and an old cream curtain.
After spending a few hours of indigo dying in the garden, I found some gorgeous Shibori fabric.
The patterns and colours were gorgeous. Indigo has to be one of my favourite colours. That is one of the reasons I love upcycling denim so much.
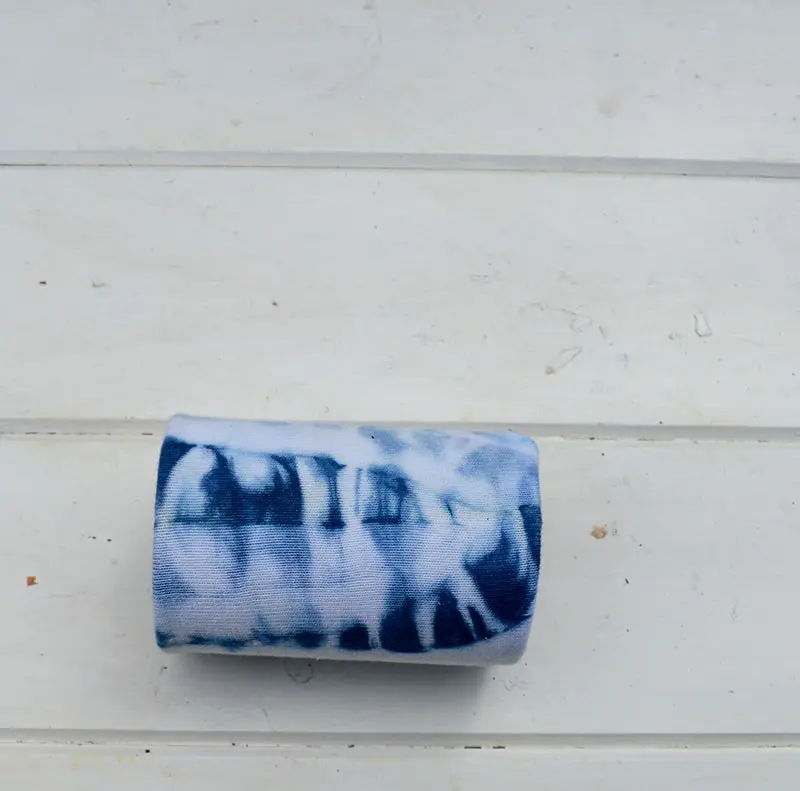
Some of the fabric I had dyed was stretchy and in tubes, such as the socks and bandages. These items were perfect for upcycling into no-sew indigo planter covers.

Shibori Indigo Dyeing
If you have never tried Shibori indigo dying, you should give it ago. It is a fun craft, even though it can be messy. It’s best done in the garden on a bright sunny day. The results make the mess well worth it.
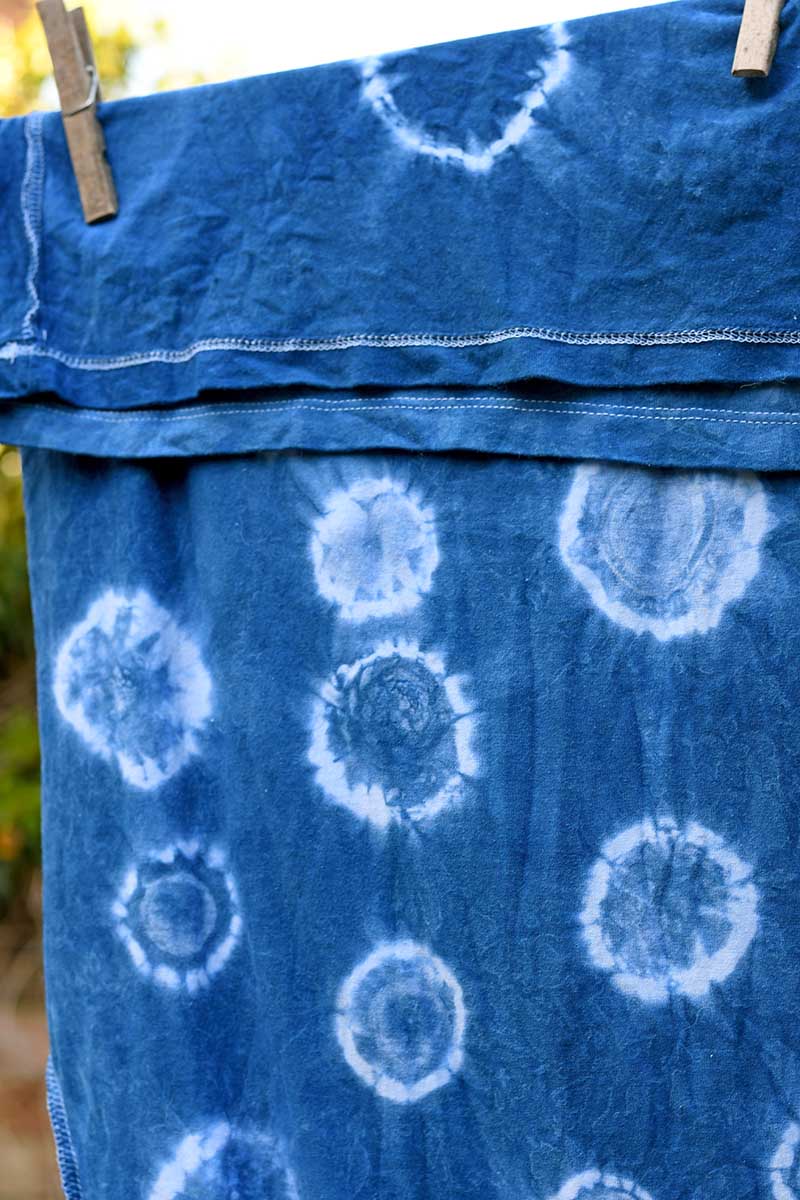
Kids love this craft too. It’s the same as tie-dying, but you use a natural indigo dye that reacts with the air. I think the results are more stylish than tie-dye.
Shibori originates from Japan and is the art of creating indigo patterns on fabric using a resist dye method.
How you fold and tie the fabric before dying determines the resulting patterns. Many of these folding and tying techniques have an official Japanese name.
It’s fun to experiment with these Shibori techniques, making different patterns with the dye on the fabric.
We’re a participant in the Amazon Services LLC Associates Program, an affiliate advertising program designed to provide a means for us to earn fees by linking to Amazon.com and affiliated sites. As an Amazon Associate, I earn from qualifying purchases.
What You Need To Make The Indigo Planter Covers
- Shibori Indigo dye kit – As well as the indigo dye, the kit comes with gloves and elastic bands. So if you can’t get the kit buy the indigo dye and elastic bands separately.
- A mixture of marbles or beads in various sizes
- Large 5 gallon (20lt) bucket with lid.
- Washing up bowl
- A large old plastic sheet – to contain the mess in the garden
- Large stick for stirring the dye.
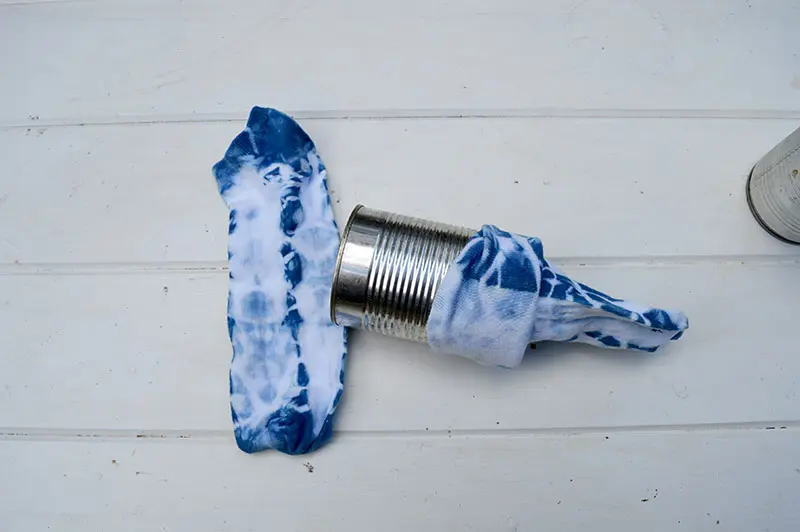
- Tin cans or similar for the planters
- Natural fabric with a bit of stretch in it that is in a tube shape. Such as white cotton socks, tubed bandages, or long-sleeved t-shirt sleeves.
The Shibori Indigo Dyeing
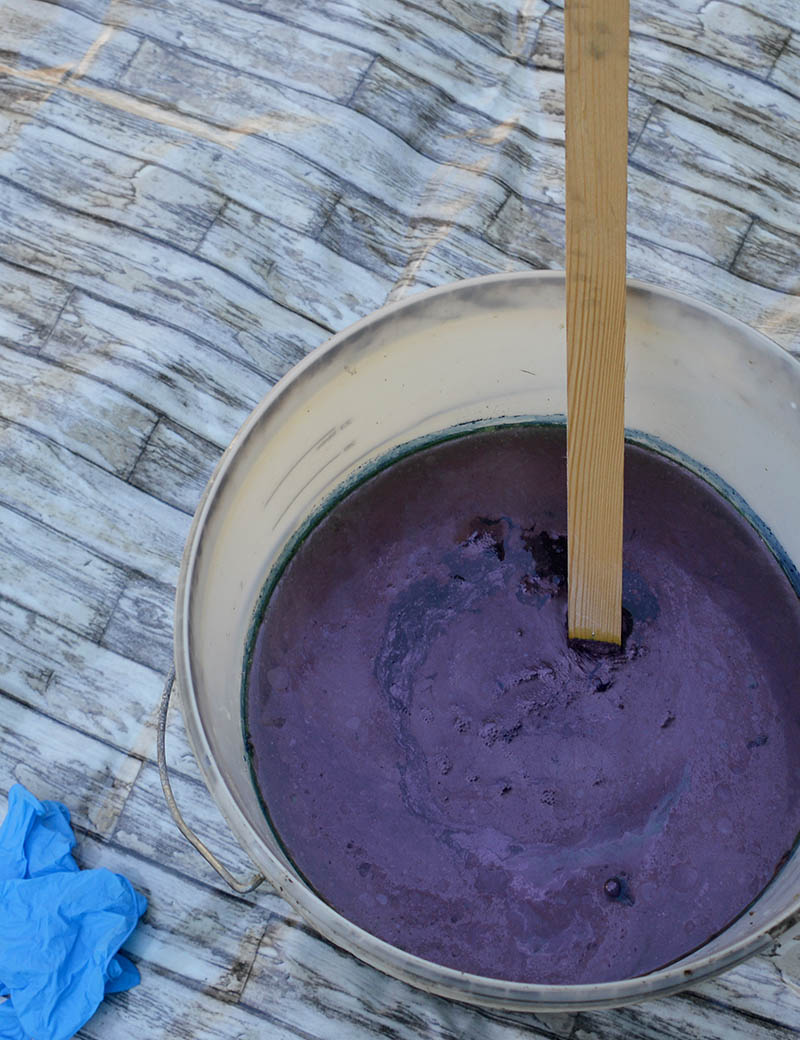
Step 1: The first thing to do is to make up the indigo dye according to the instructions on the packet. Use the large bucket for holding the dye and stir with the stick.

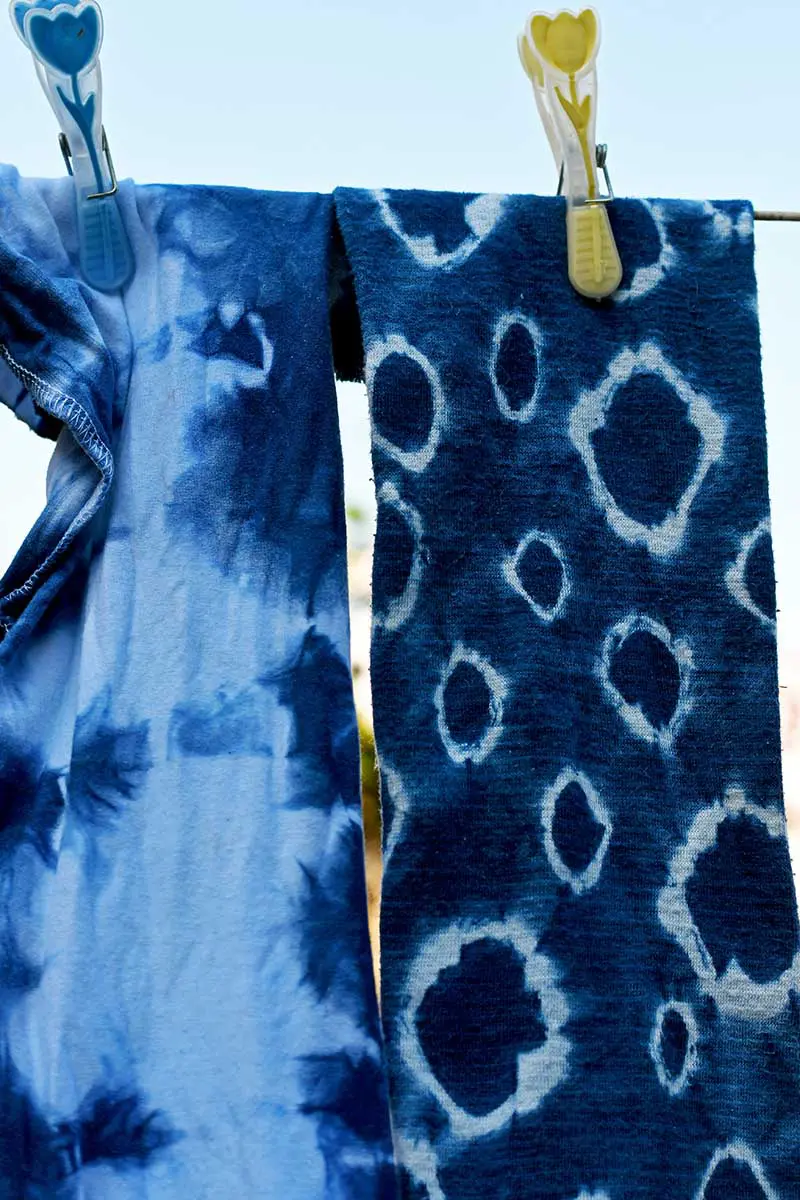
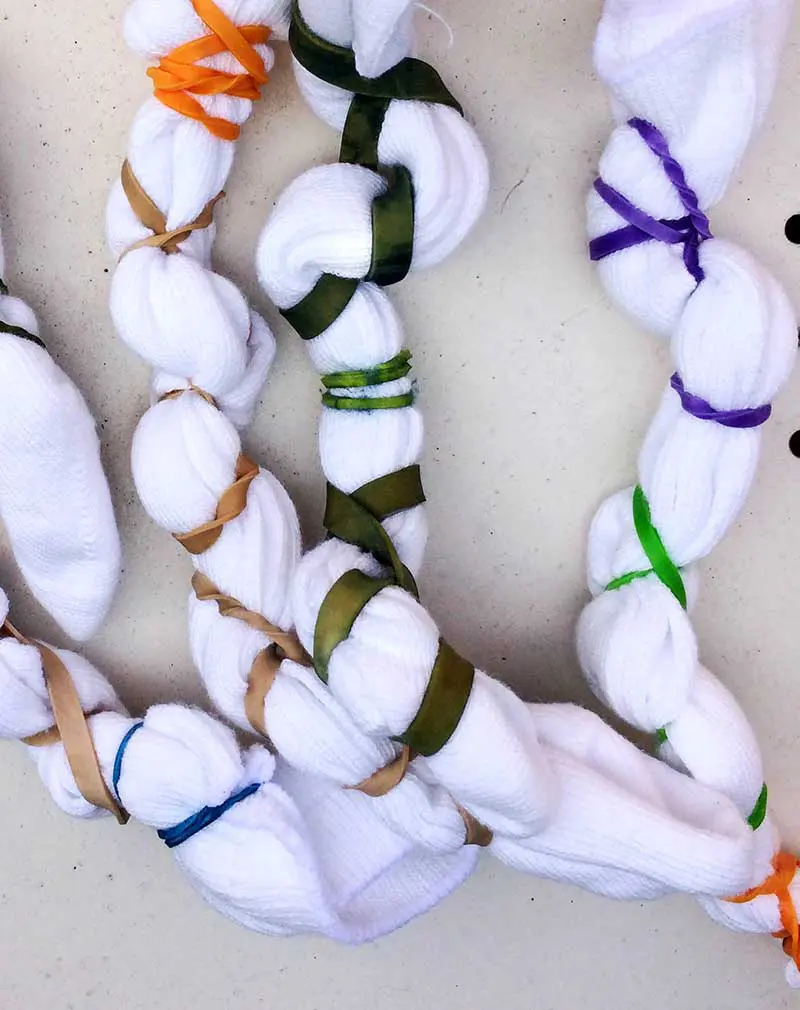
Step 2: Next, decide on the Shibori folding technique you want to use on the pieces of fabric. I used a few methods to make a variety of Shibori indigo planters.
For the socks, I just randomly tied them with many elastic bands.
For the t-shirt sleeves, I pleated the fabric before tying it with elastic bands called Kumo Shibori.
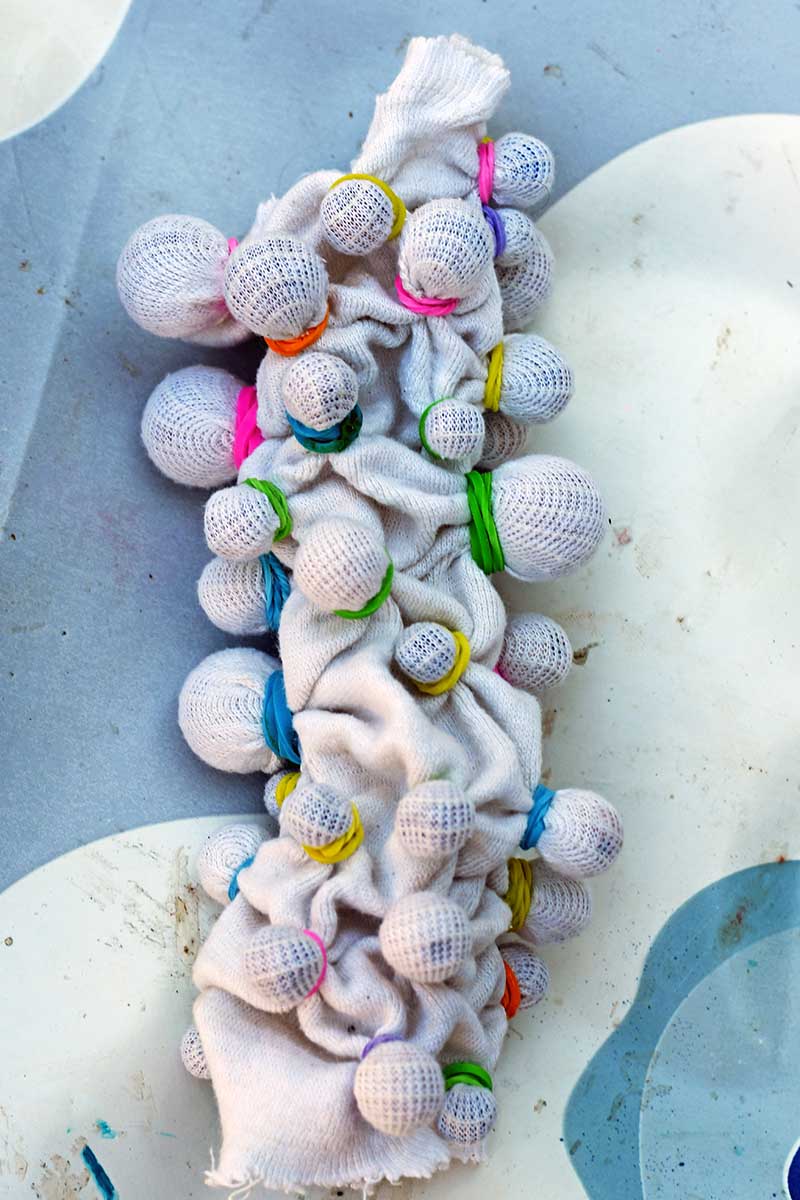
With the larger bandage tube, I used the Ne-Maki Shibori technique. I used the marbles and beads for this.
With this method, wrap the fabric around the bead and then secure it tightly with an elastic band. Repeat several times until you are happy with the number of beads used.


Step 3: Next, place the tied fabric into a bowl of water and ensure it gets thoroughly wet.
Step 4: Then, lift the wet fabric from the bowl and squeeze out any excess water before placing it into the indigo dye bucket.
Stir the fabric in the bucket to cover it, and leave for about 20 minutes.
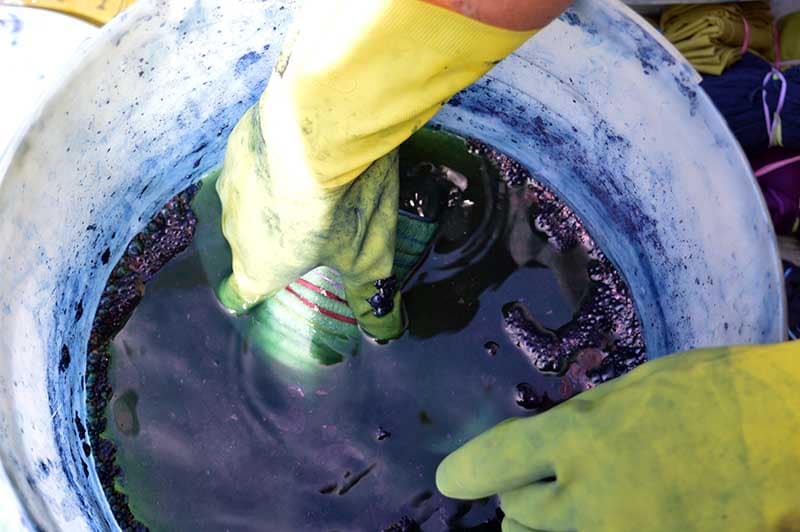

Step 5: Next, whilst wearing the latex gloves, reach into the bucket and get hold of the fabric. Gently squeeze out any air bubbles. Then lift it out of the dye, squeeze out any excess dye and place it onto the plastic sheet.
Step 6: The fabric will be green when you remove it from the bucket. Don’t worry; it will turn blue as it slowly oxidizes. Leave the fabric still tied on the plastic sheet for about 20 minutes until it has turned blue.
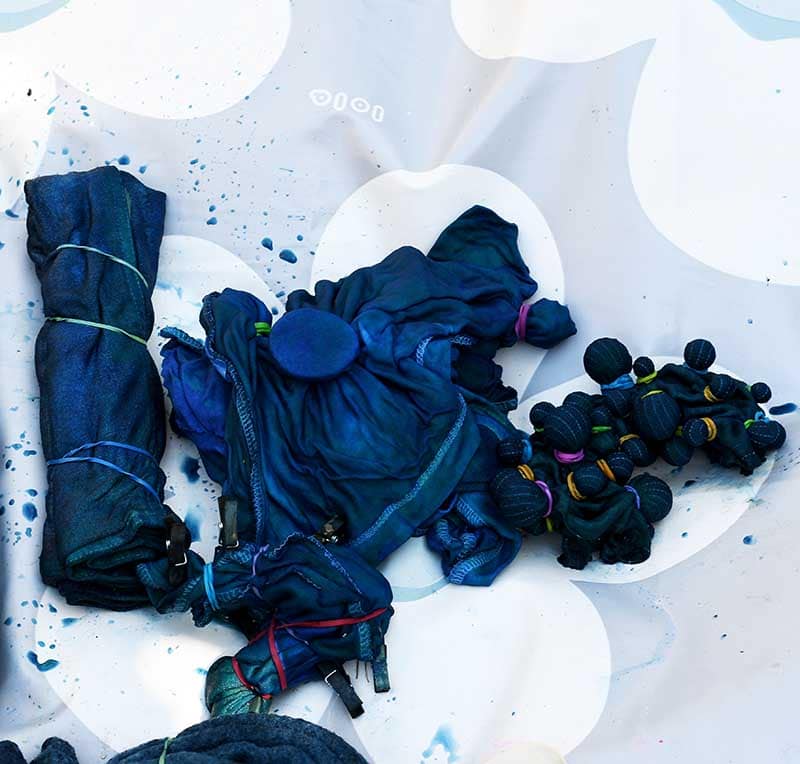
Step 7: Then, dip the fabric again in the bucket. The more times you dip the fabric, the deeper the indigo colour. For my indigo planters, I only dipped twice.
Step 8: On the last dip, remove the elastic bands from the cloth after oxidising the fabric to reveal the Shibori pattern. Rinse the cloth with water to remove any excess dye.
Step 9: Then, wash the fabric in the machine with mild detergent on a cool wash cycle. Hang the fabric out to dry. I love seeing a washing line full of newly died Shibori fabric; it looks so pretty.


The Shibori dye will keep for a few days. Whenever I’ve been indigo dying, I invite my friends to come around and use the leftover dye.
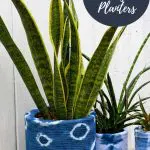
Making the Indigo Planters
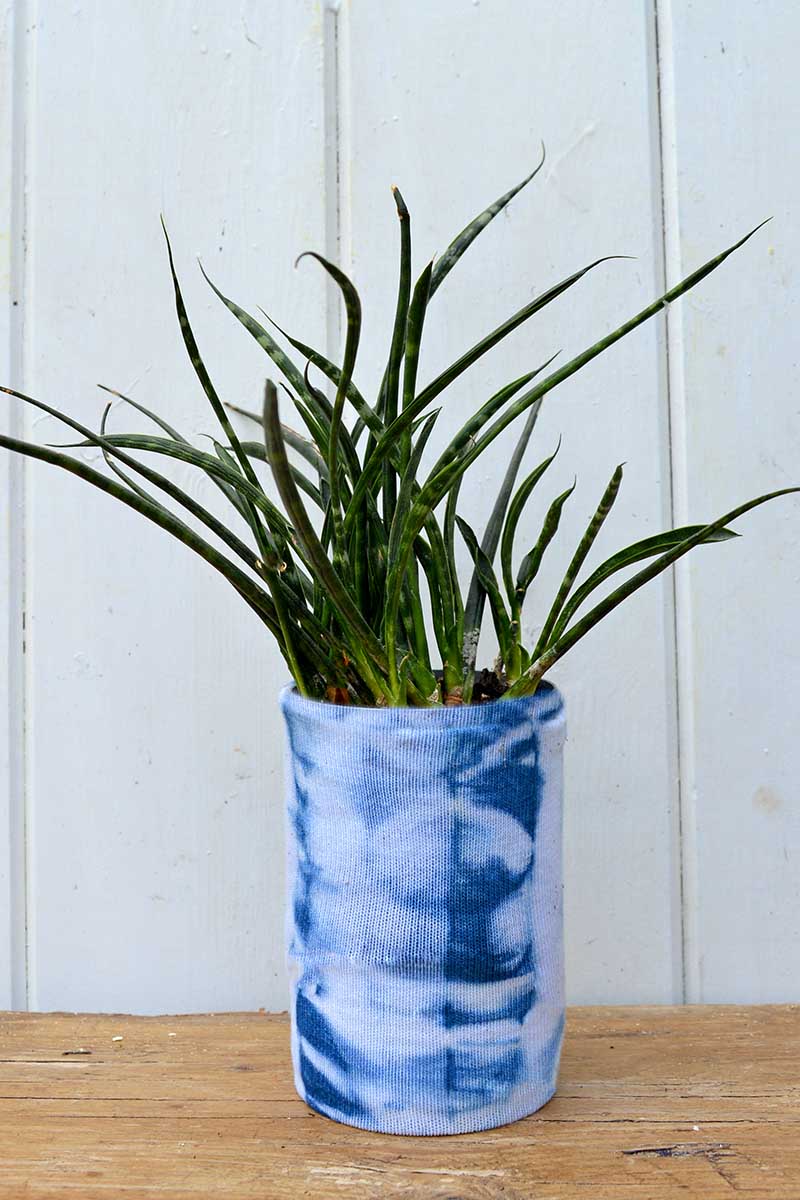
This is the easy part. Once your Shibori cloth tubes have dried, such as the socks, pop them over tin cans to make planters. I used tin cans in a variety of sizes.
To neaten up the edges, tuck the cloth in on itself. The socks and sleeves had a neat edge. However, the tube bandage had a rough edge, but I just tucked it in on itself.
If the cloth tube is too long, then cut them to size.

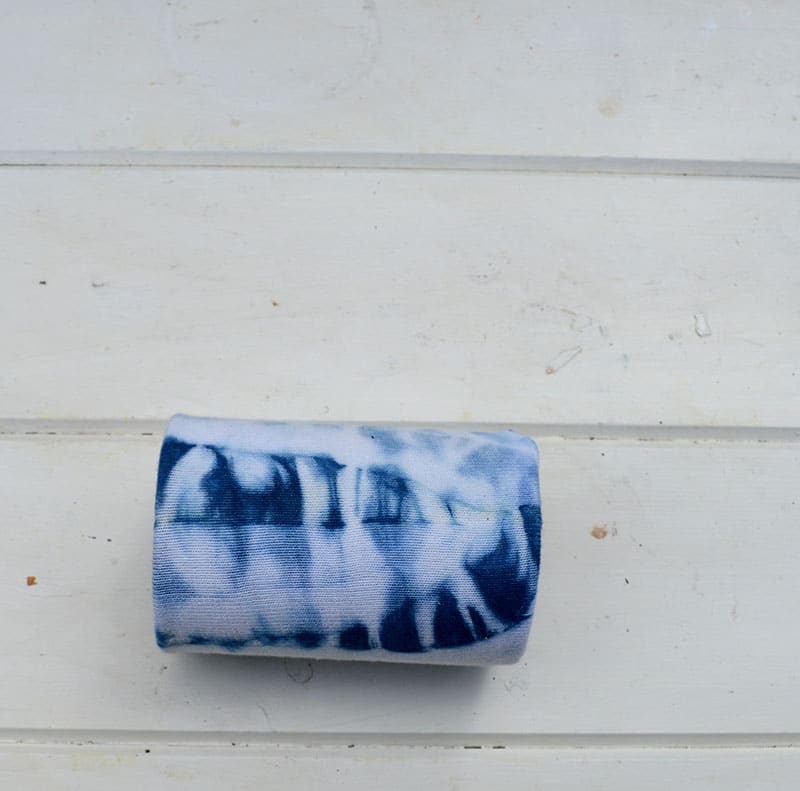


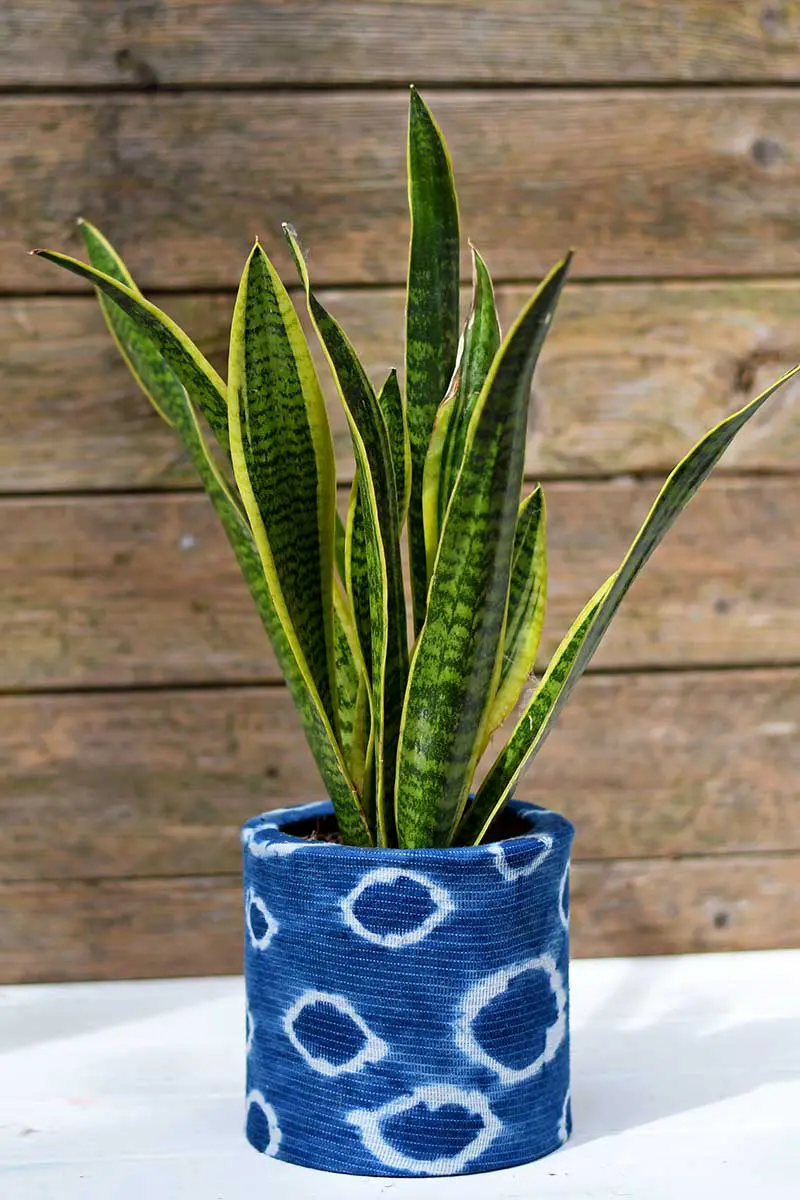

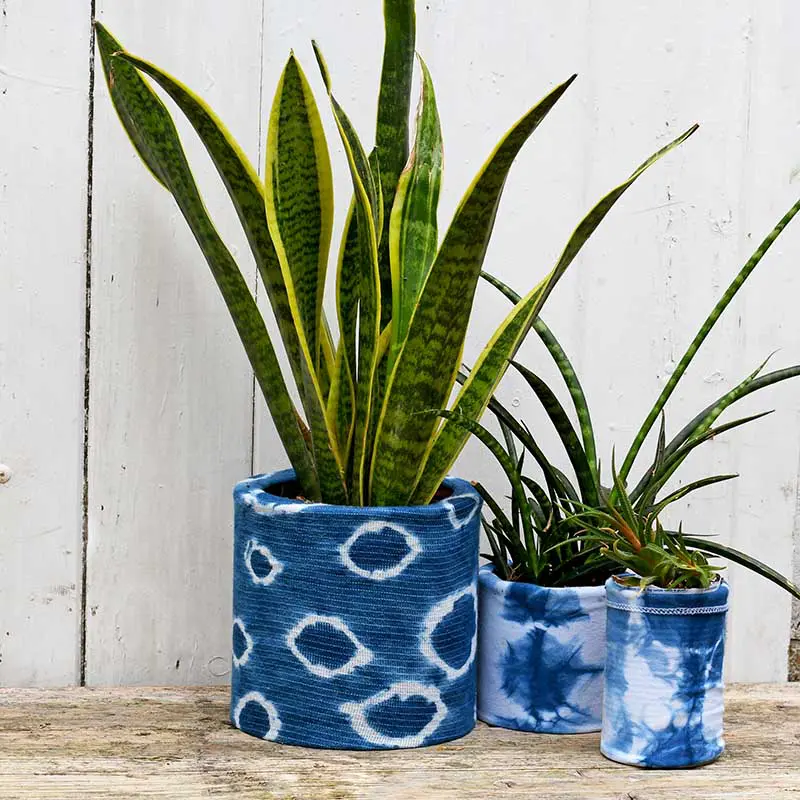
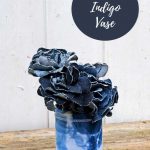
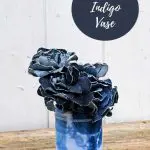
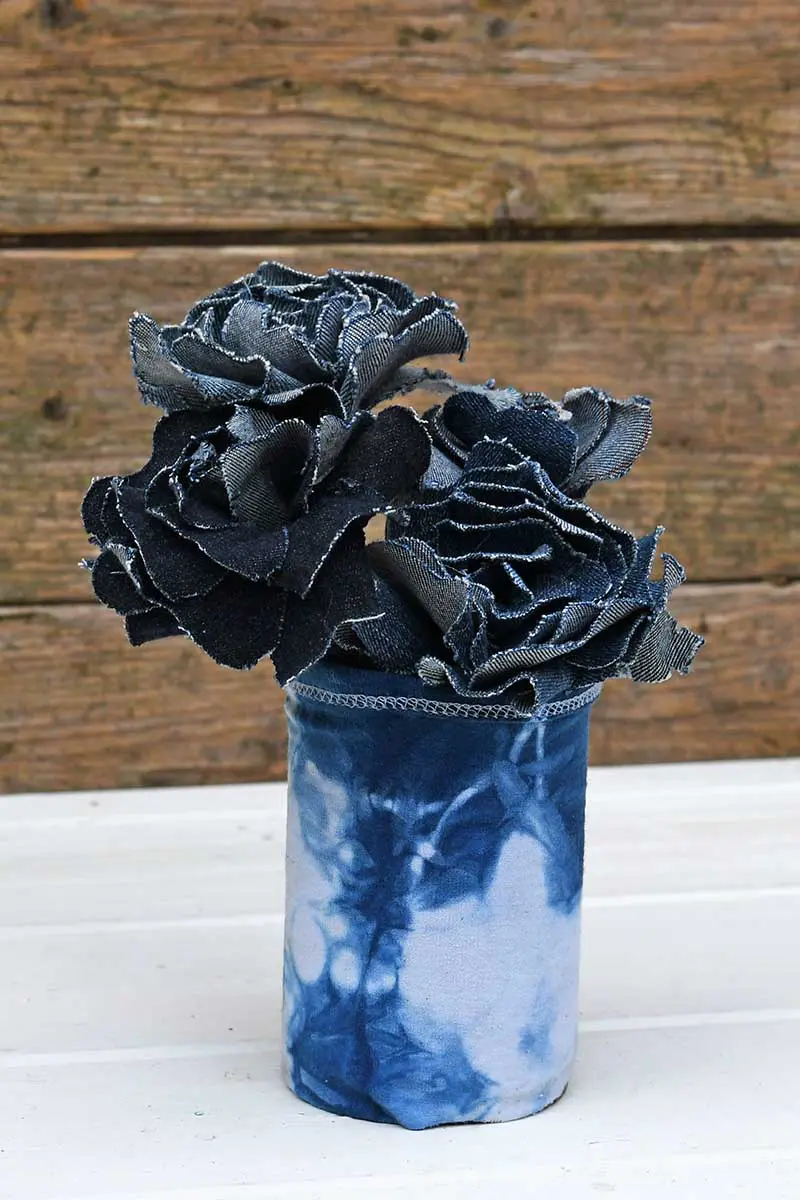
The upcycled Shibori indigo tin cans don’t have to be planters; they would also make good utensil holders or vases. My denim flower bouquet looks good in the indigo vase. And this denim snake plant would look awesome in an indigo planter.
The planters would look good on my dining table with the stencilled denim table runner I made.

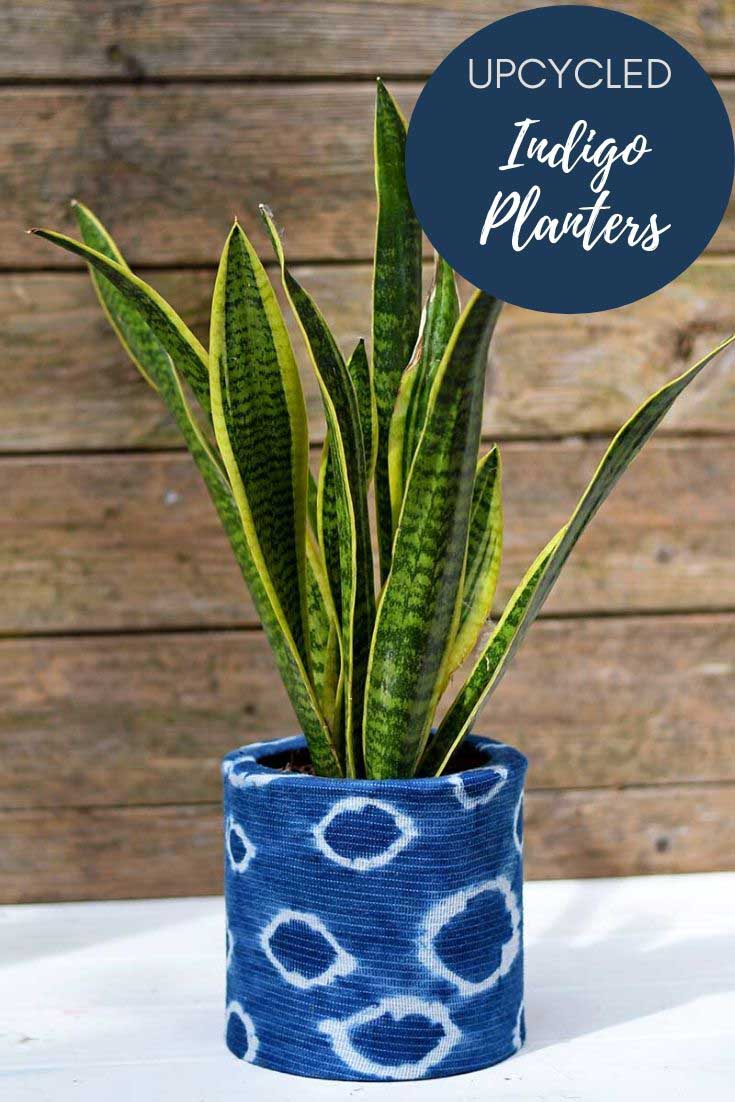

I save my old tin cans to repurpose into tin can planters; that’s why I used them for these indigo planters. These stretchy dyed covers, however, will fit over many other planter pots of different sizes.
If you liked these indigo planters, then you should check out the recycled jeans planters I made with denim seams.
There is more information about Shibori dying here.
Cindy@CountyRoad407
Thursday 28th of May 2020
Saw this on TTA. Those are super cool looking! Love the patterns and texture. Pinned ;)
Claire Armstrong
Thursday 28th of May 2020
Aww, thank you so much and thanks for visiting.
Julie Briones
Tuesday 26th of May 2020
These DIY Shibori planter covers are so unique, Claire! And I love the coastal flair, too! I'm happy to be featuring you tomorrow at Tuesday Turn About! Pinned to two boards!
Claire Armstrong
Tuesday 26th of May 2020
Thank you so much and thanks for the feature I look forward to seeing it.
Diane
Wednesday 20th of May 2020
Fun project! Thanks for all the great detail and pics!
Claire Armstrong
Thursday 21st of May 2020
Thank you so much.
Anita Holland
Wednesday 20th of May 2020
These made me smile they are so pretty. And to see how you made them is great. I thought it was denim.
Claire Armstrong
Wednesday 20th of May 2020
Thank you, I think that’s why I like Shibori so much because it looks like denim.
Marie
Thursday 14th of May 2020
This would be a lot of fun to do on a summer day with the grandkids. Shirts for them but definitely these cute little planters for me and their mom. So pretty! Pinned
Claire Armstrong
Friday 15th of May 2020
Thank you, it is a fun thing to do on a summer day. I did a curtain for my son's room which looks fabulous.