


Discover how to make DIY Scallop shell and concrete bookends for your coastal home. This easy tutorial turns seashells into stylish home decor!
I miss living by the coast, the sound of the waves, the salt in the air, and those long beachcombing walks where you’d return home with sandy shoes and pockets full of seashells.
I’ve always had a soft spot for beach-themed decor, especially when it involves upcycling natural treasures like shells. Over the years, I’ve created a variety of items, including oyster shell candles, seashell paint palettes, and scallop ring dishes. But this time, I wanted to try something both decorative and practical, something that brings a bit of coastal charm to the home while being useful.
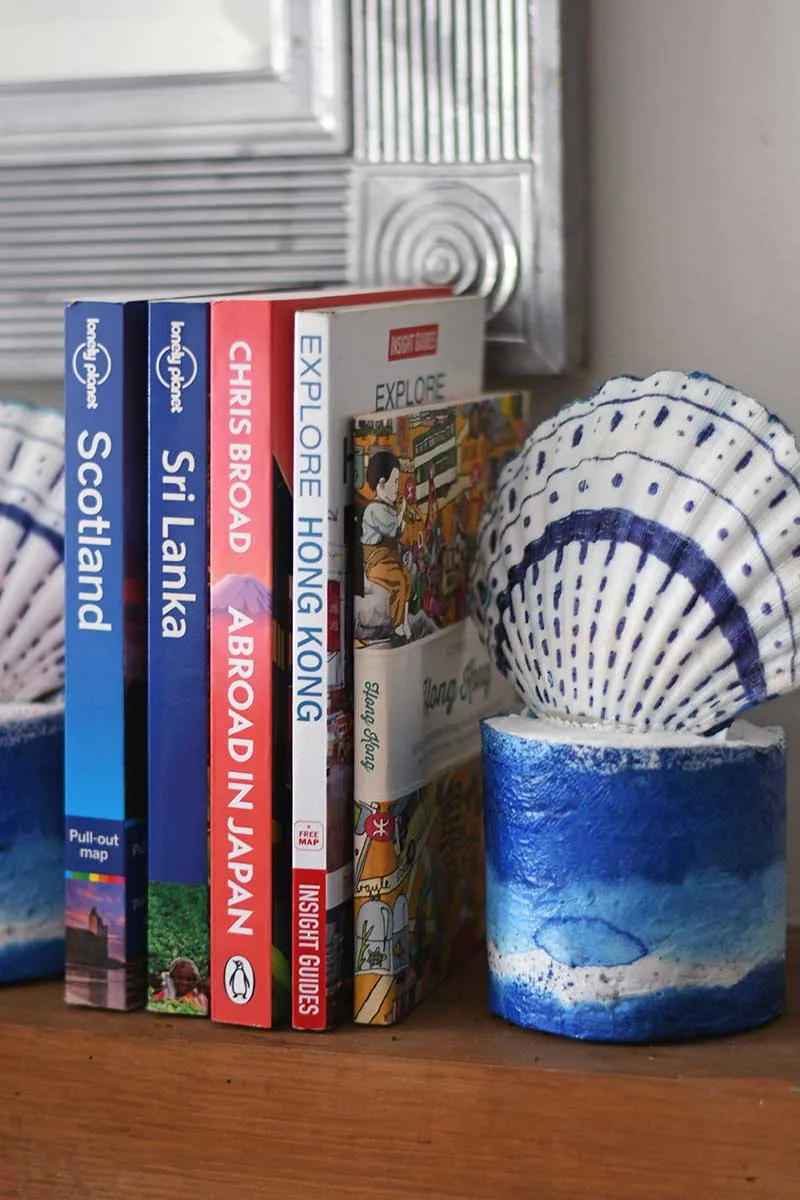
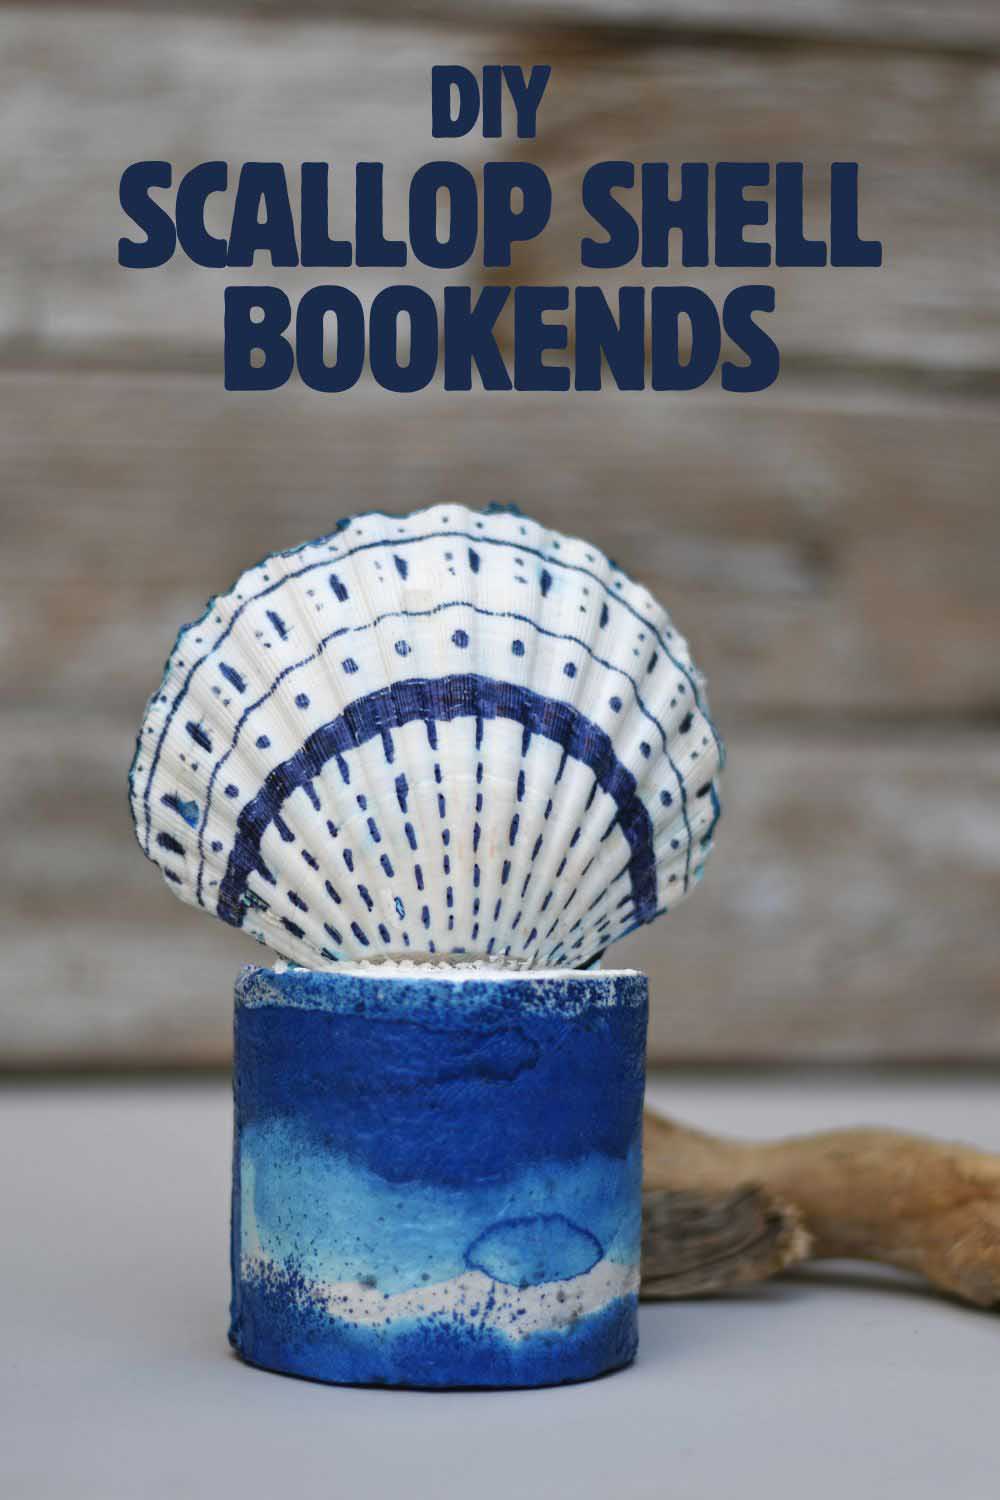
So I made a pair of scallop shell bookends! Not only do they look fantastic perched on a shelf beside your favourite seaside reads, but they’re also weighty enough to be used as quirky little doorstops. This was a fun project to work on, and it’s surprisingly easy too.
Materials Used
We’re a participant in the Amazon Services LLC Associates Program, an affiliate advertising program designed to provide a means for us to earn fees by linking to Amazon.com and affiliated sites. As an Amazon Associate, I earn from qualifying purchases.
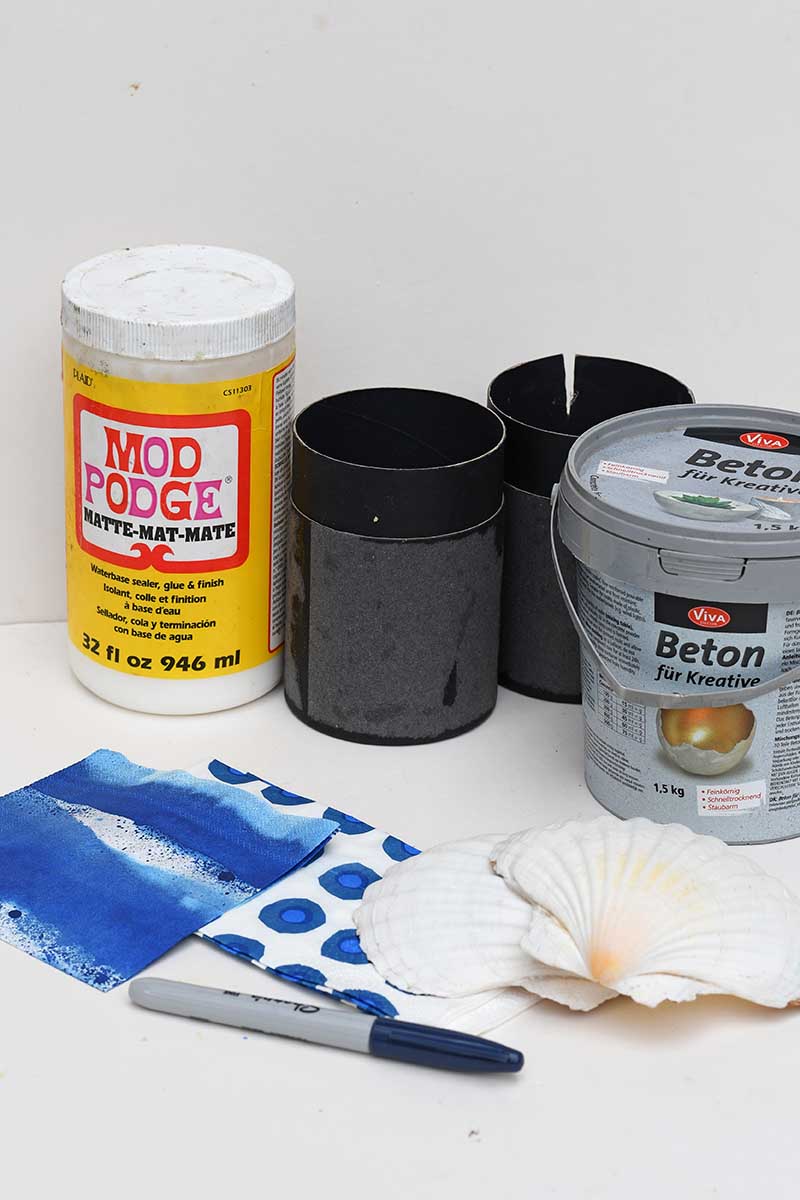

- 2 large scallop shells (clean and dry) – If you don’t eat scallops, then you can buy the shells for crafting.
- Blue Sharpie (or any permanent marker)
- Blue and white patterned paper napkins (I used IKEA ones) – Alternatively, choose paper napkins that complement your decor.
- Mod Podge or your go-to decoupage glue
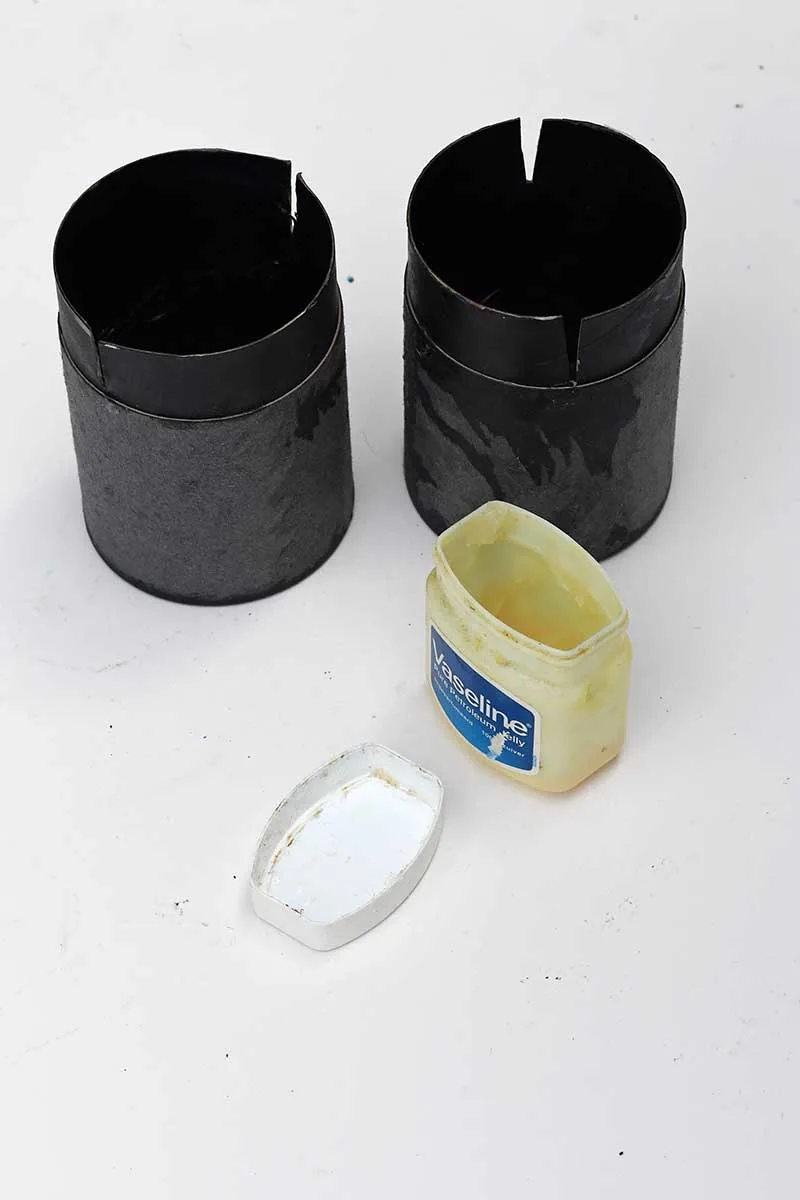
- 2 round cylindrical moulds about the size of a mini Pringles can, large yoghurt pots, or anything with a similar shape
- Vaseline (to grease your moulds)
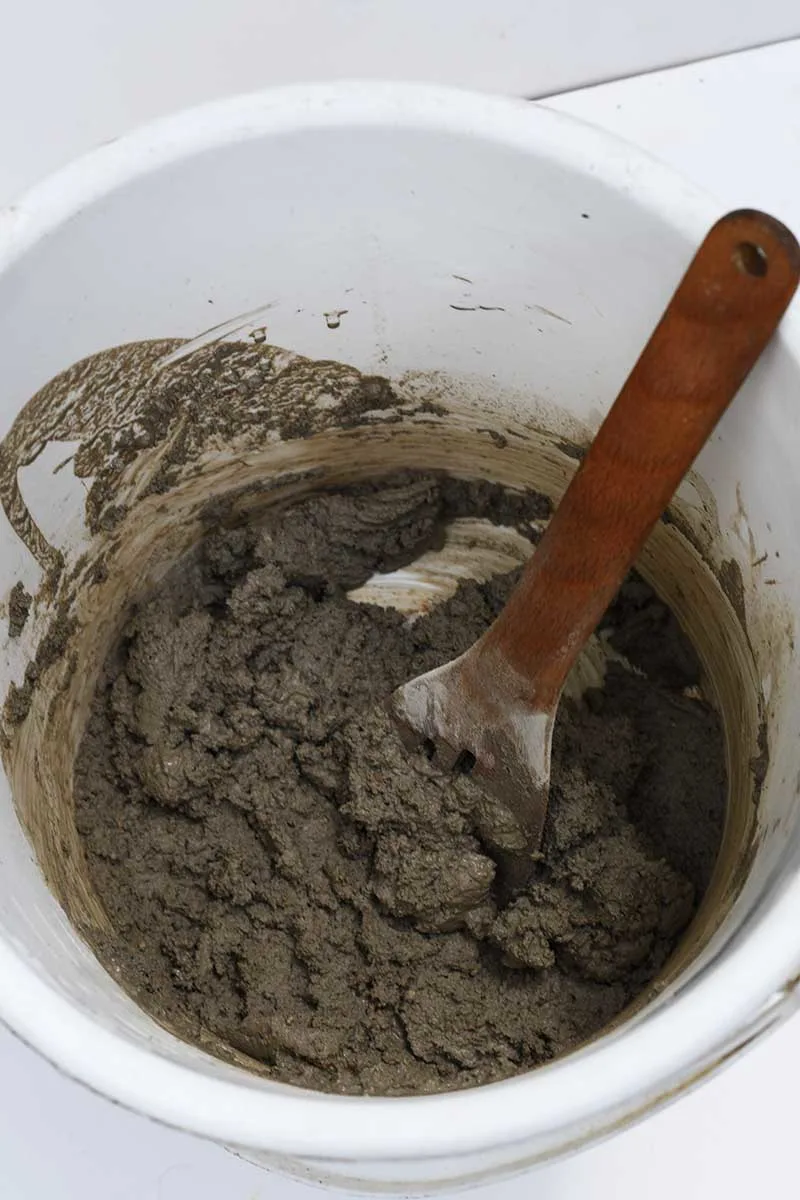
- Crafting concrete mix – I used a 1.5kg tub.
- White acrylic paint
- Foam brush
- Old bucket/tub and spoon for mixing the craft concrete
How to Make Scallop Shell Bookends
Decorating The Shells
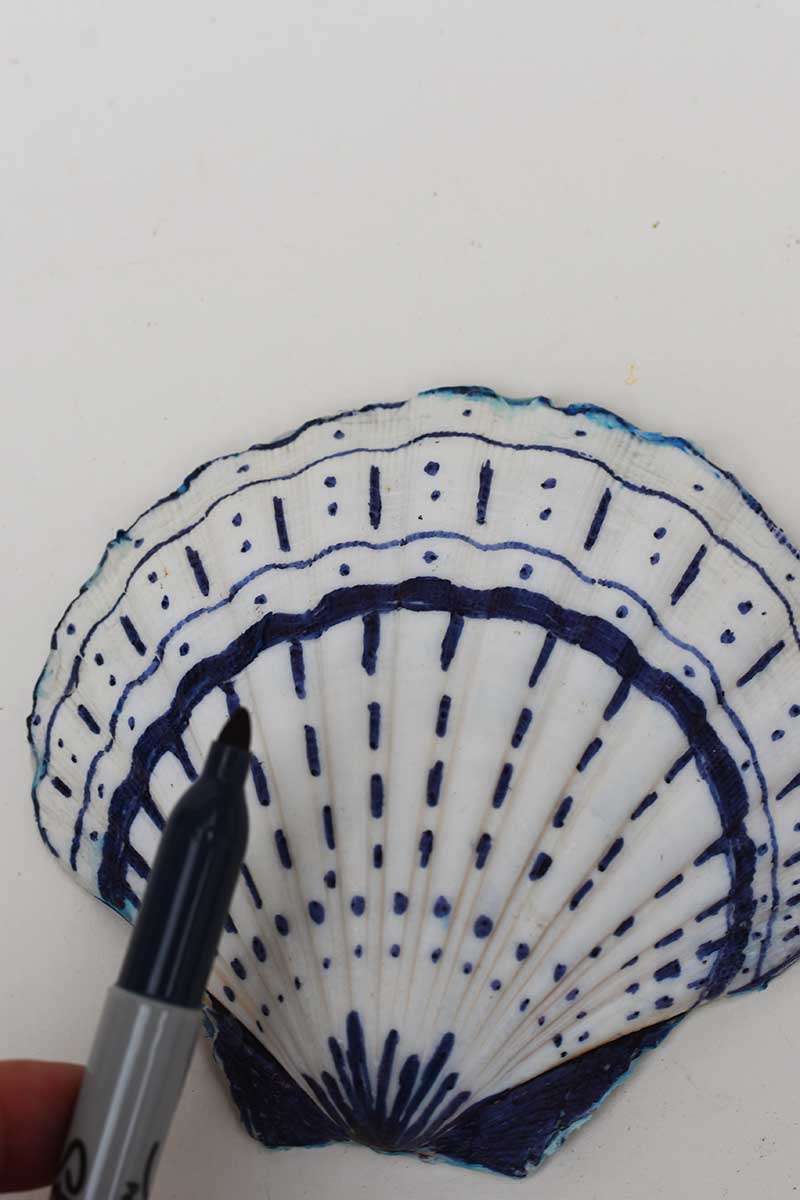
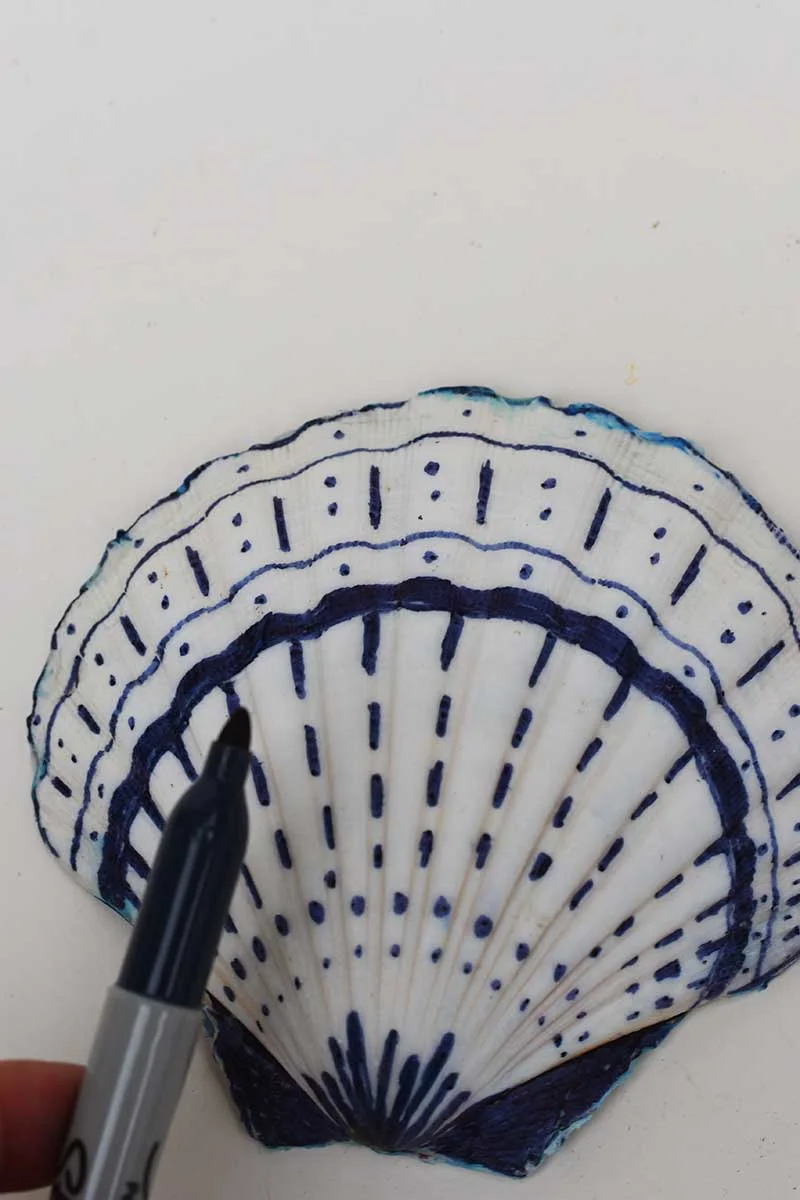
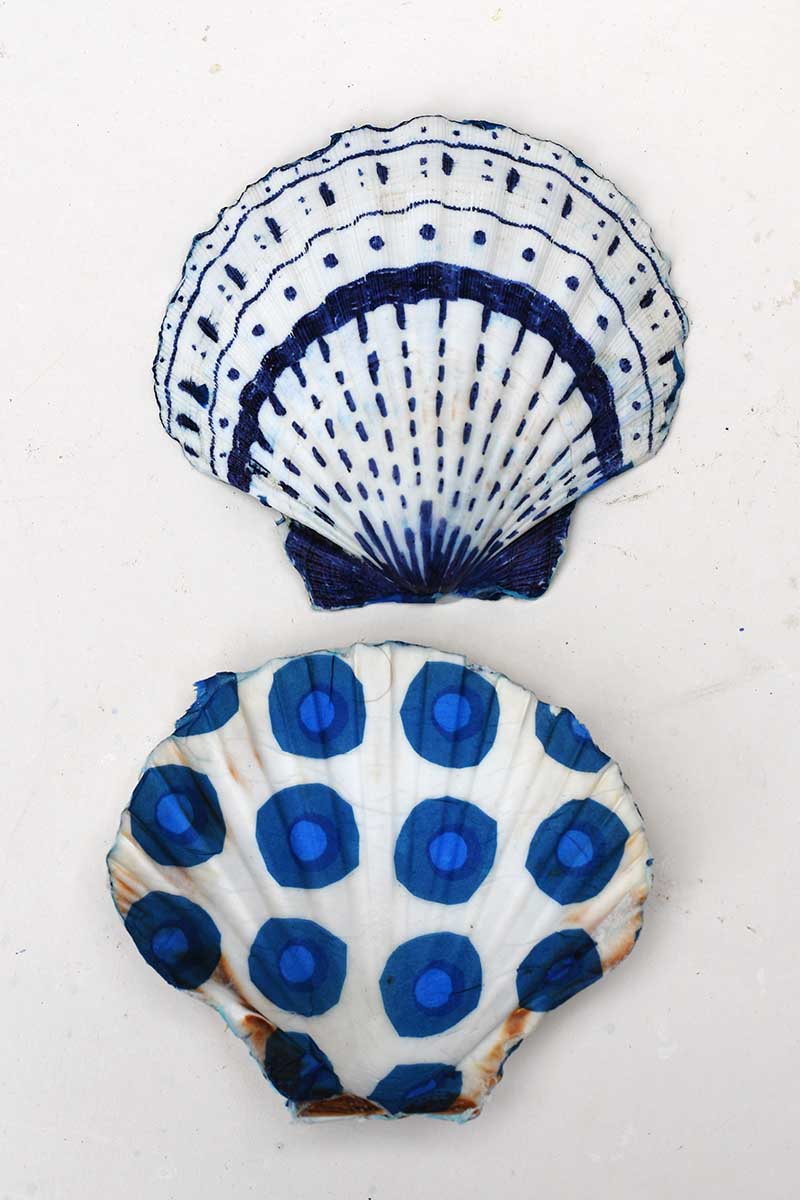
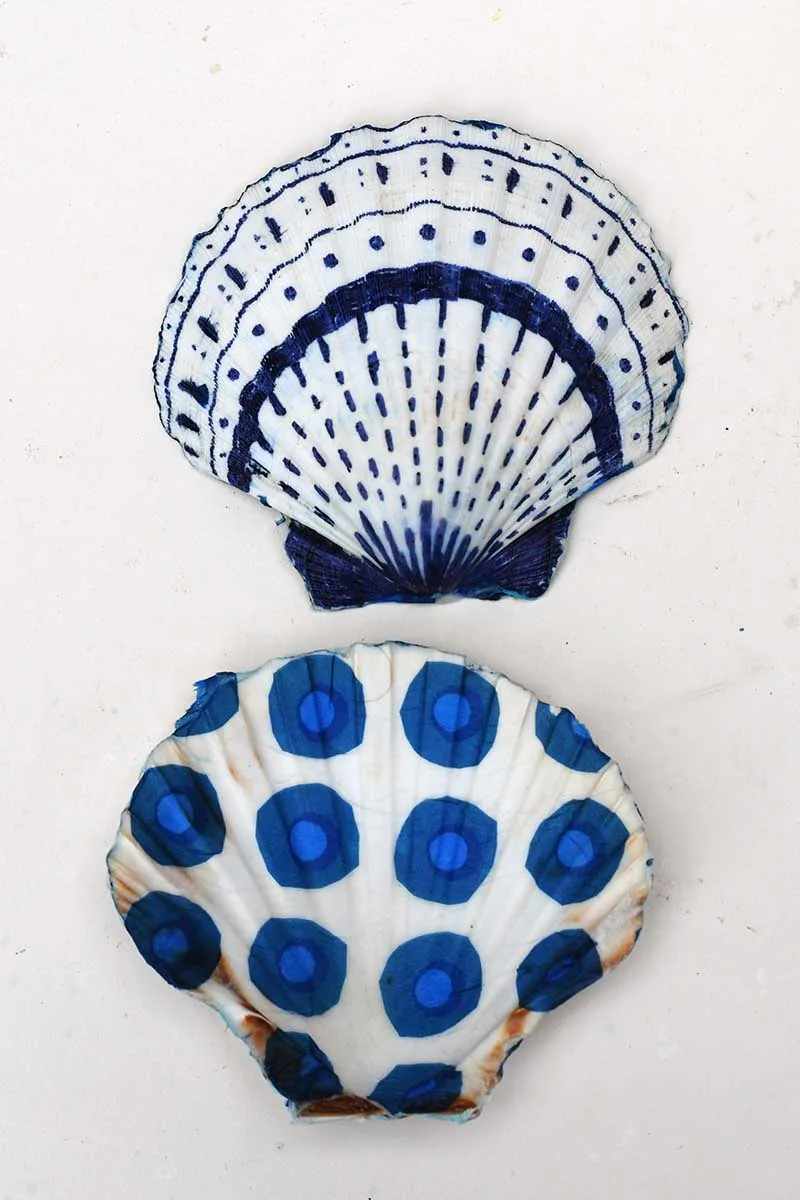
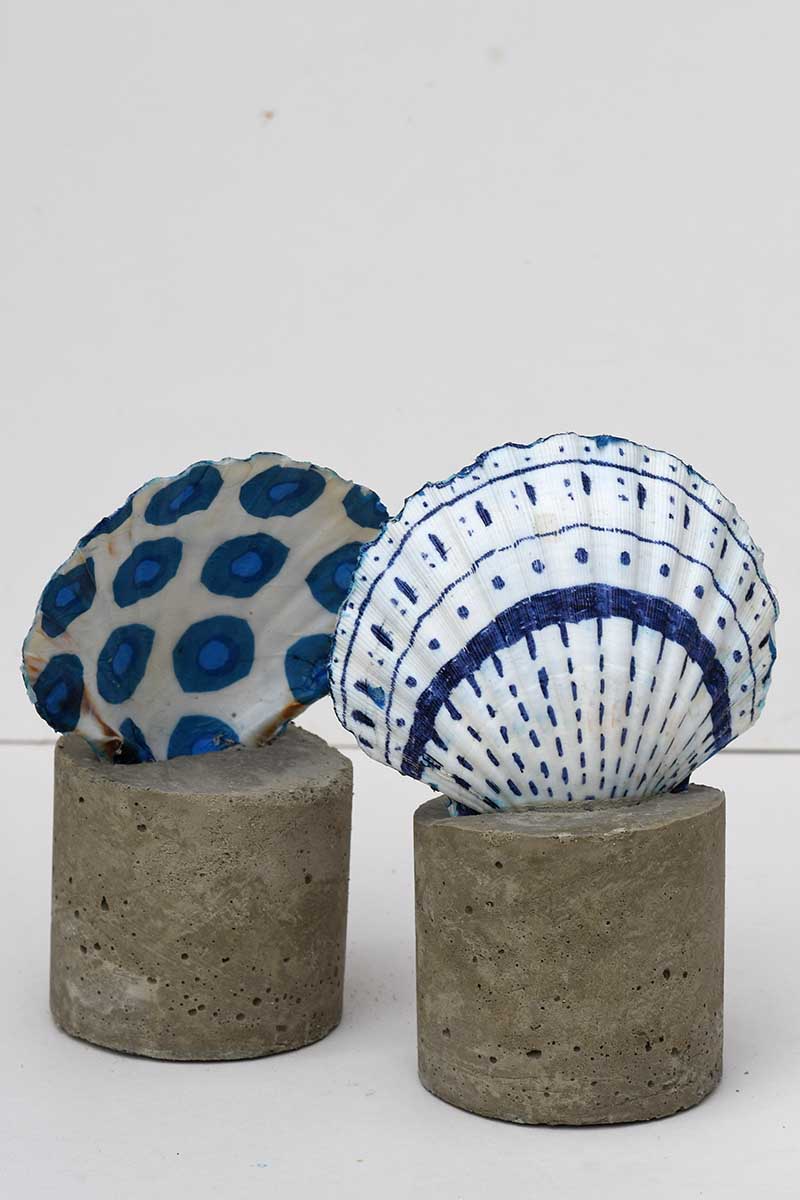
Step 1: Get creative with your shell design: Start by decorating the outside of the shells. I used a blue Sharpie to trace over the natural ridges and lines on the back of the shells. It’s a lovely, meditative process, and each shell ends up with its unique pattern. Think waves, stripes, or even just following the curves, whatever feels right.
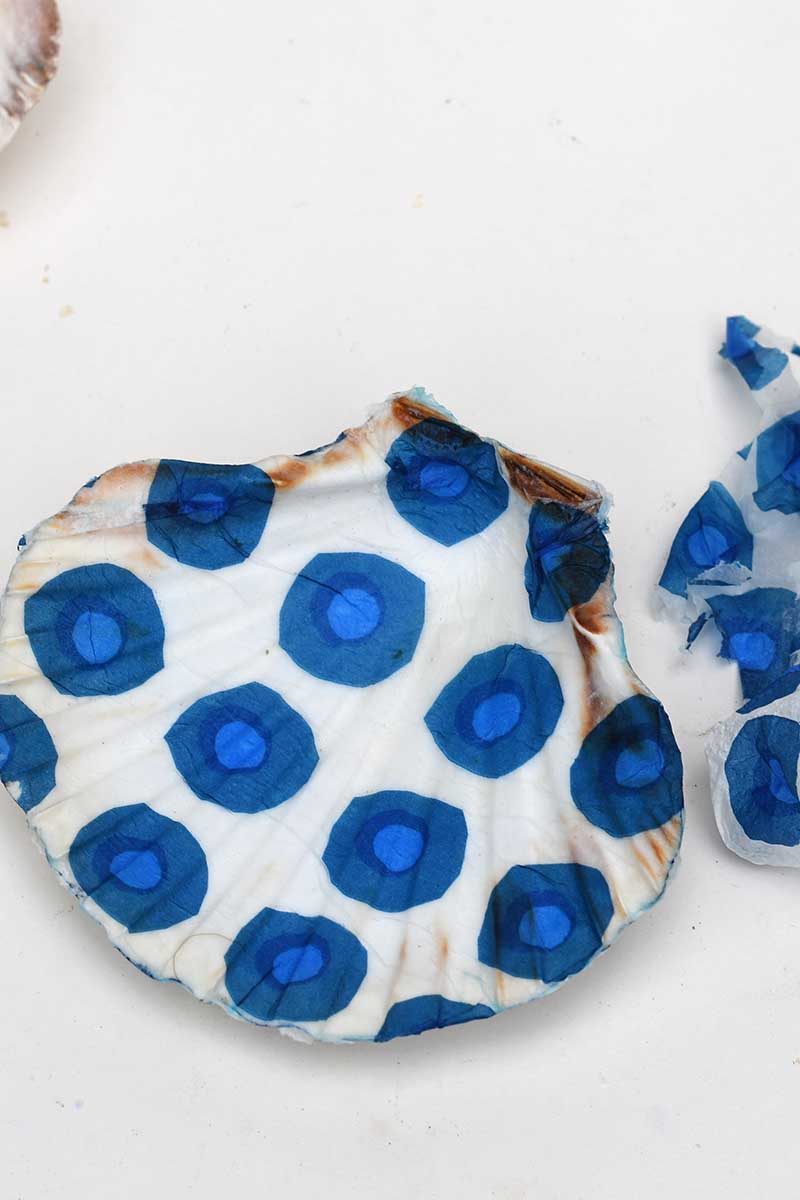
Step 2: Decoupage the inside: Once the outside is decorated, flip the shells over and decoupage the inside using blue and white napkins. Peel off the top patterned layer and adhere it to the surface with Mod Podge, smoothing out any bubbles with a clean foam brush as you go. Let them dry completely before moving on. For more details, check out this post on decoupaging scallop shells.
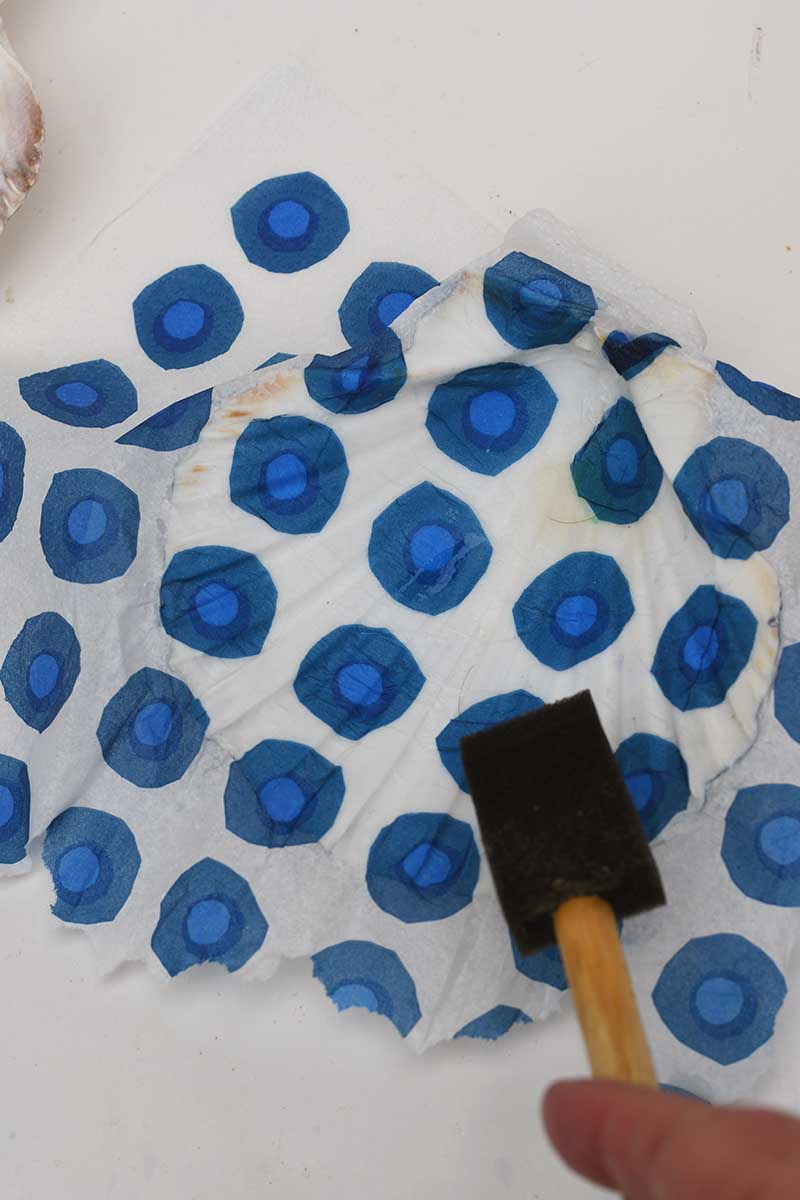

Once the paper napkin has dried, wet the edges of the shell and carefully tear away any excess paper napkin.

Making The Bookends
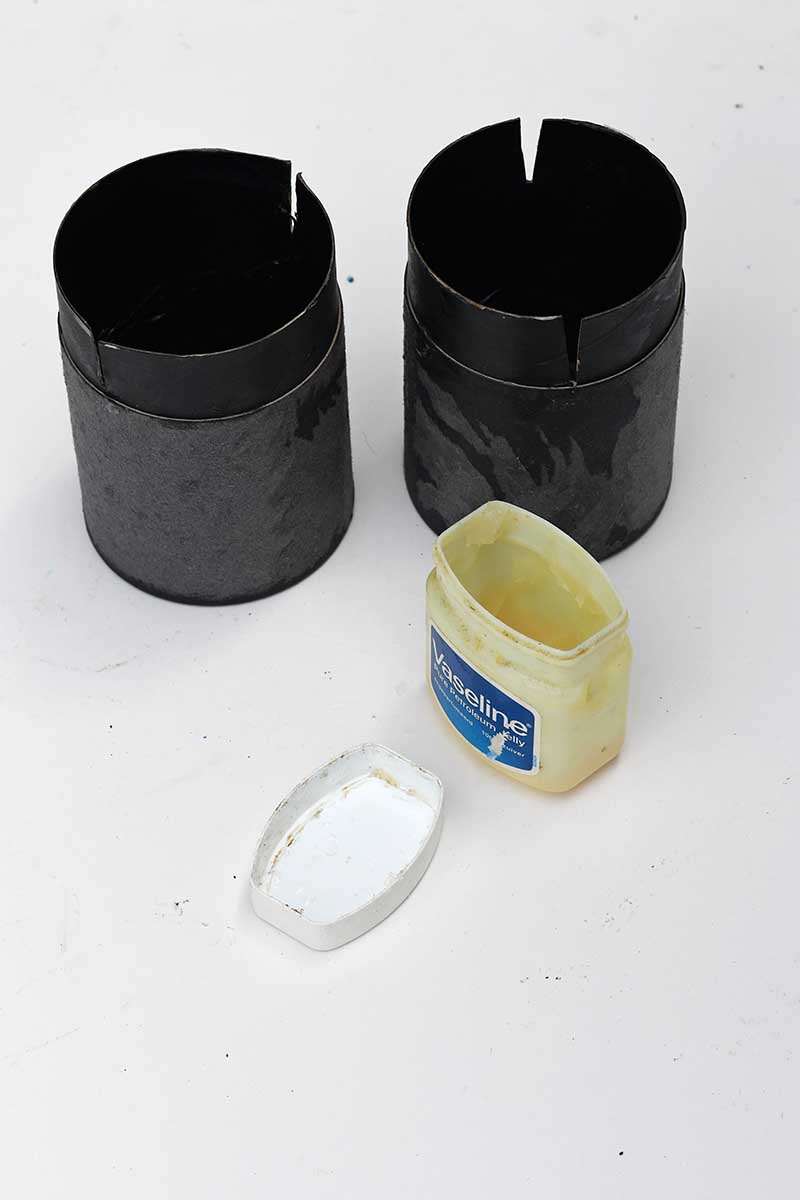
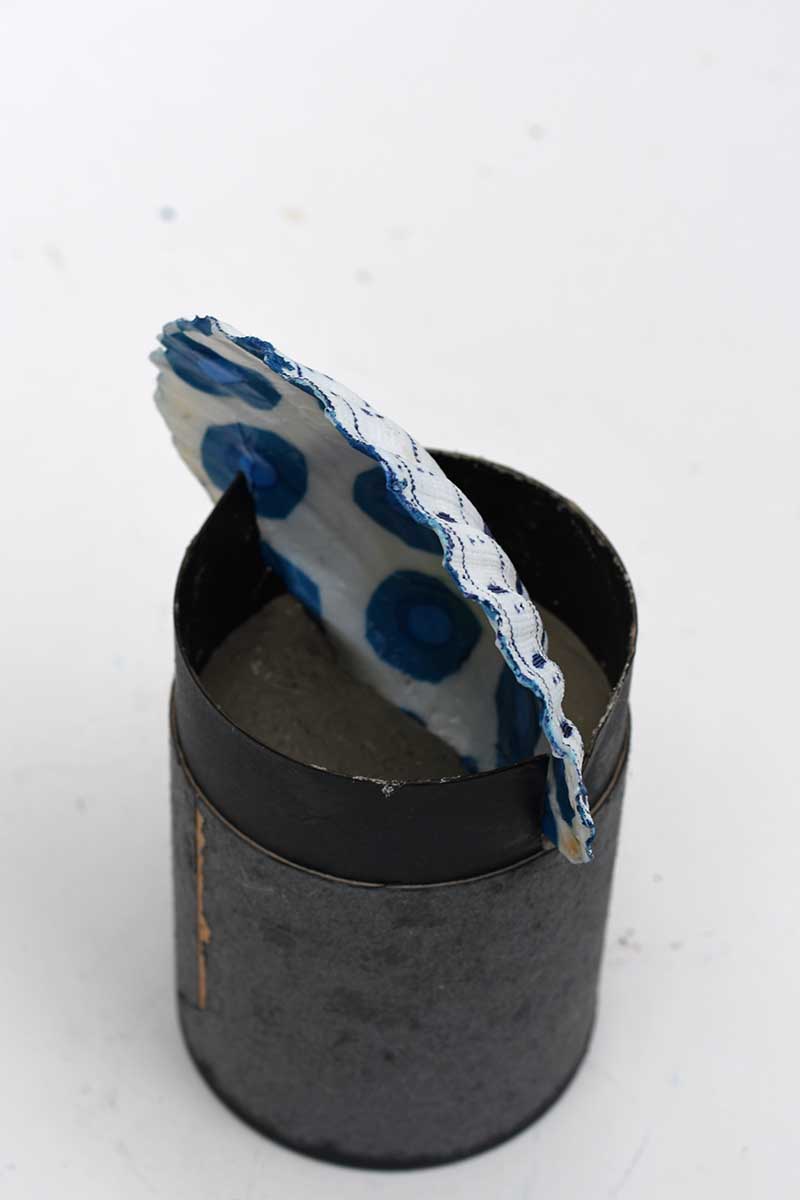
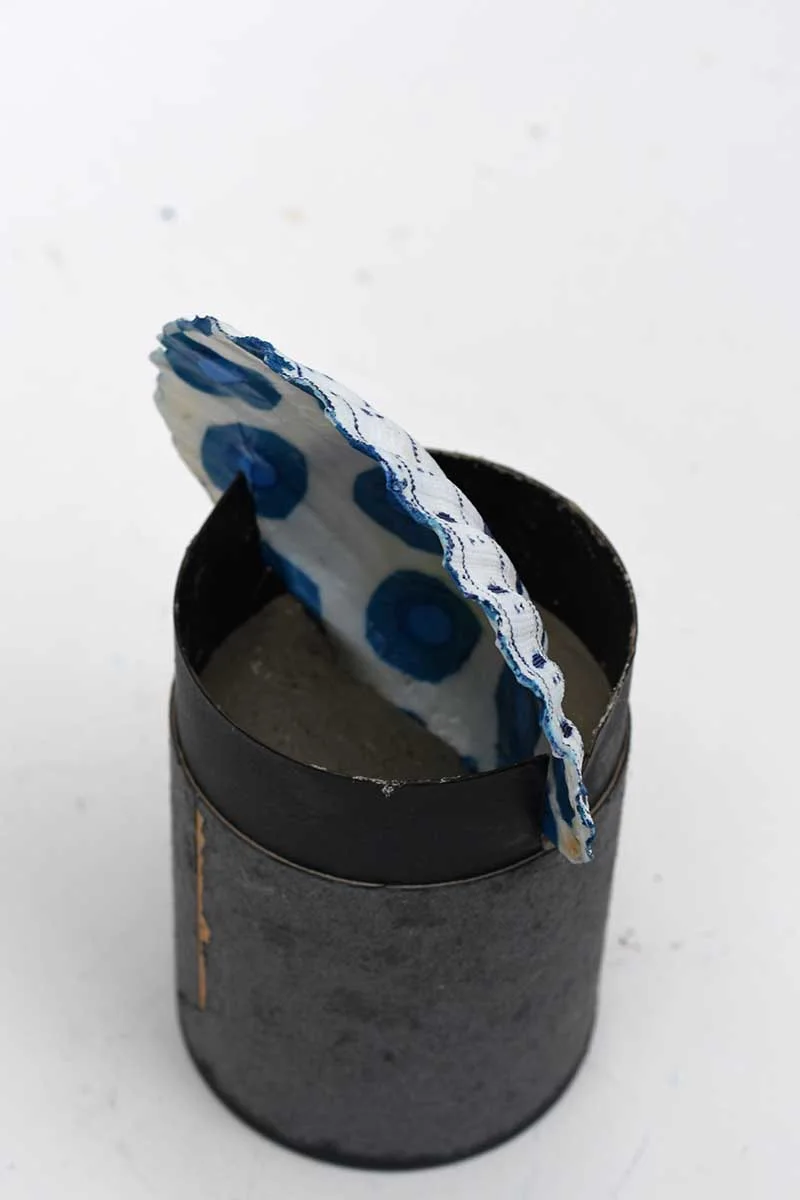
Step 3: Prep your moulds: Find two round moulds. Food packaging is perfect here. I used old containers from the recycling bin. Cut two narrow slits into the top edge of each mold, directly opposite each other. These slits will hold your shells upright while the concrete sets.
Now, grease the inside of each mould with a little Vaseline to make removal easier later.
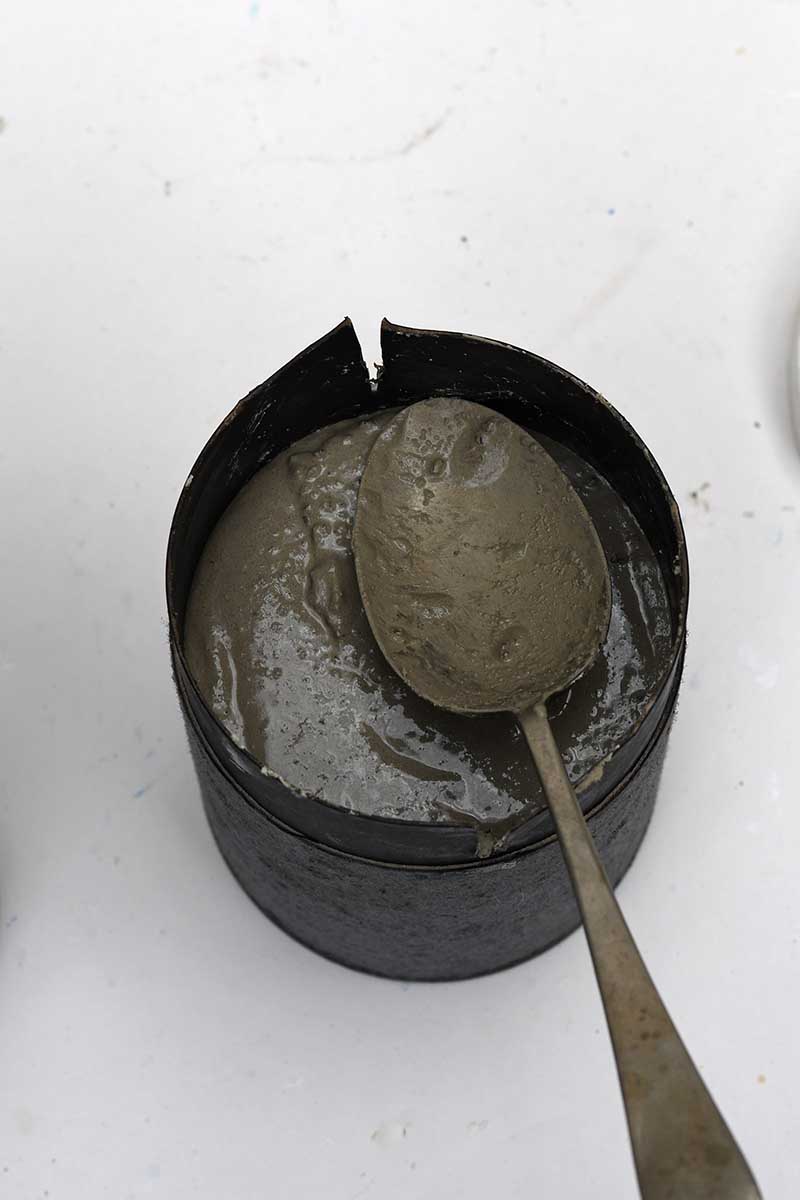
Step 4: Mix and pour the concrete. Follow the instructions on your crafting concrete mix and prepare just enough for your two moulds. Spoon it into the moulds, stopping about 2cm from the top.

Insert your shells into the slits you made earlier. The base of the shell should touch the concrete, enough to set in place but not sink too far. Now leave it all to set and harden. I left mine overnight just to be sure.

Step 5: Finish the concrete bases: Once fully dry, remove the concrete cylinders from the moulds. Your scallop shells should be standing up firmly at the top of each one.

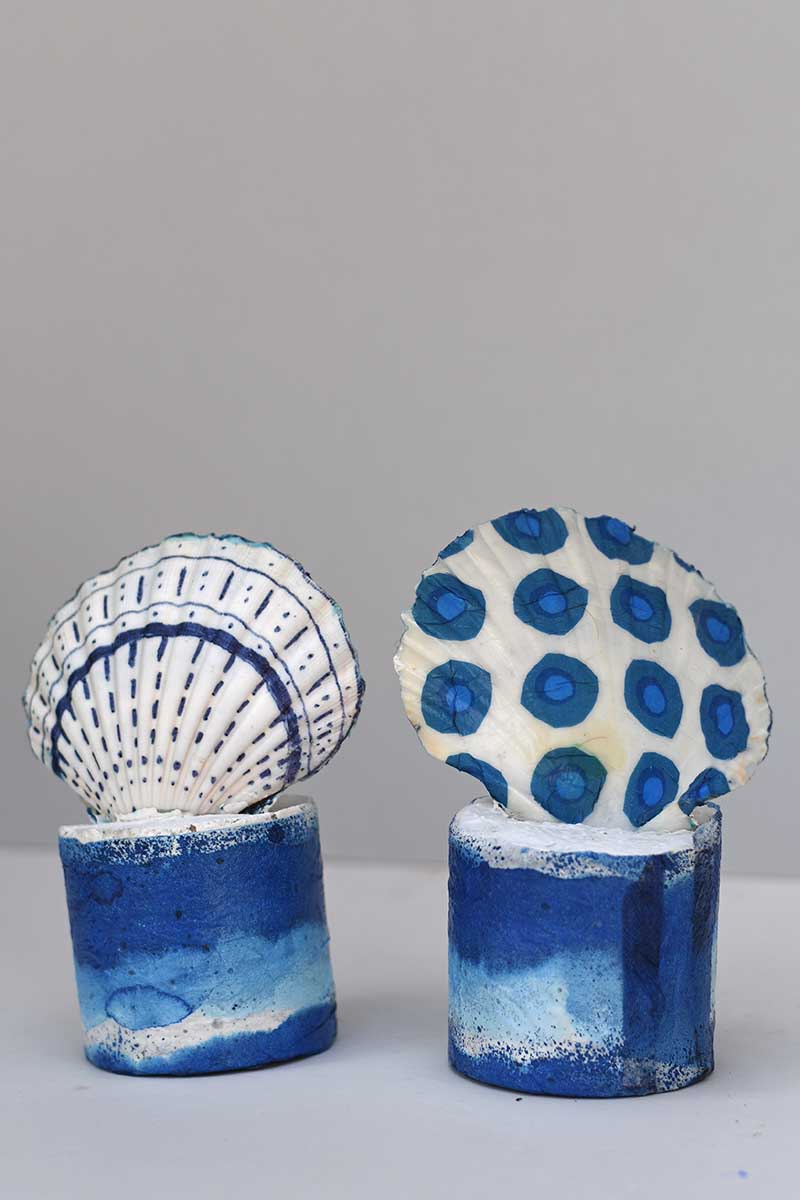
I painted the concrete white first for a nice, clean look. Then, to continue the seaside vibe, I decoupaged and sealed (with Mod Podge) the base with more of those ocean-inspired napkins. The result is a lovely soft blue-and-white beachy effect that feels just right.

Displaying Your Beach-Inspired Bookends
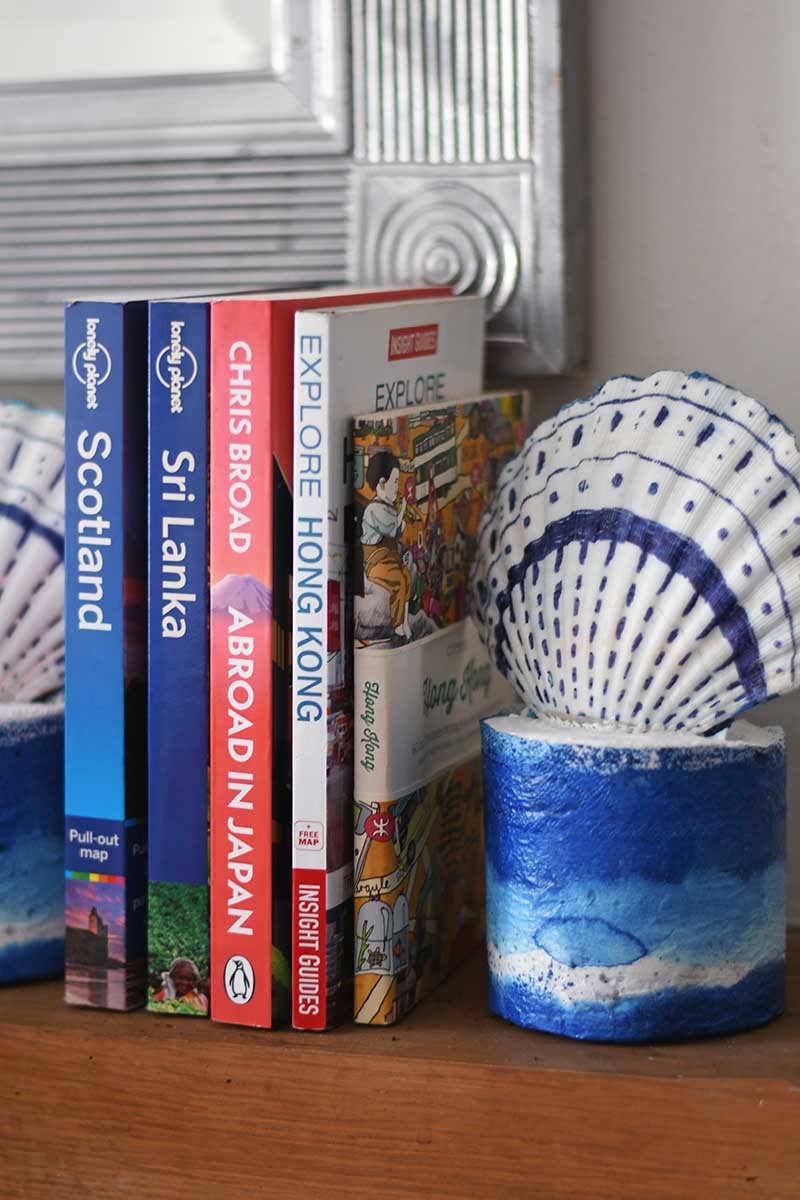
These scallop shell bookends look brilliant on a bookshelf or mantelpiece, especially when paired with driftwood, coral, or sea glass. They’re great for summer styling and coastal homes—but also make a lovely handmade gift for anyone who loves the sea.
And if you don’t have books to display, they work just as well as quirky little doorstops or stand-alone decor pieces. Also, if you still have more scallop shells, try making one of these shell napkin holders.
For more fun coastal-themed DIYs, take a look these adult shell crafts, my denim fish pillows, Sashiko koinobori windsocks, and whimsical scrap fabric jellyfish.
And don’t miss the amazing collection of vintage nautical illustrations and beautiful Japanese seashell drawings, complete with scallop shells—over on Pictureboxblue!
Beverly
Tuesday 8th of July 2025
These are so wonderful. Congratulations, you are being featured on Wonderful Wednesday Blog Hop. I hope you stop by Hugs, Bev
Claire Armstrong
Wednesday 9th of July 2025
Thank you, I look forward to seeing it.
Beth
Monday 7th of July 2025
Such a FABULOUS tutorial for creating a seashell keepsake, Claire! Thanks for sharing, have a great week! Creatively, Beth
Claire Armstrong
Tuesday 8th of July 2025
Thank you so much they were fun to make.