
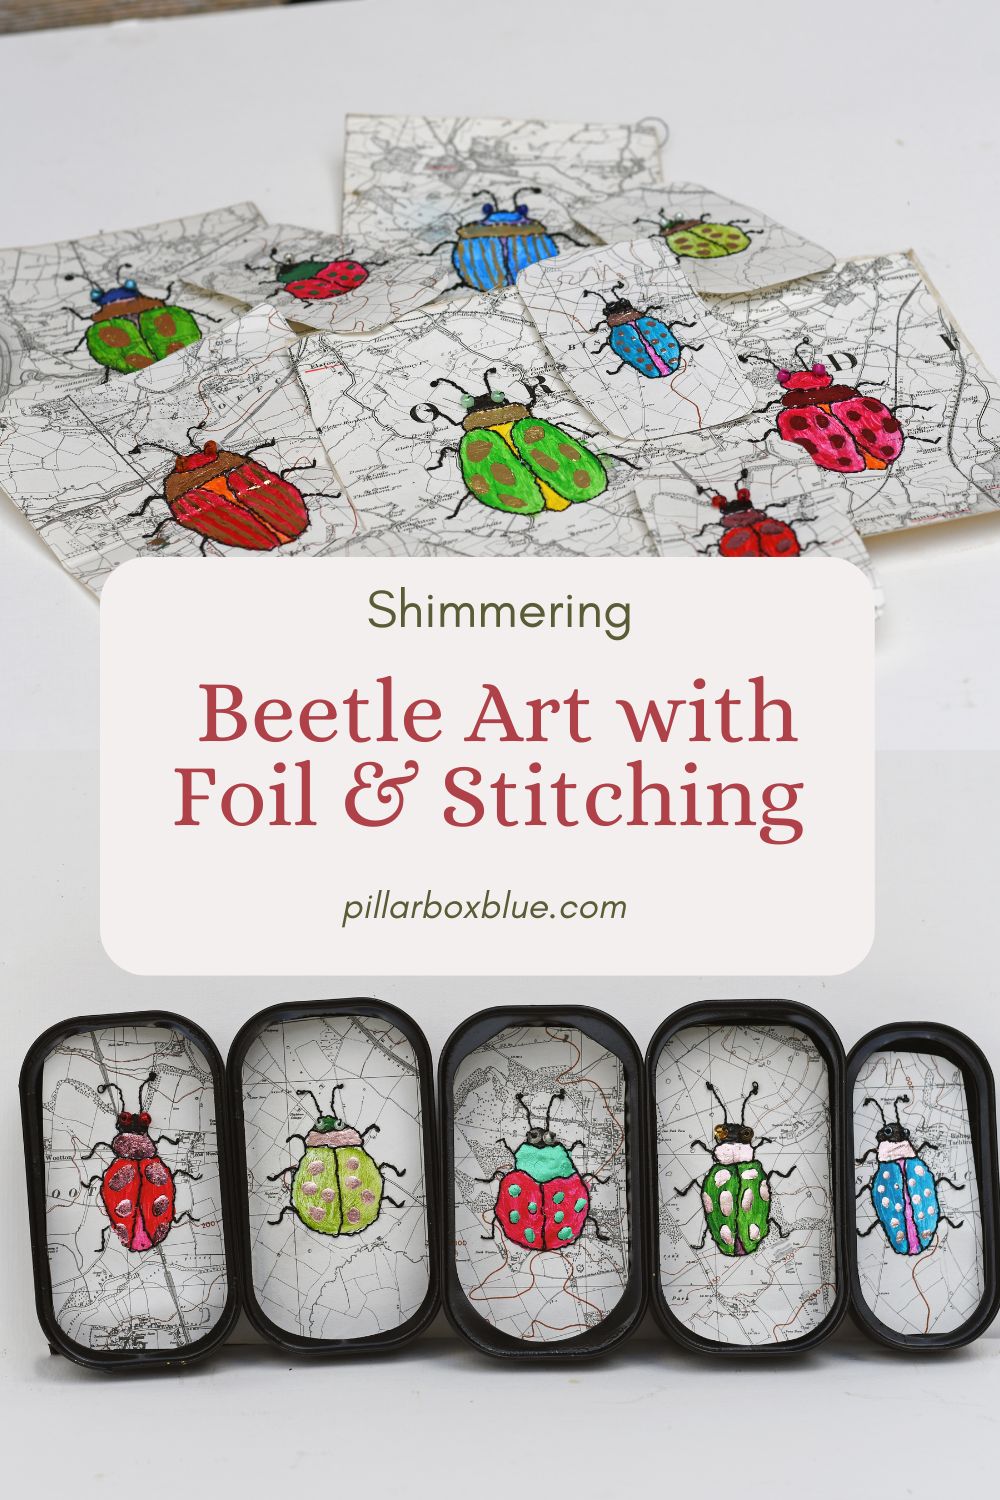
Turn old road maps into shimmering beetle art with paint, metallic foil, and simple stitching. This fun upcycled craft is perfect for creating colourful, nature-inspired wall decor with a quirky twist!
If you’ve spent any time on Pillar Box Blue, you’ll know I have a bit of a thing for turning paper and scrap fabric into something completely unexpected. From my map paper moths to fabric flowers and even denim feathers, I clearly can’t resist a nature-inspired upcycle.
This time, I’ve gone full-on Victorian naturalist… but with a colourful twist.
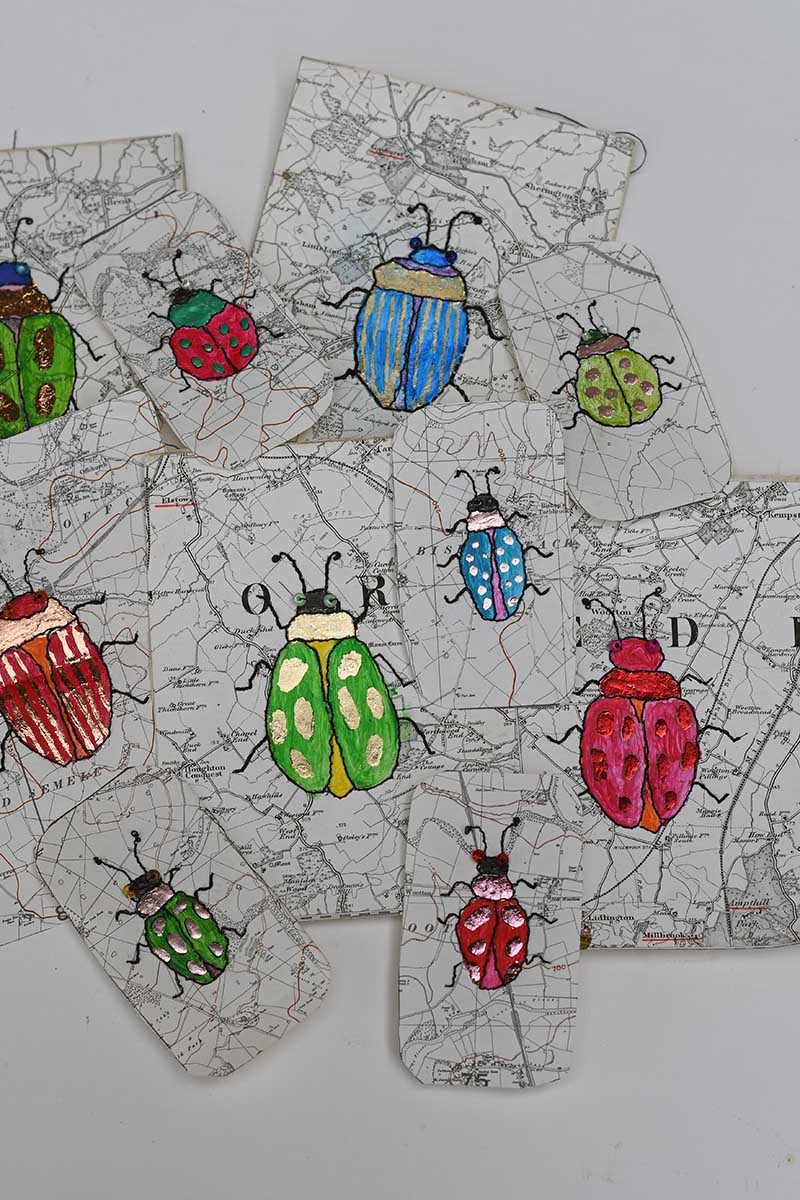
I’ve been slightly obsessed with beetles lately. Not the garden-variety ones (though they’re lovely too), but those gloriously shiny, jewel-like beetles that look like they’ve been enamelled or dipped in petrol. You know the ones, iridescent greens, electric blues, flashes of pink and gold.
So, naturally, I decided to recreate my own made-up species… using old road maps as my canvas.
These map beetle specimens combine some of my favourite techniques:
- Upcycling old maps
- Stitching on paper
- Adding metallic foils for that iridescent shimmer
- And a touch of beadwork for detail
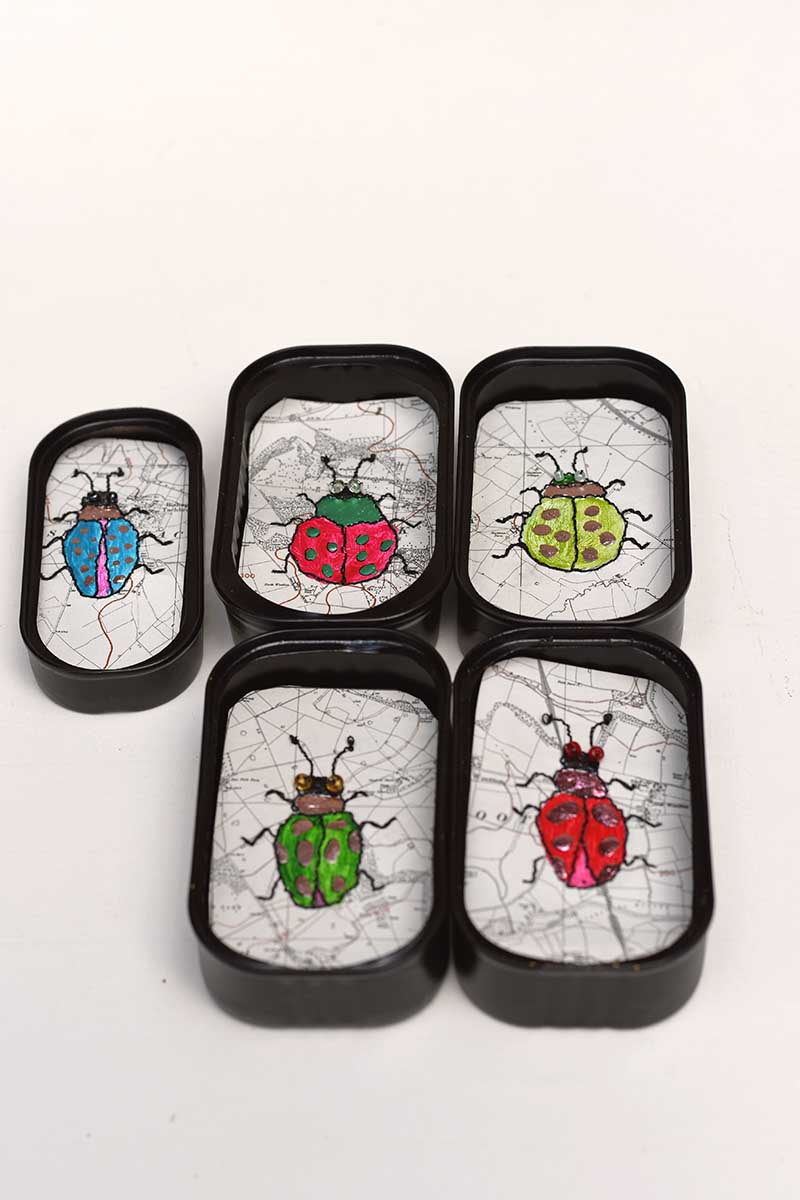
The result? A collection of bright, slightly bonkers beetles that look right at home framed like Victorian specimens, especially when displayed in upcycled sardine tins!
Materials Used
We’re a participant in the Amazon Services LLC Associates Program, an affiliate advertising program designed to provide a means for us to earn fees by linking to Amazon.com and affiliated sites. As an Amazon Associate, I earn from qualifying purchases.
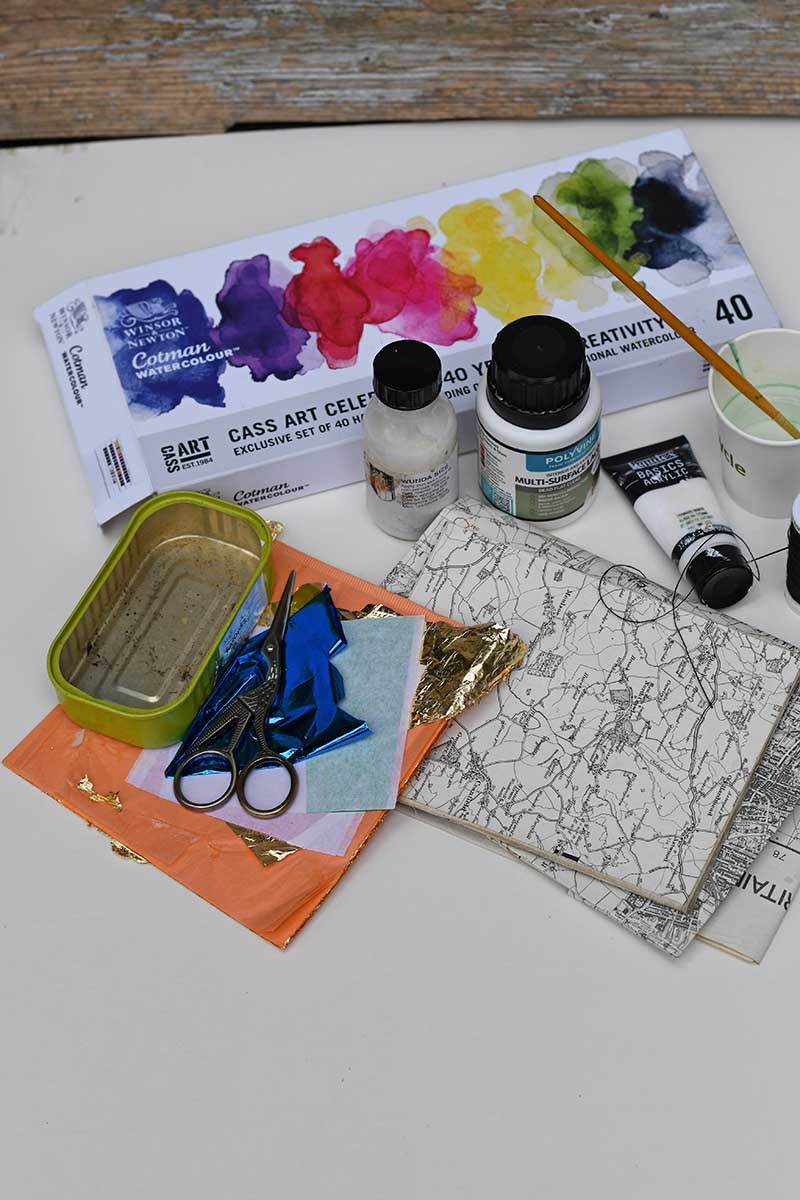
- Old road maps
- Coloured paints (acrylic or watercolour)
- Black fine liner pen
- Gold leaf size (adhesive)
- Metallic foils (green, pink, rose gold, gold)
- Small paintbrush
- Needle (plus a cork for grip)
- Foam board (for hole punching)
- Black thread
- Seed beads (for eyes)
- Old frames or empty sardine tins
How To Make Map Beetle Art
1. Create Your Beetle Shapes
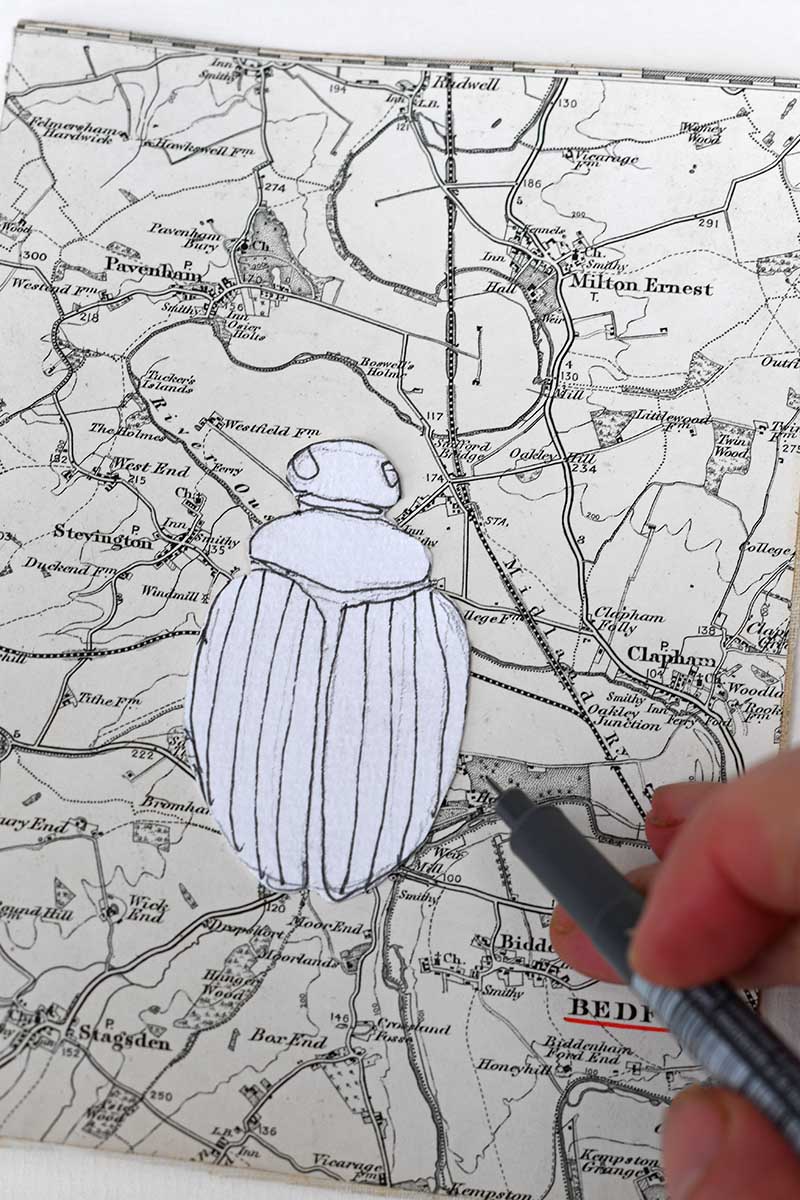
Draw beetle shapes directly onto your old road maps. I found that making a template first and drawing around it was the best way. This is a great chance to get creative. These don’t have to be real species. Try:
- Rounded ladybird shapes
- Long, narrow beetles
- Chunky jewel beetles
Paint inside each shape with white acrylic paint. This stops the map from showing through and keeps your colours vibrant. Check out these vintage entomology illustrations for inspiration.

2. Add the Details
Once dry, draw the beetle features with a black pen:
- Wings
- Legs
- Antennae
- Body sections
Think of this as your stitching guide.
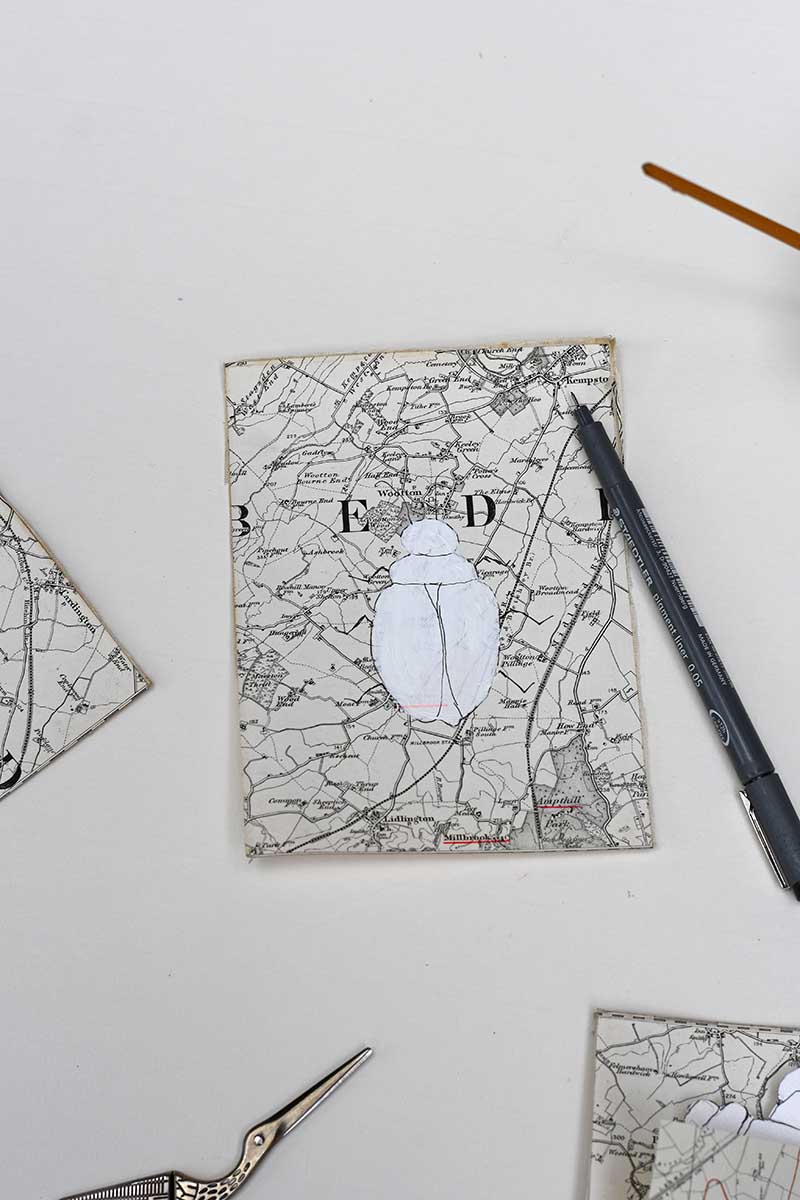
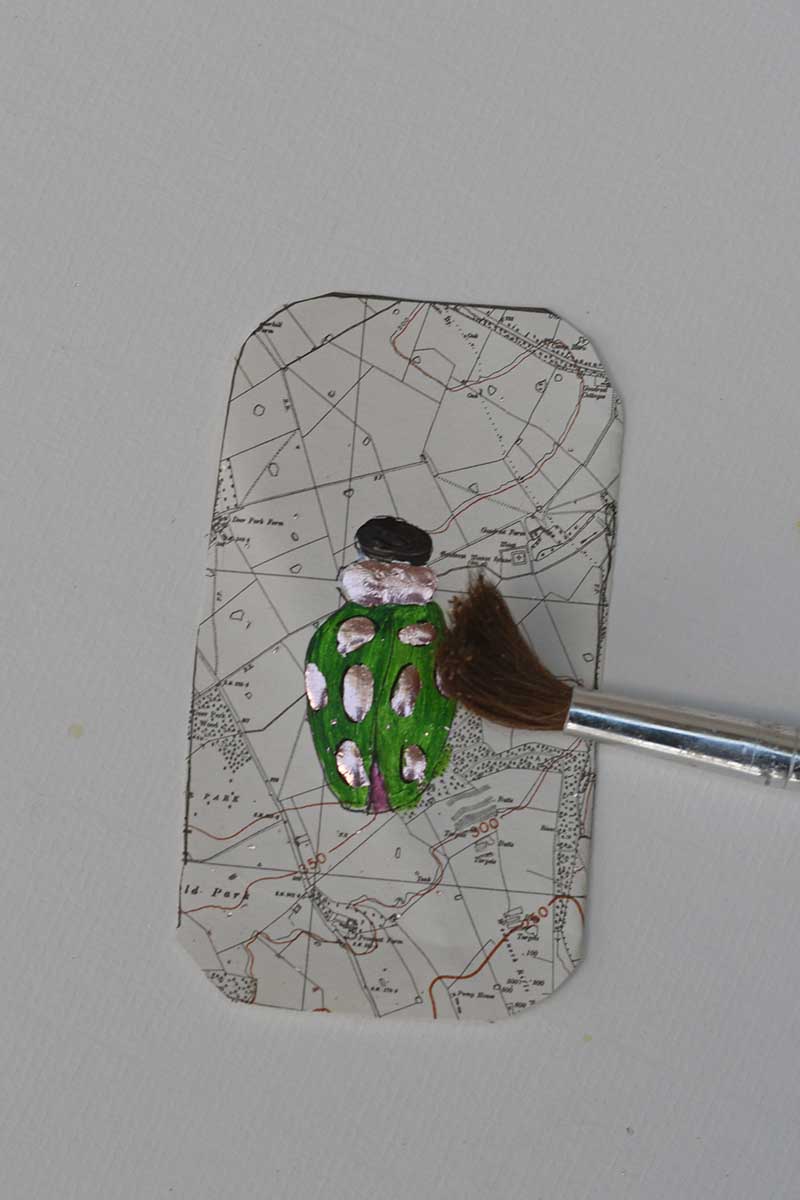
3. Paint the Beetle
Now bring your beetles to life with colour. Bright shades work best for this nature-inspired craft:
- Emerald green
- Turquoise
- Pink
- Orange
Let everything dry fully before moving on.
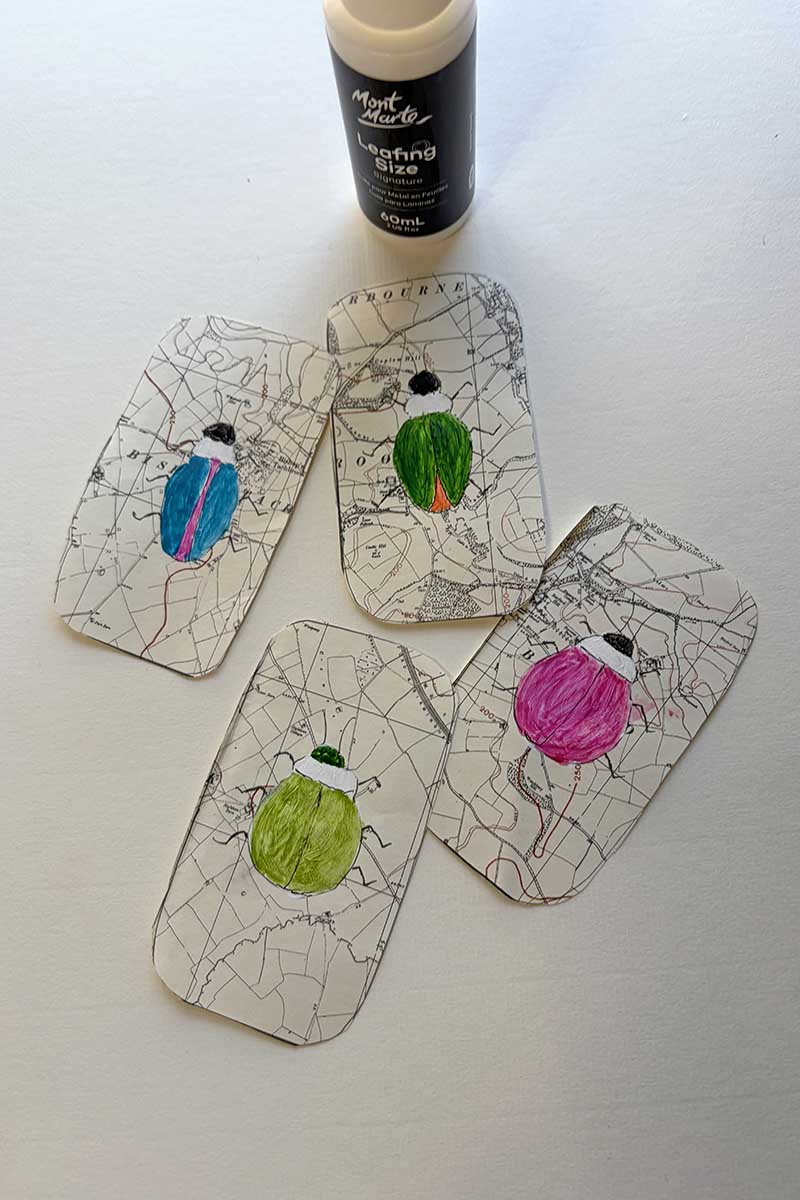
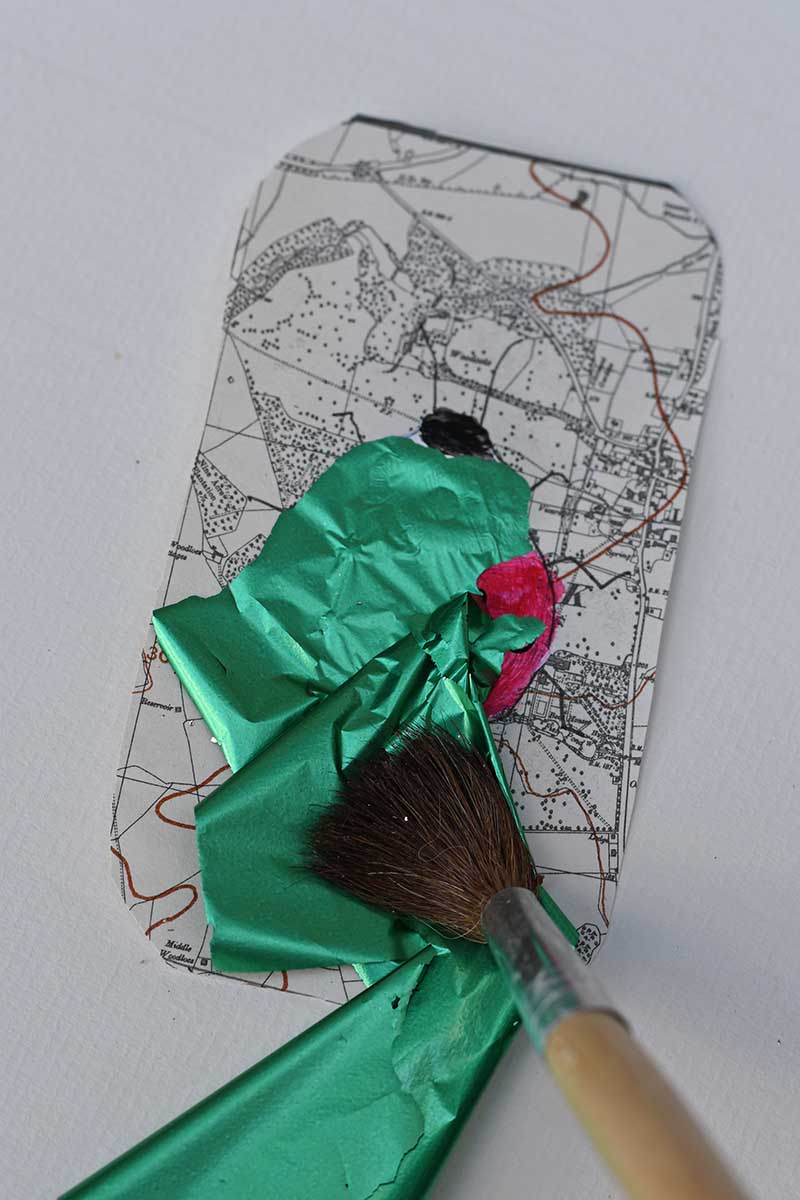
4. Add Metallic Foil (For That Iridescent Look)
This step gives your beetles that beautiful shimmer often seen in real insects.
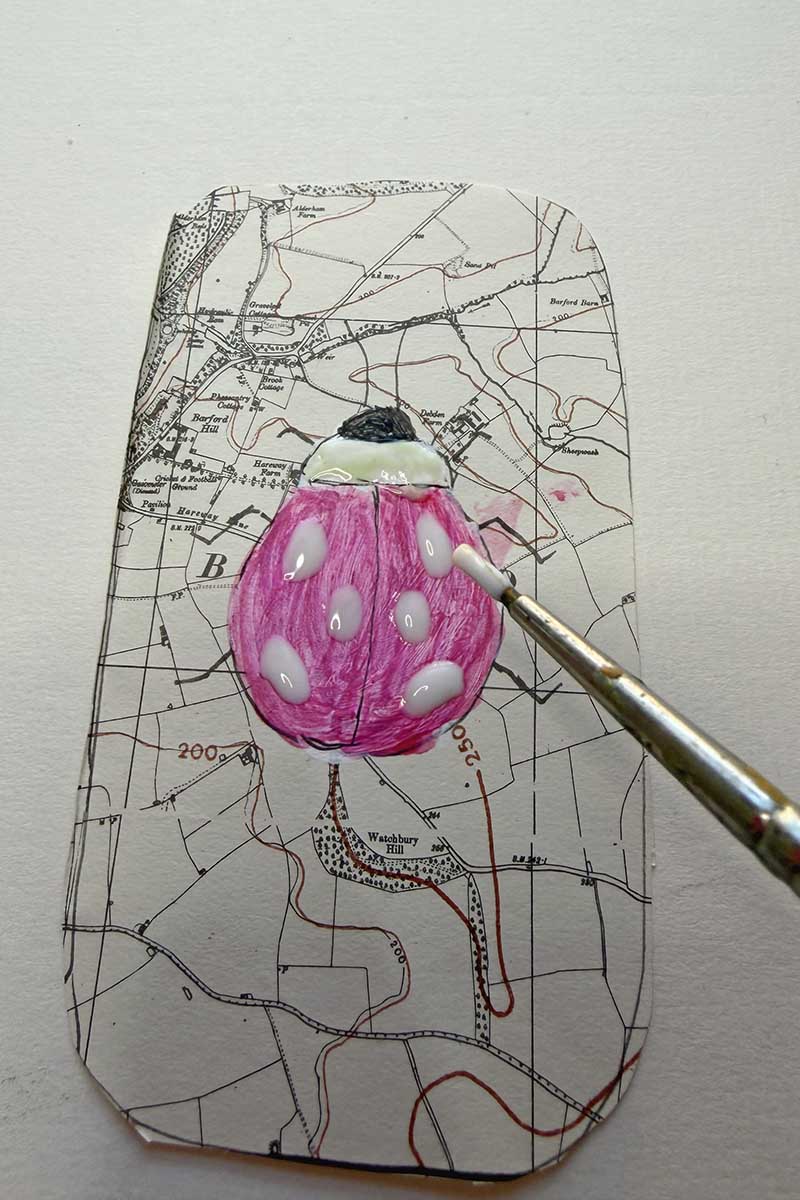
How to apply metallic foil:
- Paint gold leaf size onto areas like spots, stripes or wing panels
- Wait until the adhesive becomes tacky, about 20 mins (not wet)
- Press the metallic foil gently onto the surface
- Brush away any excess foil leaf.
You’ll be left with gorgeous flashes of colour.
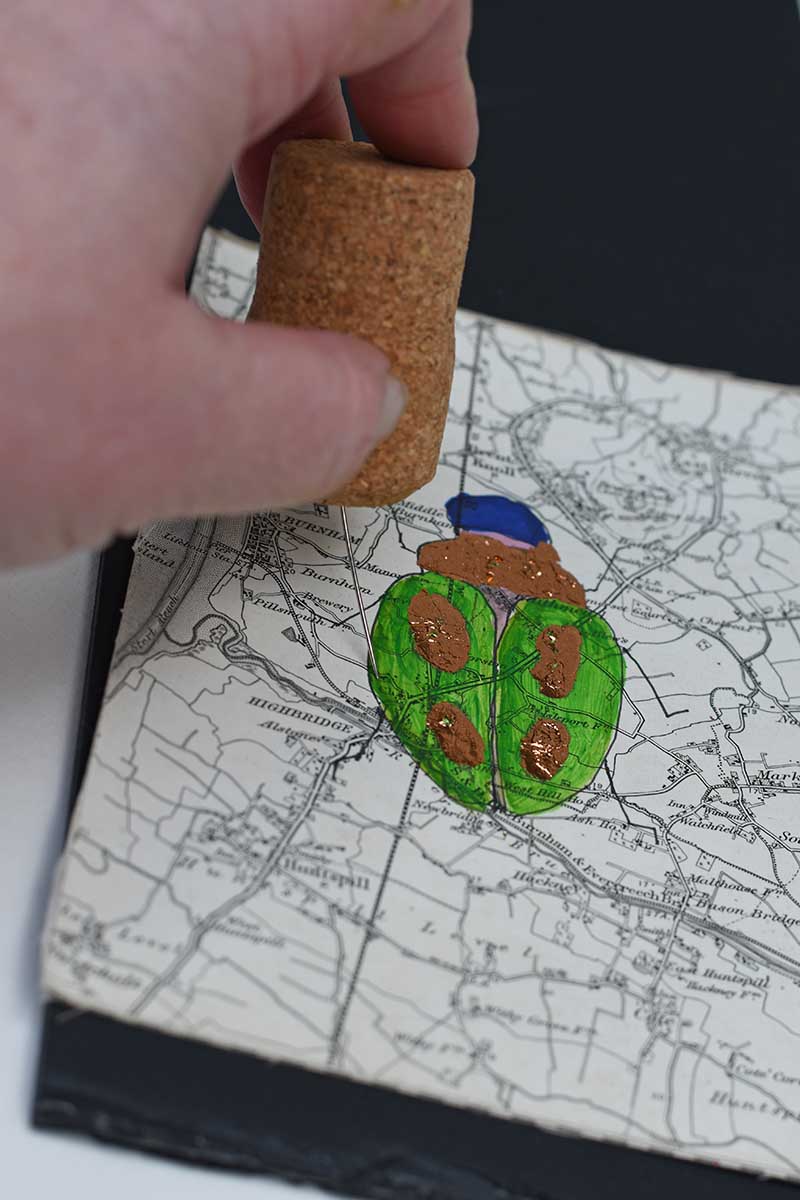
5. Prepare for Stitching
Before stitching, you’ll need to make holes in the paper.
- Place your map on a foam board to protect your surface
- Use a needle to punch holes along the outlines
- Push the needle through using a cork as a handle (much easier on your fingers!)
Make holes:
- Around the body
- Along the legs and wings
- On the antennae
Even spacing will make stitching neater.
6. Stitch the Beetle
Thread your needle with black thread.
- Use a backstitch to outline the body and legs
- Follow the lines you drew earlier
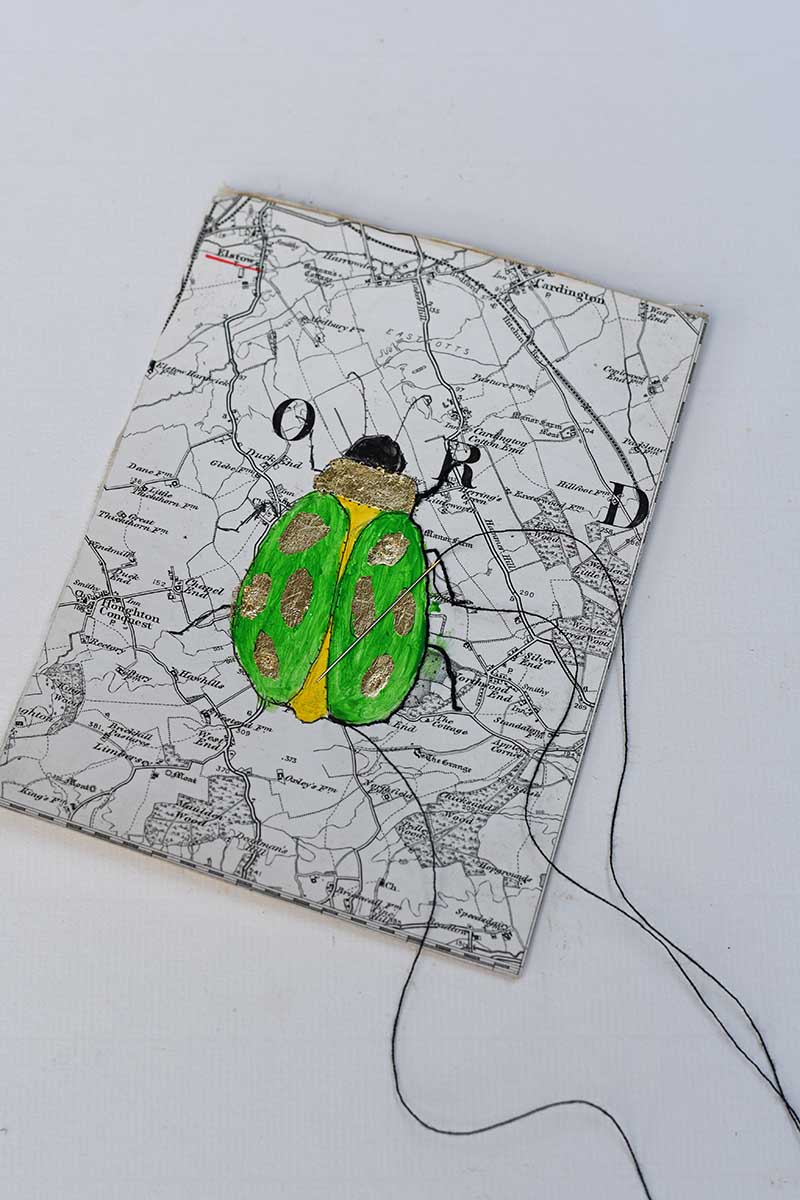
For the antennae:
- Finish with a French knot at the tips
This adds a lovely 3D detail and really enhances the embroidered paper art effect.
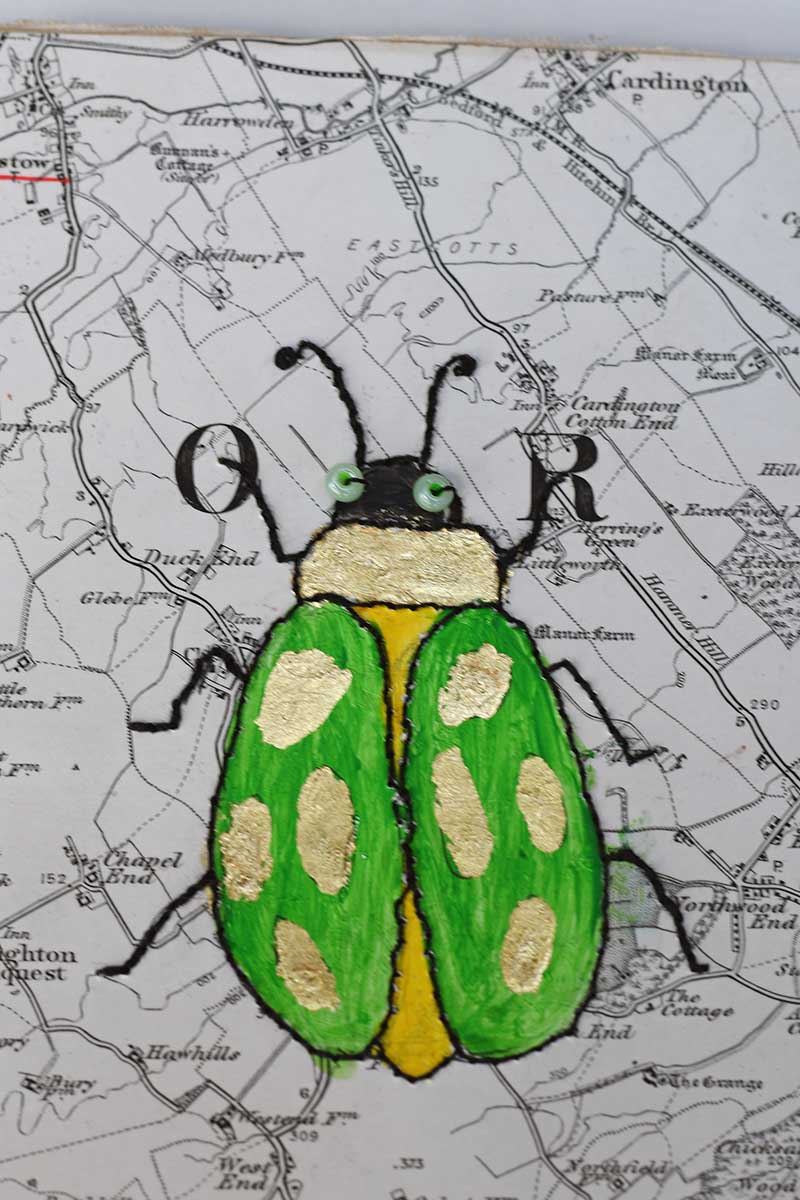
7. Add the Eyes
Sew tiny seed beads onto the head for eyes. It’s a small detail, but it really brings your beetles to life.
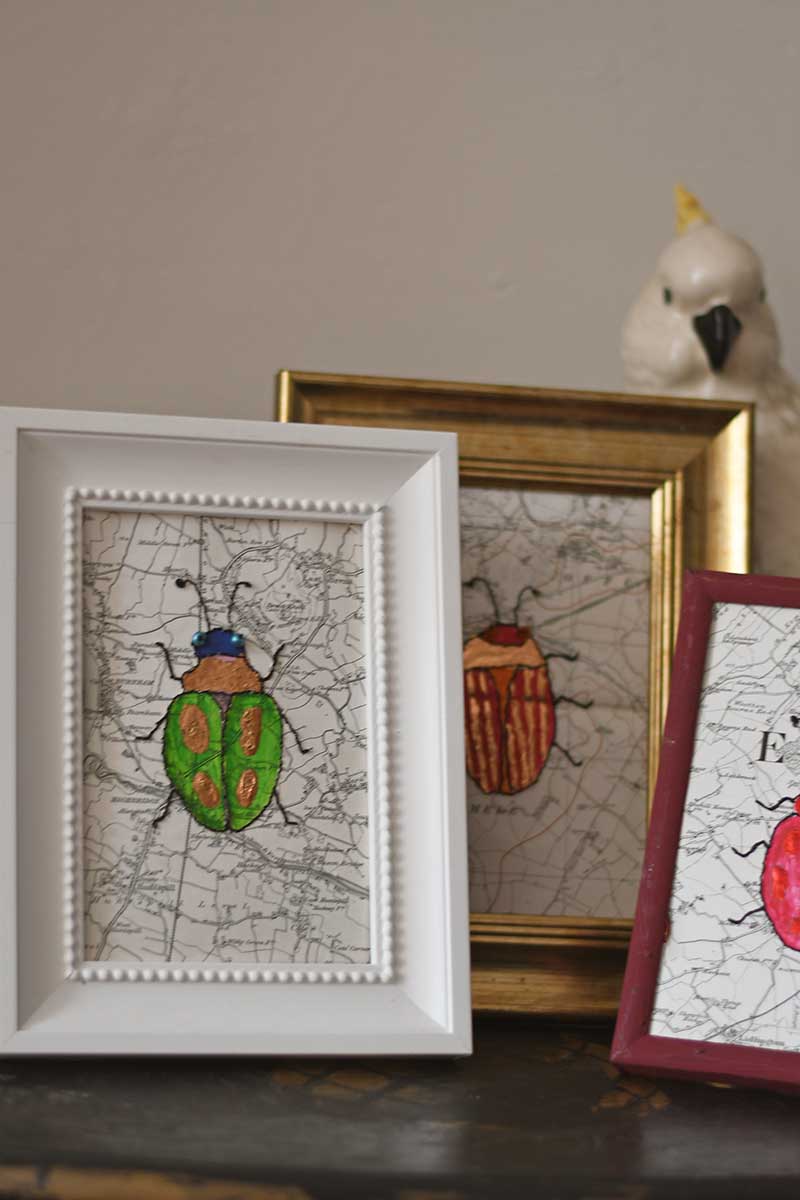
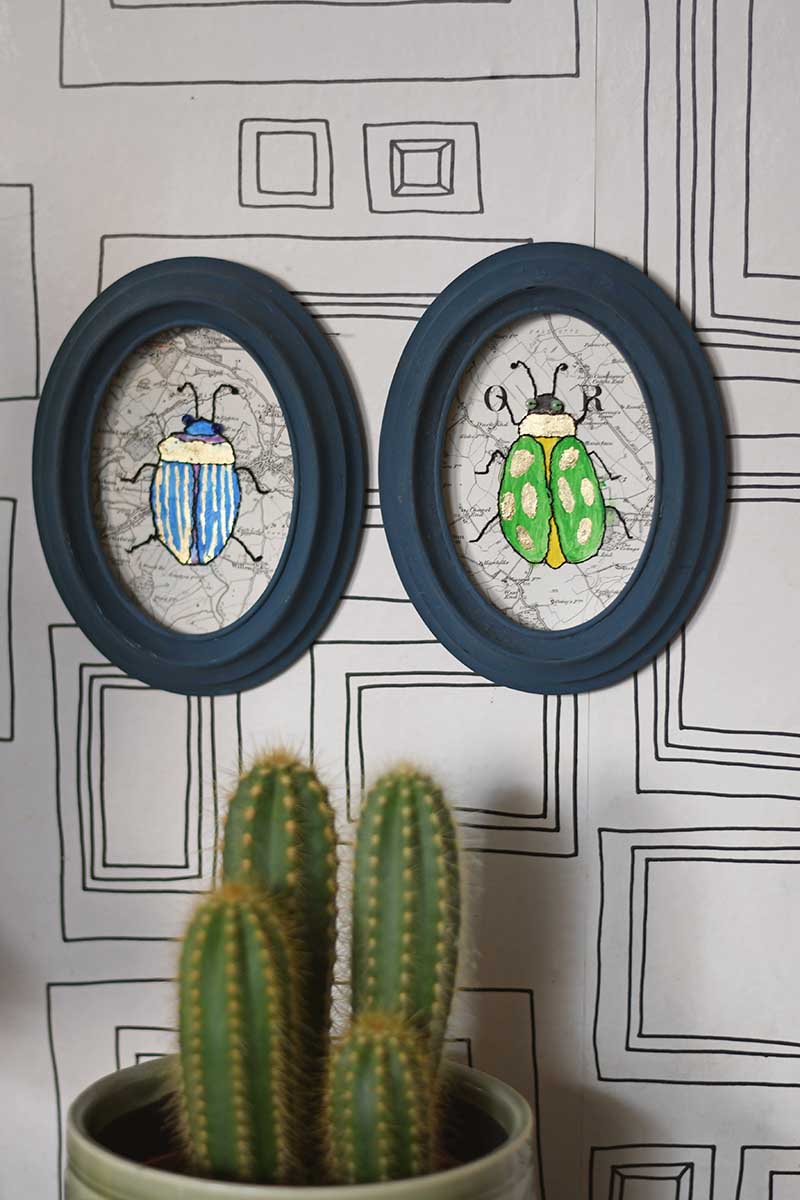
8. Frame Your Specimens
Time to display your creations! Option 1: Traditional frames. Perfect for wall art or gallery displays.
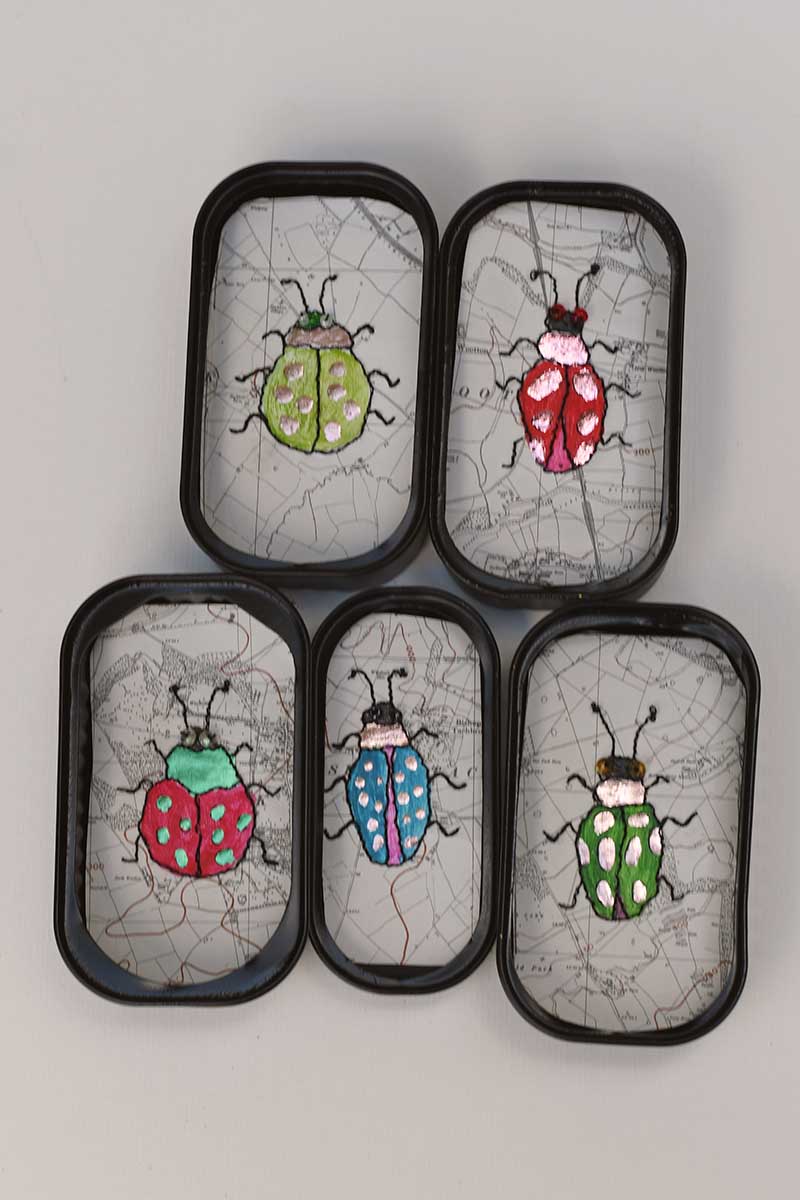
Option 2: Sardine tins (my favourite!)
- Spray paint the tins black first.
- Let dry
- Mount your beetles inside.
These give a brilliant Victorian specimen art look—tiny curiosity cabinets!
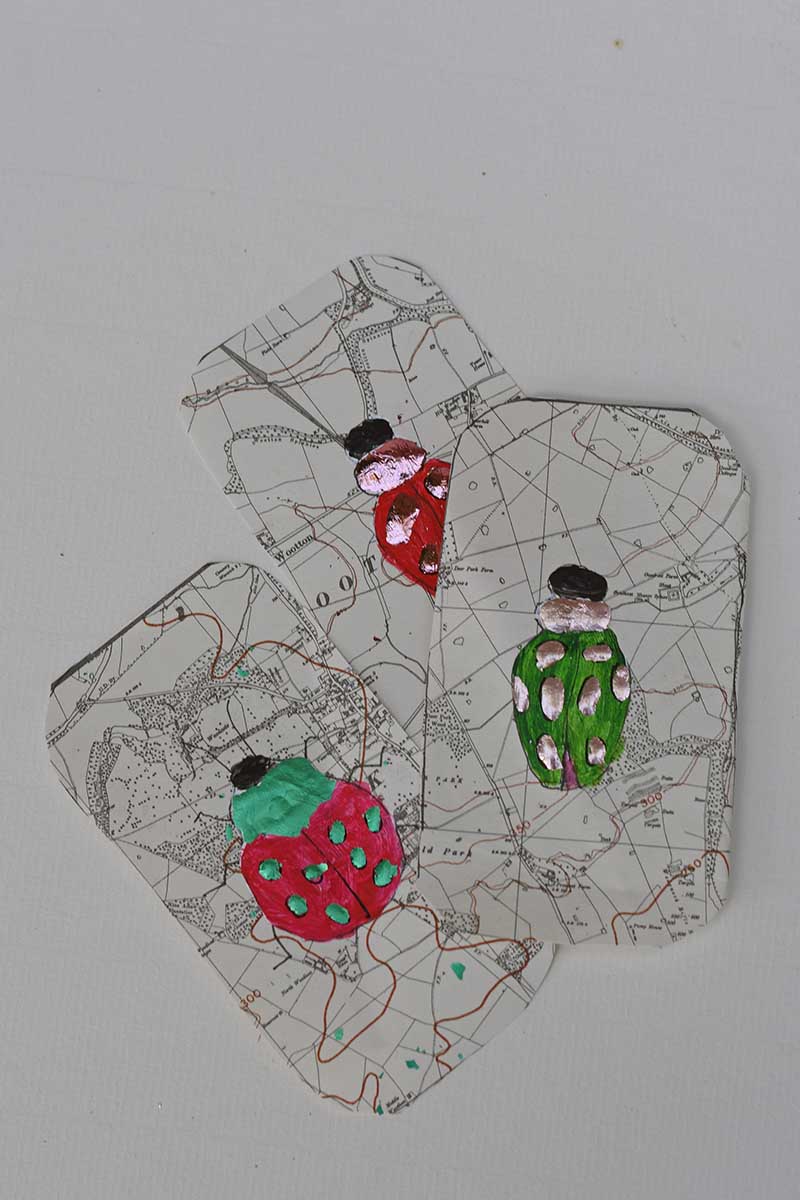
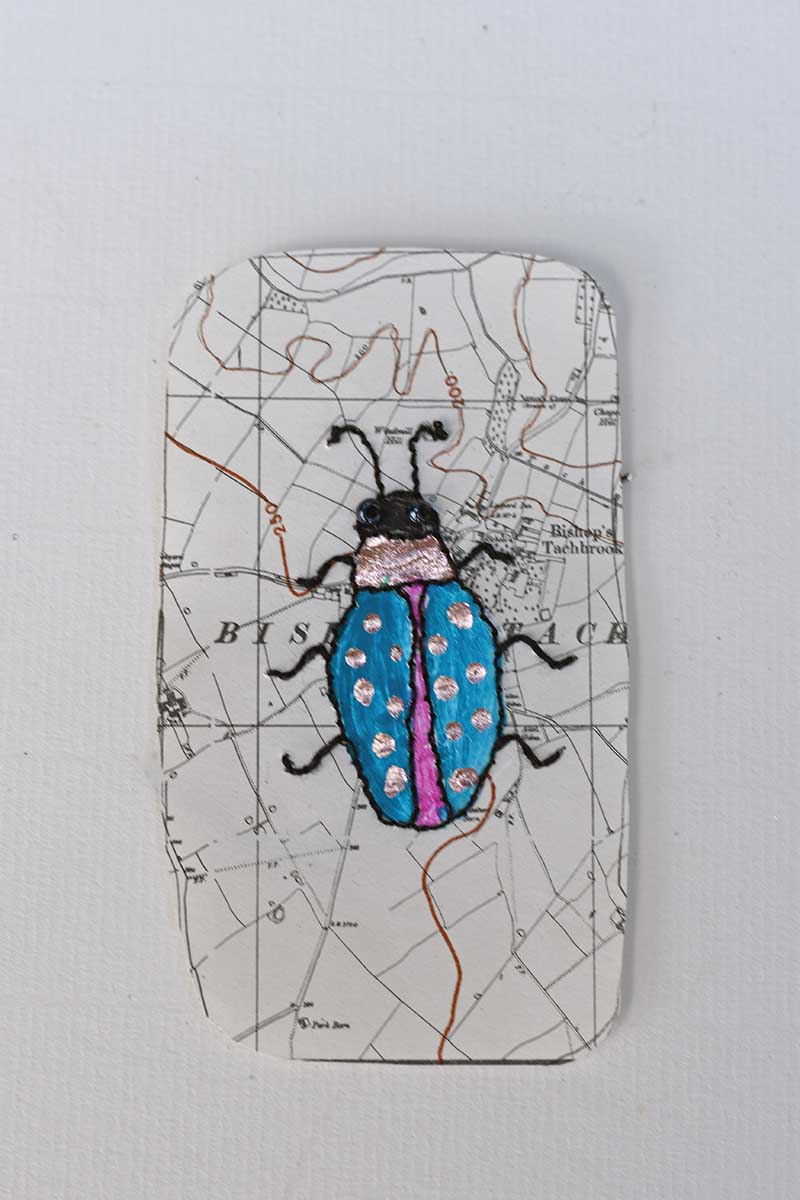
Finished Beetles
I absolutely loved how these turned out.
Each beetle is unique, with different colours, foil accents, and stitched details. They’re bold, slightly eccentric, and a perfect example of how upcycled crafts for adults can be both creative and decorative.
Plus, they’re a great conversation starter, your own collection of imaginary insects!
Tips & Ideas
- Try darker backgrounds for contrast. Book pages would work just as well as old maps.
- Use coloured thread for a different look
- Experiment with symmetry or abstract designs
- Create a full collection for a “specimen wall”
- Mix this with other map paper crafts, like moths or butterflies
Donna via Funky Junk Interiors
Friday 8th of May 2026
Well, you've officially inspired me! I have some new iridescent paint I've been wanting to use and I think this is a fabulously fun idea to try! Your beetle specimens are adorable! I'm thinking of butterflies and ladybugs...
Claire Armstrong
Saturday 9th of May 2026
I think butterflies look fabulous! Thank you.
Michele M G
Tuesday 5th of May 2026
Bravo, framed, this collection is museum worthy. Thanks for sharing at Funtastic Friday
Claire Armstrong
Wednesday 6th of May 2026
Thank you, I did have fun making them.
Esme Slabbert
Monday 4th of May 2026
So interesting, never seen this before. Visiting from Handmade Monday. My entries are Lemon Glaze Vegan Bundt Cake, Fresh Crunch Vegan Super Salad and Maple Bran Breakfast Muffins with Crunch Hope you will join us weekly at SSPS https://esmesalon.com/seniorsalonpitstop/
Claire Armstrong
Wednesday 6th of May 2026
Thank you.