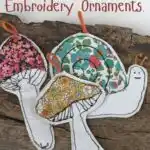
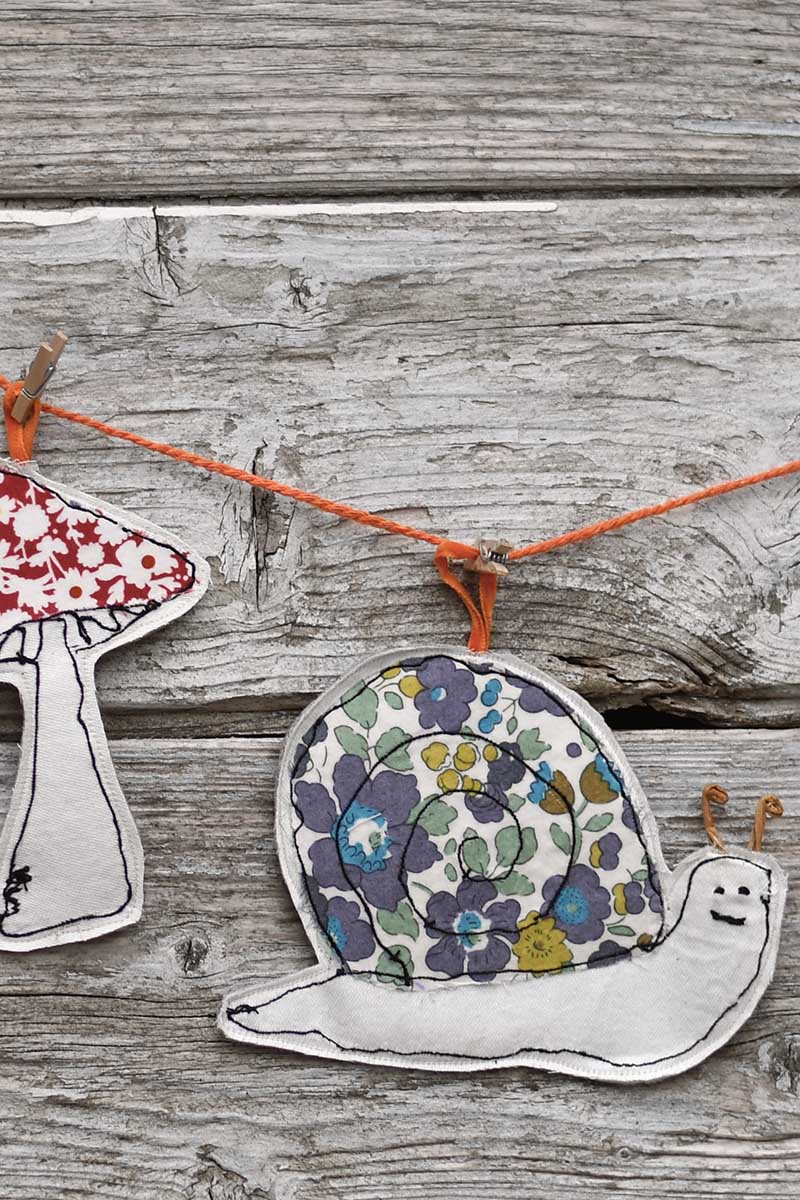
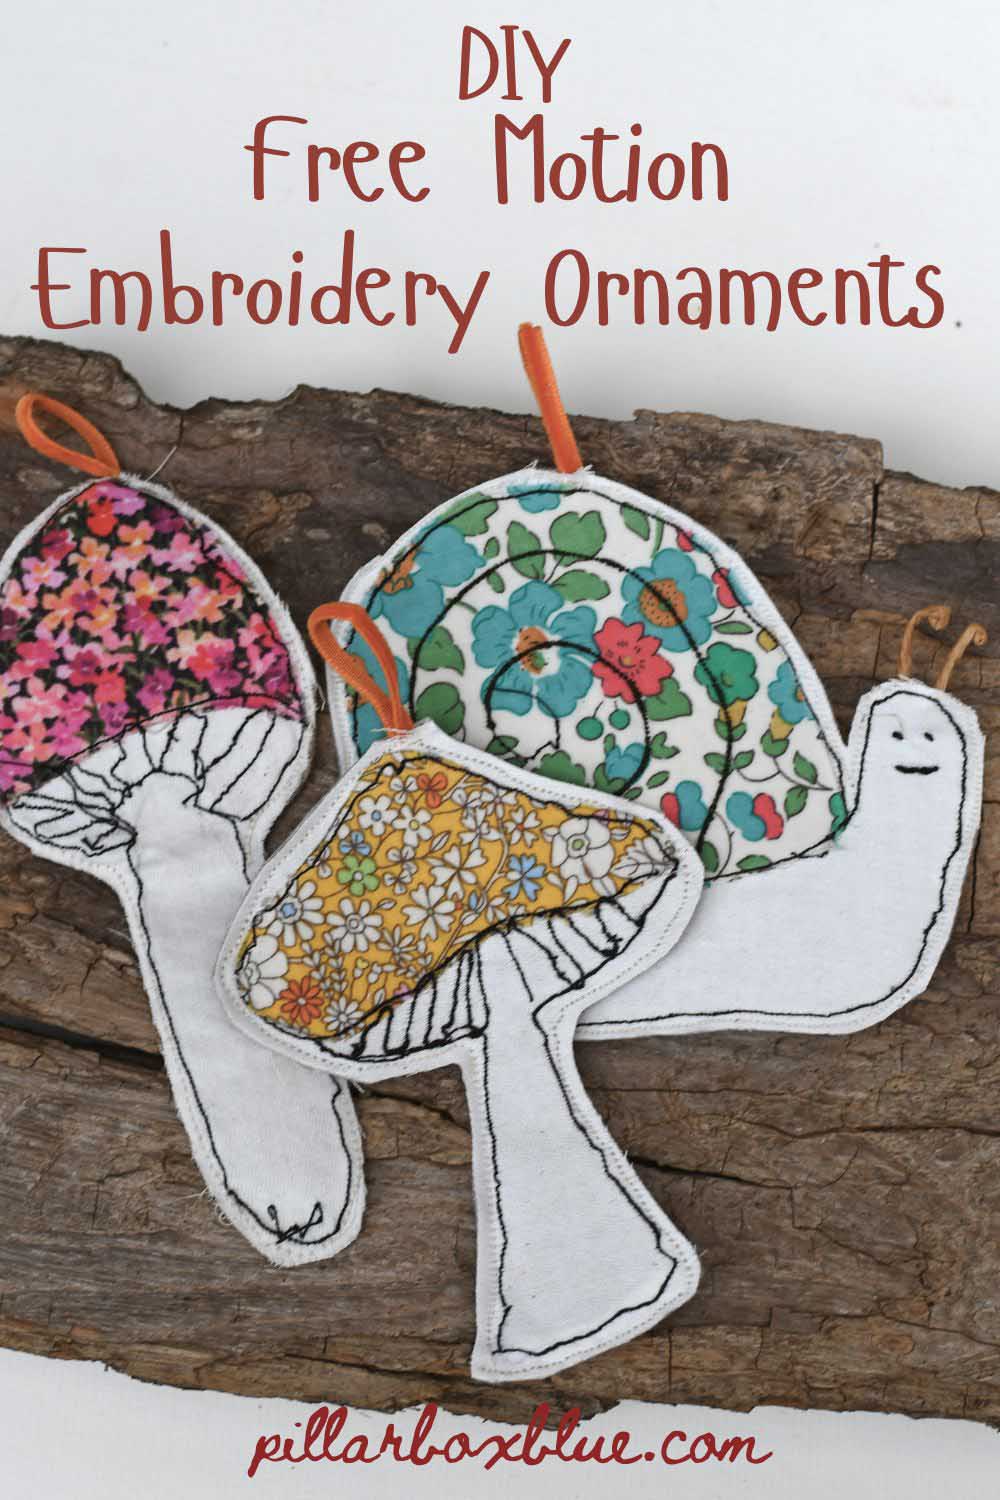
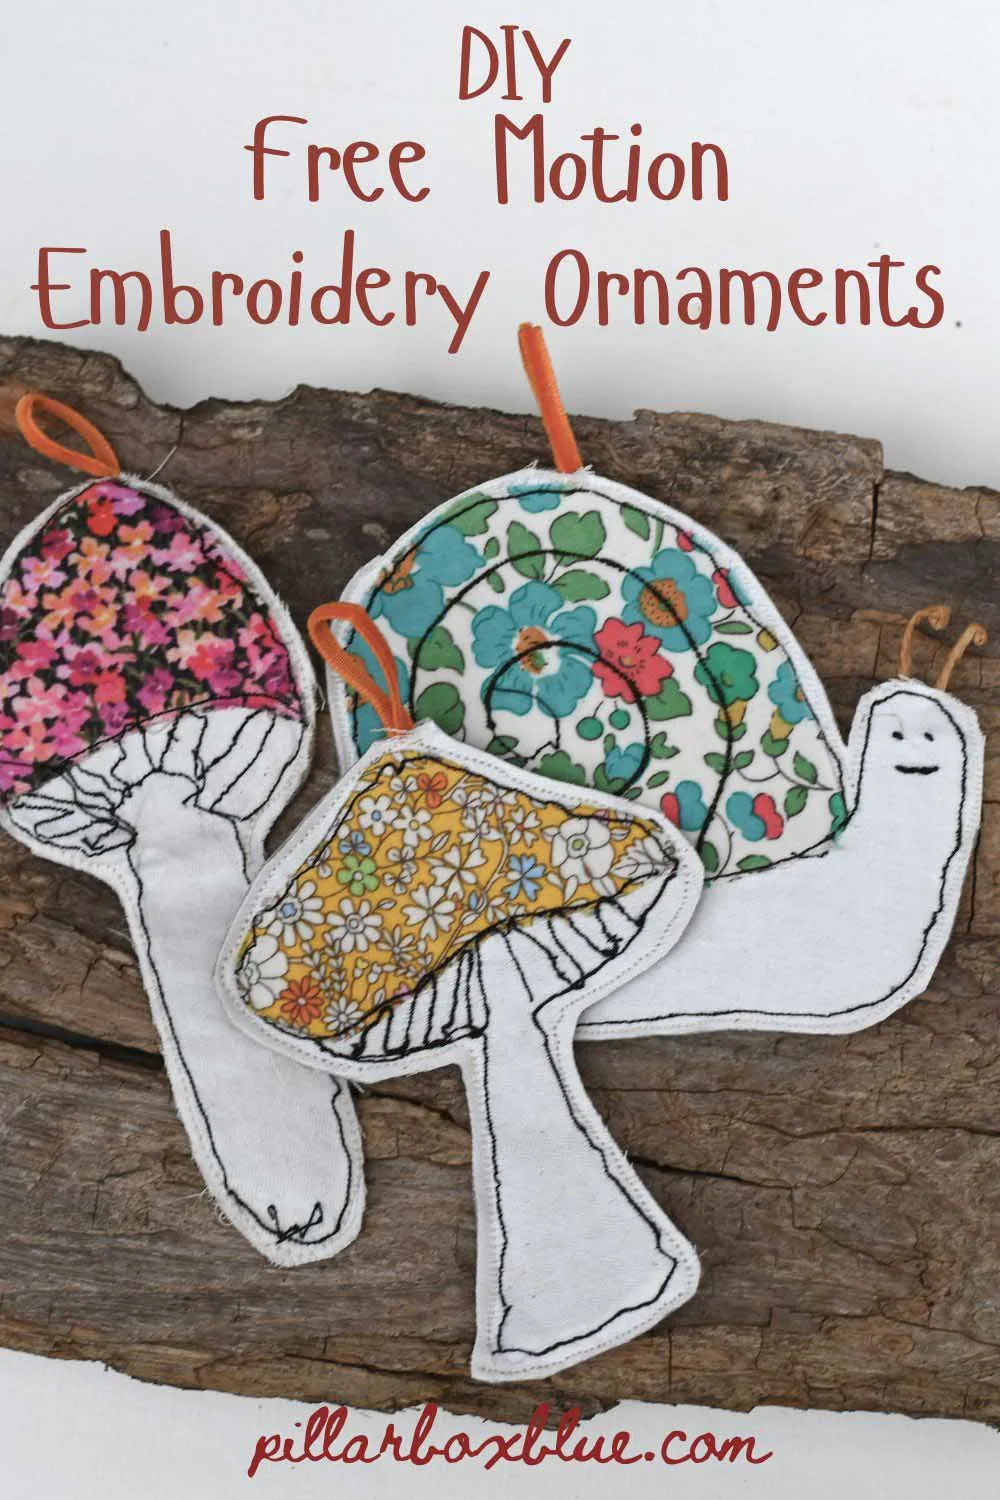
Add a touch of whimsy to your fall decor with this DIY fabric garland of mushrooms and snails! Learn how to use free-motion embroidery to stitch adorable appliqué ornaments from scrap fabric. Perfect for cosy autumn decorating, gifts, or just because you can’t resist cute fungi and snail friends.
I think it’s safe to say I’m a little mushroom-obsessed. I’ve stitched 3D fabric mushrooms before (still one of my favourite quirky projects), and made a whole mushroom display out of printed fabric. So it probably won’t surprise you that I couldn’t resist adding yet another mushroom project to the collection, this time with a few cheeky little snails tagging along.
Free Motion Embroidery Craft
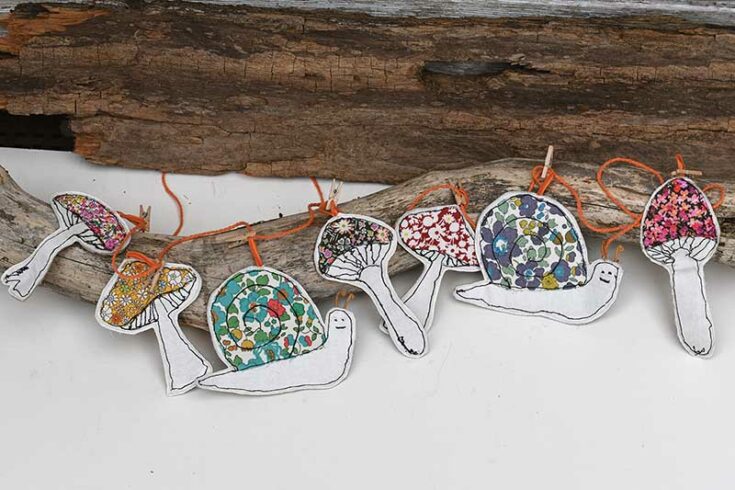
These appliqué mushrooms and snails are stitched from scraps of fabric and old bed sheets, backed with felt, and strung together into a sweet fall garland. They’re perfect for autumn decorating, but honestly, I think they’d look pretty magical all year round. And the best part? This is also a great excuse to practice a bit of free motion embroidery, one of my favourite “perfectly imperfect” stitching techniques.
We’re a participant in the Amazon Services LLC Associates Program, an affiliate advertising program designed to provide a means for us to earn fees by linking to Amazon.com and affiliated sites. As an Amazon Associate, I earn from qualifying purchases.
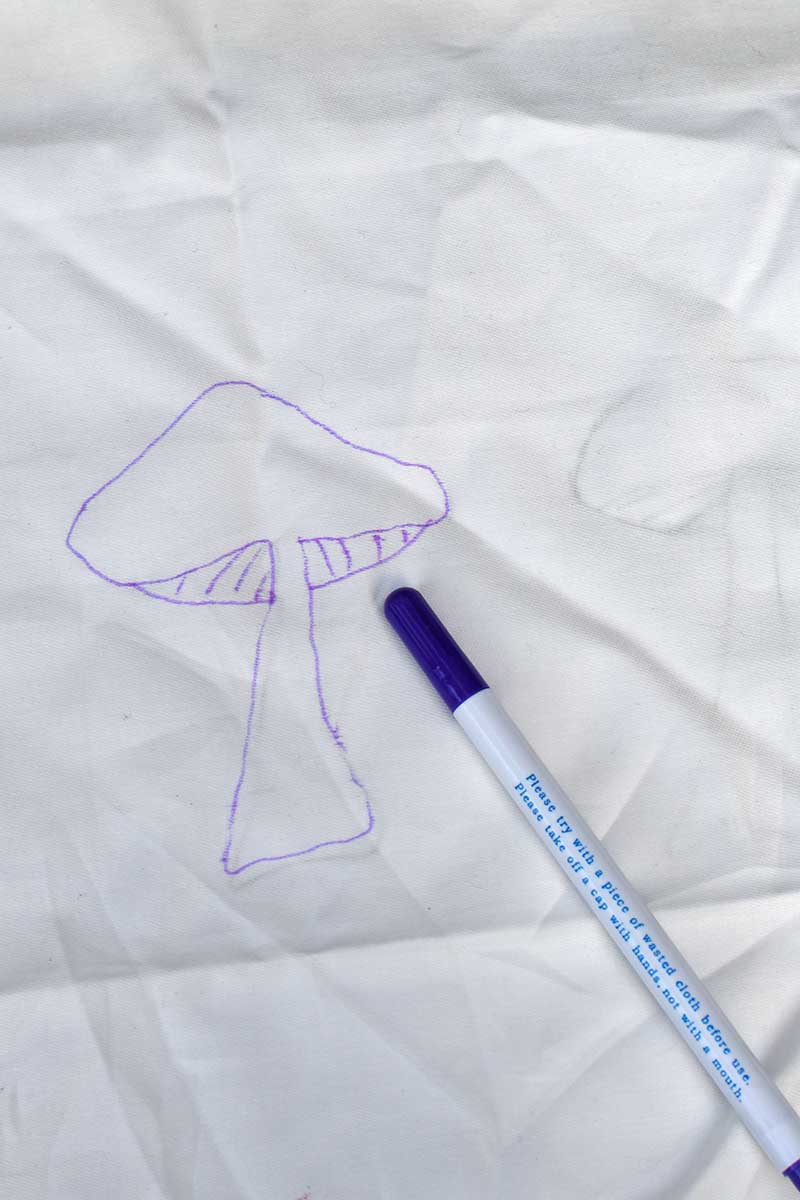
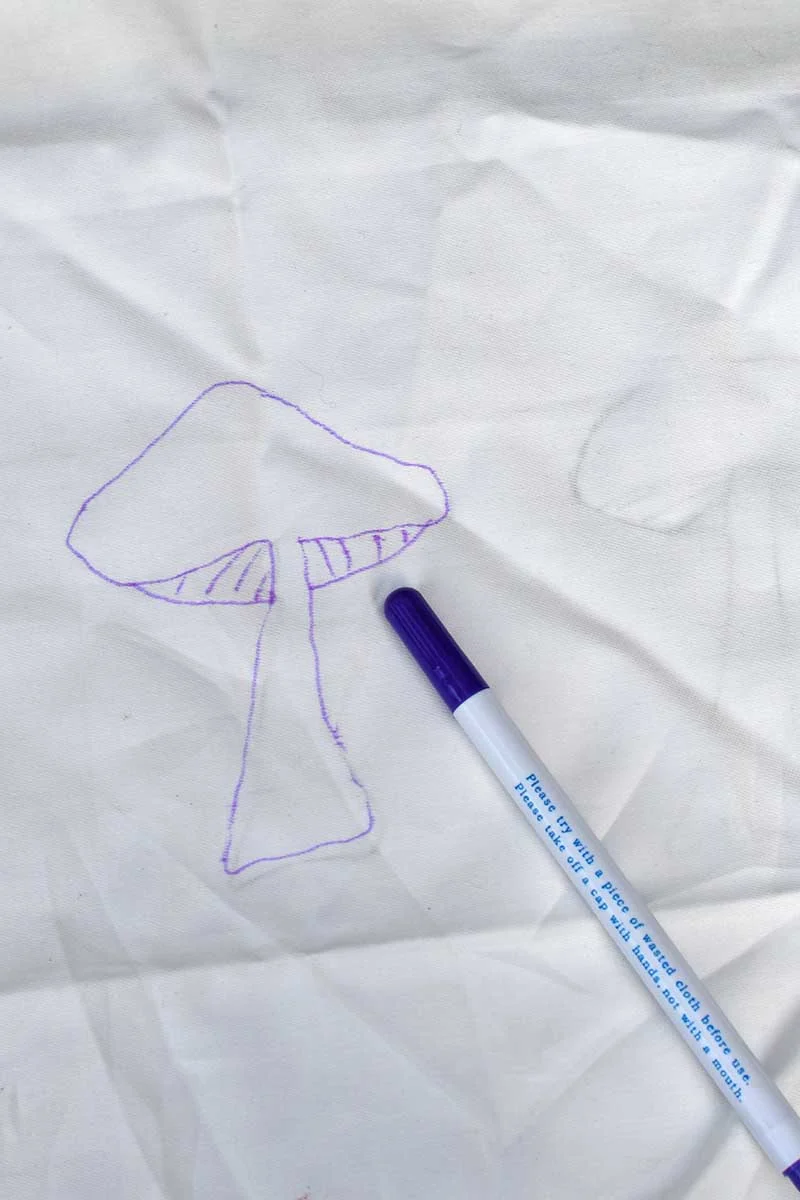
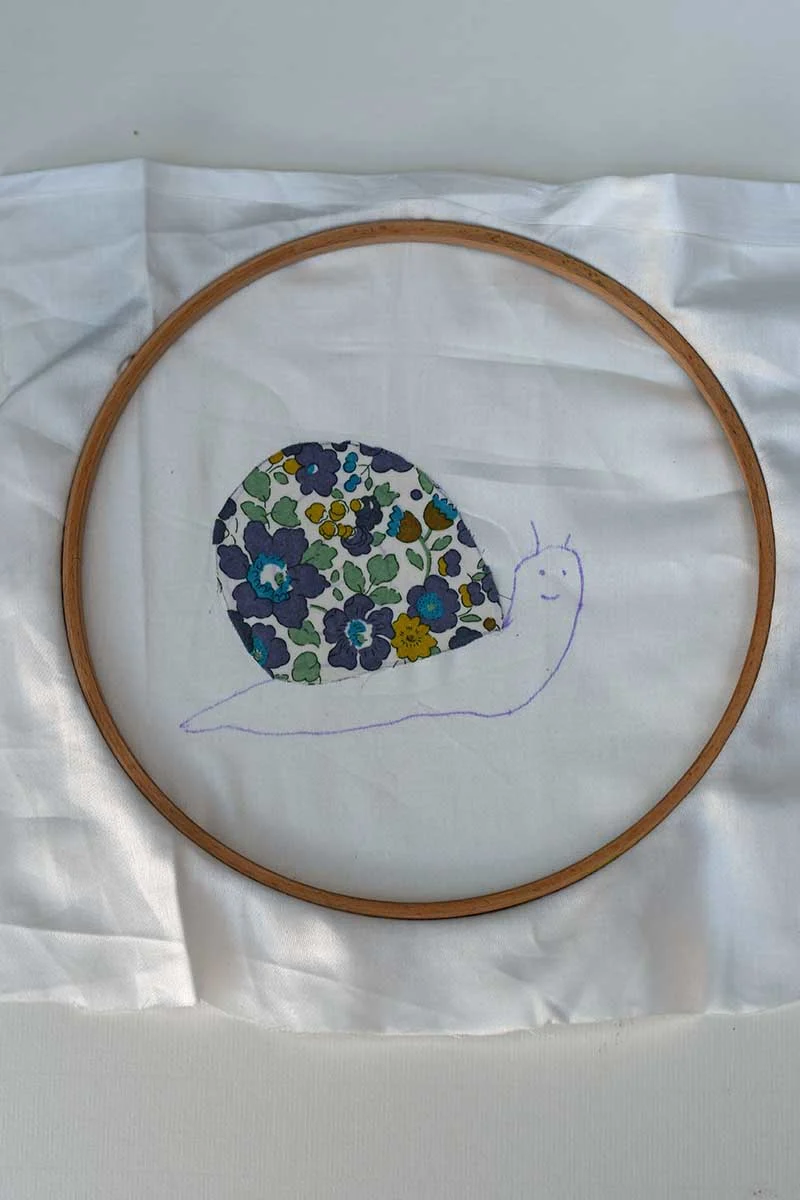
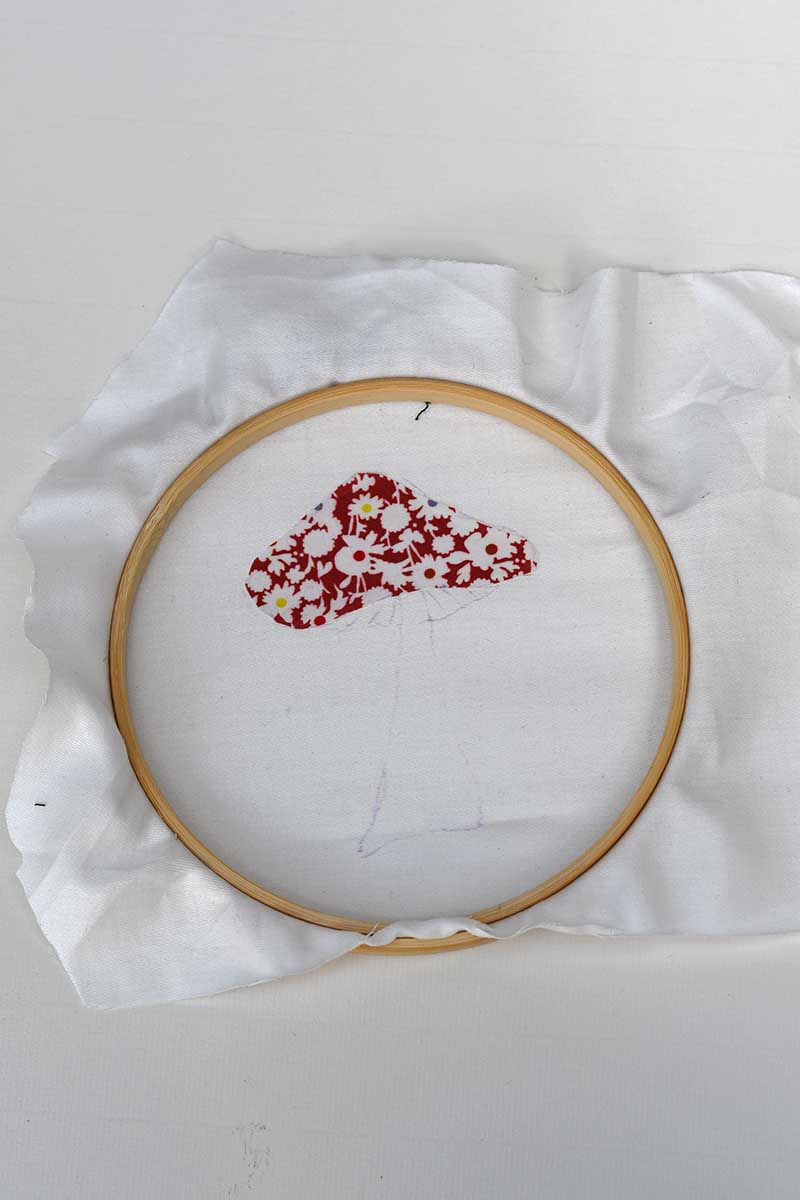
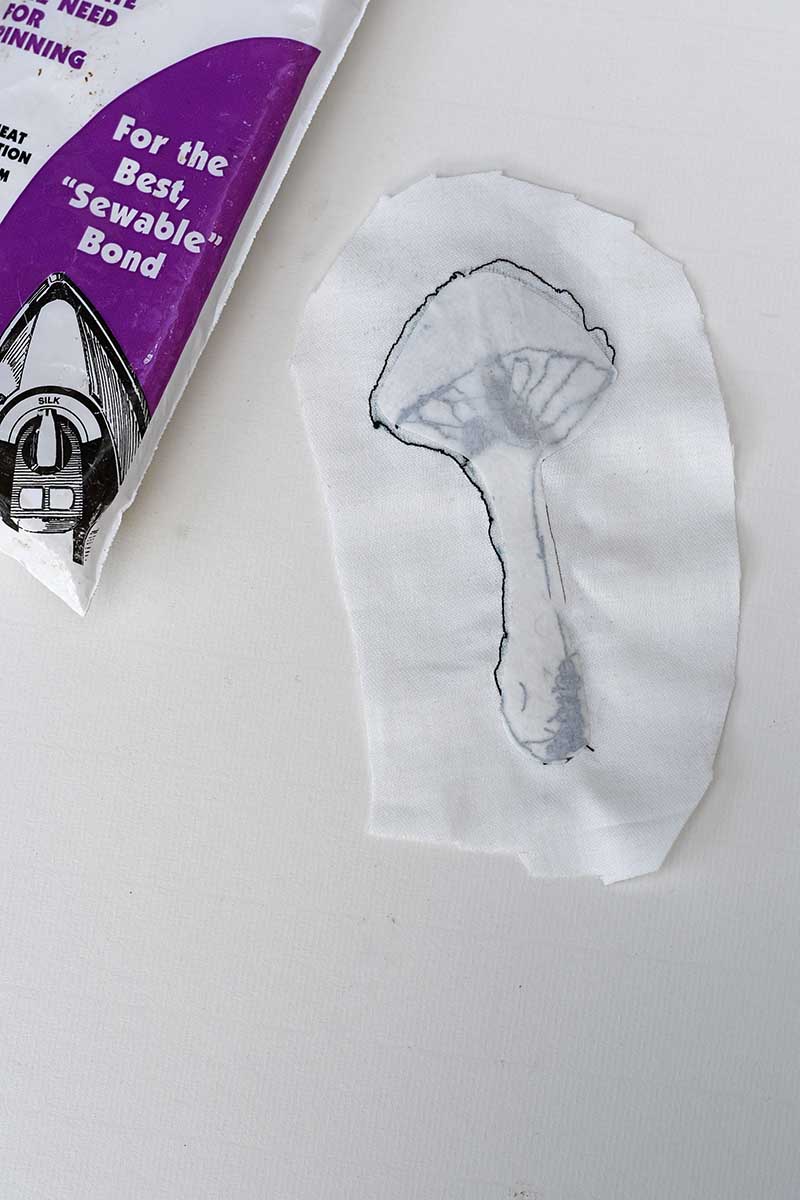
Cut a piece of bed sheet or thin cotton slightly larger than your template.
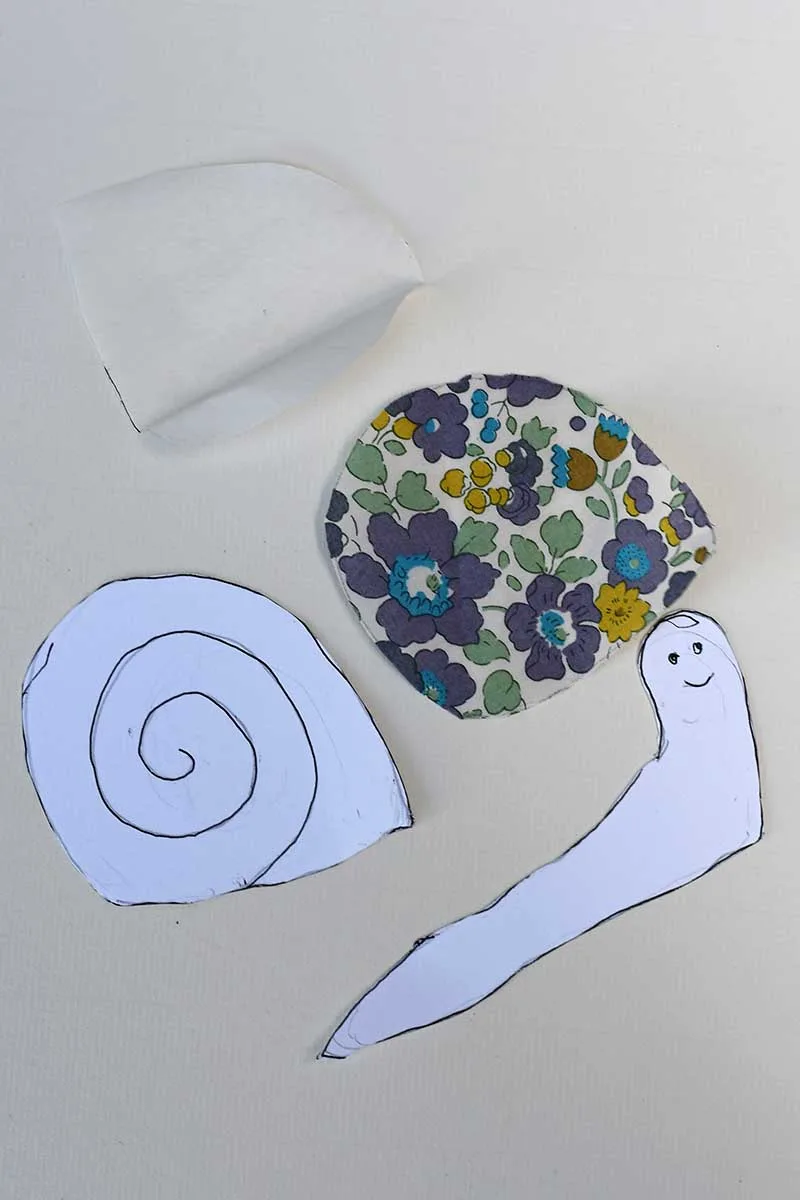
Place the fabric over your mushroom or snail template and trace the outline with a water-soluble pen.
Step 2: Add the Pretty Fabric Scraps
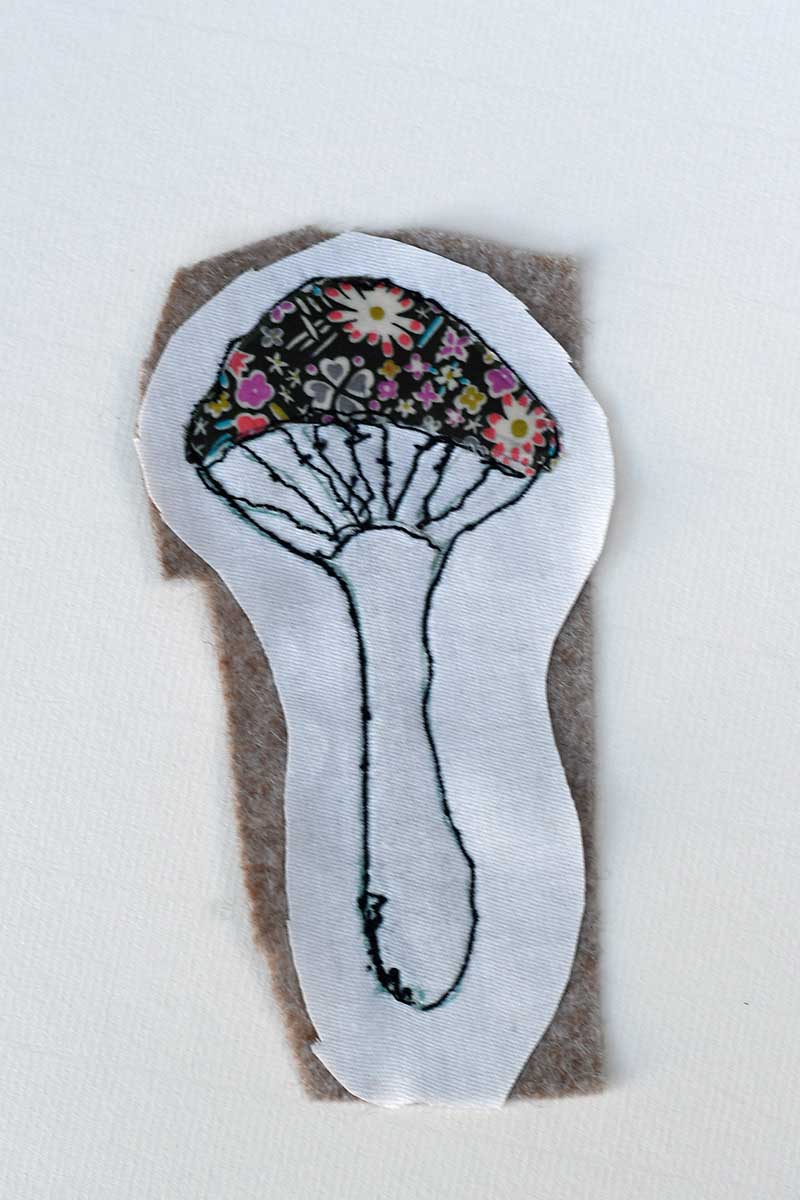
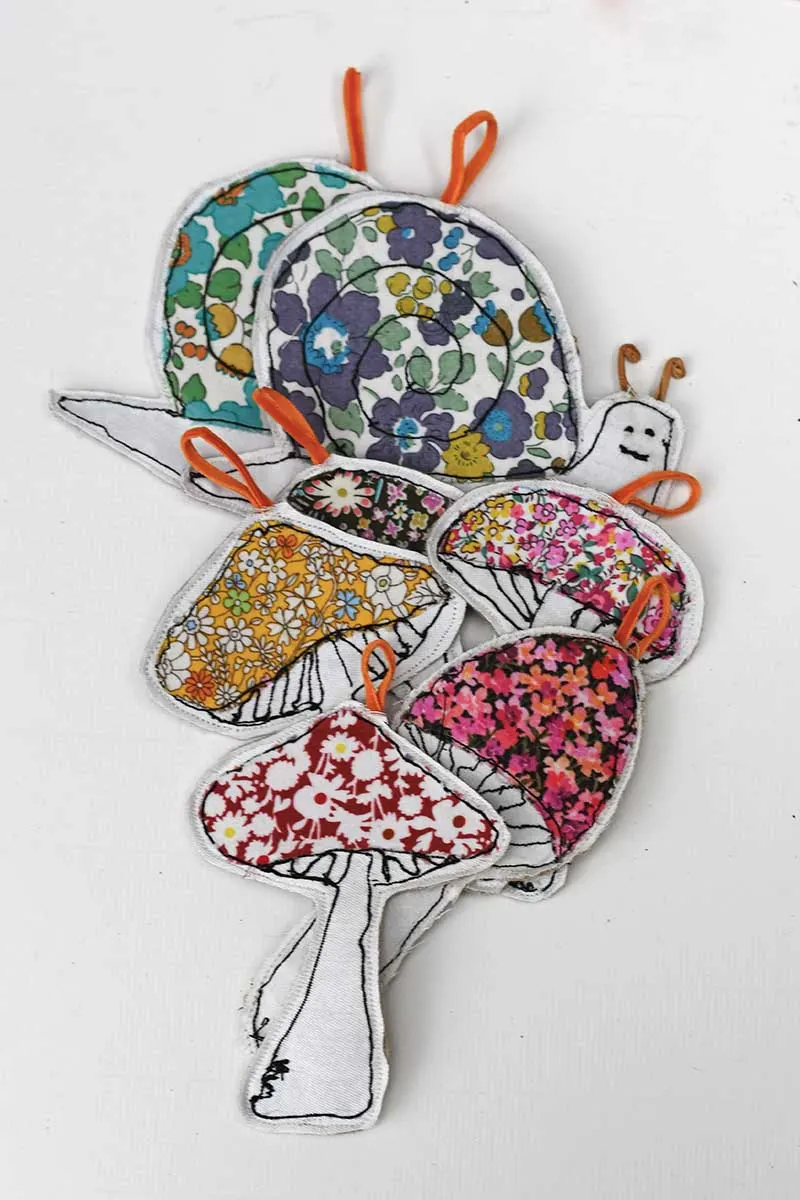
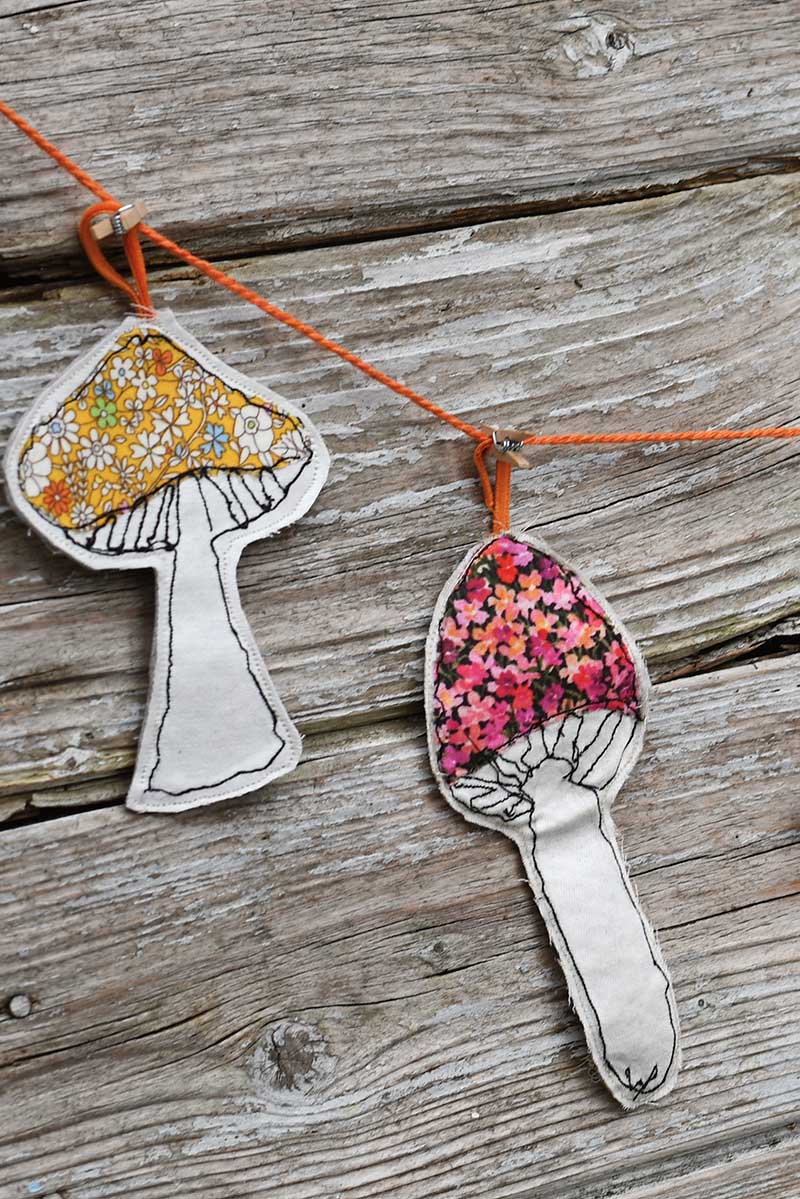
Using the template, cut the cap/shell shapes from your patterned fabric scraps. Tiny florals, ditsy prints, or Liberty-style fabrics work beautifully.
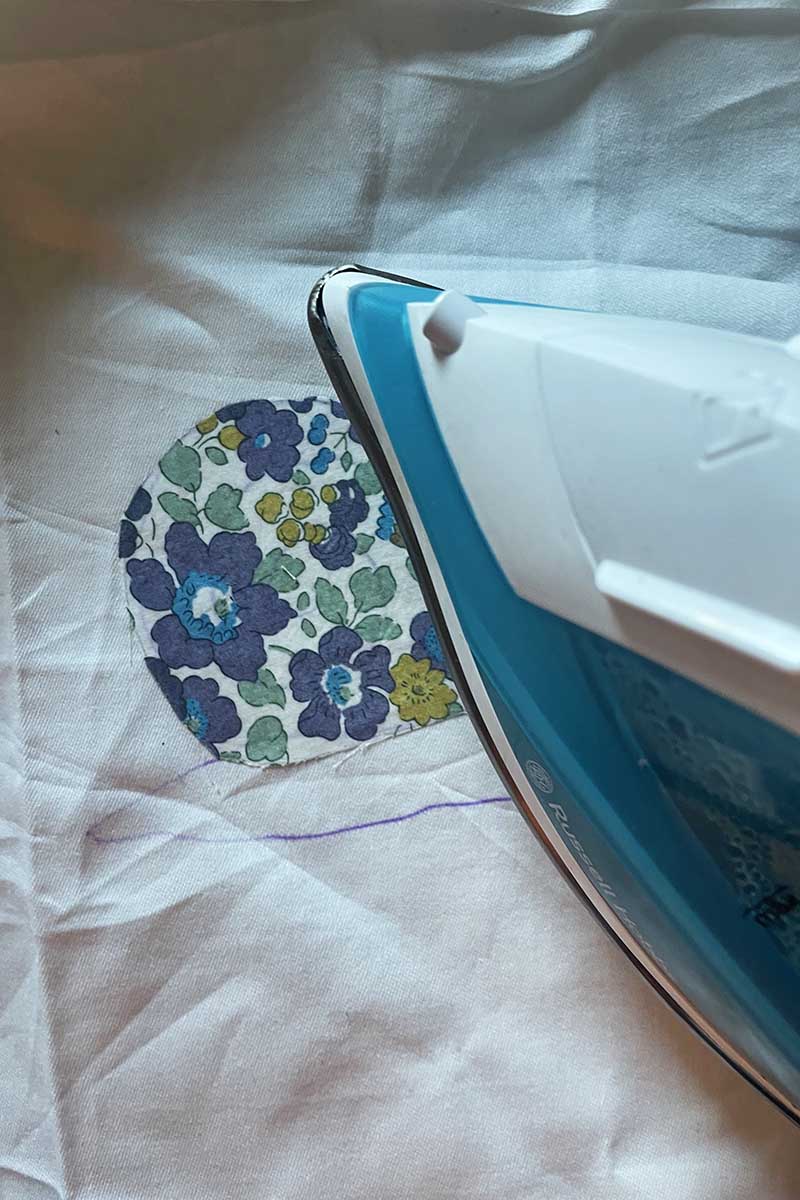
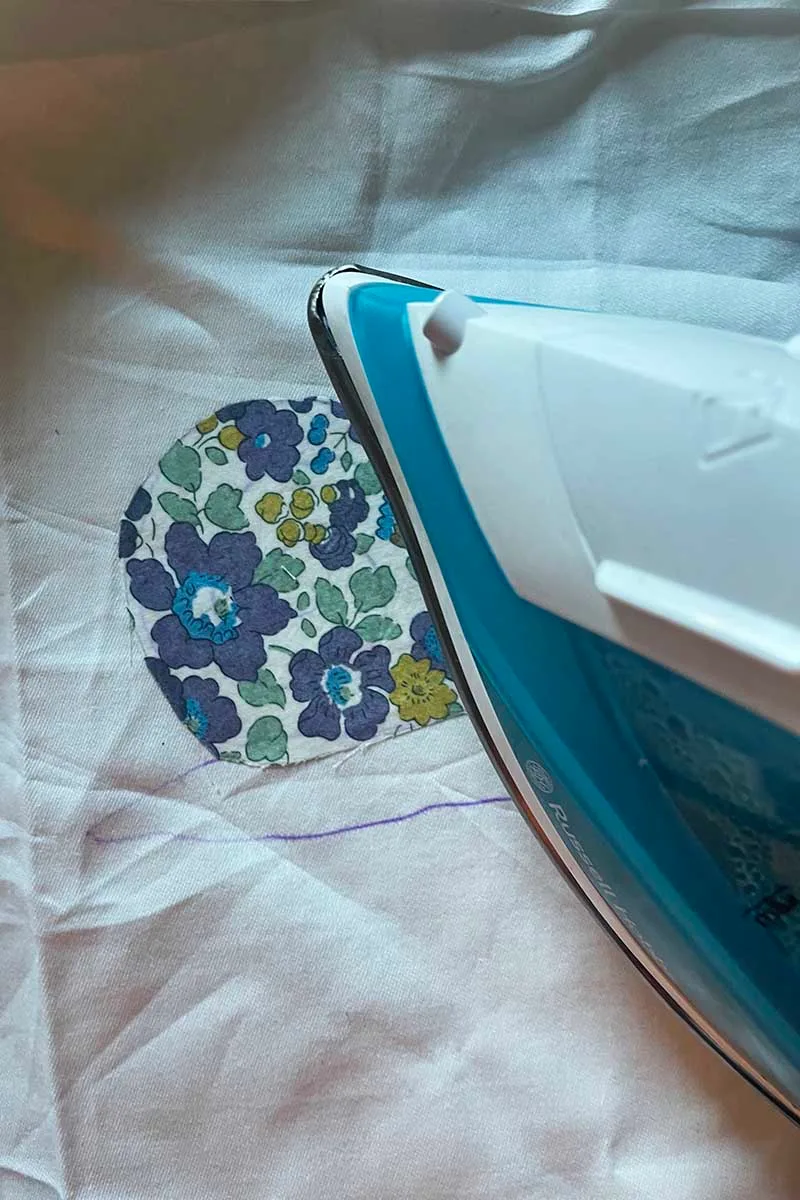
Cut a piece of iron-on interfacing the same size as your fabric shape. Place it sticky side down on the back of the fabric scrap.
Press with a hot iron for 5–10 seconds until it fuses. Don’t wiggle the iron, just press and lift. This gives your little scrap some extra body, so it won’t fray and will be easier to stitch.
Peel off the paper backing.
Position the fabric shape onto your traced bedsheet piece where the cap or shell is supposed to be. Press again with the iron to fuse it in place.
Pop the fabric into an embroidery hoop to keep it steady. I hoop it wrong way up so it glides nicely for free-motion stitching later.
The interfacing essentially turns your fabric scraps into easy-to-use appliqué stickers. You can move them around until you’re satisfied, then press to adhere. Once fused, they won’t budge when you start free-motion stitching.
Tip: If you’re working with fiddly small shapes, cut the interfacing slightly smaller than the fabric so no sticky bits gum up your iron.
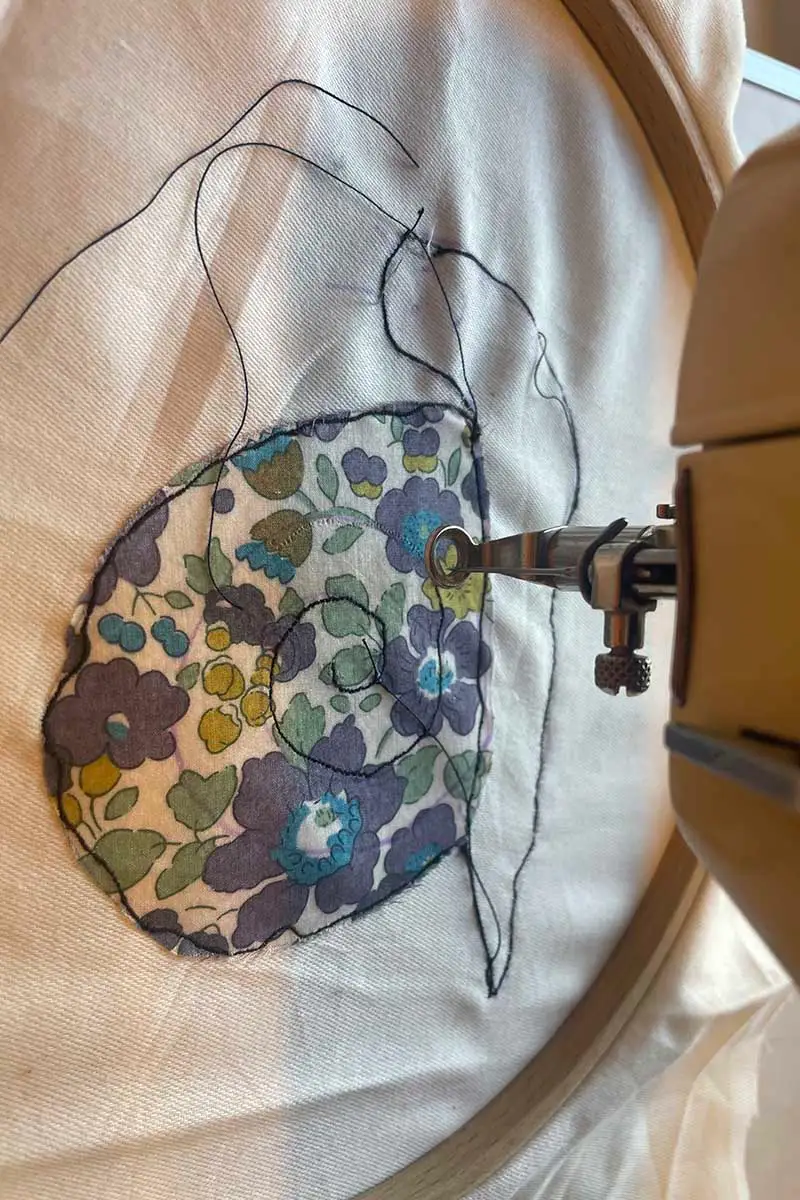
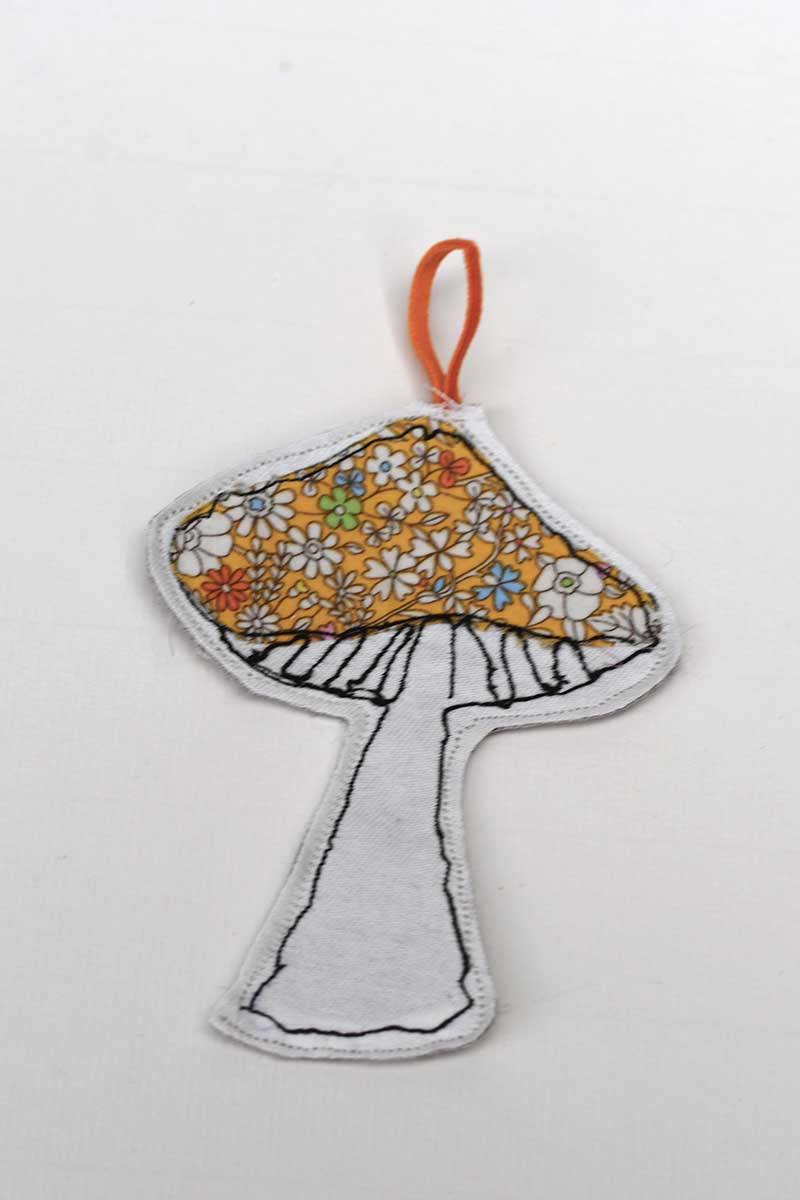
Step 3: Free-Motion Stitch the Details
This next step is done on the sewing machine but if you don’t have one it is possible to sew by hand. Just hand backstitch around the edges and use running/back stitch for the details. Free-motion just speeds things up.
With your sewing machine, switch to a quilting/free-motion foot and drop the feed dogs. Thread your machine with black thread.
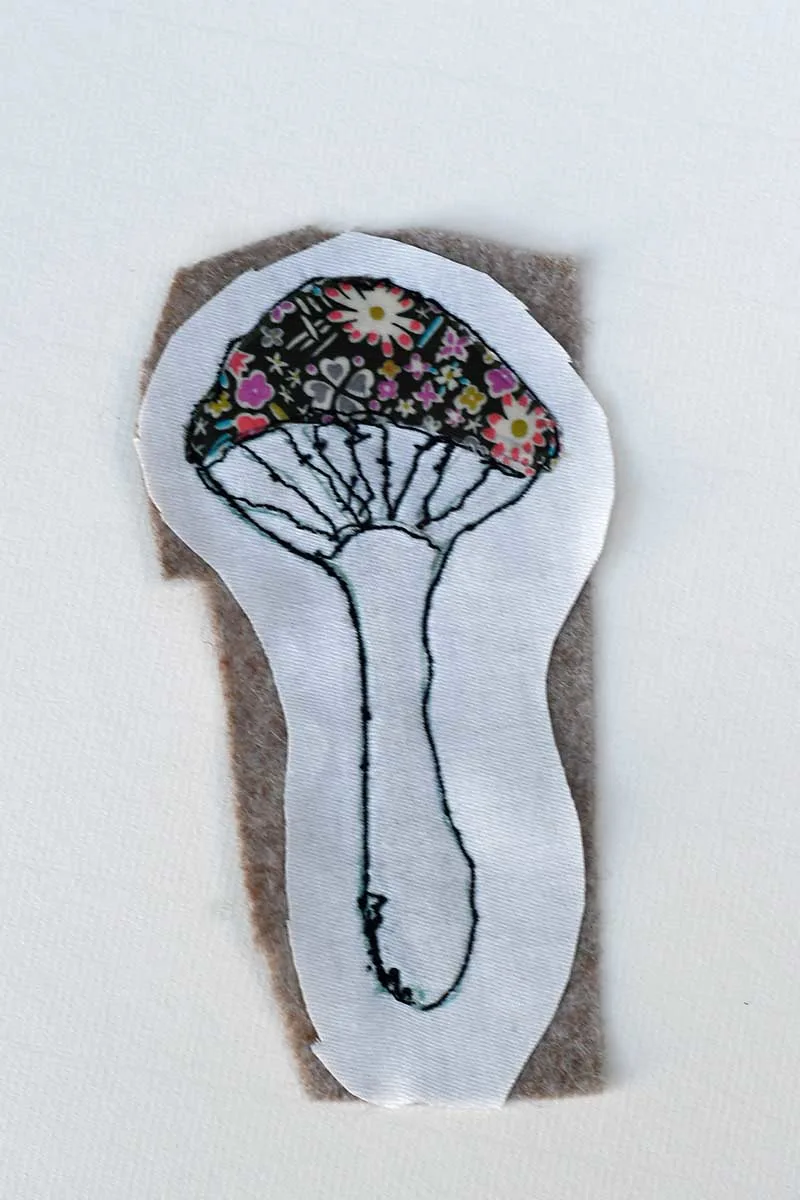
Stitch around the shapes and add details: mushroom gills, snail shell spiral, and outlines. Think of it like sketching with thread. A slightly wobbly line just adds charm.
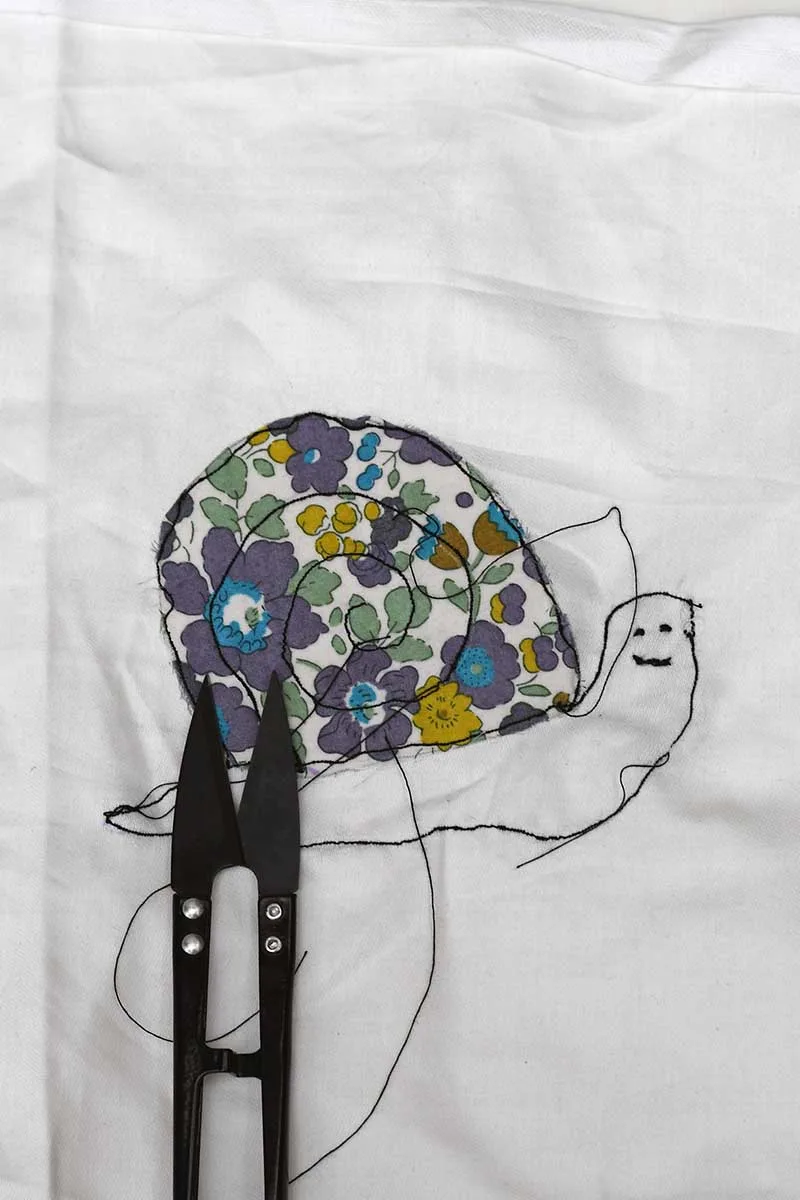
Remove from the hoop, trim away loose threads, and let the pen marks dissolve with a dab of water if needed.
Tips for Free Motion Embroidery
If you’re new to free motion embroidery, don’t worry, it looks trickier than it really is. Think of it as doodling with your sewing machine. Here are a few simple tips that helped me along the way:
Drop the feed dogs – This lets you move the fabric freely in any direction instead of the machine feeding it straight.
Use the right foot – A darning or quilting foot works best. It hops with the needle, giving the fabric space to move.
Hoop the fabric – An embroidery hoop keeps things taut and flat, so no puckering. I hoop mine “wrong way up” so it glides better under the foot.
Two hands are best – Gently guide the hoop with both hands in a free motion, like steering rather than pushing. Let the needle do the work.
Start slow – Smooth motion is more important than speed. Practice makes a huge difference.
Embrace imperfections – I was a bit rusty when I started this project, and honestly, my fifth mushroom looked a lot better than my first. But that’s the beauty of free motion embroidery—wonky lines and quirks just add to the charm.
Practice on scraps – A quick squiggle or spiral before starting the “real” piece builds confidence.
Not just for fabric – Free motion embroidery also works brilliantly on paper. It’s a fun way to add stitched details to paper butterflies and moths.
Once you find your rhythm, it’s addictive. Suddenly you’ll want to “draw” with thread on all your fabric and paper scraps!
Step 4: Give the Snails Some Personality
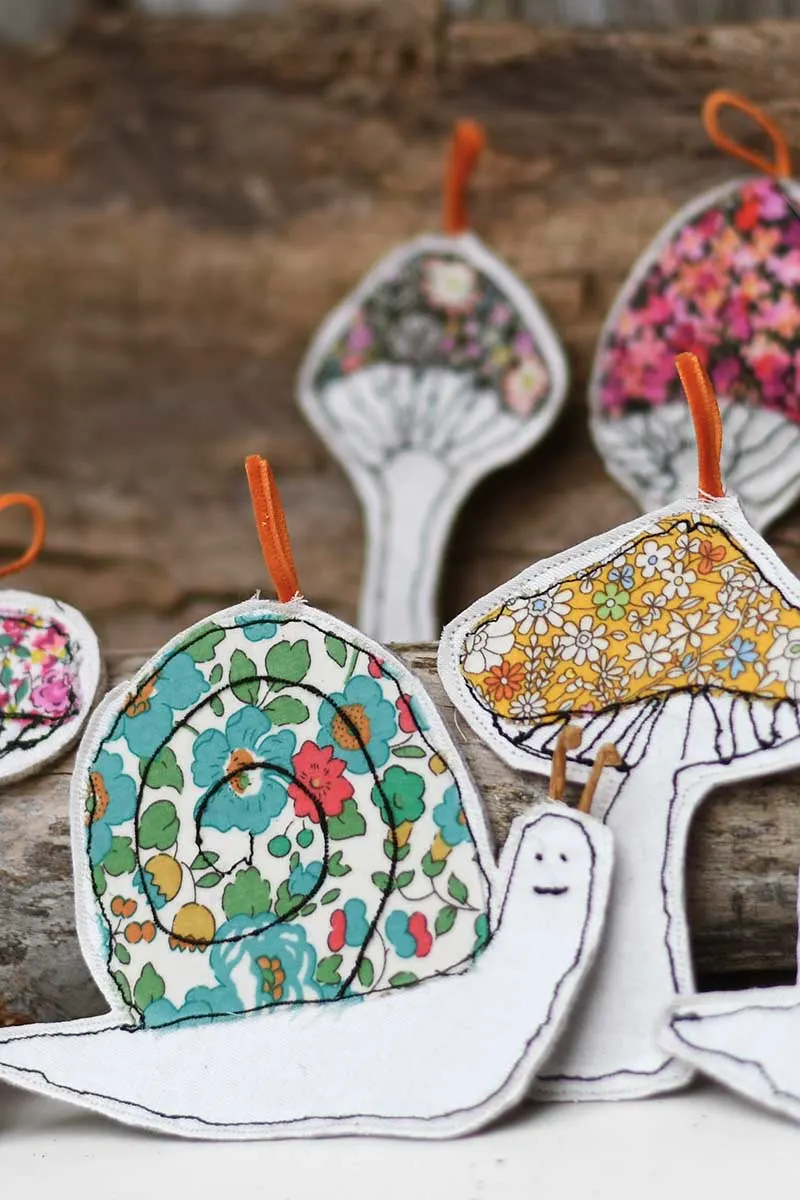
With a hand needle, embroider two tiny eyes and a smile on the snail’s face.
Cut two short pieces of paper-covered wire for antennae. Poke small holes and insert into the head; secure with a tiny backstitch or a discreet dab of fabric glue on the back.
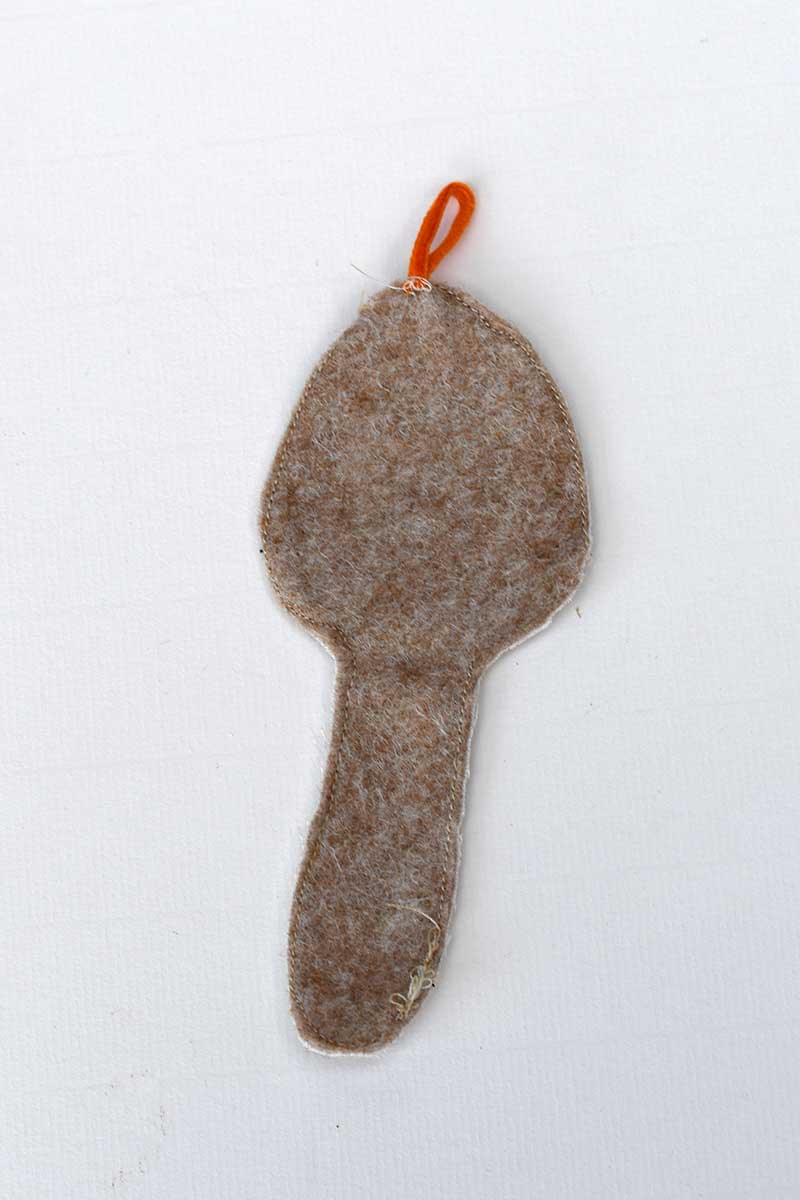
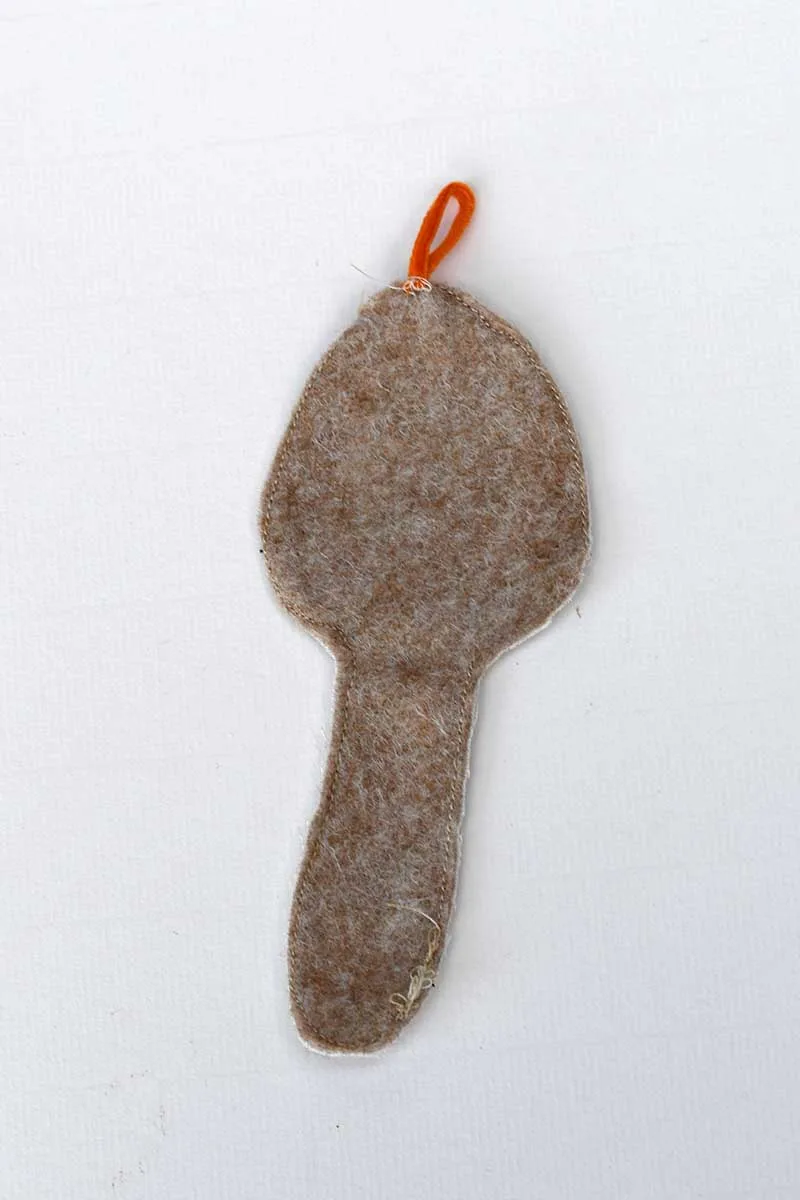
Step 5: Back with Felt & Add a Hanging Loop
Fuse interfacing to your felt backing (this helps it sew crisply).
Place the stitched piece on the felt (wrong sides together).
Fold a small velvet loop and tuck it at the top between layers.
Switch to your standard foot, raise the feed dogs, and stitch all the way around with matching thread so the seam disappears.
Step 6: Trim Neatly
Using small sharp scissors, trim closely around the stitching for a tidy edge, don’t snip the seam!
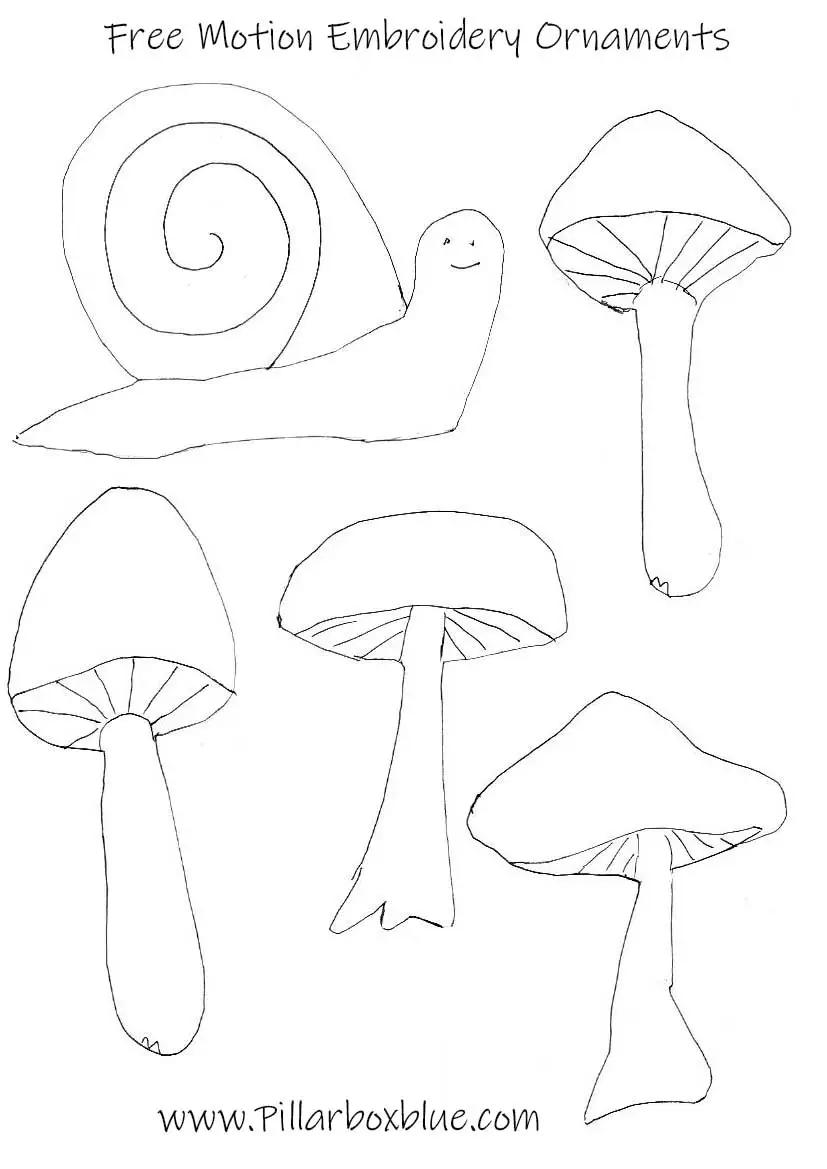
Repeat to make a little troupe of fungi and their snail sidekicks. I made seven ornaments in total (four mushroom designs + one snail shape).
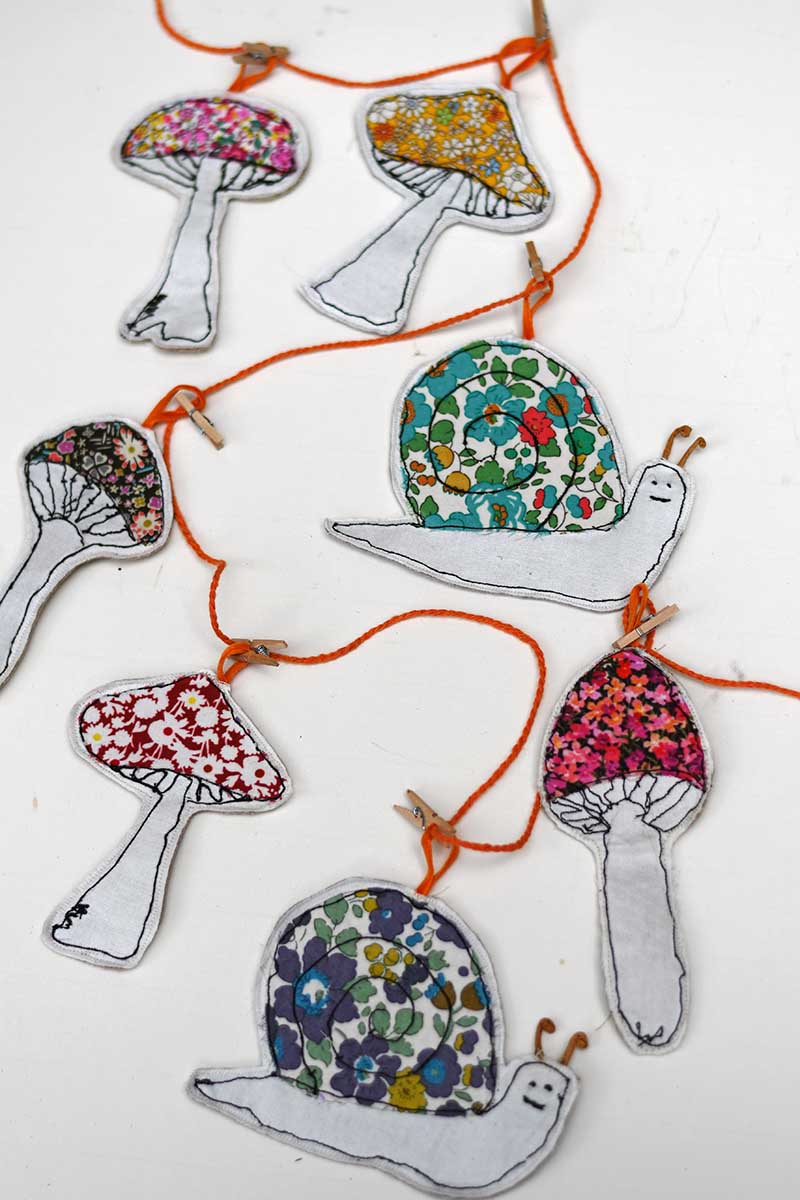
Step 7: String the Garland
Cut twine to your mantel/window length.
Thread a large needle with the twine and pass through each velvet loop, or simply clip each loop on with a tiny peg.
Space the ornaments 8–10 cm (3–4″) apart and adjust until it looks balanced. Hang and admire!
Tips & Variations
Fabric choice: Any thin cotton works for the base (bedsheet, poplin, quilting cotton).
Stitching help: If the felt drags, try a new 80/12 or 90/14 needle.
Stabiliser options: Tear-away or wash-away stabiliser also works if you’re new to free-motion.
Other uses: Skip the twine and use them as gift toppers, bookmarks (add a ribbon tail), or Christmas tree ornaments.
Scrap-buster: Tiny floral prints really shine here—great way to use the teeniest leftovers.
More Whimsical Fabric Fun
I hope you’ve enjoyed stitching up these appliqué mushroom and snail ornaments as much as I did. Once you start, it’s hard to stop—there’s just something magical about fungi-themed crafts! If you’re looking for even more inspiration, I’ve rounded up lots of mushroom craft ideas, from my painted paper mâché tray to these mushroom-painted denim pockets.
And don’t let those leftover bed sheets go to waste—turn them into fabric flowers for a completely different kind of scrap-busting project. If you’ve got Liberty-style fabric scraps, they’re perfect for making quirky denim bunnies or a bouquet of whimsical fabric flowers.
Whether it’s mushrooms, snails, bunnies, or blossoms, there’s always another way to play with fabric scraps and create something joyful.
Yield: Free motion embroidery fabric mushrooms and snails.
Appliqué Mushroom & Snail Garland DIY
Turn scrap fabrics into a whimsical fall garland with appliquéd mushrooms and snails. This project uses free motion embroidery, iron-on interfacing, and felt backing to create charming ornaments.
Prep Time30 minutes
Active Time1 hour
Total Time30 minutes
DifficultyMedium
Estimated Cost$2
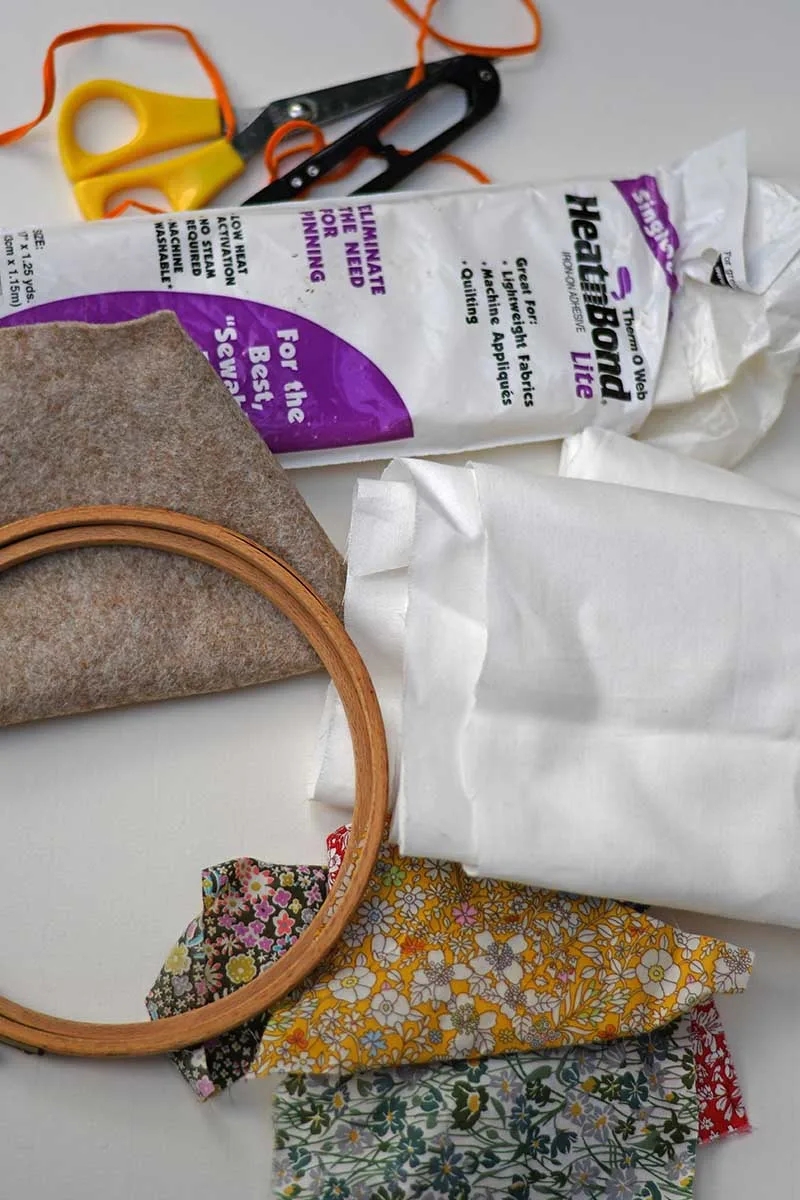
Materials
- Scrap fabric (florals or Liberty-style for caps/shells)
- Thin cotton base (old bed sheet works well)
- Felt for backing
- Iron-on interfacing
- Black thread (outlines) & matching thread (assembly)
- Embroidery hoop
- Embroidery floss & needle (snail face)
- Paper-covered wire (antennae)
- Velvet ribbon or trim (loops)
- Twine/ribbon (to string garland)
Tools
- Scissors & iron
- Water-soluble fabric pen
- Sewing machine with free motion foot + standard foot
Instructions
1. Trace mushroom/snail shapes onto cotton base with a water-soluble pen. 2. Cut caps/shells from patterned fabric. Fuse the interfacing to the back, then press onto the base fabric. 3. Hoop the fabric and use free-motion embroidery with black thread to outline shapes and add details. 4. Embroider snail eyes and mouth by hand; add wire antennae. 5. Fuse felt backing with interfacing. Sandwich stitched piece + velvet loop and sew around with matching thread. 6. Trim neatly around edges, close to stitching. 7. Make several ornaments and string them onto twine/ribbon to create a garland.
Notes
Tips - Guide the hoop with two hands for smooth stitching. - Don’t worry about wobbly lines—imperfections add charm. - Free motion embroidery also works beautifully on paper (great for cards and tags). - Try making extras as bookmarks, gift toppers, or ornaments.
Claire, these cuties really are quite adorable!
Thank you for sharing your DIY free motion snails and mushrooms at Create, Bake, Grow & Gather this week. I'm so thrilled to be featuring them at this week's party and pinning too.
Claire Armstrong
Friday 10th of October 2025
Thank you so much, I look forward to seeing the feature.
Julie
Saturday 4th of October 2025
It's been over a year since I dug out my free motion embroidery foot, I'm so tempted to give these a try. They'll be a feature over at Handmade Monday this week :-)
Claire Armstrong
Monday 6th of October 2025
Thank you so much, they were fun to make. I'd forgotton how fun free motion embroidery was.


Kerryanne
Friday 10th of October 2025
Claire, these cuties really are quite adorable! Thank you for sharing your DIY free motion snails and mushrooms at Create, Bake, Grow & Gather this week. I'm so thrilled to be featuring them at this week's party and pinning too.
Claire Armstrong
Friday 10th of October 2025
Thank you so much, I look forward to seeing the feature.
Julie
Saturday 4th of October 2025
It's been over a year since I dug out my free motion embroidery foot, I'm so tempted to give these a try. They'll be a feature over at Handmade Monday this week :-)
Claire Armstrong
Monday 6th of October 2025
Thank you so much, they were fun to make. I'd forgotton how fun free motion embroidery was.
Christine
Wednesday 1st of October 2025
These are so cute - love them!
Claire Armstrong
Wednesday 1st of October 2025
Thank you, they are fun to make.