
One of the things I love about denim jeans is the
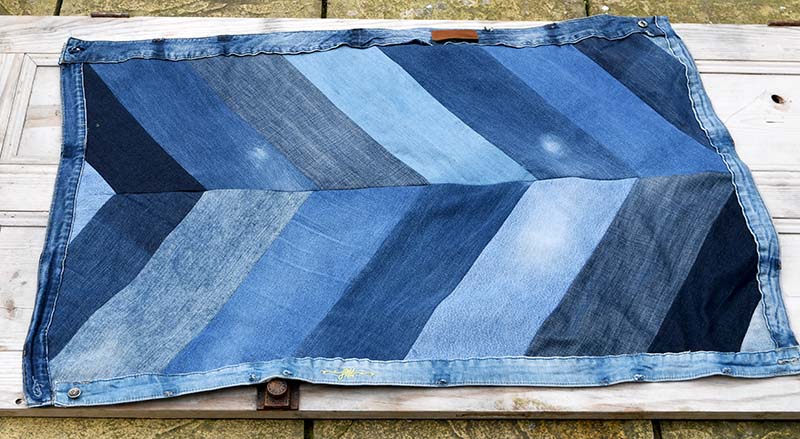
In the past, I’ve made a denim rug out of the waistbands of old jeans. This chevron rug uses the legs of old jeans. However, I still used a few waistbands to edge the chevron rug.
Upcycle Your Old Jeans Into A Lovely Handmade Chevron Rug
The way I have designed this handmade chevron rug, you can make it any size you want. The only thing restricting you will be the amount of denim you have in your stash to upcycle. You can make the rug longer by adding more chevrons to each row and wider by adding another column or two of chevrons.
Lucky for me with a family of 3 jeans-wearing boys I have a regular supply of denim to repurpose.
We’re a participant in the Amazon Services LLC Associates Program, an affiliate advertising program designed to provide a means for us to earn fees by linking to Amazon.com and affiliated sites. As an Amazon Associate, I earn from qualifying purchases.
What You Need To Make A Handmade Chevron Rug
- Pile of old jeans
- Cardboard to make a template with.
- Ruler, rotary cutter and mat
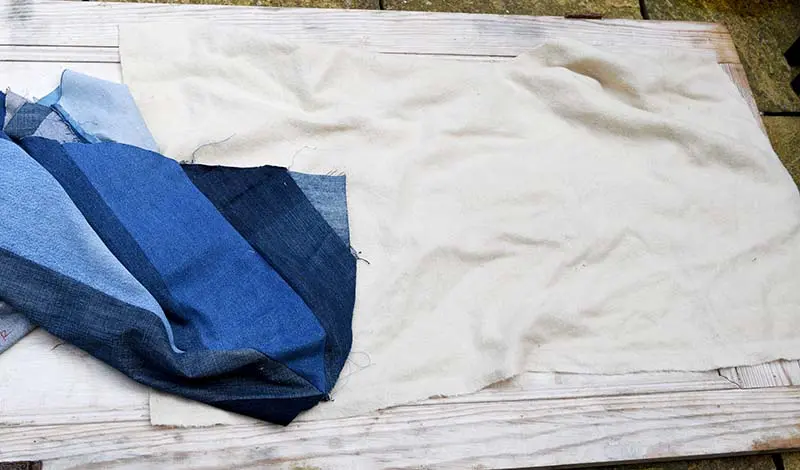
- Backing material such as rug backing, drop cloth
etc . I actually used an old woollen blanket - Pins, needles
and thread. - Sewing Machine, iron.
How To Make The Chevron Rug
Step 1: Make a template for the rug. Using a large piece of cardboard work out how large you would like each chevron. Make sure you allow for a seam. It is easier to work out the measurements if you draw out the design first.
As well as the main chevron piece you will need 2 smaller shapes to finish off the rug at both ends. The picture shows how this may look. You can make the chevrons any size you like and at any angle you prefer. To give you an idea of size the main chevron pieces in the rug were 52cm long and 15cm wide.
You will only need to make a template for one side of the handmade rug. Because if you flip over the left cardboard template you will have a template for the right side. I marked each of the three cardboard templates L for left on one side and R for right on the other.
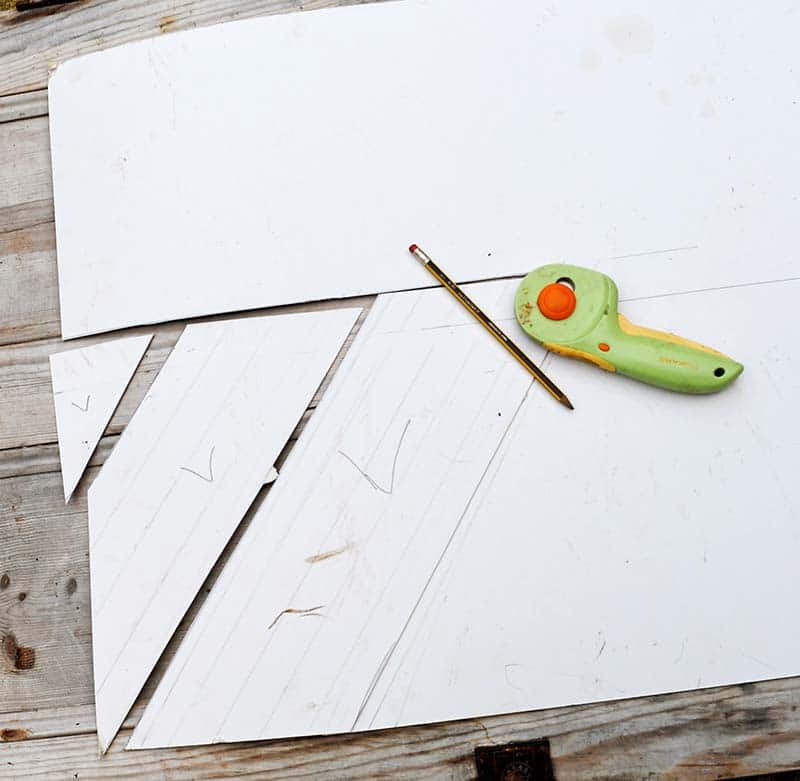
Step 2: Use the cardboard templates to cut out the denim pieces. Place the template on the denim and draw around it. Then using a ruler, rotary cutter and mat cut out the denim pieces. Once cut mark the denim on the wrong side L for left or R for Right depending on which way up you had the template.
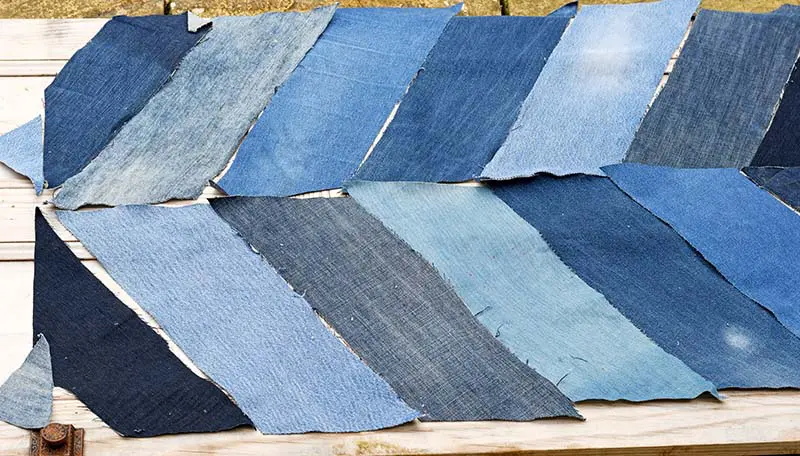
Step 3: Carry on cutting out the chevron pieces in different shades of denim. This rug was 5 big chevrons in length (10 pieces 5 right and 5 left).
Then there were 4 smaller chevron pieces 2 for the top (left and right) and 2 for the bottom (left and right). There were also 4 smaller triangle pieces to finish the rug, 2 at the top and 2 at the bottom.
Step 4. Iron the denim pieces to make sure they are nice and flat. Then lay them on the floor and place them in the rug design you want.

Step 5: Next, pin all the chevrons on the left side of the rug right sides together one by one. Then using the sewing machine stitch them together. Allow about 1cm for the seam and make sure this is a
A standard sewing machine should be able to manage this with no problem as there are no thick bits of denim such as seams or pockets to deal with.


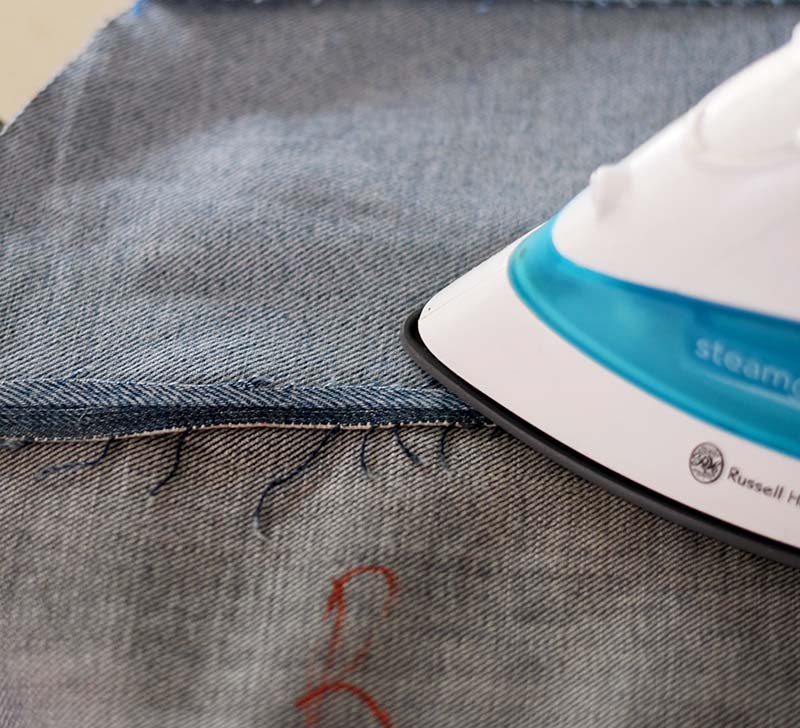
Step 6: Repeat the pinning and stitching on the right side of the rug. Then to ensure the rug will lie flat. Turn over the sewn sides of the rug and iron the seams open and flat.

Step 7: Once both sides are stitched, lay them side by side and match up the edges. Then pin both right sides together and stitch.
Step 8: The next thing you need to do is to back the rug. I used an old wool blanket. Drop cloth or rug backing can be used instead. I cut the blanket to the same size as a rug.

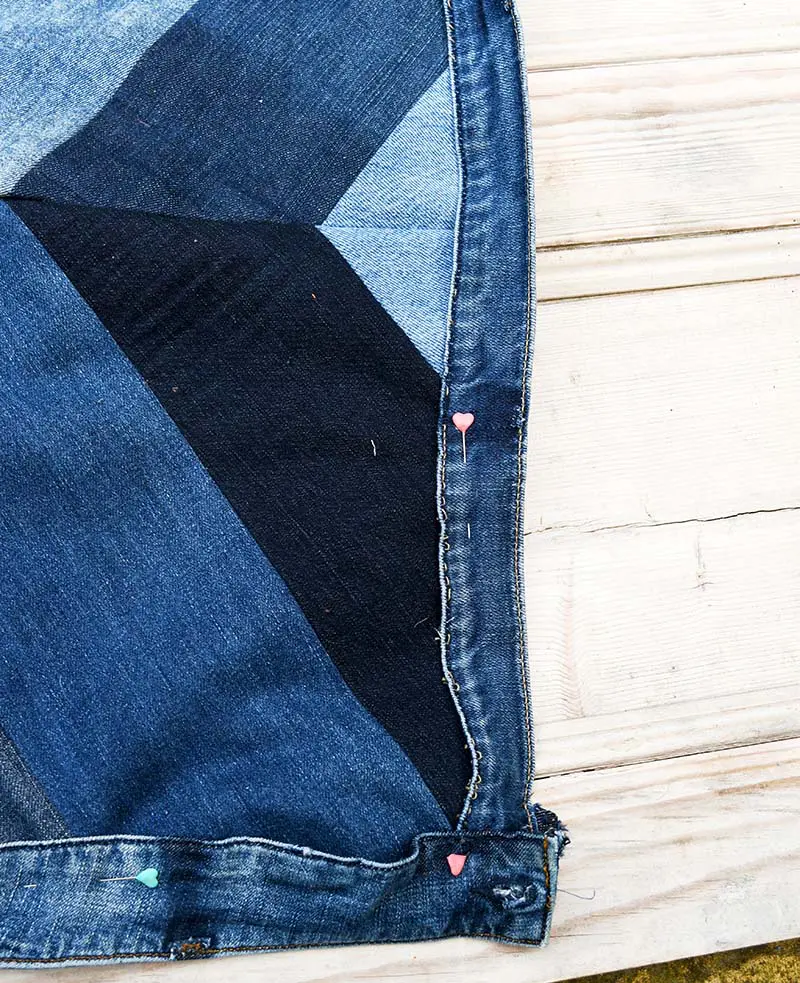
Step 9: The final thing to do is to attach the backing to the rug and add a trim. For the edge trim, I used the waistbands of the old jeans. I opened up the edge of the waistbands (like I did here with this recycled sweater throw). I then sandwiched the chevron rug and backing between the waistbands.
Unfortunately, my sewing machine struggled with sewing up the thick edging. So I just sewed this by hand which actually only took about 30 minutes for the whole rug.

I love denim rugs as they are really hard-wearing and this one can just be popped into the washing machine when needed. At the moment it is sitting in the study. Toby, the dog has taken a shine to it. I don’t think it will last long there, one of my sons is already eyeing it up.
Did you know that you can also make fabric yarn from jeans legs? This can then be used to make another denim rug but this time a no-sew rag rug.
If you have some denim scraps left over then you might want to use them to make a matching patchwork denim fabric bowl to match.
If like me you love to upcycle and repurpose your old jeans, check out some of my other denim crafts and DIYs.
Pam @Threading My Way
Tuesday 28th of May 2019
Hard wearing and looks great, Claire. I've featured several of your beaut denim recycling projects in a round up today.
Claire Armstrong
Tuesday 28th of May 2019
Thank you, Pam I will pop over to the round-up and share.
Linda at Mixed Kreations
Sunday 28th of April 2019
What a great idea for upcycling old jeans! I love the different shades of jeans and your chevron rug turned out so pretty!
Claire Armstrong
Monday 29th of April 2019
Thank you so much Linda.
Linky Thursday | StacySews
Thursday 25th of April 2019
[…] your old denim jeans into something remarkable, like this denim poof, chevron rug, picnic blanket, or door […]
Julie
Sunday 21st of April 2019
This is lovely Claire, it'll be one of the features at Handmade Monday this week. I especially like how you used the waistbands, such a nice touch.
Claire Armstrong
Sunday 21st of April 2019
Thank you, Julie. I love to use as much of the parts of a pair jeans as I can.
Cecilia
Friday 19th of April 2019
This is so creative, Claire! Thanks for sharing at Vintage Charm!
Claire Armstrong
Friday 19th of April 2019
Thank you, Cecilia.