
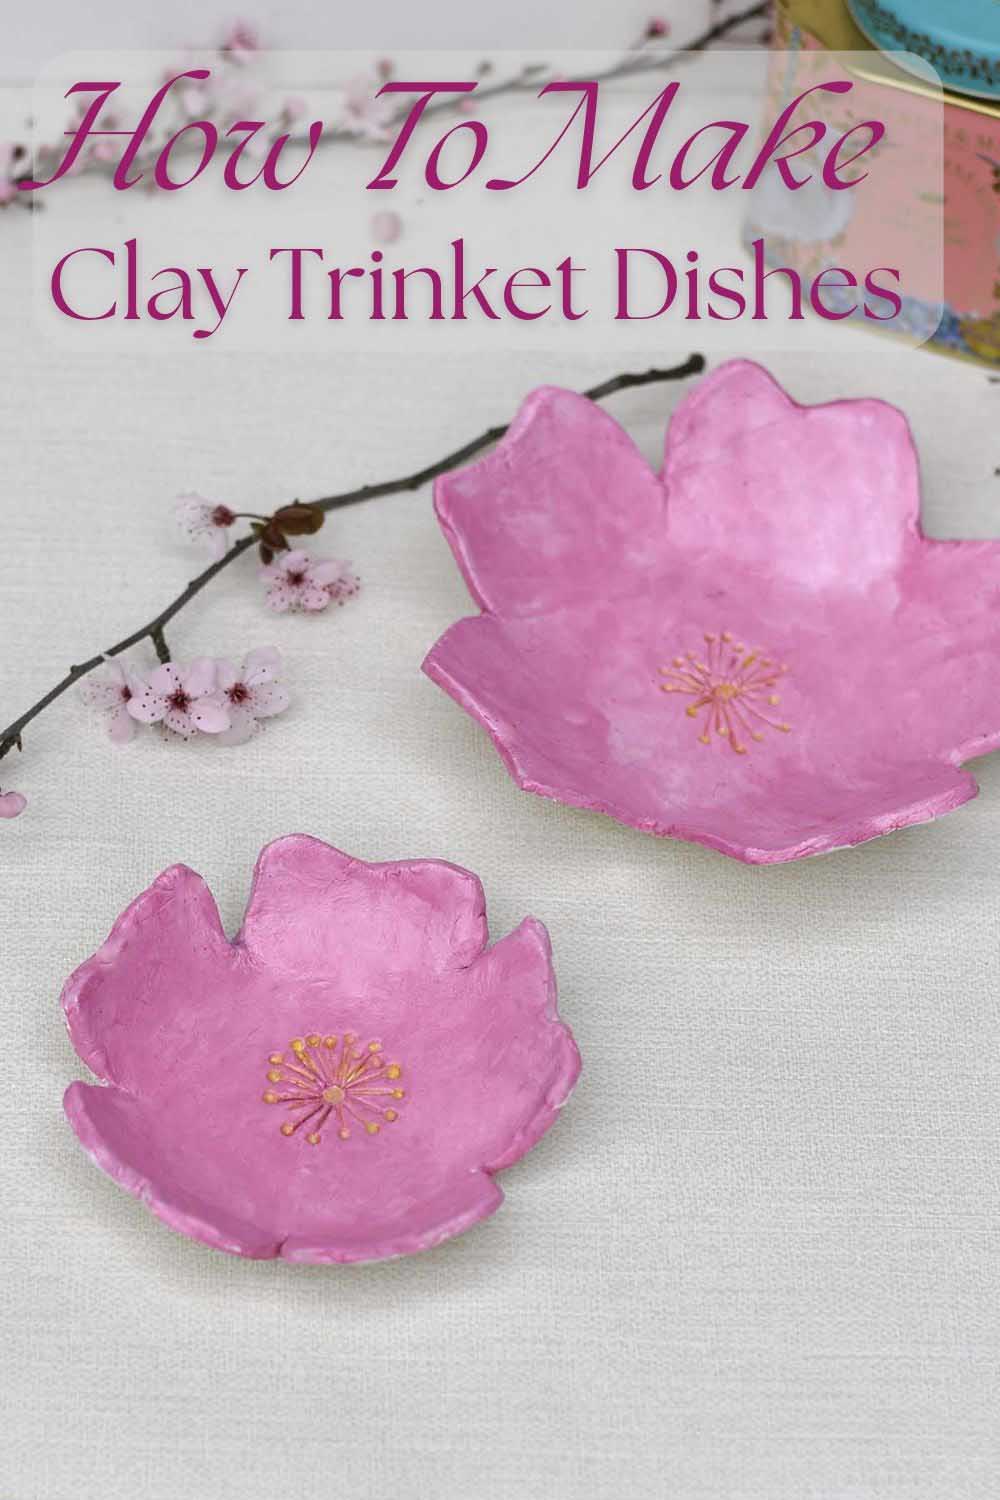
DIY Air Dry Clay Trinket Dishes: Cherry Blossom Edition
If you love easy DIY crafts that are both pretty and practical, these DIY air-dry clay trinket dishes shaped like cherry blossoms are the perfect spring project. Using simple materials like air-dry clay, paint, and a printable template, you can create delicate flower-shaped dishes ideal for holding rings, jewellery, keys, or tiny treasures.
Whether you're looking to craft ring dishes, clay bowls, or little dishes for your trinkets, this spring craft project is a great way to get creative with air-dry clay, paint, and a little imagination.
Crafting with air-dry clay offers a fun and accessible way to create a pretty personalised gift or decorative piece for your home. Plus, with our hand-drawn cherry blossom template available for download, you can easily make your unique clay dishes.
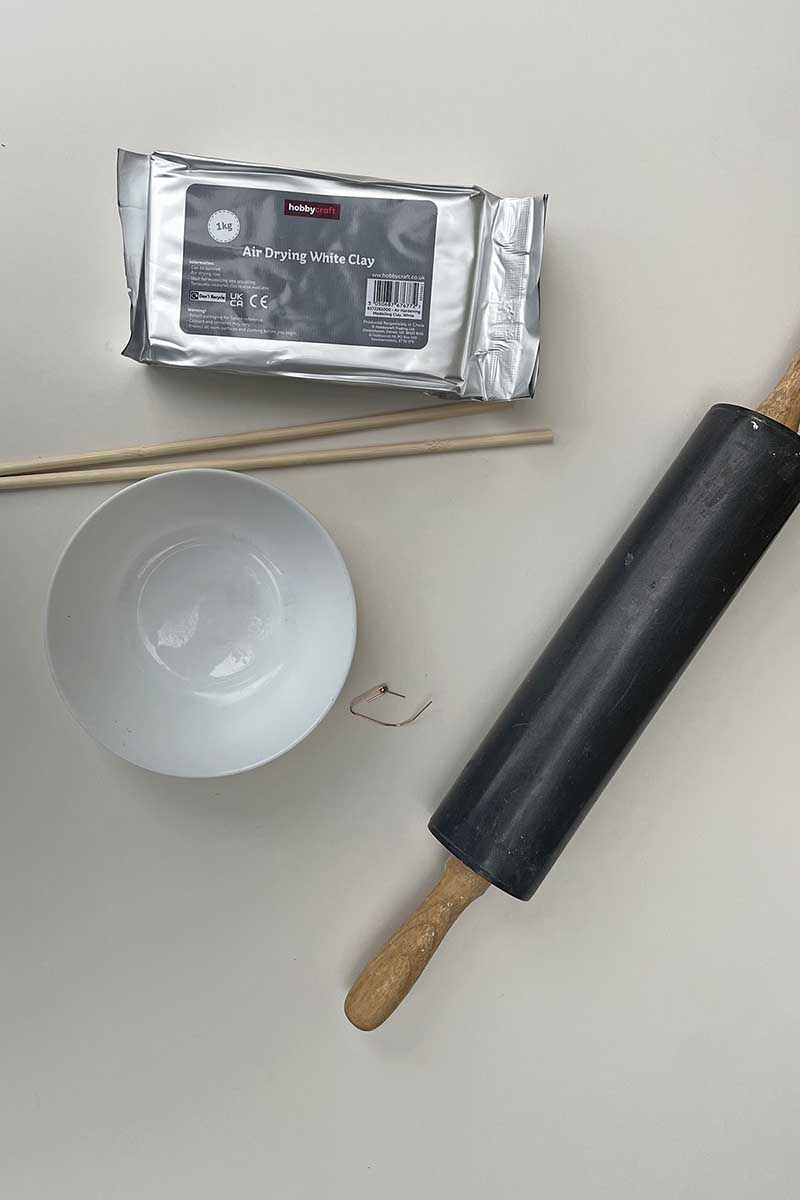
Materials Needed
We're a participant in the Amazon Services LLC Associates Program, an affiliate advertising program designed to provide a means for us to earn fees by linking to Amazon.com and affiliated sites. As an Amazon Associate, I earn from qualifying purchases.
- Non-toxic white air-dry clay
- Acrylic paint or watercolour inks (in your choice of colours for the cherry blossoms)
- A generous amount of glaze (to seal and protect your dish)
- A small bowl of water and a small amount of water (for smoothing surfaces and edges)
- Regular wooden rolling pin
- Sandpaper
- Hand-drawn cherry blossom template (available for download with this tutorial)
- Paper clip and round drawing pin
- Small bowls or ring dishes (as moulds or inspiration)
- Work surface (protected with parchment paper or a silicone mat)
How To Make An Air Dry Clay Trinket Dish
The Cherry Blossom Template
I used the template technique with this DIY ring dish. The template shape I chose was a Cherry Blossom, as it's one of my favourite flowers and is a very simple shape perfect for this. But feel free to use any air-dry clay project templates you want; they could be anything from tropical leaves and mushrooms to pineapples and lemons.
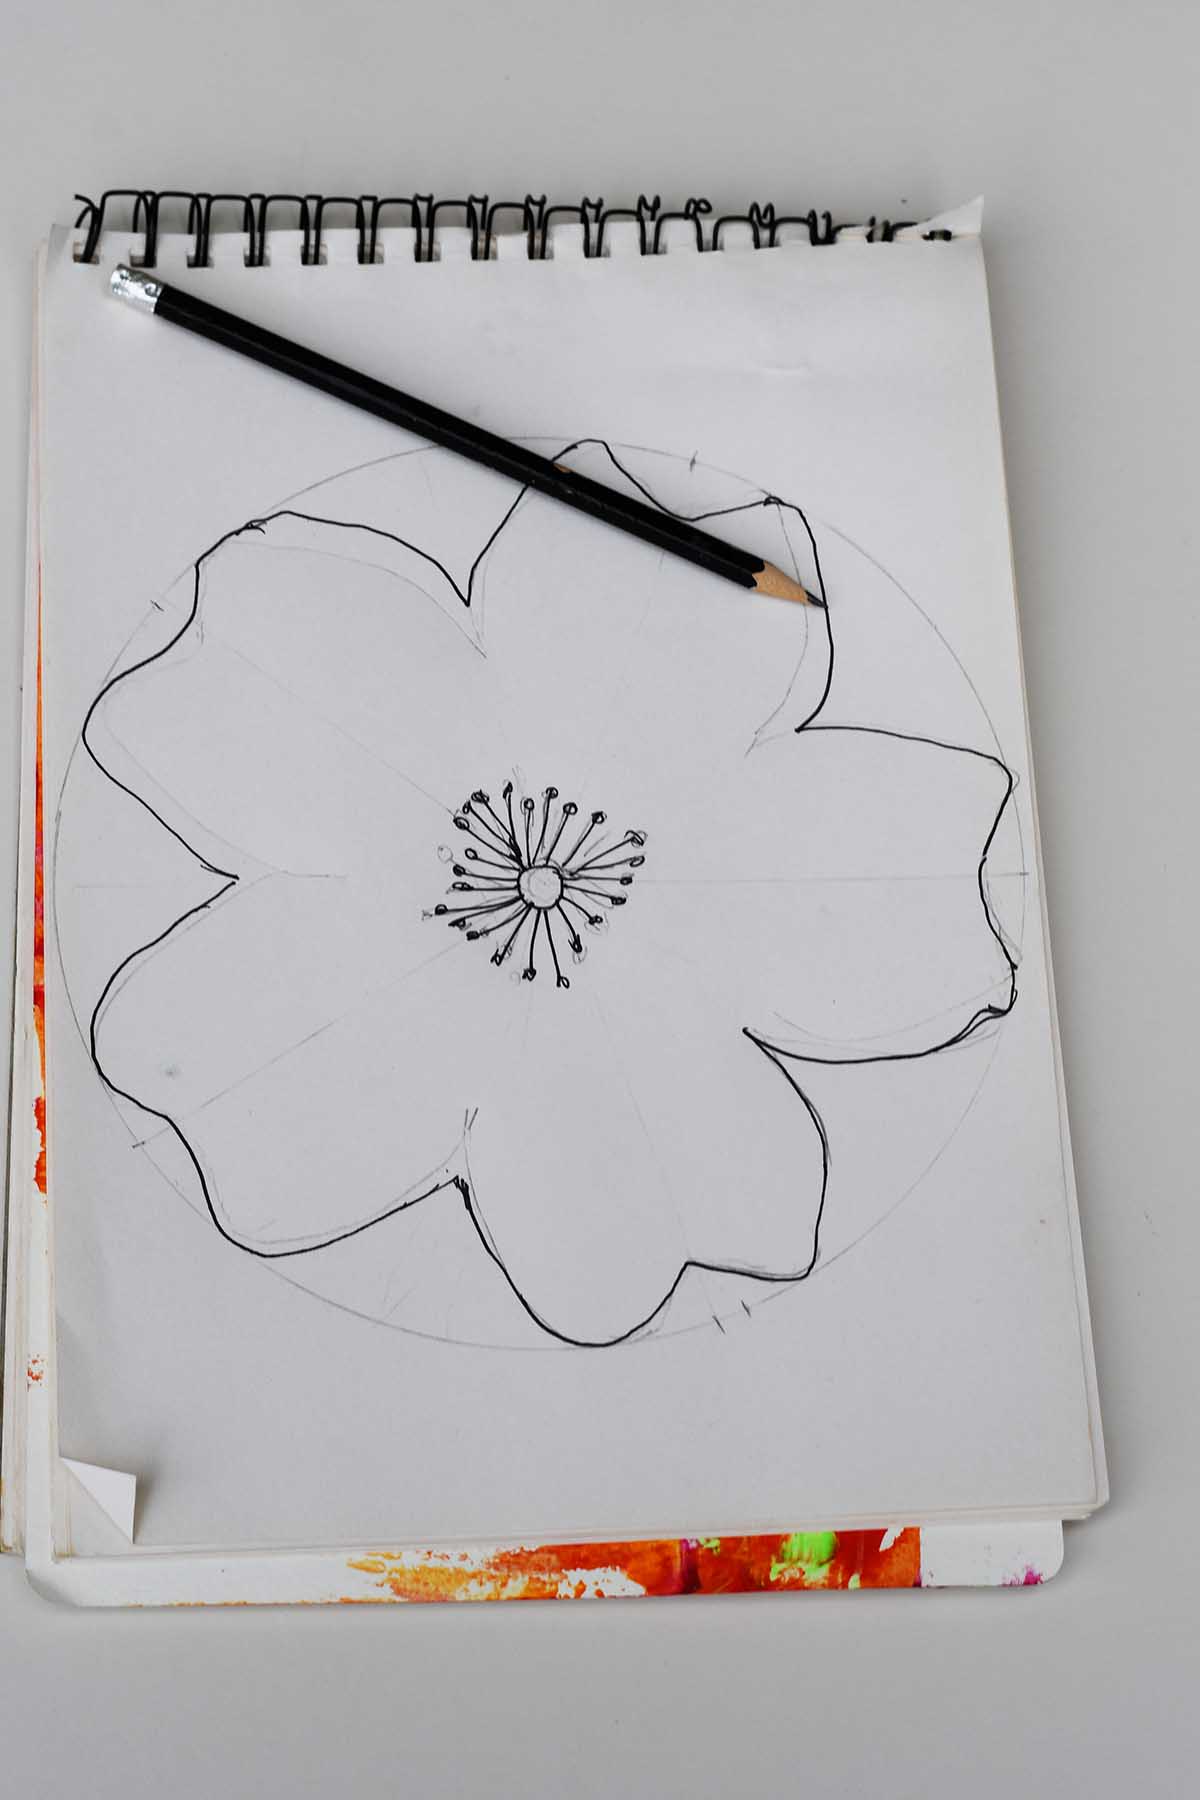
I used this easy Cherry Blossom drawing tutorial for my trinket bowl templates. You can draw cherry blossoms of any size with the same tutorial. It's very easy to do or print off my template below.

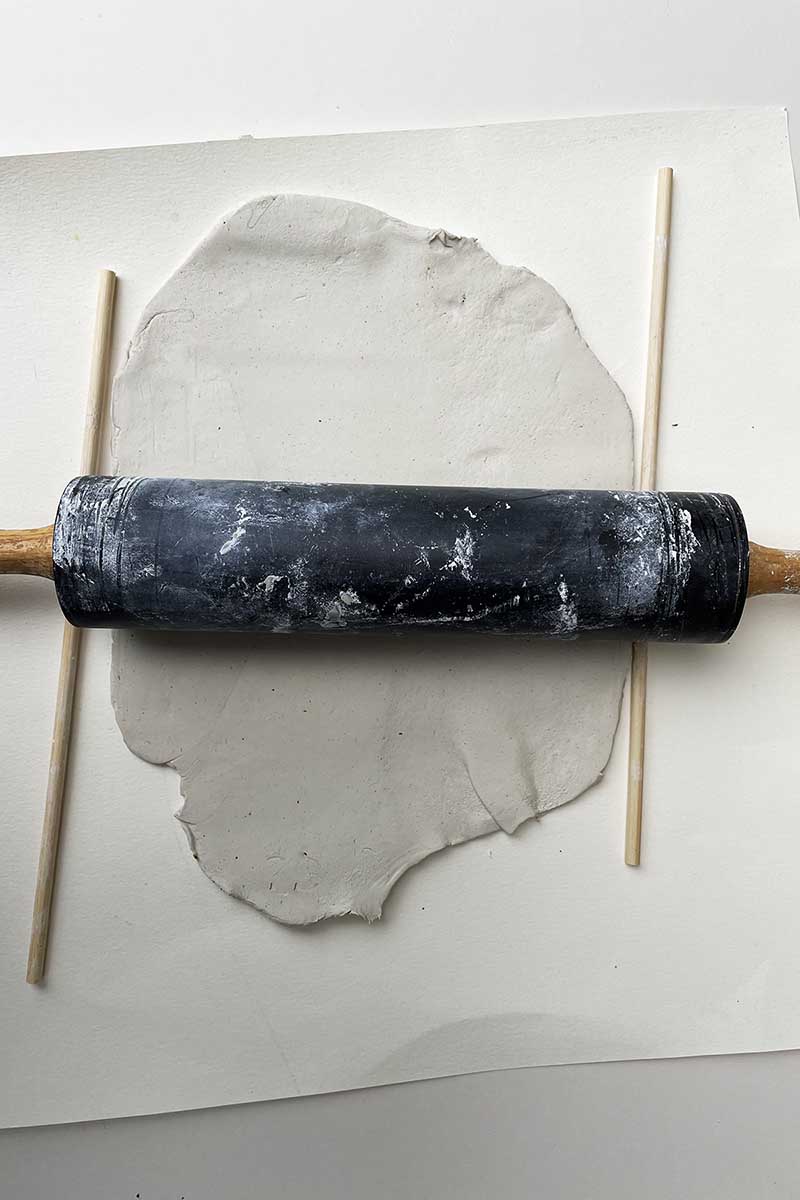
Preparing Your Clay
Step 1: Start with a Handful of Clay: Begin by kneading a small amount of white clay on your work surface. Add a little water to smooth out small cracks if you encounter them.
Step 2: Roll Out the Clay: Using your regular wooden rolling pin, roll the clay to about ¼ inch thick over a large enough surface. I roll between two wooden sticks to ensure the clay is evenly spread, avoiding thin spots that could lead to breakage.
Shaping the Dish
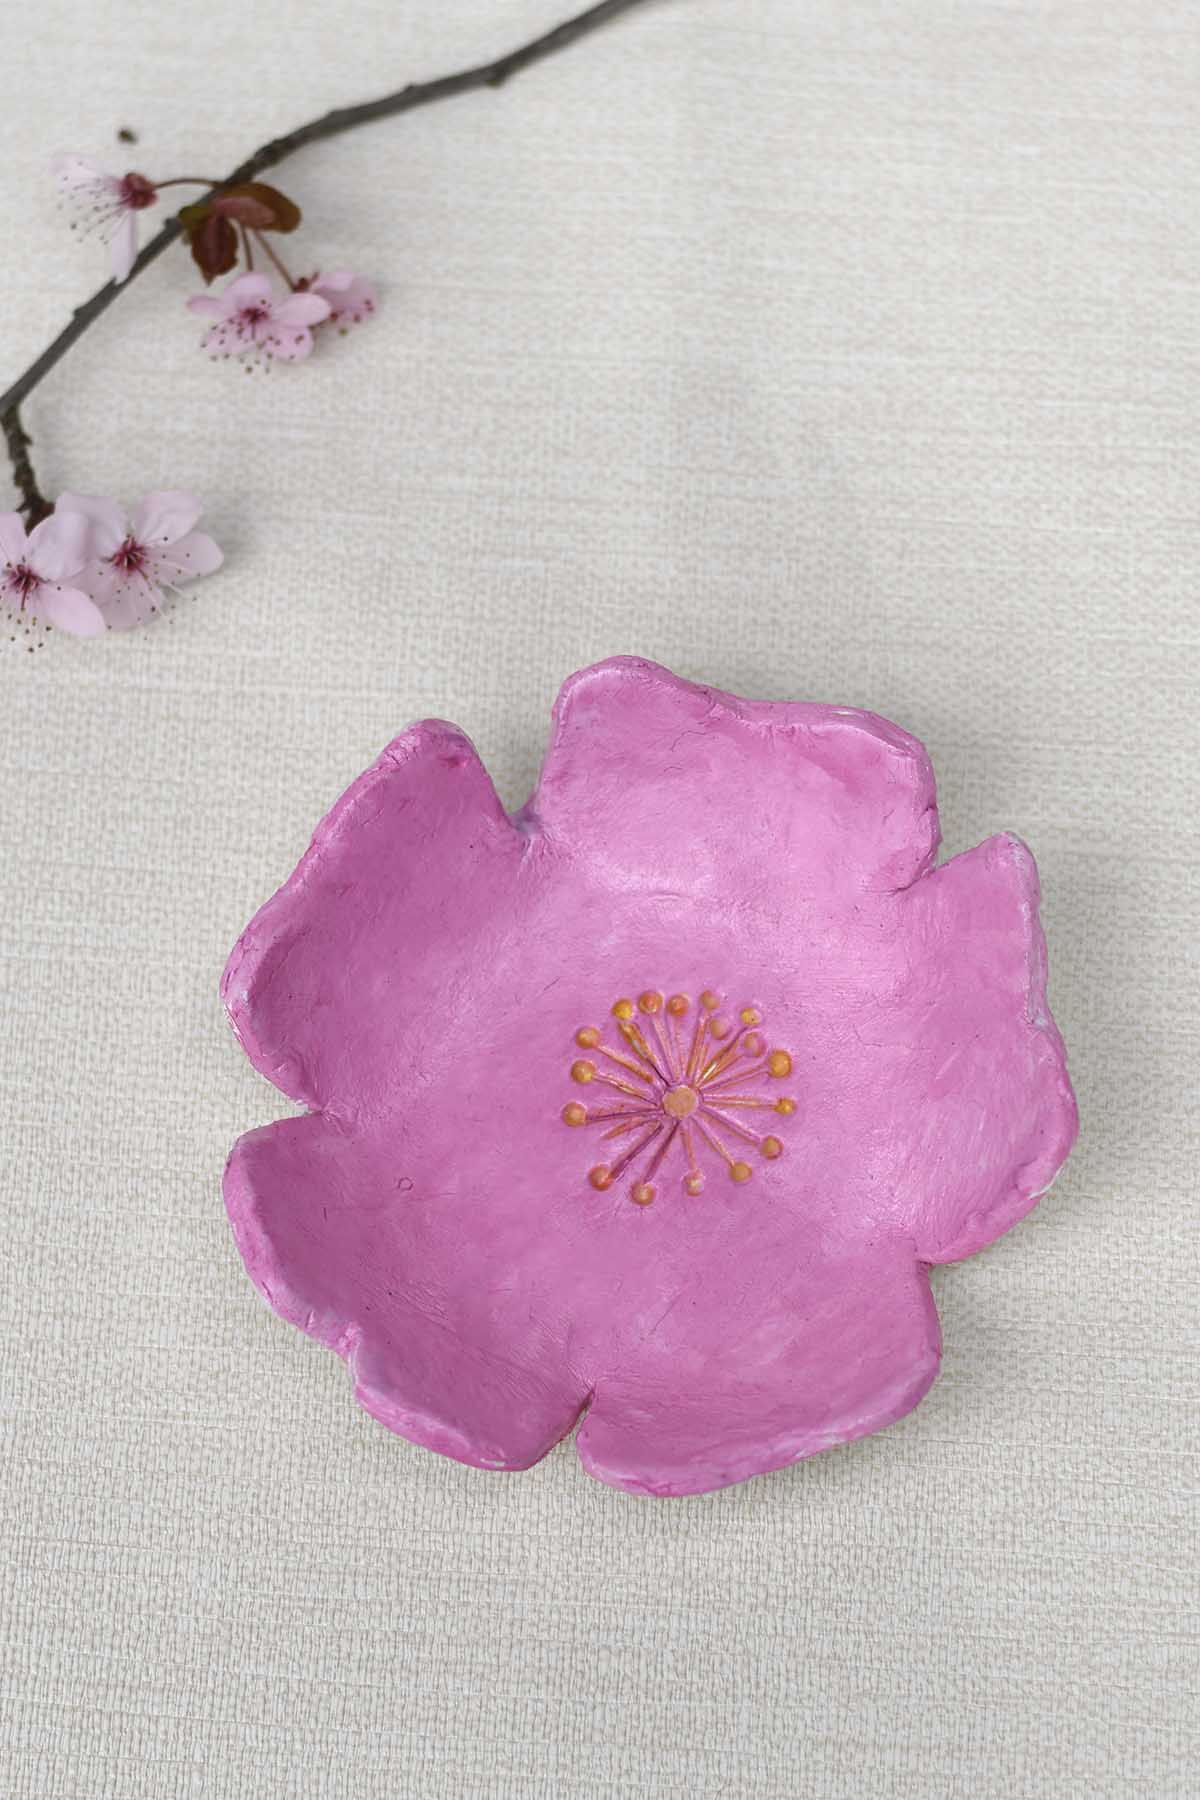
Step 3: Cut Out the Cherry Blossom Shape: Place your hand-drawn cherry blossom template over the rolled-out clay and carefully cut around it. The air-dry clay project template makes it easy to achieve the perfect cherry blossom shape for your trinket dish.

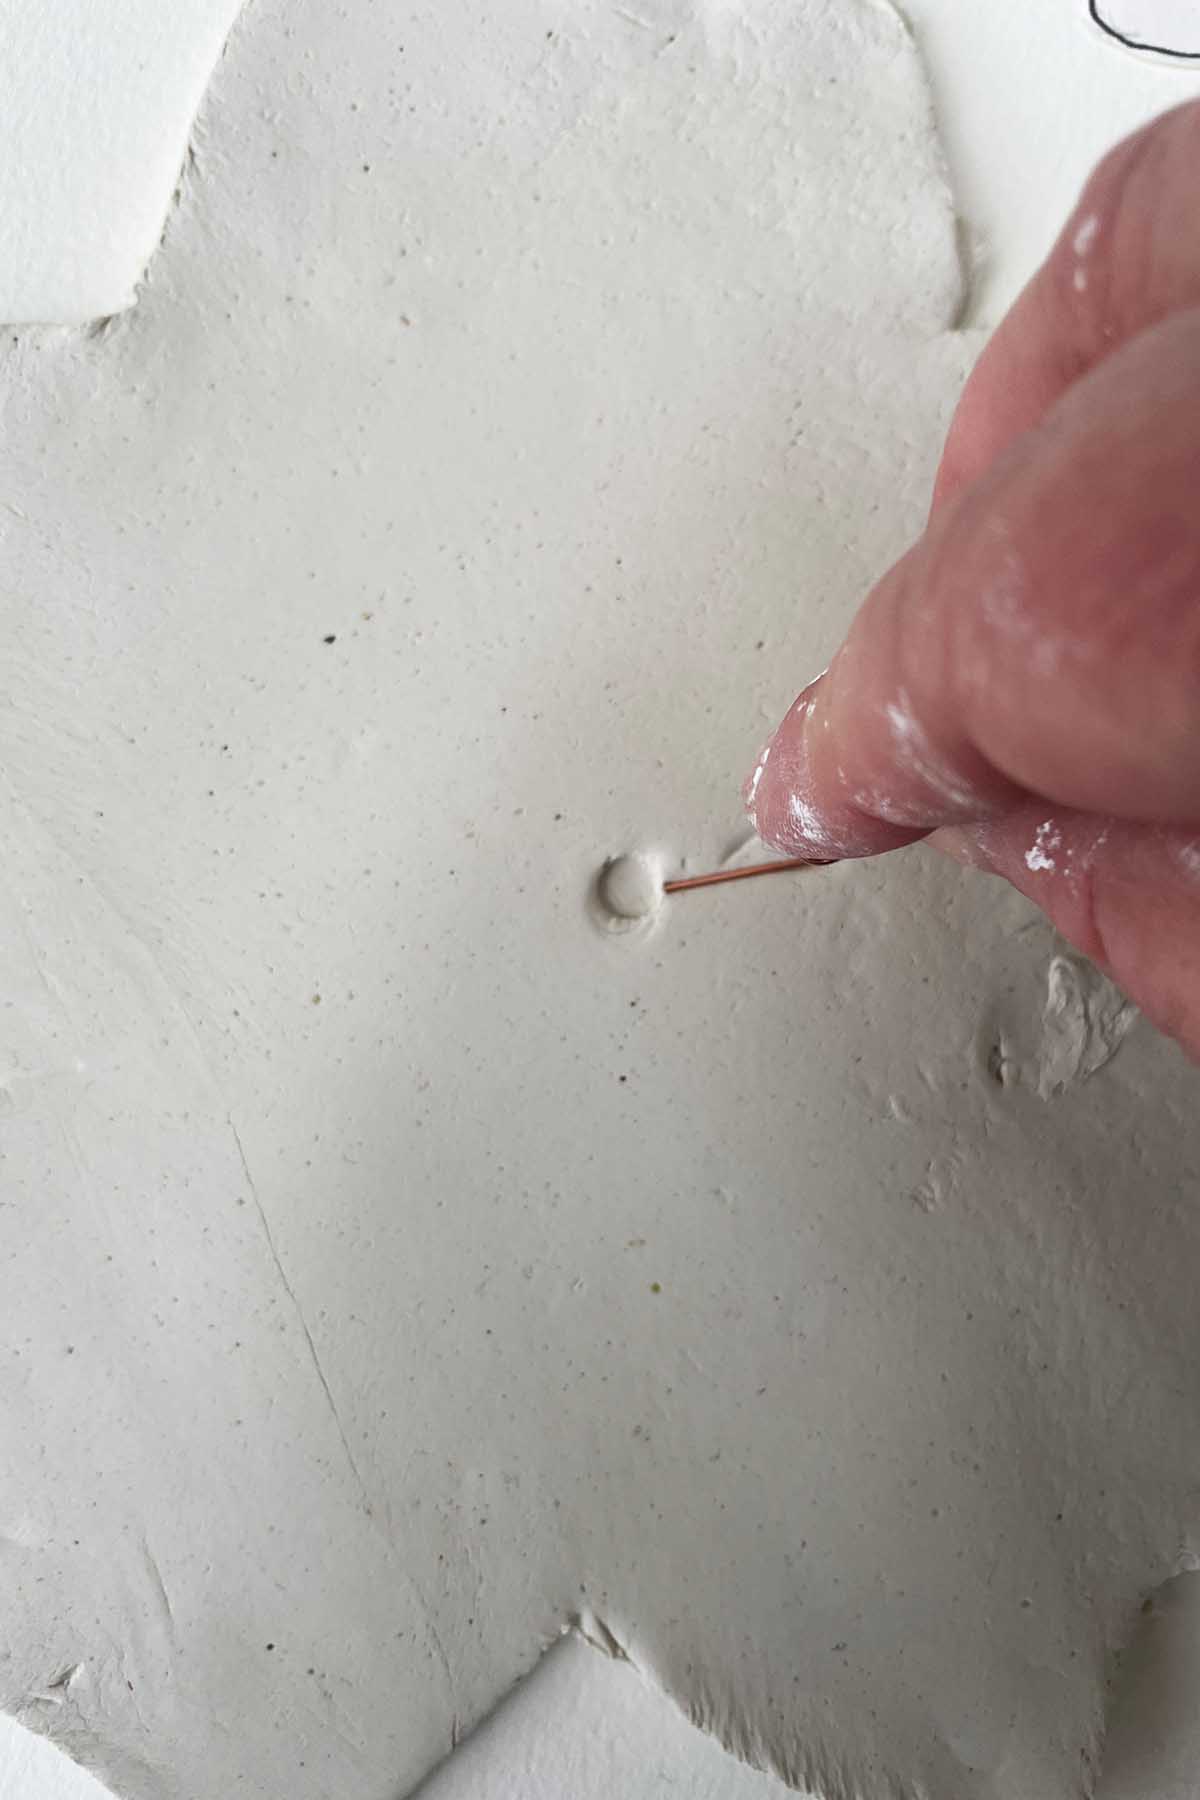
Step 4: Stamp in the Stamen: Use a bent paperclip and a round drawing pin head to stamp the stamen in the centre of the flower. Just press down firmly to make an imprint in the clay.
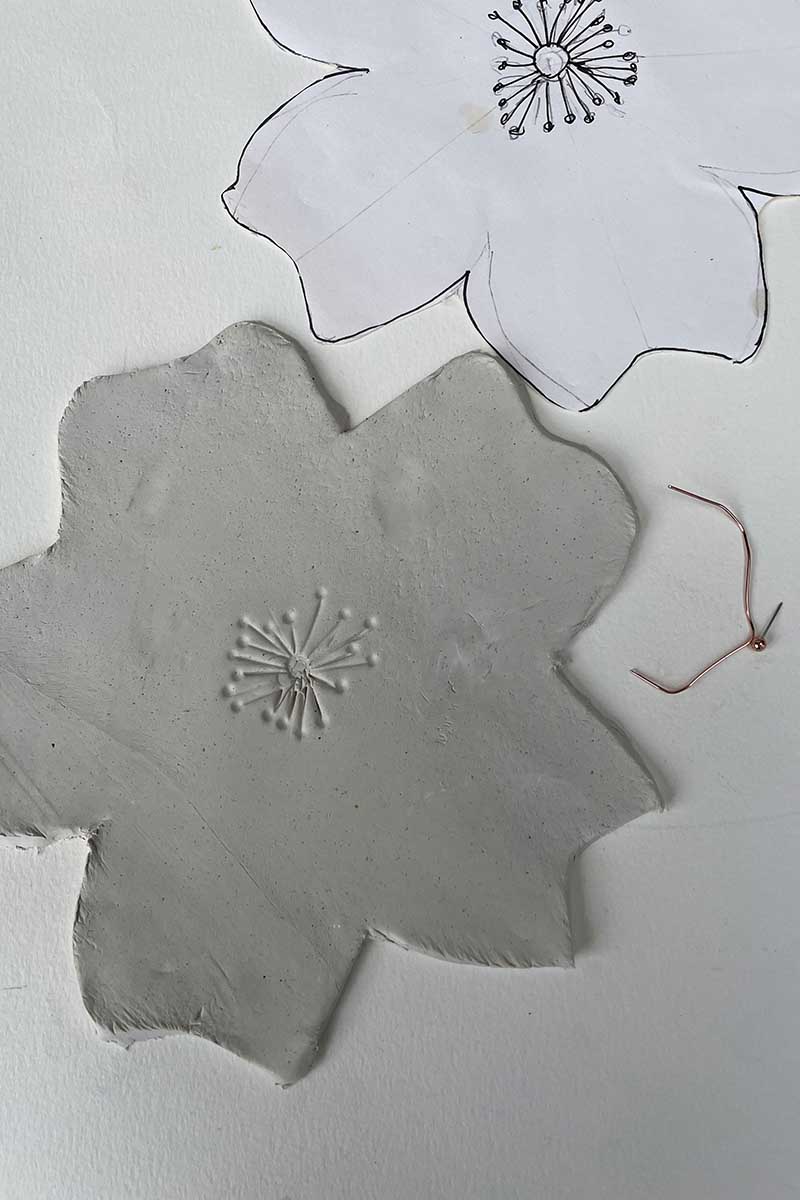
Step 5: Form the Dish: Gently lift the clay cherry blossom and place it in a small bowl or dish to slightly curve it. Use a small bowl of water to smooth any edges or fingerprints.
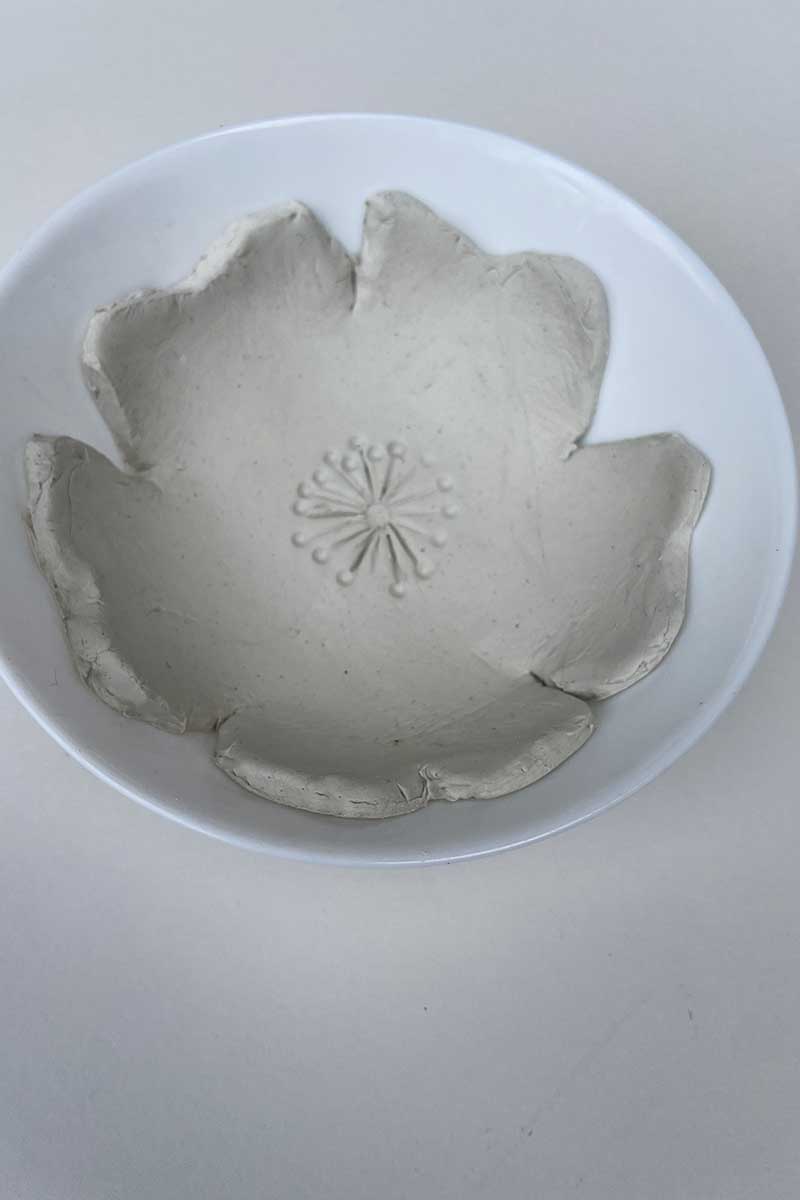
Step 6: Allow it to dry. The drying time for the clay varies based on your local climate; aim to place it in a warm, dry area for optimal drying. Since air circulation is limited when the clay is in bowls, drying can take longer.
To hasten the drying process, remove the clay from the bowl once it has maintained its shape and expose the entire trinket dish to open air, which will help it dry more quickly.
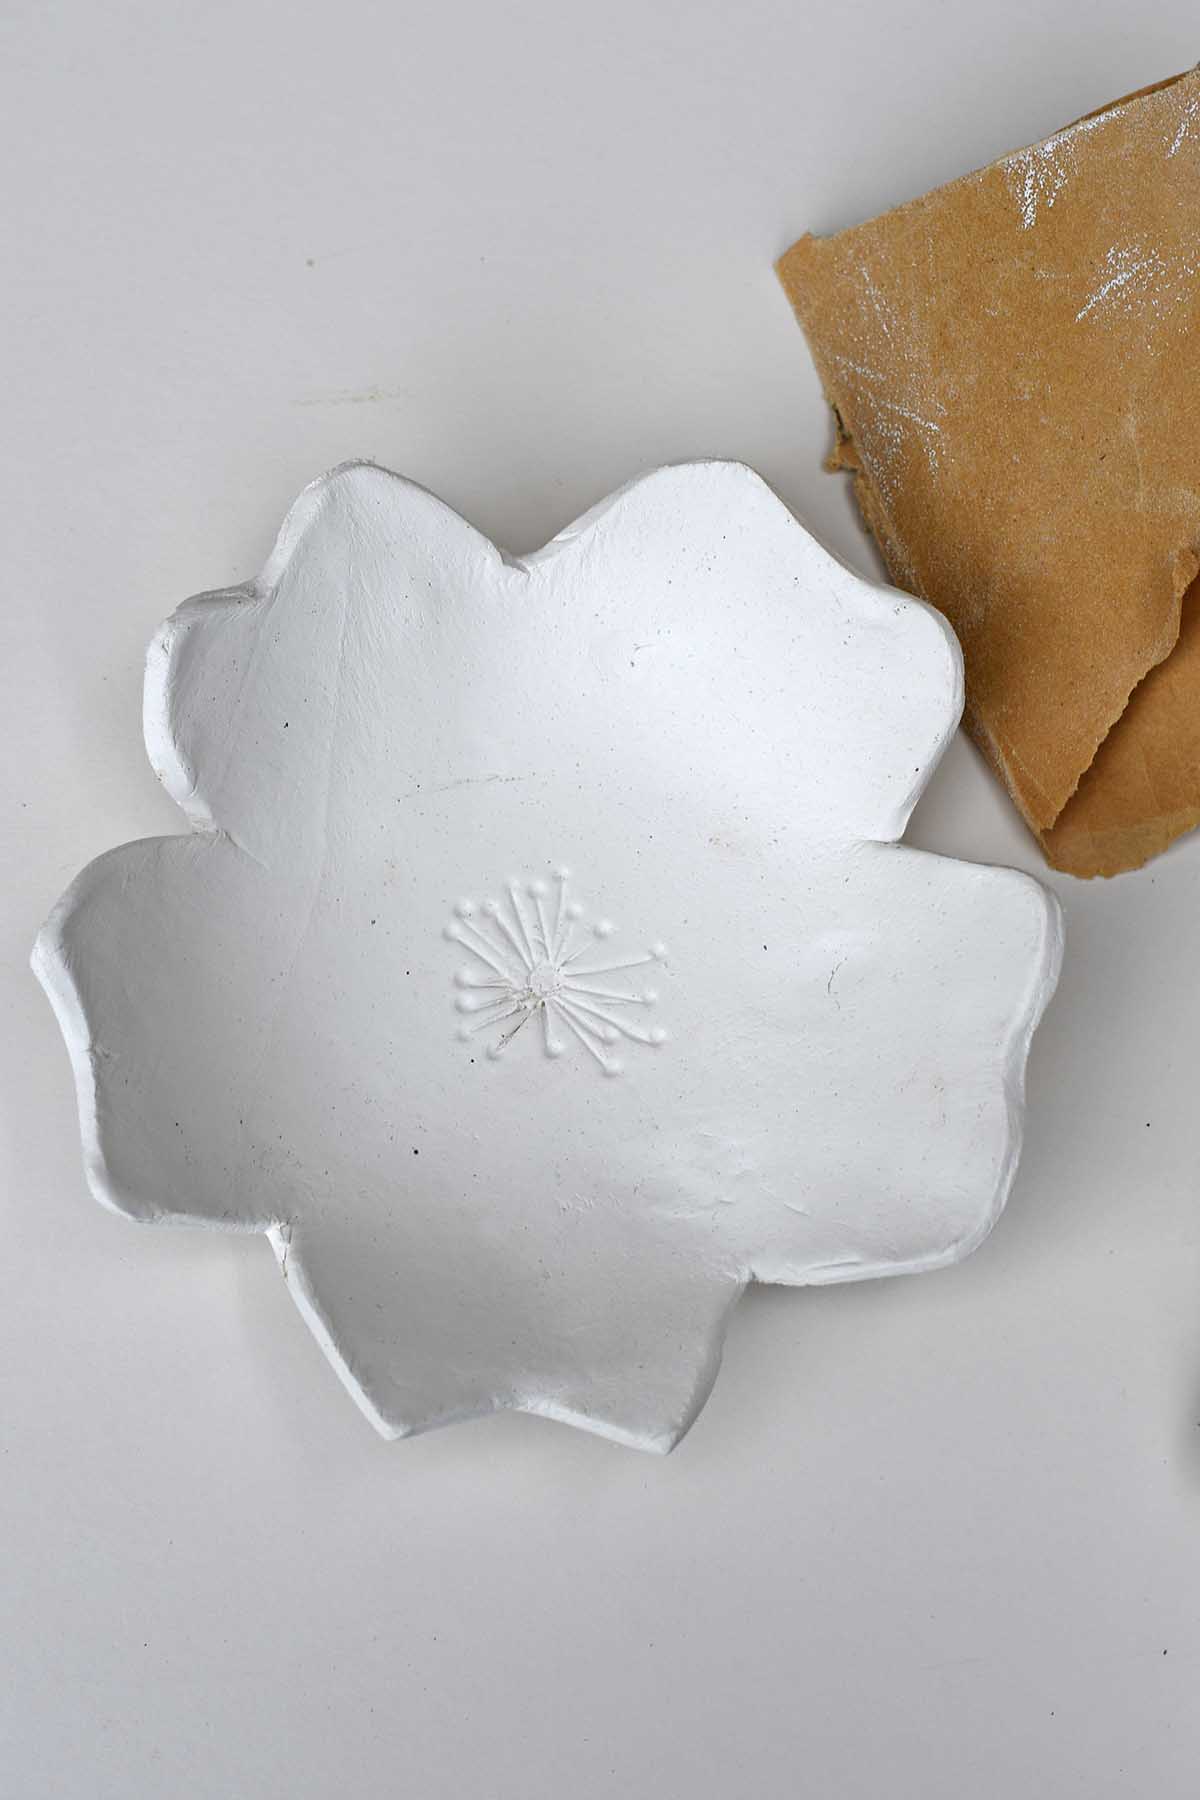
Step 7: Sanding: After thoroughly drying the clay, smooth the edges with fine-grade sanding paper.
Adding Details and Colour
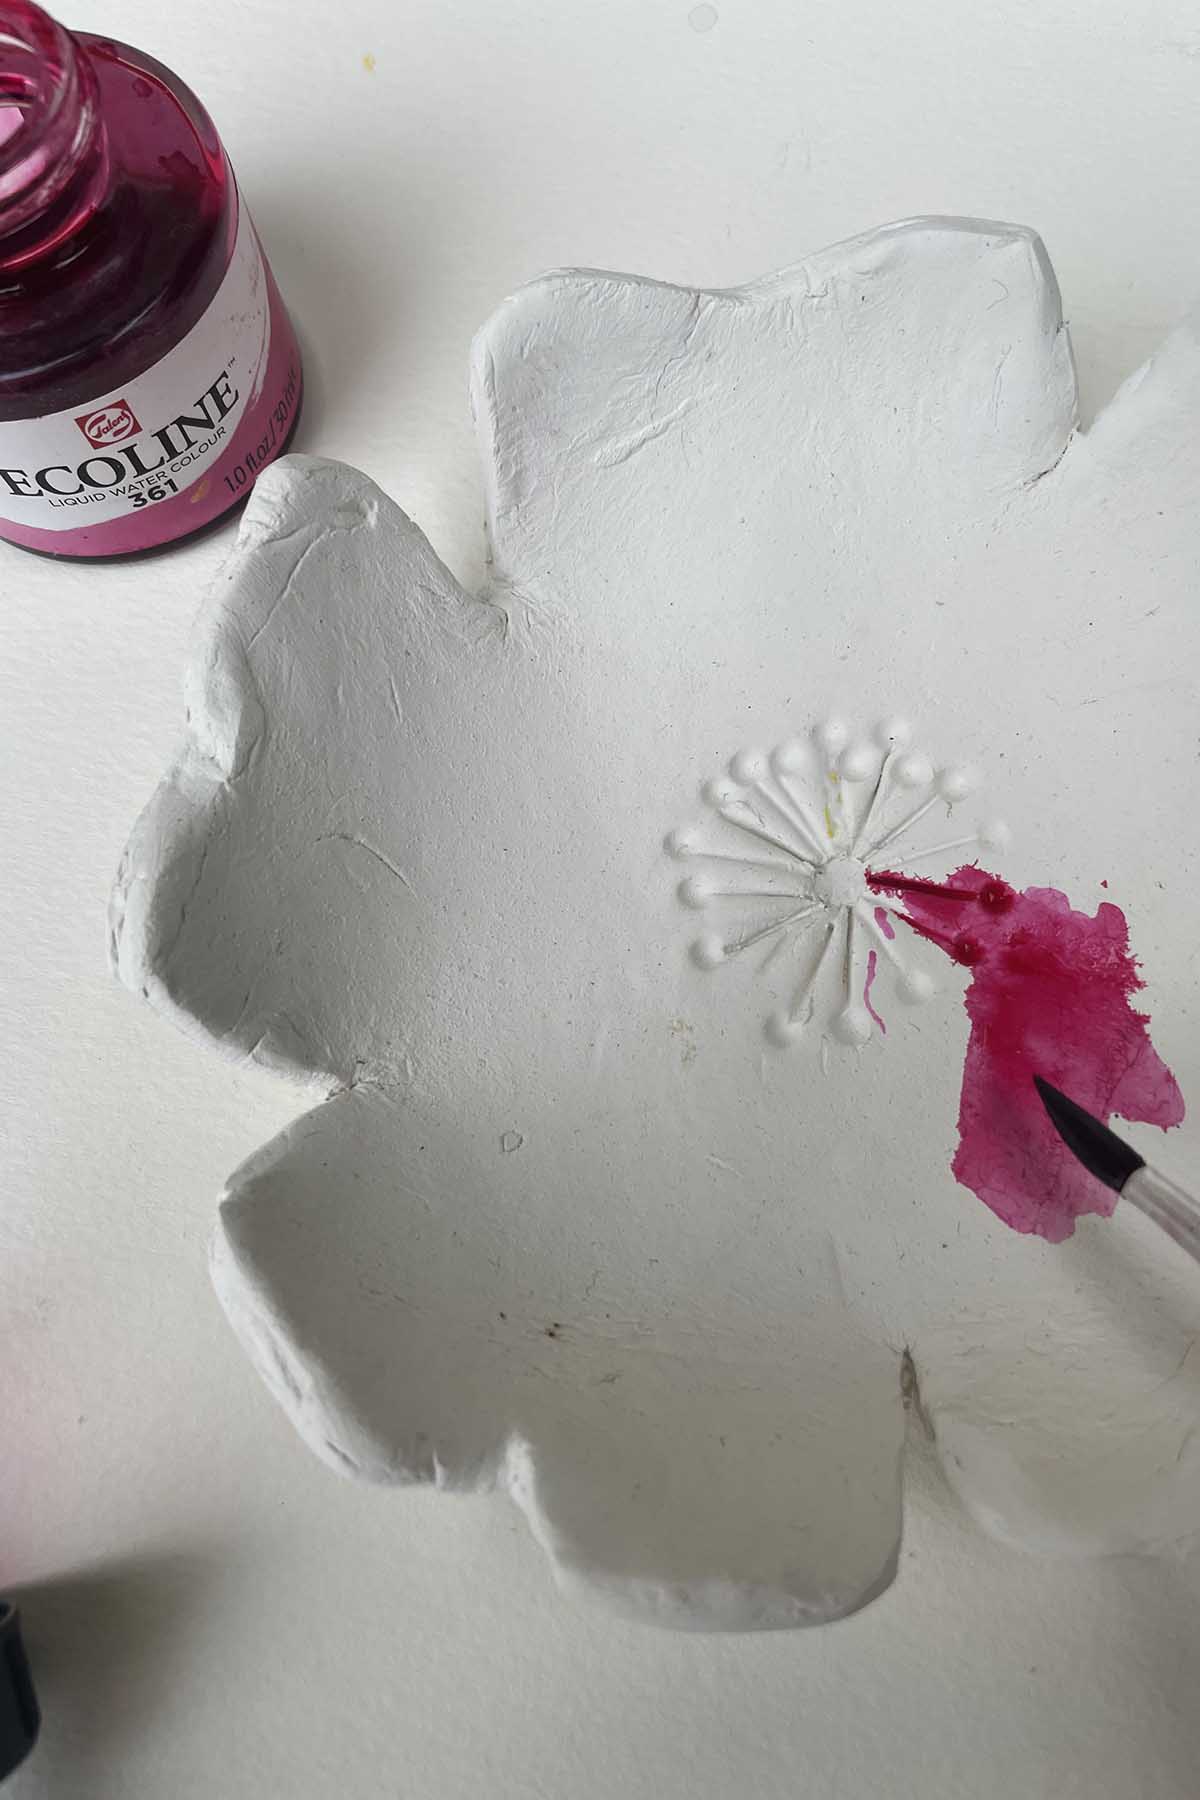
Step 8: Painting: Once your clay dish is dry, it's time for the fun part! Use paint to add colour to your cherry blossom. You can follow traditional pink hues or go in different directions with your colour scheme. You can use a variety of paints on air-dry clay, including acrylics, spray paint, and watercolour inks.
I used watercolour inks because that is what just happened to be to hand, in a pink hue.
Once the pink paint had dried, I used a gold Sharpie to colour the stamen in the centre of the flower bowl.
Step 9: Glazing: Apply a generous amount of glaze to your dish after the paint dries. This seals the acrylic paint, gives your dish a beautiful glossy finish, and adds durability.
Finishing Touches
Step 10: Drying: Allow your trinket dish to dry thoroughly according to the glaze instructions. This usually takes a few hours to a day.
Step 11: Little Finishing Details: Add any additional touches you like, such as painting the edges or adding a second coat of glaze for extra shine.

Keep the remaining clay airtight; you can use it for one of these unique Air dry clay ideas, including these cute embroidered clay hearts and this Valentine's heart bouquet.
Conclusion & Other Ideas
Creating DIY air-dry clay trinket dishes shaped like cherry blossoms is a great project for crafters of all levels and a way to make pretty handmade gifts for friends. They would also look great with this DIY egg carton Cherry Blossom table decoration.
With just a little clay, some paint, and a few small tools, you can create beautiful clay bowls and dishes perfect for holding small items or sweet treats. Here are more spring air-dry clay ideas.
Explore more DIY bowl and dish projects to enhance your crafting repertoire. Transform decoupaged scallop shells into stunning ring dishes, or decoupage small wooden bowls for a vibrant makeover with floral paper napkins for a pop of colour.
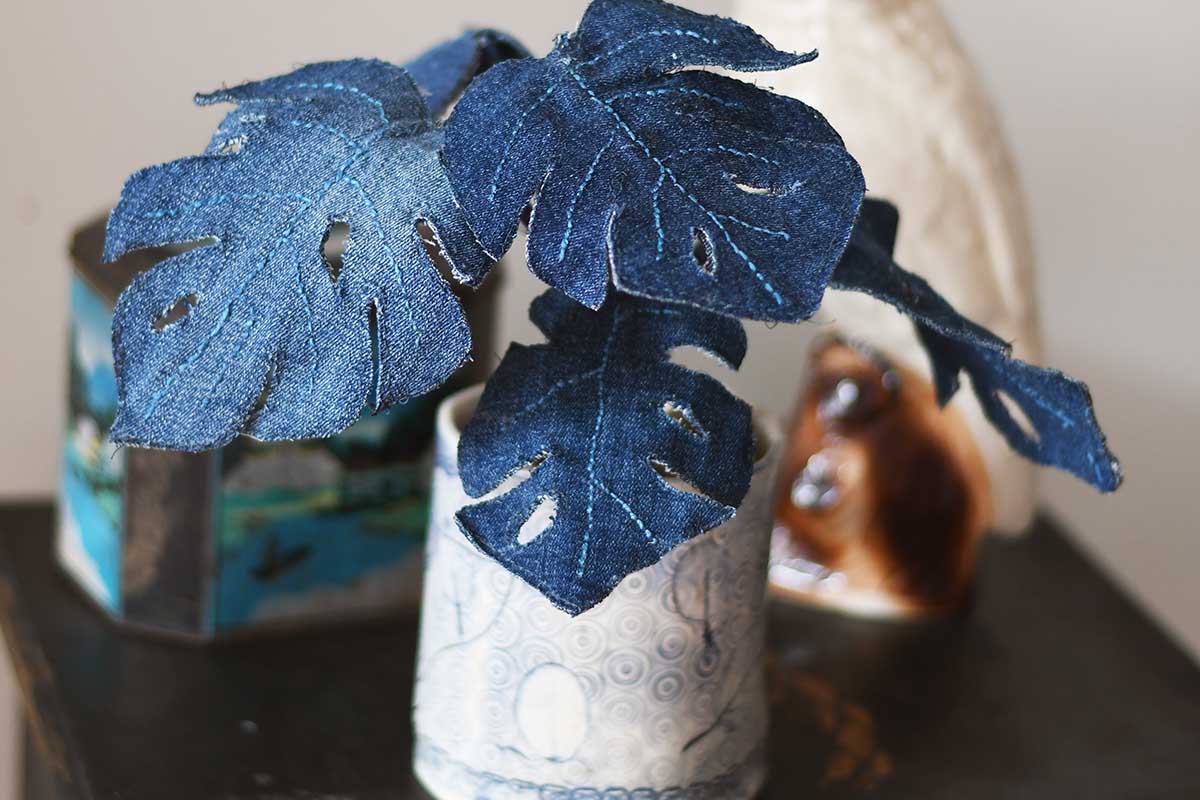
Dive into the world of paper mache for another creative bowl-making method. Try crafting quaint paper mache tea cups as charming mini trinket bowls. Additionally, discover how to create unique no-sew denim bowls, employing a technique akin to paper mache for an inventive twist on traditional crafts.
You'll find many more cool adult craft ideas here.
I am a bit jealous. My air dry projects usually crack or fall apart. Thanks for sharing with Create-it Link Party.
Thank you. The trick is to let them dry slowly and then they are less likely to crack.
Just lovely! Thanks for sharing this post at the Will Blog for Comments #29 linkup. Hope to see you next time, too.
Thank you so much, and thanks for the invite.
Oh I absolutely love this idea! It turned out beautifully and so simple to make. Visiting from "will blog for comments"
Thank you so much, I love to craft with air dry clay.
Absolutely love this DIY Air Dry Clay Trinket Dishes: Cherry Blossom Edition tutorial! The cherry blossom design adds a touch of elegance to the dishes. I can't wait to try this out and create my own personalized trinket dishes. Thanks for the fantastic inspiration!
Thank you so much.
I think air-dry clay would be right up my alley! These turned out so beautifully. Thanks for sharing this post at the Will Blog for Comments #27 linkup. Hope to see you there next time, too. Have a great weekend.
Thank you, there are so many wonderful things you can make with air dry clay.
These are so pretty and you made the process so easy to follow. I have some clay I need to use and something like this is perfect to use it up. Thanks for sharing and this post will be a feature this week. #HomeMattersParty
Thank you so much. I just love Cherry blossom so I thought it would be cute to have some clay trinket dishes.
This is so charming! I love the cherry blossom flower and the color you painted it. Thanks for the tip of placing it in a bowl to develop the shape.
Thank you so much, yes the use of the bowl helps get just the right curve for the bowl.
These are adorable. So simple to make but so pretty. Thanks for sharing.
Thank you, yes easy to make but perfect for spring.
Super cute, reminds me of many moons ago when I did pottery
I visited you via A Pinch of Joy: BUSY MONDAY 608
My links: 99+100. We will be so happy if you share your blog links with us at SeniorSalonPitStop. Link under BLOGGING
Thank you so much, it's fun playing around with air dry clay.