

I decided to make this fun wall key holder, as I seem to spend half my life looking for my keys especially my car keys.
What I need to do is put them in the same place every time so I know where they are. Now that I have a wall key holder, when I come in I hang my keys up and I don’t have to hunt for them anymore!
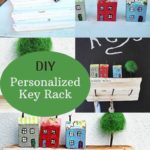
Upcycle Scrap Wood Into a Unique Wall Key Holder
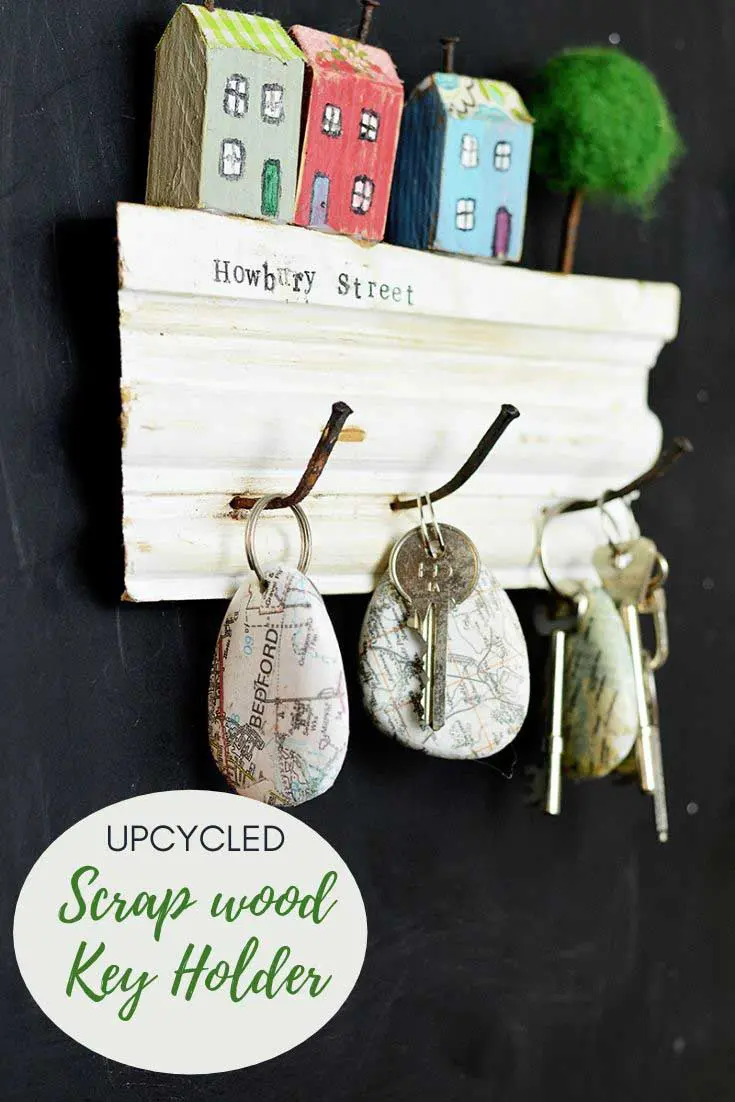
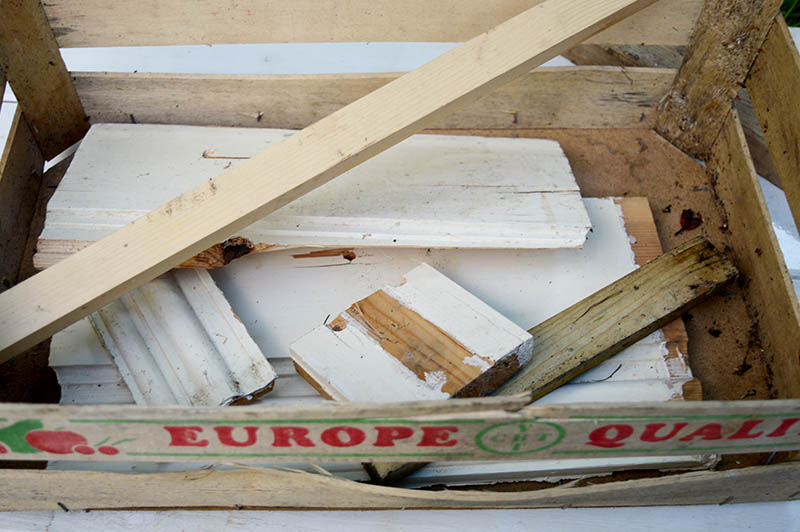
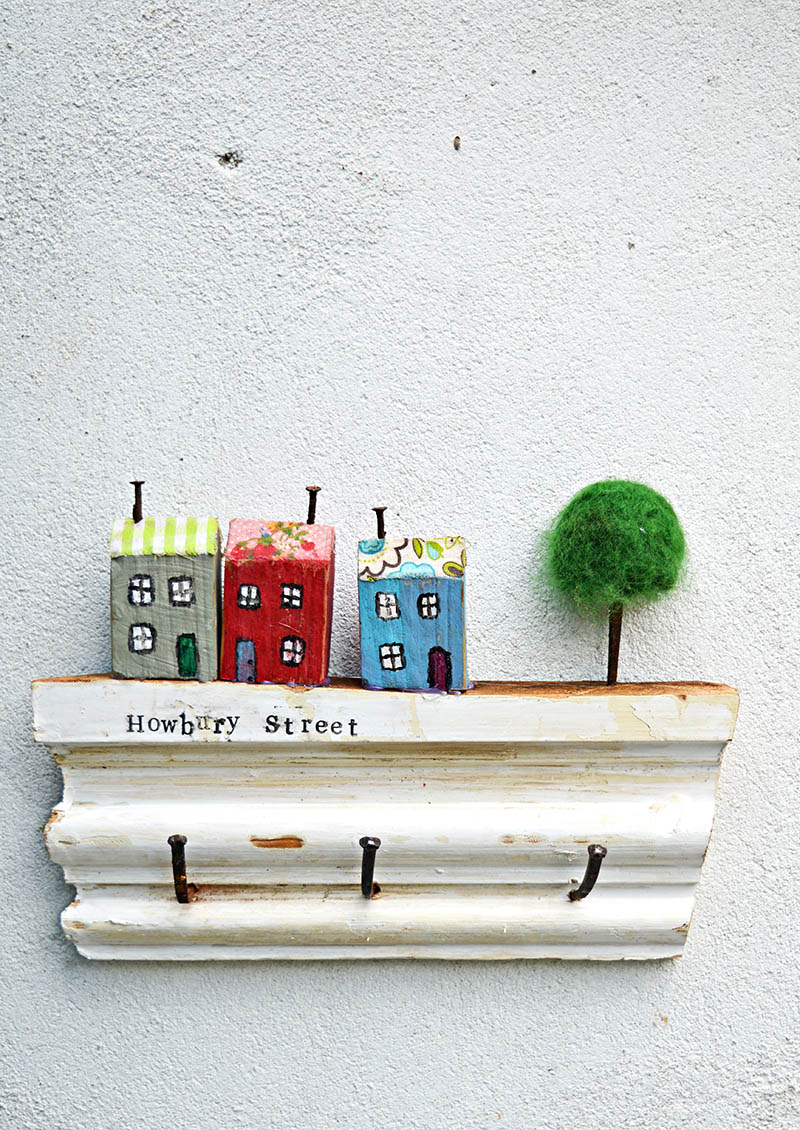
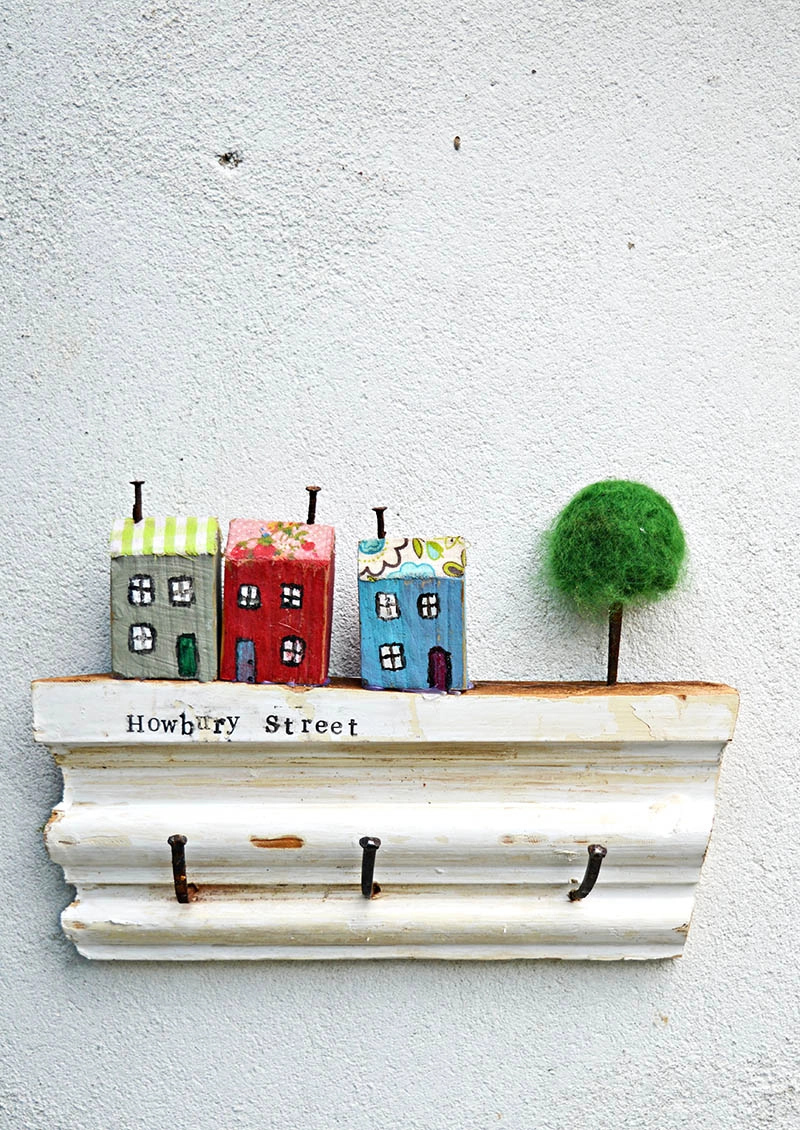
When I say that this wall key holder is made from junk I’m not exaggerating, it’s literally some scraps of wood and rusty nails. My husband thought I’d lost it when I went on the hunt for some rusty nails in the garden for my project.
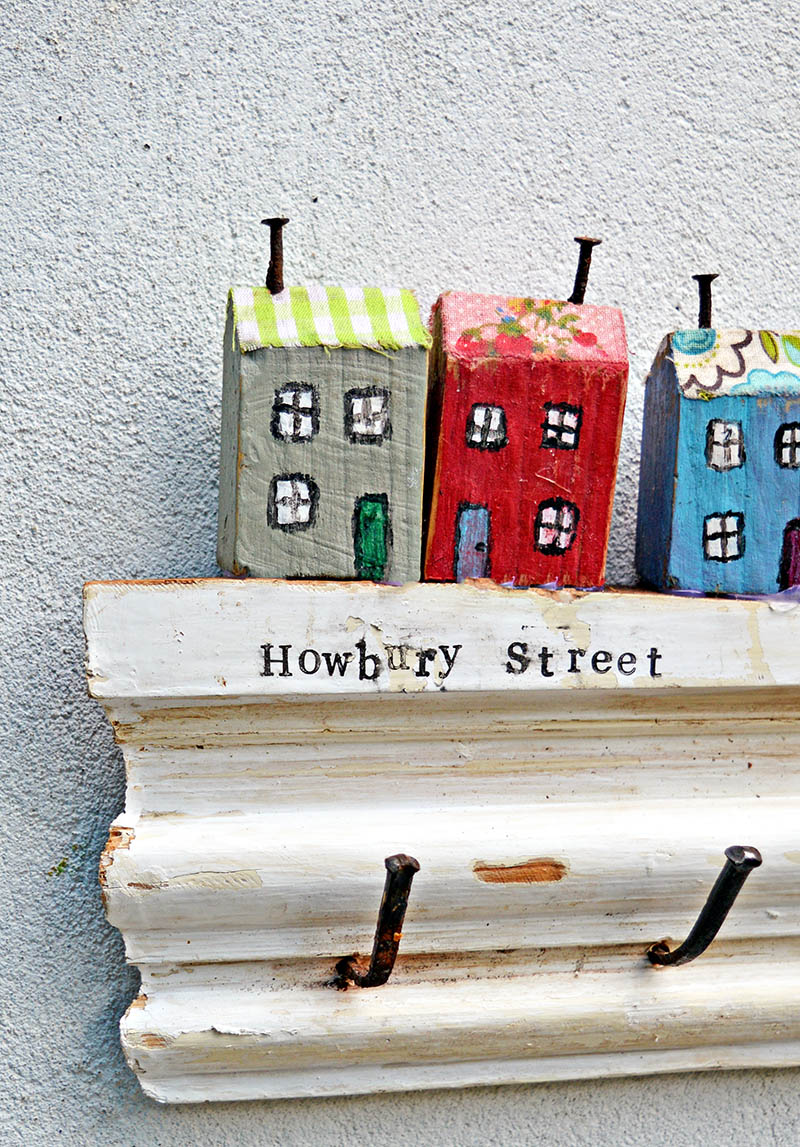
The houses are supposed to represent the homes on my street, which they kind of look like except we don’t have flowery roofs, unfortunately. That’s why I stamped our street name on the key rack. I even used a bit of old skirting board (baseboard) from the house
These key holders would make a lovely gift, especially if you stamped the recipient’s street name on the rack. For my next one, I want to get a bit more ambitious and do one for my old home in Hong Kong with some icon buildings made out of scrap wood.
I have also made some map rock key chains for my keys to hang on to the rack, which will also make a great gift. Perhaps you could make both as a set.
We’re a participant in the Amazon Services LLC Associates Program, an affiliate advertising program designed to provide a means for us to earn fees by linking to Amazon.com and affiliated sites. As an Amazon Associate, I earn from qualifying purchases.

What you need to make a wooden wall key holder
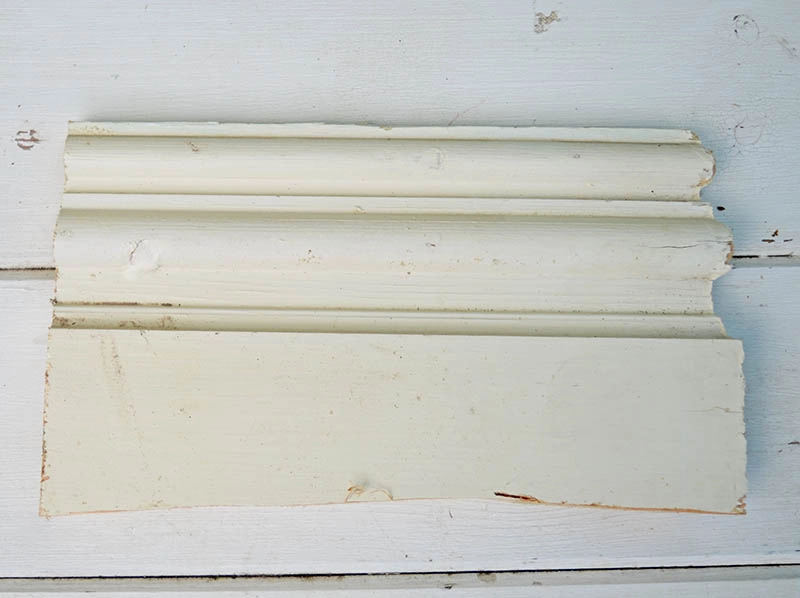
- Scraps of wood, some long thin bits (ie 2″x 1″) and a bit of skirting board (baseboard). Or some other piece of molded wood-like architrave.
- Rusty nails, small ones for the houses and large ones to use as hooks.
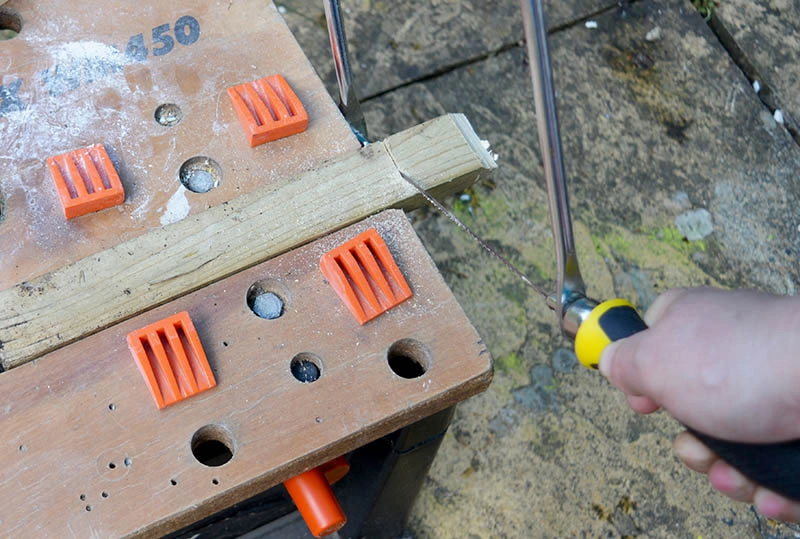
- Hacksaw
- Acrylic paint in various colours.
- Fabric scraps or decorative washi tape
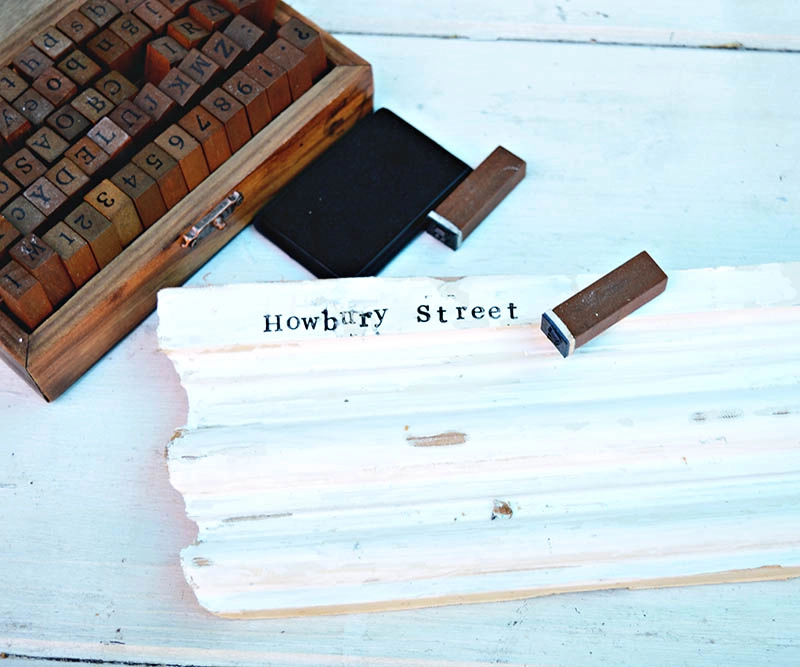
- Letter stamp set and a black stamp pad.
- Green felting wool and a felting needle and sponge
How to Make a Wooden Wall Key Holder
Making the cute houses…
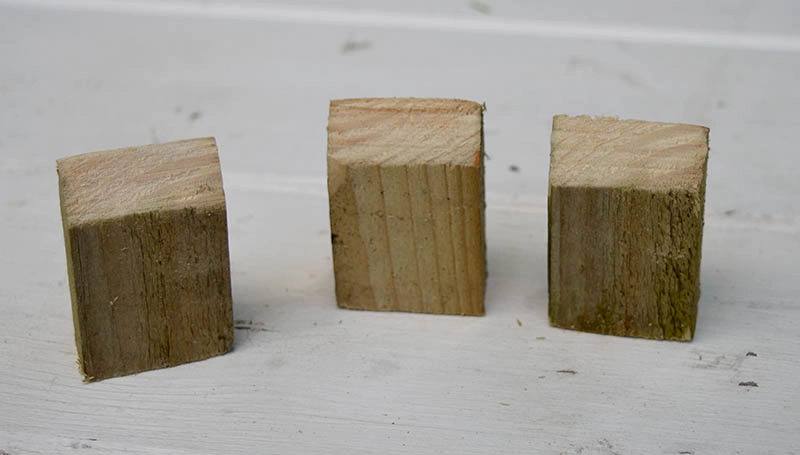
1.. First, using a hack saw cut scraps of wood into 3 small pieces approximately 2″ high 1″ wide. Use the saw also to create a pointed roof.
Top Tip: Don’t worry too much about getting a perfect shape the wonkiness of the houses gives them their charm.

2. Next, smooth any jagged edges on the houses with a hand chisel, and give them a light sand.

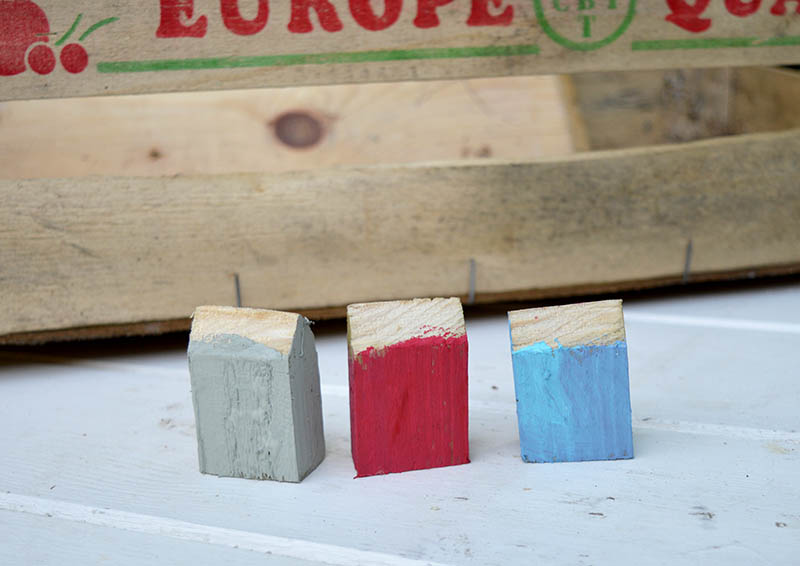
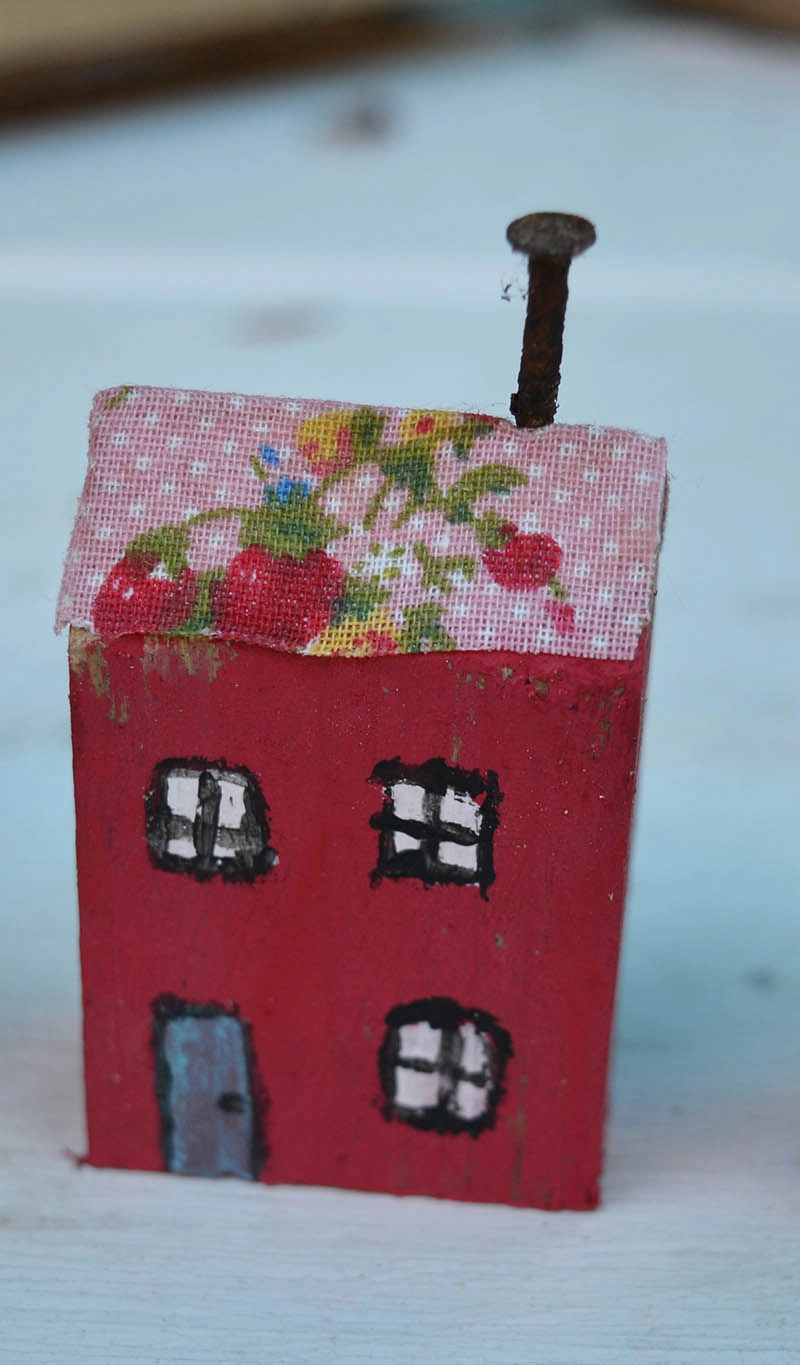
3. Next, paint each house a different colour. Then, stick fabric scraps or decorative washi tape on the pointed roofs.

4. Then, when the paint has dried on the houses, paint white dots for the windows and a coloured front door.
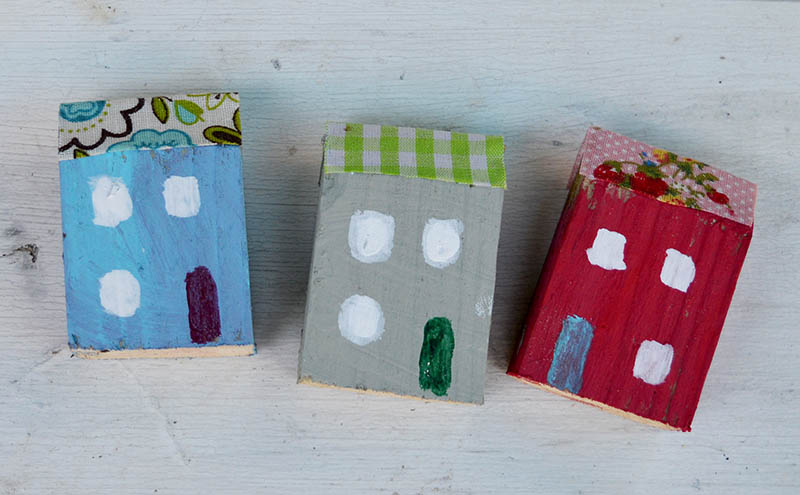

5. Next, after the window and door paint has dried, paint black window frames around them. You could even use a black sharpie for this.
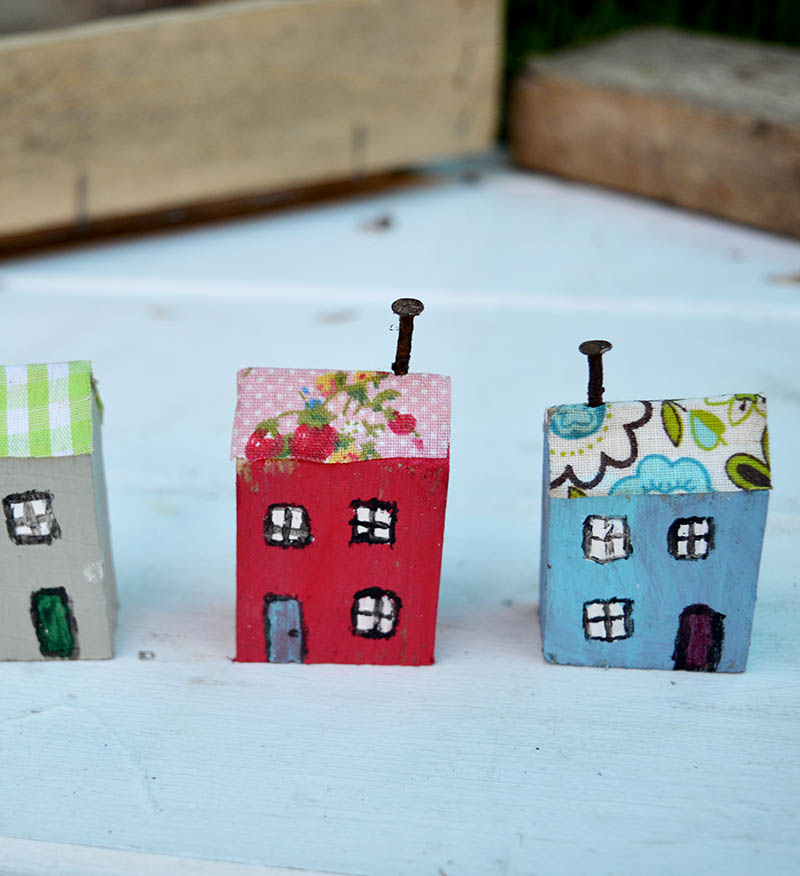

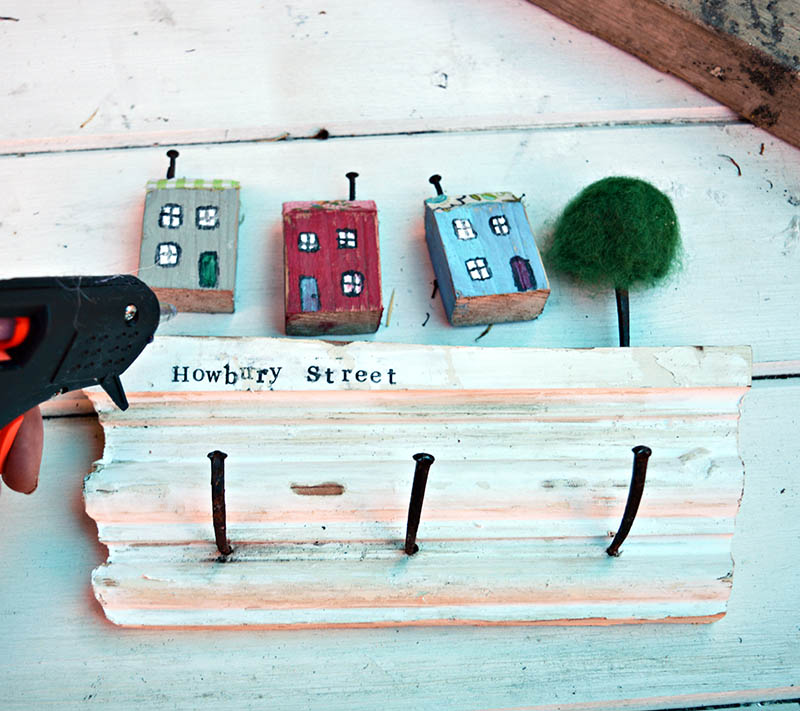
6. To finish off the houses, hammer a small rusty nail into the the roof for a chimney.

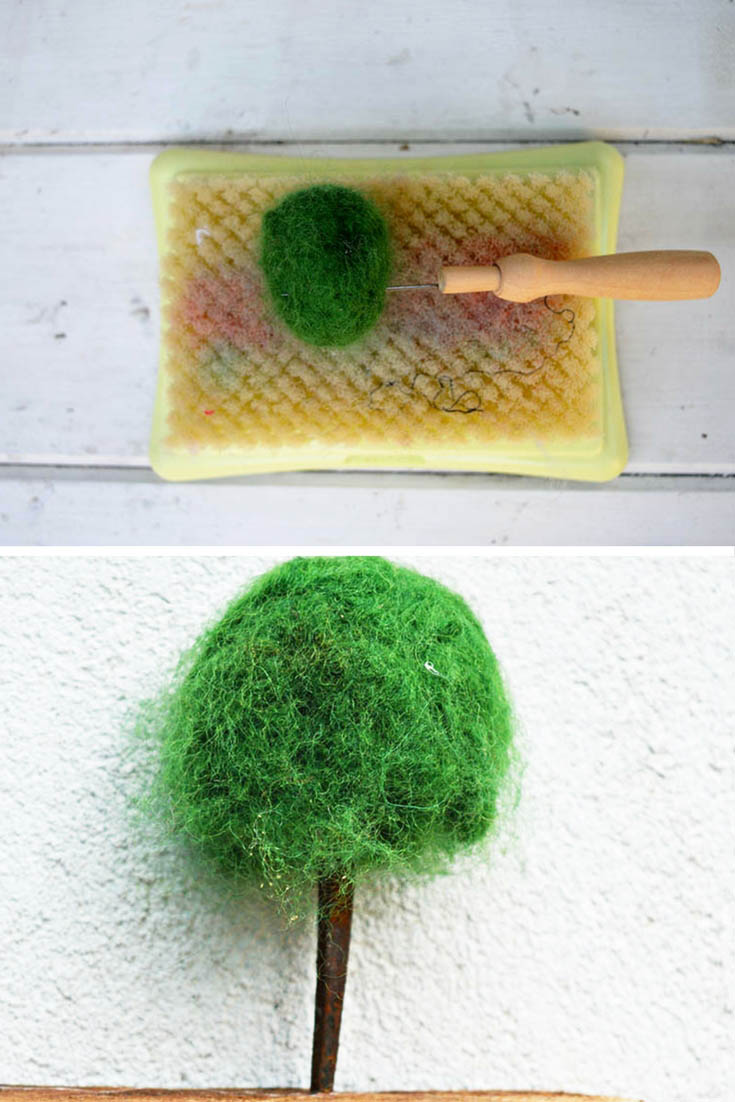
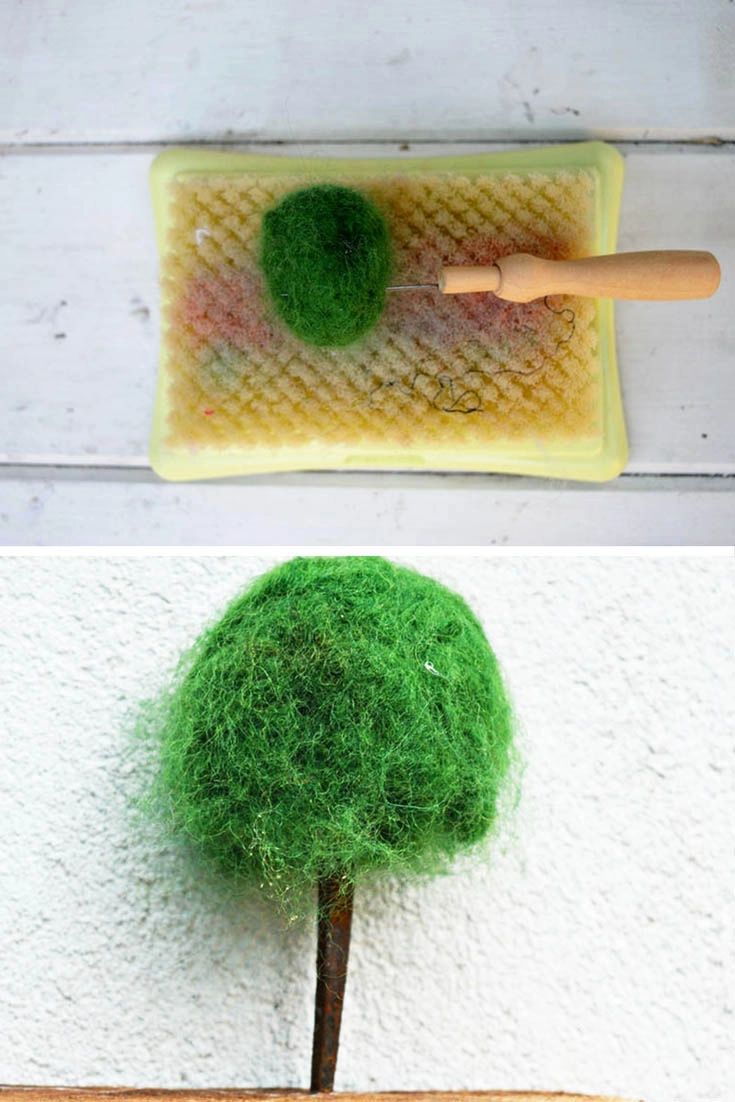
Making the felt tree
There are lots of trees on my street so I wanted a tree on my key holder. To make a tree, firstly I needle felted some green roving wall into a round tree shape.
If you are not familiar with needle felting there are loads of tutorials on YouTube like this one from Hawthorn Handmade.
7. When you have your tree shaped green felted ball simply stick it on top of one of the big rusty nails.
Stamping and making the key holder rack..
8. For the main back board of the key holder, I used a piece of old skirting board (baseboard). But any moulded bit of old wood would work well, such as mouldings from a window frame. Saw the wood into a piece about 7″ (18cm) wide and about 5″ (12cm) wide.

9. Next to personalie the wooden key rack and make it extra special, stamp your street name onto the skirting board. Just use as simple letter stamp kit to do this.

Assembling the wall key holder..
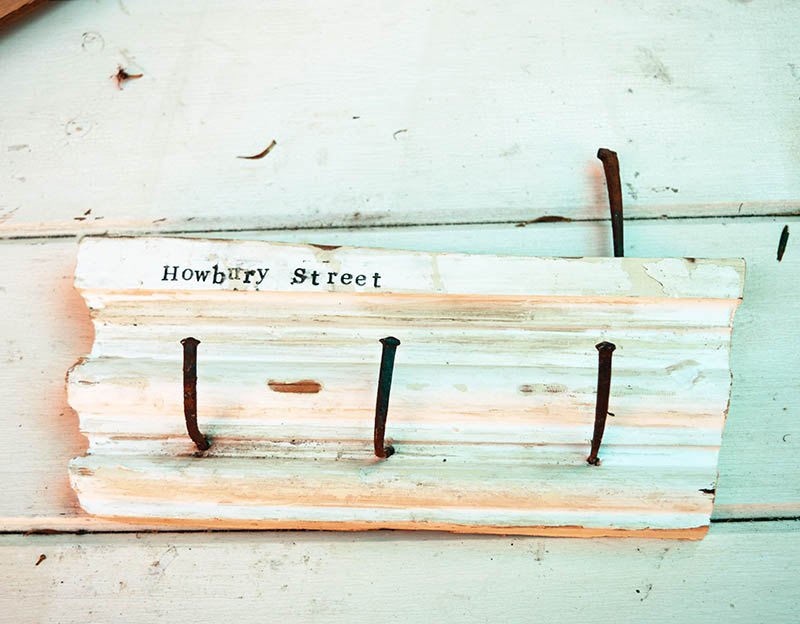
9. Then, hammer one of the four large rusty nails into the top of the baseboard at one end. This rusty nail is the trunk for the felt tree. Hammer the other 3 nails into the front of the key rack and an equal distance apart. Bend the nails as you hammer them in so that they form a hook.

10. Finally, the last thing to do is to glue the wooden houses onto the key rack. I used a hot glue gun for this.


I love to upcycle old bits of discarded wood into something useful and fun, or just fun. I’ve made some map wooden ornaments out of scraps before. I’ve even rescued and upcycled an old drawer from a skip(dumpster) and turned it into a bathroom storage shelf.
Every time I walk past a skip I can’t help taking a peek and seeing if there are any interesting bits of old wood to upcycle. I have amassed quite a collection in my shed. One of the best things I made from this scrap wood was a unique wooden Christmas tree.
Maria
Wednesday 15th of July 2020
What a cute upcycle! Just darling !
Claire Armstrong
Thursday 16th of July 2020
Thank you so much Maria.
Linda at Mixed Kreations
Sunday 14th of April 2019
What an adorable little key holder! Love the little houses and tree and how you used the nails for the hooks. Super cute!
Claire Armstrong
Monday 15th of April 2019
Thank you so much.
How To Make A Cool Map Rock Keychain - Pillar Box Blue
Wednesday 4th of October 2017
[…] Cardiff for my son who is currently studying there. You can even make a cute personalised wall key holder of your street for your map rock keychains like the one below. […]
June 20th: Recipe & DIY Linky - The SITS Girls
Tuesday 20th of June 2017
[…] Pillar Box Blue: Upcycled Wall Key Holder […]
DIY Salvaged Junk Projects 383Funky Junk Interiors
Saturday 17th of June 2017
[…] Upcycled scrap wood wall key holder with charming village, by Pillar Box Blue […]