
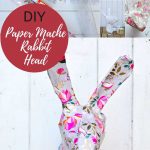
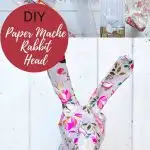
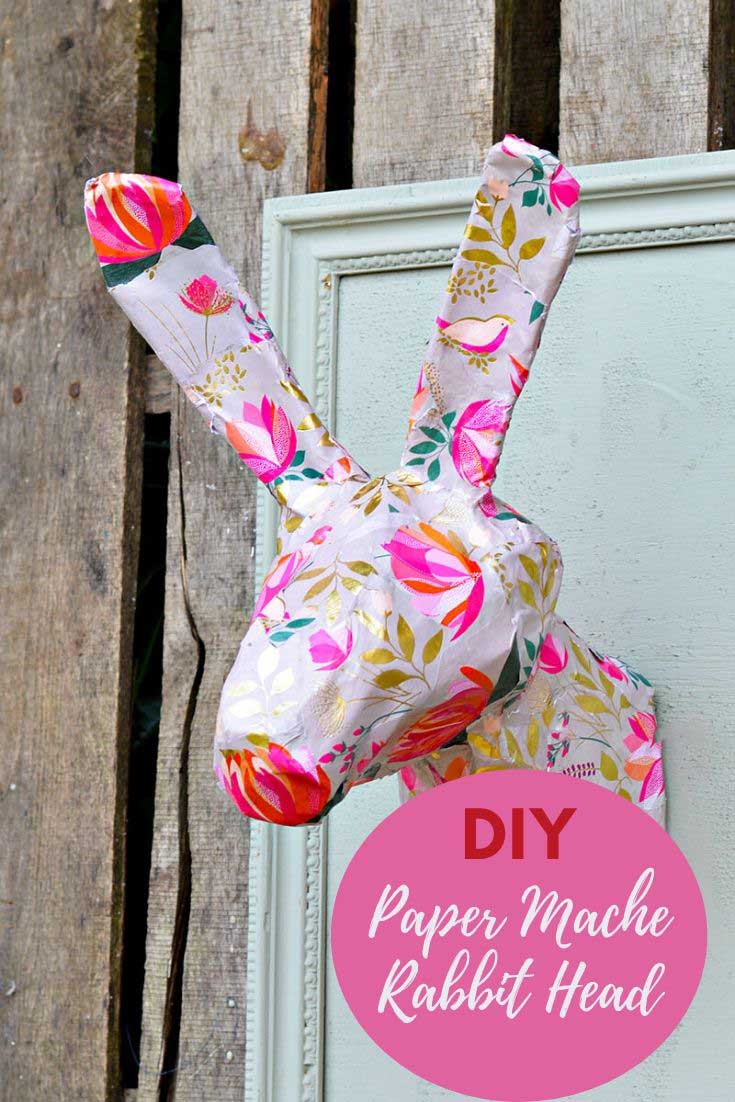
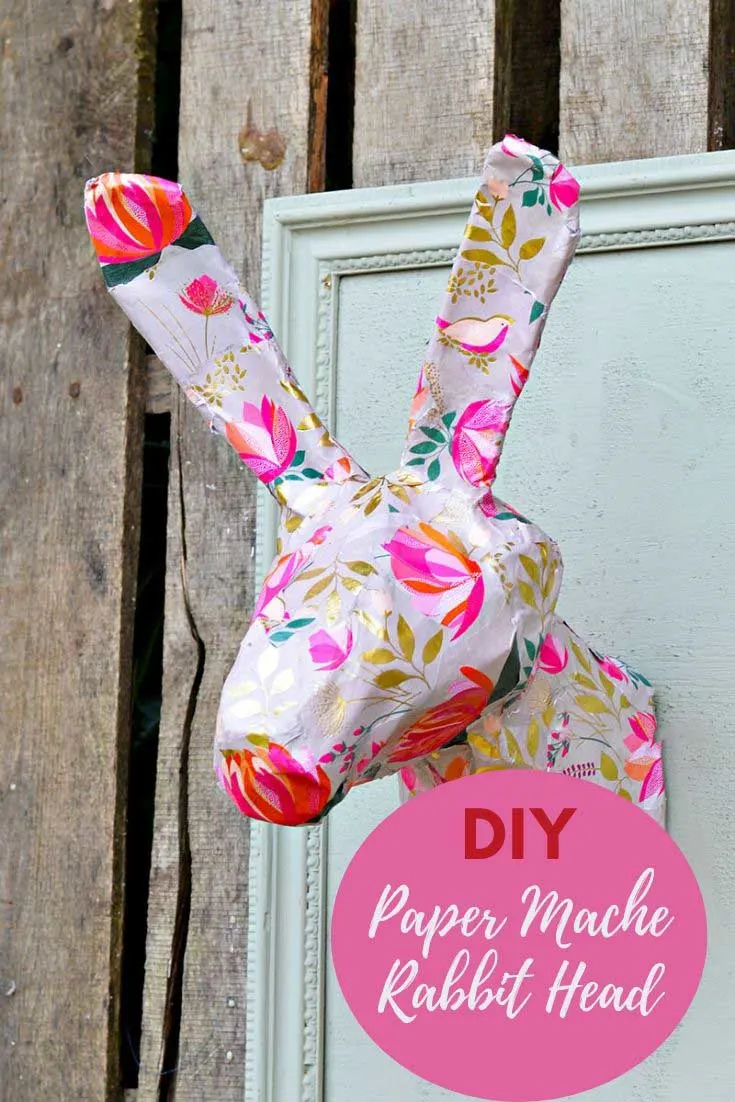
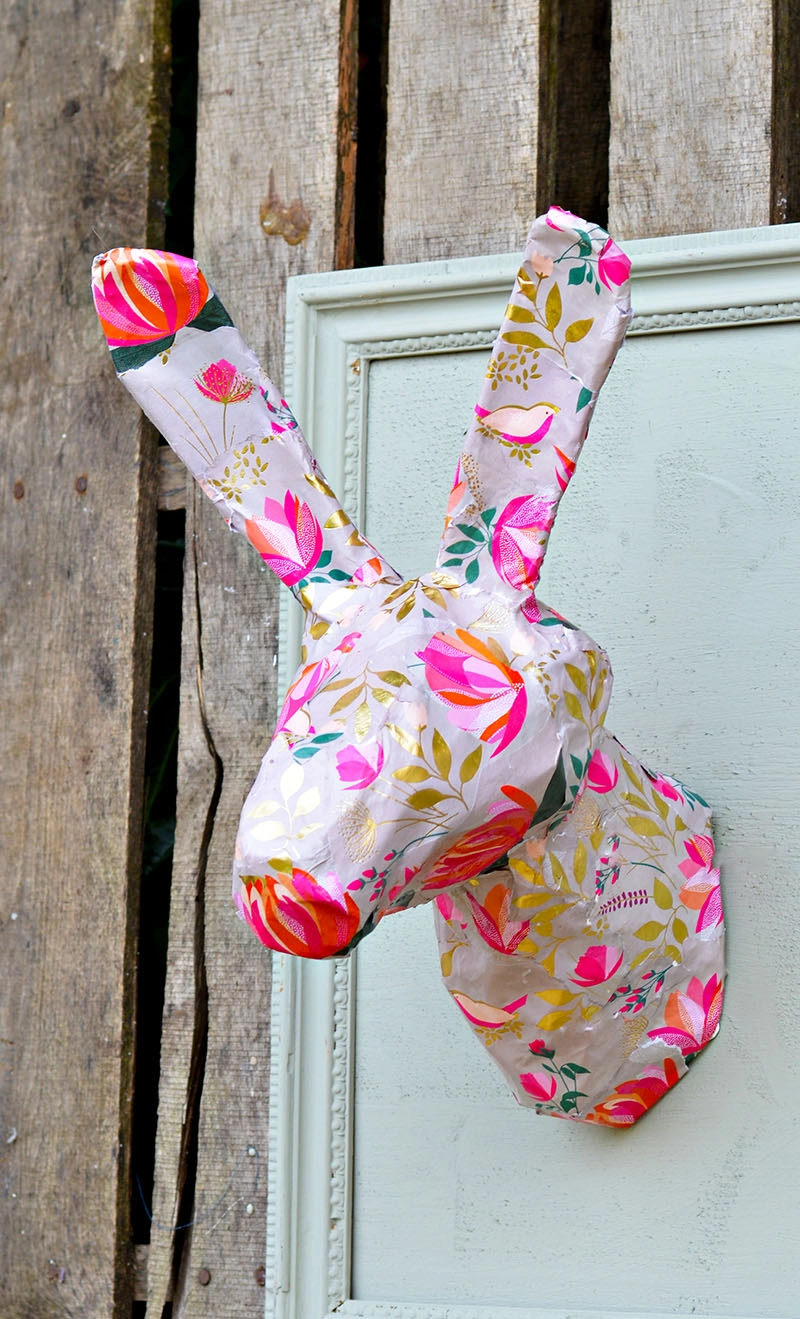
Every time I visit London, I get drawn to Anthropologie. I wander around the shop, swooning over their beautifully crafted homeware. I was taken with their paper mache rabbit head.
The paper mache heads may be gorgeous, but gosh, they are expensive. There were several animal heads in Anthropologie, but I was smitten with the gorgeous spring rabbit head decoration.
As well as saving a lot of money by making my paper mache rabbit head, I could also tweak it to match my decor using paper patterns.
Once I worked it out, the rabbit head was quite simple. If you are not into rabbits/bunnies, you could use the same method to make any animal head you want. Flamingoes are very popular now, and stag heads always look good.
I already have two stags head decorations on my wall my DIY fabric stags head and my LED deer, so a rabbit head makes a nice change.
We’re a participant in the Amazon Services LLC Associates Program, an affiliate advertising program designed to provide a means for us to earn fees by linking to Amazon.com and affiliated sites. As an Amazon Associate, I earn from qualifying purchases.
Tutorial For A Paper Mache Rabbit Head
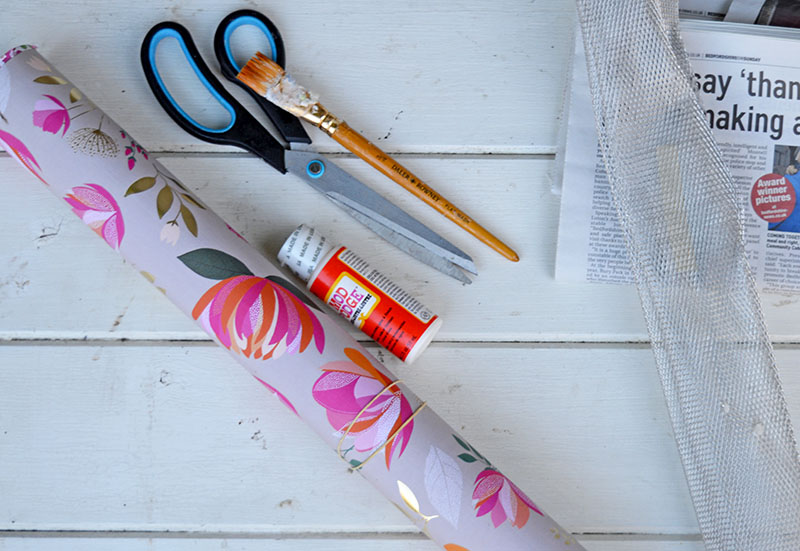
What You Need
- Craft aluminium wire mesh is fantastic; it’s like fine chicken wire.
- Old newspapers
- White school glue / PVA glue
- Mod Podge
- Glue brushes
- Gesso (optional)
- One sheet of pretty floral wrapping paper – My paper was by Sara Miller, and I got it from John Lewis in the UK. If you aren’t in the UK or near a John Lewis store, many gorgeous spring gift wraps are in the shops. I’m sure you’ll find one you love.
How To Make The Paper Mache Rabbit Head
I made this paper mache rabbit head very similar to my giant paper mache cactus but on a much smaller scale.
Making The Wire Frame
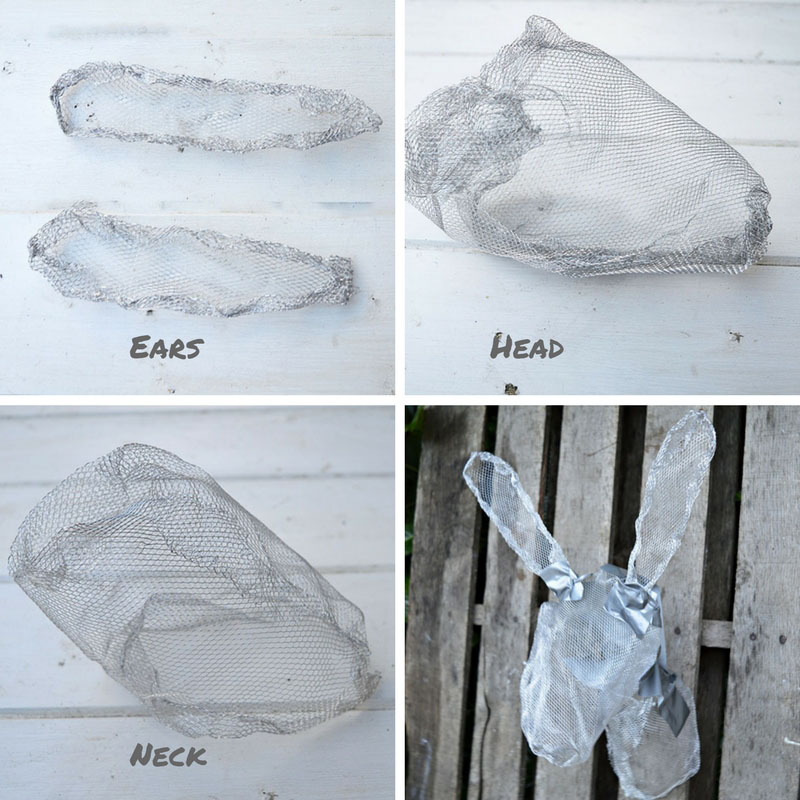

- The first and probably the most tricky bit is making the wireframe. To simplify this, I divided the head into three main sections; the neck, head, and ears.
- The wire mesh is easy to cut, stretch, bend, and shape.
- To make the neck, you will need to shape the wire into a kind of cylinder shape that is smaller at the top and wider at the bottom. As the head will be wall-mounted, the neck will also be much longer at the front than the back for it to hang right. It’s just a case of manipulating the wire mesh until you have the right shape. Holding it against the wall to check that it will hang right.
- The head is more of a cone shape with a flat nose at the front. The ears are just tall and round at the top.
- Once you are happy with the shape of your neck, head, and ears, either tape them together or glue them with a hot glue gun to make your wire complete wire mesh frame.
The Paper Mache
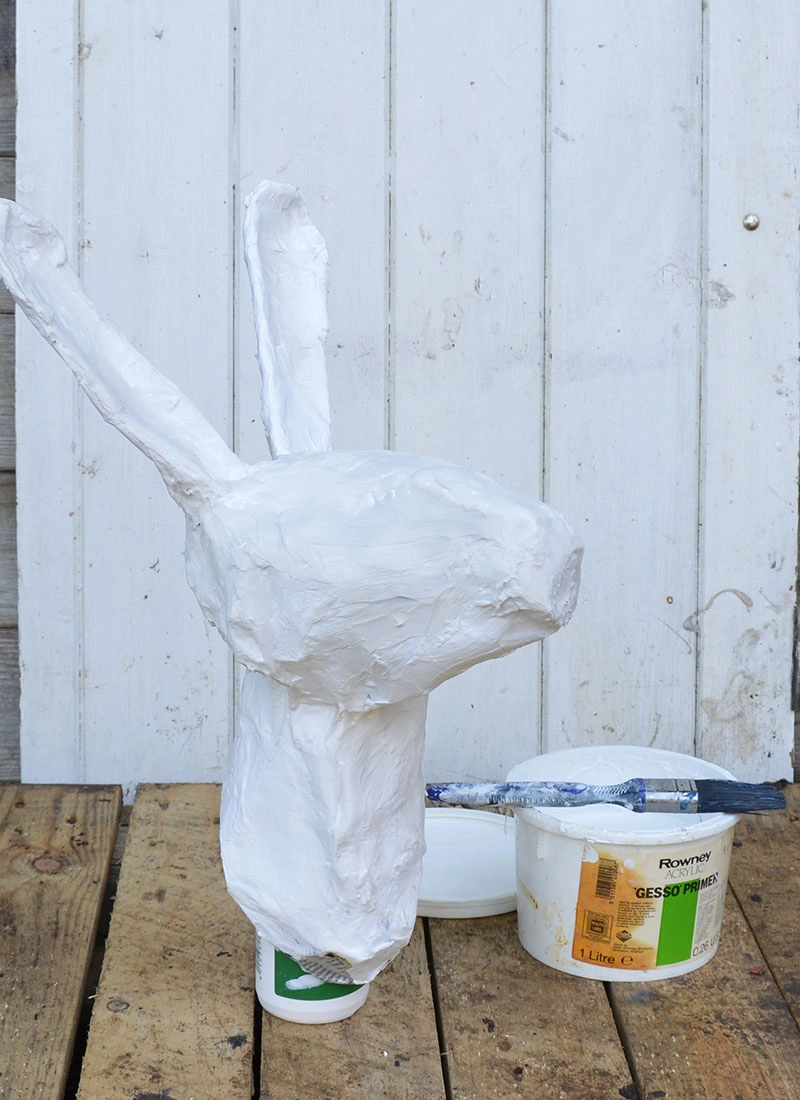
Step 1: Firstly, you’ll notice that your wire structure is challenging to work with as it’s designed to hang on the wall and not to stand up. Sticking it on top of a bottle to support it will be much easier to work with.
Step 2: Paper mache two layers of newspaper onto the wireframe using small strips of newspaper and 50/50 glue to the water mixture. Sticking the first layer of paper is the hardest. Ensure that the paper is fully dry in between layers.

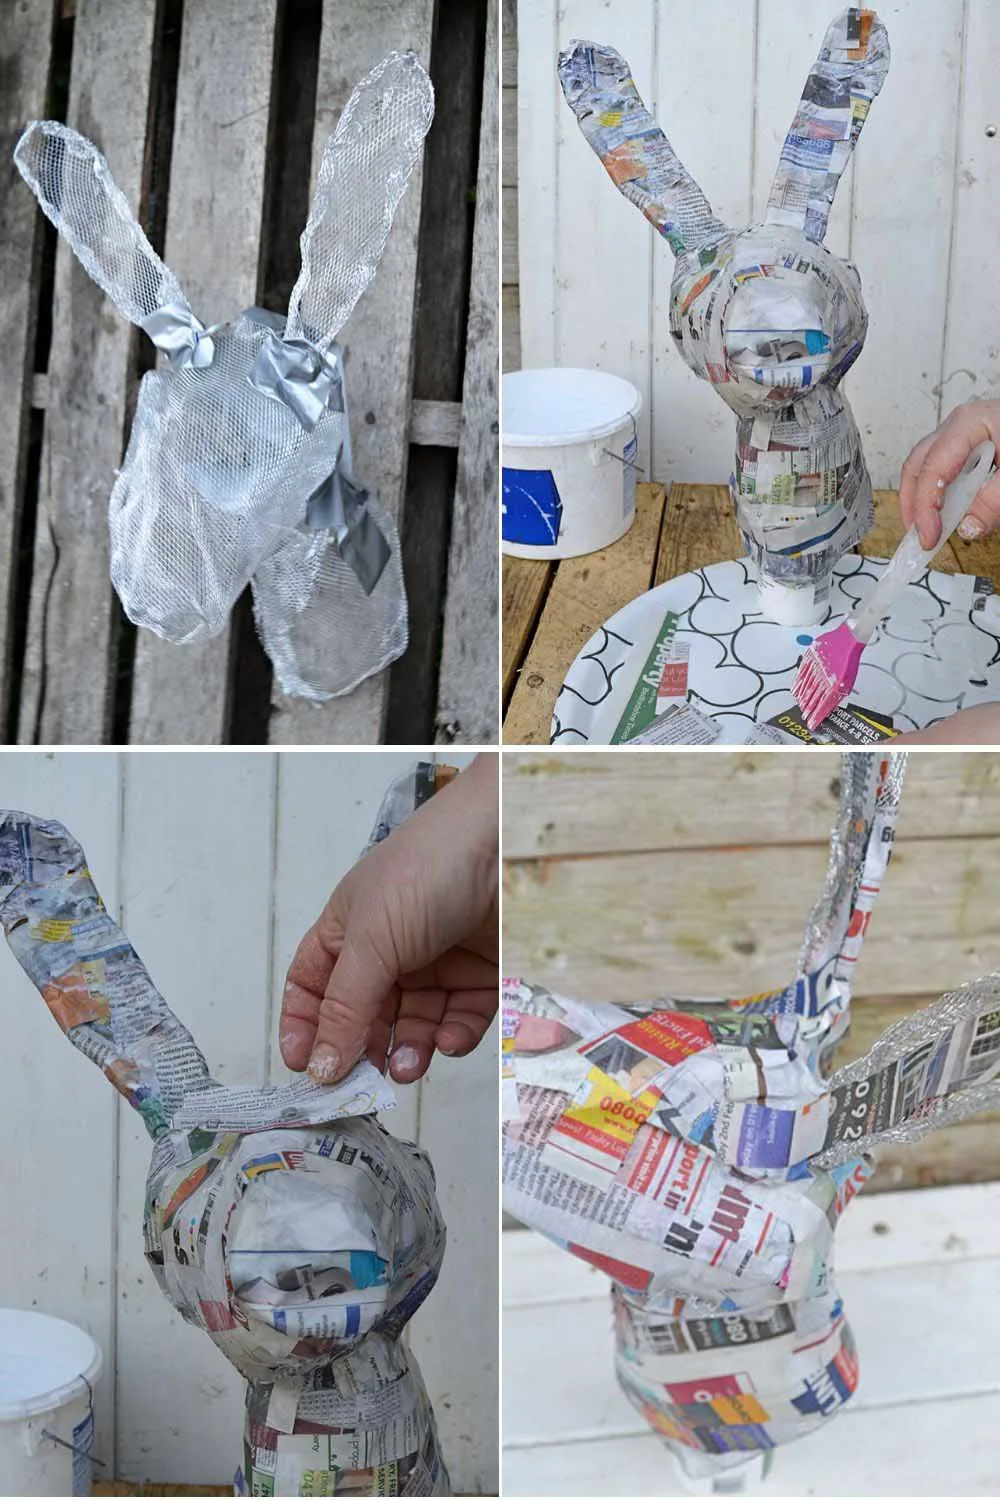
Step 3: Before adding my floral layer of paper, I covered the rabbit head with a couple of layers of gesso. This is optional, but I find it gives a smoother finish.
The gesso also paints the head white, ensuring that none of the newspaper print will show through the final decorative paper layer.

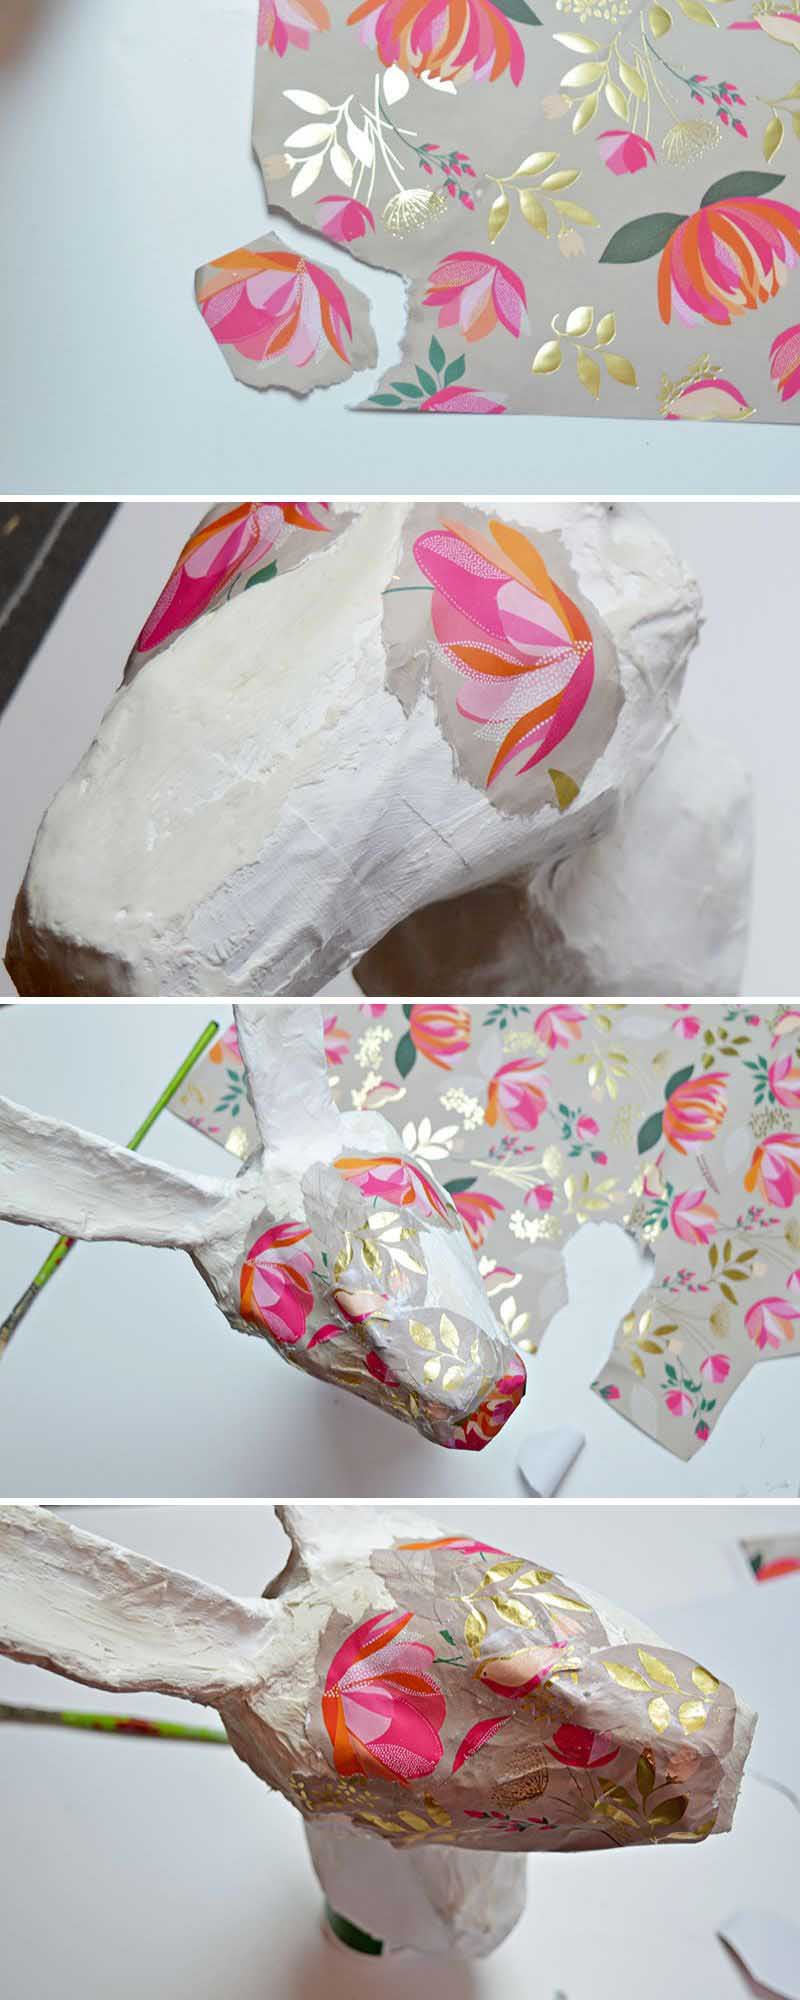
The Final Decorative Paper Layer
Step 4: Apply Mod Podge to the paper and the rabbit’s head to stick the paper onto the model. Don’t cut the paper into strips but tear it into small sections. Tearing the paper will give a more natural feathered edge.
Step 5: I stuck them onto the head first to ensure two identical flowers for the eyes. The rest of the rabbit was covered piece by piece tearing the wrapping paper into sections as I went along.

Step 6: To finish off, I covered the whole head in a layer of Mod Podge to provide a protective finish.
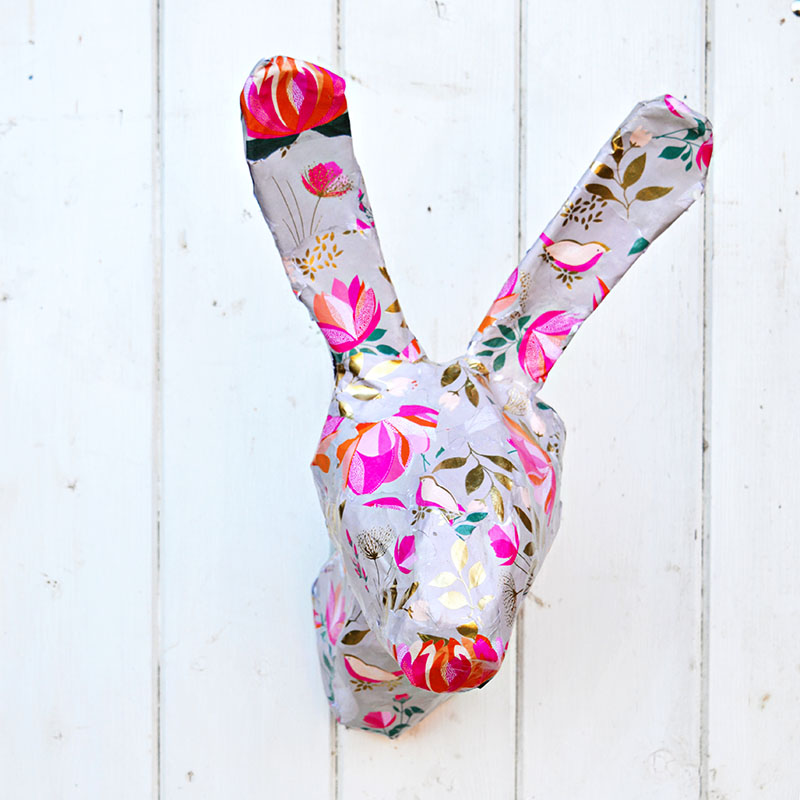
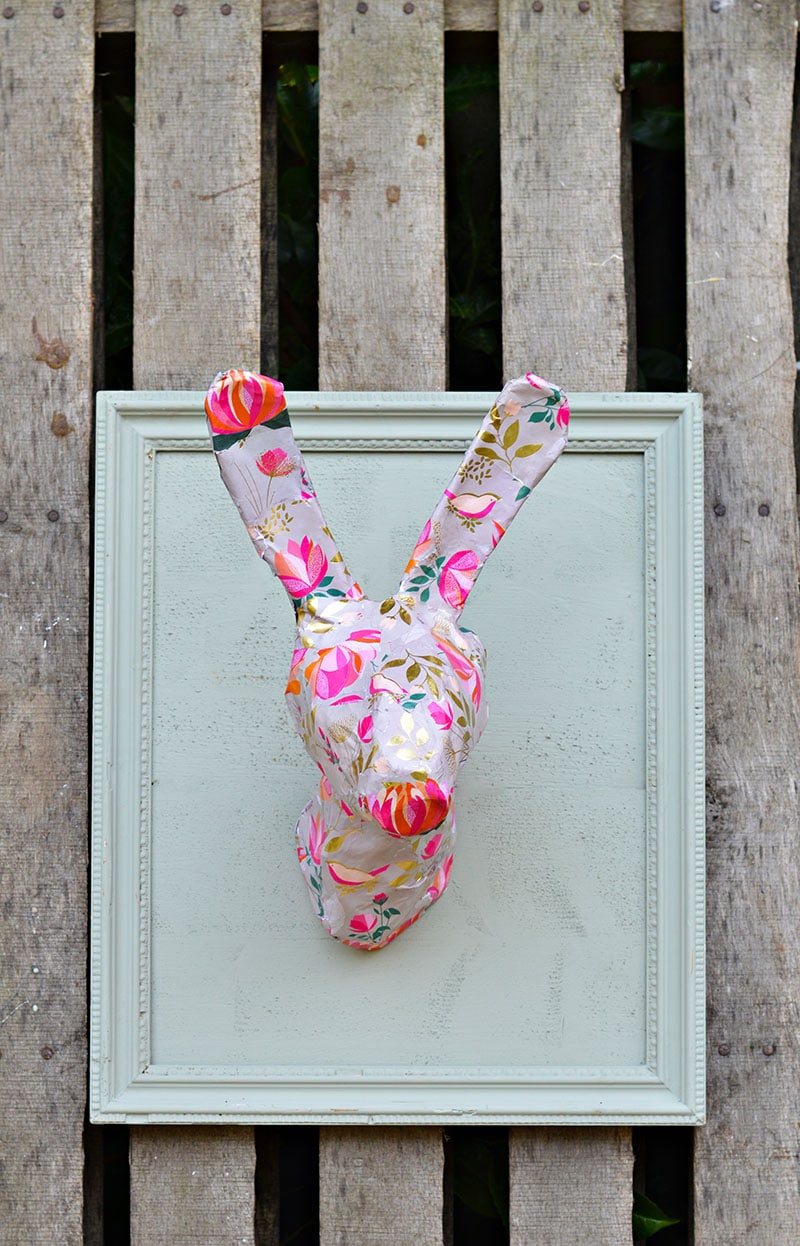
The paper mache rabbit head can easily hang on the wall as it is balanced on a hook. Or you can mount it on a frame and hang it as you see in a trophy room.
Chack out these other bunny rabbit crafts for adults. You’ll find more affordable paper crafts for the home here.


I covered my paper mache rabbit head with gift wrap paper, but there is no reason you couldn’t use fabric for your final layer. Use fabric mod podge to stick and seal it if you use the material. Or you can use paper napkins for the last layer, just like I did with these paper mache teacups.
This would be a fun Easter craft with kids; once you’ve helped them with the frame, they could do the paper mache bit. From experience, I know kids love paper mache; it was one craft my boys enjoyed.
My son still has the giant paper mache cactus in his room that we made a couple of years ago.
If you want more Adult spring/Easter crafts, I have made a cute upcycled spring bunny and duck embroidery for the mantle. If wall hangings are more your thing, check out this blue tit egg wreath or this Marimekko spring wreath.
Pam
Thursday 11th of May 2023
Could I paint it rather than collage it….great tutorial, many thanks.💕
Claire Armstrong
Thursday 11th of May 2023
Yes it would be just as easy to paint as to collage. Perhaps do a white undercoat first.
Sally in St Paul
Wednesday 15th of February 2023
Wow, that's a really fun-looking project and a great looking piece of decor!
Claire Armstrong
Thursday 16th of February 2023
Thank you, it was fun to make and does turn heads!
How To Make A Fabric Stags Head With Free Pattern - Pillar Box Blue
Monday 11th of September 2017
[…] You may like some of my other fabric decorations: Homemade fabric birdhouse Spring Fabric Birdcage Anthropologie Rabbit Head amzn_assoc_placement = "adunit0"; amzn_assoc_search_bar = "true"; […]
Monicque Olwage
Tuesday 28th of February 2017
We definitly will make for the grandchildren. It such a fantastic idea. Thanku.
Claire Armstrong
Tuesday 28th of February 2017
Thank you, have fun making it with them.
Sam @ Raggedy Bits
Tuesday 28th of February 2017
Your little rabbit head turned out so cute Claire! I love the paper that you used!
Thank you for sharing your very sweet project with us over at Waste Not Wednesday!
Claire Armstrong
Tuesday 28th of February 2017
Thank you so much.