
Inside: Embrace your crafty side with our DIY Fabric Stag Head tutorial, including a free pattern for a fun and charming addition to your wall decor.
Why settle for typical wall decor when you can enter the fun and quirky world of faux taxidermy? With a touch of fabric, a sprinkle of creativity, and a dash of patience, you can bring a rustic yet chic vibe to your interiors.
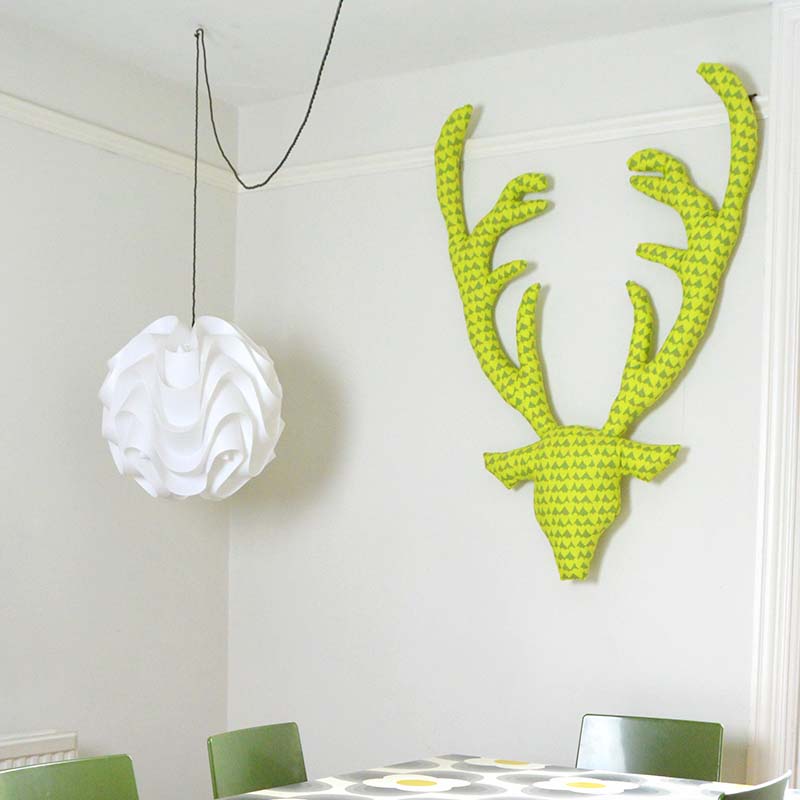
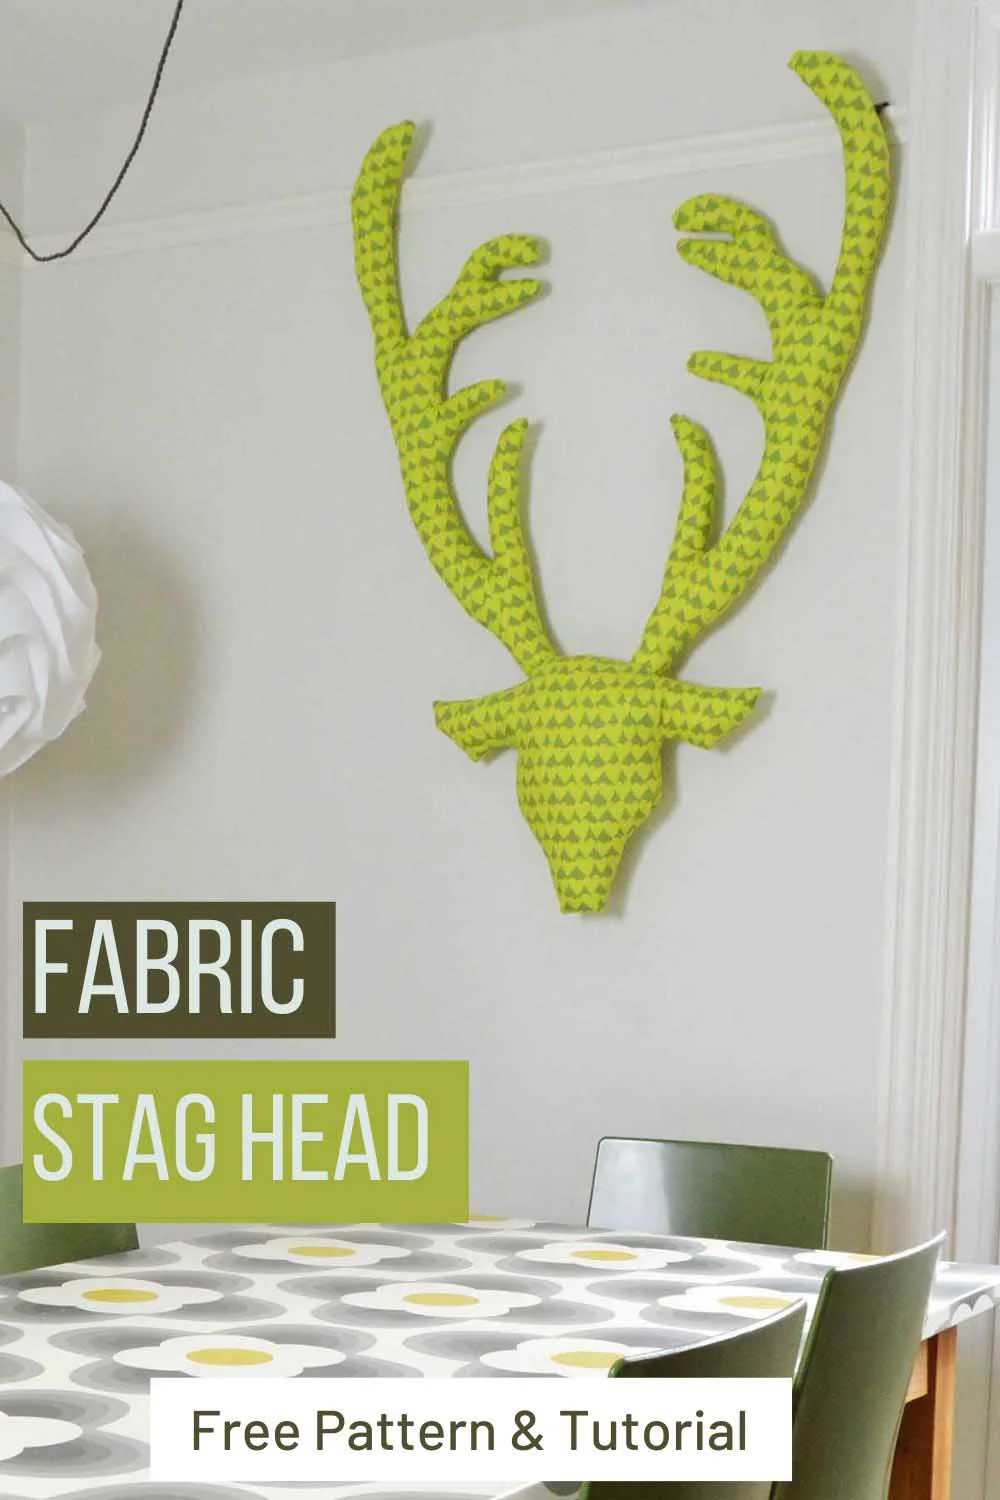
Our DIY Fabric Stag Head is the perfect project to get started! Who knew faux taxidermy could bring charm and personality to your walls?
Choosing Fabric for Your Stag Head
Choosing the suitable fabric for your DIY Fabric Stag Head is where the real fun begins. This is your chance to inject your personality and style into the project.
You can go bold with vibrant, patterned fabric, creating an eye-catching piece that stands out on your wall. Think funky geometric designs, charming floral prints, or trendy animal patterns.
Alternatively, you can opt for subtler, solid colours or textured fabrics for a more understated yet equally stylish effect. The beauty of this project is that it’s completely customizable. Whether your aesthetic is modern chic, vintage-inspired, or delightfully eclectic, you can select a fabric that brings your fabric stag head to life in a way that complements your interior décor.
We’re a participant in the Amazon Services LLC Associates Program, an affiliate advertising program designed to provide a means for us to earn fees by linking to Amazon.com and affiliated sites. As an Amazon Associate, I earn from qualifying purchases.
What You Need to Make Fabric Deer Head
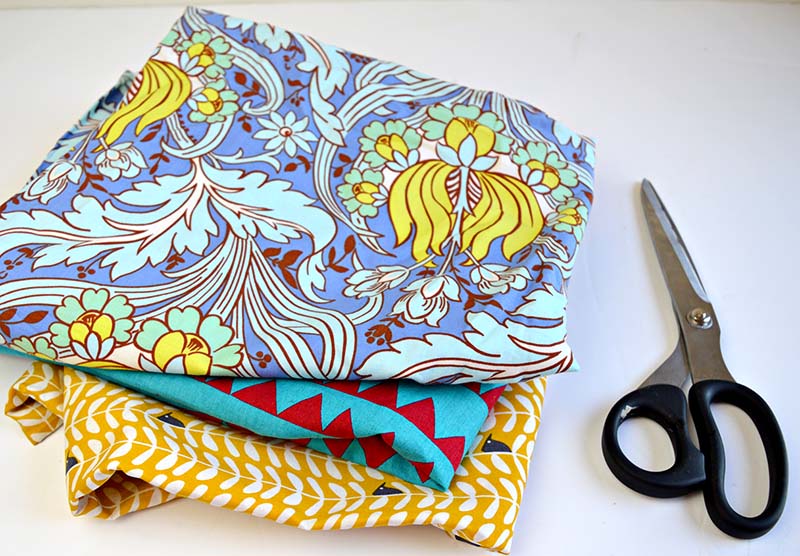
- You can use any cotton fabric of your choice. You may want a suitable fabric year-round or a more seasonal-themed fabric if it is a Christmas decoration. The material needed will range from 1/2 a metre for a small stags head and a metre for a large head. The fabric I used for the tutorial was an old half-metre of Amy Butler from my stash.
- Pattern: You can download my crude outline of a stag’s horn and head here Stag Pattern. This pattern should be a guide; you can make the head your preferred size. When deciding what size to make your fabric stags head, remember that the smaller you make it, the harder it will be to stuff the horns and turn them right side out after stitching.
- Fiber Fill
- Pen, scissors, needle and thread. A knitting needle or chopstick is needed to help push the stuffing into the far corners of your antlers.
- Sewing machine, but this project can be stitched by hand. It will just take a little longer.
How to Make a Fabric Stag Head
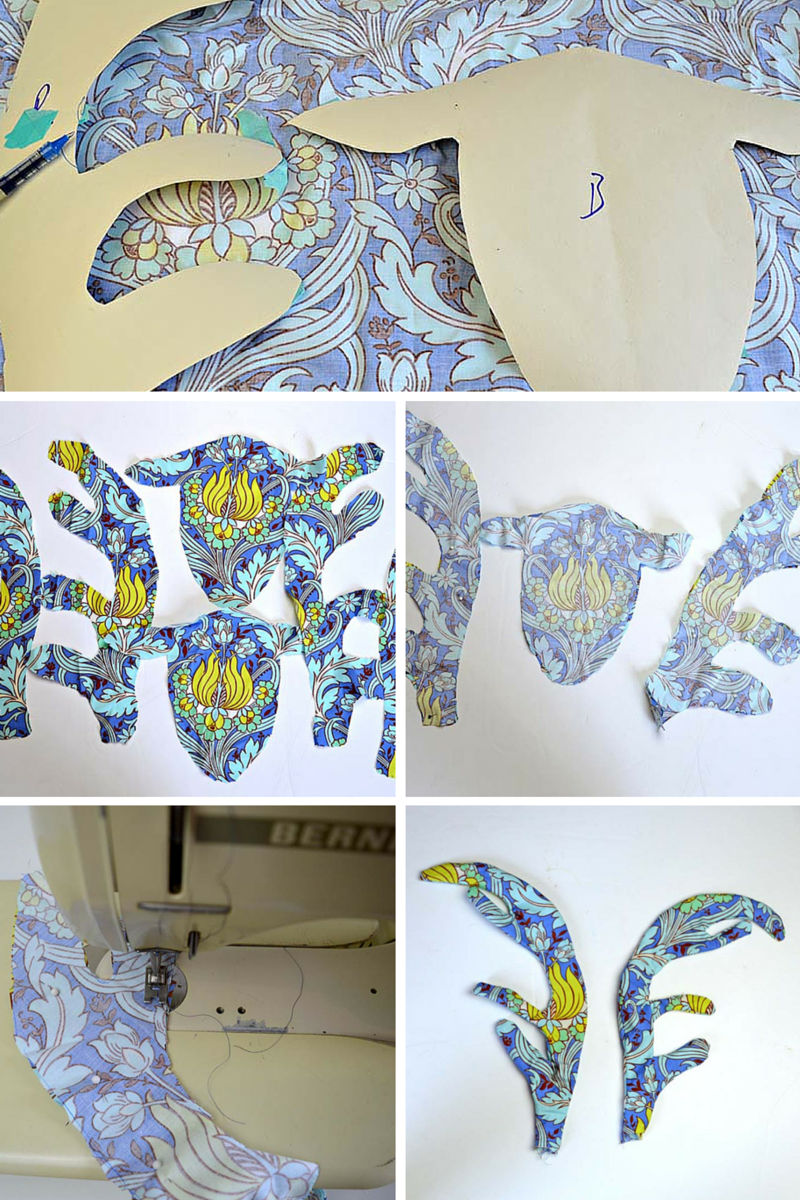
Step 1: Cut out your paper templates for your antlers and head shape. Lay these on the wrong side of your fabric and draw around them.
You will need 4 X antlers, two facing left and 2 facing right. You will also need two 2 X headpieces, one for the front and one for the back.
As well as avoiding as much wastage as possible, you will also want to consider the fabric pattern as you lay out your pieces.
Step 2: Pin the fabric pieces’ right sides facing so that you have two antlers and one head.
Step 3: Using a sewing machine, sew around the antlers using only a 5mm seam edge, and leave the base of the antlers open. Then turn your antlers right side out; you may need the knitting needle to help push out some corners. A small seam edge makes your antlers easier to turn right side out.
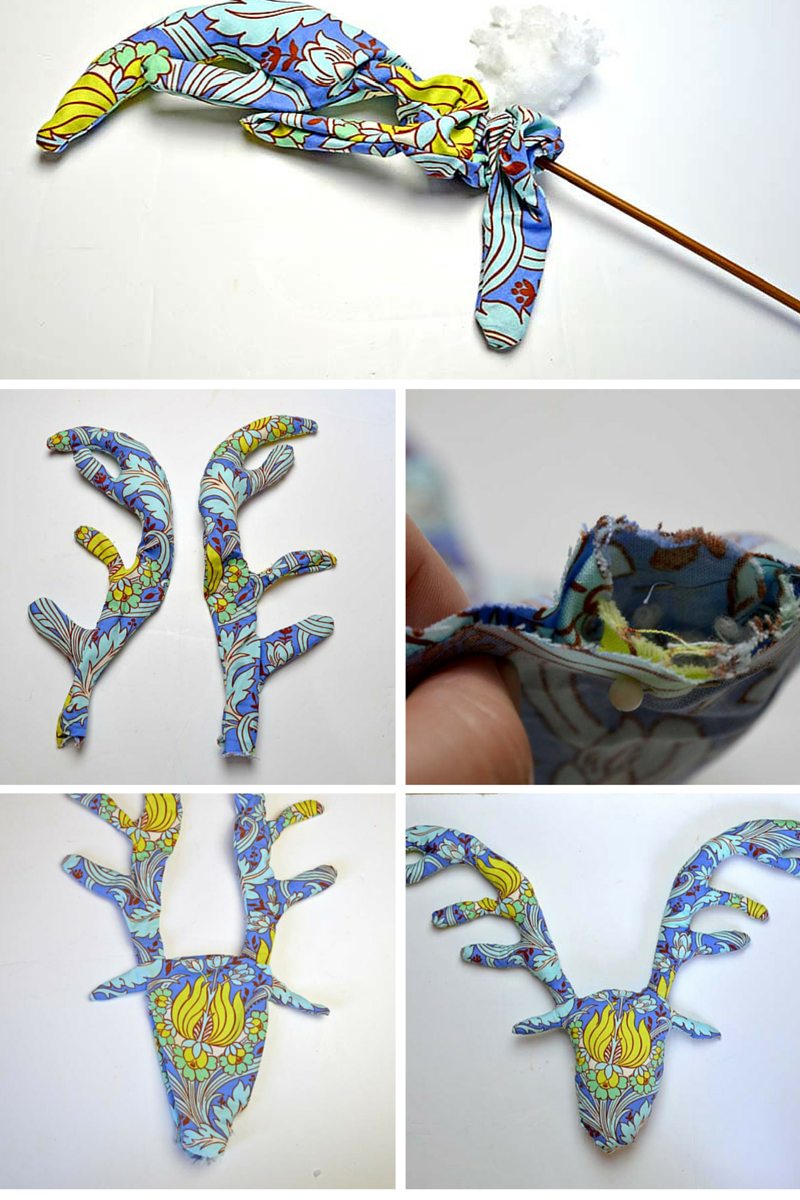
Step 4: Sew your head again with a small seam. This time only sew around the ears and the sides leaving the top and bottom open. Do not turn this right side out yet.
Step 5: Stuff just the top third of each antler. You must push small amounts of stuffing into the far corners using your knitting needle. This is a bit fiddly, but using small amounts of filler at a time helps.
Step 6: To attach the antlers to your head, you need to place these inside your stag head and pin the open edge of the antler to the open edge of the stag head next to the ears.
The right sides of the fabric should be facing. *You must carefully stitch the antlers to the head by hand, ensuring you still have an opening to the antlers.
Step 7: Once the antlers are stitched in place, turn the head right side out and stitch up any remaining gap at the top of the head.
Step 8: Now, you can finish stuffing the antlers and the head. You will do this through the opening at the bottom of the stags head. You will need your knitting needle again to push the stuffing into the antlers.
Step 9: Stitch up the remaining hole in the base of your stag’s head. You may also want to sew three small loops into the back of the stags head, one on the tip of each antler and one on the head. These loops will help with hanging your stag head on the wall.
Conclusion and More Animal Craft Ideas
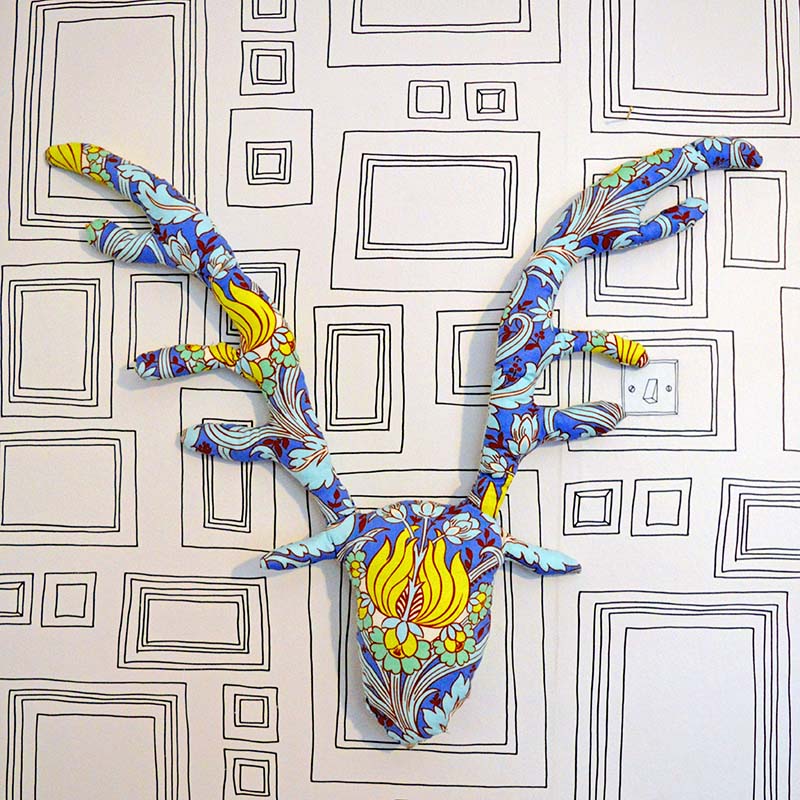
*Since posting this, my friend has pointed out that I have sewn the antlers the wrong way round (facing out instead of in) on the Amy Butler stags head above. I don’t think it matters which way around you have the antlers; they work either way. So you can sew them either way, whichever suits your space and preference.
I’ve got some more lovely fabric, so I think I’ll make more fabric stag heads to adorn my walls. I’m even considering designing another animal head to make in material, but I’m not sure which one yet.
However, I think the fabric chosen for the stag above fits in with the mid-century vibe of the table and other decorations.
This would be a fun Christmas sewing project idea if you use a festive fabric like a red tartan fabric. They are a great idea for a craft to make and sell for Christmas.

You may like some of my other fabric decorations:
Homemade fabric birdhouse
Spring Fabric Birdcage
Anthropologie Rabbit Head
And these faux taxidermy denim moths.
If you love deer/stag decorations, you’ll find a pattern for antlers among these string art ideas. And here are some wonderful Public Domain reindeer drawings.
50+ DIY Christmas Wall Decor Ideas for 2019 that spells out the Christmas joy in the most appropriate way - Saudos
Thursday 24th of October 2019
[…] Cheerful Fabric Stag Head. Instruction at Pillar Box Blue […]
35 Best Christmas Decoration Ideas for 2017 · Dwelling Decor
Thursday 12th of October 2017
[…] Source: pillarboxblue.com […]
Sam- Raggedy Bits
Thursday 14th of September 2017
What a fun project Claire! You come up with the best ideas!!
Claire Armstrong
Thursday 14th of September 2017
Ahh Sam that's really kind of you to say so.
Hanna K.
Tuesday 21st of February 2017
Hi Claire Tolle Dinge machst du. Gute Ideen! Vielen Dank! Viele Grüsse aus Deutschland
Claire Armstrong
Tuesday 21st of February 2017
Thank you !
How To Make A Gorgeous Anthropologie Inspired Rabbit Head - Pillar Box Blue
Thursday 16th of February 2017
[…] and stag heads always look good. I actually have two stags head decorations on my wall my DIY fabric stags head and my LED deer so a rabbit head makes a nice change. *I now have the […]