
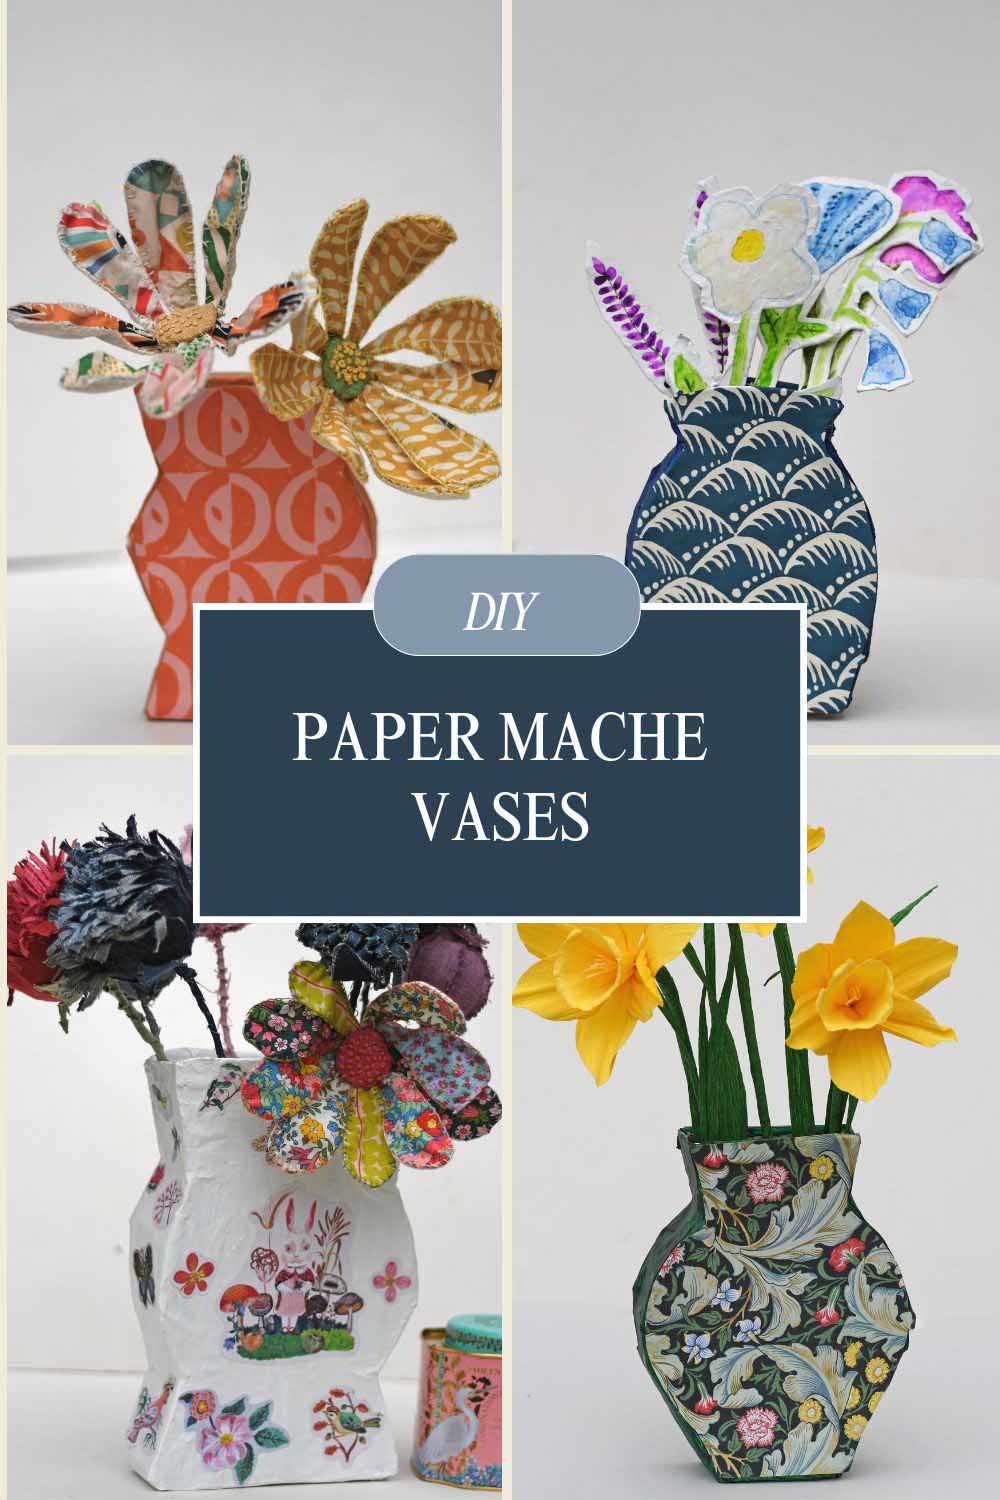
DIY trendy flat paper-mâché vases made from cardboard and paper, finished with decorative patterns for chic, modern home décor.
Recently, I stumbled across some adorable flat vases in an antique shop—you know the kind that stop you mid-scroll (or mid-wander) with their unusual shapes and vintage charm. But the prices? Let’s say I slowly backed away. Still, I couldn’t stop thinking about them. And since I’ve made whimsical paper mache teacups and large decoupage bowls before, I figured—why not make my version of these vases?
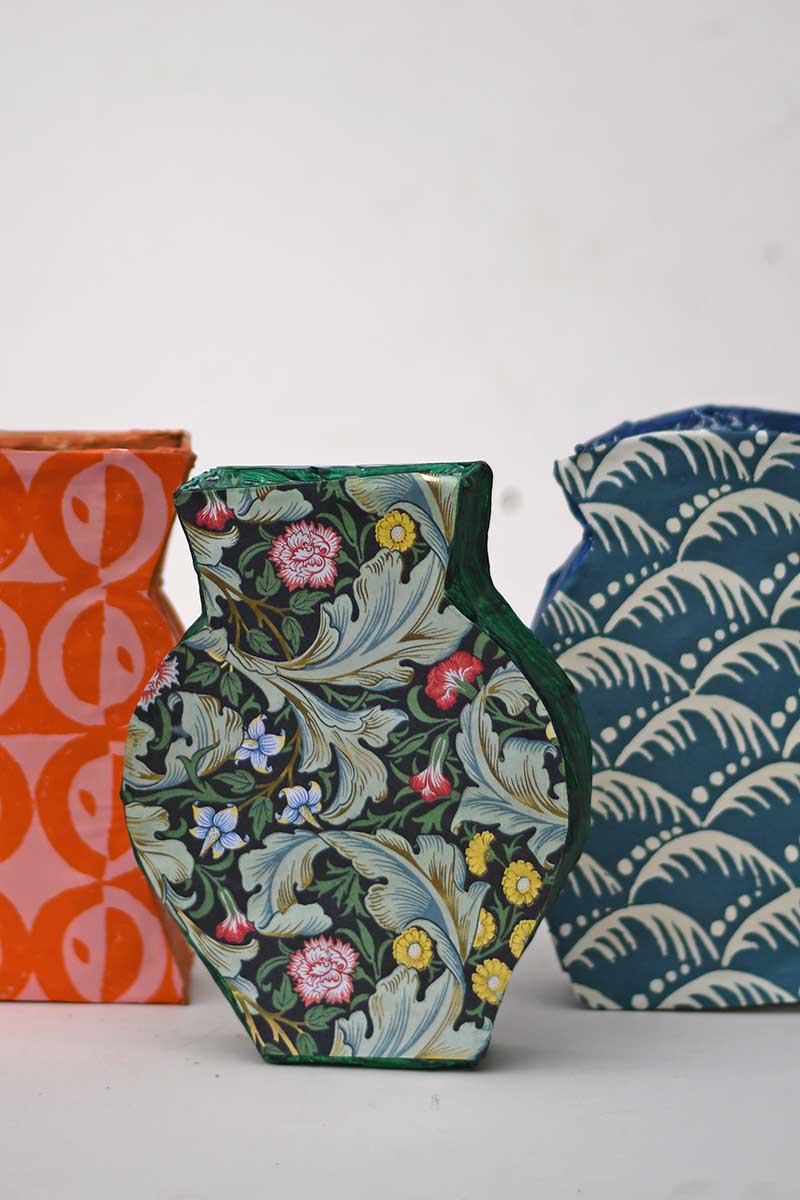
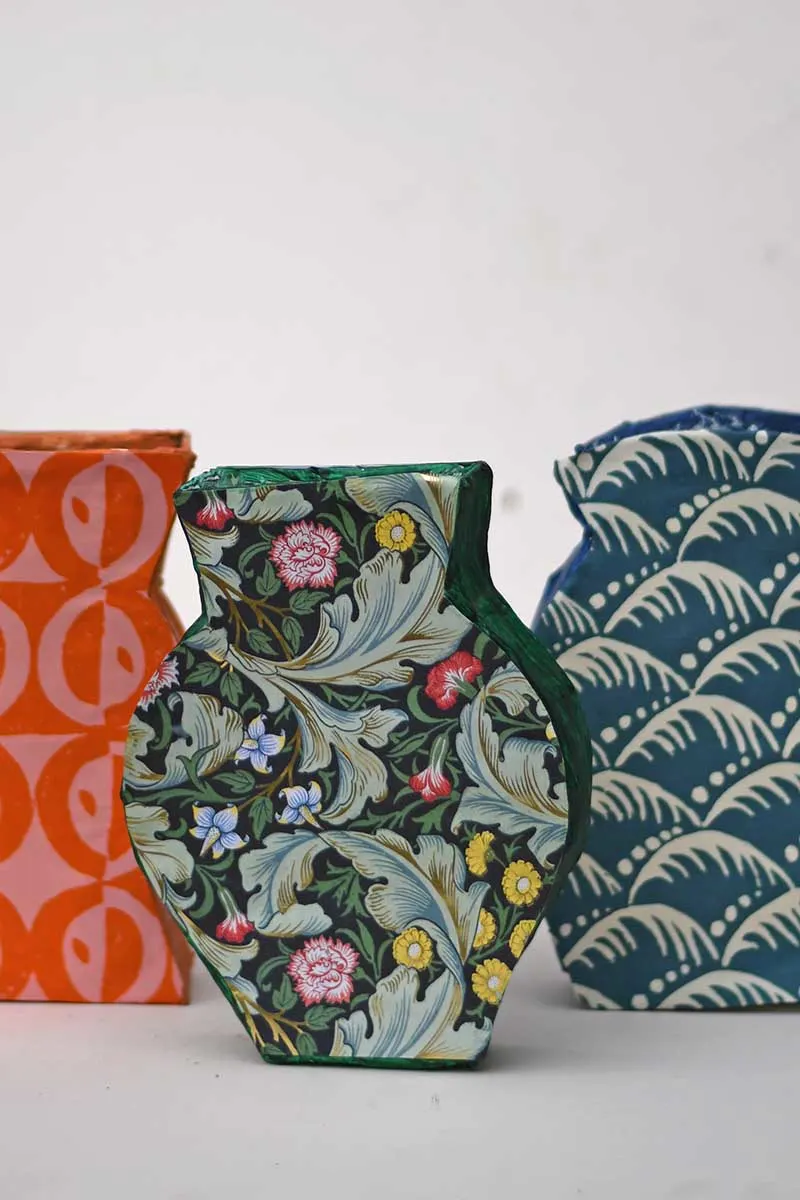
These aren’t your average paper mache pots. They’re flat-fronted (but still 3D), made from cardboard, and covered in patterned paper. They’re a bit quirky, just right for showing off handmade flowers—or even real ones, with a clever little liner trick.
And yes, I’ve created free printable templates so you can make your own.
What You’ll Need
We’re a participant in the Amazon Services LLC Associates Program, an affiliate advertising program designed to provide a means for us to earn fees by linking to Amazon.com and affiliated sites. As an Amazon Associate, I earn from qualifying purchases.
- Free printable vase templates (download below)
- Packaging cardboard (think delivery boxes)
- Scissors or a craft knife
- Masking tape
- Newspaper strips
- White glue (PVA) and water
- Paintbrush
- White gesso (or white acrylic paint)
- Patterned gift wrap or decorative paper
- Acrylic paints for edging
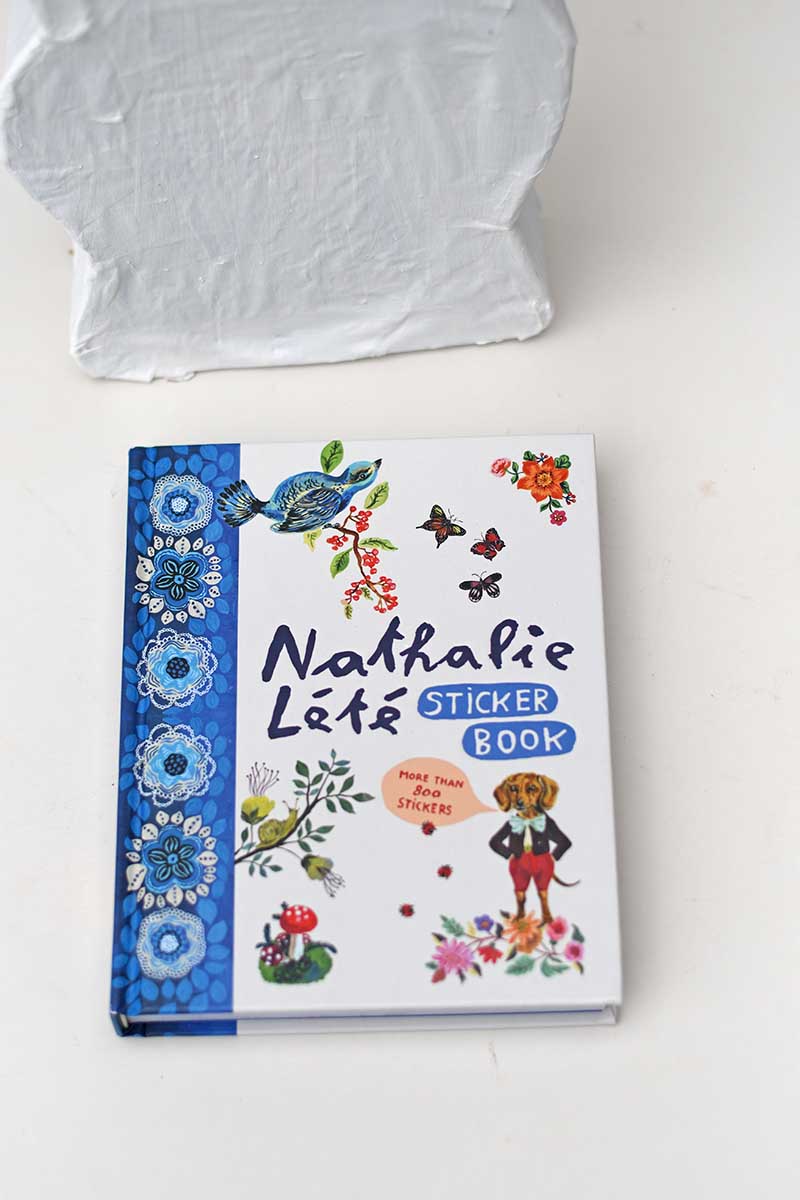
- Optional: fun stickers or collage elements like Nathalie Lété’s Sticker book.
- Zip-lock bag or small container (if you want to use real flowers)
- Small pebbles or gravel (to weigh the base down)
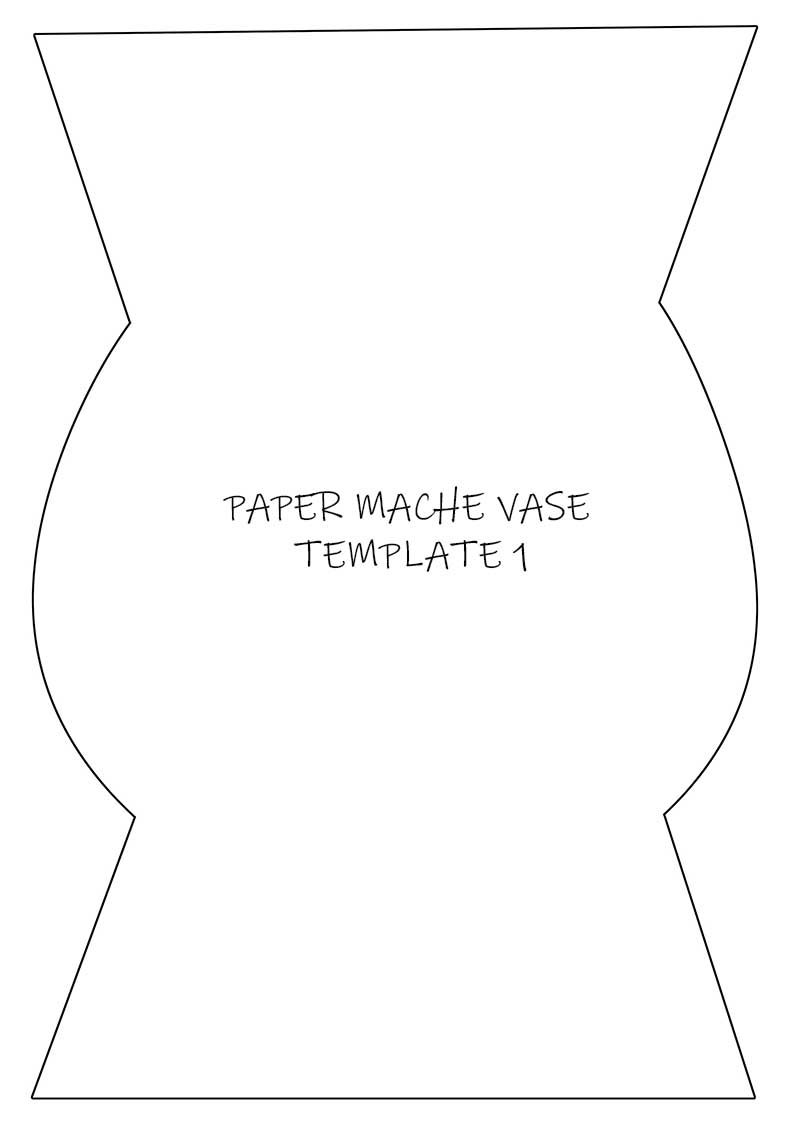
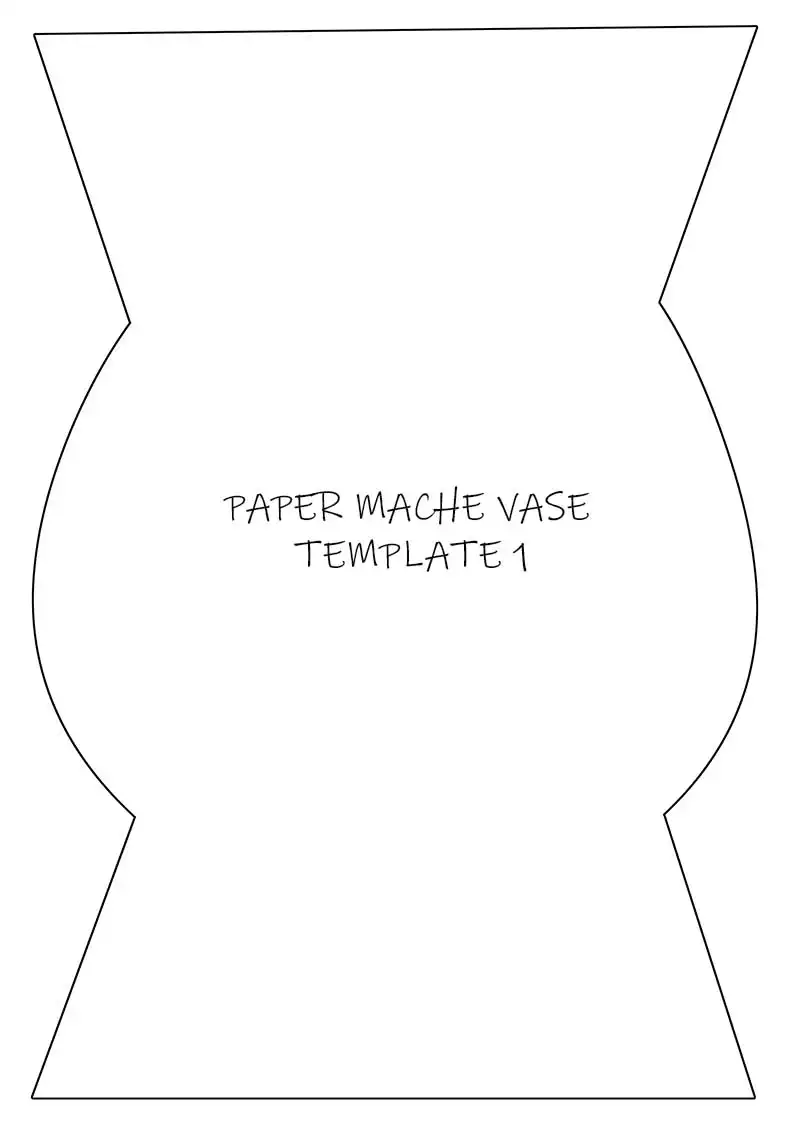
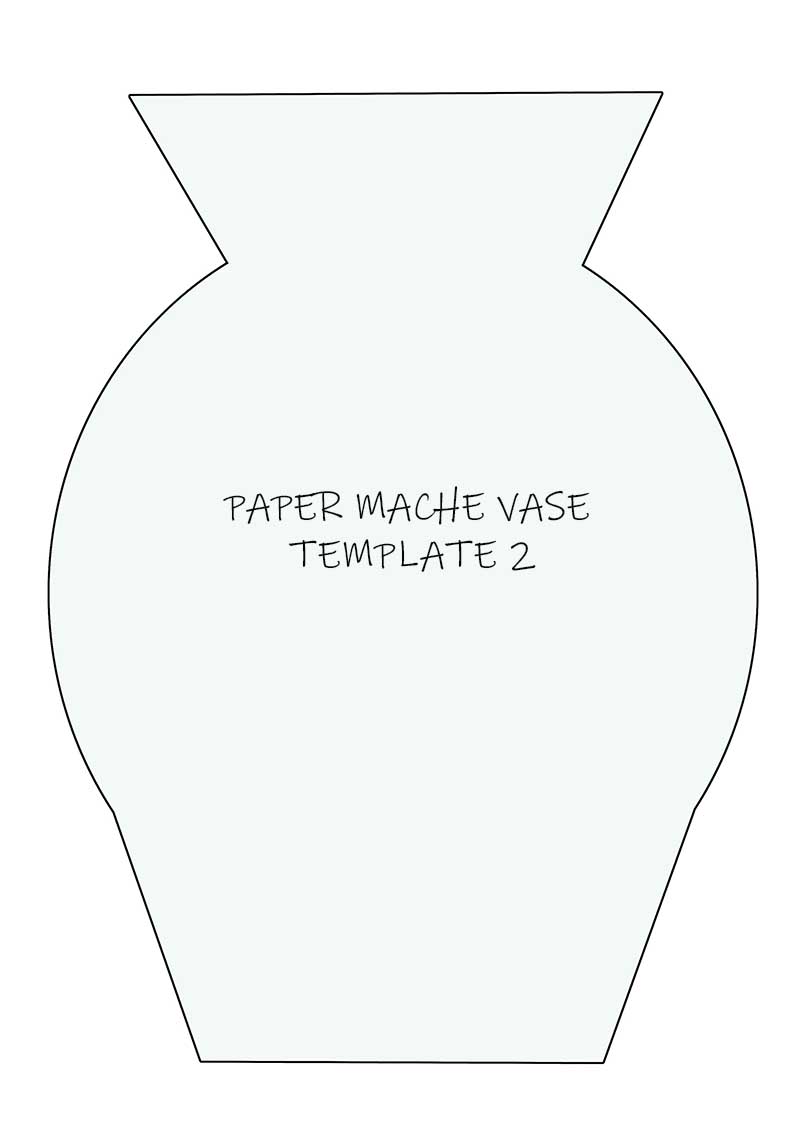
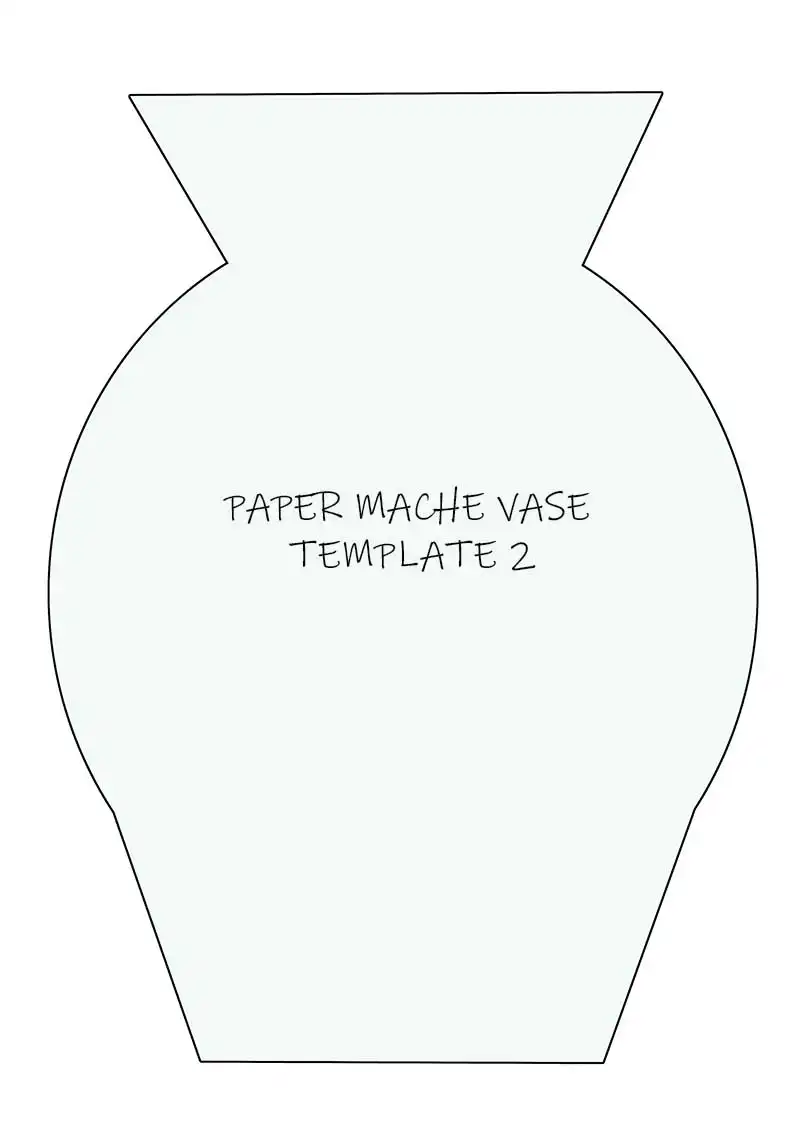
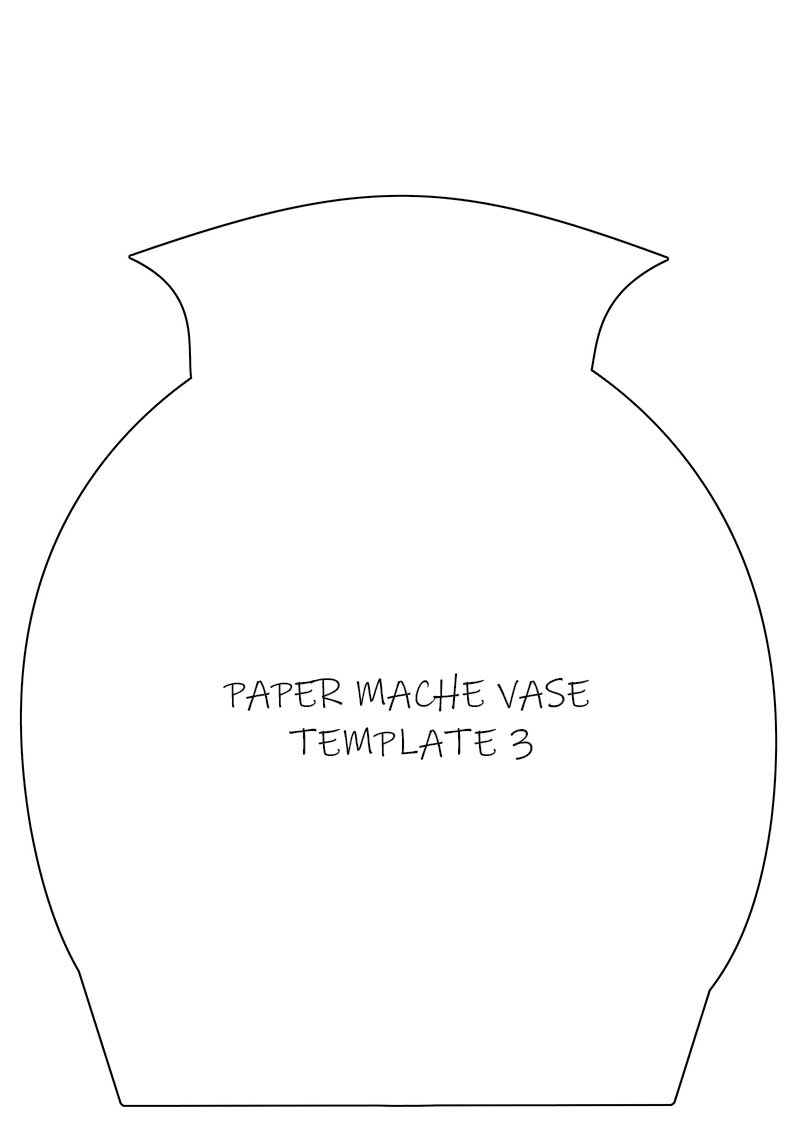
Vase Templates
You can choose from three templates or draw your own. To download a template, click on the title above it.

How to Make Paper Mache Vases
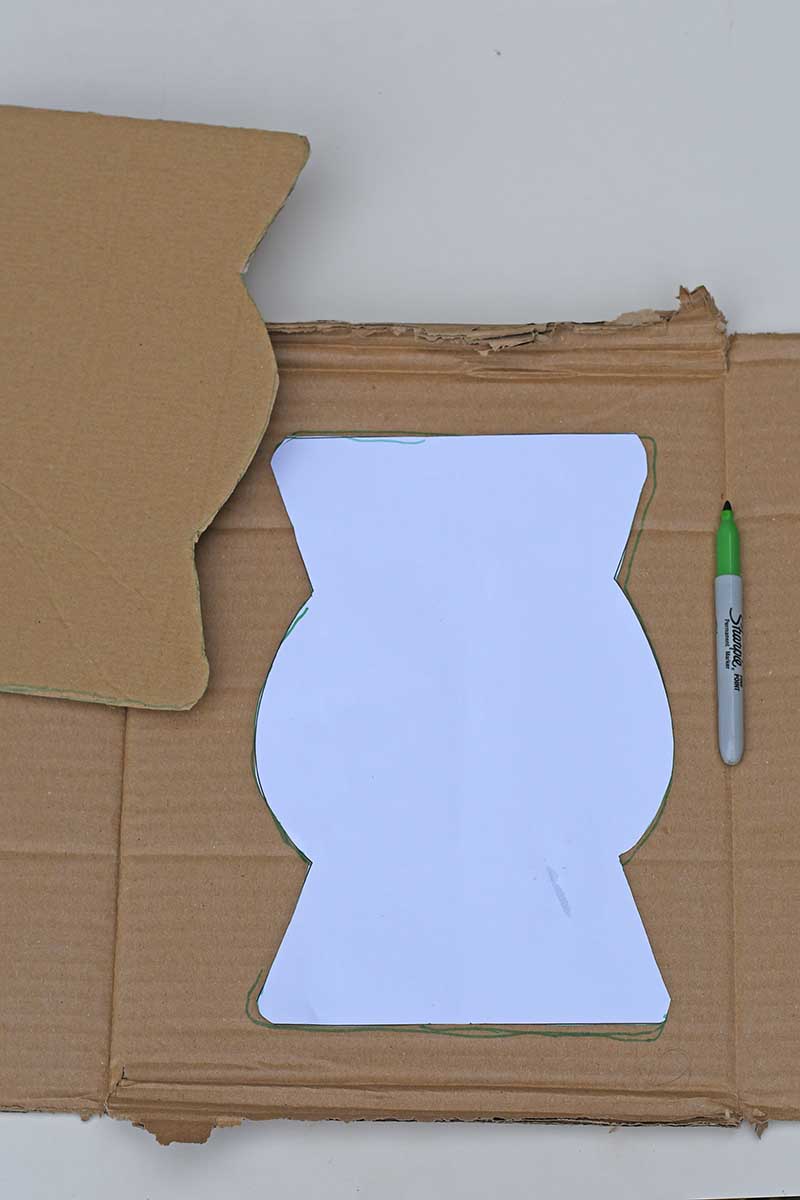
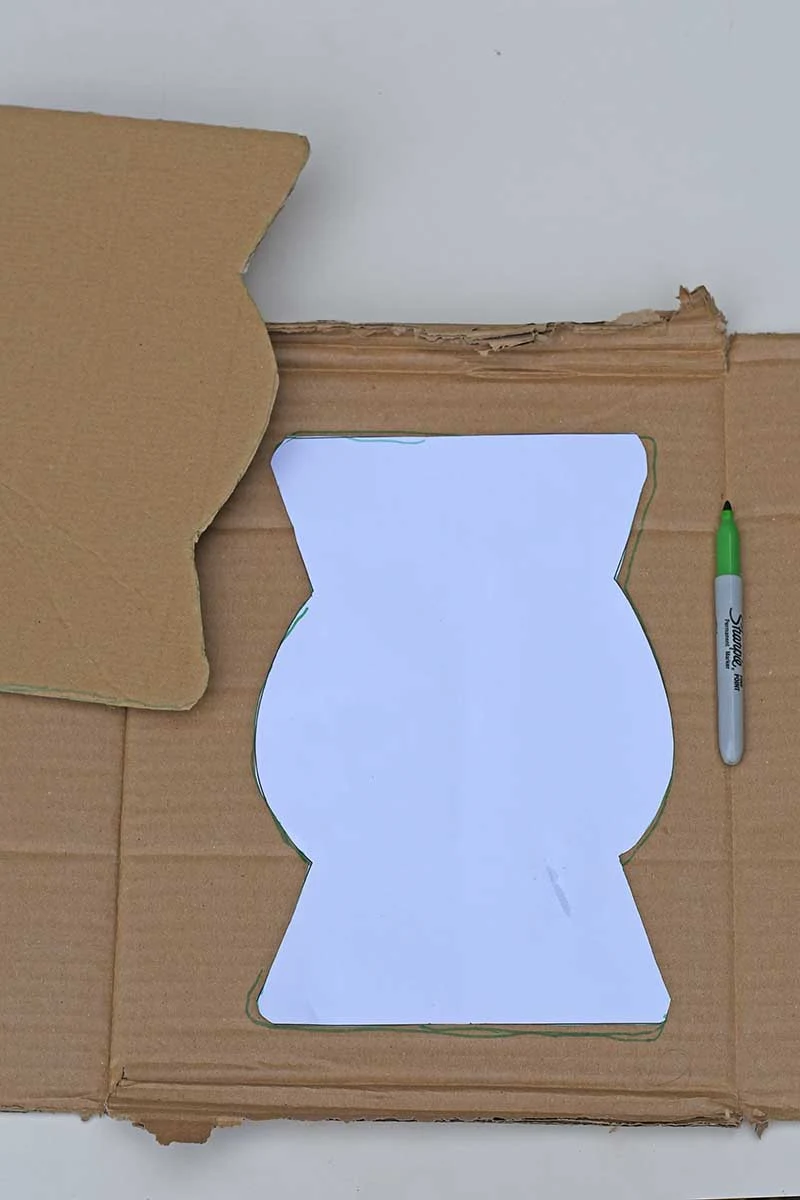
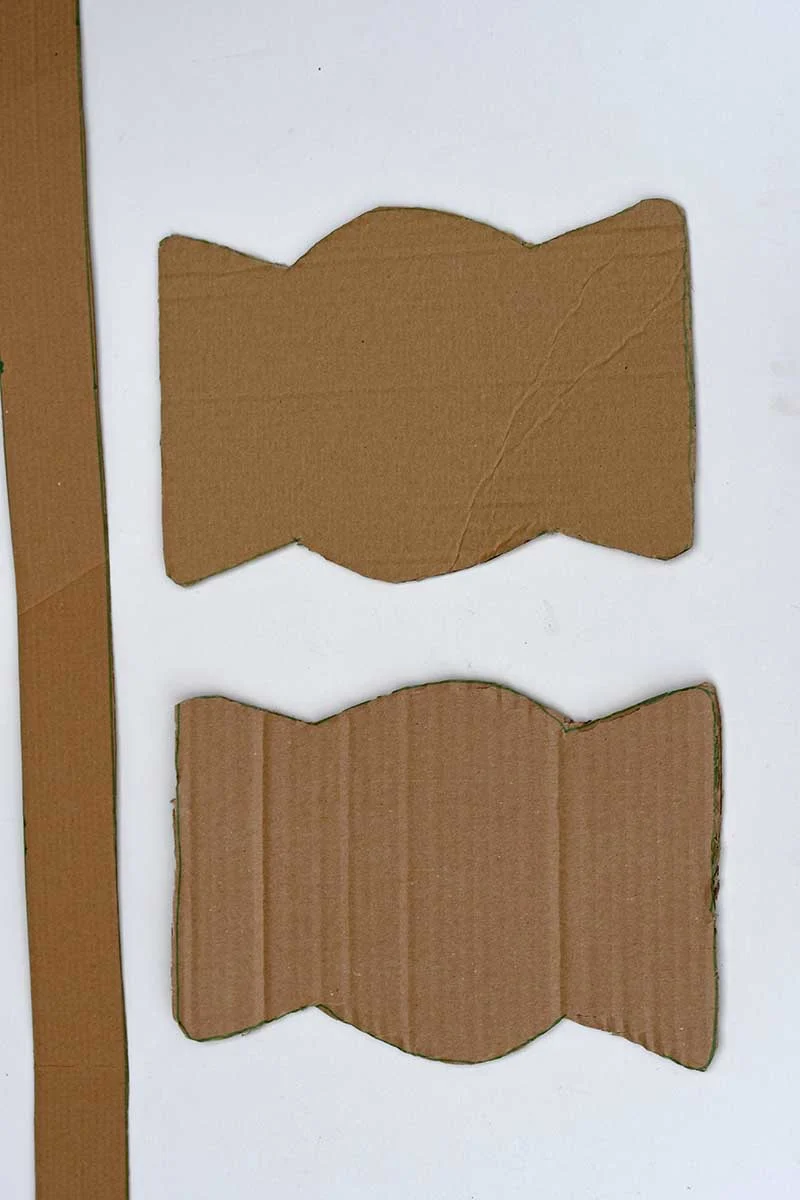
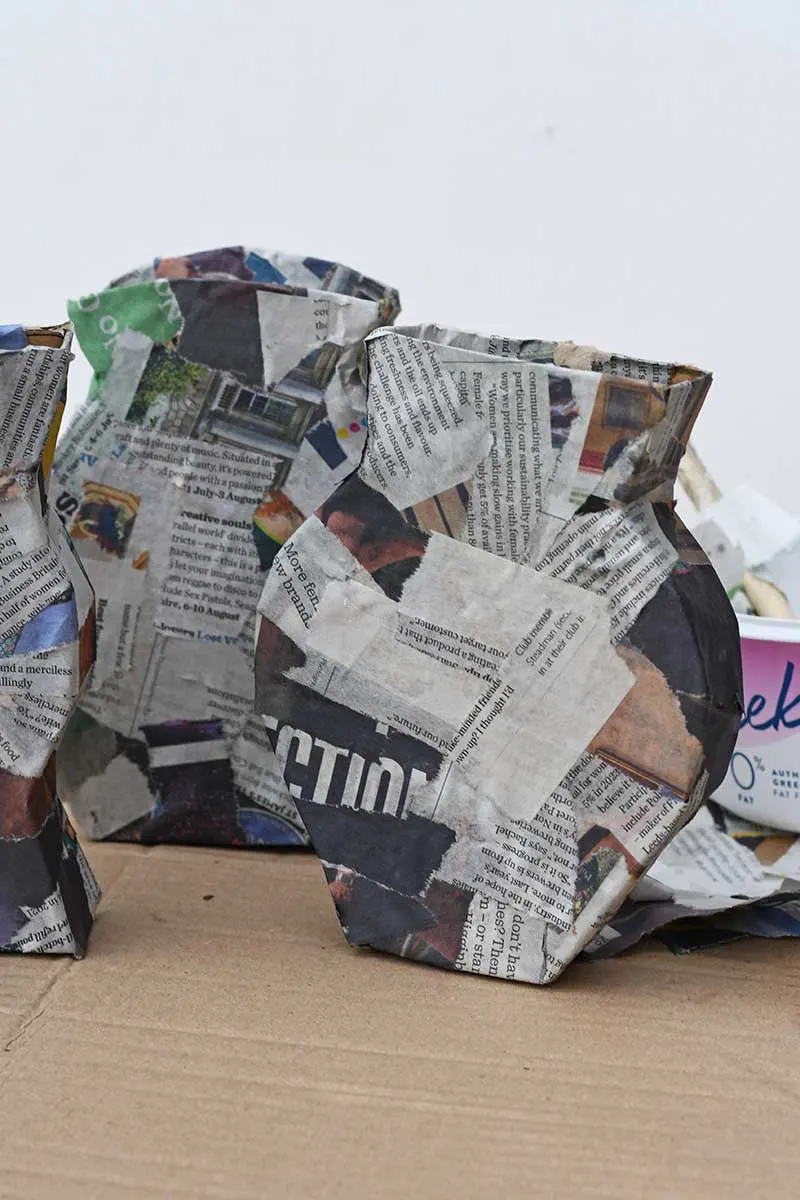
Step 1: Pick a Shape & Cut the Cardboard
Start by printing out the free vase templates (there are three to choose from). I traced them onto cardboard twice, once for each vase (a front and back).
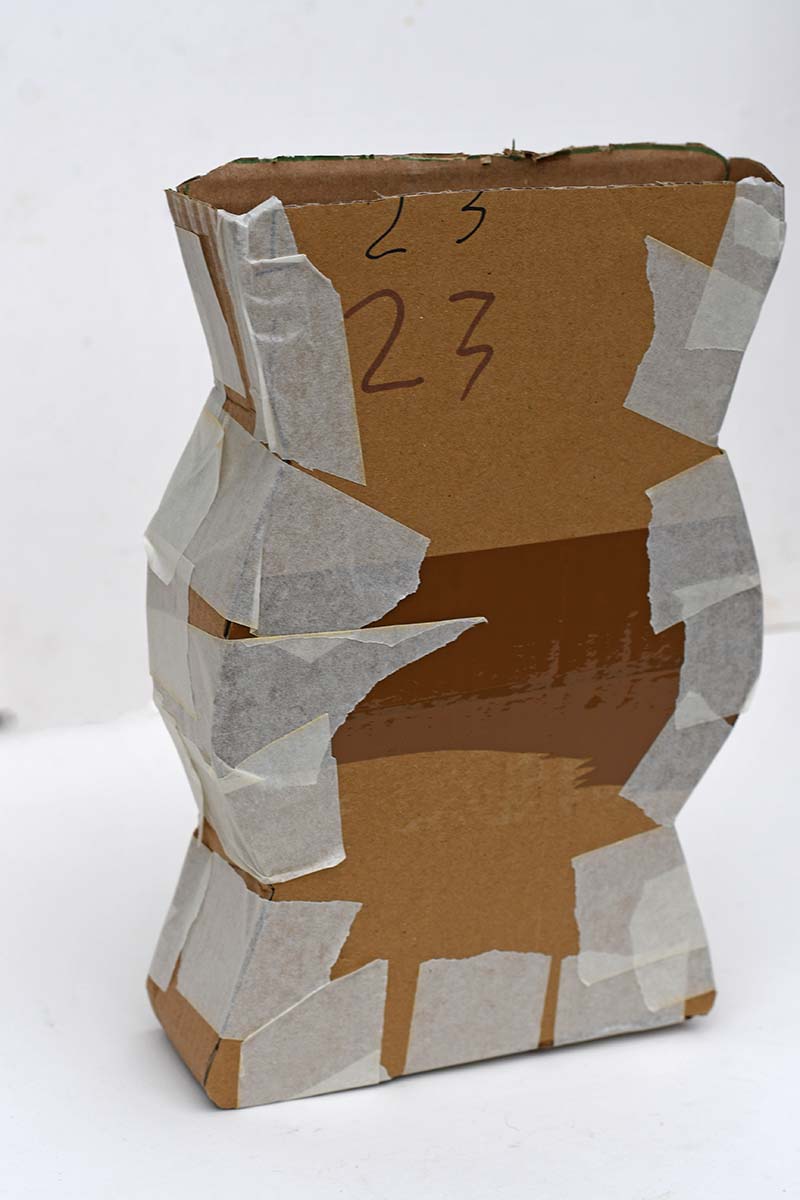
To give the vase some depth, cut a 2-inch-wide strip of cardboard to run around the edge. It’s like making a vase sandwich: front, back, and the strip in the middle.
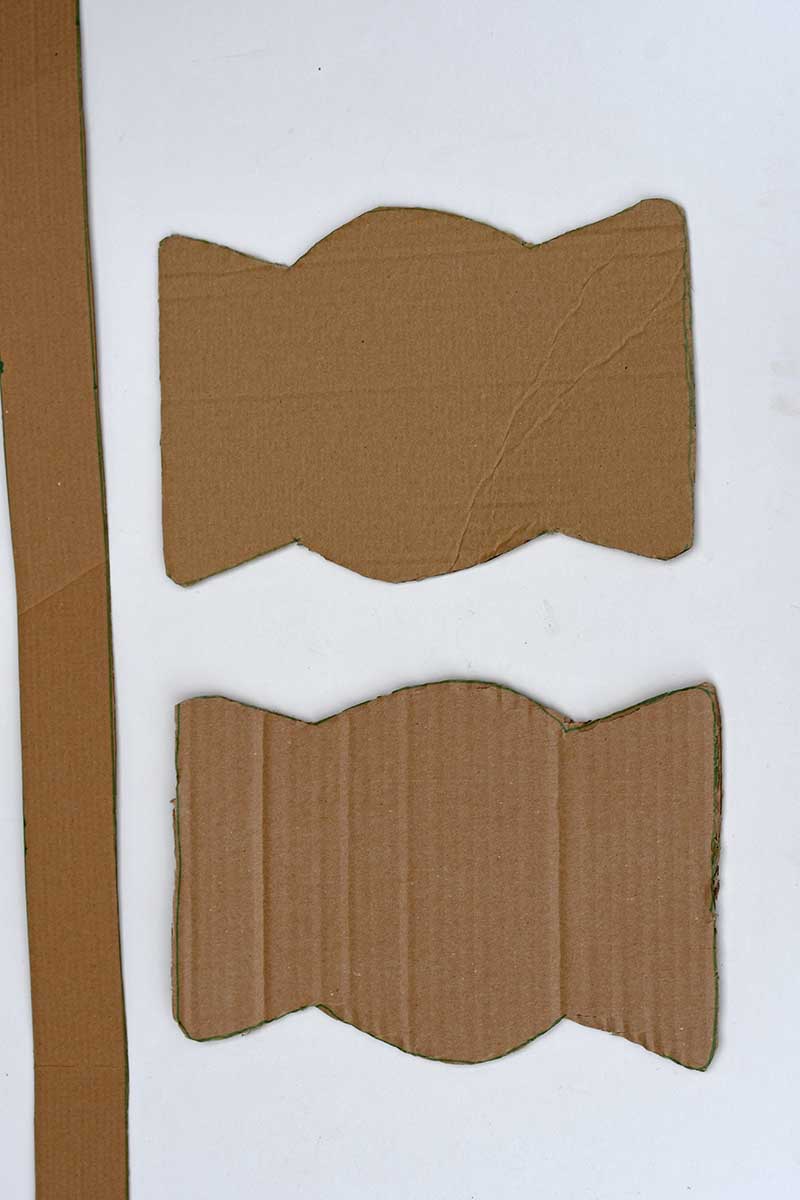
Use masking tape to hold everything together. It doesn’t need to be perfect—just firm enough to withstand paper mache.

Tip: Go wild with the shapes. You can stick with my templates, but if you feel like tweaking one or drawing your own—do it! Wonky = wonderful.
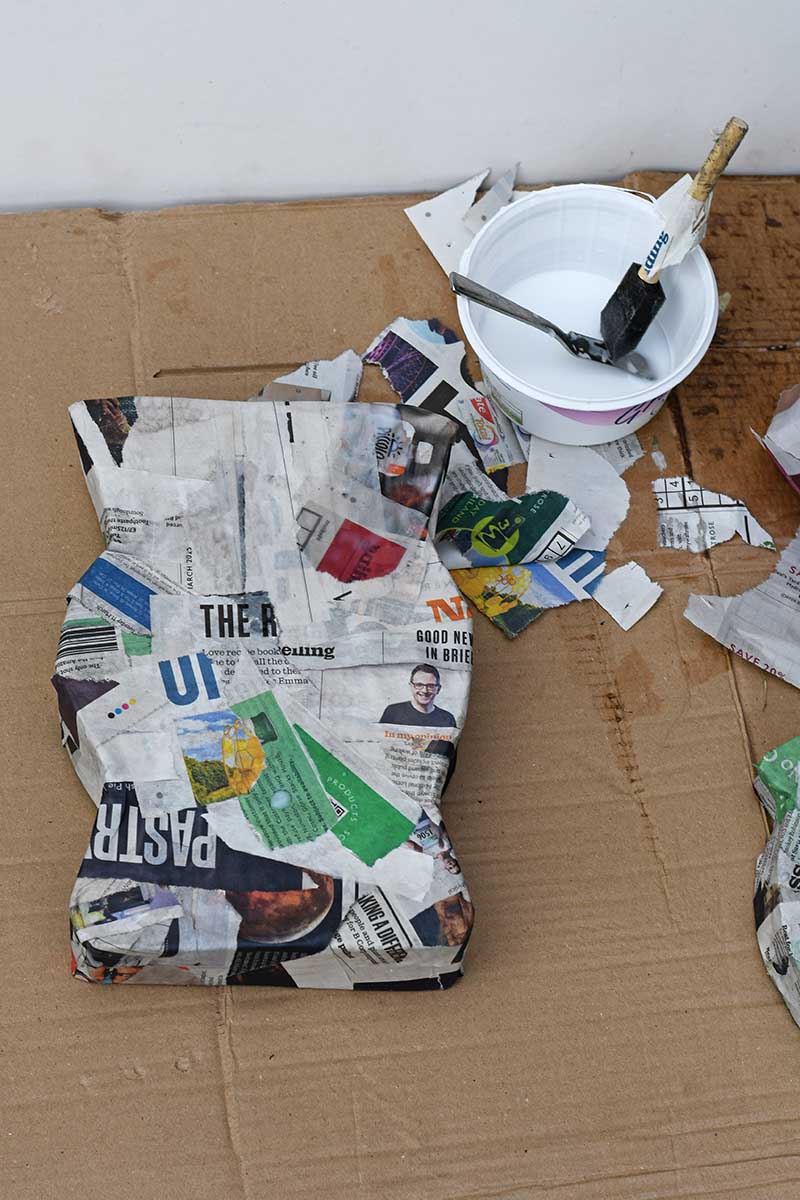
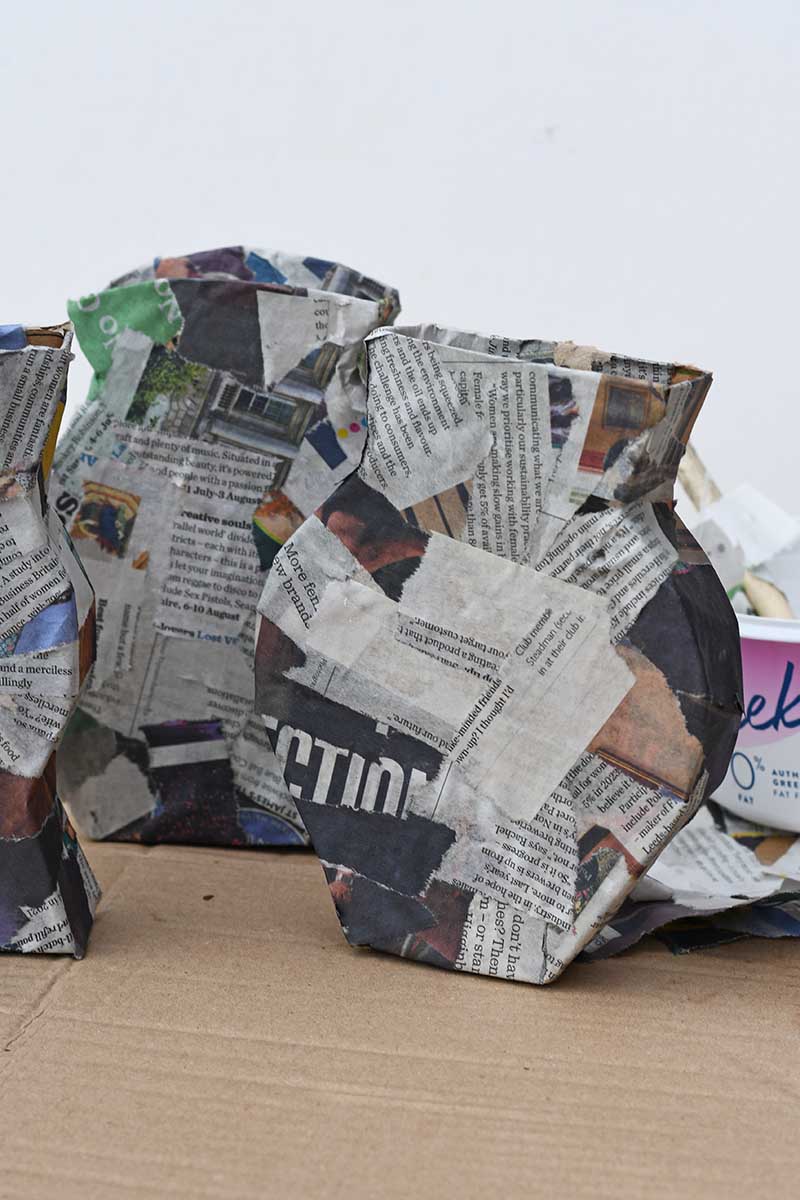
Step 2: Time to Get Messy (Paper Mache Style)
Mix a 50/50 white glue and water paste. Tear up some newspaper (I find strips work better than neat squares—less wrinkling).
Cover the entire vase structure in 1 to 2 layers of newspaper. This part is oddly satisfying, but also sticky. Expect gluey fingers.
Let it dry thoroughly—I left mine overnight near a radiator.

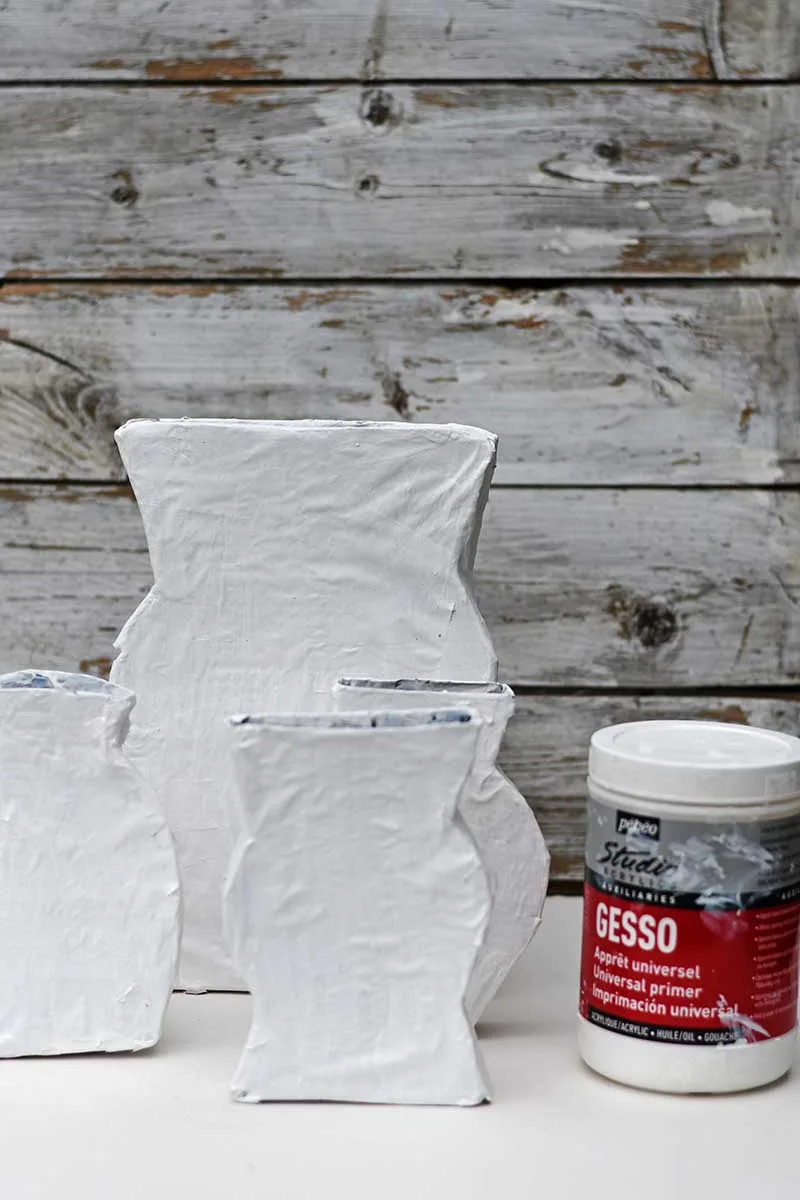
Step 3: Prime It with Gesso
Once the paper mache is dry and solid, give your vase a couple of coats of white gesso. This smooths things out and gives you a nice blank canvas. If you don’t have gesso, white acrylic paint works too.
You can already start to see the vase’s personality coming through at this point.

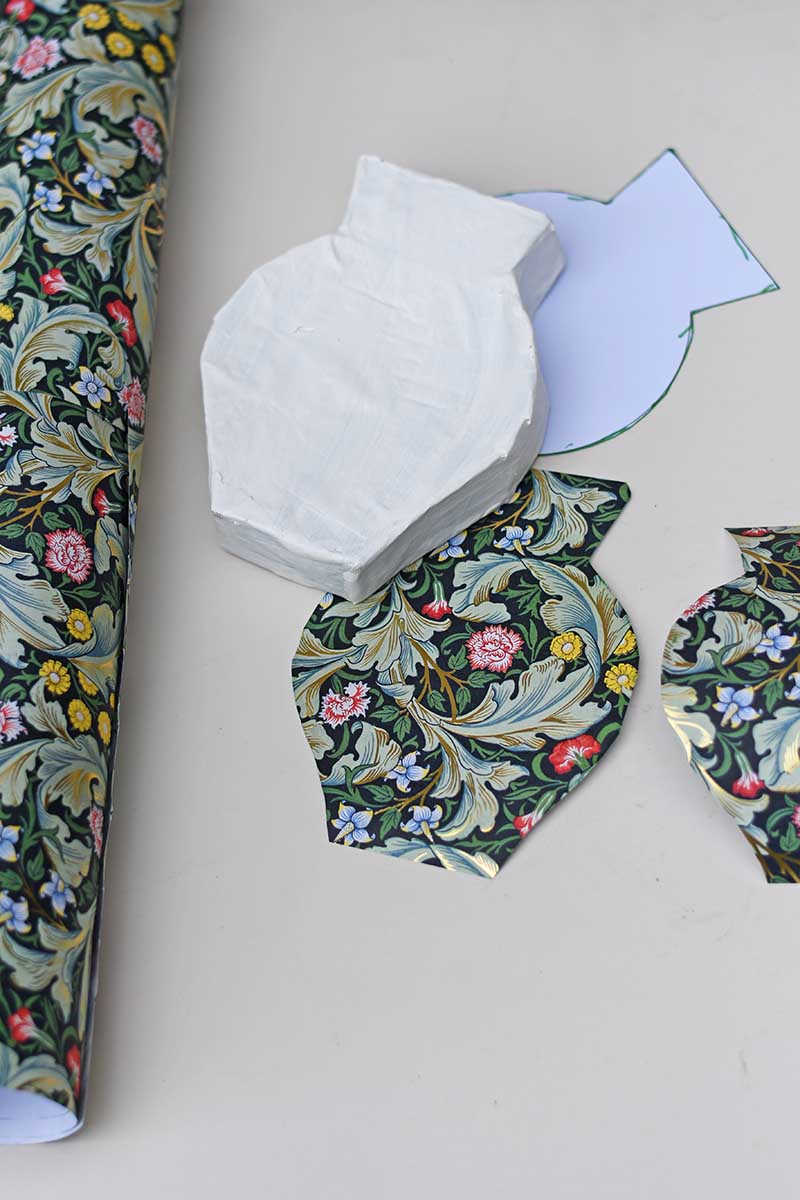
Step 4: Add the Pretty Paper
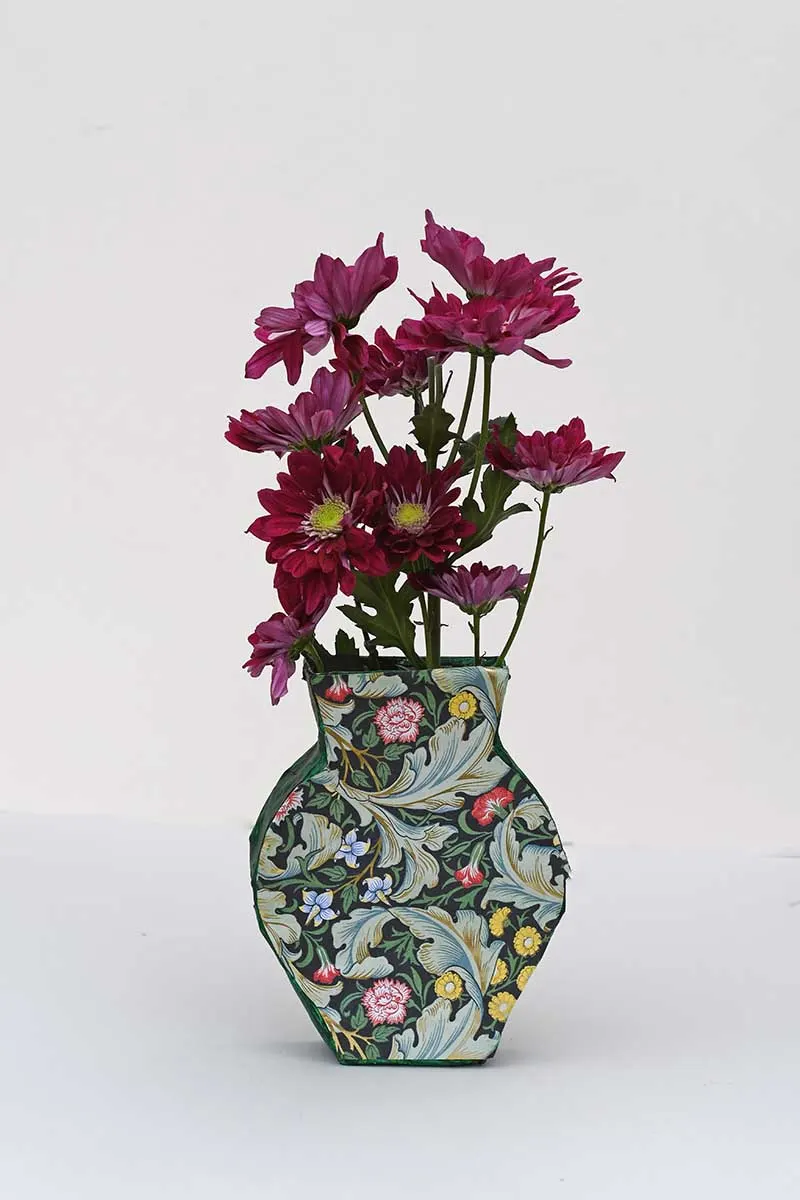
This is where the fun begins. I used some patterned gift wrap that I’d been hoarding. (You know that drawer of “too nice to use” paper? This is its moment.) William Morris patterned gift wrap is readily available and a good choice for floral patterns.
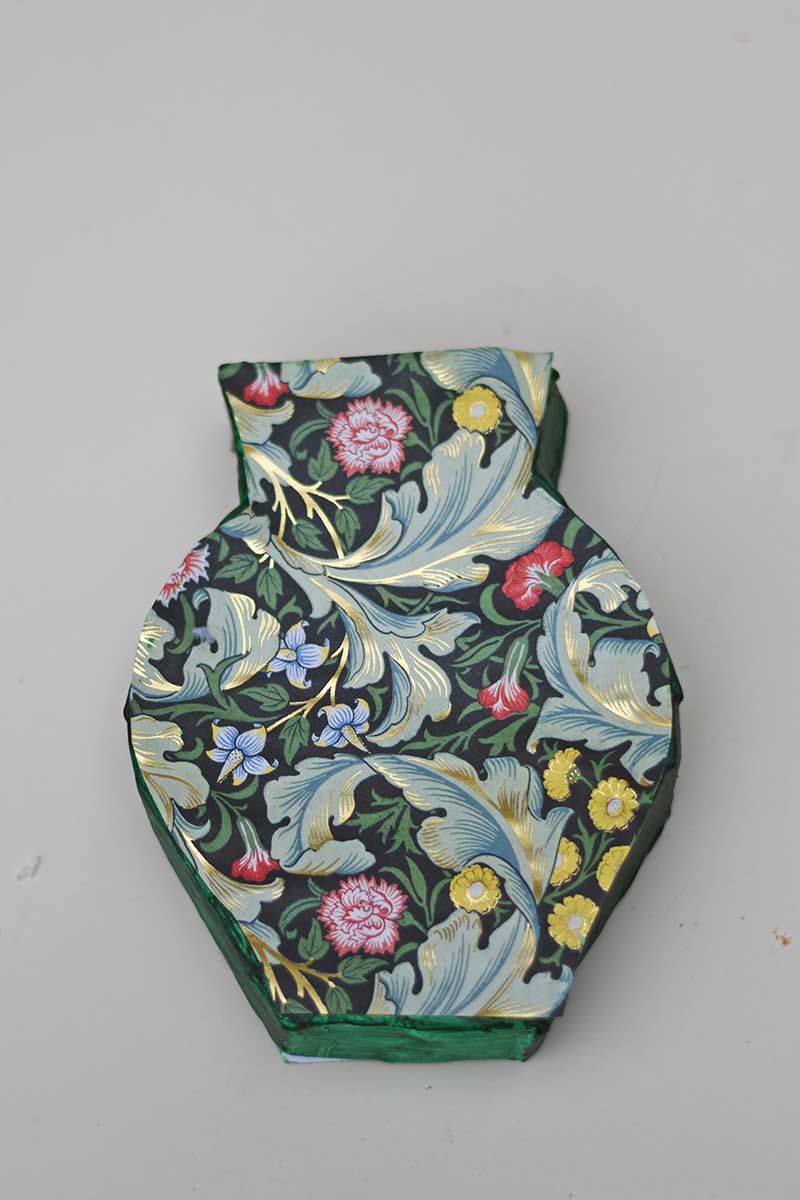
Using the same template, cut a front and back from your paper and glue them on. Smooth it out as best you can. I used PVA again to brush it evenly, then pressed down.
Then I painted the edges of each vase in a colour that worked with the pattern. That little detail pulls it all together.


Wallpaper samples would work just as beautifully as gift wrap for decorating these vases. In fact, you could use one pattern on the front and a completely different one on the back—then simply flip the vase around whenever you feel like switching things up. Two looks in one!
Step 5: Make It Your Own
One of the vases got a bit of an Anthropologie-style collage upgrade with some Nathalie Lété collage stickers from a book I was gifted.

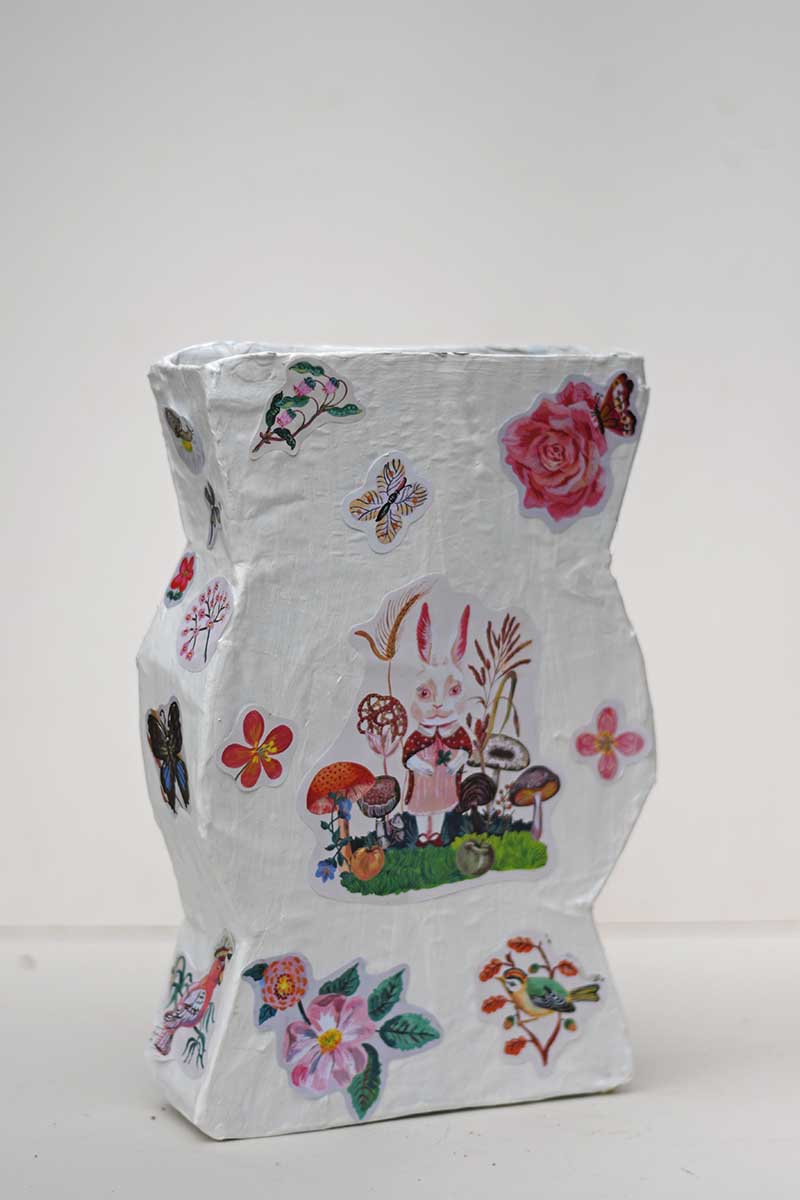
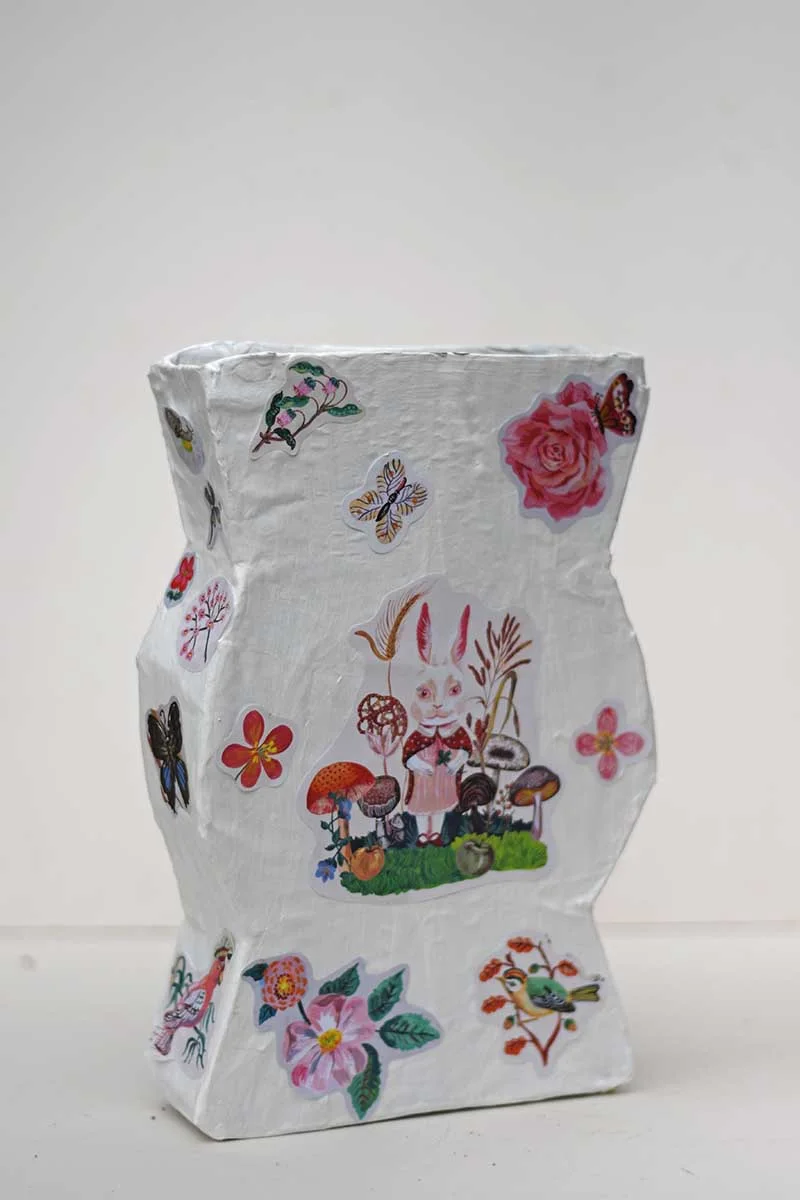
You could go a different route—try painted details, use vintage book pages instead of gift wrap, or make a whole collection in different colour palettes. It’s the kind of project that invites experimentation.
Step 6: Add Pebbles for Weight
These vases are very light—dangerously top-heavy if you plan to add stems. I added a layer of small pebbles inside the base to keep them standing.
Step 7: Add Flowers
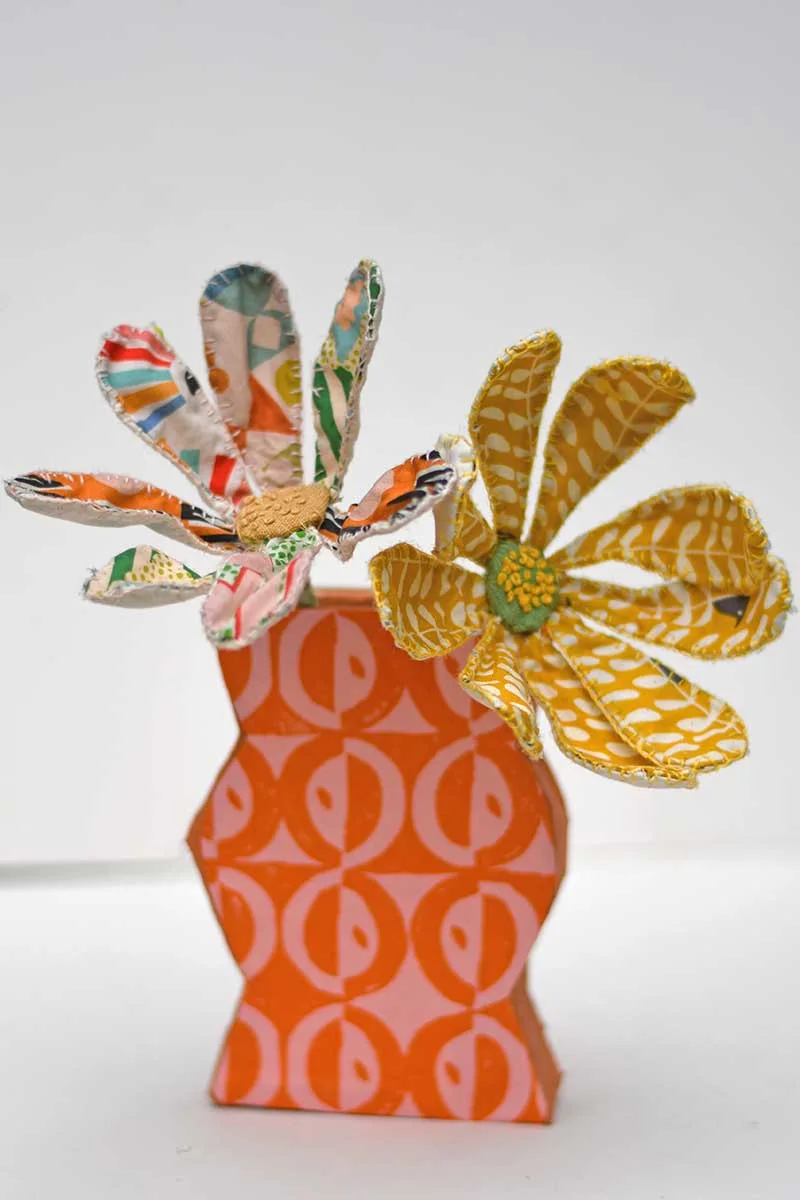
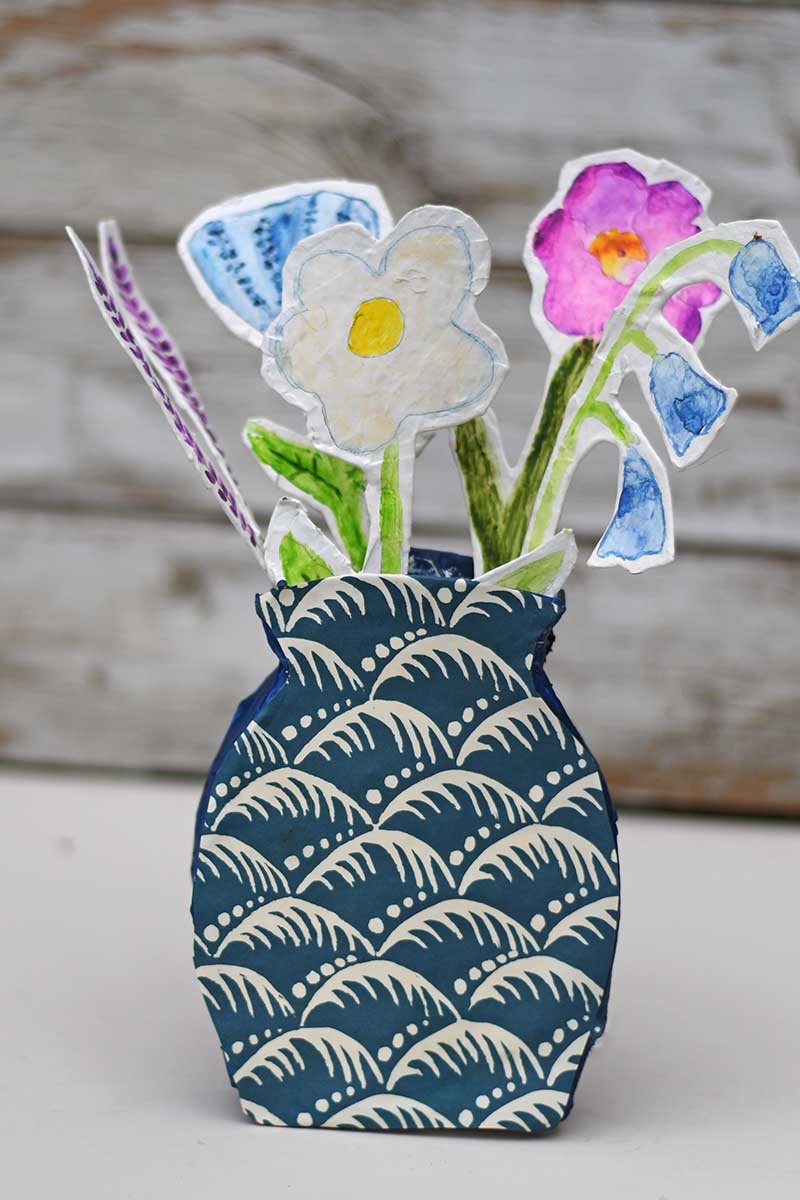
They look brilliant with paper flowers, my fabric Chrysanthemum flowers, scrap fabric blooms, and even the whimsical paper mache flowers I made recently.

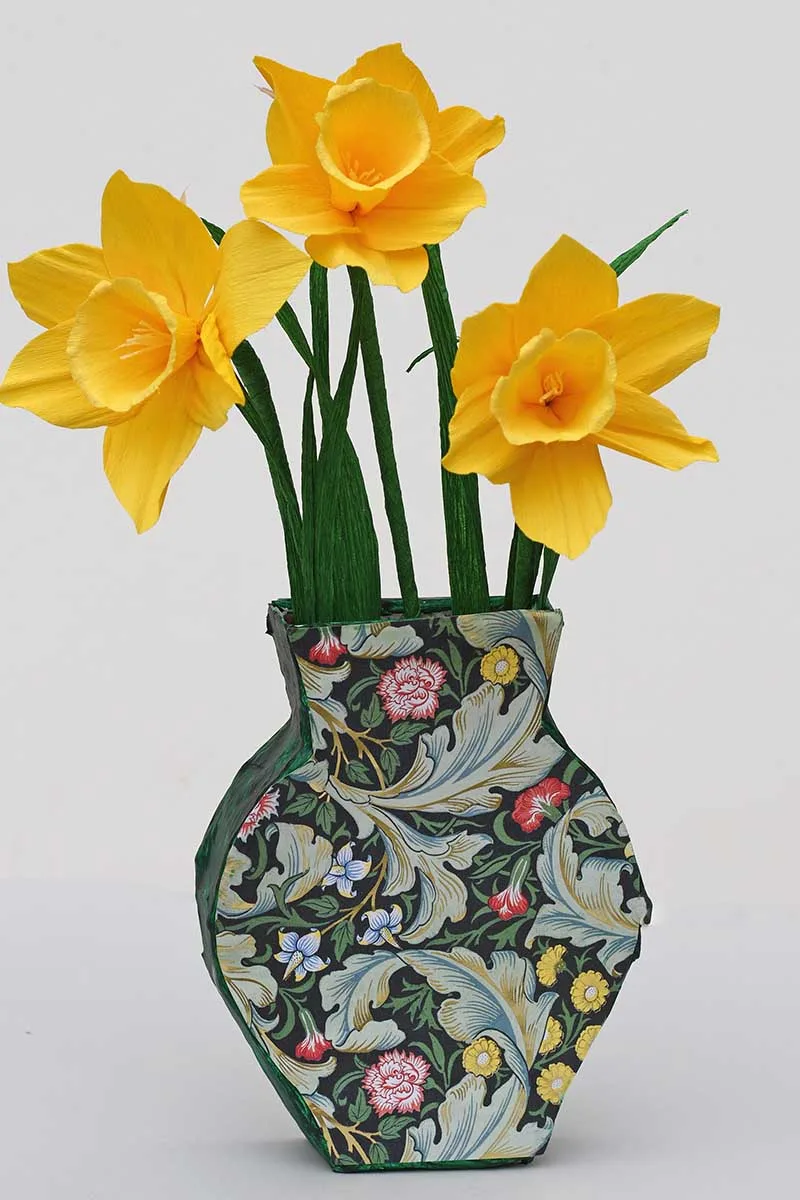


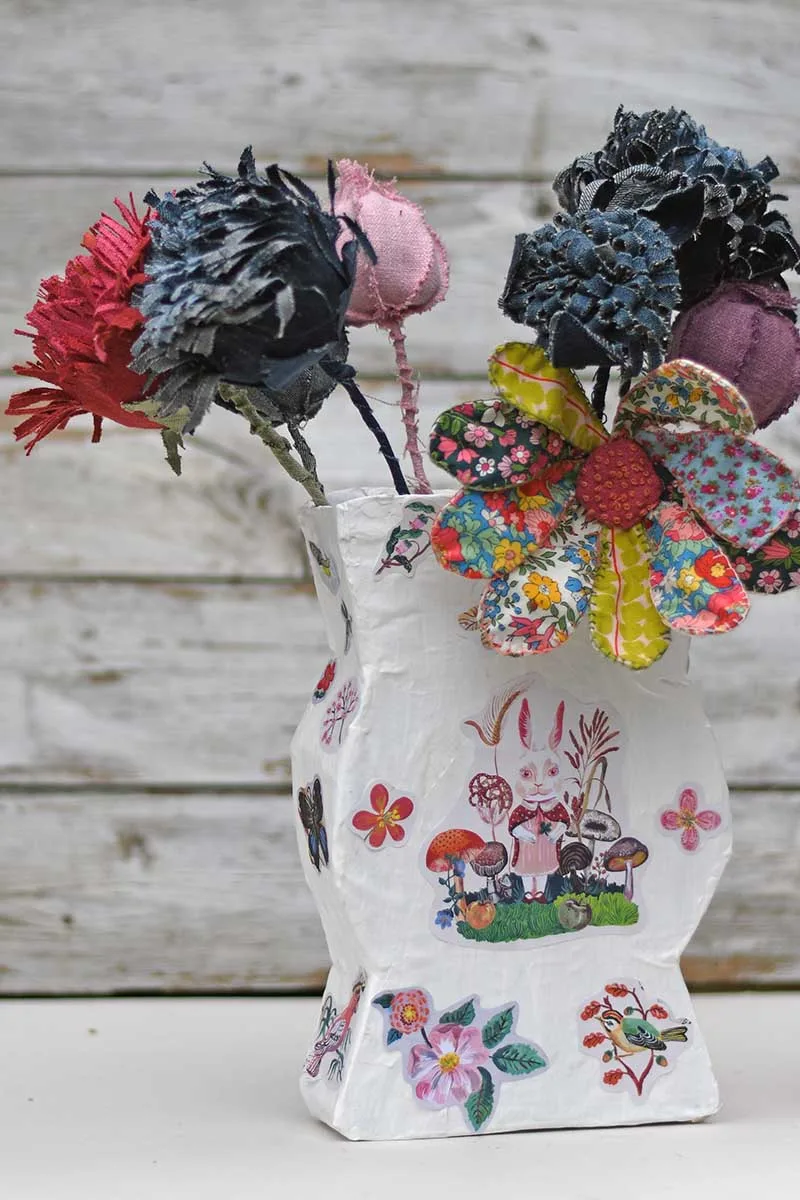
But they’re also surprisingly functional. If you want real flowers, just pop a little zip-lock bag or waterproof container inside to hold the water. Nobody will see it, and it does the job nicely.

Final Thoughts
I love how these paper mache vases turned out—just another reminder that you really can make beautiful things from the recycling bin. Some cardboard, a bit of newspaper, leftover wrapping paper, and glue… that’s it! It’s such a satisfying upcycled craft, and chances are you already have everything you need at home.
One of the best things about these vases is how versatile they are. You can decorate them to match your home—go bold with colour, keep it neutral, collage them with florals, vintage scraps, or stickers. You could even involve the kids and let them paint their own versions for their rooms.
If you’re into upcycled vase ideas (like I clearly am), there are plenty more on the blog that might inspire you:
How to Decoupage a Vase with Fabric – This tutorial shows you how to transform a plain vase using small fabric scraps and Mod Podge. It’s a brilliant way to showcase beautiful patterns, especially if you have leftover pieces from other projects.
Paper Vase Mason Jar Sleeve – A quick and easy craft that turns mason jars, tin cans, or plastic bottles into decorative vases using wallpaper samples and a bit of stitching. Perfect for adding a pop of pattern to your space.
Paper Embroidery and Embroidered Paper Vase – Combine hand embroidery with paper crafting to create unique vase sleeves. This project adds a tactile, artistic touch to your decor and is a great way to experiment with stitching on different materials.
Leather Boho DIY Vase – Upcycle old leather into a stylish boho vase, complete with a handmade tassel. The tutorial also includes instructions for creating stunning giant crepe paper flowers to display in your new vase.
Denim Hanging Mason Jar Vase – Repurpose old jeans and a paper mache mason jar to create a charming hanging vase. This project also features a guide to making delicate crepe paper daisies, adding a whimsical touch to your wall decor.
If you want to explore paper mache more then check out these cool adult paper mache ideas.

Donna via Funky Junk Interiors
Saturday 17th of May 2025
Oh gosh... these flat vases are just the cutest Claire! Teamed up with your flowers, they are perfection!
Claire Armstrong
Monday 19th of May 2025
Thank you, being flat they also take up less romm and fit more easily on shelves etc.
Jennifer Wise
Wednesday 14th of May 2025
This is SO fun, Claire! What a creative project. Visiting from the Busy Monday link party. Pinning to save and share. :)
Claire Armstrong
Wednesday 14th of May 2025
Thank you they were fun to make.
Julie Henderson
Friday 9th of May 2025
This is my vibe....mmmm, some wonderful boho crafty goodness, really cute!
Claire Armstrong
Saturday 10th of May 2025
Thank you so much.
Donna
Thursday 8th of May 2025
I’ve been looking for a way to recycle or upcycle those slabs of styrofoam that is packed in every box shipped to you. I think this work for that?
Claire Armstrong
Saturday 10th of May 2025
Yes you could try that.