
Unleash your creativity with paper embroidery! Learn about various paper types and stitching techniques, and try our embroidered vase tutorial. It is ideal for lovers of paper crafts.
Have you ever tried paper embroidery? This fantastic mix of hand embroidery and paper crafting brings your projects to a new level of creativity. Imagine stitching beautiful designs onto paper to make personalised cards, unique art pieces, and fancy bookmarks.
This post will discuss all the fun things you can do with paper embroidery and the best paper types. I’ll even share a step-by-step tutorial for making an upcycled embroidered vase. Stitching on paper is fun!
What Can You Do with Paper Embroidery?
Paper embroidery is a game-changer for anyone who loves to get crafty. Here are some fun ideas to get you started:
- Handmade Cards: Add some pizzazz to your greeting cards with hand-stitched designs.
- Decorative Art: Create intricate patterns and frame them for unique home decor.
- Mixed Media Projects: Combine paper embroidery with paint to create unique art for your home.
- Personalised Gifts: Make one-of-a-kind gifts by embroidering special messages or images on paper.
- Scrapbooking: Spice up your scrapbook pages with embroidered accents on paper ephemera.
- Bookmarks: Whip up some personalised bookmarks that are both pretty and practical.
- Gift Tags: Make your gift wrapping extra special with handmade embroidered tags.
- Photographs: Add a touch of embroidery to photos for a cool mixed-media effect.
- Postcards: Jazz up old postcards and greeting cards with a fun embroidery design.
Types of Paper Perfect for Embroidery
Choosing the right paper is super essential for paper embroidery. Here are some top picks:
- Card Stock: Thick and durable, perfect for multiple stitches.
- Watercolour Paper is sturdy and great for detailed designs. You can even print on watercolour paper on an inkjet printer at home.
- Scrapbook Paper: This comes in many designs and weights and is ideal for decoration.
- Handmade Paper: Adds a unique texture to your projects.
- Photographs: Print your photos on matte or glossy paper for an added dimension.
- Old Postcards: Give old postcards a new twist with some hand embroidery.
Although heavy paper is ideal for hand embroidery, you can still use thinner paper by reinforcing it with a muslin backing. This technique creates a linen-like paper, similar to the durable backing found on vintage road maps.
I’ve detailed this process in my stitched paper art tutorial on the blog. This method allows you to enjoy the flexibility of thinner paper while ensuring it can withstand the embroidery process.
For a step-by-step guide, check out my stitched paper art tutorial. This approach opens up new possibilities for your paper embroidery projects, combining the best of both worlds.
Must-Have Tools and Materials
Before we get started, here’s what you’ll need:
- Sharp Needle: This is a must for cleanly piercing the paper. I like to use a sewing needle to punch holes in the paper, the same size as the embroidery needle.
- Foam Board: This will be placed under the stitch embroidery paper when punching the holes.
- Embroidery Floss: Pick your favourite colours.
- Transfer Methods: Lightbox, tracing paper, or a printable template to get your design onto the paper.
- Scissors and tape: These are used to cut the floss and secure the ends at the back of the hand embroidery pattern. Washi tape is perfect for this.
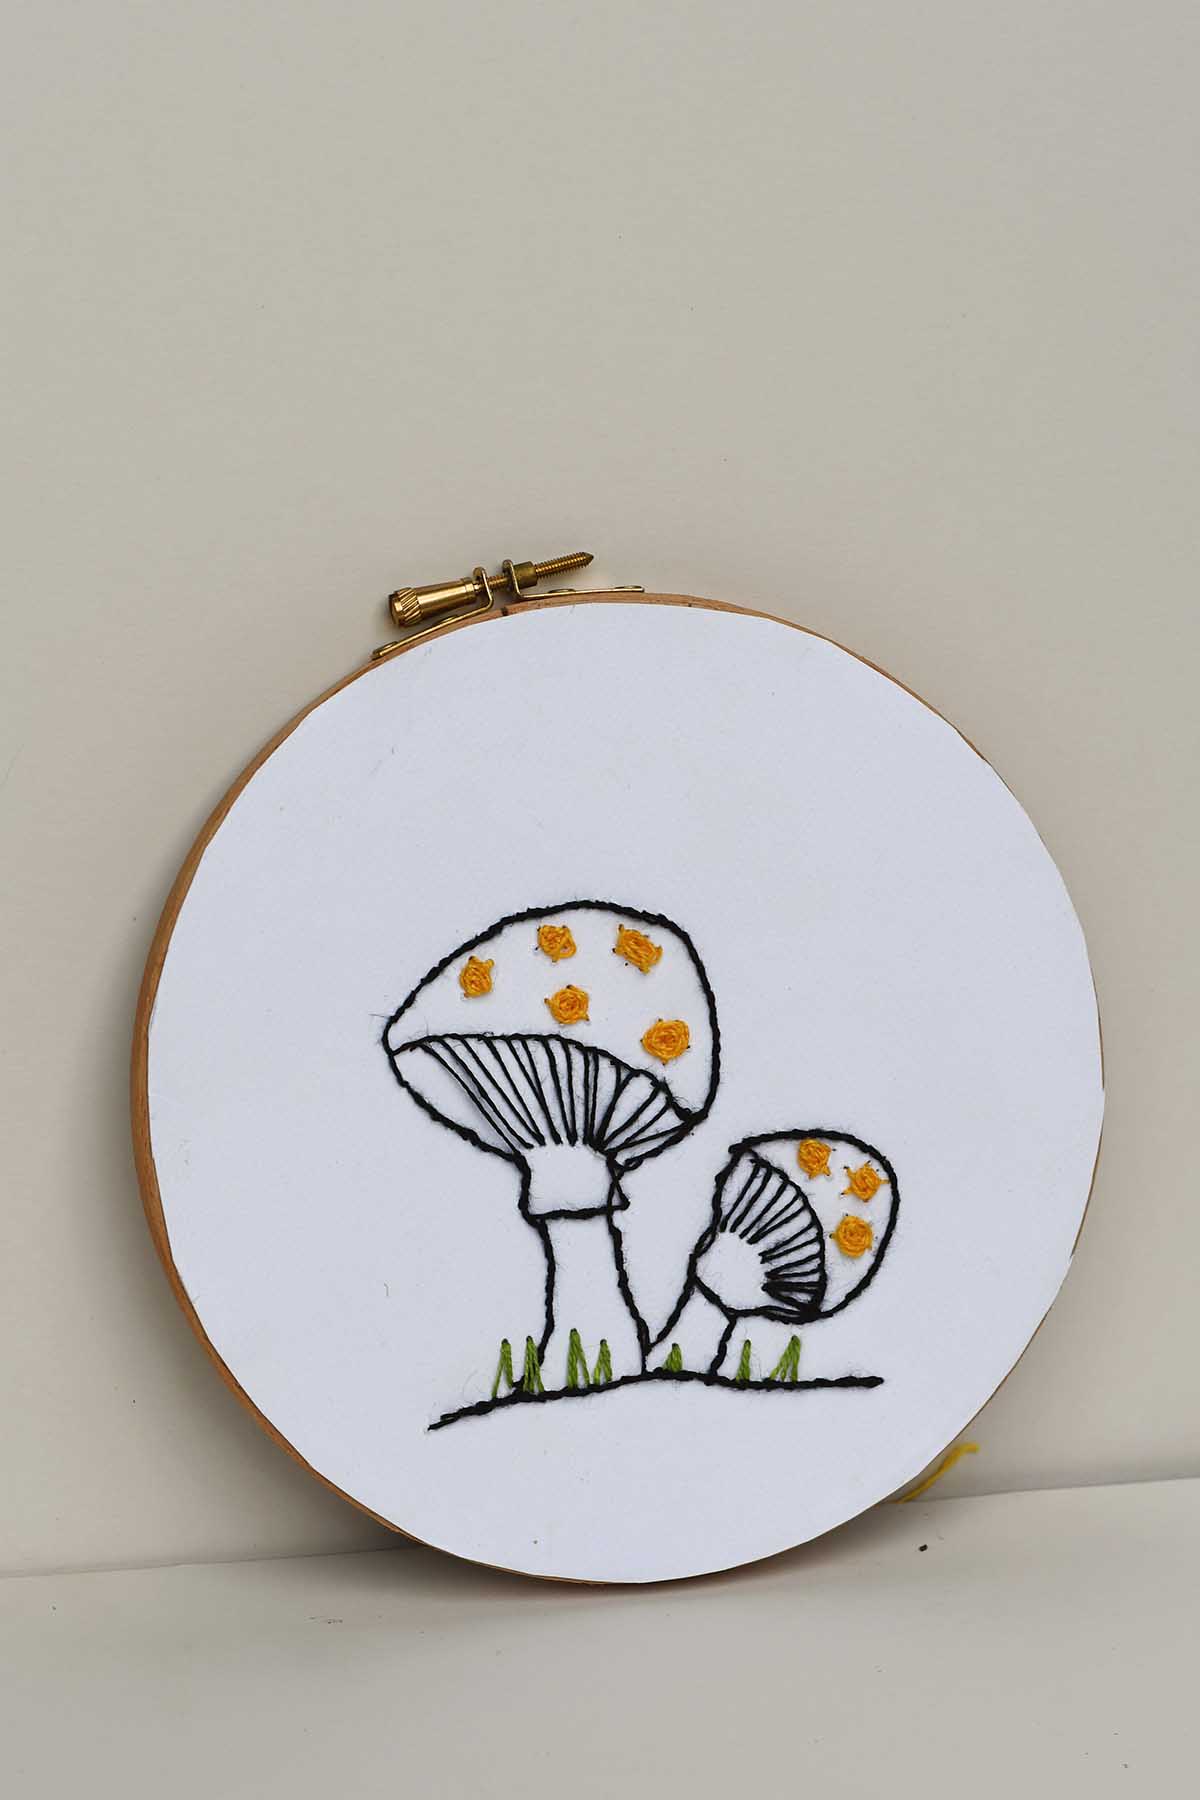
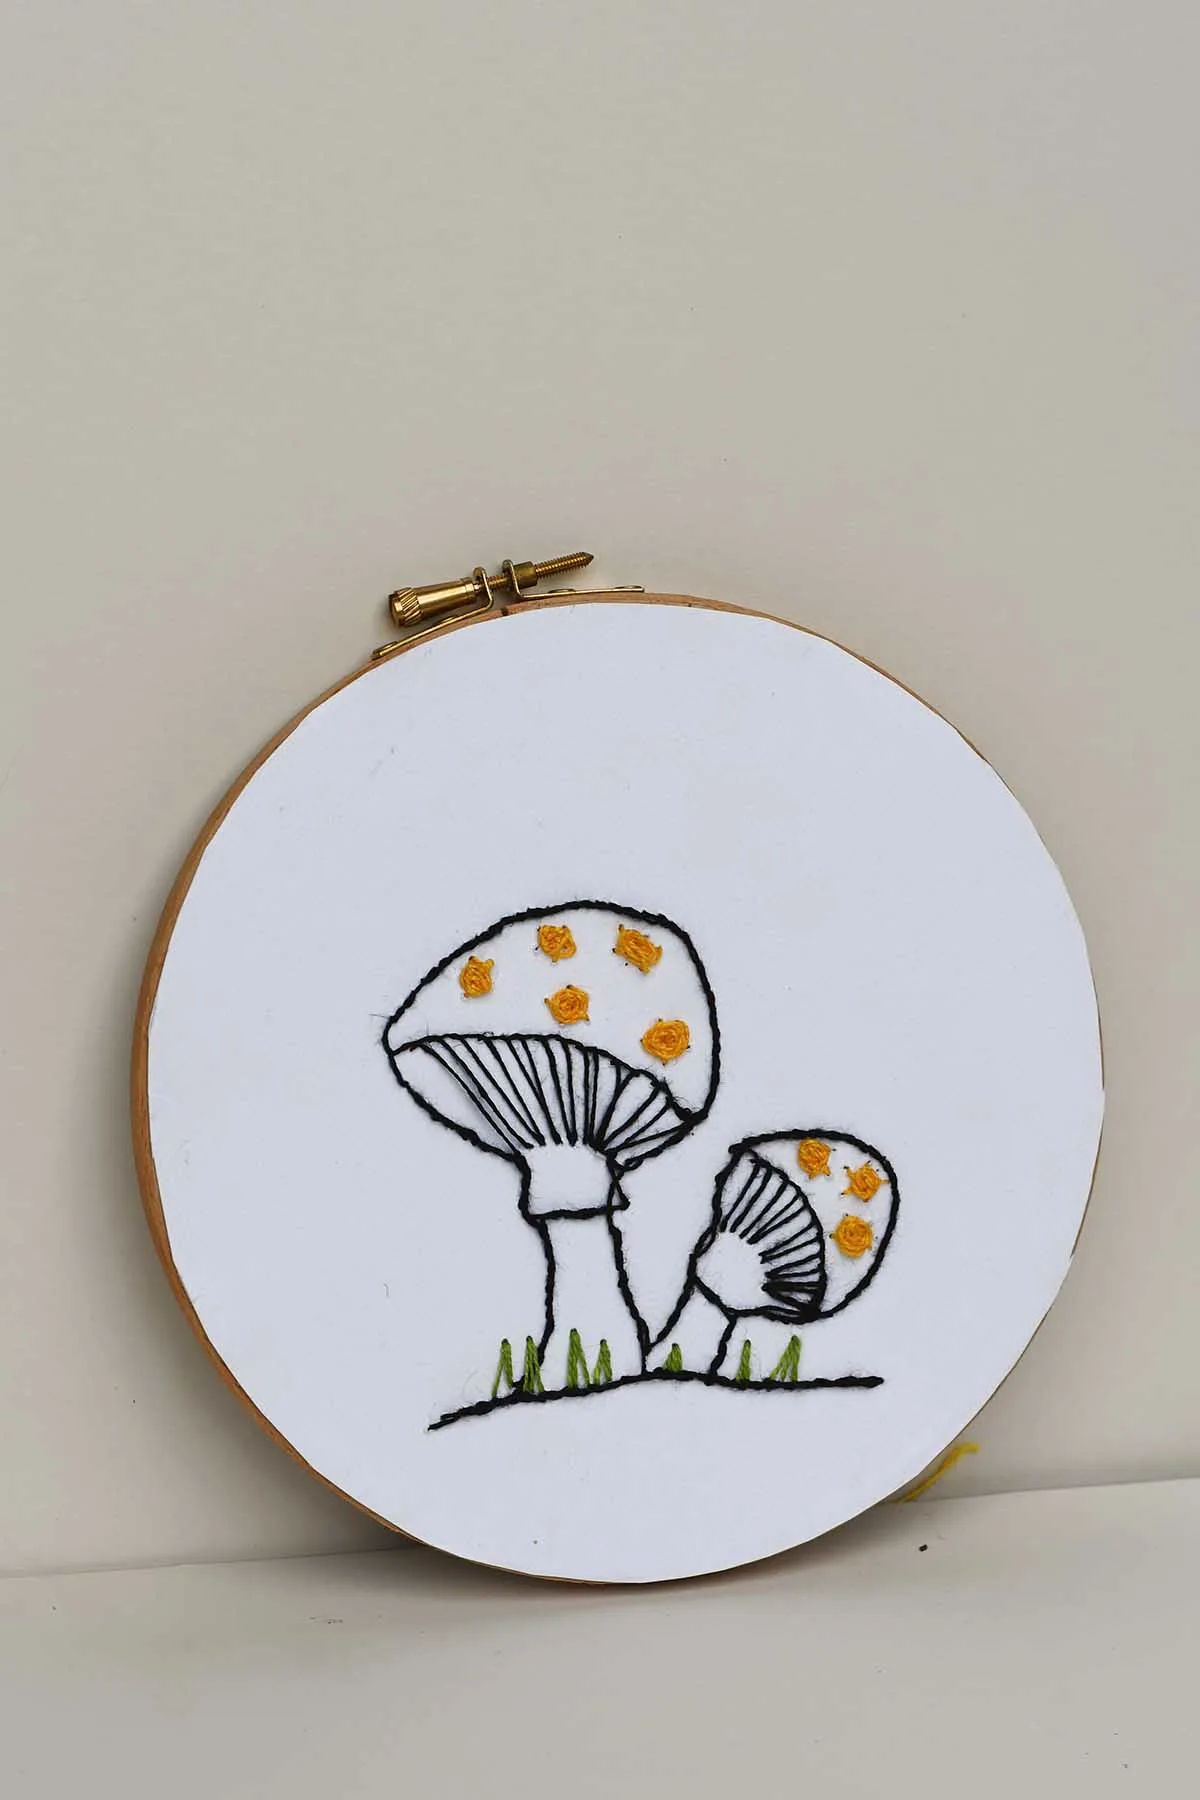
You don’t need an embroidery hoop for paper embroidery because the paper is stiff and won’t stretch like fabric. However, if you want to achieve the look of hoop embroidery, you can always glue a round piece of paper to a hoop. This method worked perfectly for my mushroom paper embroidery project, giving it a classic framed appearance.
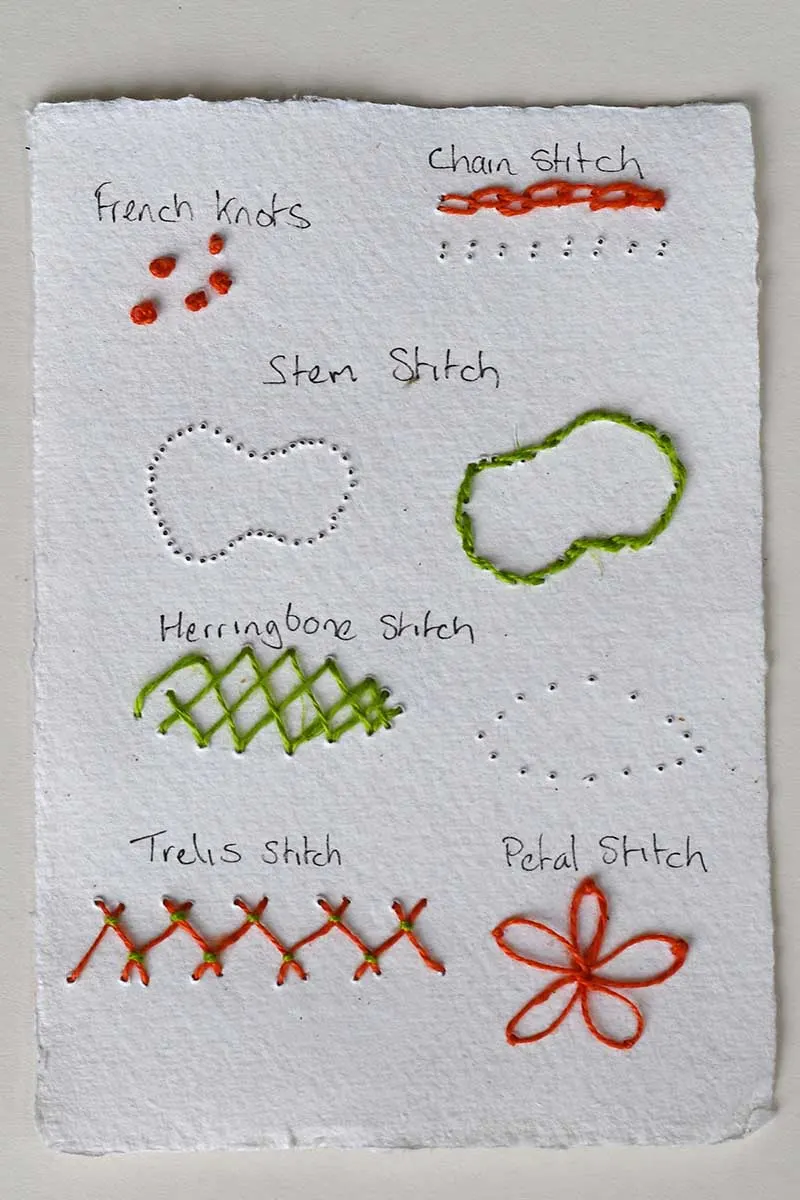
11 Best Stitches for Paper
Paper embroidery uses many of the same stitches as fabric embroidery, but some stitches work better on paper than others. Since making too many holes can weaken the paper, choose stitches that don’t require closely spaced holes.
Here are a few stitches that are particularly effective for paper embroidery:
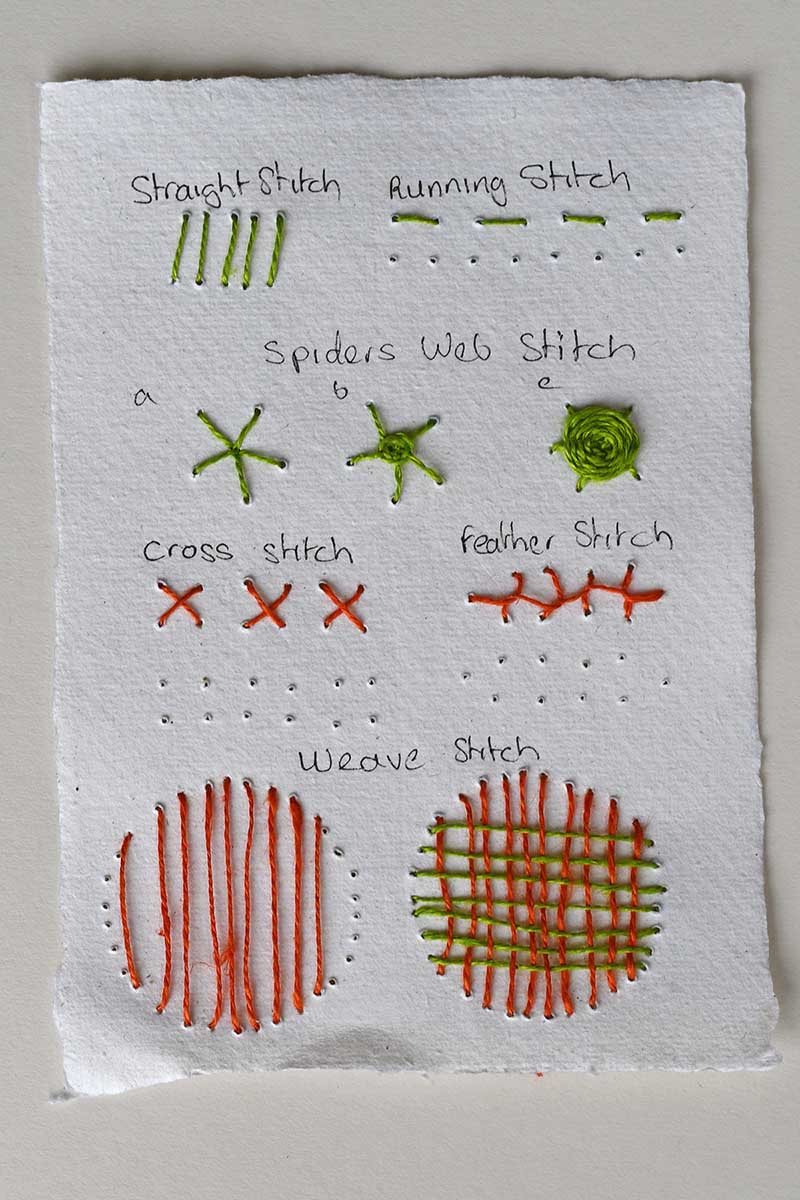

- Straight Stitch: Simple straight stitches can be used to outline or as filler stitches.
- Running Stitch: Simple and great for outlining shapes. Prepunch holes at regular intervals
- Spider Web Stitch: Creates a beautiful circular web-like effect, perfect for flowers or decorative motifs.
- Weave Stitch: Adds a woven texture, ideal for filling areas or creating interesting patterns.
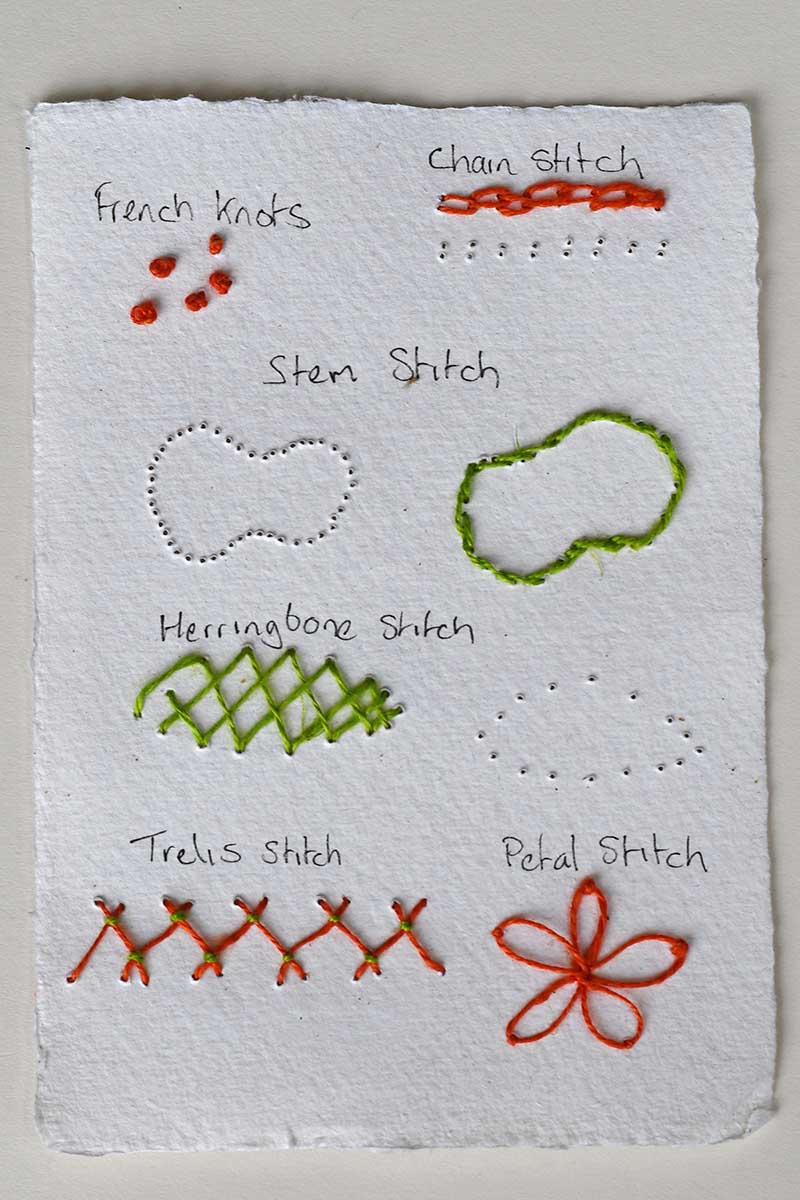
- Chain Stitch: Adds texture and is perfect for decorative elements.
- Cross Stitch: Works well for creating patterns and filling areas.
- French Knots: Ideal for little raised dots.
- Stem Stitch: Great for curved outlines.
- Herringbone Stitch: Another interesting filler stitch.
- Trellis Stitch: A two-tone stitch great for borders on hand-stitched cards
- Petal Stitch: A simple way to add flowers to embroidery patterns.
Experimenting with these stitches will help you discover the best techniques for your paper embroidery projects. There are so many more stitches to explore! For detailed stitch diagrams of the ones mentioned above and many others, check out this site for comprehensive guides on stitches.
Paper vs. Fabric Embroidery: What’s the Difference?
Let’s compare paper embroidery with fabric embroidery:
Similarities:
- Techniques: Basic stitches like running, back, and chain stitches work for both.
- Tools: You’ll need a sharp needle, embroidery floss, and a way to transfer your design.
Differences:
- Material: Paper is less forgiving and can tear, while fabric is more flexible.
- Durability: Fabric can withstand more handling, but paper can remain sturdy if handled carefully.
- Design Transfer: Transferring designs is often easier on paper with printable templates.
- End Use: Fabric is great for clothes and home decor, while paper is perfect for art, cards, and other crafts.
We’re a participant in the Amazon Services LLC Associates Program, an affiliate advertising program designed to provide a means for us to earn fees by linking to Amazon.com and affiliated sites. As an Amazon Associate, I earn from qualifying purchases.
Upcycled Embroidered Paper Vase Tutorial
Ready to get started? Let’s make a cute embroidered vase!
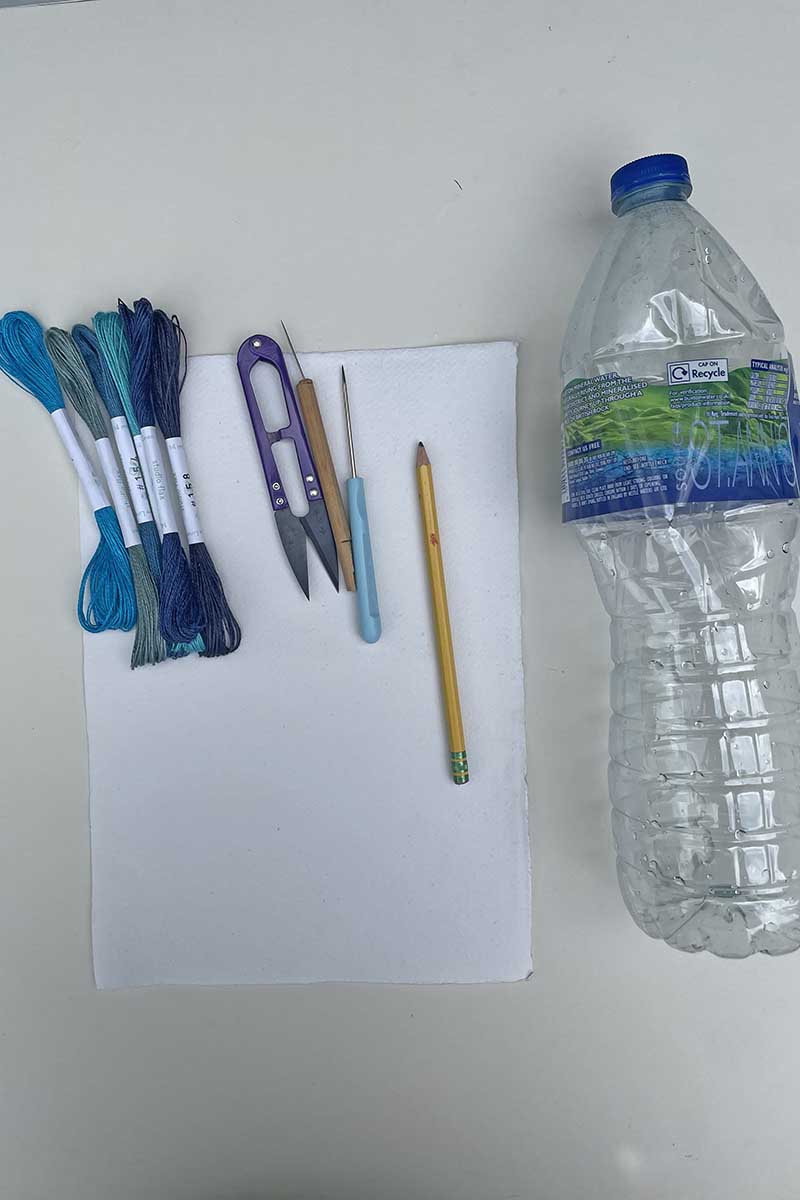
Materials Needed:
- Handmade paper A4 (letter size)
- I use two sharp needles, both the same size. One is for punching the paper, and another is for the embroidery. I use chenille needles size 22.
- Embroidery floss in various colours
- Pencil
- Scrap piece of foam board or something similar
- Scissors
- Washi tape or masking tape
- Plastic water bottle

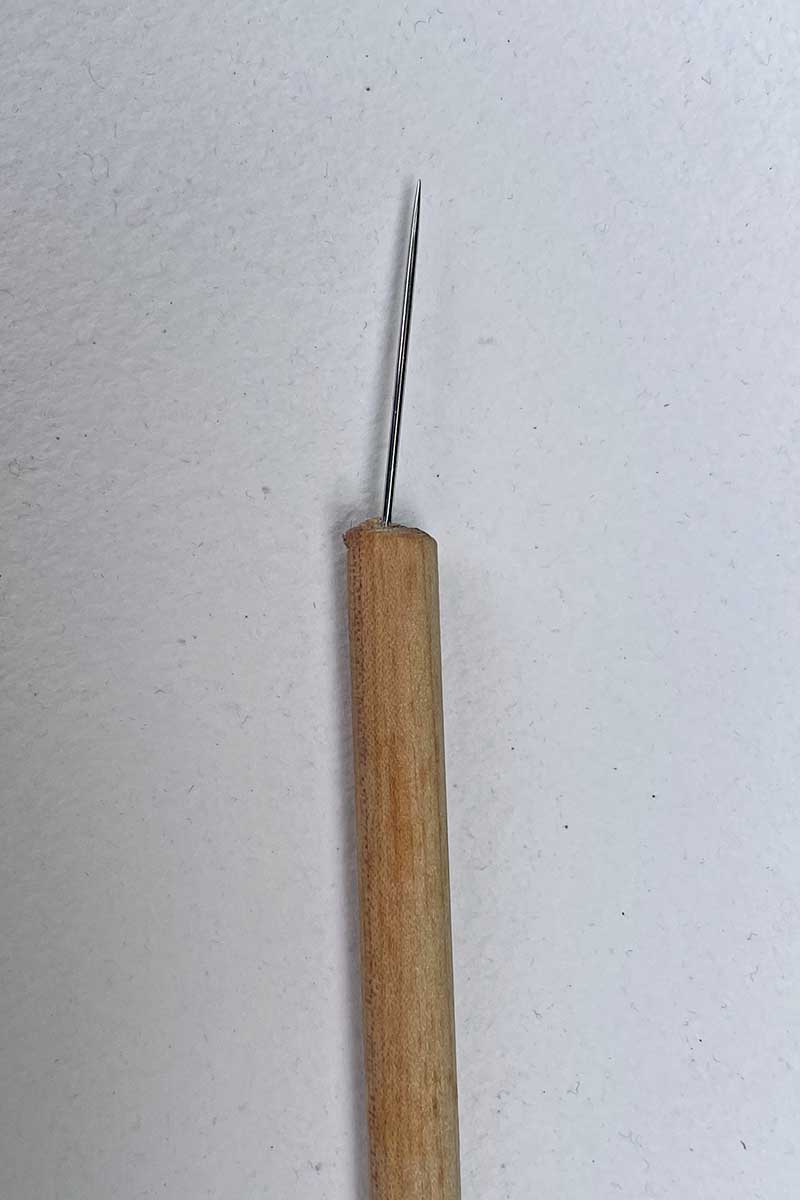
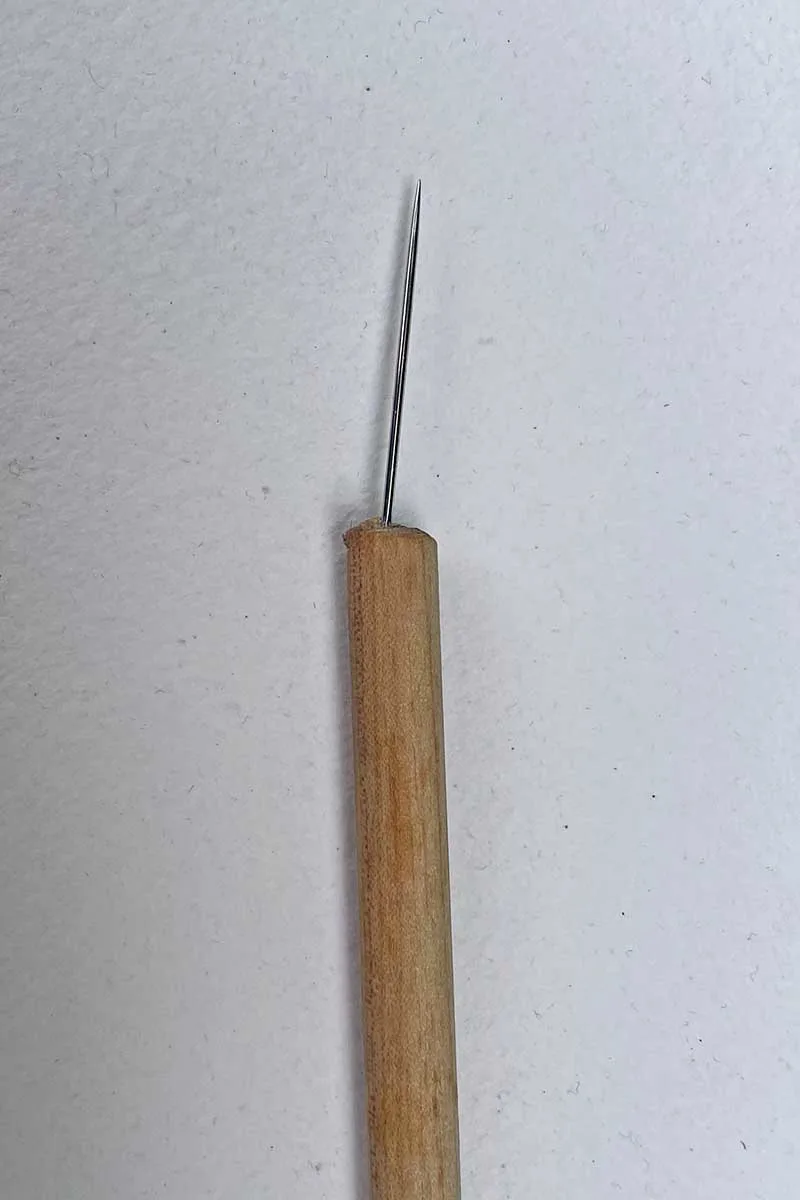
The Hole Punching Needle
When doing paper embroidery, it’s best to pre-punch the needle holes. While an awl can be used, it often makes the holes too large. Instead, I prefer using a needle the same size as the one I’ll be using to stitch with.
I create a makeshift handle to make the needle easier to hold while punching the paper. I do this by sticking the eye end of the needle into a piece of balsa wood dowel or a wine cork. This makes the process much more comfortable and precise.
Paper Embroidery Steps
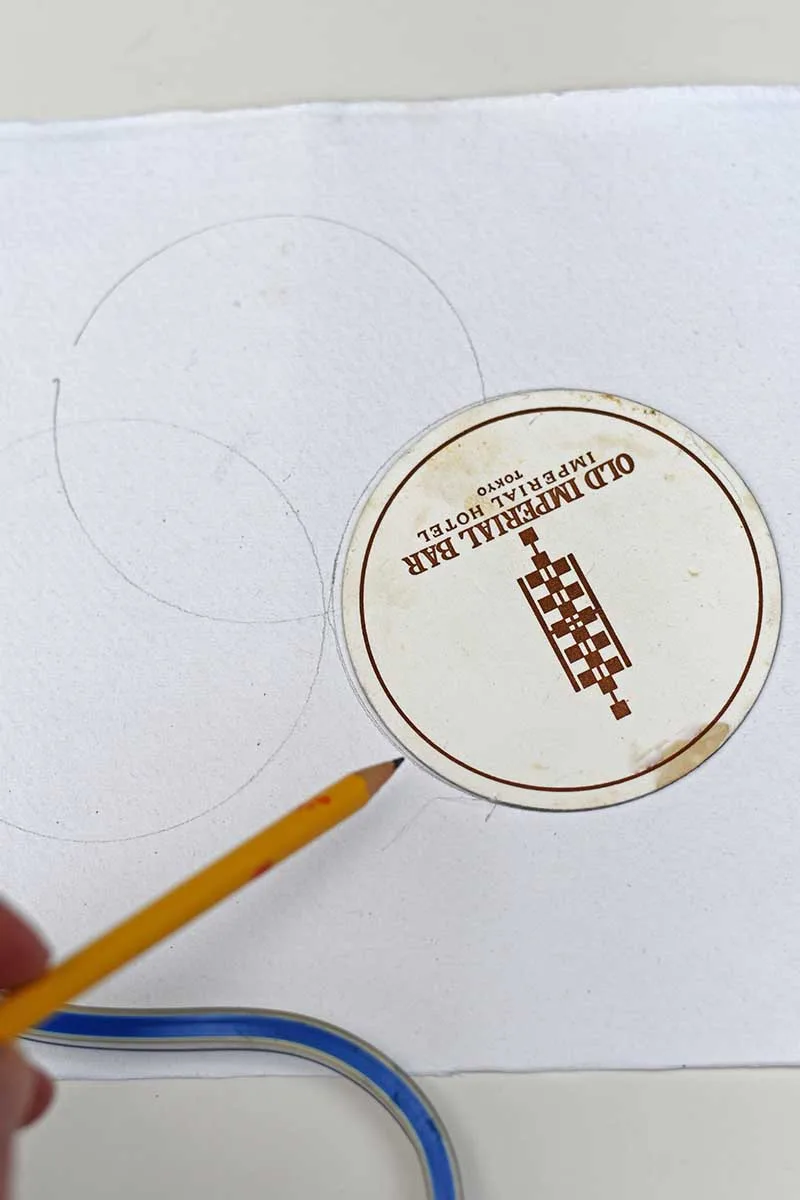
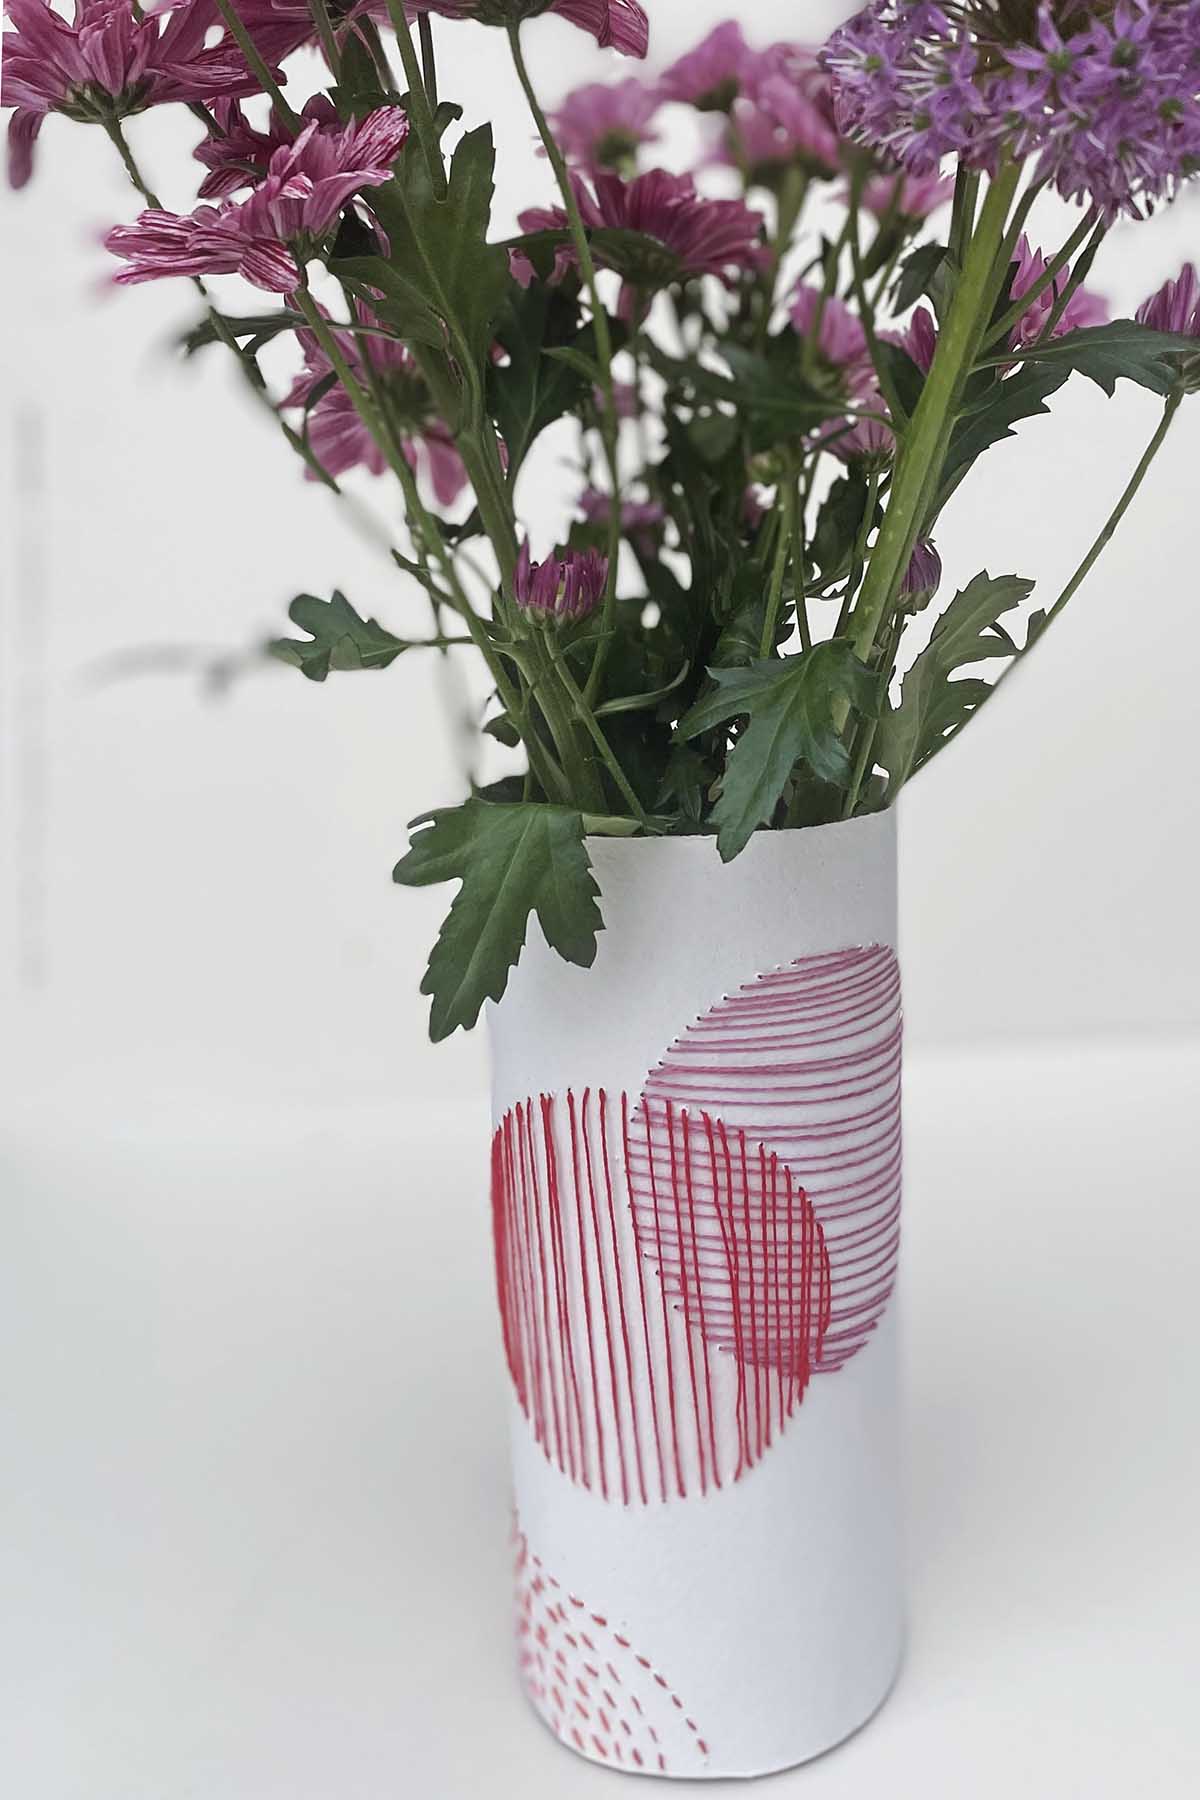
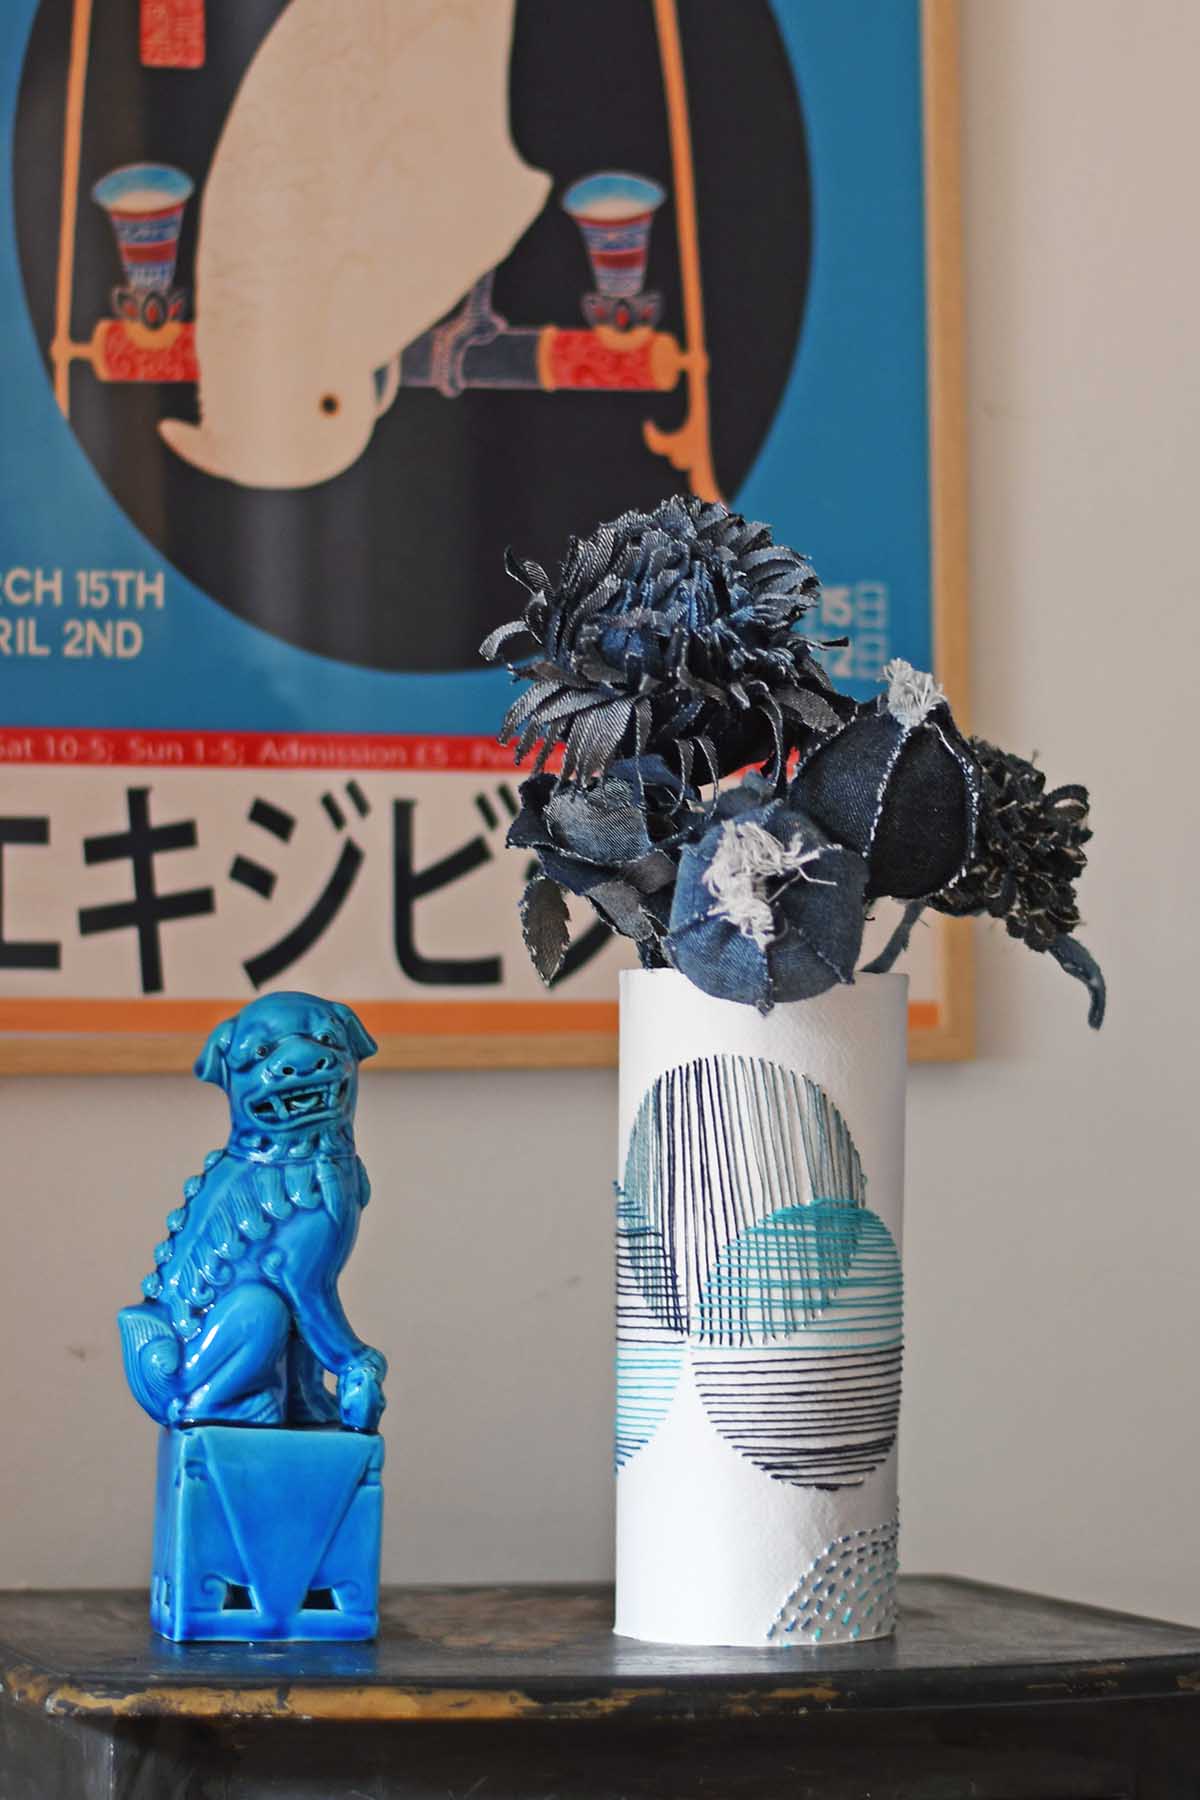
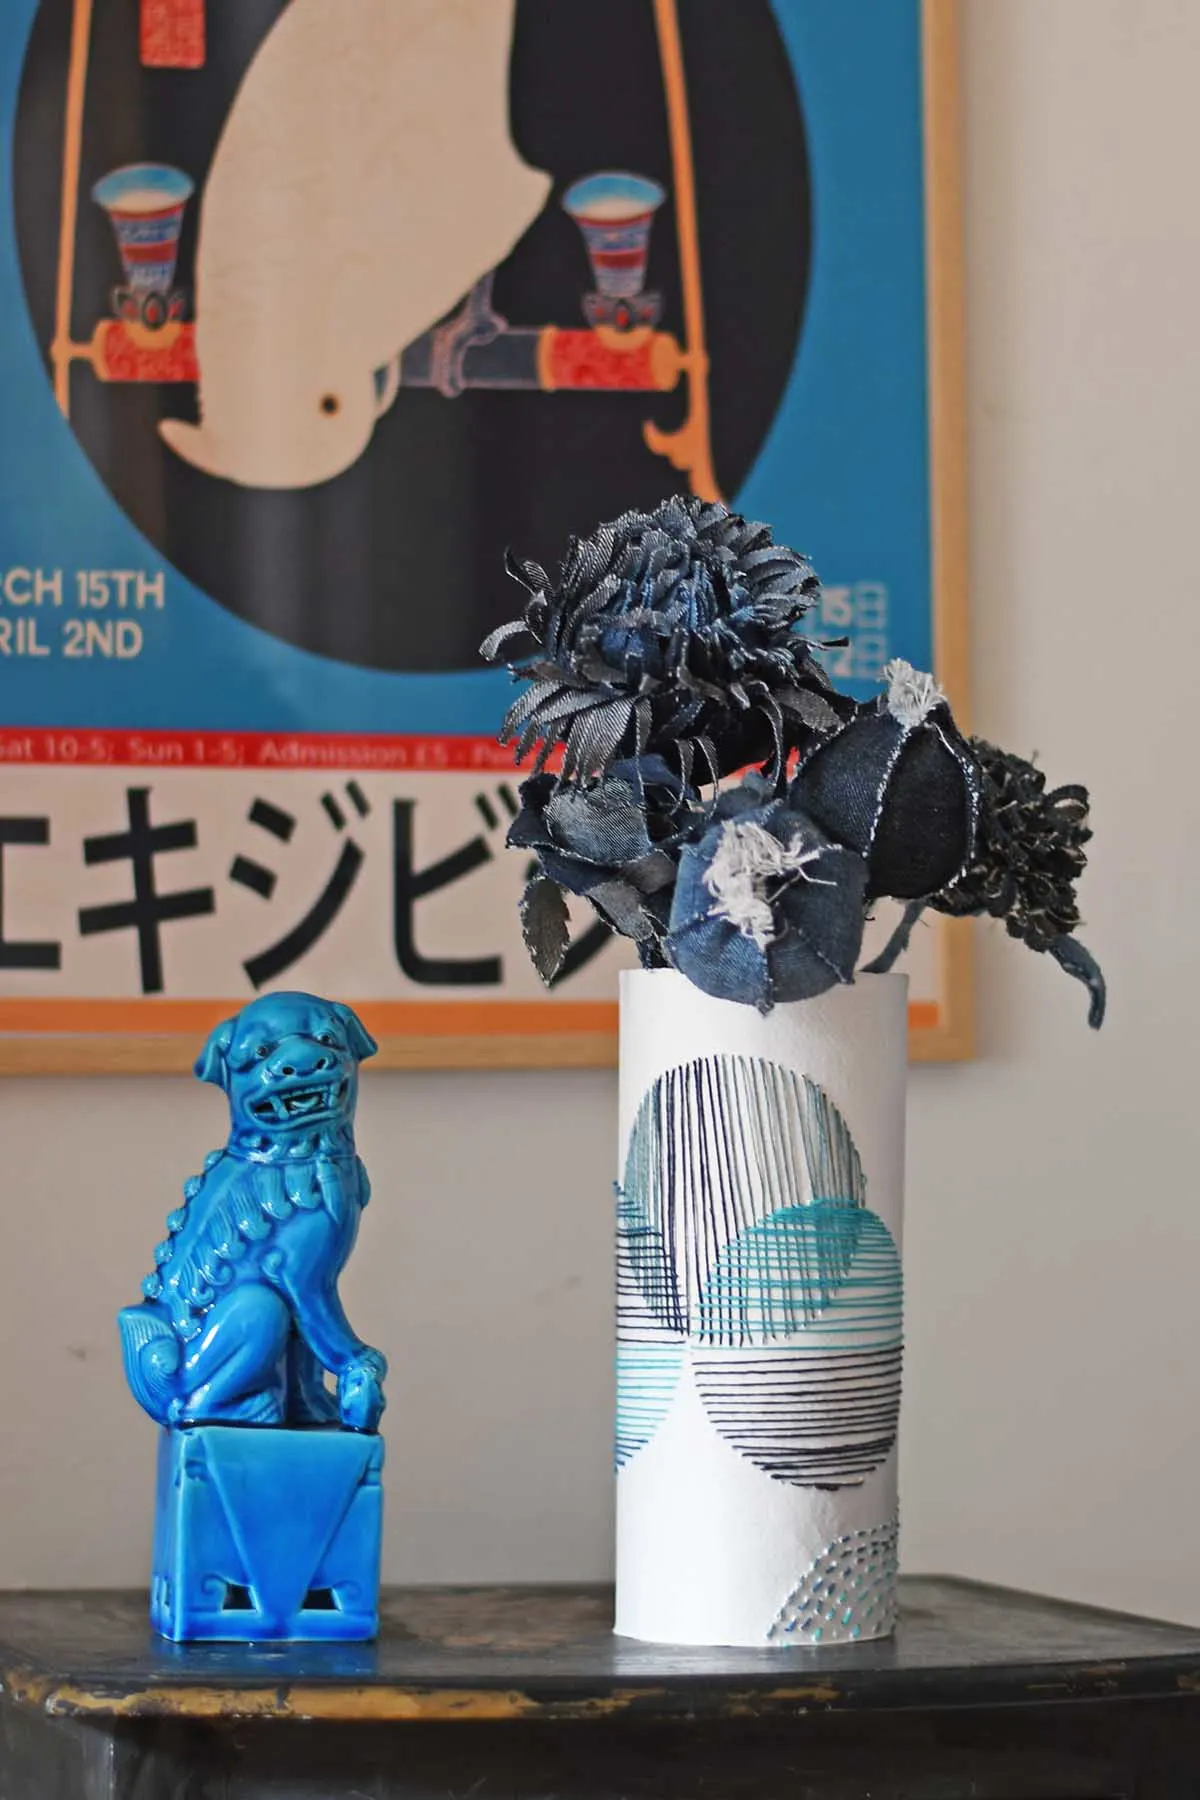
Step 1: First, draw your embroidery design with a pencil on the back of the handmade paper. I just drew a simple geometric pattern of overlapping circles and some wavy lines.

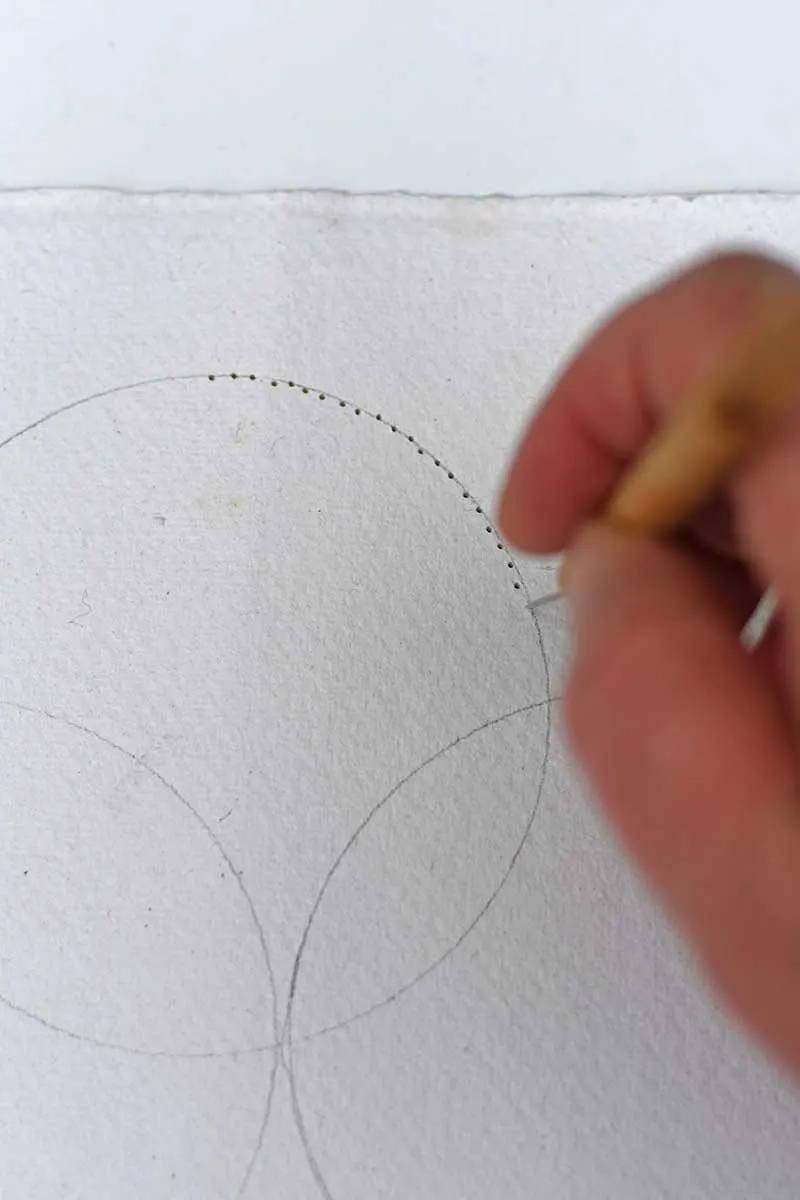
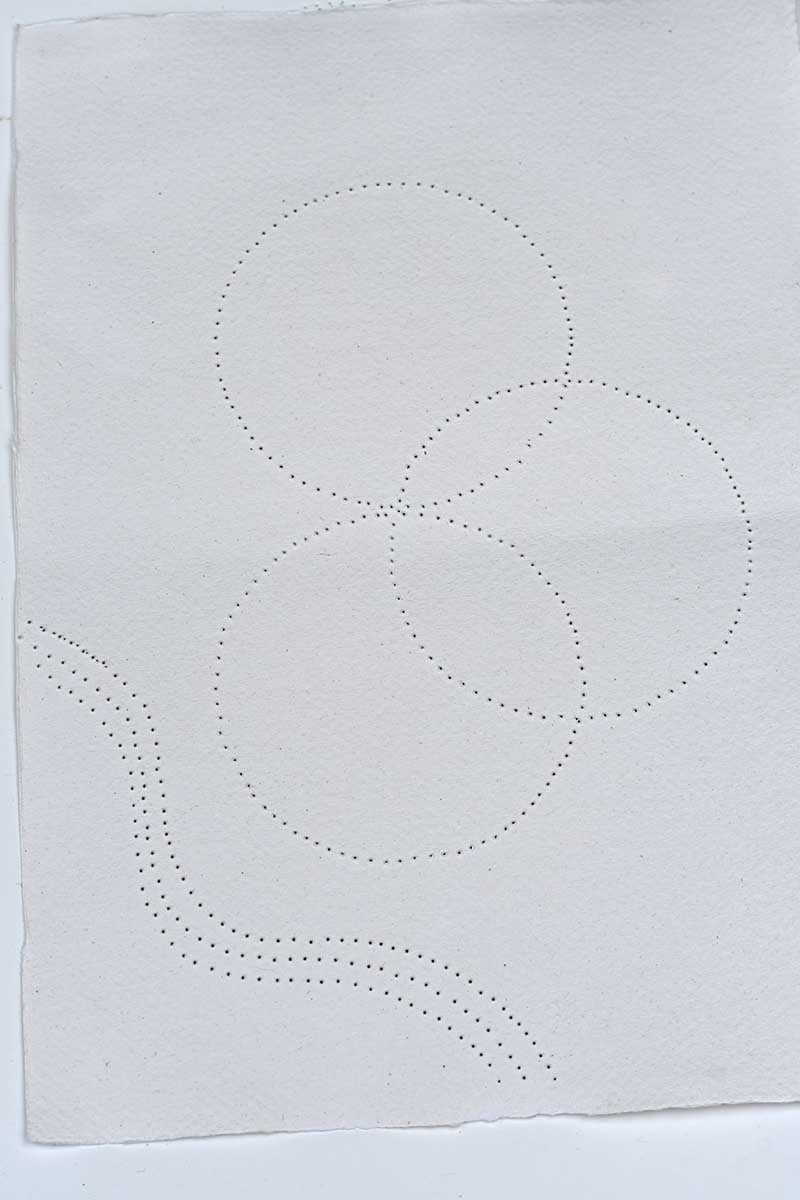
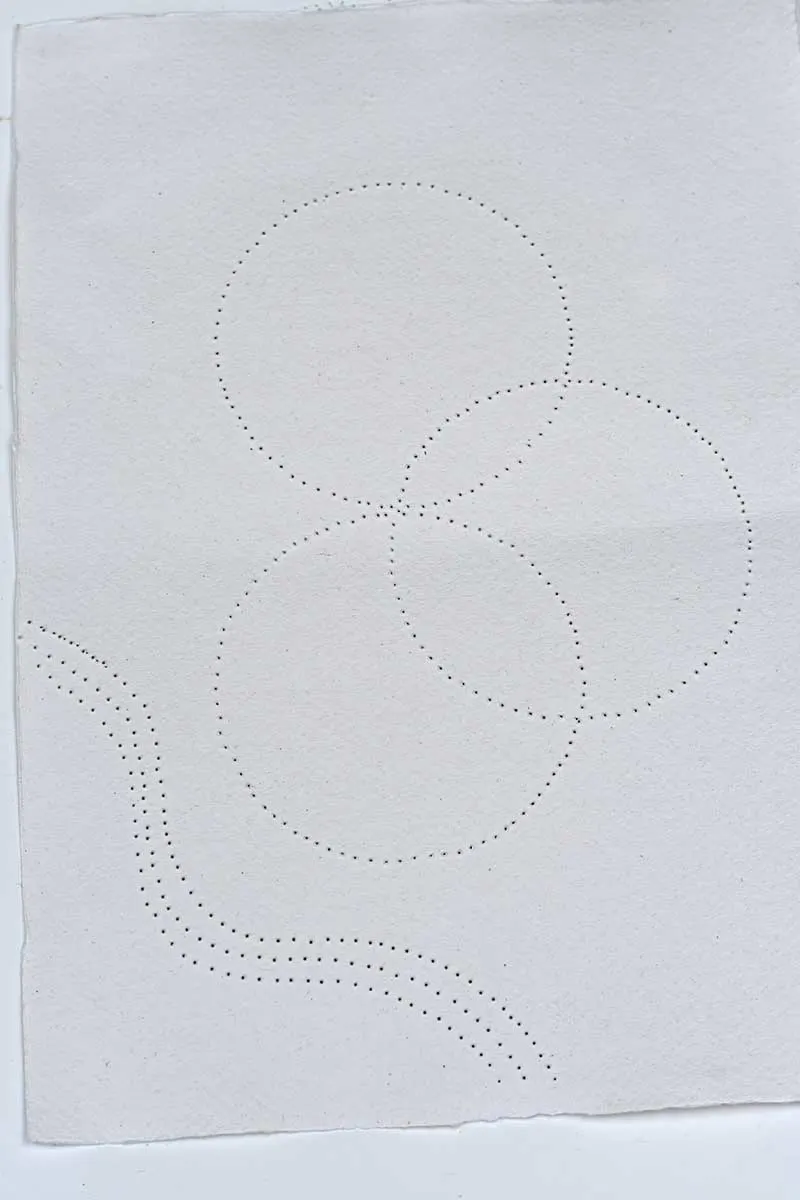
Step 2: Place the paper on a piece of foam board. Use a sharp needle to pierce holes along the design at regular intervals (about 3mm apart). This will make stitching easier and prevent the paper from tearing.

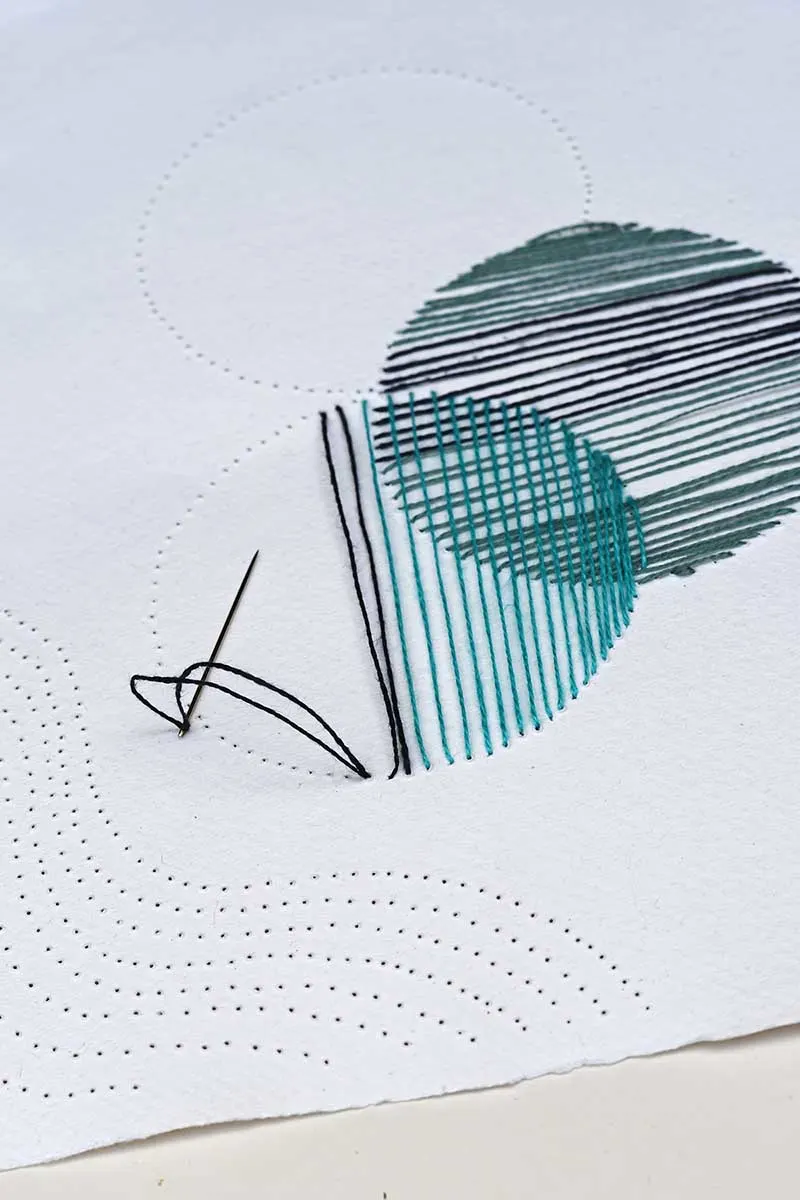
Step 3: Thread your needle and begin stitching. For the first stitch, pull the needle from the back of the paper (with the drawn pattern) to the front. Secure the end of the embroidery thread by either tying a knot or using a small piece of tape to attach it to the back of the paper.
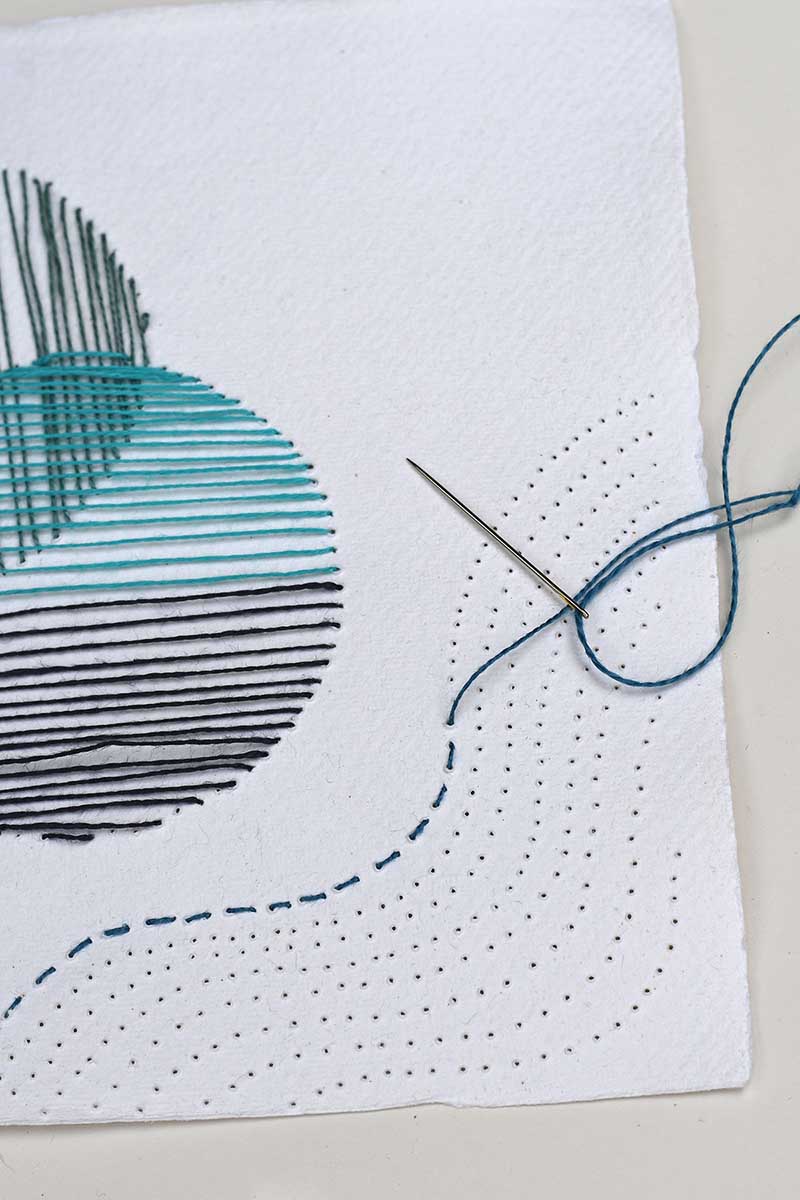
For the embroidery pattern I drew, I used long, straight stitches across the circles in broad stripes of coloured thread. I opted for a simple running stitch for the wavy lines, again in broad stripes of different coloured threads.
Before you begin, experiment with different stitches on a spare piece of paper. This will help you decide which techniques work best for your design.


Step 4: Once the embroidery is complete, secure any ends with tape on the back and trim any excess threads.
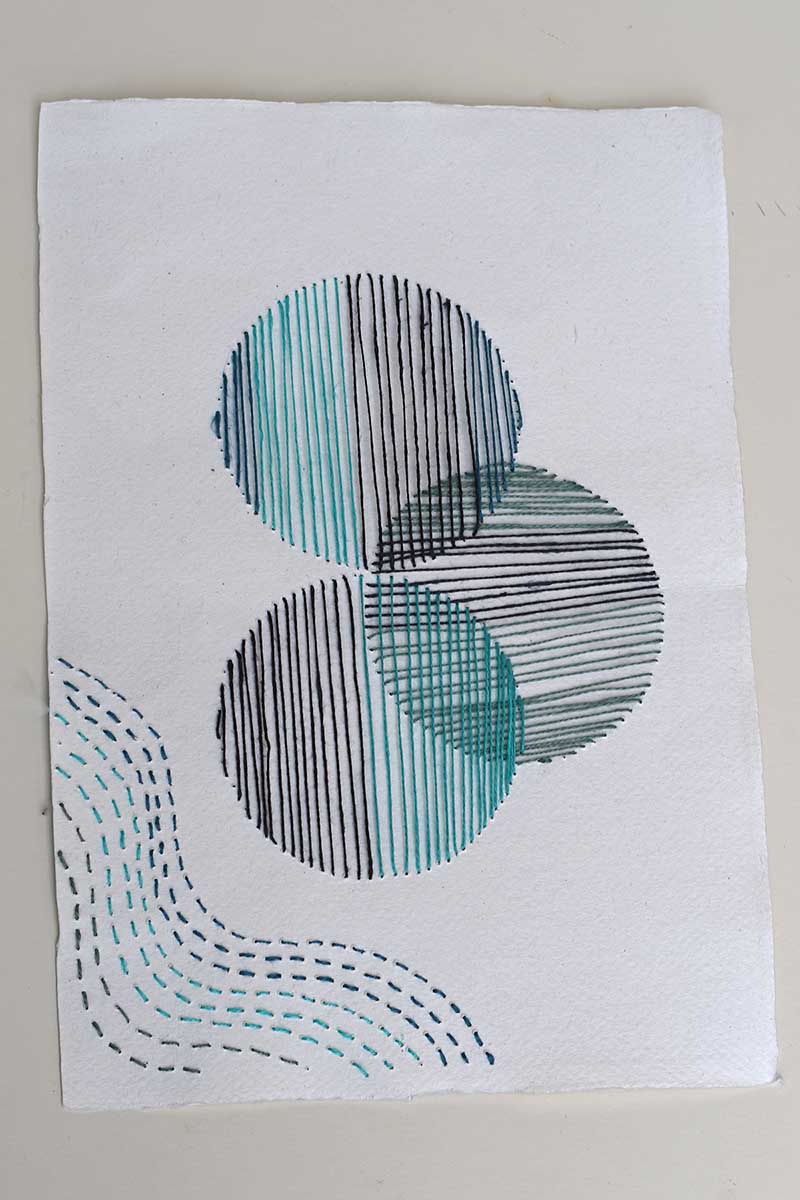
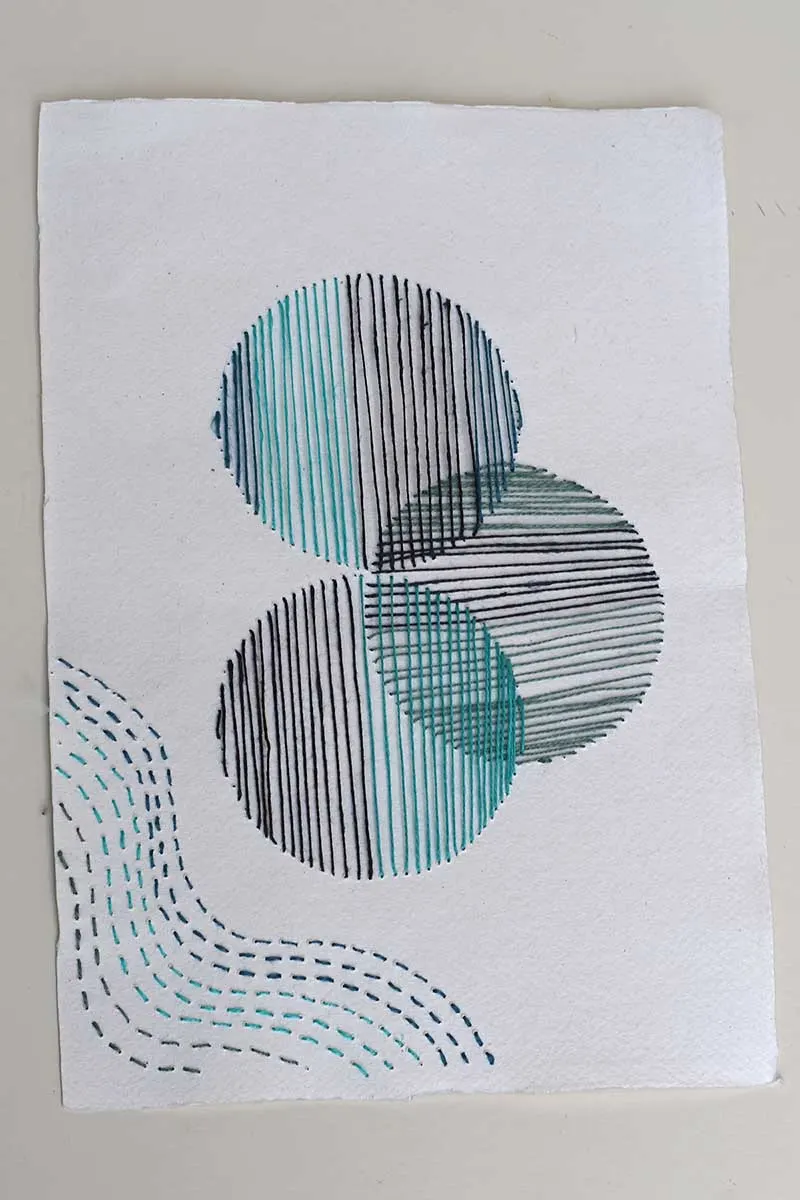
Turning the Paper Embroidery Into A Vase
You could frame your paper embroidery as a fun piece of abstract art for your wall, but I decided to display mine more uniquely by transforming it into decorative sleeves for upcycled vases.
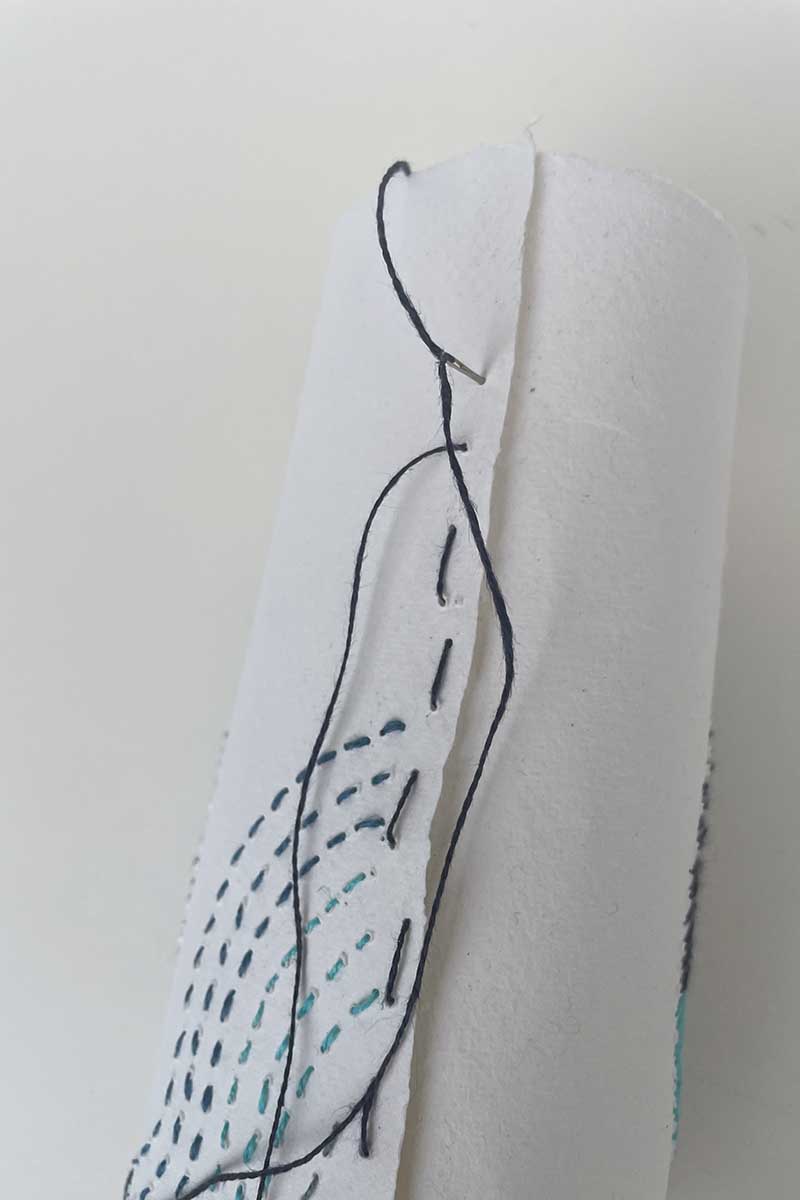
Step 5: First, roll the embroidered paper into a tube shape. Then, stitch the ends together to secure it. If you prefer not to stitch, you can use glue instead. This method showcases your embroidery and adds a creative touch to your home decor.

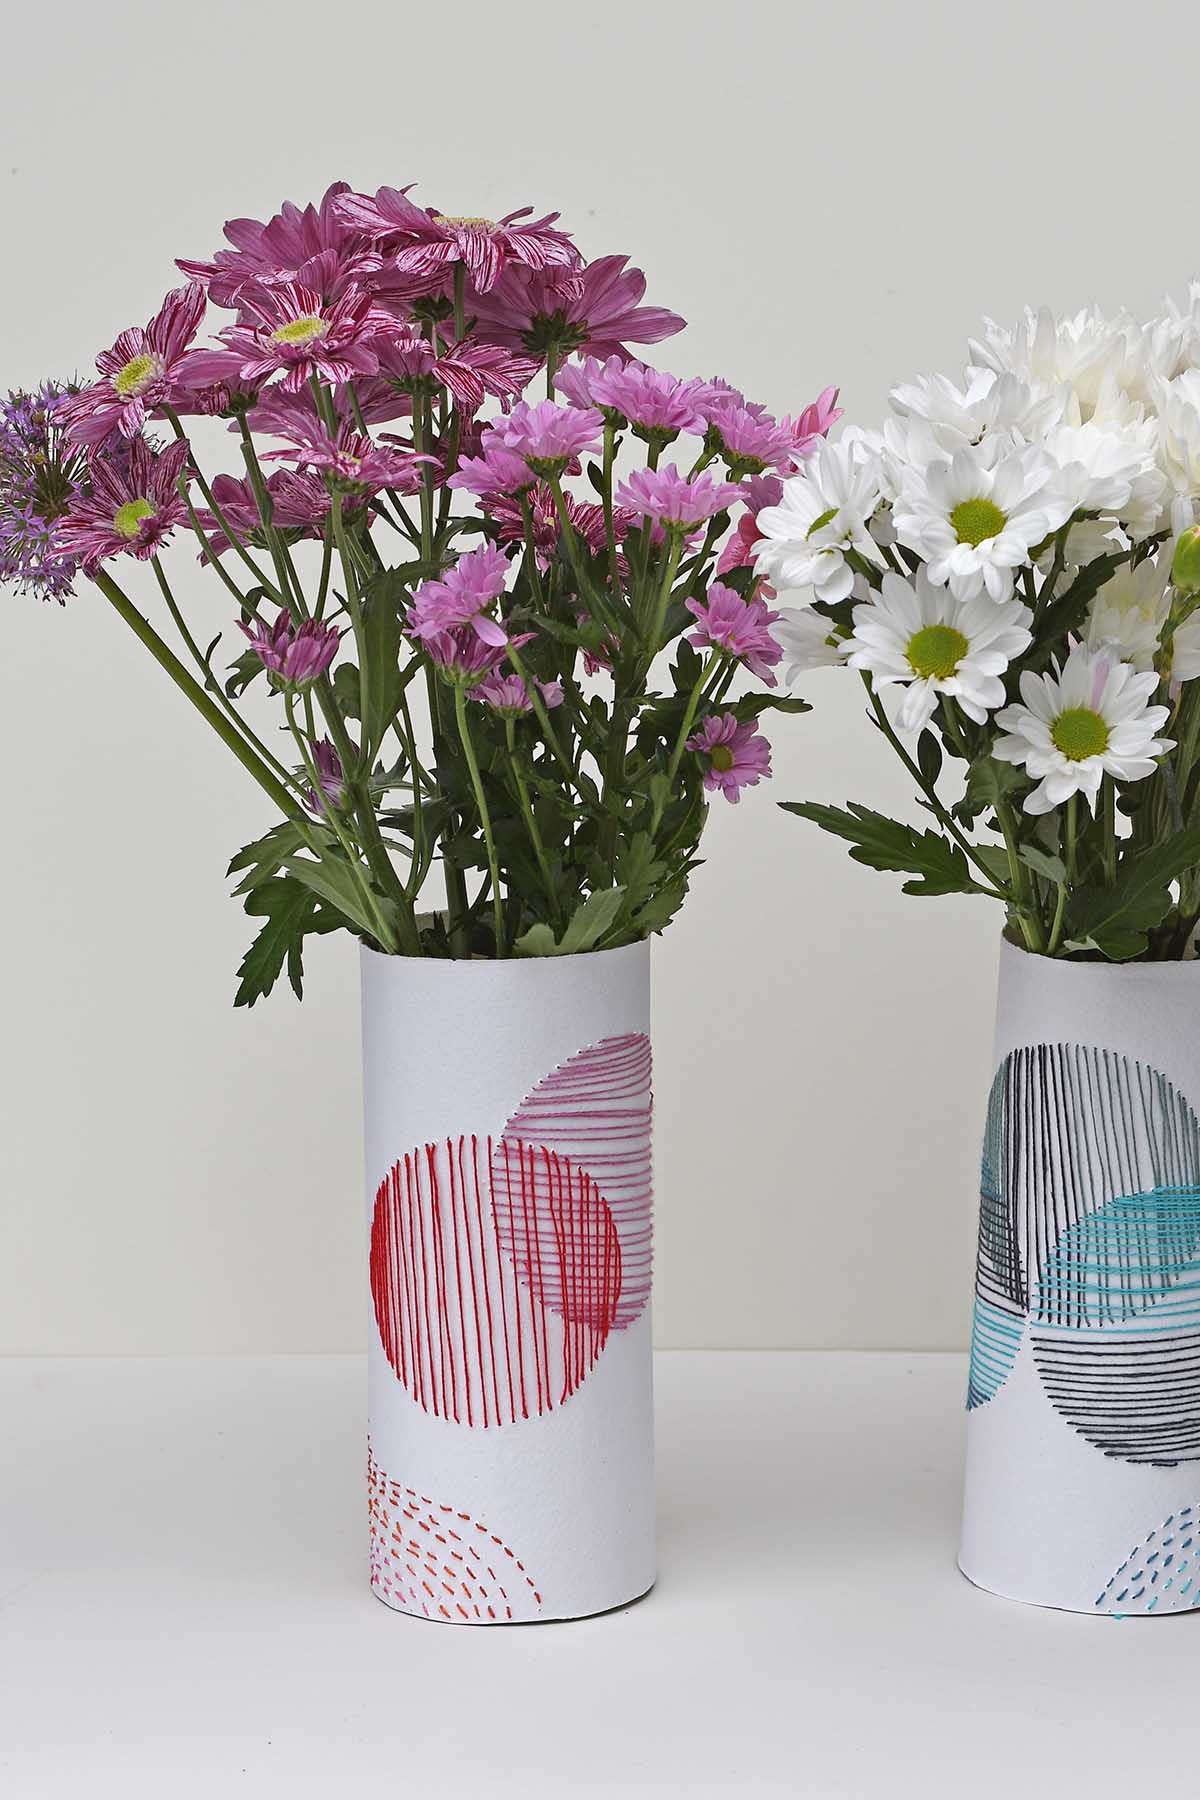
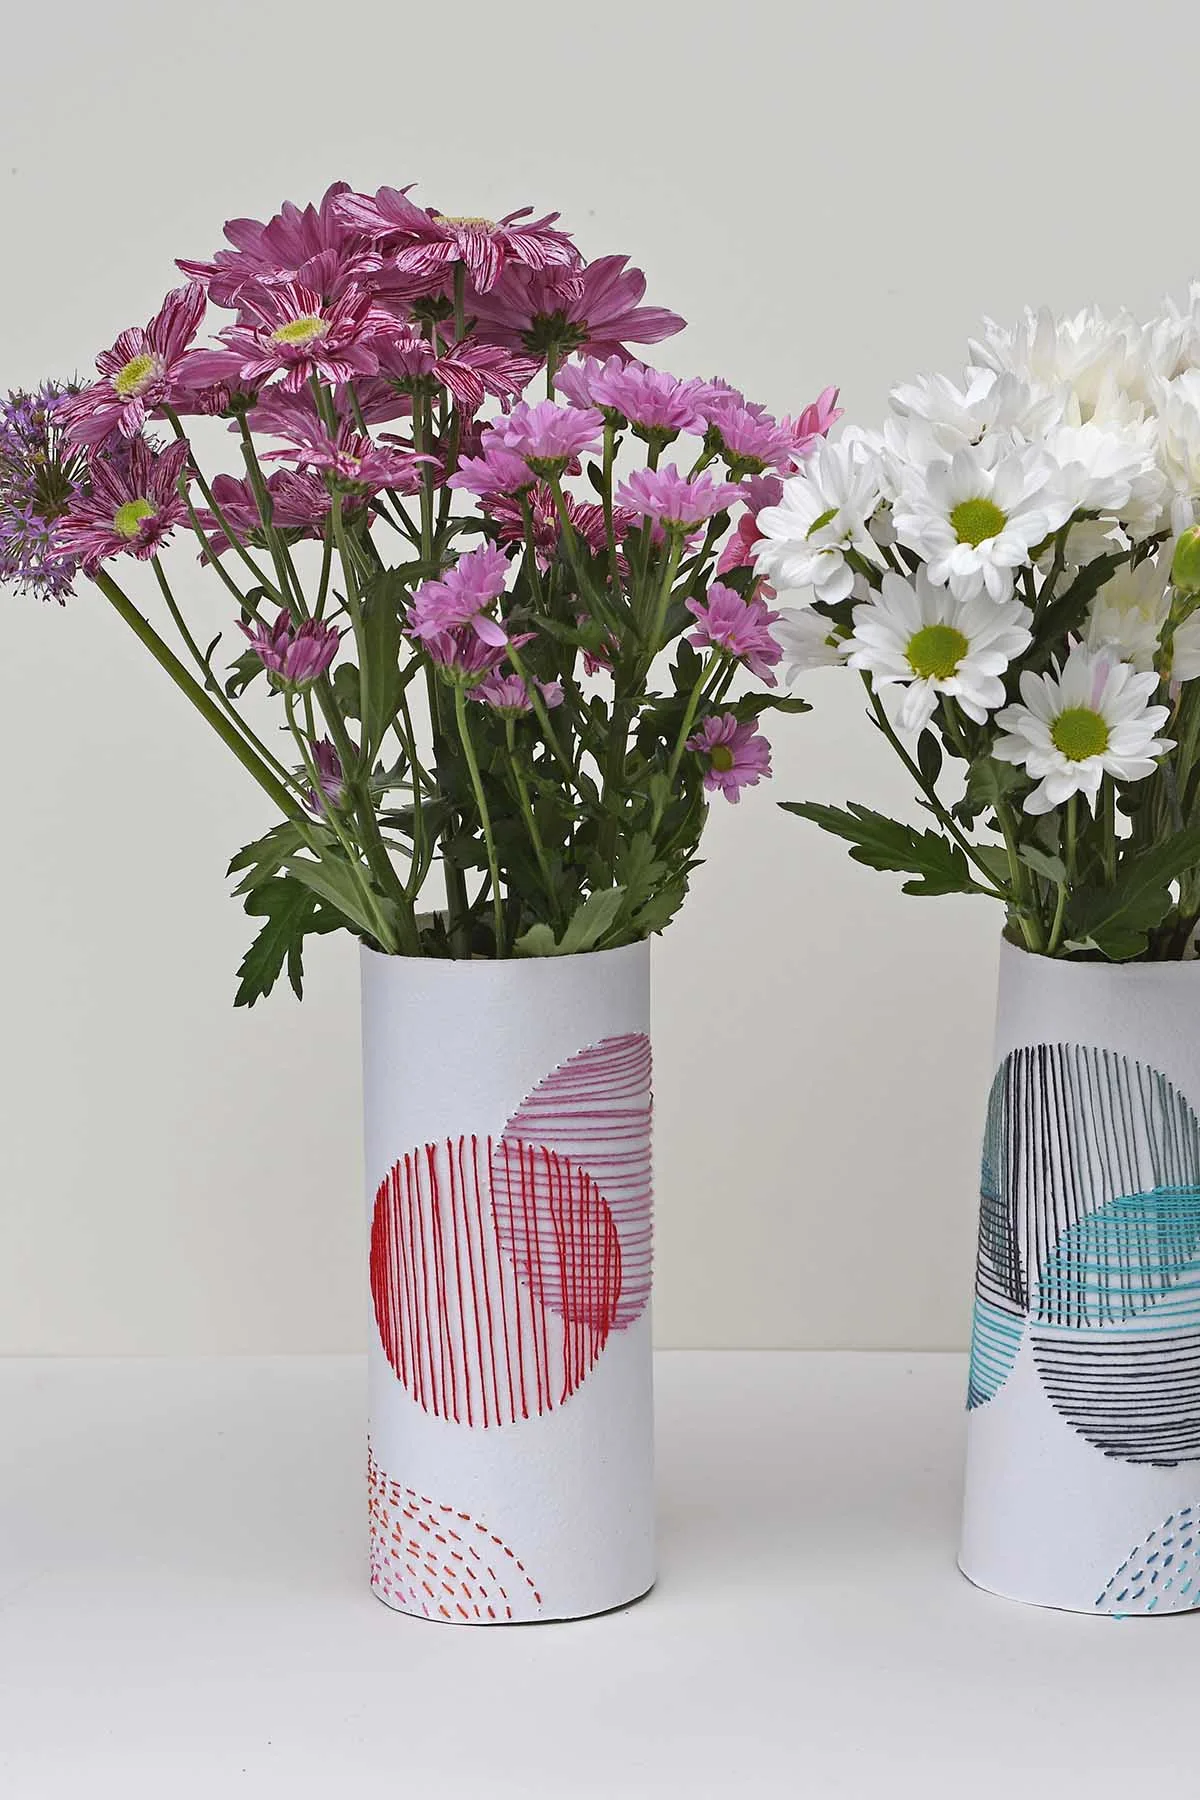
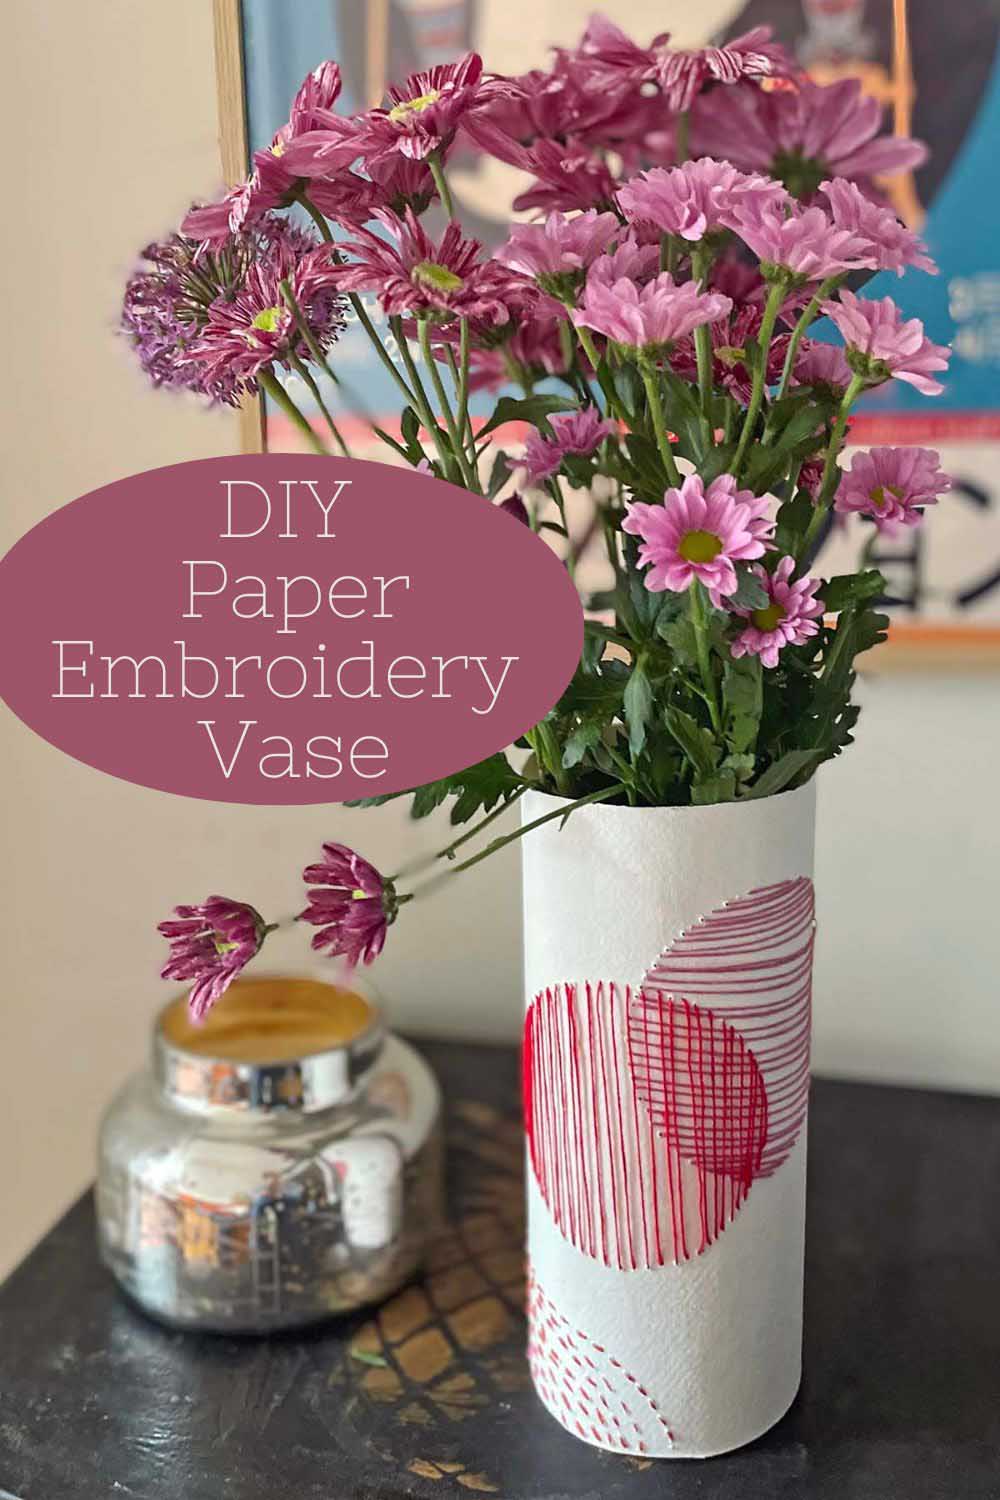
I had so much fun stitching the paper that I made two vase sleeves. One in pink and red, and the other in blue.


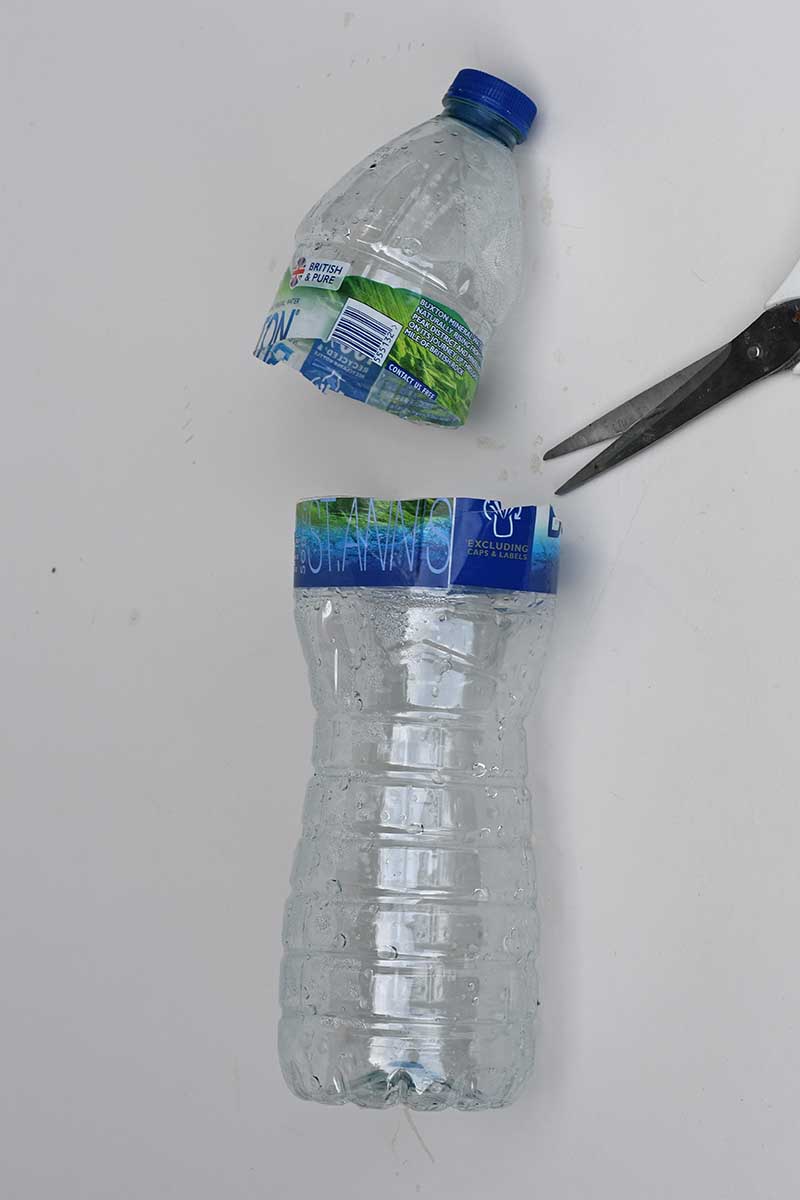
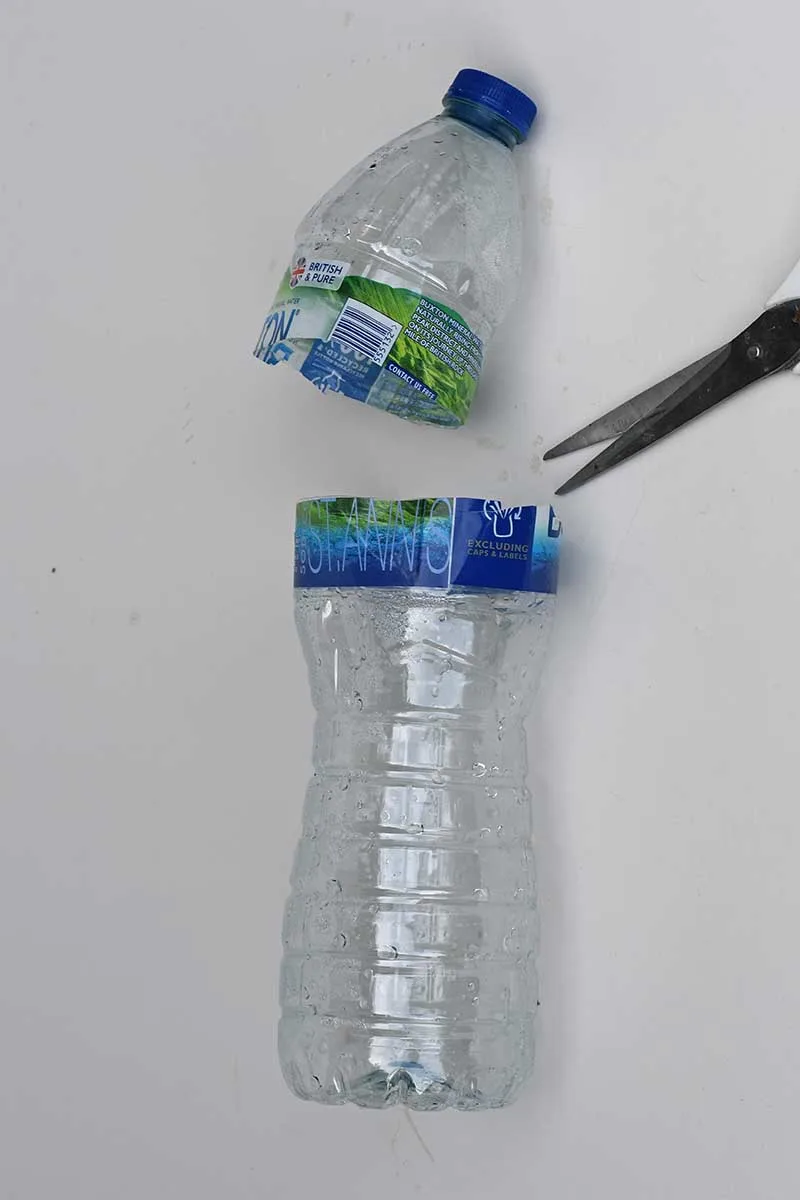
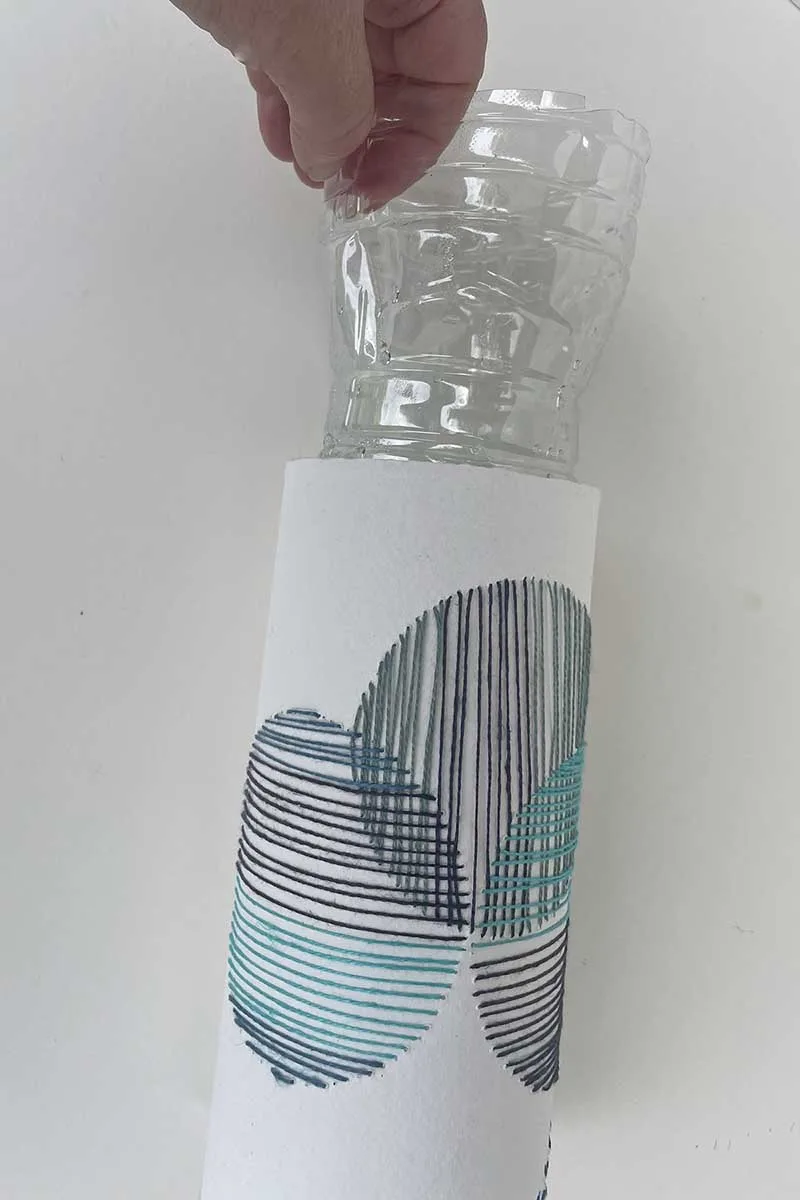
Step 6: With scissors, cut the plastic water bottle to the height of the vase.
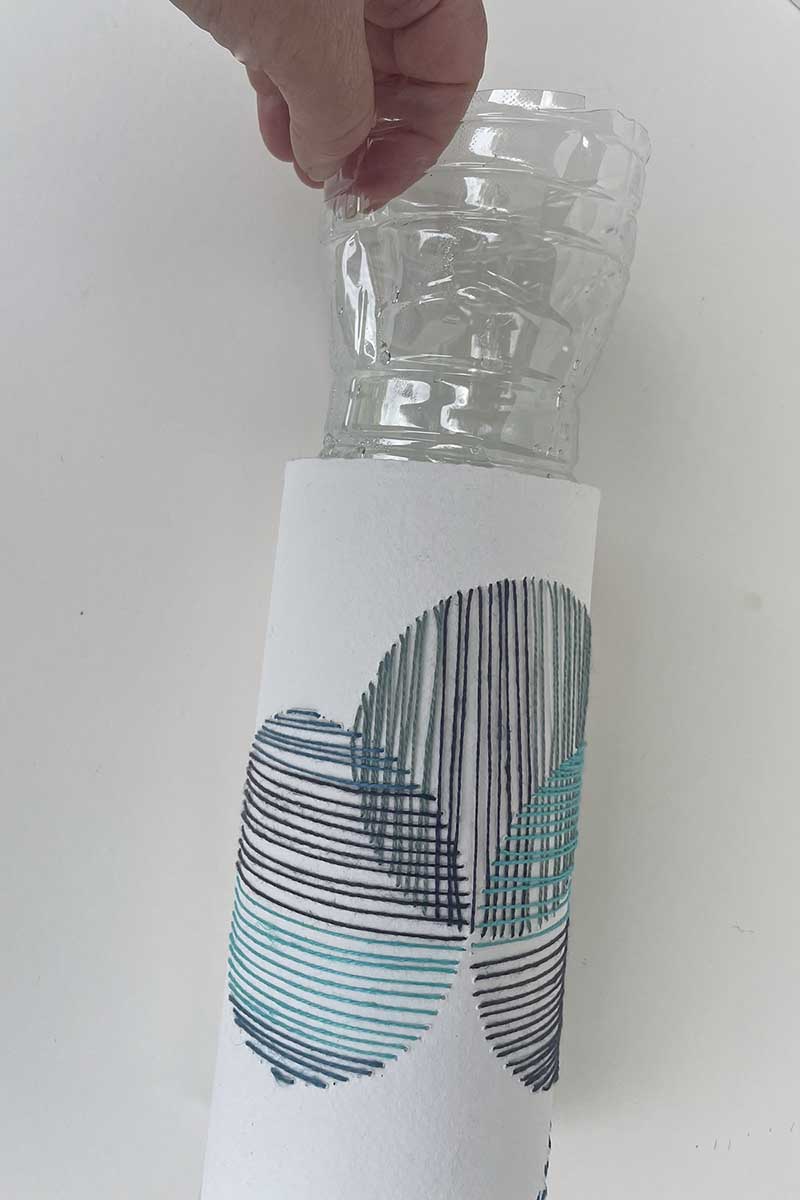
Step 7: Now, all that is left to do is slip the cut bottle into the paper sleeve and add flowers!

FAQs
Q: Can I use regular printer paper for paper embroidery? A: Regular printer paper can tear easily. It’s better to use thicker papers, like cardstock or watercolour paper.
Q: Do I need special needles for paper embroidery? A: No special needles are needed, but a sharp needle works best to pierce the paper cleanly.
Q: How do I transfer my design onto paper? A: You can use a lightbox, tracing paper, or printable templates.
Q: Can I embroider on any photograph? A: Photos printed on matte or glossy paper work well. Just be careful with very thin photo paper, as it may tear.
Q: How do I prevent the paper from tearing while stitching? A: Pierce the paper gently and avoid pulling the thread too tightly. Using thicker paper also helps.
Q: Can I use the same stitches on paper and fabric? A: Yes, most stitches work on both. Some might need slight adjustments for the different textures.
Conclusion & Other Related Posts
Paper embroidery is a fantastic way to mix up your crafting routine. You can create beautiful cards, Christmas ornaments, gifts, and art pieces with just a few basic materials and stitches. Keep experimenting with different papers and designs, and you’ll soon find your unique style. For example, try some Sashiko-style paper embroidered hearts.
I’ve also tried these paper embroidery techniques on air-dry clay, and it worked really well. Check out these embroidered clay pendants.
You can also stitch on paper with a sewing machine, and this post provides the best tips on sewing on paper and some wonderful craft ideas.
The tips and techniques for embroidering on paper are similar to embroidering on wall canvases. Check out this embroidery canvas wall art for details.
Another excellent paper embroidery craft idea is this embroidered fall leaves decoration for the mantle. If you love to create and decorate with paper, check out all these wonderful paper decoration crafts.
Many of the tips in this post for combining watercolour and embroidery will also apply to paper embroidery.
Finally, if you like the simple idea of upcycling plastic bottles into vases with decorative paper sleeves, check out these sewing machine-stitched wallpaper vase sleeves. Plus, there are all these other wonderful adult craft ideas.

creativejewishmom/sara
Thursday 6th of June 2024
wow Claire, another fabulous project! thanks for sharing on craft schooling sunday!
Claire Armstrong
Saturday 8th of June 2024
Thank you so much. Hope you are well and safe.
Pam
Thursday 6th of June 2024
This is such a great idea. Such creative ways to use embroidery. I will be featuring this post at Thursday Favorite Things tomorrow. :)
Claire Armstrong
Thursday 6th of June 2024
Thank you so much. Paper embroidery is fun. I look forward to seeing the feature.
Joanne
Wednesday 29th of May 2024
That is really neat! I had never heard of paper embroidery before.
Claire Armstrong
Wednesday 29th of May 2024
Thank you, it is a fun craft to do and very economical.