
Inside: The top tips on how to do mixed media watercolour embroidery with two free patterns and a step-by-step tutorial.
Last weekend I visited the Knit & Stitch show and was in awe of the fantastic embroideries. These were detailed and skilled pieces that must have taken weeks, if not months, to complete.
Even though I find embroidery meditative, I don’t have the patience for big detailed projects. With mixed media watercolour embroidery, I can combine paints and stitches to create colourful pieces that would otherwise take ages if they were all stitches.
Combining watercolour paint and embroidery speeds up projects. And it’s a fun way to create fantastic decorative stitched artwork for your home.
I will show you how to successfully combine watercolour paint and stitches with two free embroidery patterns that you can download to have a go yourself.
We’re a participant in the Amazon Services LLC Associates Program, an affiliate advertising program designed to provide a means for us to earn fees by linking to Amazon.com and affiliated sites. As an Amazon Associate, I earn from qualifying purchases.
(There is a printable how-to card for this craft at the end of the post.)
What is Mixed Media Watercolour Embroidery?
Mixed media embroidery is when you combine watercolour painting with hand embroidery.
The paint can be used to decorate fabric, and the stitches to add texture. Or the stitches can be used to outline designs, and the watercolour paint can fill the design with colour.
Using watercolour paints is quicker to add colour than filling stitches. Shading with paint is also more straightforward than it is with embroidery floss.

What Fabric To Use
- Like when you paint on paper with watercolour, you want a white/whitish background. Light fabrics in whites and natural colours work best with watercolour paints.
- Cotton canvas (calico) fabrics are suitable for both paints and stitches. It is sturdy enough to take paint and easy enough to hand stitch. It is an easy fabric to get drum tight in an embroidery hoop.
- Unbleached fabric is best for watercolour painting techniques as the colour bleed is better. Bleached fabrics tend to be smoother, and watercolour paints don’t bleed and mix as well.
- NOT stretchy fabrics, as these are harder to embroider.
- NOT felt or velvet fabrics; they may be easy to embroider, but they aren’t good with watercolour paints.
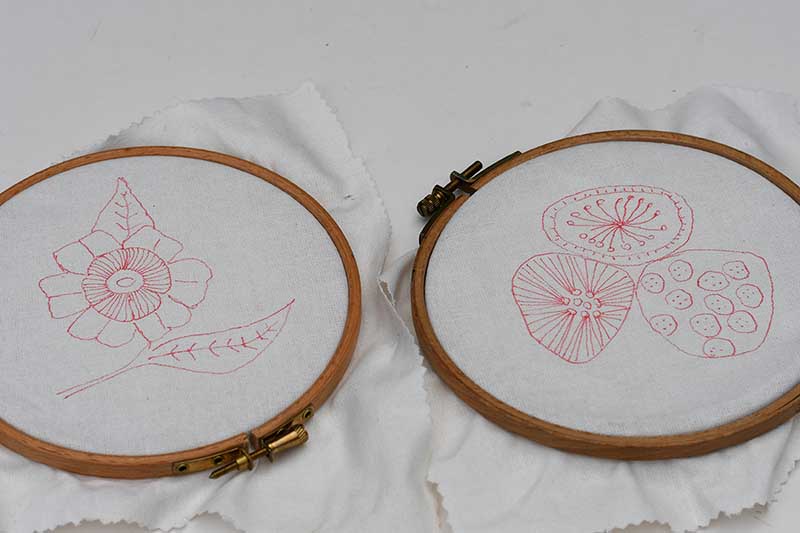
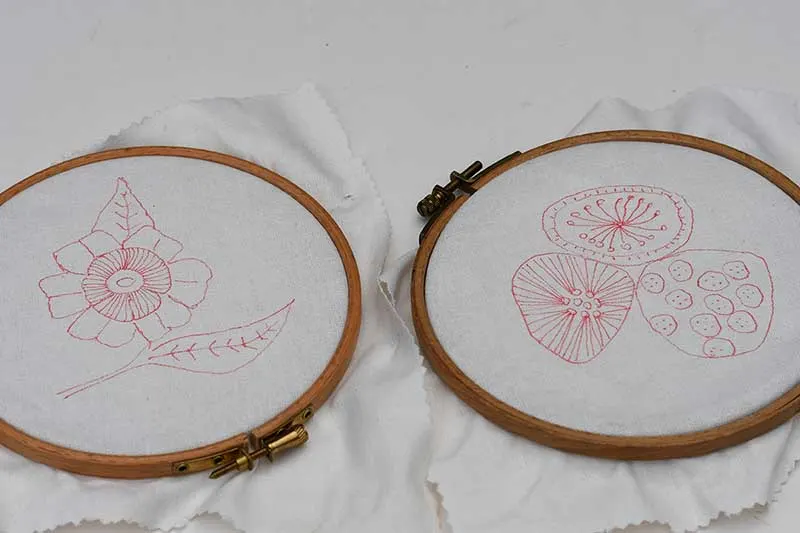
The Free Watercolour Embroidery Patterns
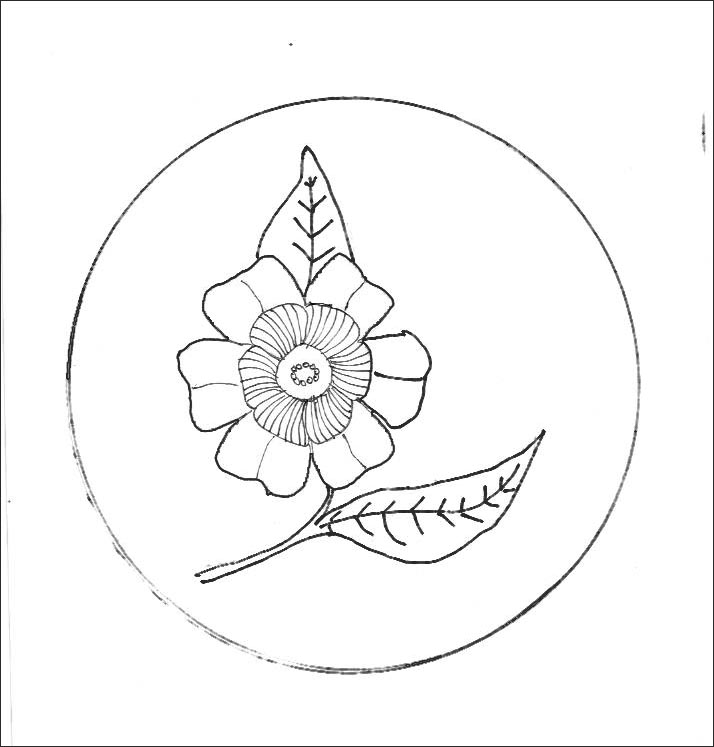
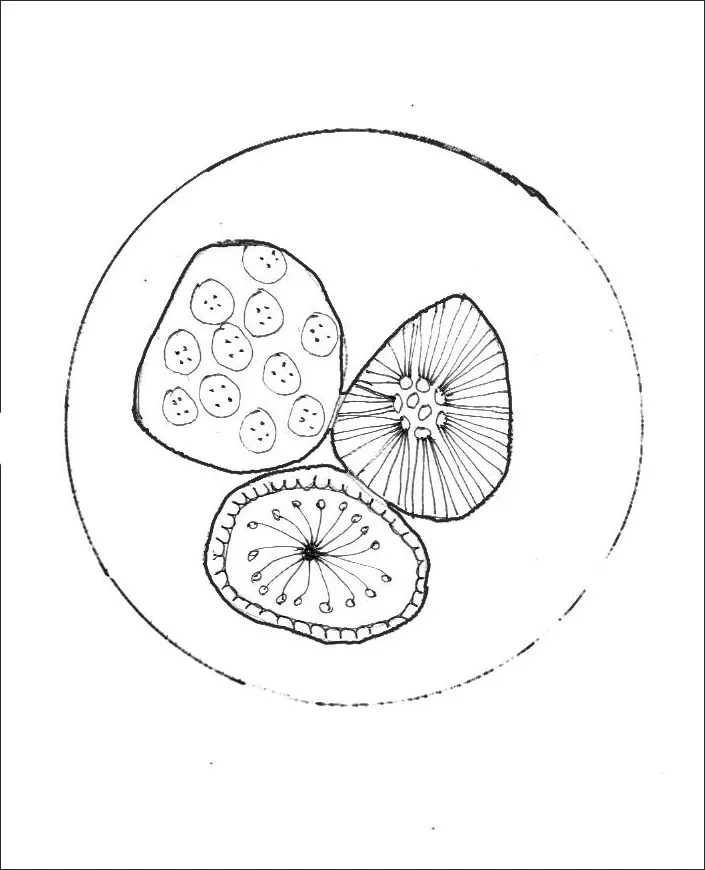
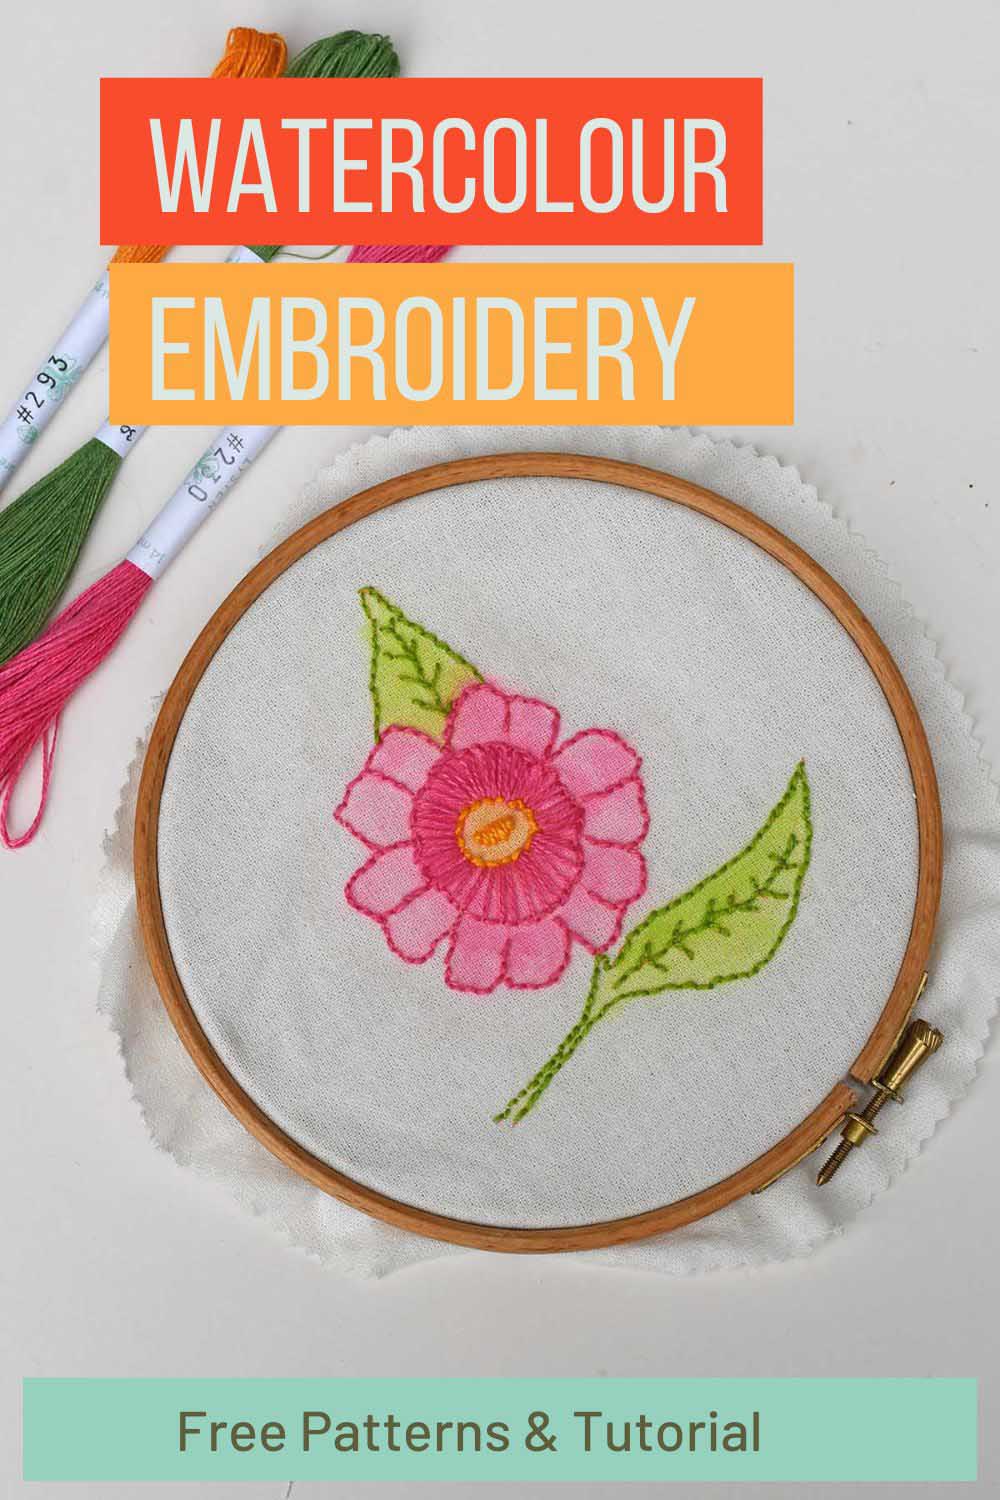
I have designed two free patterns for practising with. One is a simple flower, and the other is an abstract pebble design. You can download and print them for free, click on the title above the design you want.
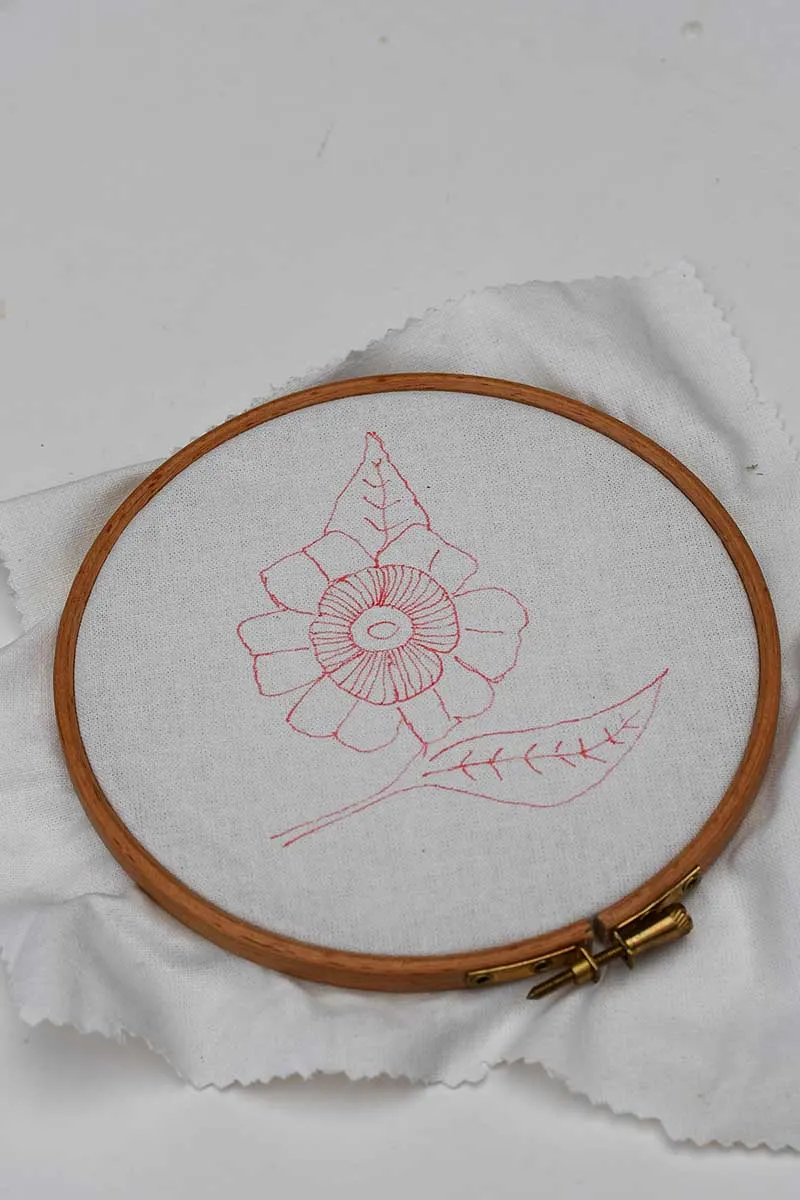
Flower watercolour embroidery pattern

Abstract Pebble Embroidery Pattern

How To Transfer The Pattern
The fabric will get wet when painting with watercolours, so you can’t use water-soluble transfer pens. Also, carbon copy paper doesn’t work well as the carbon dust will smudge the light fabric.
The best thing to use is a heat-erasable pen. Or, if you are confident that your stitches will hide any ink marks, use a thin nibbed ink pen to mark out your design.
Step 1: Place the printed pattern on top of a lightbox. I use an app on my iPad that turns it into a lightbox. Or you can use a window on sunny days. Then place the fabric on top of the pattern and trace the image with a pen.
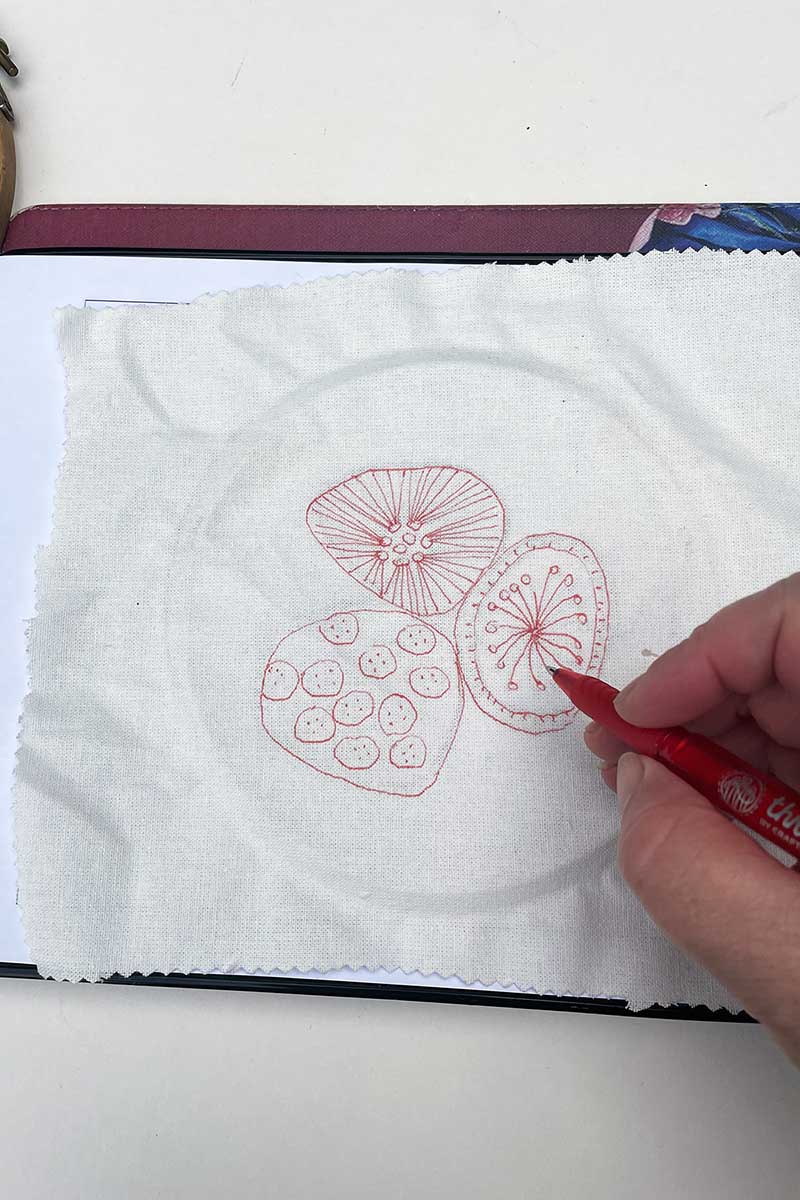
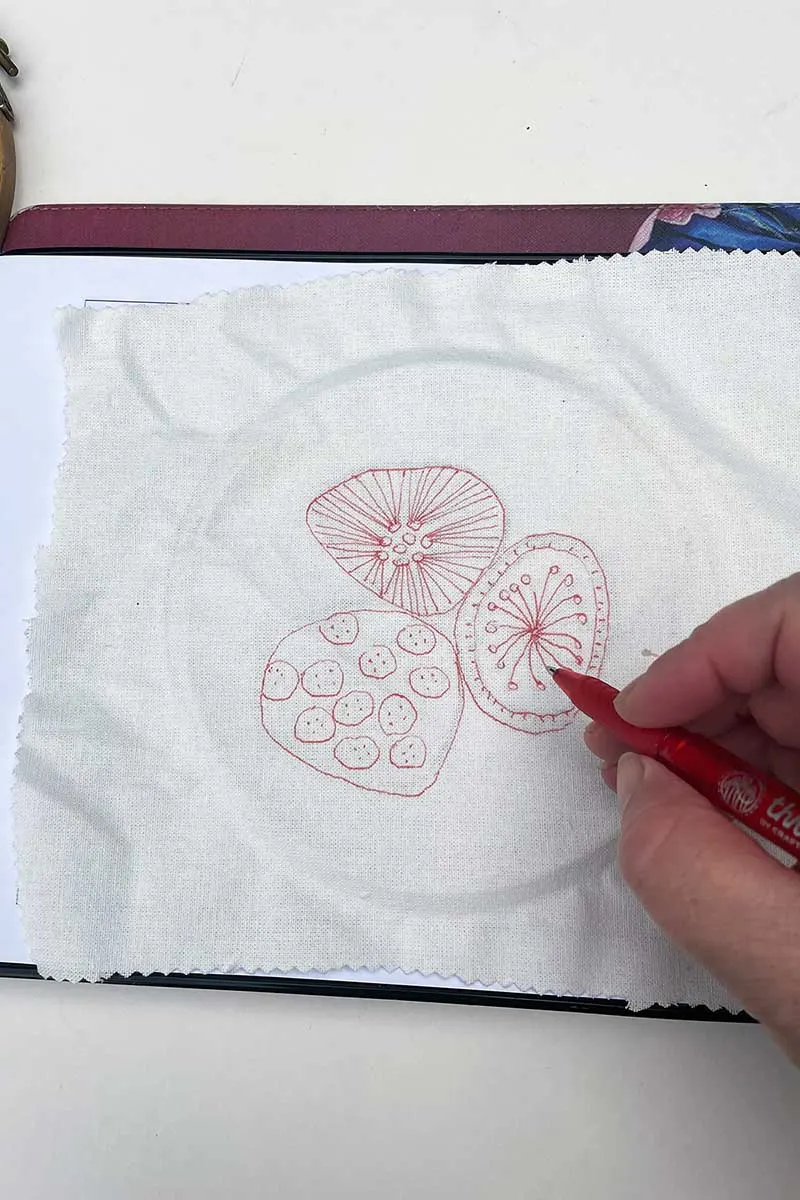
Step 2: Once the pattern has been traced onto the fabric, place it in an embroidery hoop. Pull the fabric evenly as you tighten the hoop by turning the screw. The material should be drum tight.

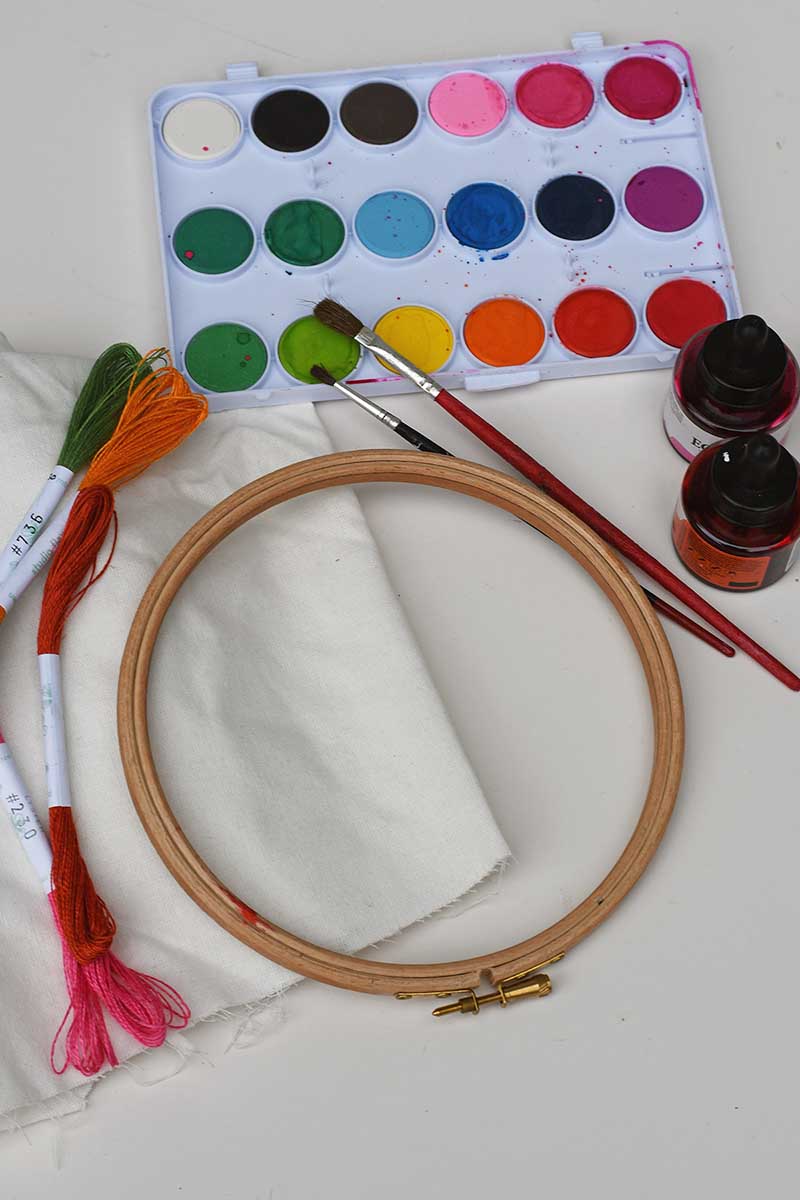
What Watercolour Paints & Brushes To Use
You can use any watercolour paint, and you don’t have to use expensive brands. Use standard watercolour paint brushes in a variety of sizes.
One thing to remember when using watercolour paints on fabric is that the colours will not be as vibrant as they are on paper. Therefore, use a higher paint-to-water ratio than traditional watercolour painting.
Also, if you are going to want to be able to wash the finished mixed media embroidery, then you will need to use a fabric medium to seal the paint to the fabric.
I used solid watercolour paint cakes for the flower pattern, and with the pebble design, I used watercolour inks. I used tube paints with this watercolour embroidery canvas.


What To Do First, Paint or Stitch?
It depends on the effect you are after, whether you paint or stitch first. With these designs, I painted first and then stitched them.
Things to think about before deciding what order to paint and stitch in.
- If using light-coloured floss, the paint can colour the stitches.
- If embroidering in black or dark colours, you can paint afterwards
- The stitches may act as a barrier to watercolour paint bleed.
- Let the paint dry thoroughly before stitching.
- Stitch in white floss and then paint to add a textual effect
- Paint the fabric first and then stitch it in dark colours to define the design.
How To Paint On The Fabric
Part of the charm of using watercolour paints is that they bleed. The bleeding can be controlled by how wet the paint is, how wet the fabric is and whether or not you add water after painting.
If you apply watercolour paint to dry fabric, the colour will not spread, but if you apply it to wet cloth, the colour floats out and spreads.
Before starting the painting, I recommend practising beforehand on a scrap piece of fabric. Check out the bleed of your paints and fabric, playing with wet and dry material and adding water later.
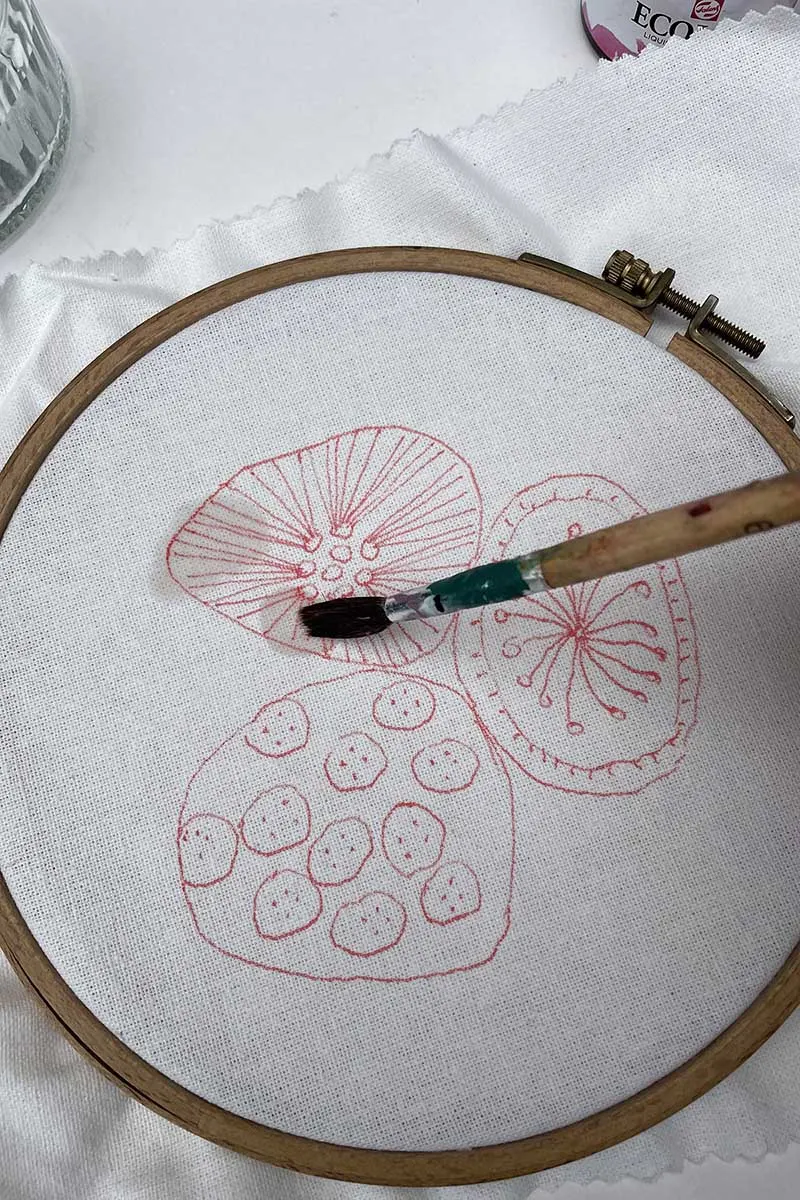
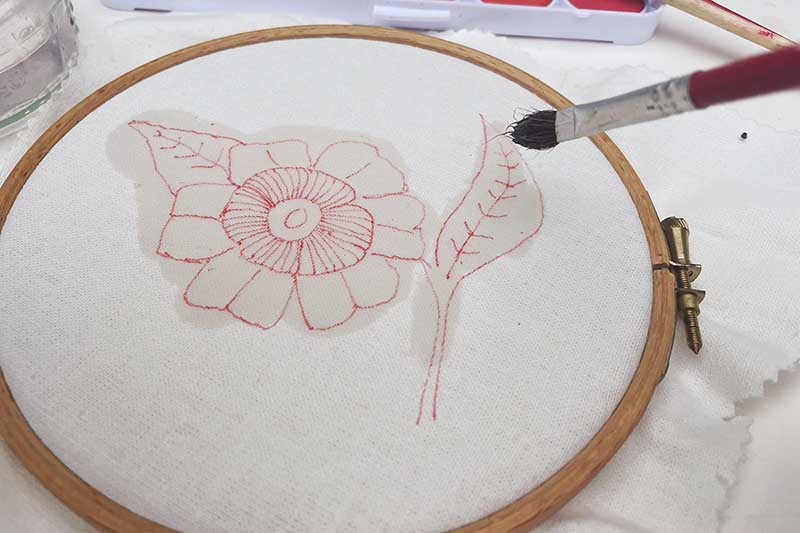
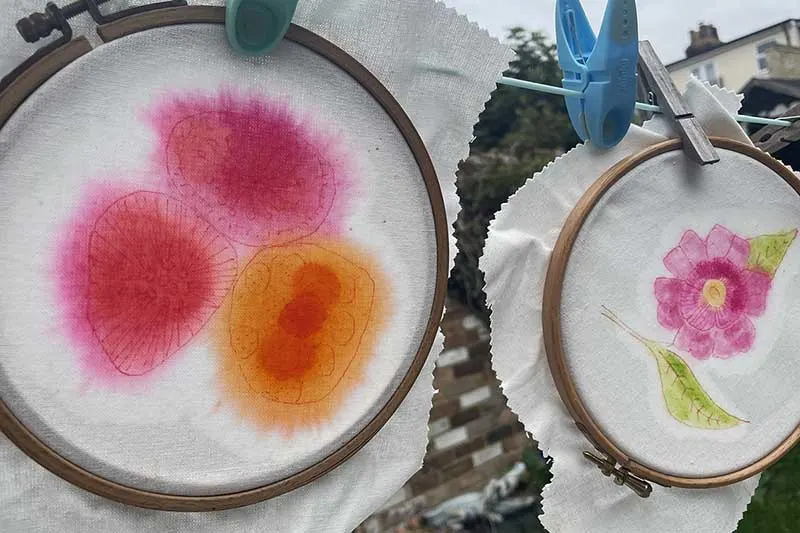
Step 3: I wet the fabric with both embroidery patterns before adding the watercolour paints.


Painting the flower pattern
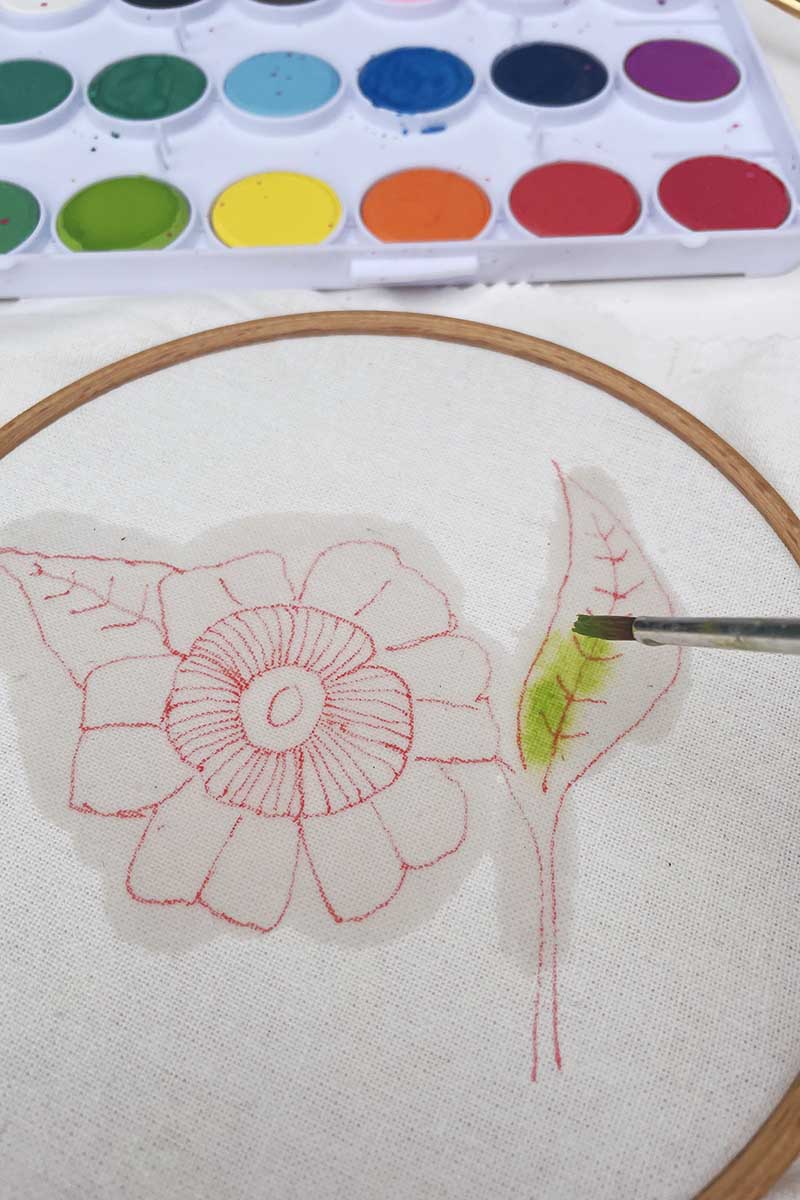
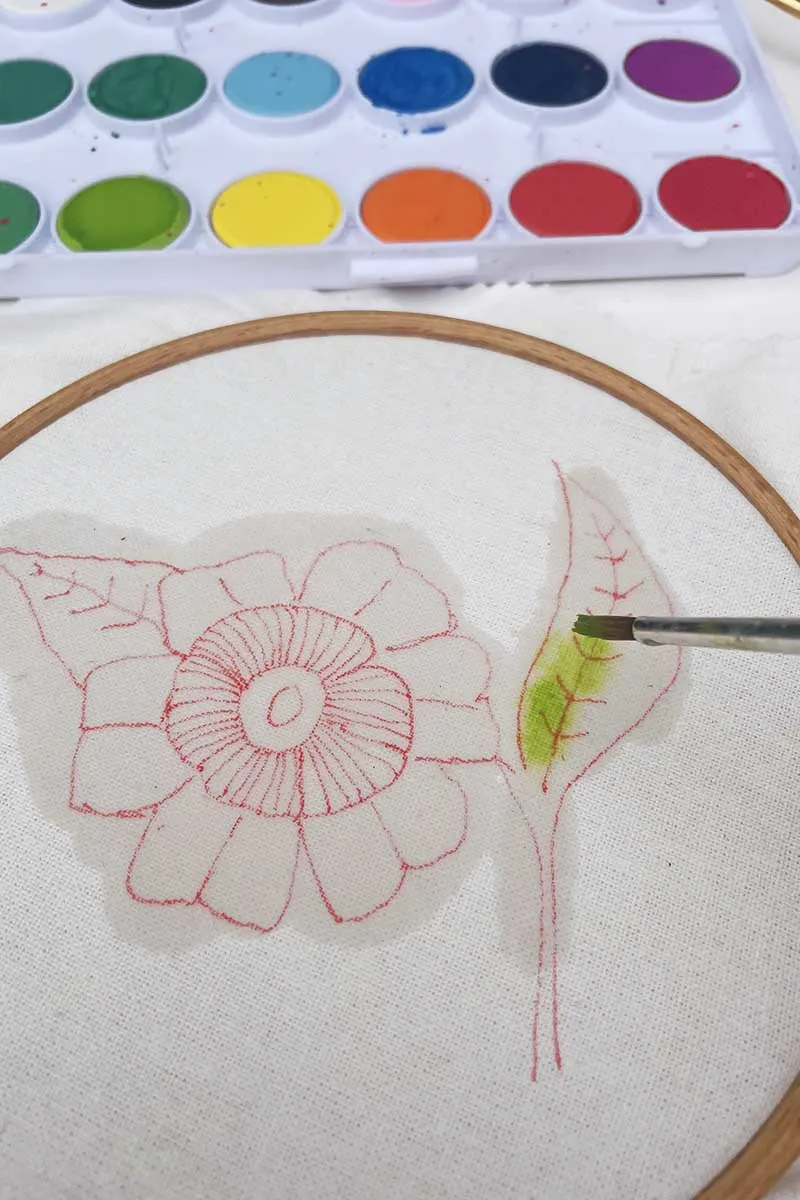
Step 4: With the flower pattern, I loaded my brush with lots of water before dabbing it onto the solid paint. I painted onto the wet fabric when enough colour was transferred to the brush.
With this paint, it was easy to control the watercolour bleed; I could keep within the pattern lines. I painted the leaves first, followed by the flower.


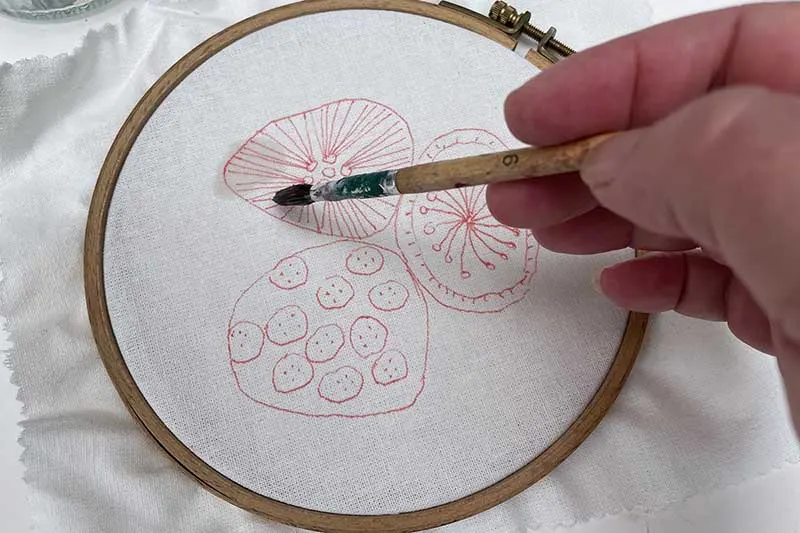
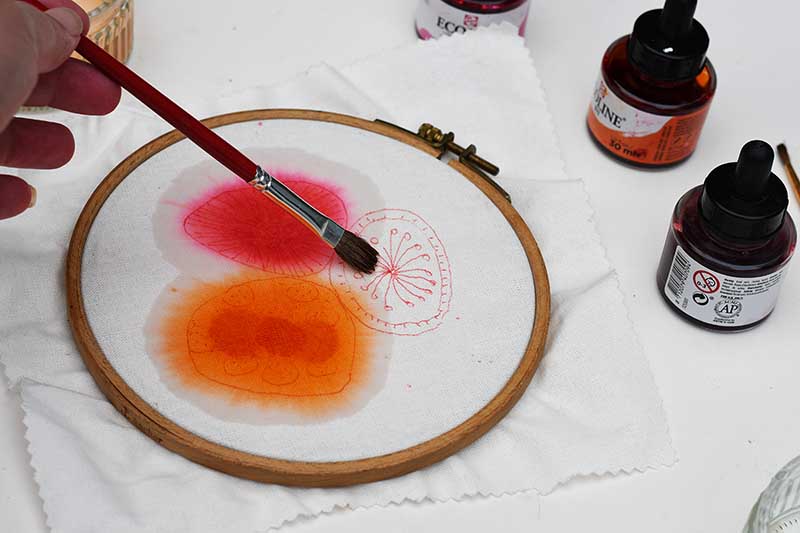
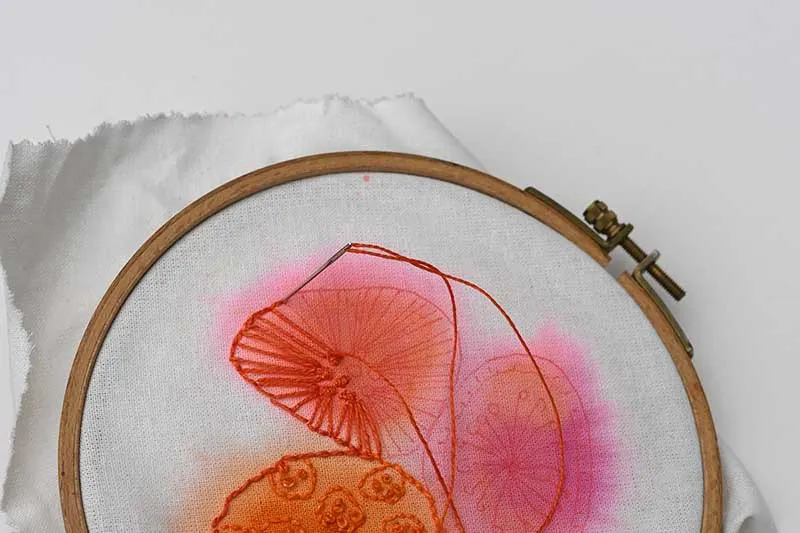
Painting The Pebble Pattern
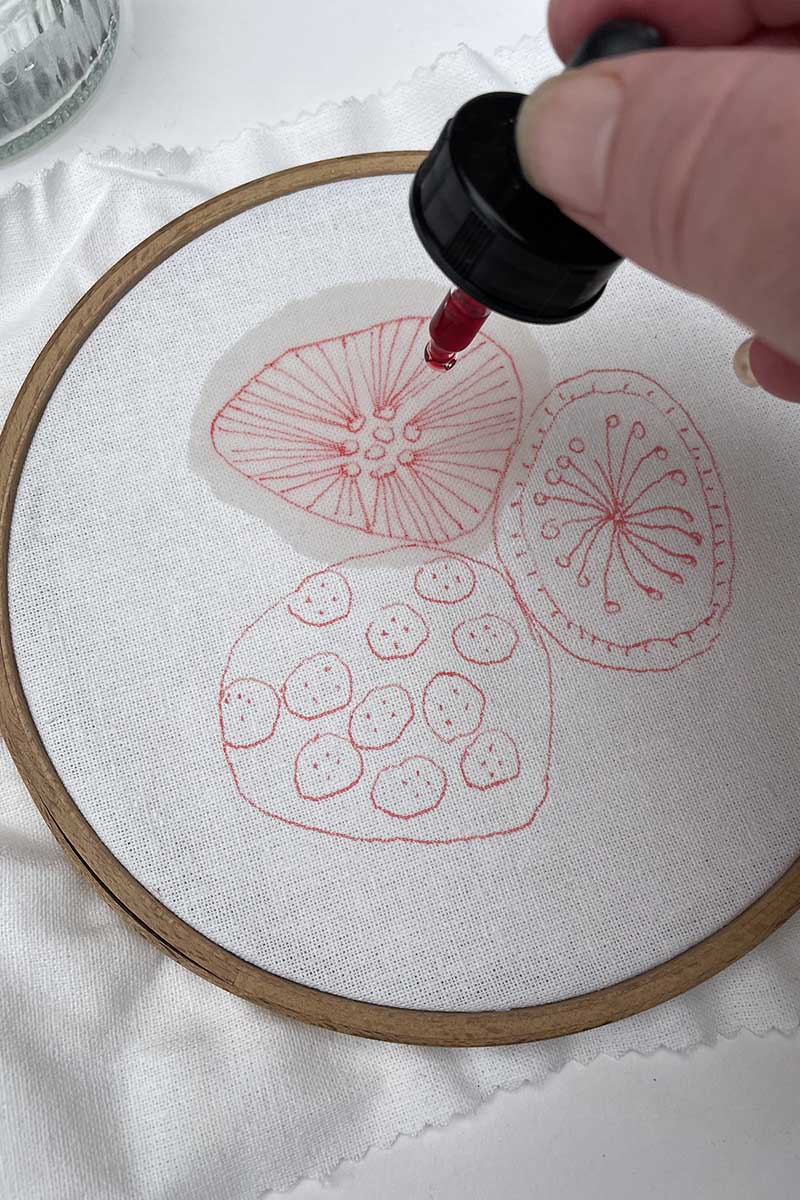
Step 5: I used watercolour inks with the abstract pebble pattern. First, I added a drop of ink onto the wet fabric and watched it spread out. I added more water with my brush to make the ink spread further. I kept on adding ink and water.
Unlike the flower embroidery pattern, I was less concerned about painting within the pattern lines. Part of the charm of using watercolour paints is that they bleed!

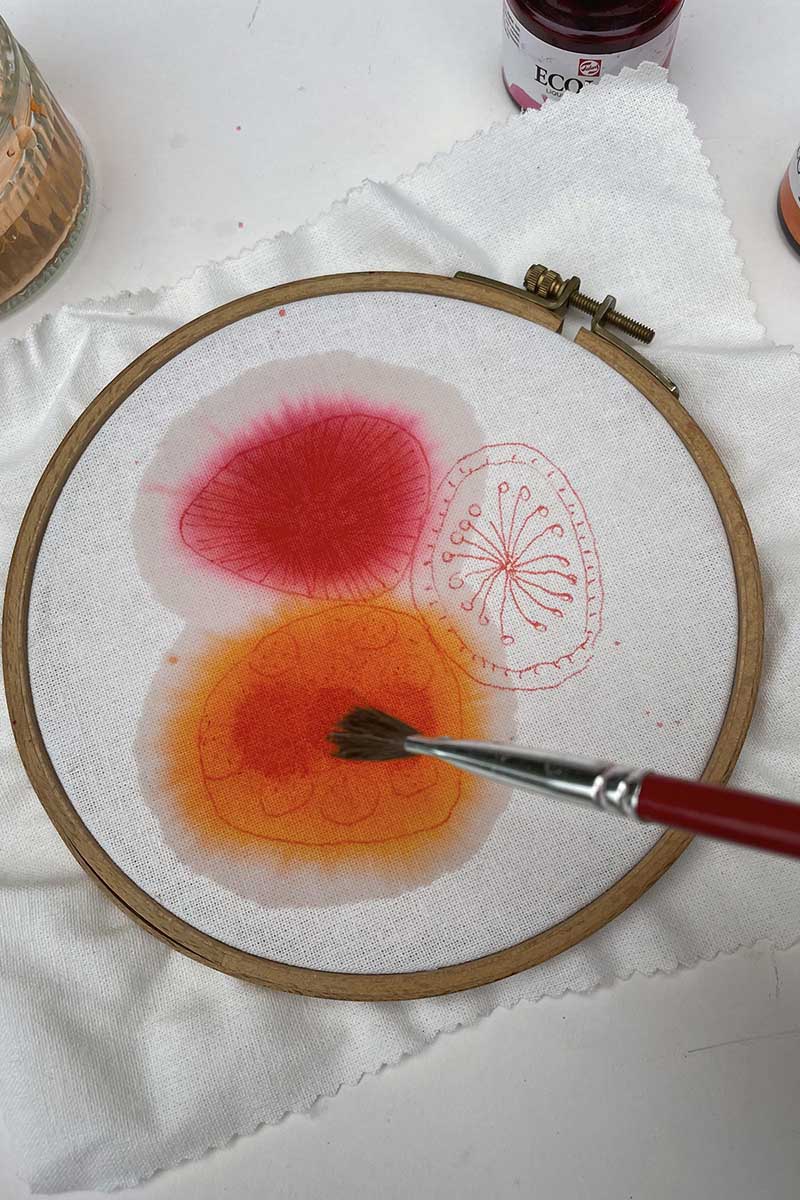

Step 6: Hang the painted fabric to dry before starting any embroidery.

How To Embroider Watercolour Painted Fabric
You can use embroidery floss, from cotton and silk threads to crewel wool.
I used my favourite Swedish linen threads for these two designs. I like these threads partly because of their vibrant colours; the yarn is non-divisible, spun to be used as it is, and works best with a chenille needle 22.
Stitching the Flower
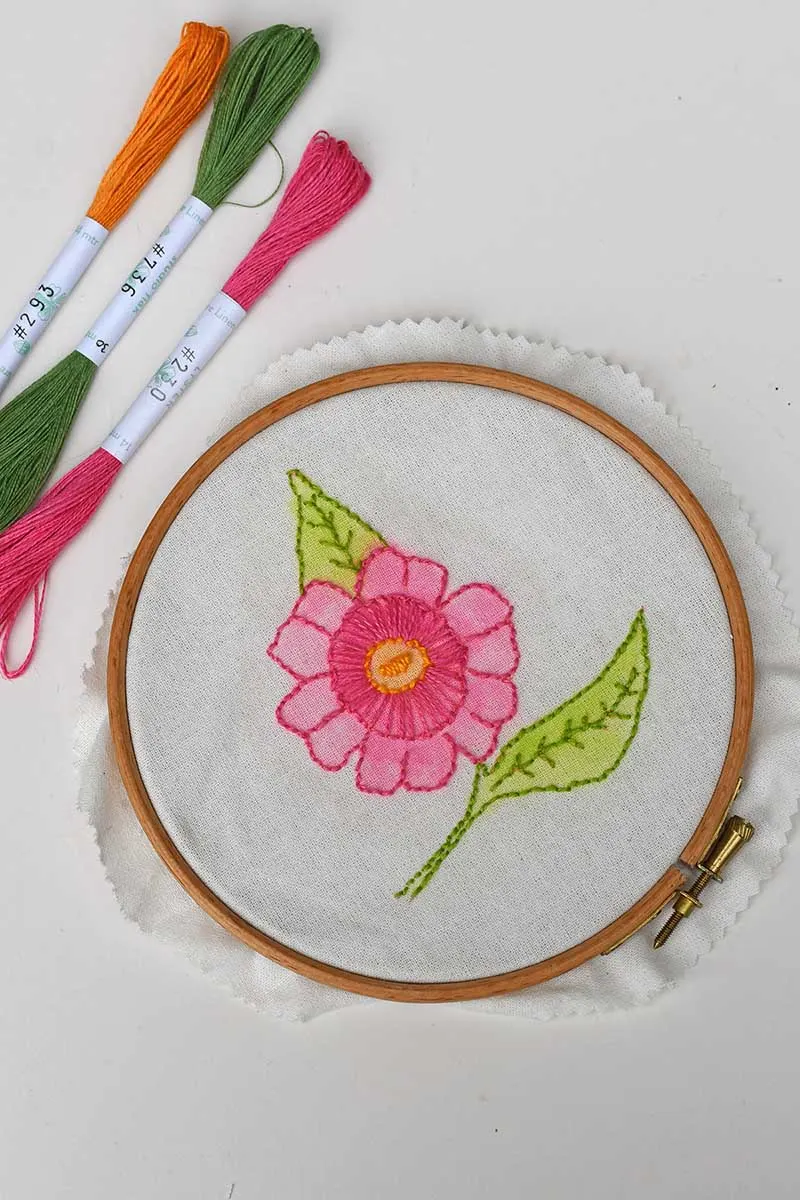
Step 7: Using green floss, stitch the outline and veins of the leaves. Use a simple backstitch, as I did with my oak leaf embroidery. If you are unsure about a backstitch, check out this video.
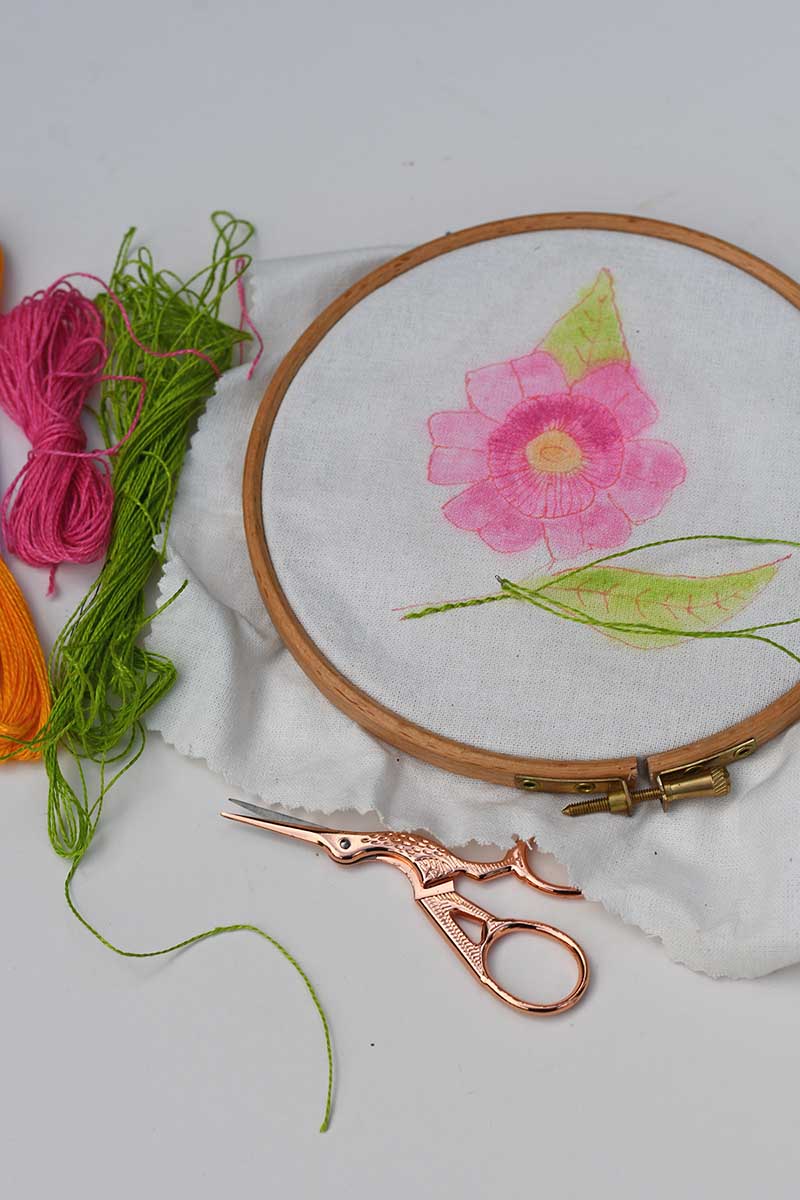

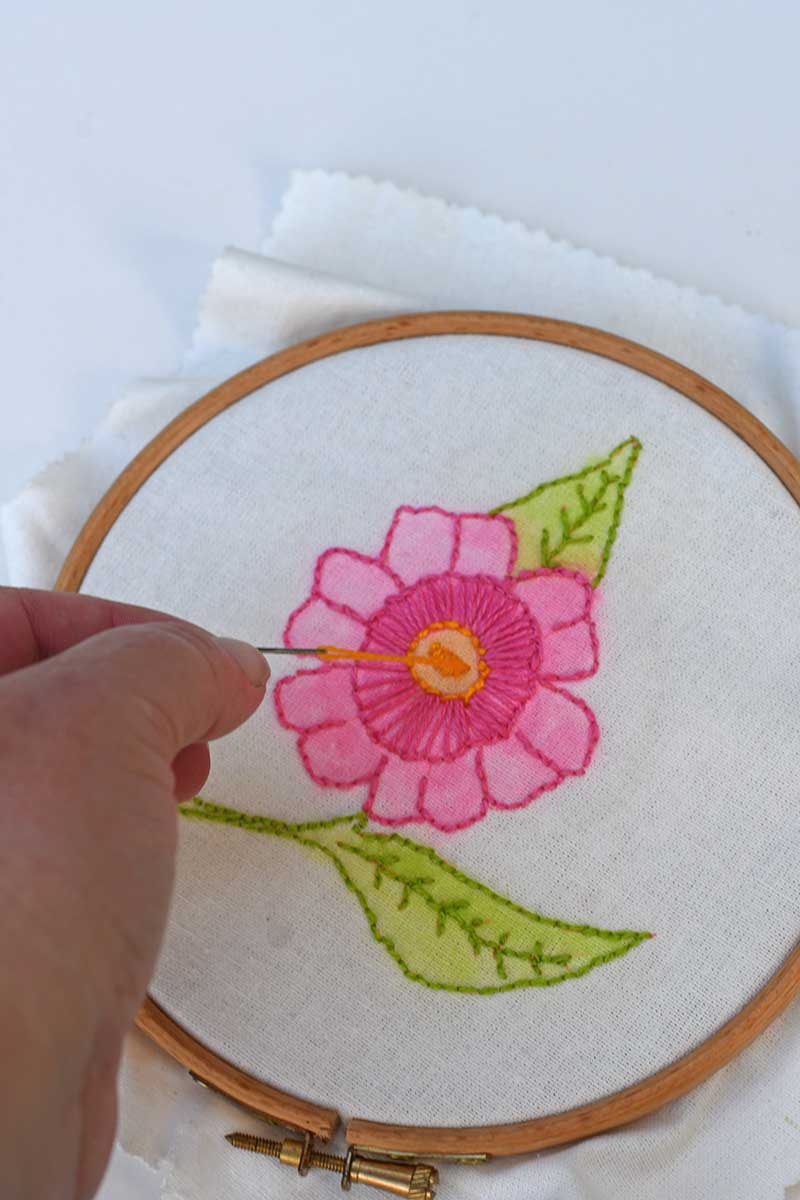
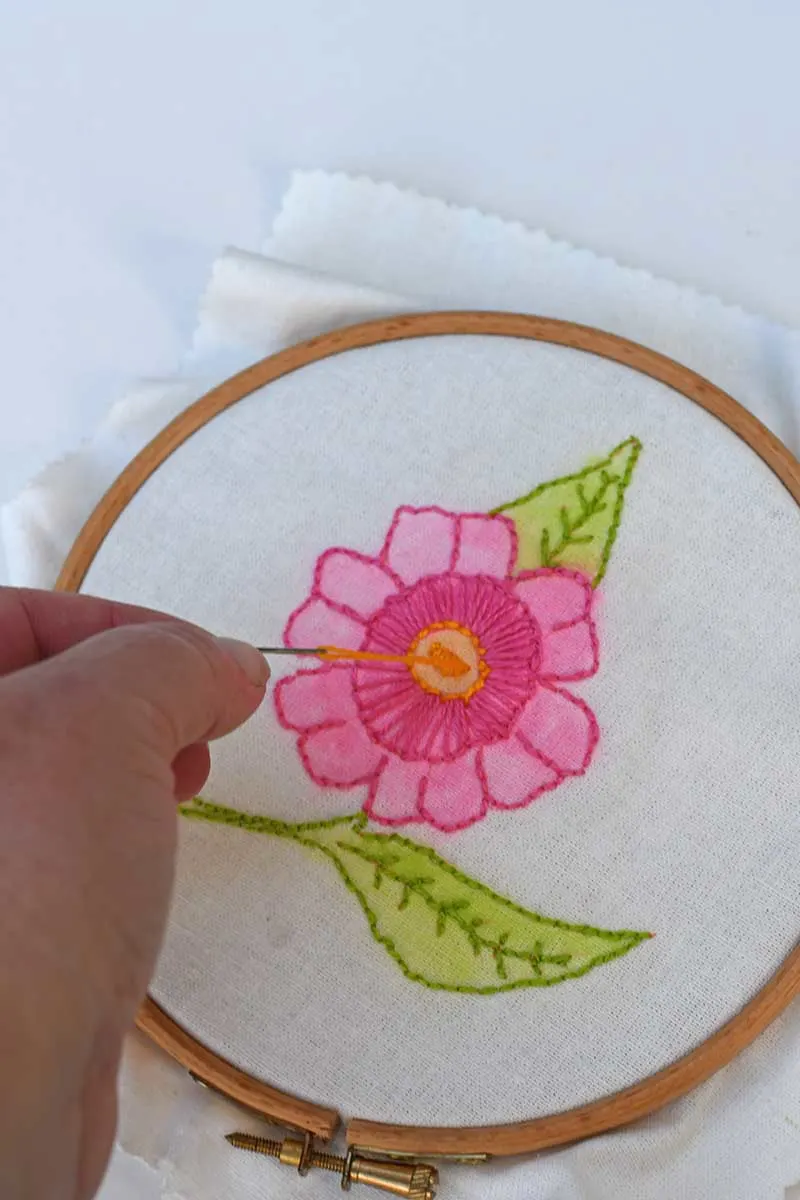
Step 8: With pink thread, backstitch the petal outlines. Then with the same thread, embroider one long stitch over the centre lines—finish by filling the flower’s centre with a satin stitch with orange floss.
Embroidering the Pebble Pattern
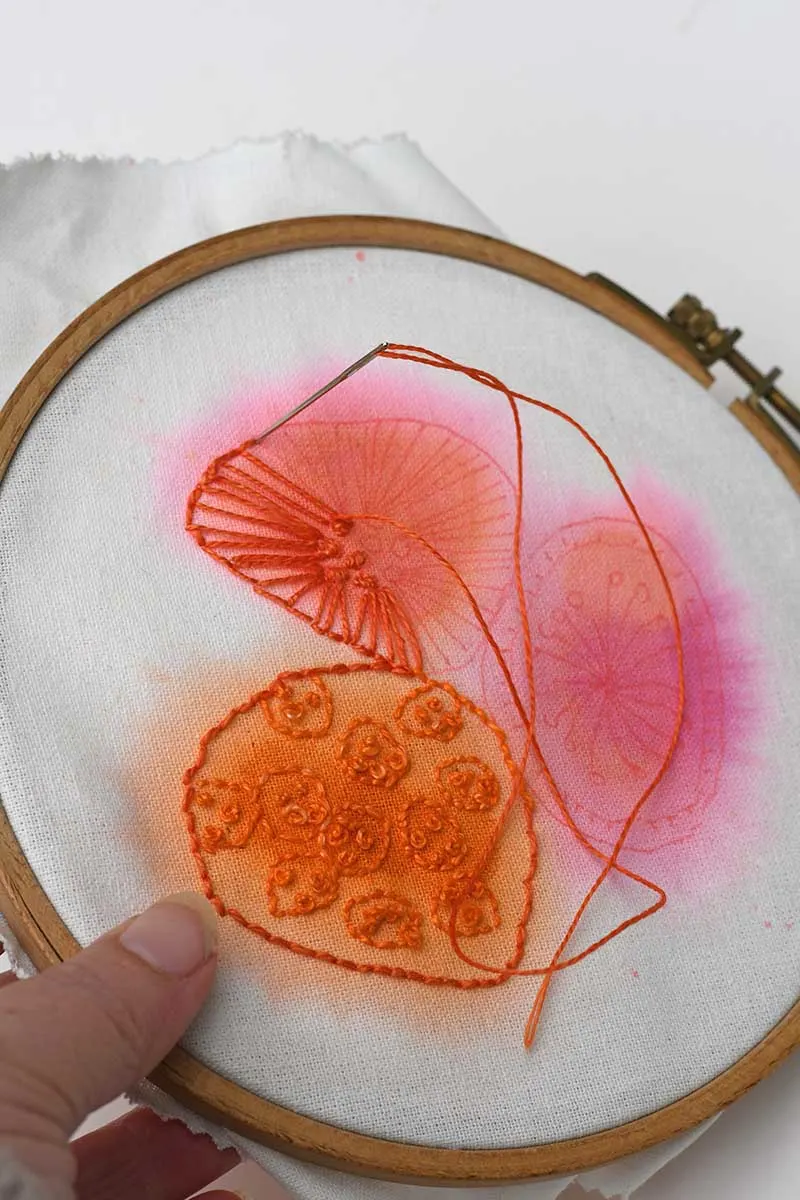
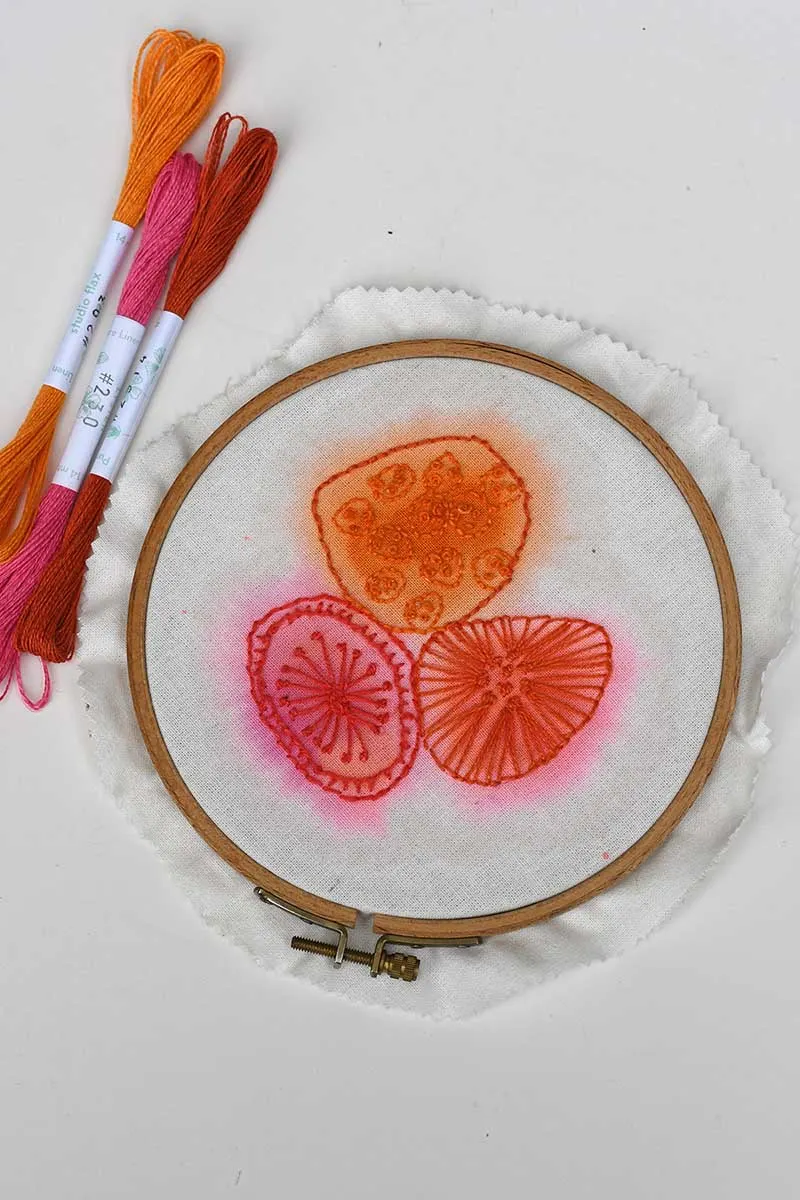
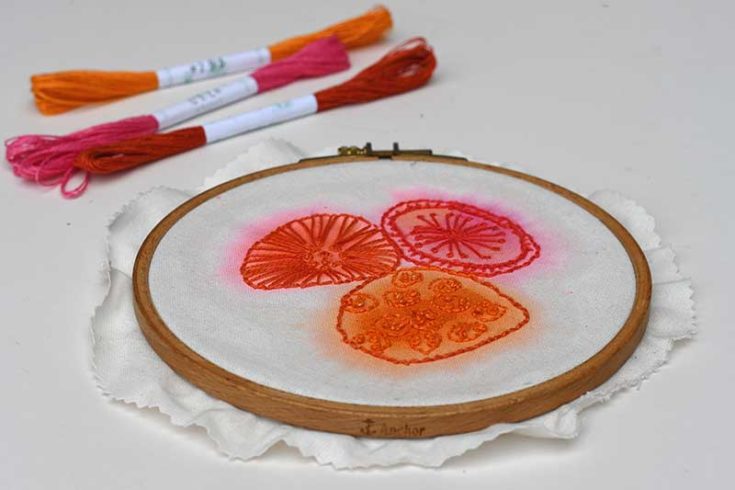
Step 9: Embroider each pebble with a different coloured floss.
- Pebble with buttons (orange thread): Outline of the pebble and the small circles inside use a backstitch. Then fill each circle with 3-4 french knots (see here for the video).
- Pebble with lines (red thread): Outline in backstitch. Dots in the centre with a french knot. Then one single long stitch from the french knot to the edge.
- Pebble with stamen (pink thread): Outline the pebble with a backstitch. Stitch the inner circle in a blanket stitch. Then use one long stitch with each stamen and add a french knot at the end.


How To Finish Of the Watercolour Embroidery
If you hang these embroideries in the hoop as they are, then you will need to add a backing to the hoop.
- First, draw around the inner hoop onto a piece of felt and cut the circle out.
- Next, trim the embroidery fabric outside the hoop, so you have a margin of between 1-2 cm.
- Using one long-running, gather the fabric to the back of the hoop, just like you would make a fabric yo-yo.
- Finish off by whip-stitching the felt to the back of the hoop.

Other Ways To Use And Display Embroidery
- Remove it from the hoop and frame it in a traditional frame using double-sided tape on a mounting board. I have lots of ideas for upcycled picture frames. Or you could buy an old vintage frame from a thrift store. Like I did with my children’s artwork embroidery.
- The watercolour embroidery is on canvas cotton to be stretched onto a frame like canvas prints and then displayed on a picture frame stand.
- Make embroidered Christmas ornaments with small embroideries. They can either be hung in small hoops or made into plushie ornaments.
- Turn large watercolour embroideries into decorative pillows.
- The cotton canvas embroideries could be sewn into little pouches and then filled with dried flowers such as lavender to make lovely-smelling sachets for your drawers and wardrobes. These would make a lovely handmade gift idea.
How To Do Watercolour Embroidery

Did you know you can combine watercolour paints and embroidery? It is a quick way to add blocks of colour and tone to your embroidery projects. Or use stitches to add texture to your watercolour painting.
Materials
- Unbleached cotton canvas fabric
- Watercolour paints (inks, cakes, tubes or pencils)
- Embroidery floss
Tools
- 6" wooden embroidery hoop
- Watercolour brushes
- Embroidery needles and heat-transfer pen
Instructions
- Download the free embroidery patterns from the site - one is a flower the other is an abstract pebble design.
- Transfer the patterns to the cotton fabric using a light box and heat-soluble pen.
- Place the design in an embroidery hoop and make it drum-tight.
- Wet the fabric where you want to paint it with watercolour paint.

- Paint with the watercolours like you would on paper. Then add more water if you want more bleeding. Bear in mind the colours won't be as intense as they are on paper.

- Leave the painted fabric to dry thoroughly before embroidering.
- Embroidery the outline lines of the patterns with floss and a needle. Use a mixture of backstitches, blanket stitches, satin stitches and french stitches.

- The embroidery is to add texture and definition; the majority of the colour comes from watercolour paint.
Did you know that you can also stitch and embroider paper? Check out my guide for stitching on paper. Then, you might want to try colouring a paper watercolour instead of a fabric one.
Another post you might want to check out is this watercolour heart decoration for Valentines. Check out these other spring craft ideas for adults.
Don’t forget to Pin it for later!

Michelle
Monday 24th of October 2022
What a gorgeous combination of craft techniques. I'm loving the pebble one. The over-bleed makes it look so dreamy. I'm definitely going to give this ago.
Claire Armstrong
Monday 24th of October 2022
Thank you, yes it’s fun to experiment with.
Jill
Wednesday 19th of October 2022
wow ,I have never heard of this before, thankyou so much for sharing. The pieces look beautiful. Jillxo
Claire Armstrong
Thursday 20th of October 2022
Thank you, it's a fun technique to try.
Kathy A
Wednesday 19th of October 2022
Great tutorial. I love simple embroidery; I find it very relaxing whereas counted cross stitch is very stressful for me! AND I don't think I will EVER be good at the satin stitch so painting would be GREAT! One of my favorite dollhouse projects was making a small rug with just French knots.
Claire Armstrong
Wednesday 19th of October 2022
Thank you. Yes, I find counted cross-stitch takes too much concentration for me. I like the sound of your rug; I bet you were very good at French knots at the end.