
I’d have done it years ago if I had known how easy it was to do embroidery on canvas. I’m chuffed with how this piece of embroidered wall art turned out. And I can’t wait to get stitching again on another stretched canvas.
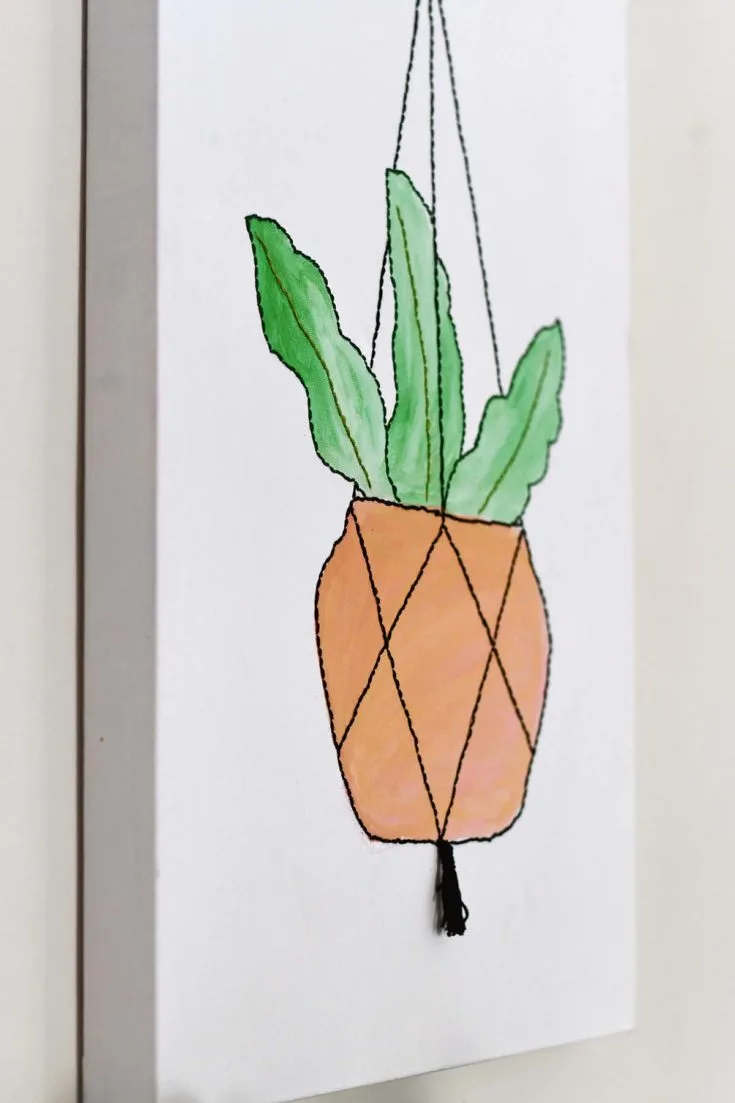
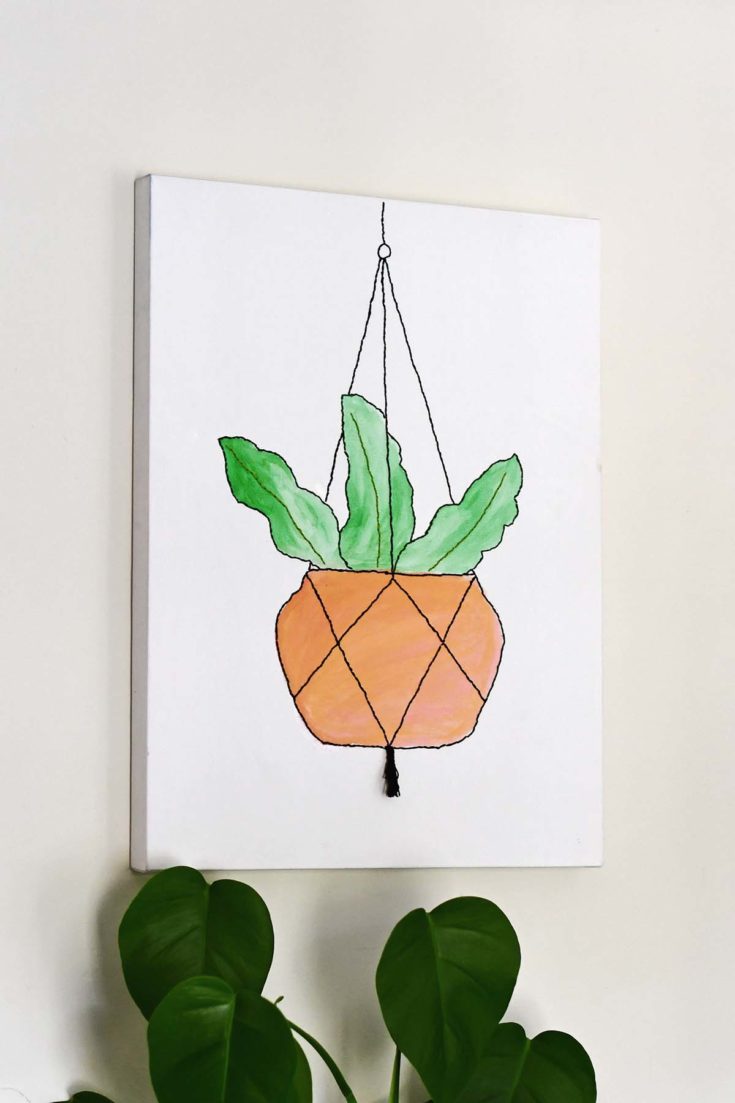
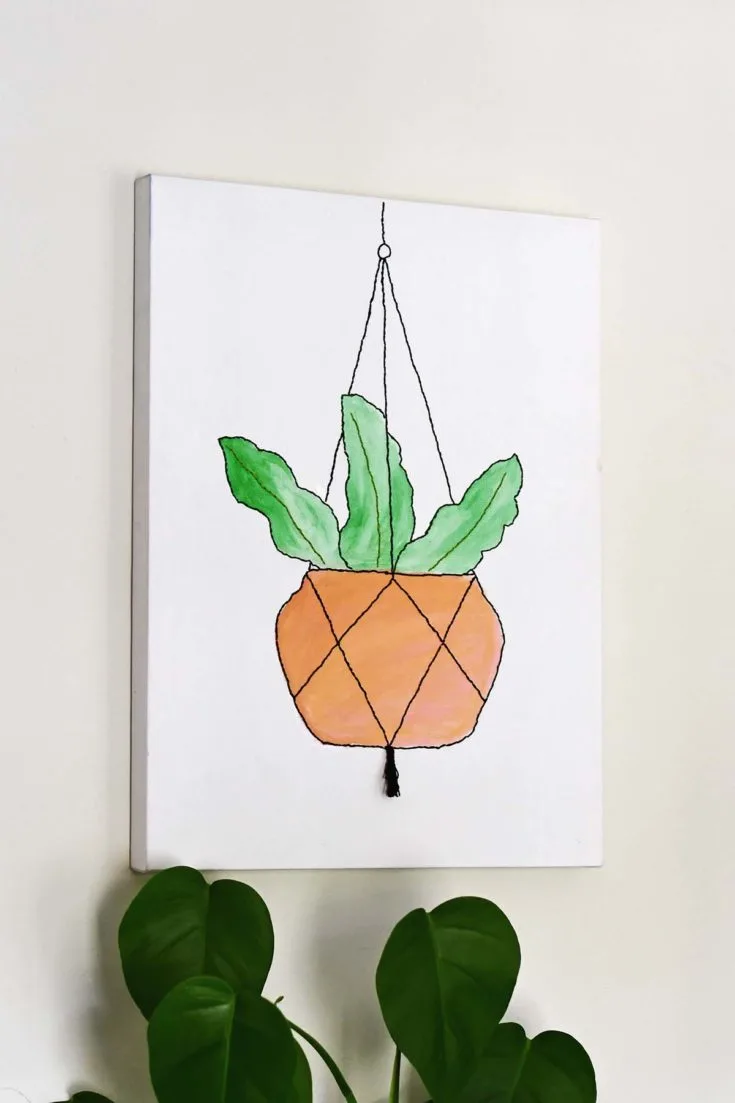
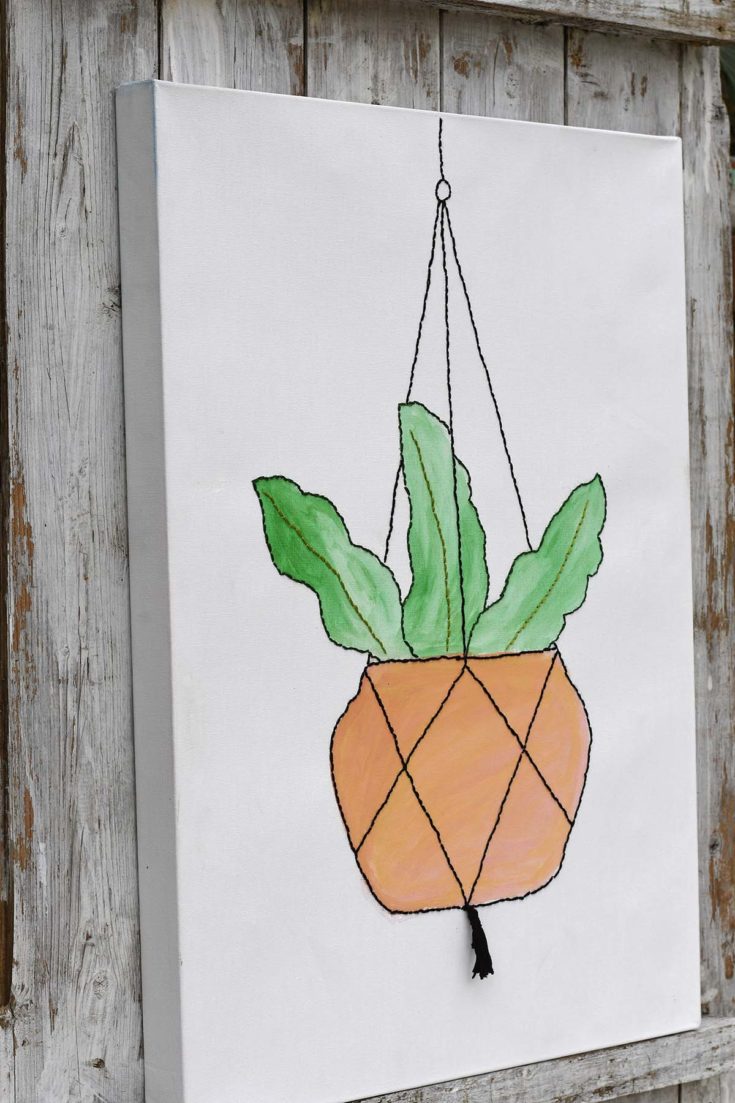
The design I used for the embroidered canvas was a hanging plant.
I love houseplants, but they don’t always love me. Monstera plants thrive in my house; the one in my bedroom is massive. Unfortunately, though, I’ve not been so successful with other species.
But no worries, this embroidered hanging plant wall art will last forever, no matter how much I neglect it.
We’re a participant in the Amazon Services LLC Associates Program, an affiliate advertising program designed to provide a means for us to earn fees by linking to Amazon.com and affiliated sites. As an Amazon Associate, I earn from qualifying purchases.
How To Make Embroidered Canvas Art
This cool adult craft was straightforward to do; it’s suitable for both adults and teens. The embroidered canvas wall art only takes a couple of hours and can be made in the afternoon or evening.
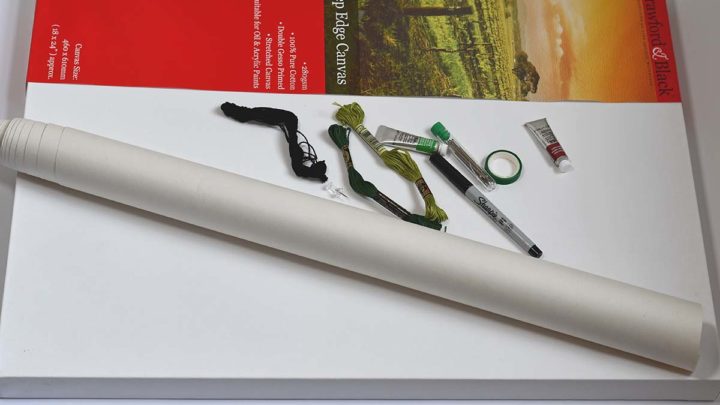
What you need
- A stretched canvas, my local craft shop sells these very cheaply, in various sizes. The one I used for this canvas embroidery was about 60cm by 45cm. Choose any size you want.
- Plain paper as large as the canvas. I use cheap lining paper.
- Masking tape
- Black marker pen
- Embroidery thread and needles. For the embroidered hanging plant, I used black and green threads.
- Watercolour paint in green and reddy brown.
- A raised pushpin that you can easily grip. Or something similar can be used to punch holes in the stretched canvas.

Preparing the Canvas for Embroidery
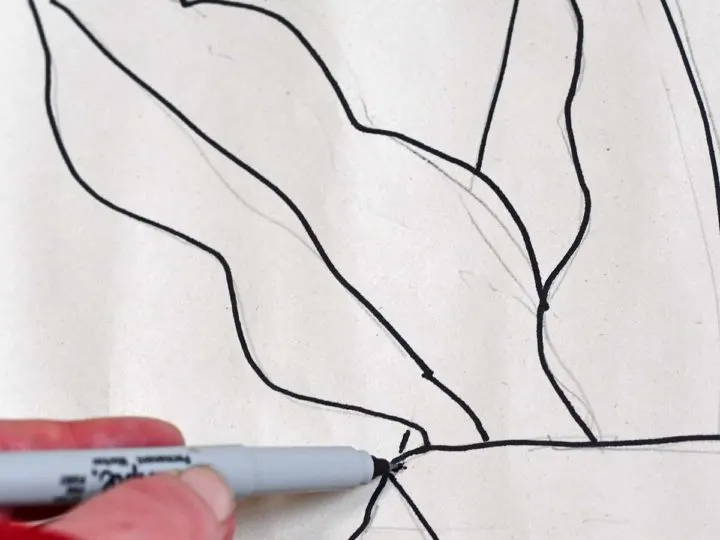
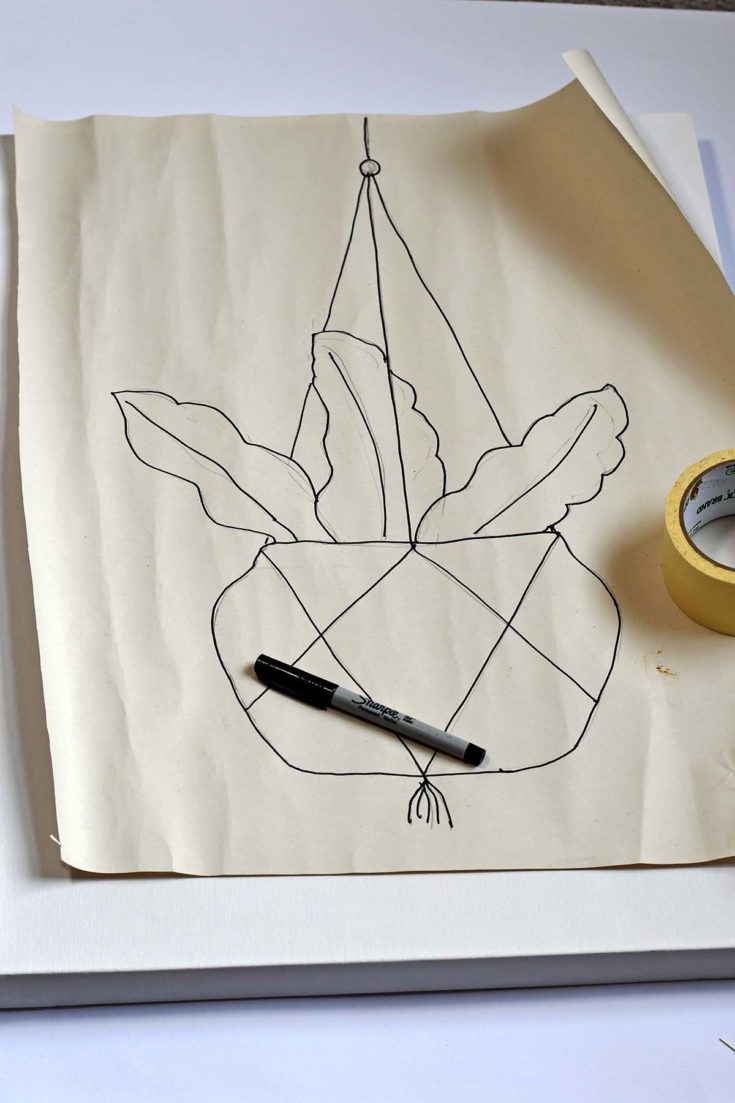
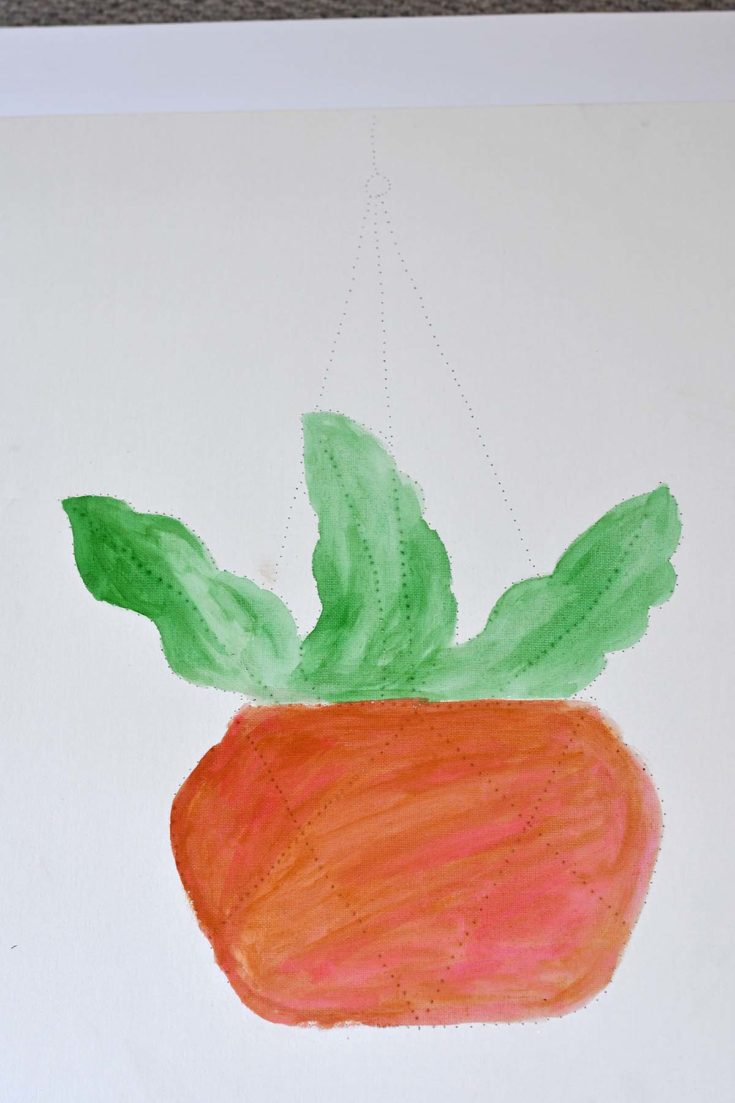
Step 1: First, cut a piece of lining paper to the size of your canvas. Then, use a black marker pen and draw the hanging plant design onto the paper.
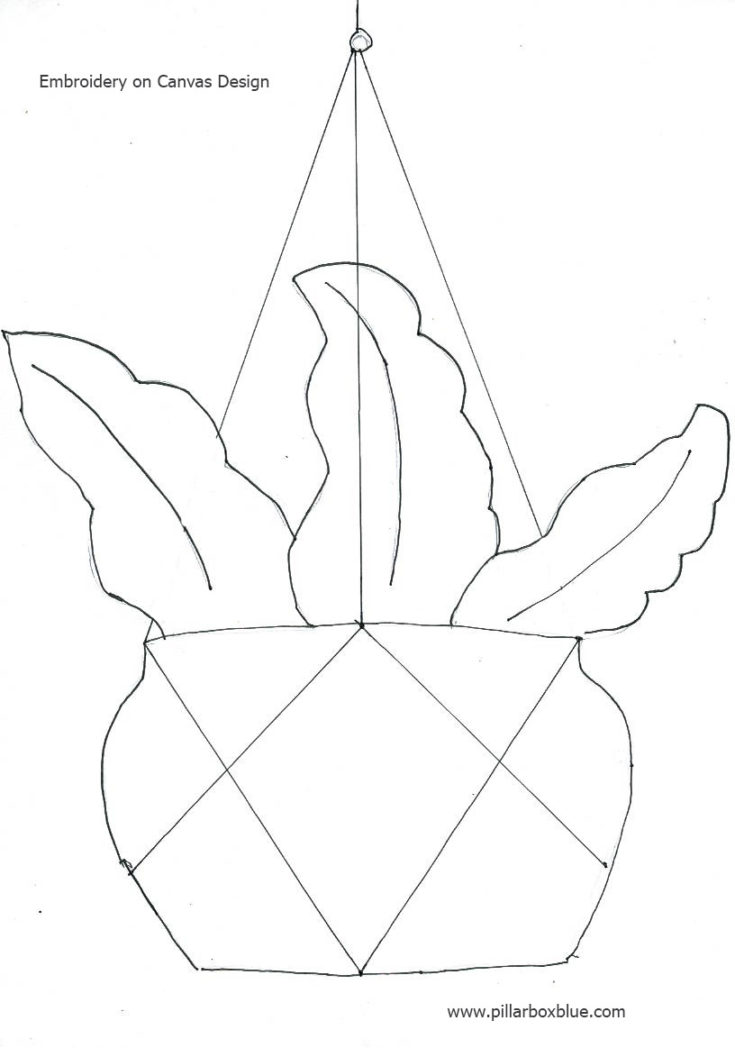
You can copy my design. It’s a straightforward hanging plant with just three leaves. Remember that the more complicated the design, the more complex the embroidery.


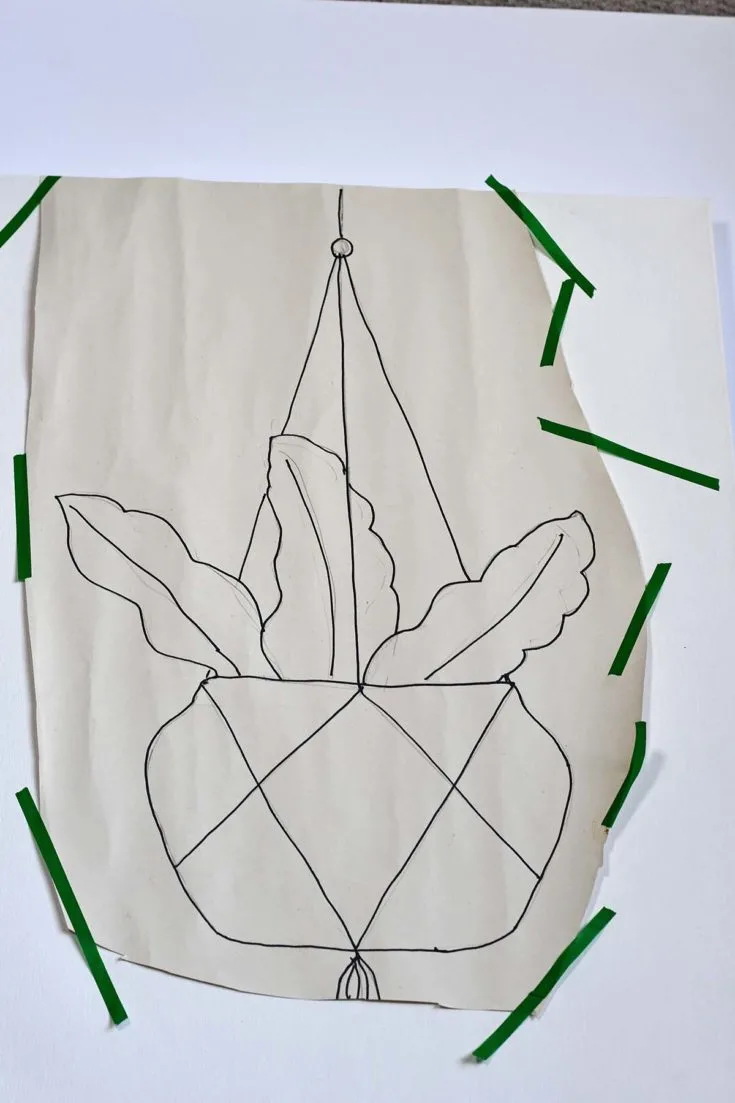
Step 2: Next, tape the drawing to the stretched canvas. The tape is to hold it in place temporarily. Use tape that won’t mark the canvas.

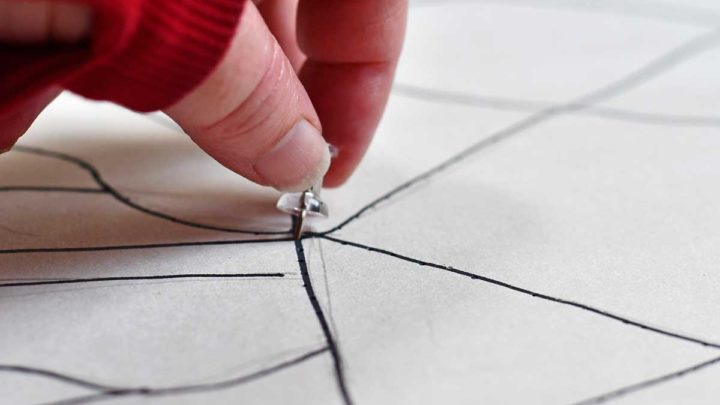
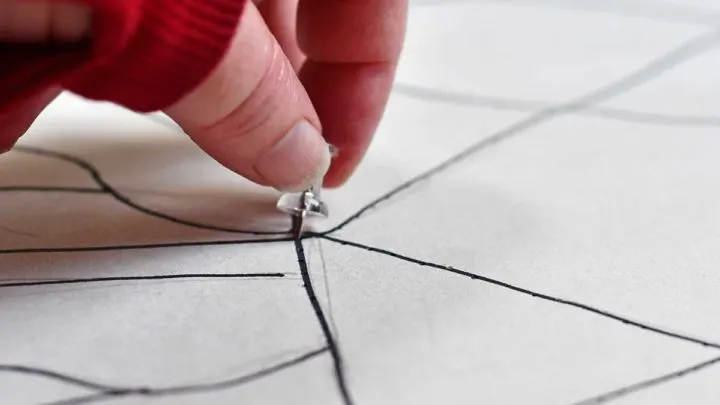
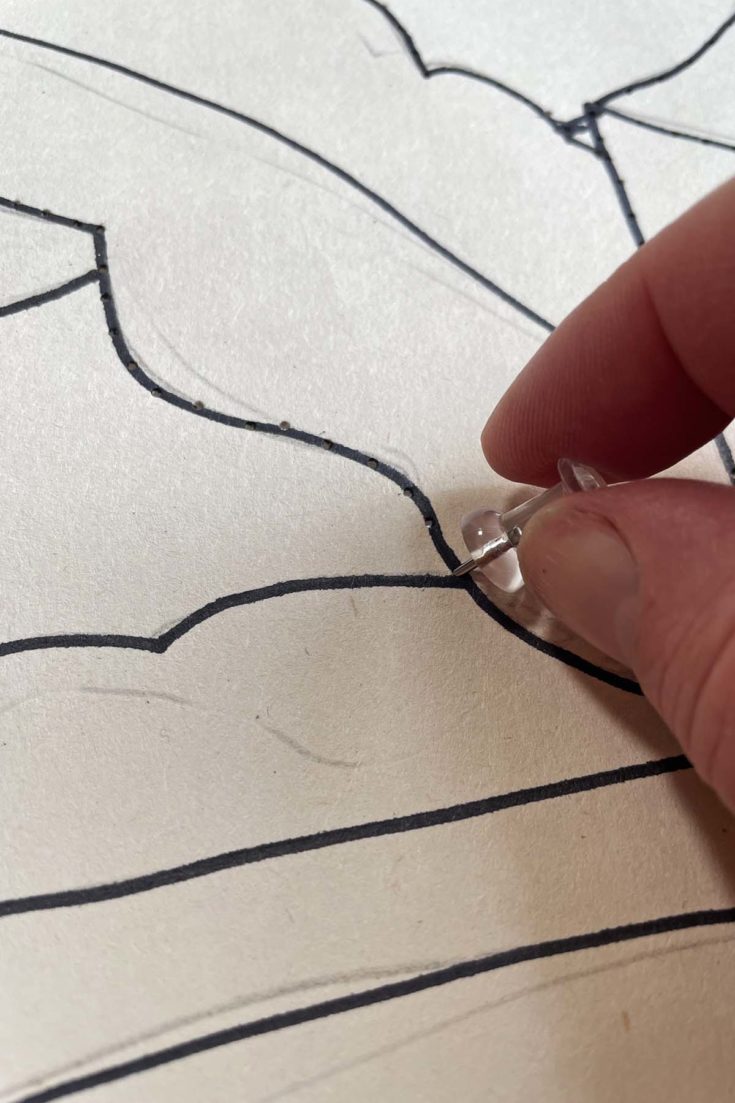
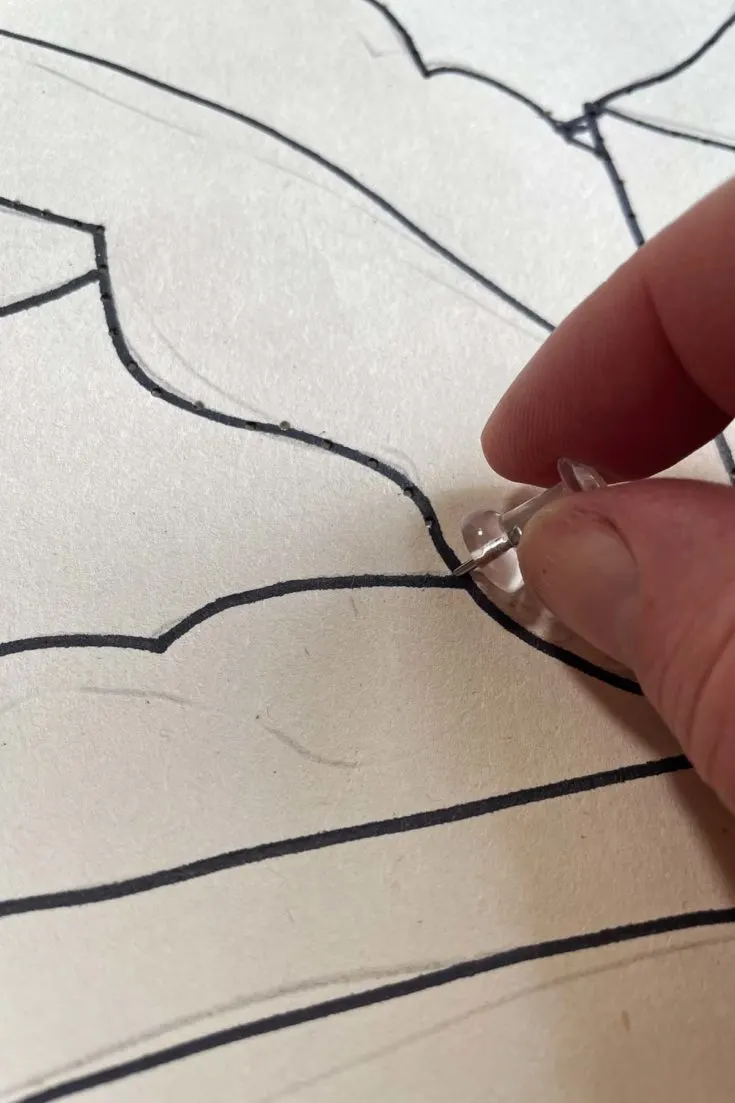
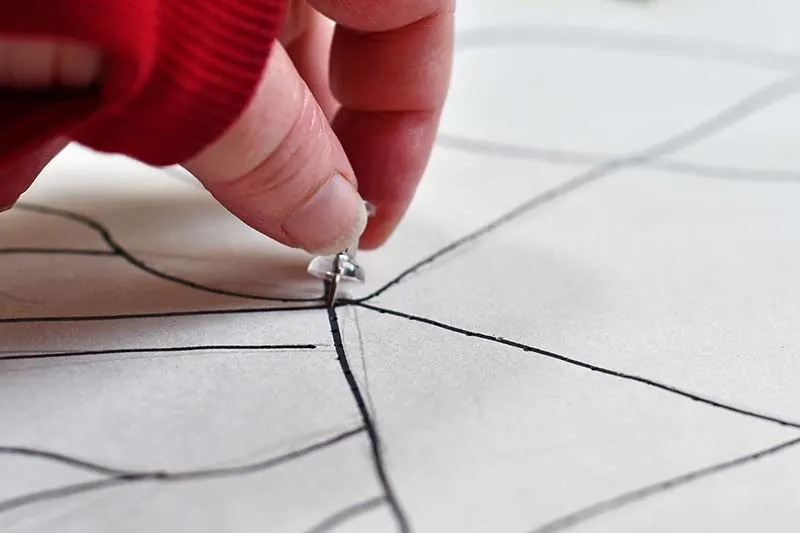
Step 3: Next, this is the fun bit; punch holes through the paper and canvas with the pushpin (drawing pin). Follow the black marker lines, punching holes about 5mm apart.
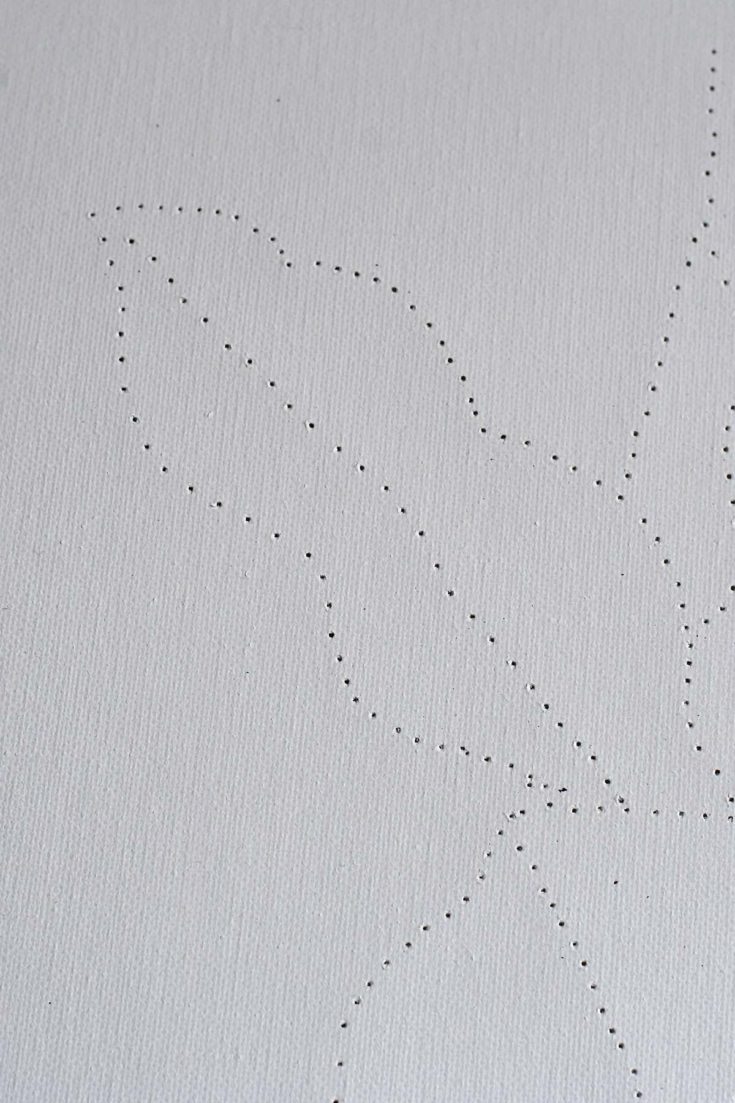
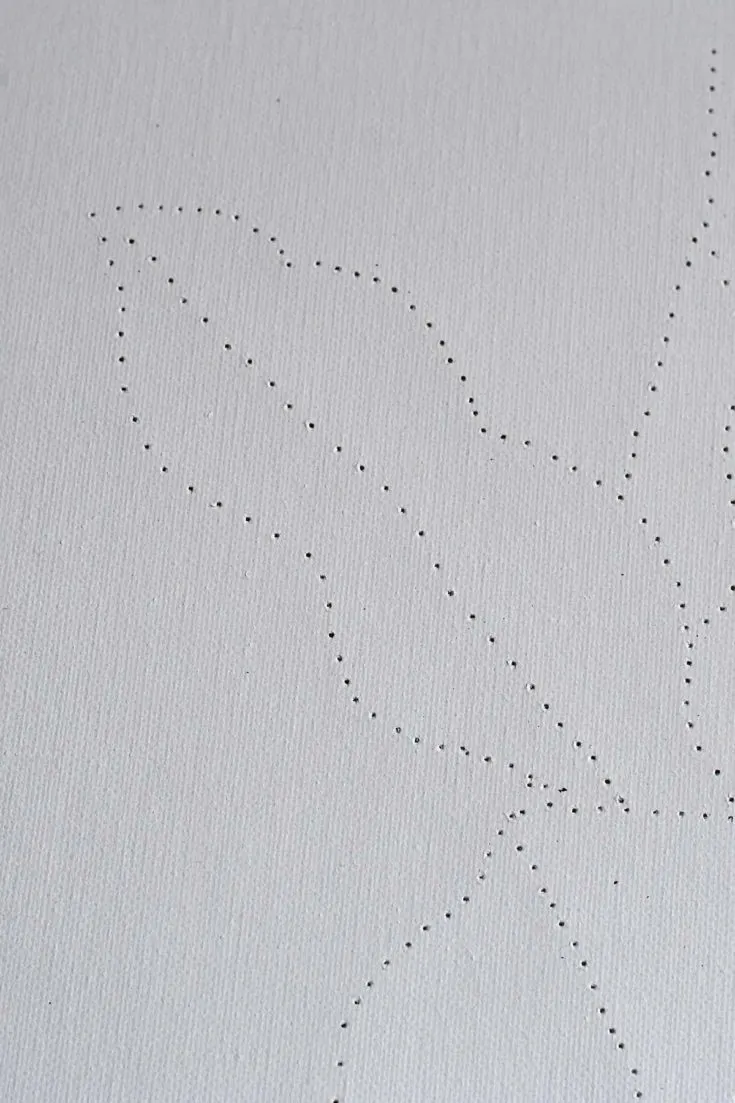
The distance between the holes will be the distance between each stitch. Make sure that you punch holes where lines intersect on the drawing. I didn’t bother punching holes for the tassel at the bottom of the plant, as I decided to make a genuine tassel instead.
Step 4: Remove the lining paper when all the stitch holes have been punched.
Painting the Canvas
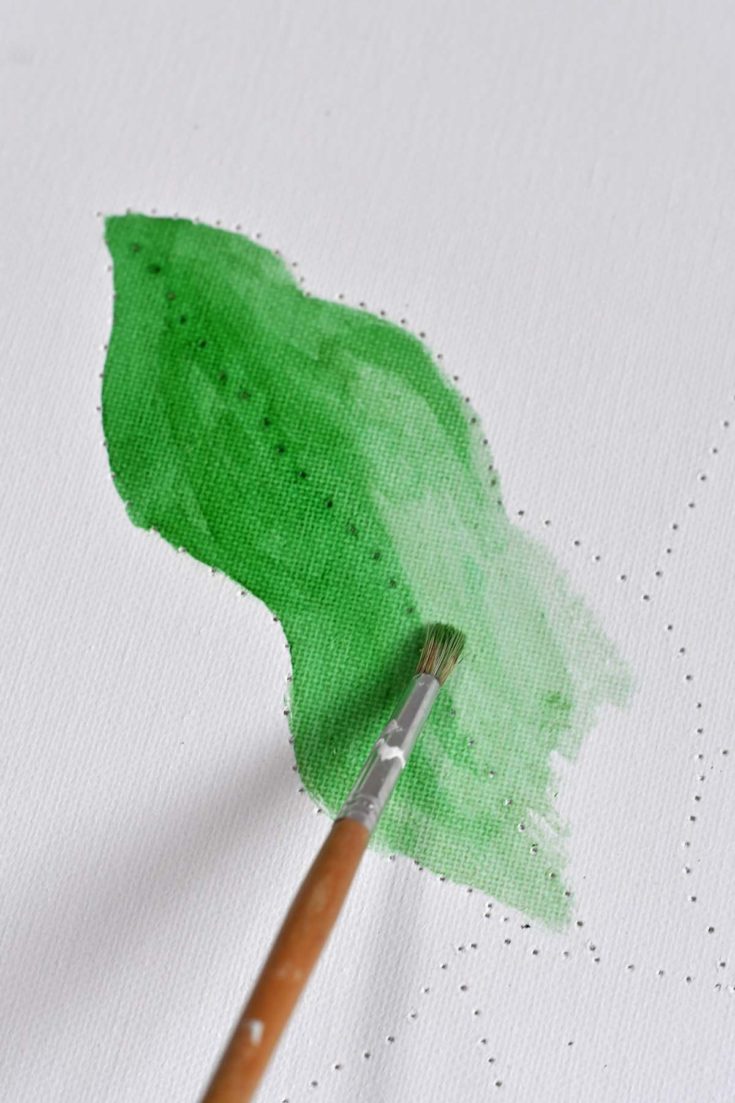
Step 5: I used paint to add colour to the embroidery wall art. The leaves were painted green, and the plant pot was in terracotta. I used watercolour paint. The punched holes guided me on where to paint.
You’ll find more tips on watercolour embroidery here.


Starting the Canvas Embroidery
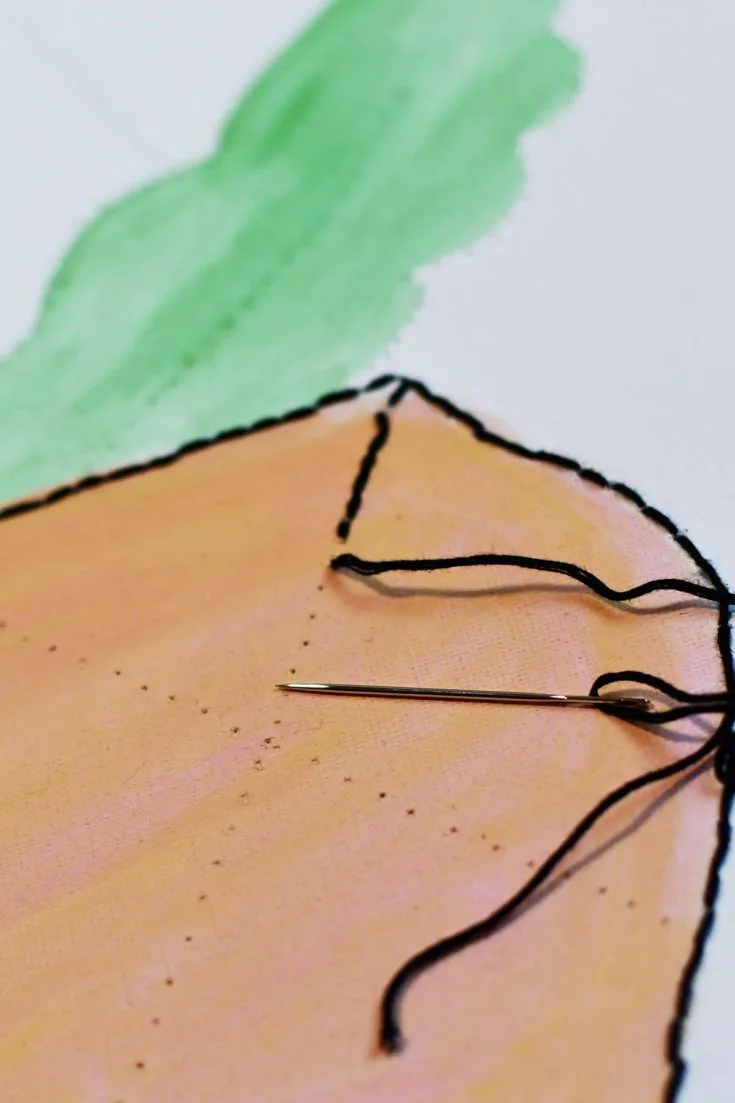
Step 6: The watercolour paint will dry very quickly. This means you can then start embroidery on the canvas.
First, thread a large embroidery needle with six strands of black embroidery thread. Tie a knot in one end of the thread. From the back of the canvas to the front, follow the stitch holes around the outside of the pot, then stitch the hanging pot string.
Use a backstitch that is ” a stitch sewn one stitch length backwards on the front side and two stitch lengths forward on the reverse side to form a solid line of stitching on both sides.”

Step 7: Next, change the embroidery thread to dark green. Then stitch the outline of each leaf. Again, use a simple backstitch. Use a lighter green thread for the veins of each leaf.

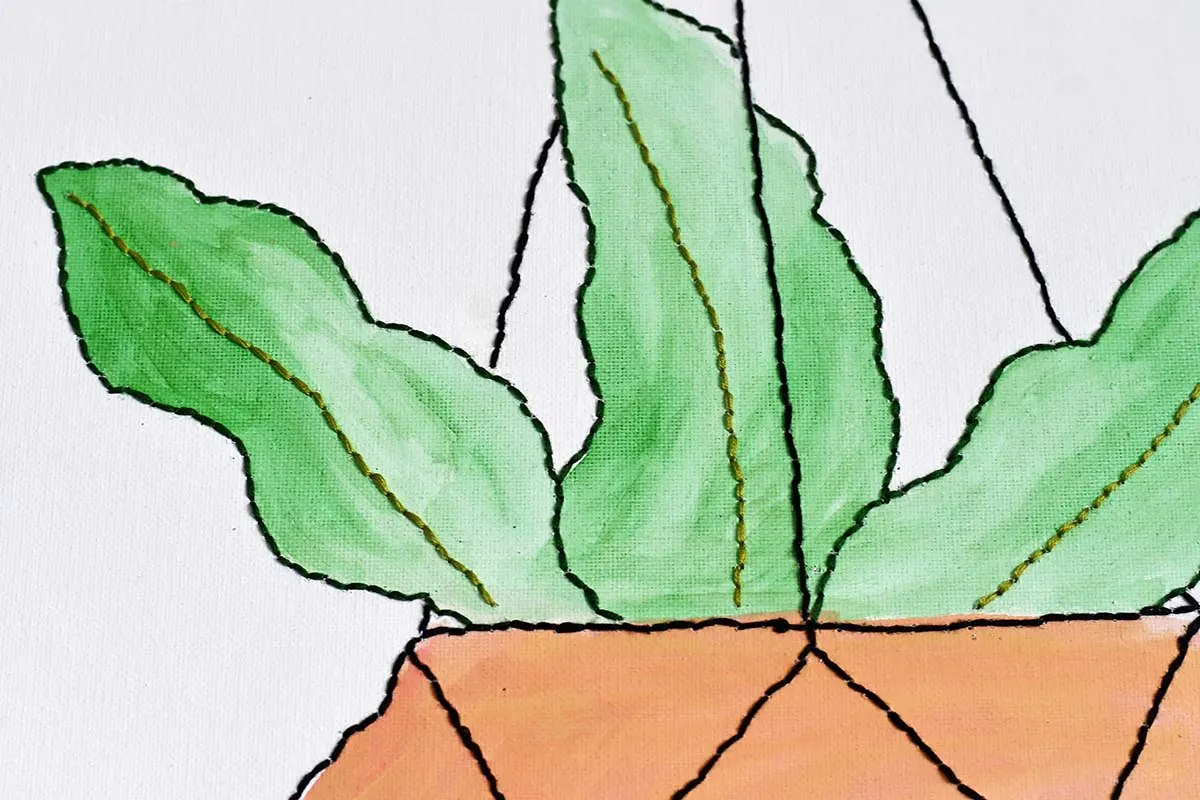
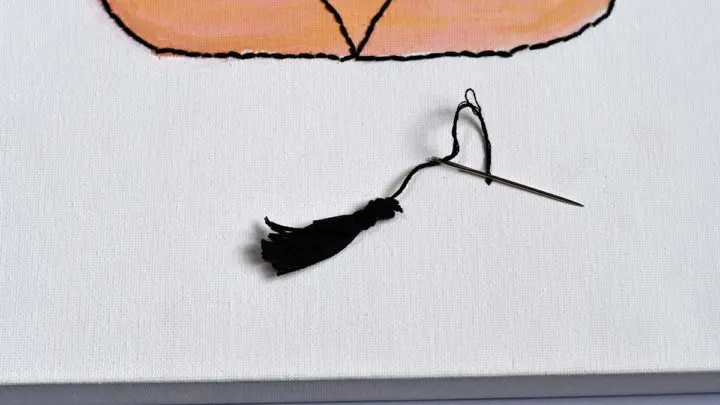
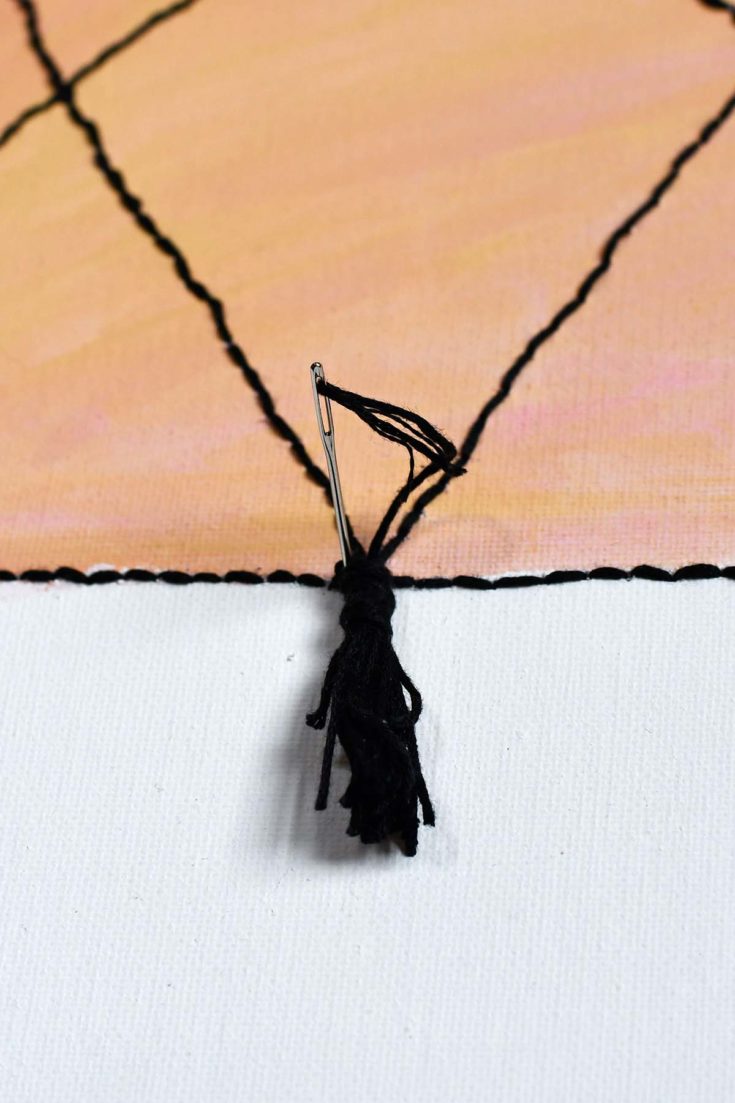
Step 8: To finish off, I made a small tassel for the base of the hanging plant. Use black embroidery thread to make the tassel and then stitch it in place.

All that is left to do is to decide where I’m to hang my new embroidered plant. One of the things I like about creating wall art on stretched canvas is that it is very light. I can hang this canvas just using one small nail.


It’s so light that it can just be rested on a mantle or shelf if you don’t want to hang it.

I have made wall art by embroidering on paper, but I think canvas embroidery is easier. This is one craft I will do it again.
I like the idea of pimping some existing canvas pictures with embroidery. I will scour my local junk shops to find a suitable canvas picture to embellish with some stitches. Here is a fabulous collection of vintage potted plant prints that would be perfect for this craft.
More Embroidery and Wall Art Ideas
You’ll find a few more embroidery on canvas ideas with this collection of Halloween embroidery projects.
For more specific embroidery crafts, check out this cute duck embroidery for the mantle or these popular Scandi embroidered felt trees and Christmas ornaments.
I have tutorials for making great wood slice DIY plant shelves and recycled hanging planters to showcase your natural plants.
For more sizeable DIY wall art, check out this excellent giant pet portrait, paper angel wings and personalized map wall art. You’ll find many more DIY Boho projects here.
Stitching on canvas is very similar to stitching on paper. Check out this comprehensive guide to paper embroidery.
Embroidery on Canvas Wall Art


This tutorial shows you how easy it is to embroider stretched canvas and create some fun wall art. Suitable for both adults and teens
Materials
- Large white blank stretched canvas about 45cm by 60 cm. But can be made any size.
- Embroidery threads and needle in black and green.
- Scrap paper the size of the stretched canvas.
- Watercolour paint in green and terracotta.
Tools
- Push pin or something similar for punching holes in the canvas.
- Black marker pen and masking tape
Instructions
- First, draw out the hanging plant design on plain paper. Draw it out to a size that fits the canvas. You can print and copy the free design on my site, or design your own.
- Tape the hanging plant drawing to the front of the stretch canvas.
- Then using the push pin punch holes on the black draw lines. Space the holes at about 5mm apart. Make sure you punch holes where the black lines intersect.

- Remove the paper from the canvas.
- Next, using watercolour paints, paint the leaves and the plant pot.
- Then, when the paint has dried, start the embroidery. Use six-strand embroidery thread and a backstitch. Embroider the plant pot and string in black thread. Then, embroidery the leaf outline in dark green and the veins in light green thread.
- Next, use the black embroidery thread to make a small tassel for the base of the plant pot. Finish off by stitching the tassel to the planter.
Gayl Tomaszewski
Wednesday 18th of May 2022
I love this idea & it is on my to do list. Please help me find & get the free pattern. I can't seem to find it. Thank you
Claire Armstrong
Sunday 22nd of May 2022
Thank you, you can just print the pattern from the post or use this link here for the hanging basket drawing.
Diane
Thursday 21st of April 2022
I love this. Never thought to use a stretched canvas for embroidery. But why not — built in hoop, right? Thanks for sharing at Fabulous Friday!
Claire Armstrong
Thursday 21st of April 2022
Thank you, yes that's right a built-in already stretched hoop.
Donna @ Modern on Monticello
Wednesday 20th of April 2022
This is a really great idea. I didn't know you could add embroidery to canvas either. Thanks so much for sharing such a detailed tutorial as well. #HomeMattersParty
Claire Armstrong
Thursday 21st of April 2022
Thank you, it is a very easy and surprisingly satisfying craft.
Mary
Thursday 14th of April 2022
What a fantastic idea! I love how creatively you used the canvas for this project Claire. It looks really great stretched too!
Claire Armstrong
Thursday 14th of April 2022
Thank you very much, Mary. I really liked making this project and it's given me ideas for more.
Shirlee
Thursday 14th of April 2022
Beautiful! Going to try it.
Claire Armstrong
Thursday 14th of April 2022
Thank you, that's great, enjoy making it.