
Inside: How to embroider on delicate paper such as dictionary book pages to make fun art.
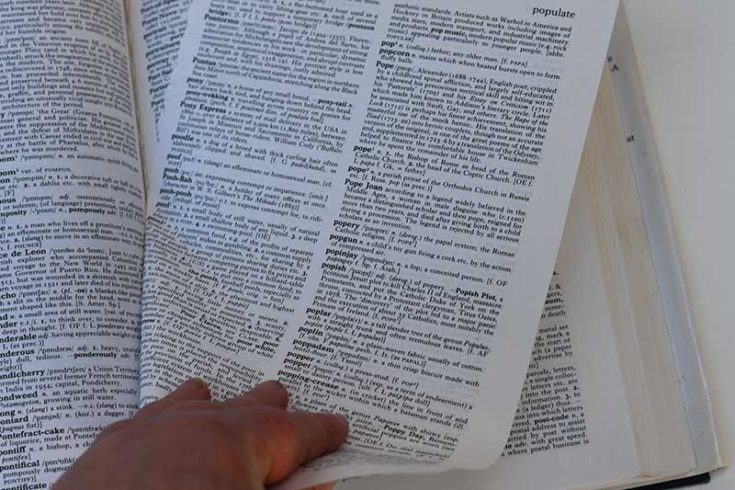
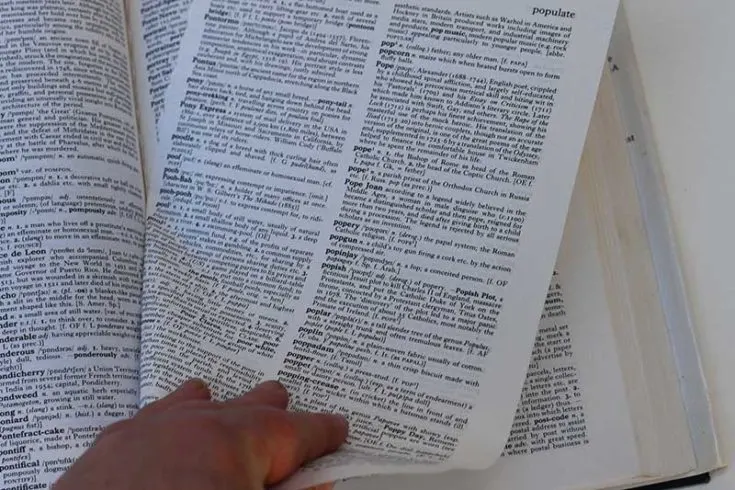
I have printed on dictionary paper before, but this time I wanted to go one step further with embroidery. The trouble with dictionary paper is that it is fragile and difficult to stitch by hand without tearing.
Stitching on paper with a sewing machine is relatively easy, especially if you use the right needle and large stitches. I recently used a machine when stitching some map paper moths. Stitching on paper by hand is more challenging, as it’s easier to tear the paper.
Embroidery on Paper
Most of the examples I could find for stitching on paper by hand were of large cross-stitches. The holes are pre-punched into the paper to form a pattern, which is then cross-stitched. Many of these examples involved more heavy-weight paper than fine-thin dictionary paper.
To embroider on heavy paper, you have to pre-punch the holes, and the range of embroidery stitches you can use is limited. If you want to see this example, check out this framed canvas embroidery.
I love old maps, many printed on cloth paper, making them more robust and great for crafting and upcycling. That’s when I considered making the dictionary paper more like old maps using muslin.
I created my hand-stitched free-form embroidery dictionary art by turning the pages into fabric paper.
Dictionary Art Ideas
I can’t remember the last time I used a physical dictionary. These days almost all my writing is done on a computer. Like most people, I use a digital dictionary. It’s the same with maps; nowadays, most people use a Sat Nav rather than paper road maps.
I have an extensive old dictionary which I use for arts and crafts. Like maps, dictionaries become outdated and need to be updated. Routes change as new roads get built, like language evolves and changes as new words are developed.
I illustrated a word for my latest dictionary art project on a dictionary page. I printed and embroidered an image on the dictionary page related to a word on the paper.
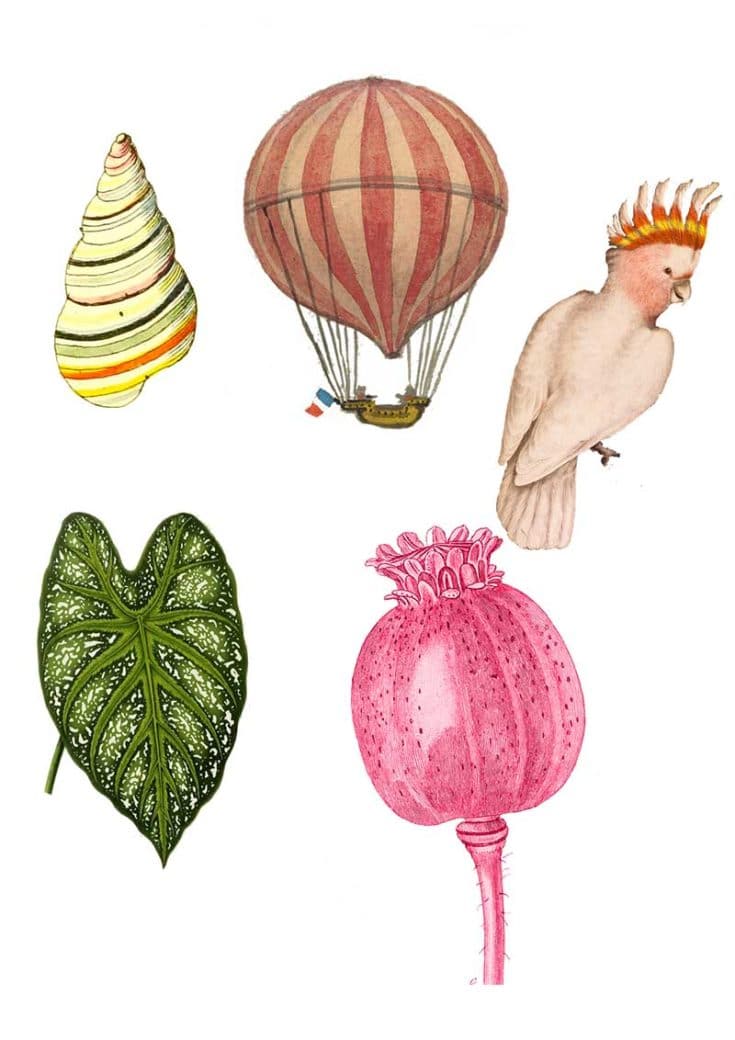
Sometimes my images and words match, such as with my leaf dictionary art, are obvious. Other times the match is not instantly apparent, for example matching the word crest with a cockatoo or conical with a shell. Part of the fun of this craft is deciding what dictionary word and art picture to use.
By adding texture and highlights to the images, Dictionary art was created with embroidery.
We’re a participant in the Amazon Services LLC Associates Program, an affiliate advertising program designed to provide a means for us to earn fees by linking to Amazon.com and affiliated sites. As an Amazon Associate, I earn from qualifying purchases.
What You Need
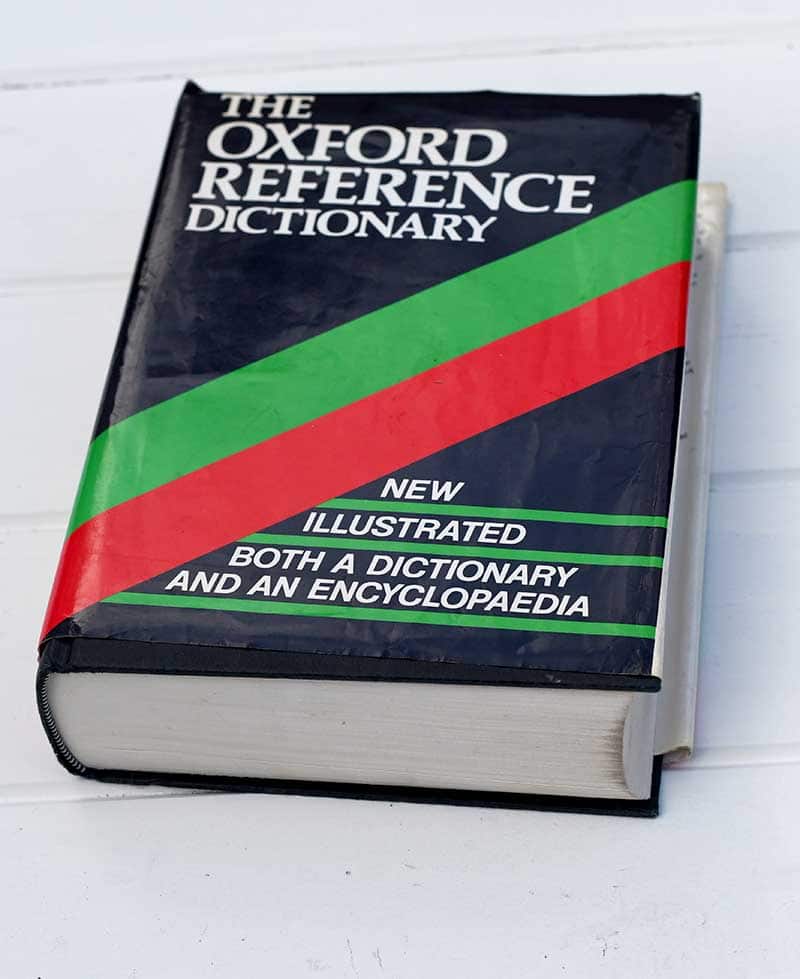
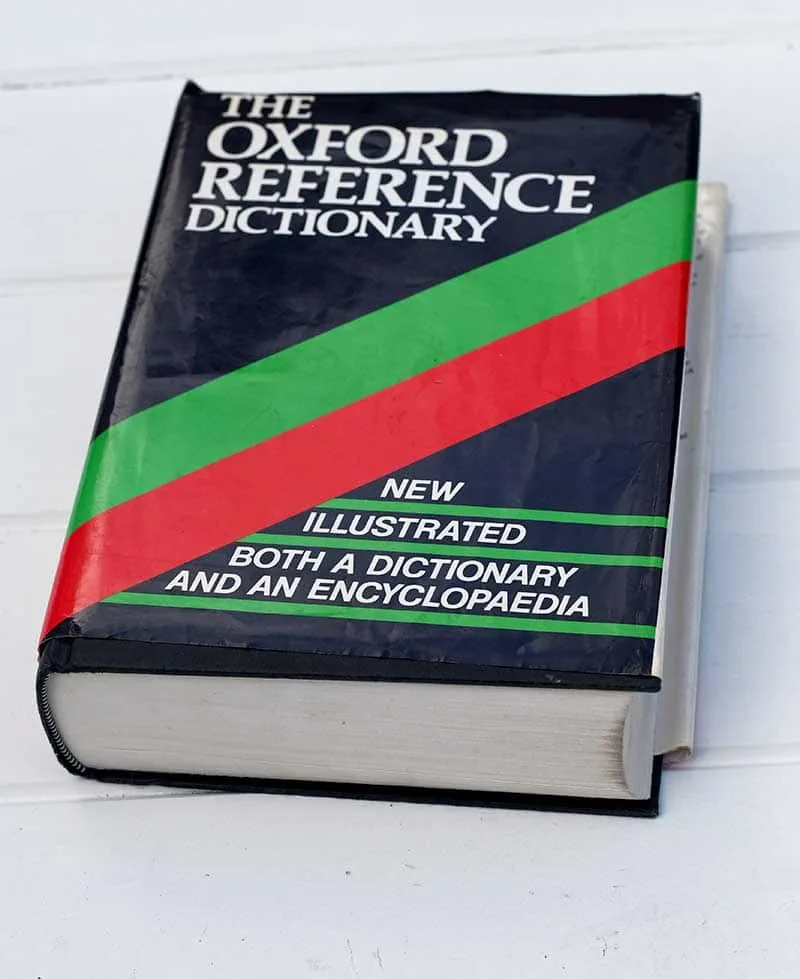
- An old dictionary or encyclopedia – If you don’t have one, they are easily picked up from a charity/thrift store for very little money. An old dictionary is of great value as often they have hundreds of pages that can be used for many art and craft projects.
- Muslin cloth (cheesecloth) – the thin cloth you use in the kitchen for straining food.
- Mod Podge
- Cling film (Sarin) wrap
- Embroidery threads in various colours
- Embroidery Needles
- Masking tape
- Vintage images – Pictureboxblue is full of thousands of free vintage images. You can download the same ones I used for my dictionary art here. More vintage clip art images are available with my paper mache bowl tutorial.

How To Embroidery on Paper and Make Dictionary Art
Preparing the Paper
Step 1: The first thing to do is choose what page from the dictionary you want to use for the dictionary art. The idea is to match the image you embroider on the paper to a word on the dictionary page. Once chosen, carefully tear the page out of the dictionary.
Top tip: I know some people are squeamish about tearing up dictionaries. For some, it just seems wrong. You can always use a photocopy instead if you are one of these people. However, this embroidered art does work better on the original, thinner book pages.
Step 2: Next, tape the dictionary page to printer paper. Then put this paper into your printer’s paper feed and print the image of your choice onto the page. Print a dummy run first to ensure that the image prints the right way up and is to scale.
I made a mistake when I first printed the poppy seed head onto the poppy dictionary page; the image was printed upside down. I reprinted the same image again on a dictionary page with the word seed.
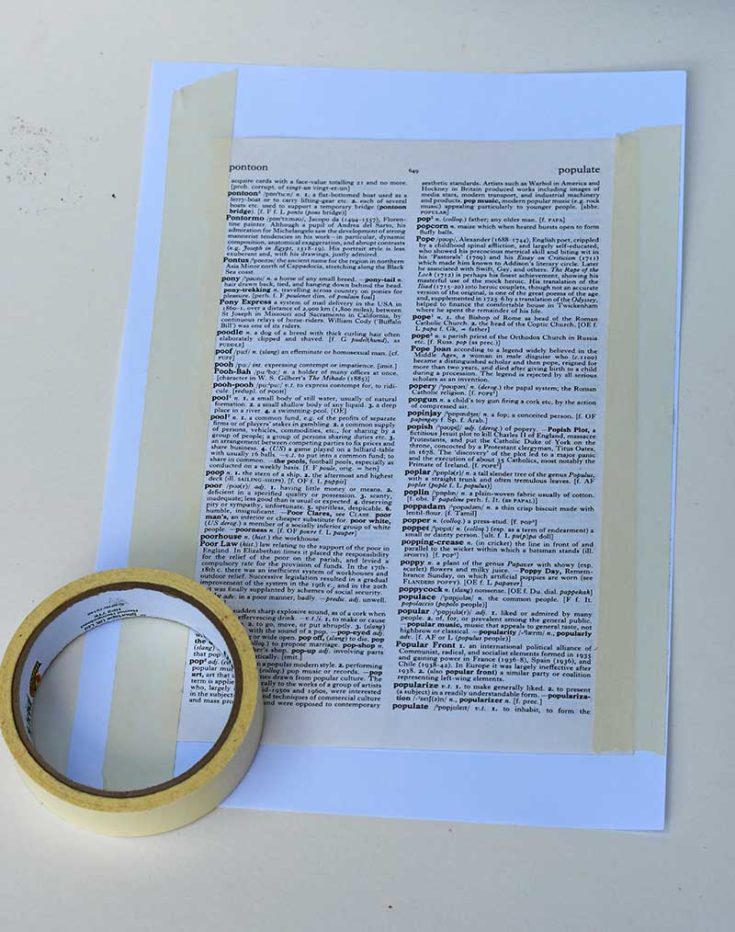
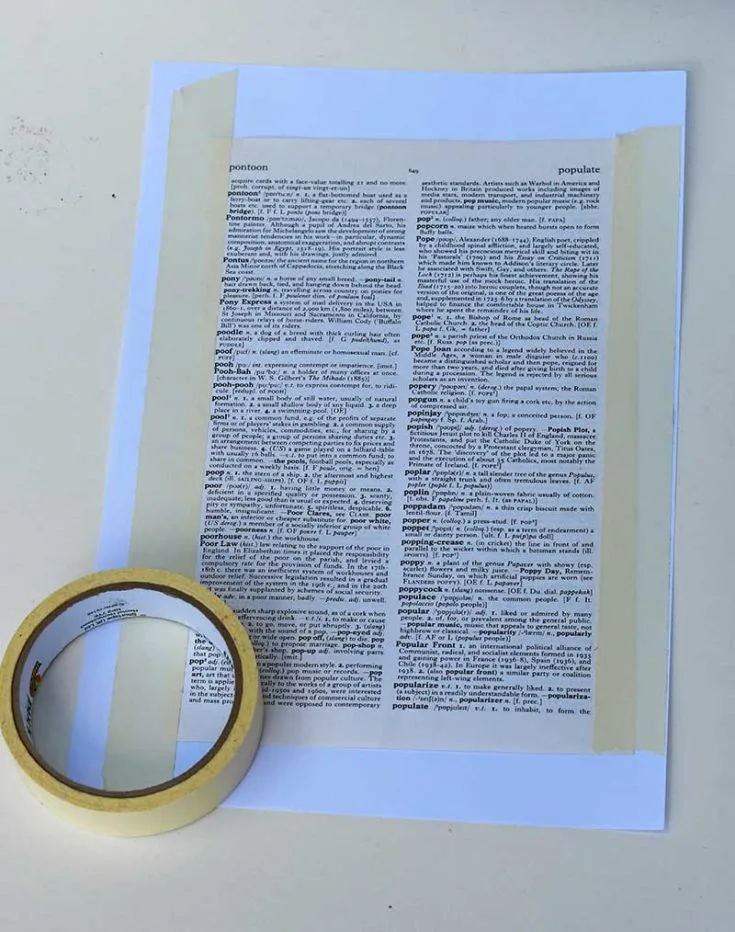
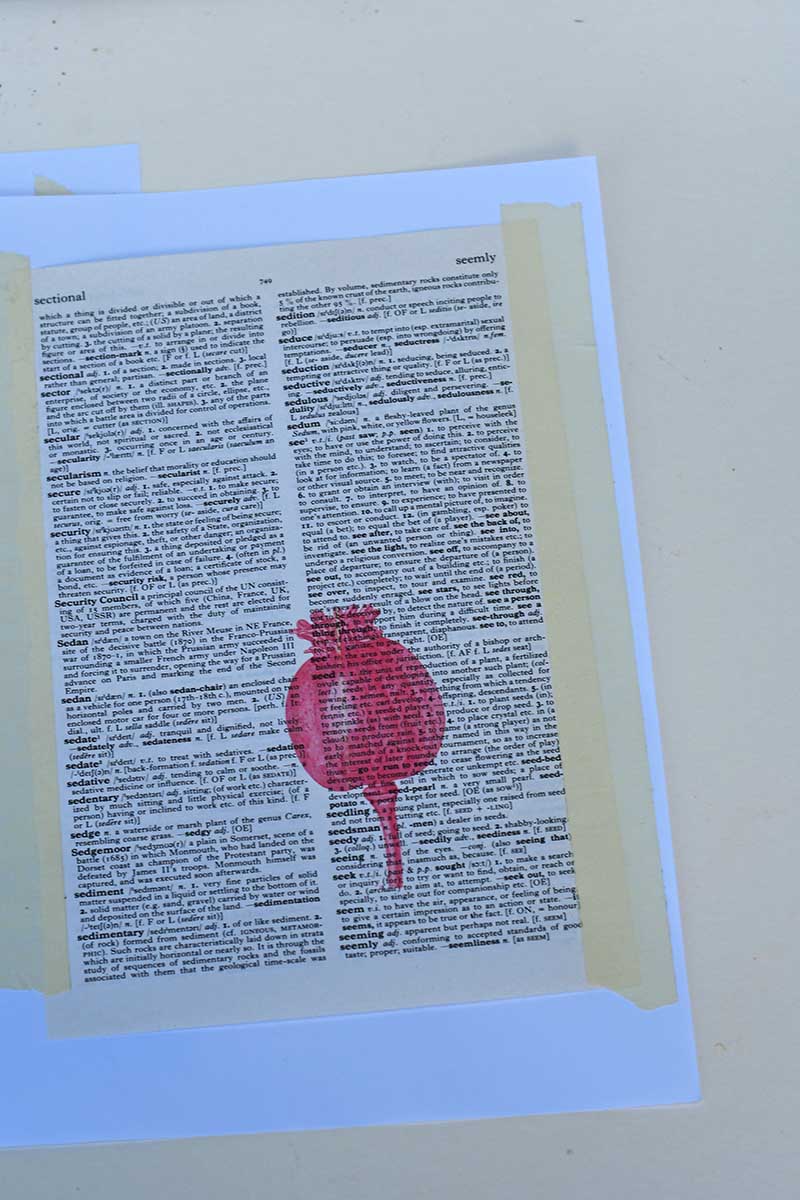

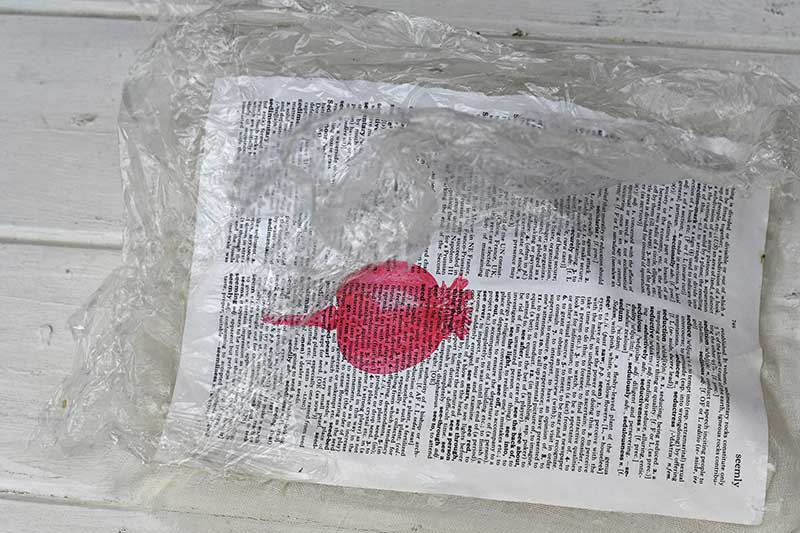
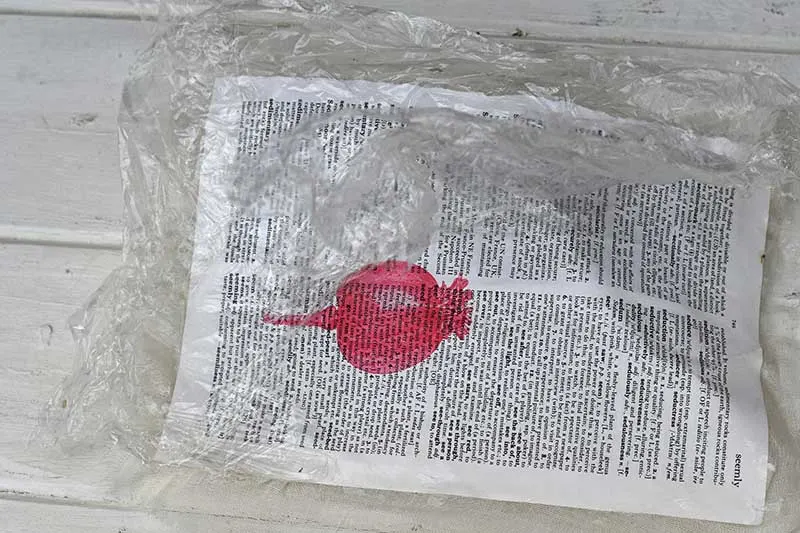
Step 3: Remove the masking tape once the image has been printed onto the dictionary page. Then place the page image side down onto the clingfilm (plastic wrap). Next, paste the back of the page with Mod Podge.

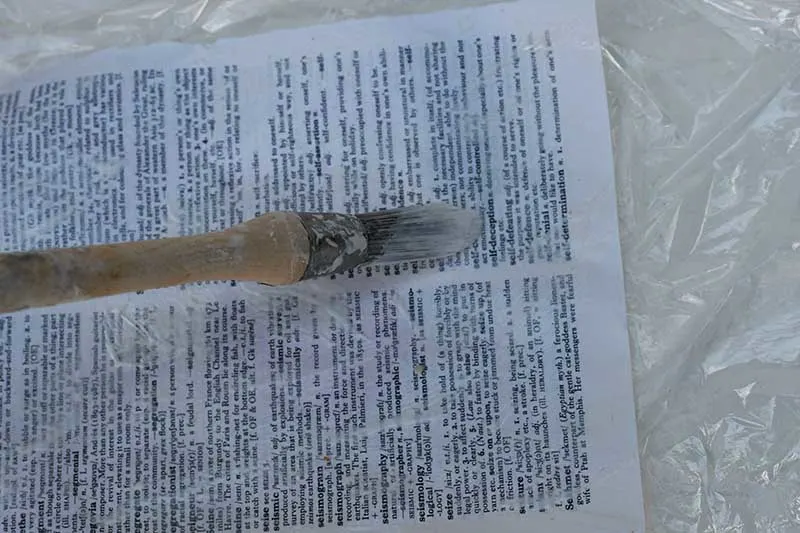
Step 4: Cut a piece of muslin slightly larger than the dictionary page. Then lay the muslin onto the pasted Mod Podge page, smoothing it out. Then brush another layer of Mod Podge onto the muslin.
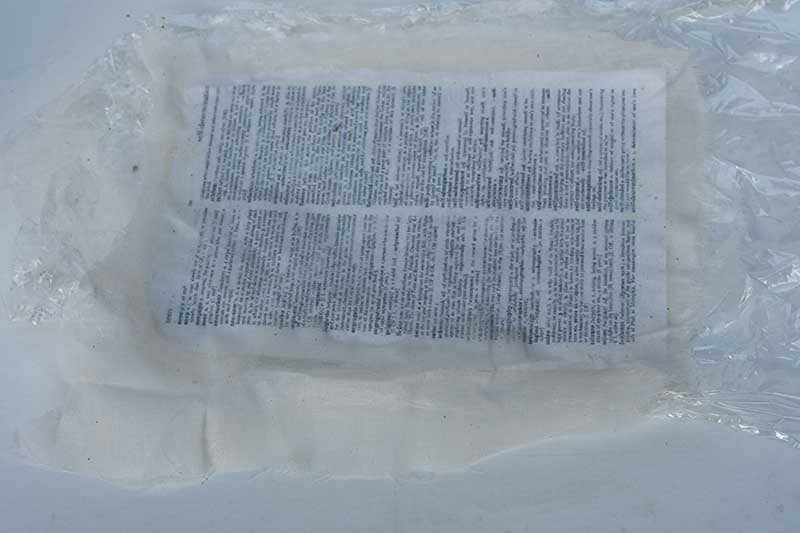

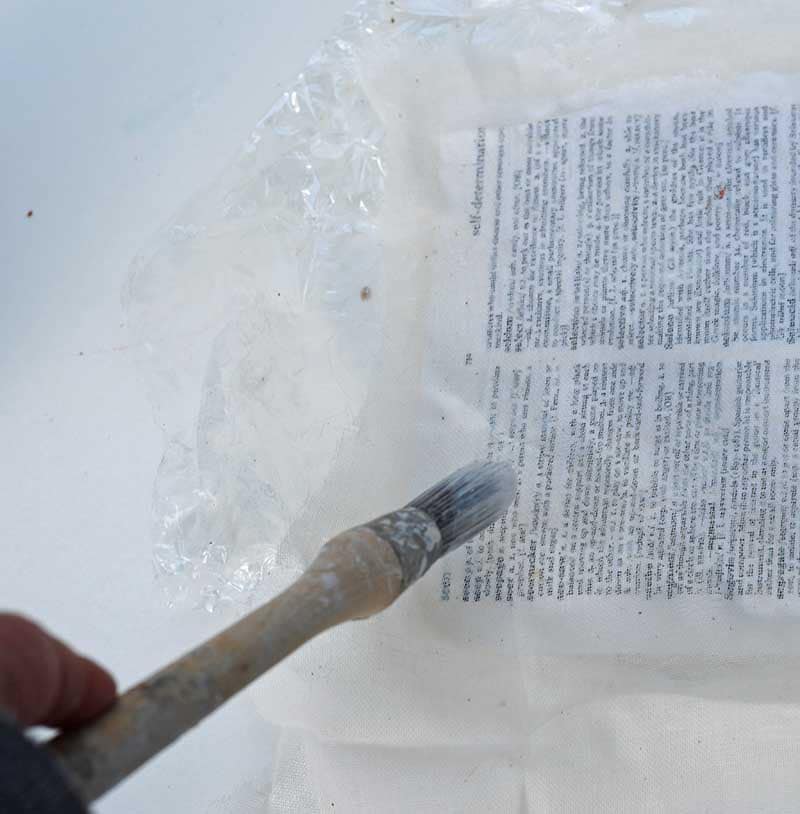
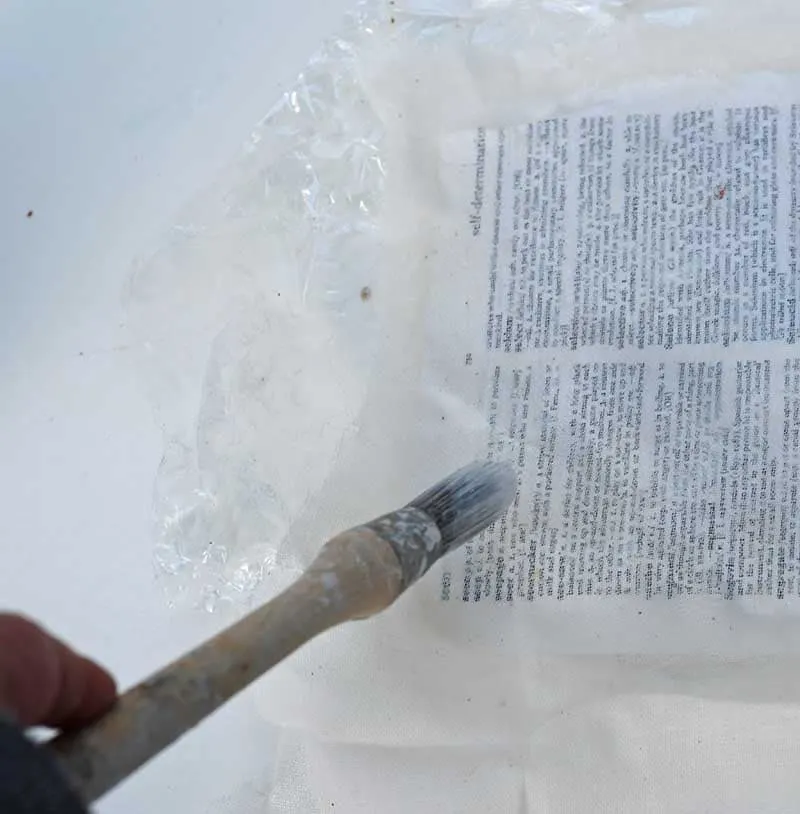
Step 5: Leave the dictionary page to dry. Once fully dry, remove the clingfilm (plastic wrap) from the front of the dictionary page. The paper is now ready for embroidery.
Embroidery on Paper
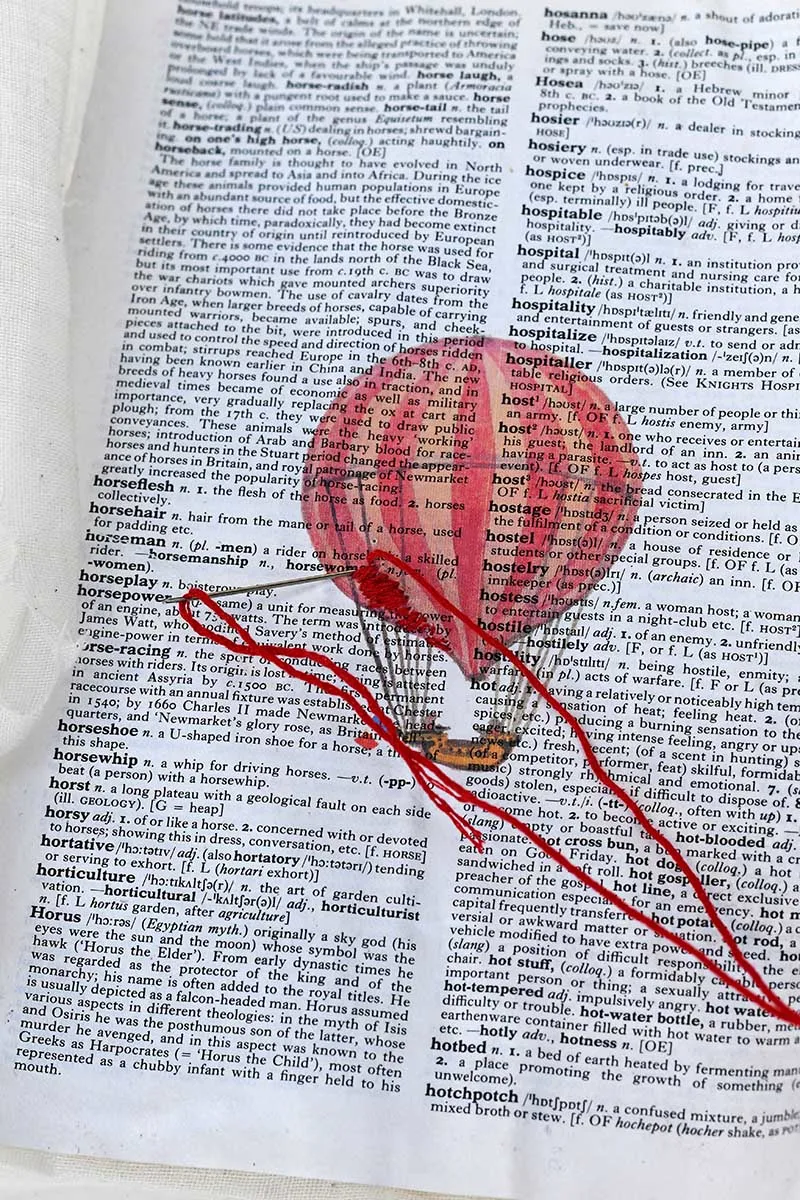
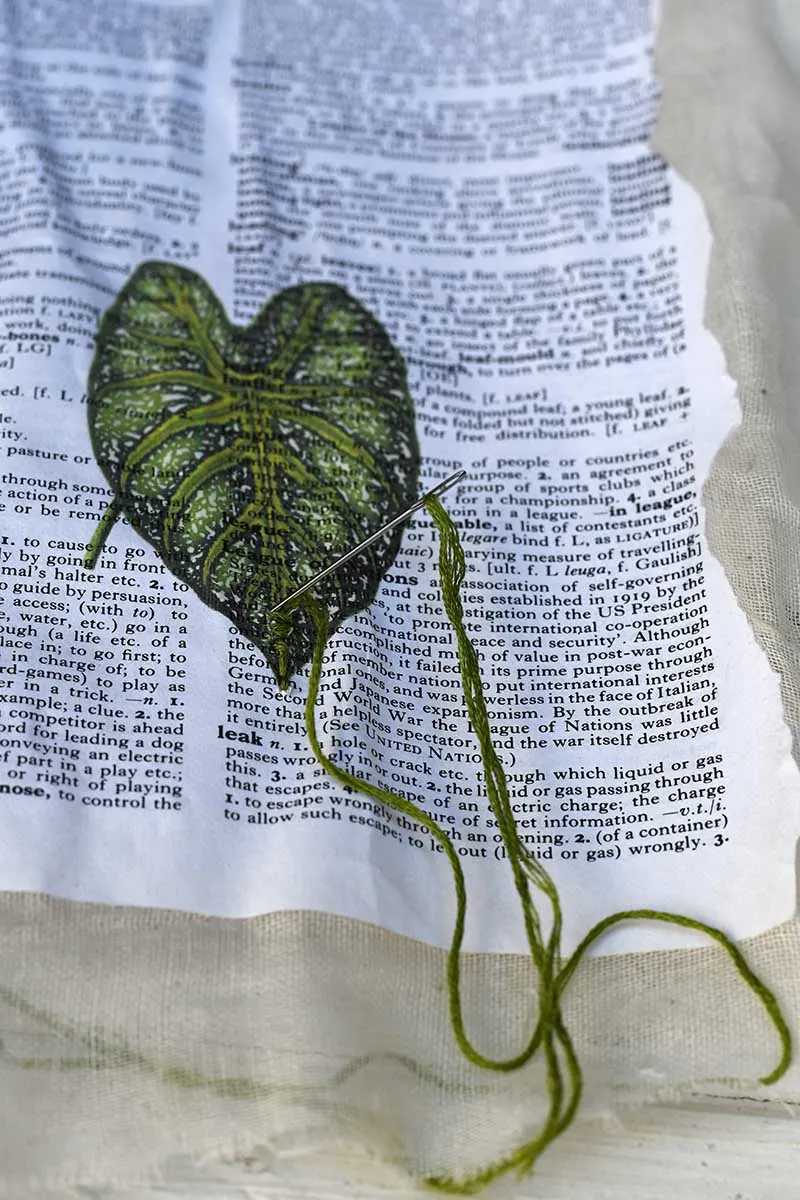
Step 6: Thread a sharp embroidery needle with embroidery thread. I used all six strands of embroidery thread. The idea with the dictionary art was to enhance the printed images with stitches on the paper.
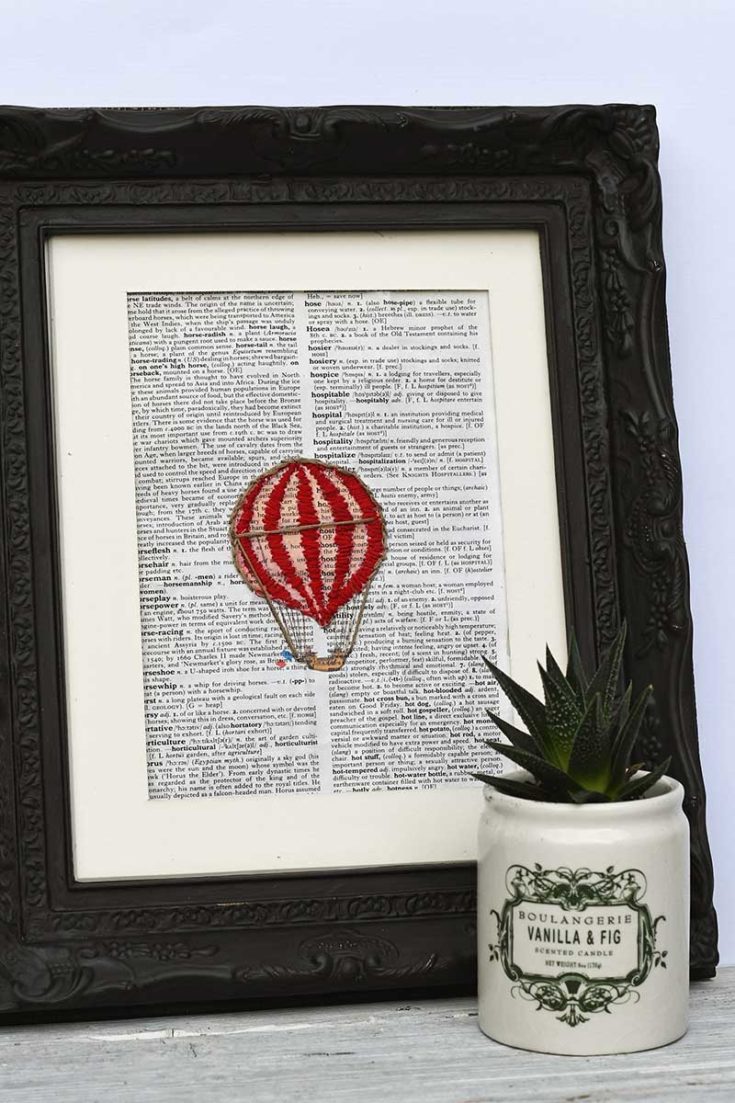
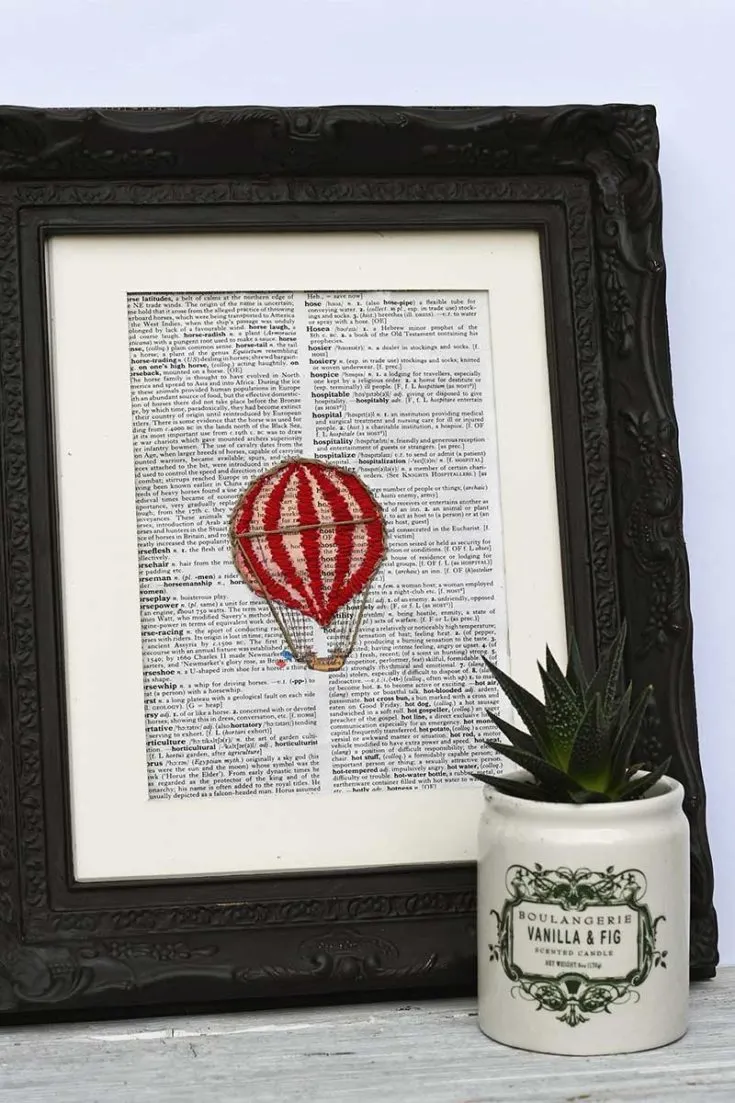
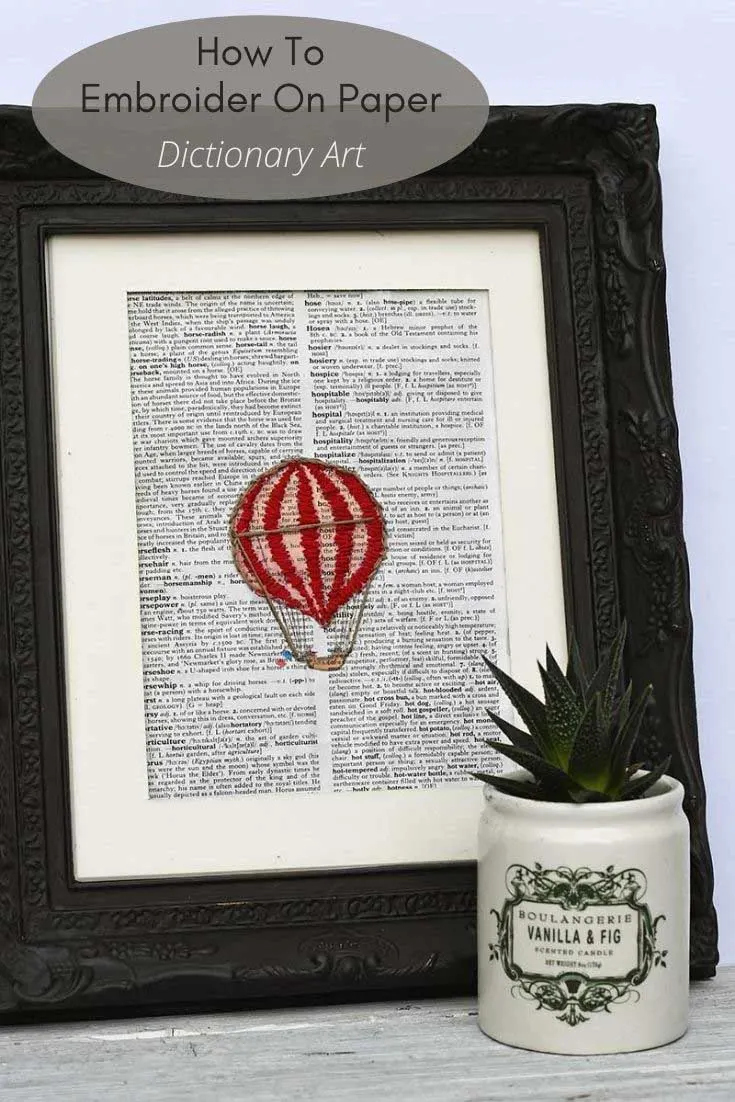
Just pick a particular element in the picture to stitch over. For example, I just embroidered the red stripes on the hot air balloon and left the others.
You can still see some printed images and dictionary words under the embroidery.
I used short satin embroidery stitches to fill in sections of colour on the images. To outline an image, I used a chain stitch. I used a few French knots at the top for the poppy seed head. But I do need to practice my French knots a bit more!
Top tip: Use a sharp embroidery needle to pierce dictionary pages easily. Sometimes embroidery/cross stitch needles are blunt, designed to go through the cloth with pre-stitched holes.

When the paper embroidery is finished, cut away any excess muslin from the paper.

The Dictionary Art Embroidered Images
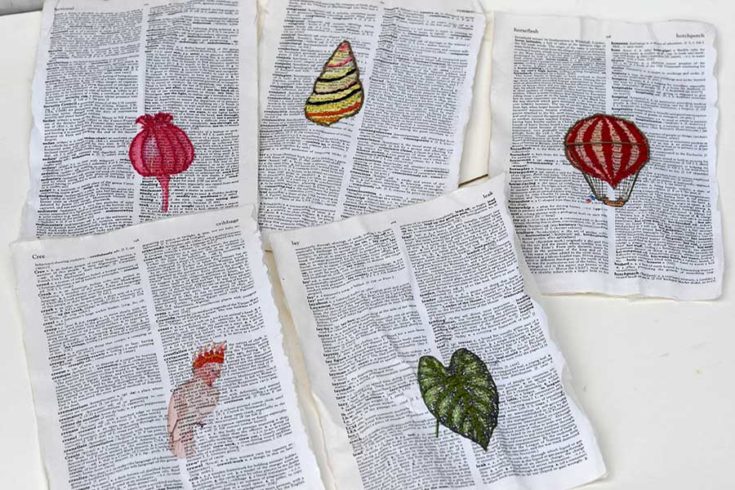
I am so excited that I have worked out how to embroider on paper that I made five of these dictionary art pages and plan to make more.
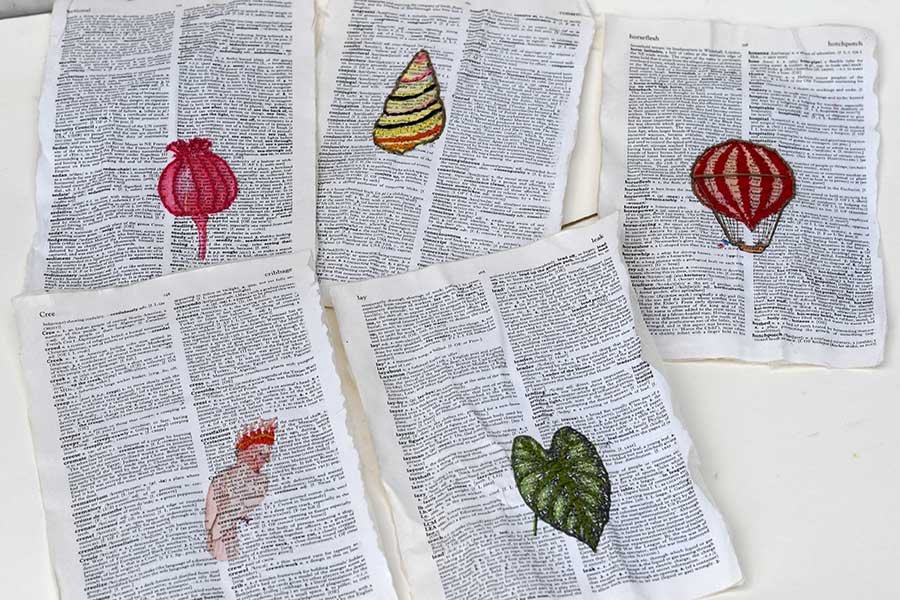
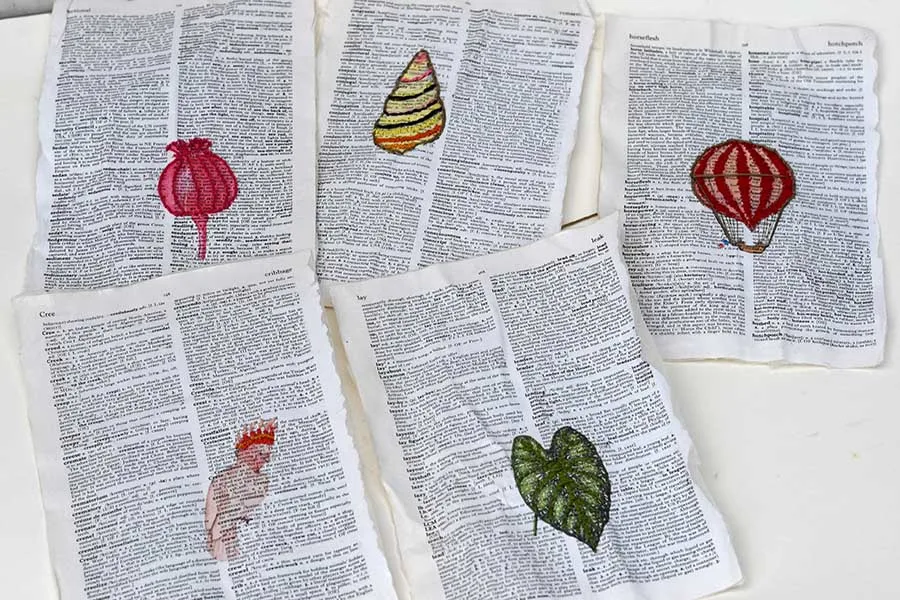
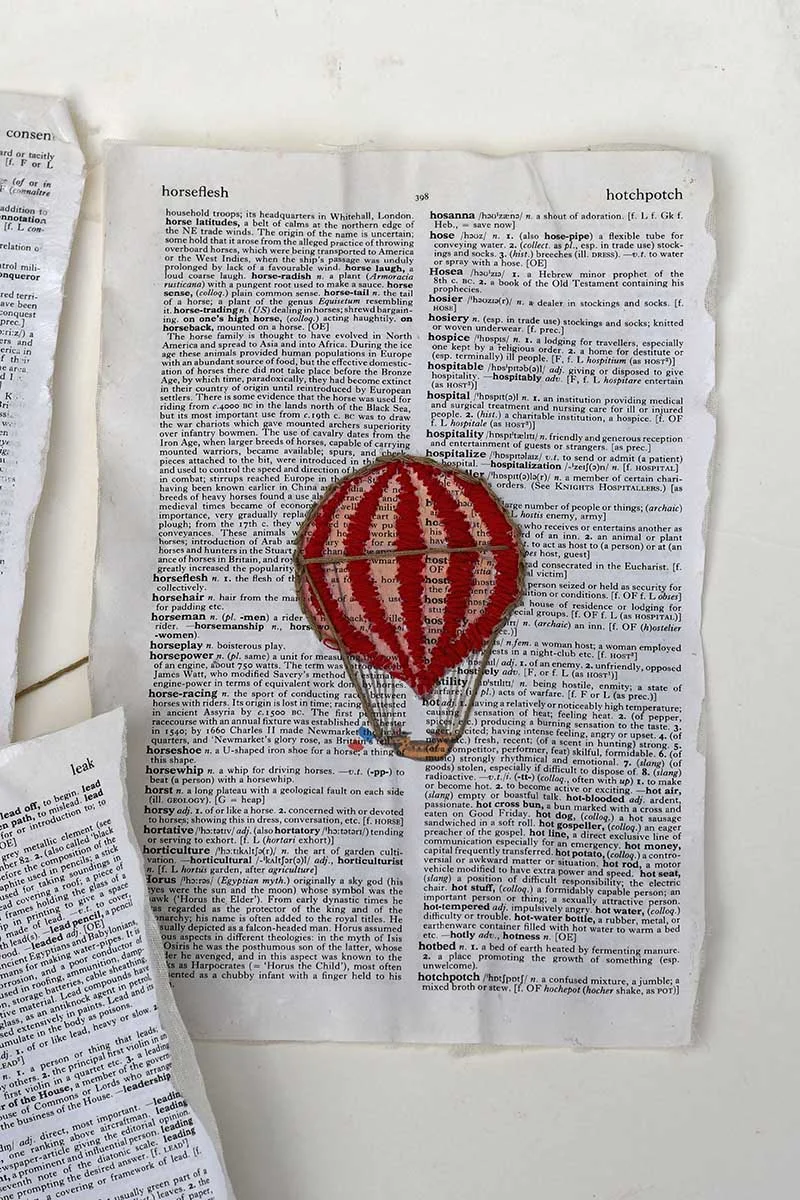
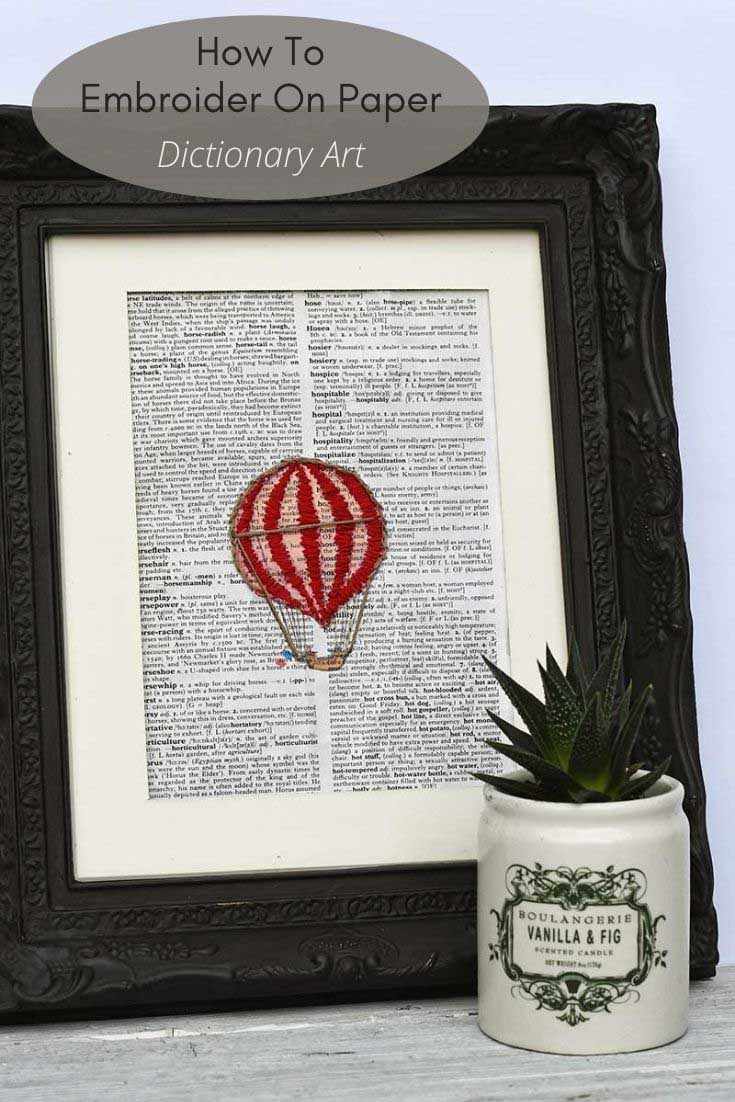
Hot Air Balloon
I choose a dictionary page for the hot air balloon with the word hot. The balloon’s outline was embroidered with a chain stitch, and the red stripes were filled with a satin stitch.
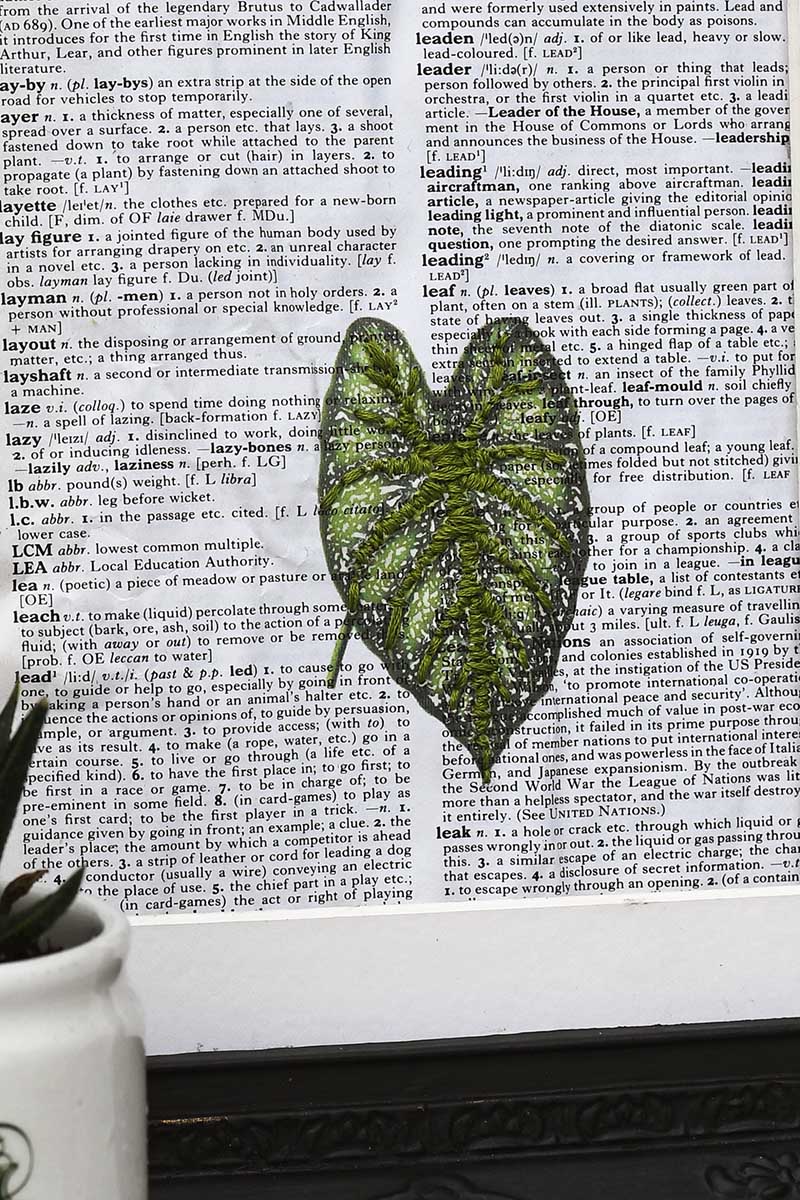
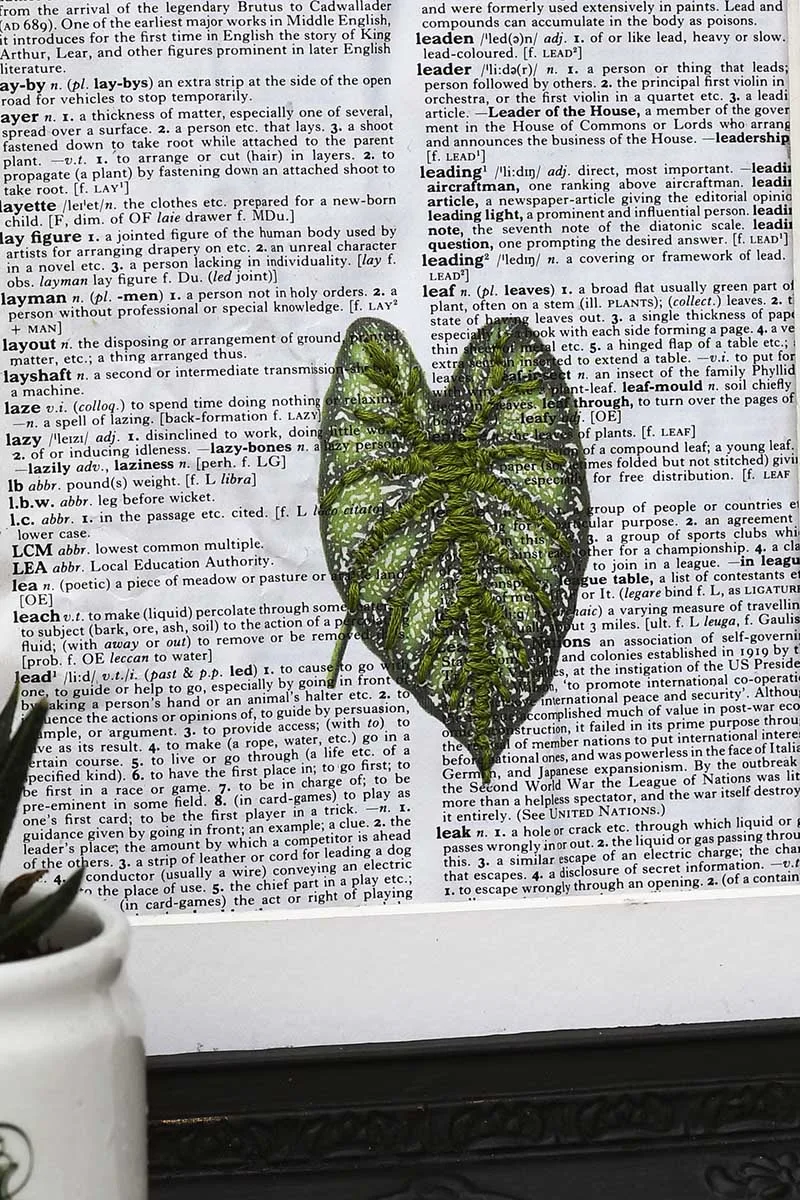
Leaf Dictionary Art
The veins of a tropical leaf were embroidered with a satin stitch on dictionary paper with the word leaf printed on it.

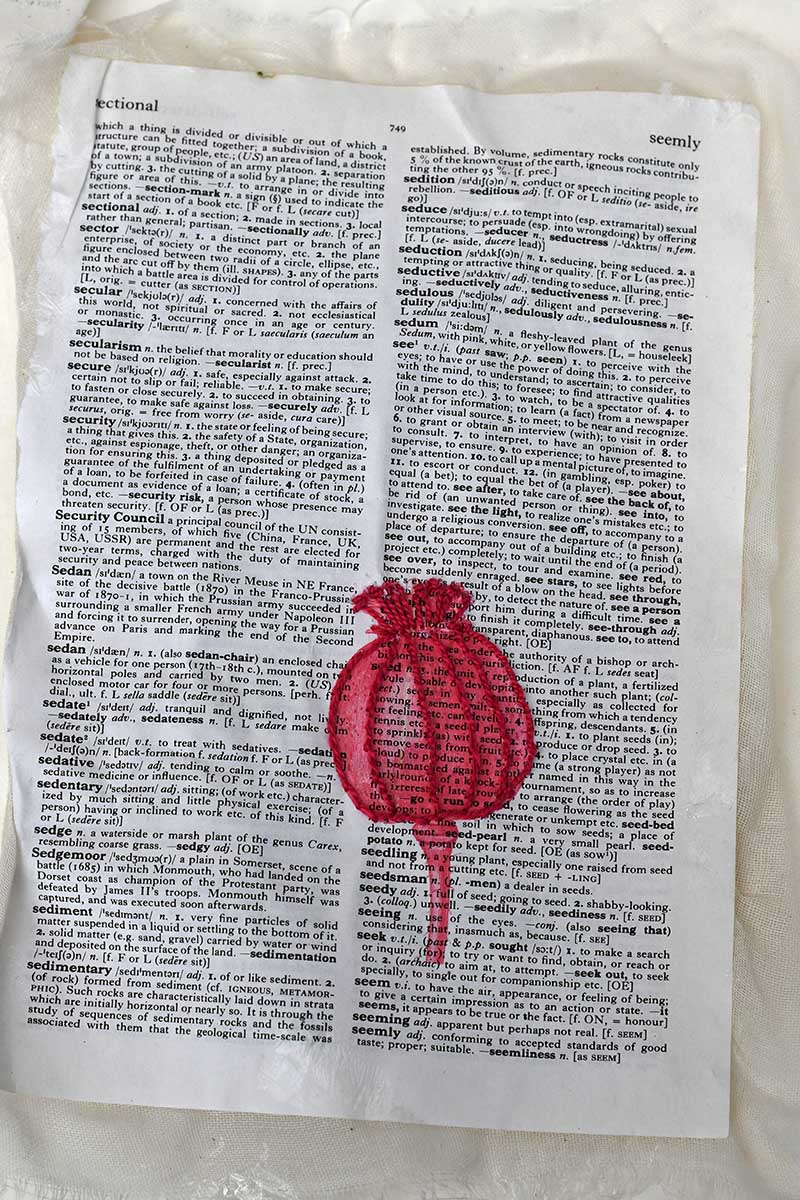
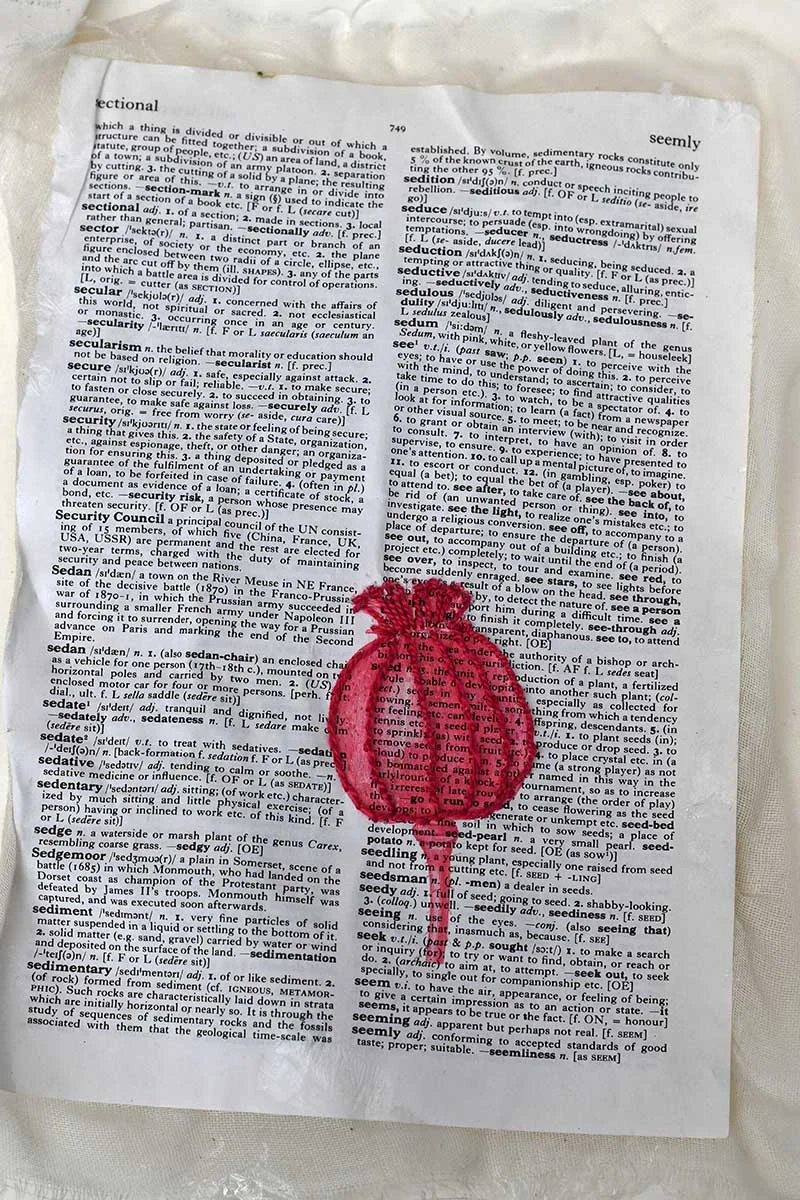
Poppy Seed Head
Initially, I would print this poppy head on the dictionary page with the word poppy. But as I already mentioned, I messed up the printing. I fixed this by printing the poppy seed head on the page with the word seed instead.
A simple chain stitch was used to outline the poppy head. French knots were embroidered at the top of the seed head.
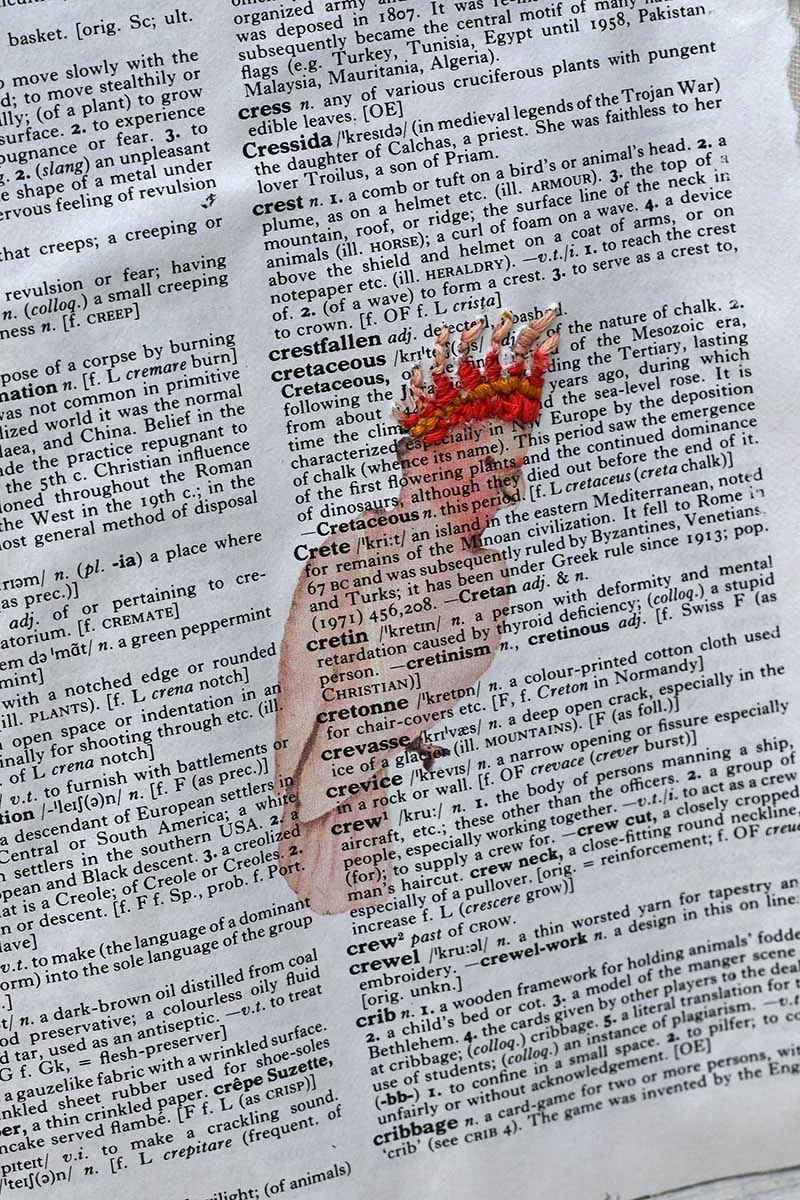
Cockatoo Dictionary Art
A crested cockatoo was printed on the dictionary page with the word crest. Only the cockatoo’s crest was embroidered with a satin stitch, using three colours.

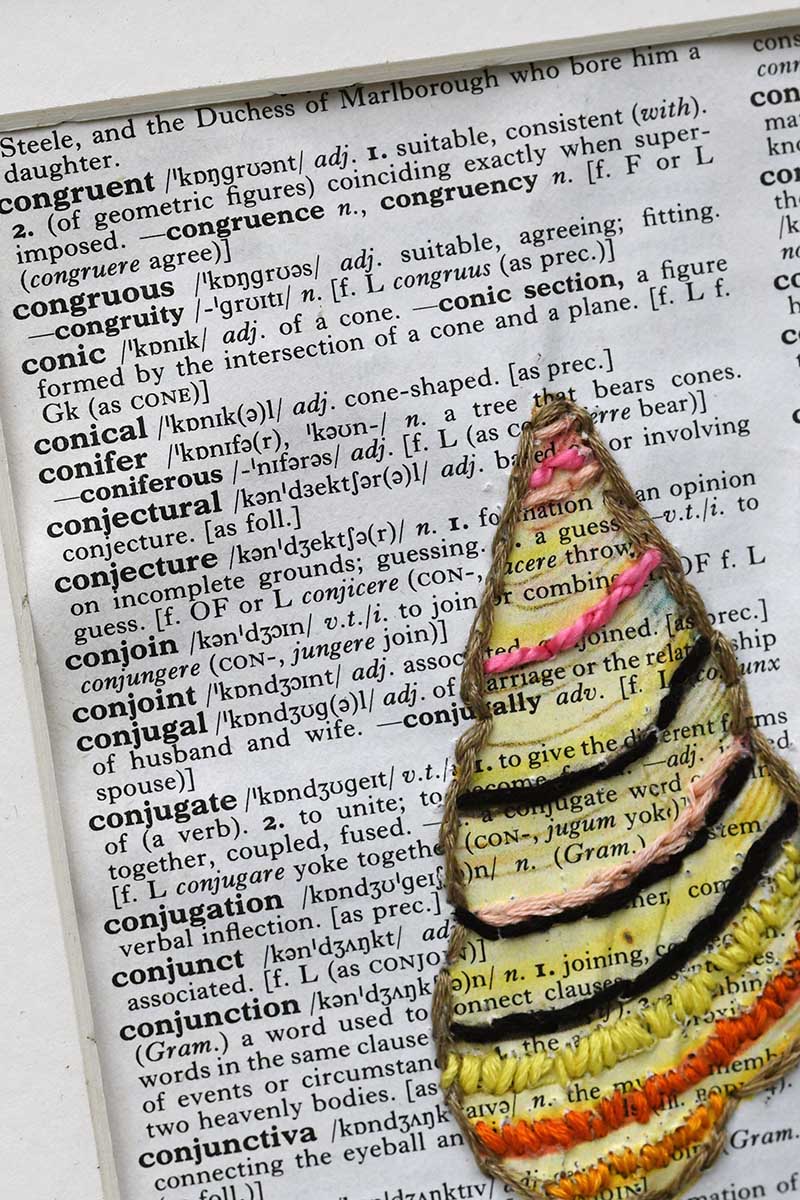
Shell Dictionary Art
A cone-shaped shell was embroidered on the page with the word conical.

I enjoyed this craft; creating the dictionary art was fun. I will be stitching more dictionary pages to make a gallery wall. Now that I have worked out how to hand embroider paper, I’m on the lookout for other book pages to use to create more unique and fun stitched art.
You might also want to see how I turned my children’s old artwork into a large keepsake embroidered memories piece.
There are many examples of stitching on paper on the site, from making personalized map treat bags to paper bag advent calendars and even paper vases.
How To Embroidery On Paper

A step-by-step tutorial that shows you how to reinforce thin book pages such as those from an old dictionary, so that you can embroider on the paper and create some dictionary art.
Materials
- Old dictionary - these can be picked up very cheaply from thrift stores if you don't have one at home for upcycling.
- Muslin cheesecloth
- Mod Podge
- Plastic wrap/cling film
- Coloured embroidery threads
- Masking tape
Tools
- Glue brush
- Colour printer
- Sharp embroidery needles
Instructions
- First, decide on what dictionary page you want to use. Match the words on the page to the image you will embroider. Then carefully tear the paper out of the book.
- Tape the dictionary page to computer paper using masking tape. Feed the paper through the paper feeder on your home printer and print an image on it. There are many to choose from for free on the site.
- Remove the tape from the printed paper and then lay it print side down onto the plastic wrap.
- Paste the back of the page with Mod Podge. Then lay the muslin cloth on top of the glue.
- Paste another layer of Mod Podge on top of the muslin and leave it to dry.
- Once the Mod Podge has dried, remove the plastic wrap.
- Thread the embroidery thread onto a sharp-pointed embroidery needle.
- Outline the printed image in a simple chain stitch. Use a satin embroidery stitch to fill in highlights of colour.
- Cutaway an excess muslin cloth overhanging from the paper.
You will find Christmas embroidery ideas here and tip tips for watercolour embroidery. And don’t forget to check out these other paper craft ideas for home decoration.
Diane
Sunday 26th of November 2023
Brilliant! I have a question: does the mod podge come off and sticky up your needle? I like to sew on cardstock but of course the needle perforates it. Previous practice with strong tape was a no-go due to adhesive on the needle. My next project will be a Kendra Norton page, sew looking forward to it!
Claire Armstrong
Sunday 26th of November 2023
I didn't find the Mod Podge a problem with my needles, just make sure you leave it long enough to dry full. Good luck with your project it sounds interesting.
Sooz
Tuesday 4th of October 2022
Thank you for sharing this idea, and for detailing your process. Can you please clear up one thing for me: are you using cheesecloth (stuff you would use in the kitchen) or muslin (woven fabric that you make things out of)? Im confused. Thanks for the inspiration!
Claire Armstrong
Wednesday 5th of October 2022
I'm in the UK, and we call the cloth that you drain food in the kitchen muslin as well as cheesecloth. So yes, it is the thin cloth you use in the kitchen. I hope that helps.
April Iris McLeod
Thursday 14th of April 2022
Beautiful! I LOVE to use old dictionary pages and I love to embroider! Adding this to my bucket list🥰 I love your final designs and I have a question that is not meant as a criticism- just wondering if you ironed the paper/ fabric after embroidering before framing? Another question - did you use any type of fixative/spray/ varnish on the finished project? Sorry if these questions were already answered; I'm having trouble seeing parts of the text due to ads 🙃 I love your work! Best, April
Claire Armstrong
Friday 15th of April 2022
Thank you. To answer the question, I didn't iron the paper, but if you wanted to, I recommend using some greaseproof paper when ironing. I didn't use any fixative or spray as there was no need to protect the pictures as they were going to be framed. I hope that answers your questions.
LydiaF
Tuesday 4th of May 2021
Wow! What a great effect! I've purchased prints on dictionary paper, but would not have thought of embroidery. Thanks for sharing with us at Creatively Crafty #ccbg :)
Claire Armstrong
Wednesday 5th of May 2021
Thank you, the embroidery is a great way to add some texture.
Cecilia
Sunday 2nd of May 2021
Fun idea! Thanks for sharing at Vintage Charm!
Claire Armstrong
Monday 3rd of May 2021
Thank you so much