
Create stylish and spooky Halloween decor with these hand-embroidered felt skulls on wire stems. Perfect for adding a unique, handmade touch to your home
I got the idea for this Halloween felt craft by combining two of my other previous crafts. The first one was the simple handmade monochrome felt Christmas ornaments. The second was the Scandinavian doodle flowers for how to display them.
If such a thing exists, you could almost describe this as a Scandinavian-style Halloween decoration. The simple felt skull decorations fit in with all my other handmade Nordic and Scandinavian crafts and decorations.
The DIY Halloween felt decorations are effortless to make; the materials hardly cost anything. All you need is some black and white felt scraps and embroidery thread.
The stitching is straightforward. There are no complicated embroidery stitches; it’s like doodling with thread. Anyone should be able to complete this craft; it is suitable for adults and teens.
(There is a printable how-to card for this craft at the end of the post.)
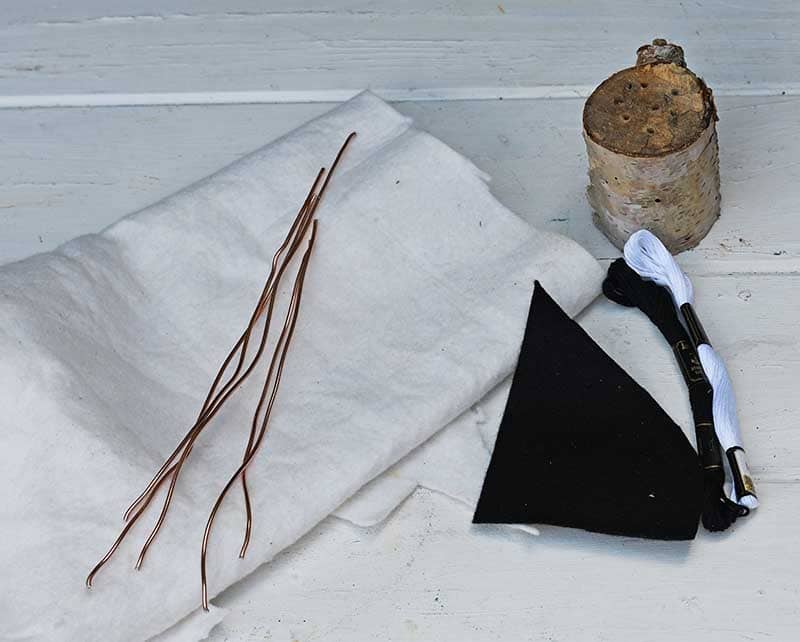
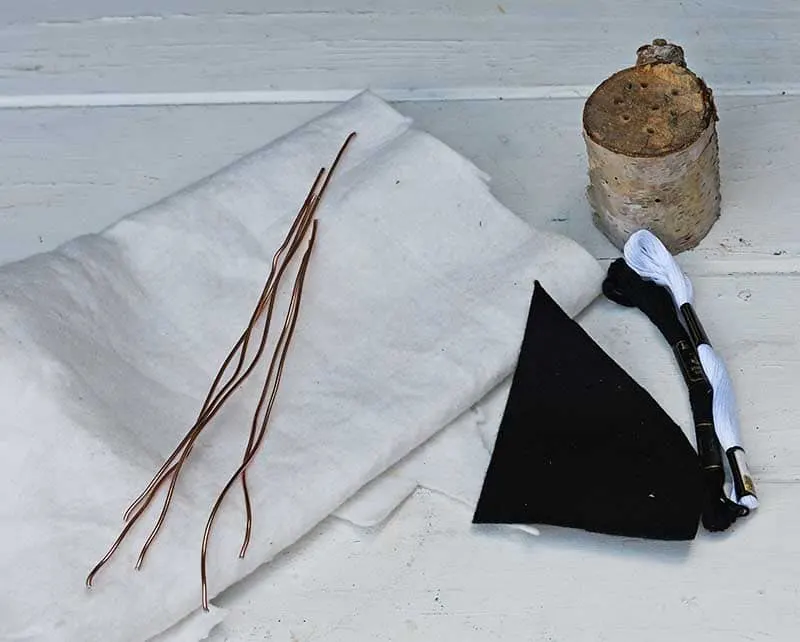
What You Need
- Off-white/ivory felt enough to make five small skulls. You can either use craft felt or felt from an old sweater. I like to use 100% pure wool felt, but any felt from the craft shop will do. Just make sure it isn’t too thick.
- A tiny amount of black felt (see above).
- Black and white embroidery thread
- Embroidery needle
- Copper craft wire
- I use the stuffing from old pillows for a small amount of fibre fill.
- Birch stump or any small scrap piece of wood.
To Make Scandinavian Halloween Felt Decorations
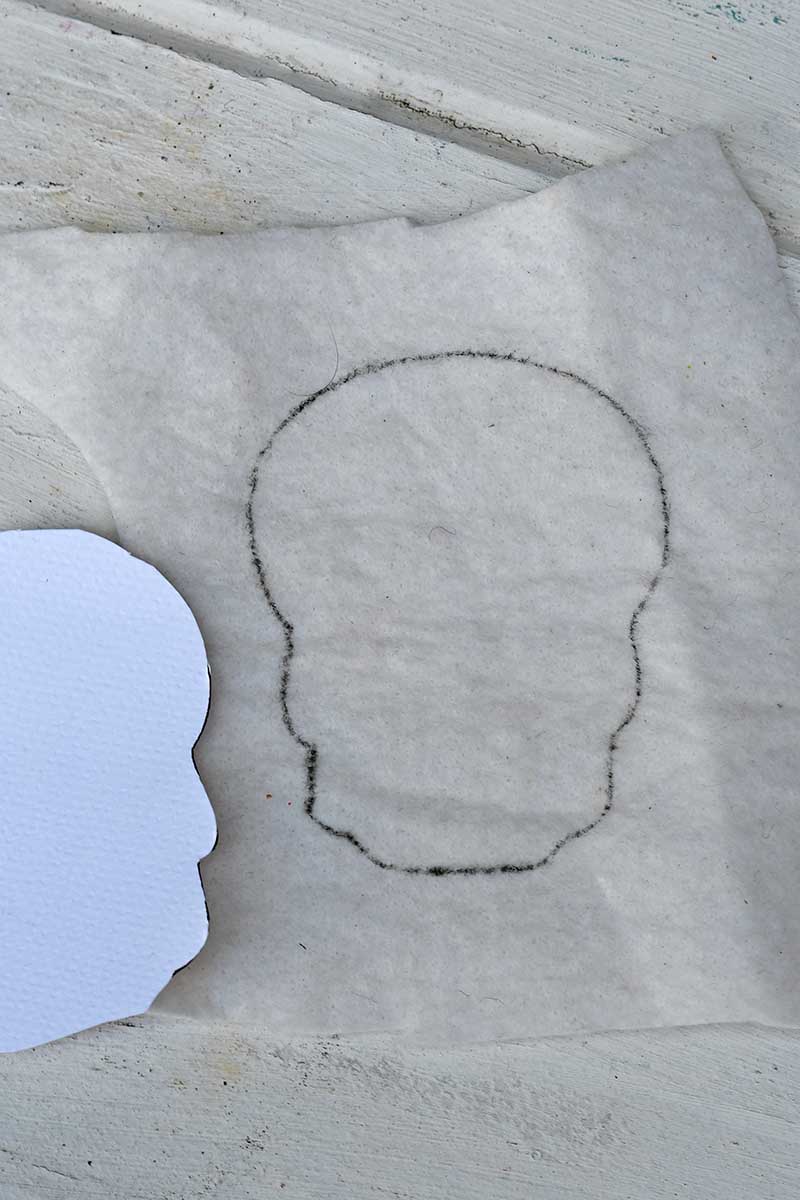
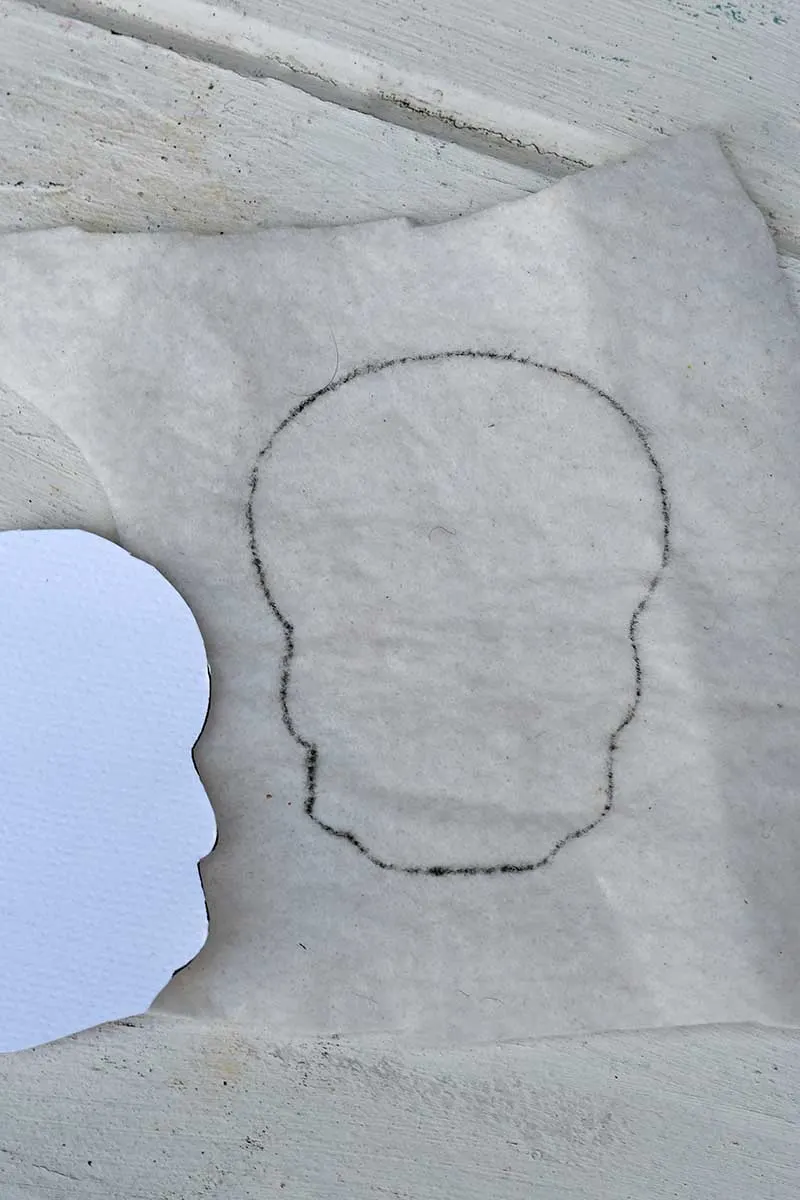
Step 1: First, print off the skull felt Halloween decoration patterns. You can design your own. Cut out the skull shapes to use as a template.
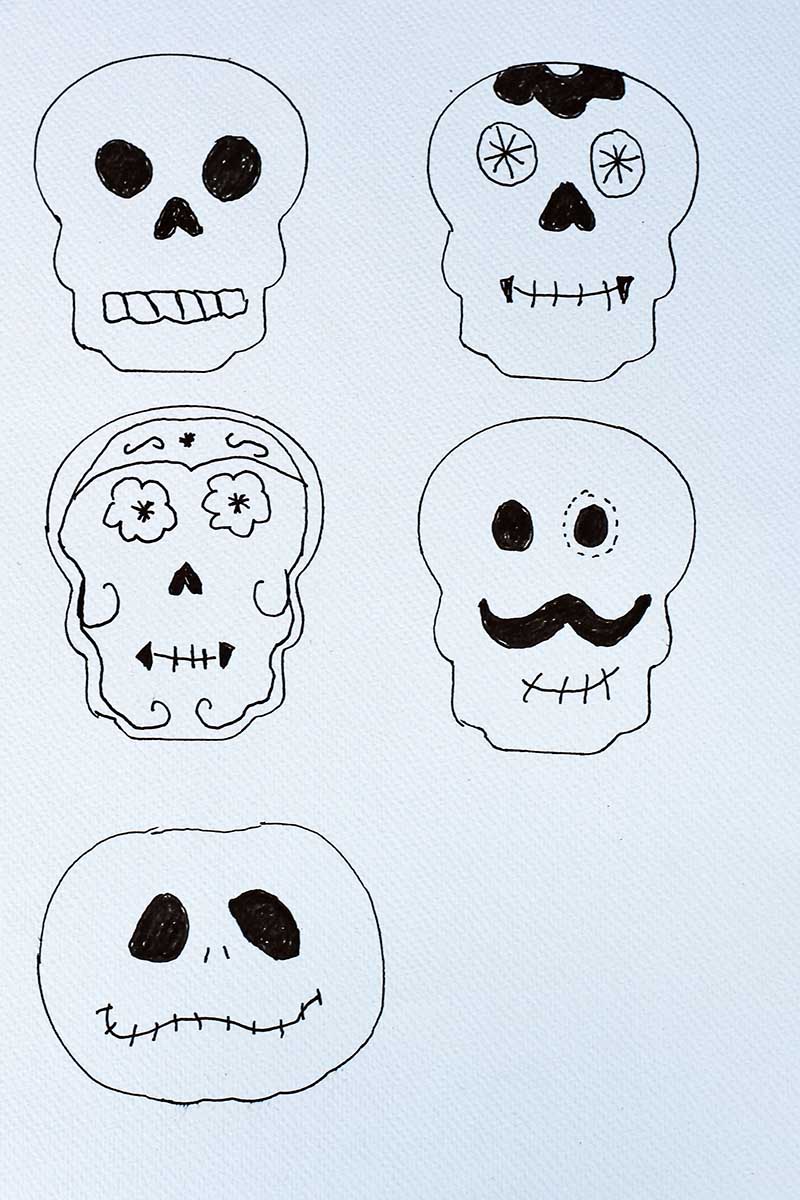
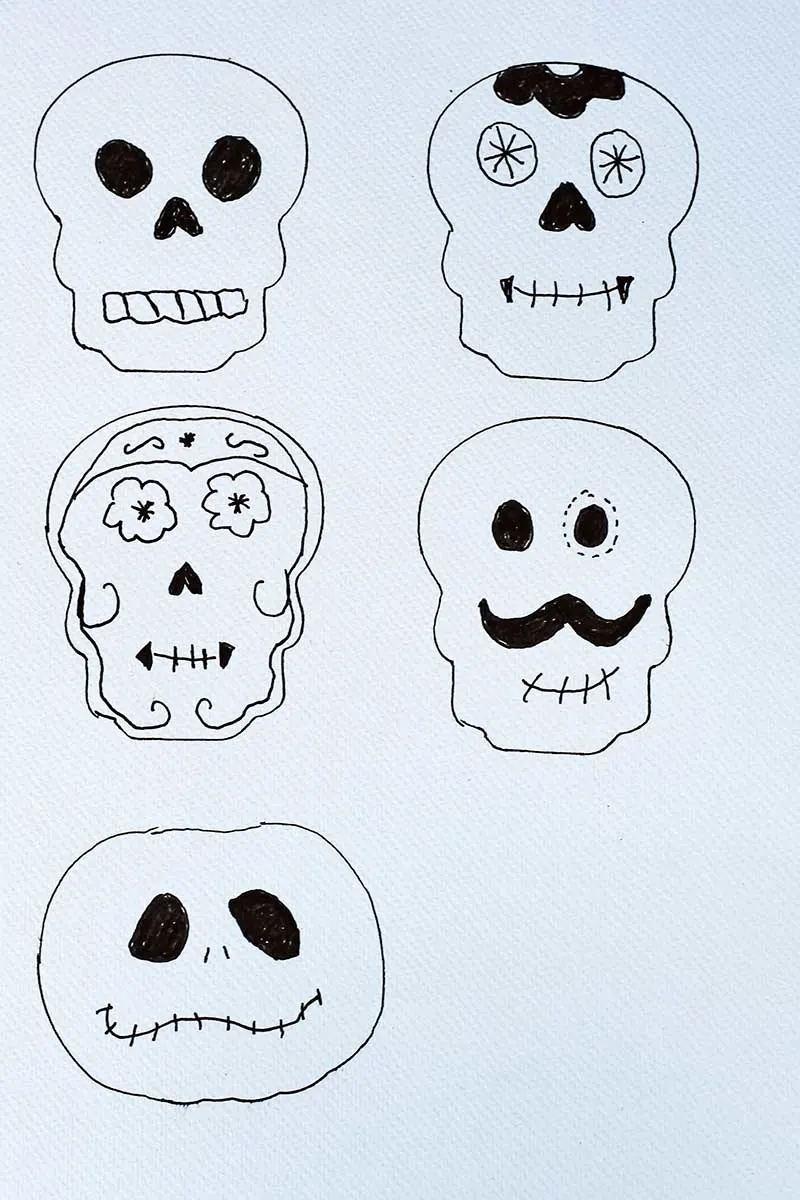
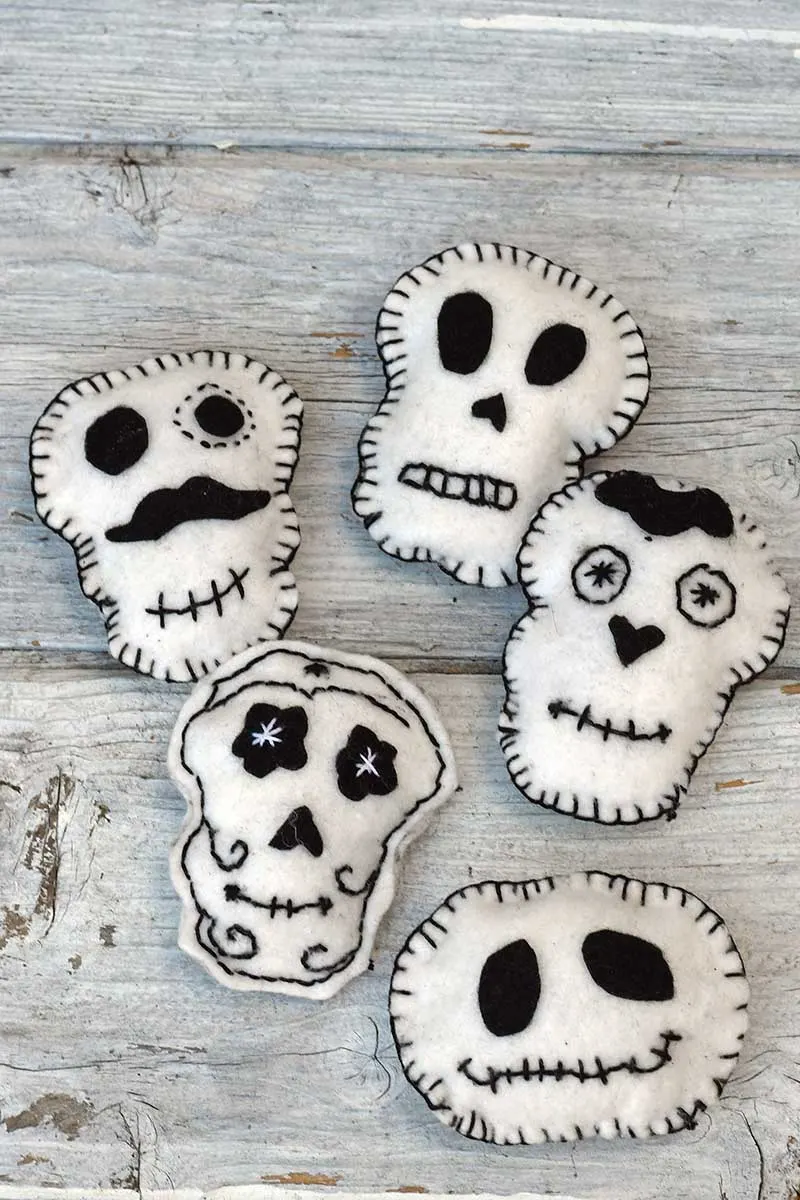
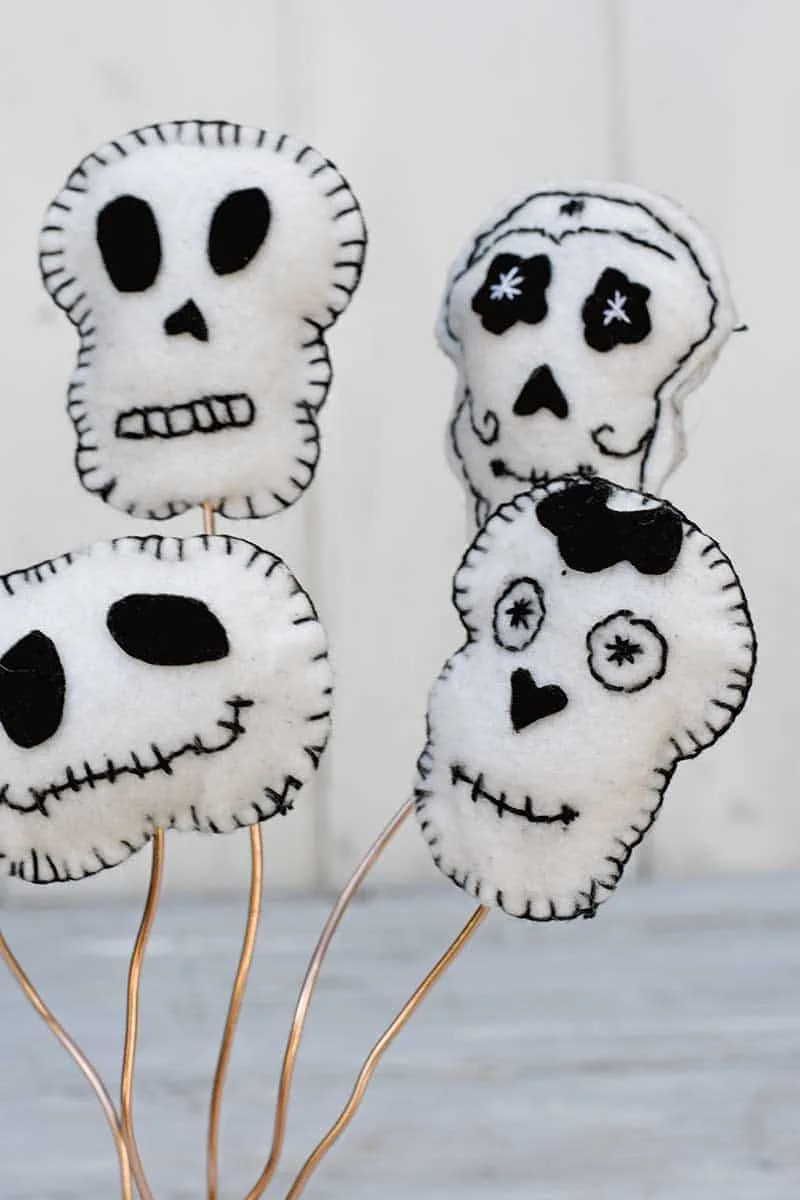
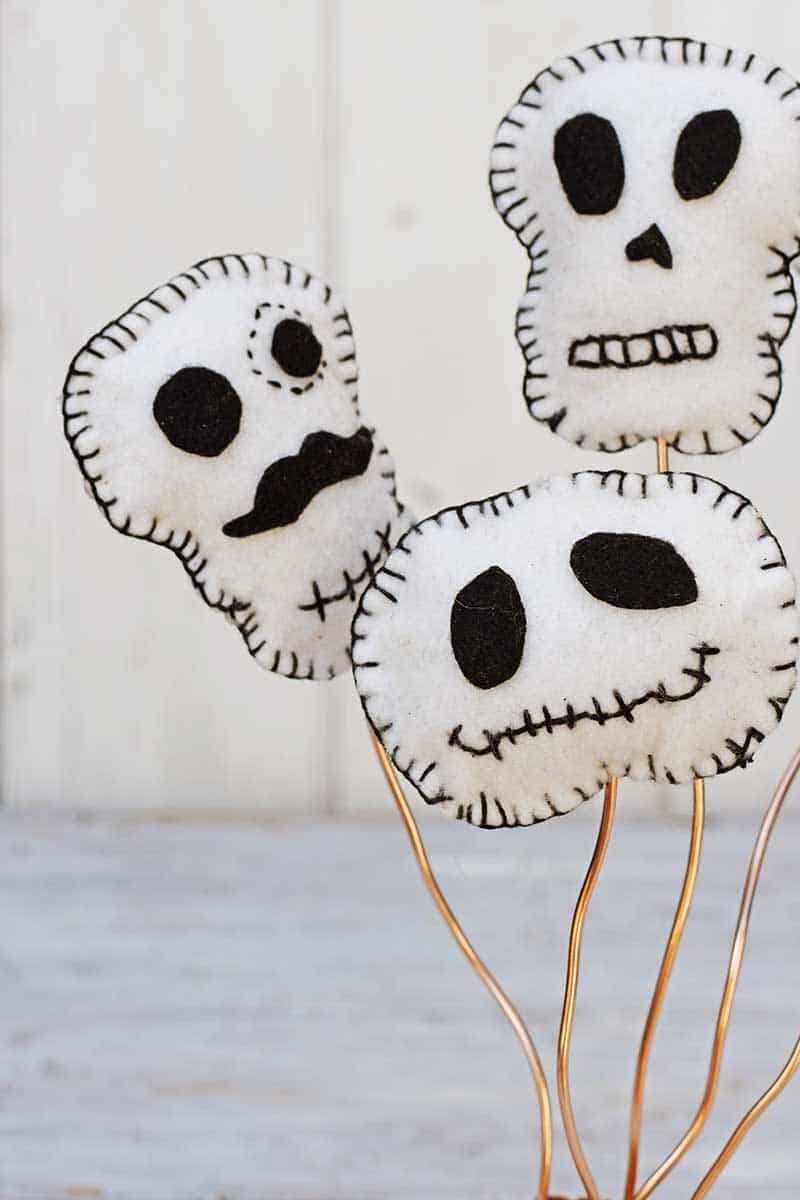
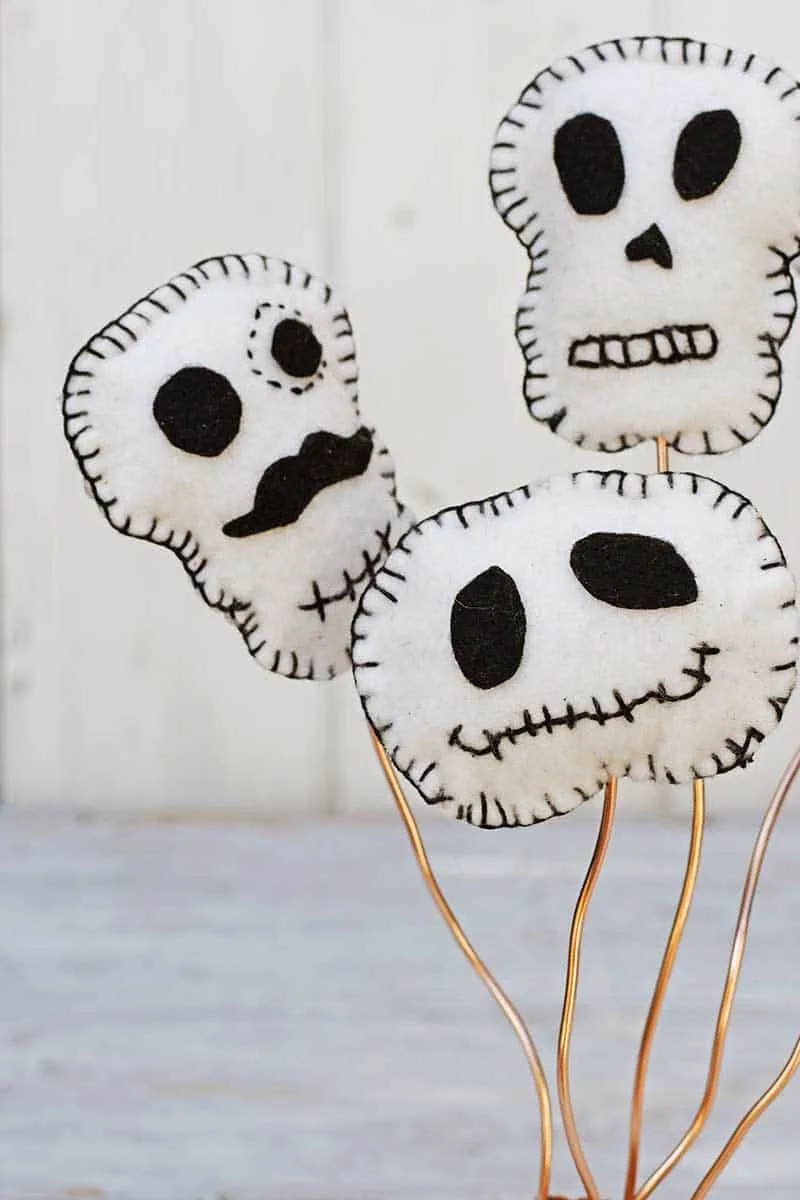
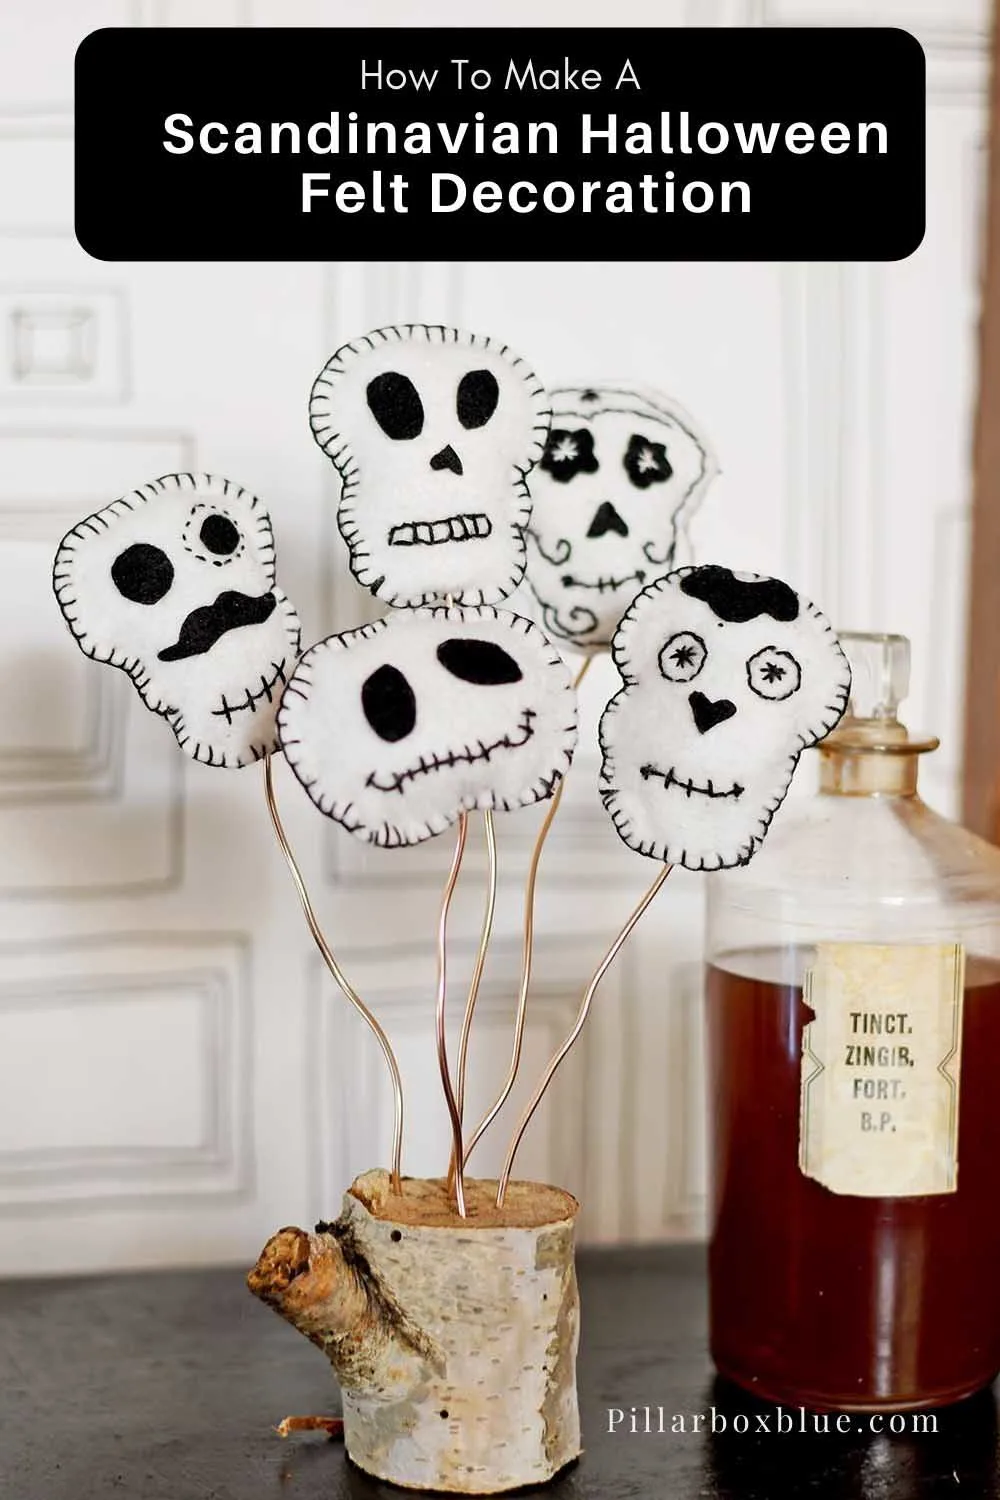
Step2: Next, place the skull cutout shape onto the cream felt, then draw around it. Cut out two shapes for each felt skull Halloween decoration. I made five different embroidered skulls for this Scandinavian Halloween decoration.
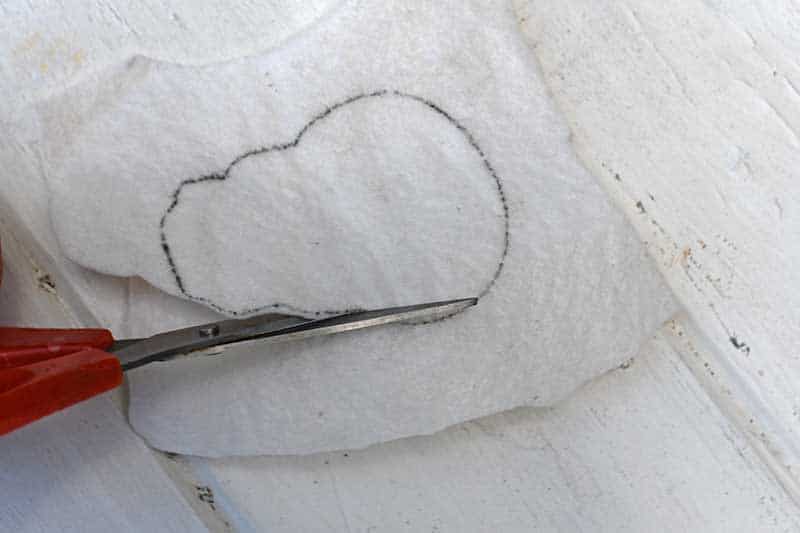
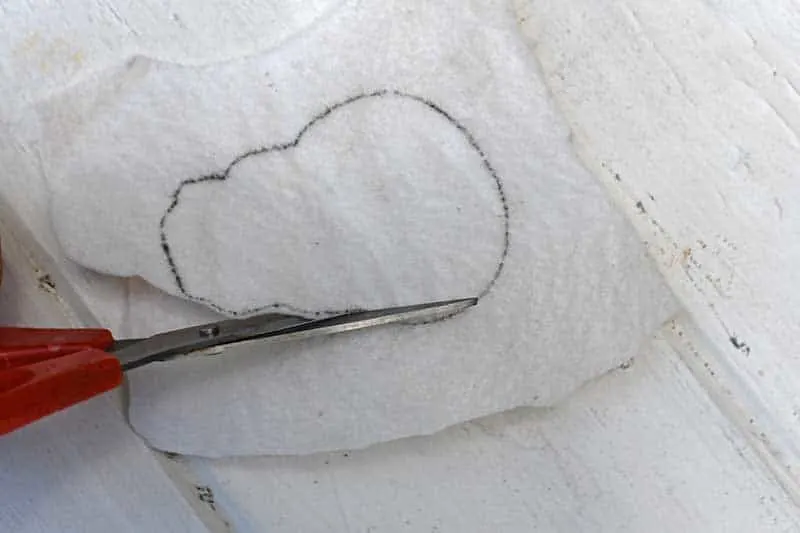
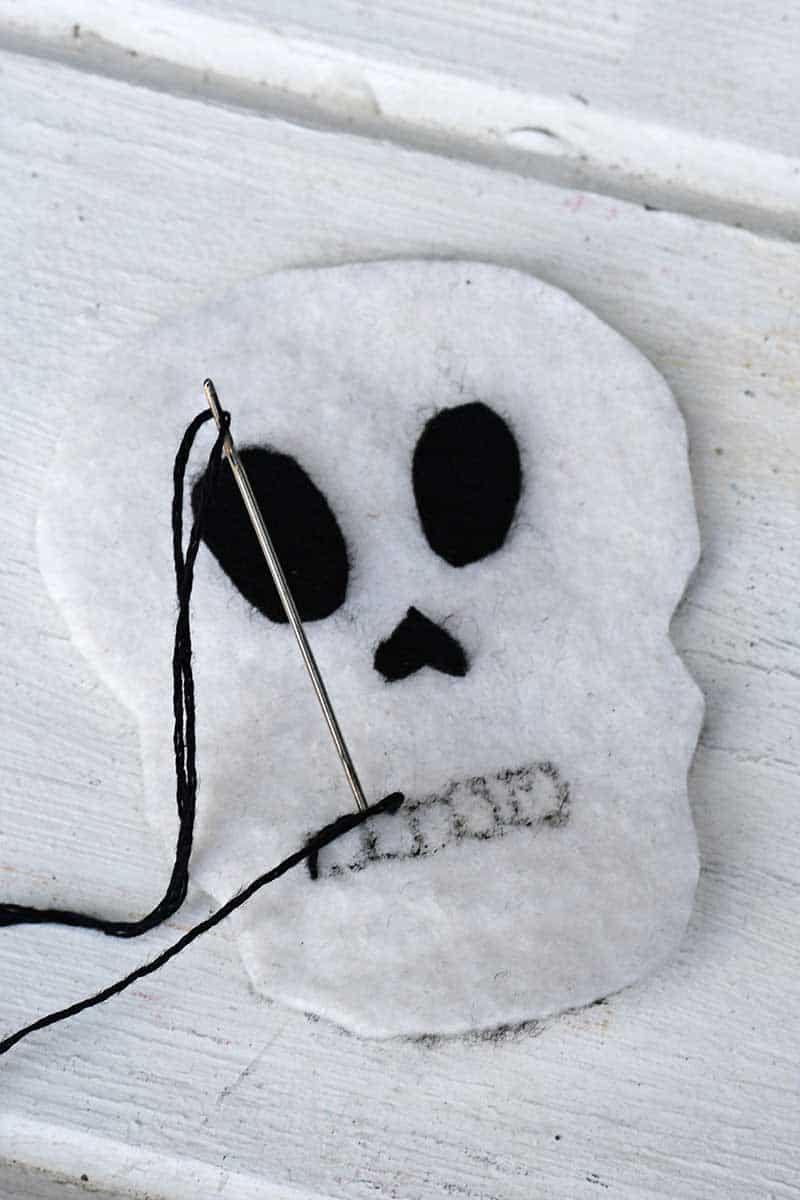
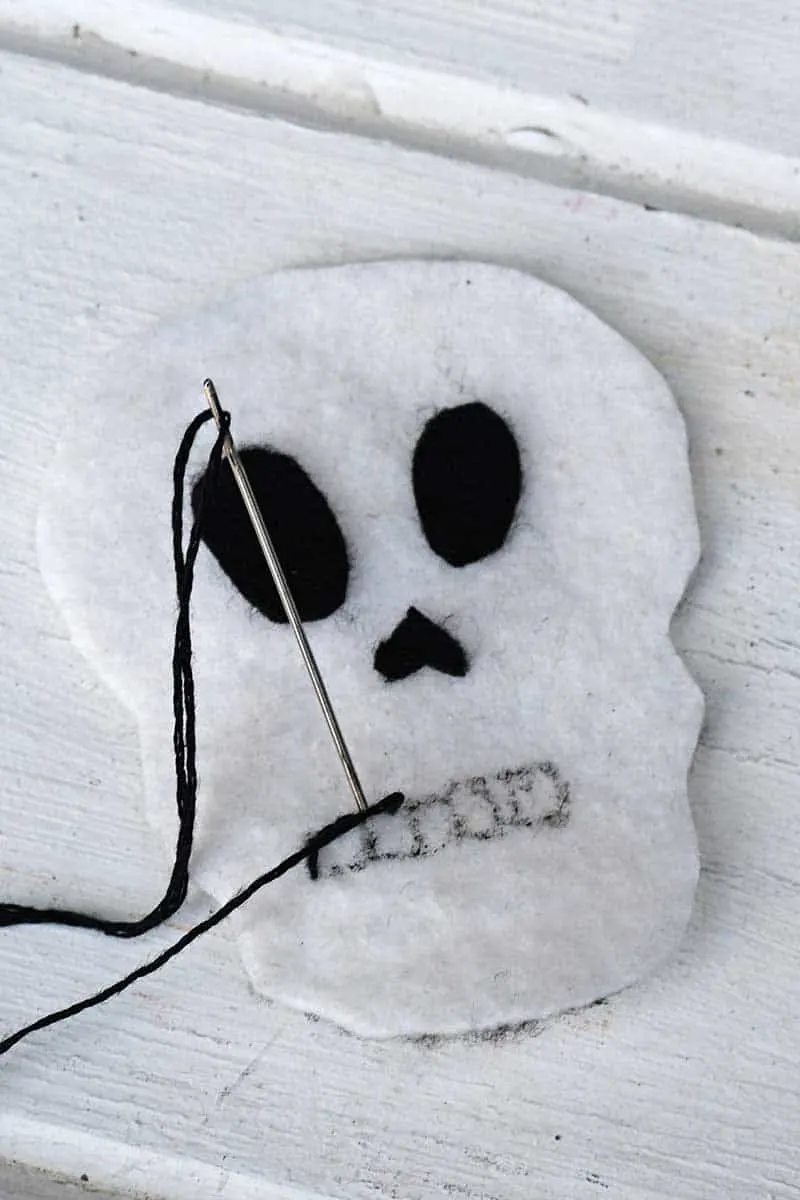
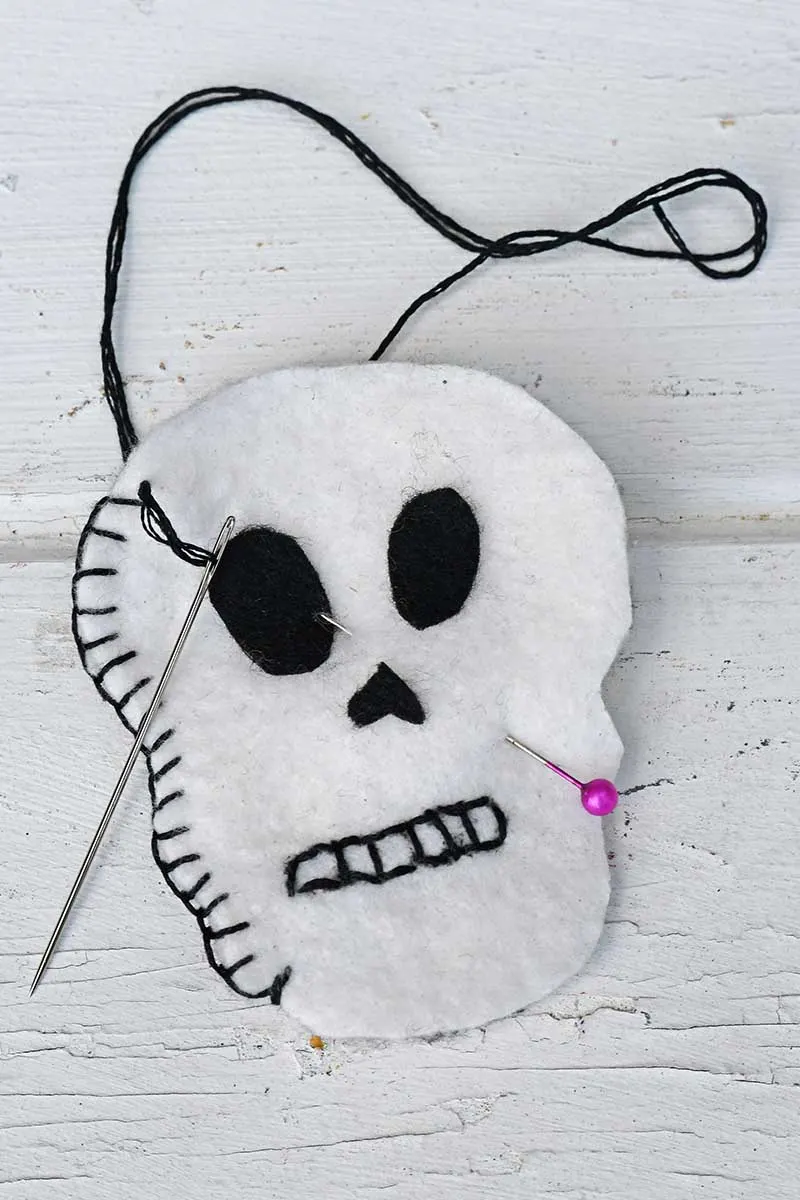
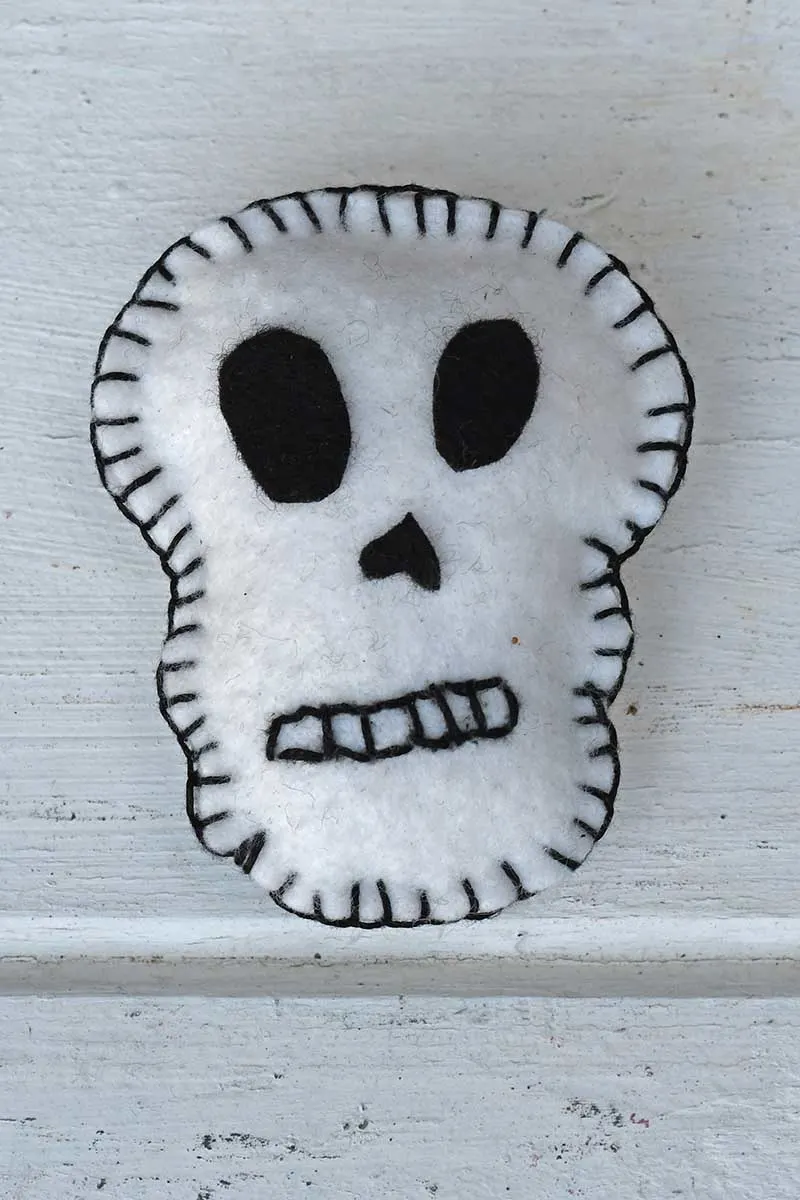
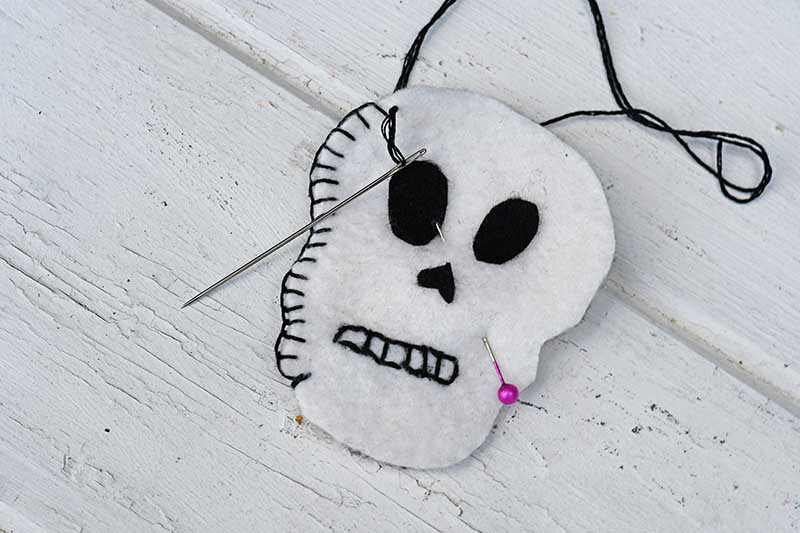
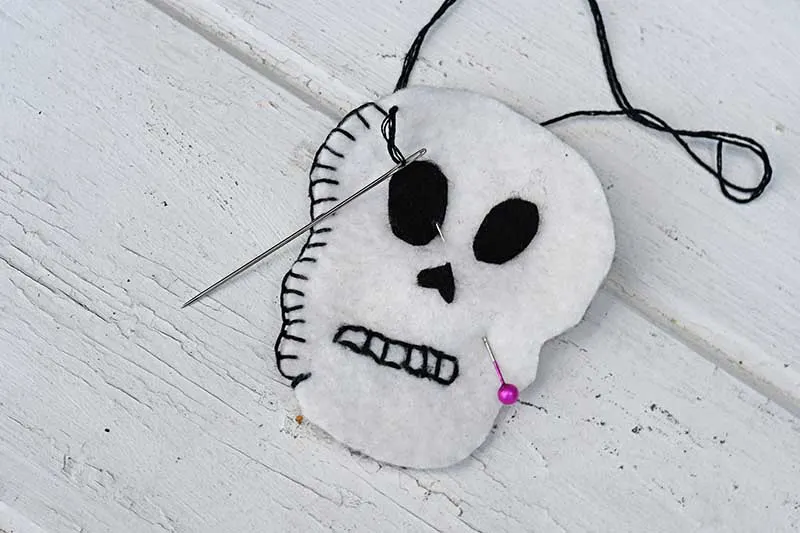
Step 3: Each skull is decorated with a mixture of black felt shapes and embroidery. The significant elements on the felt skulls, like the eyes, use black felt. The more delicate bits, such as the mouths, were embroidered. Cut out the eyes and noses in black felt. Then, stick them to the skull faces.
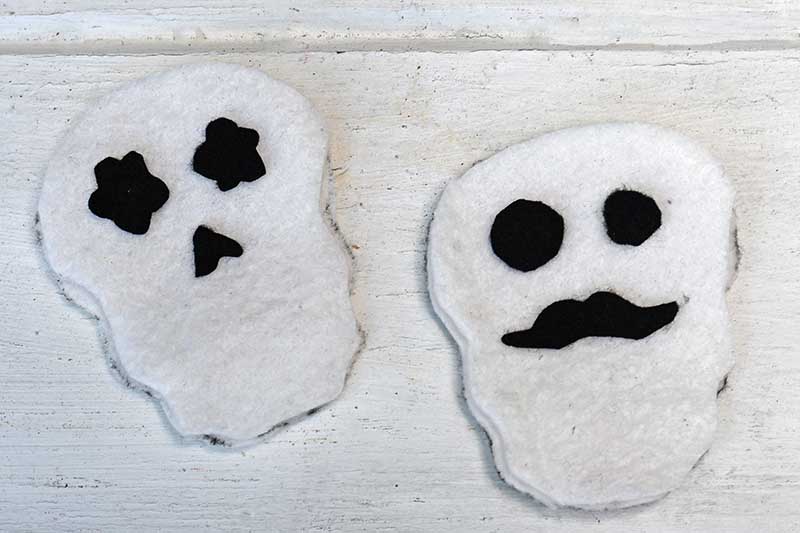
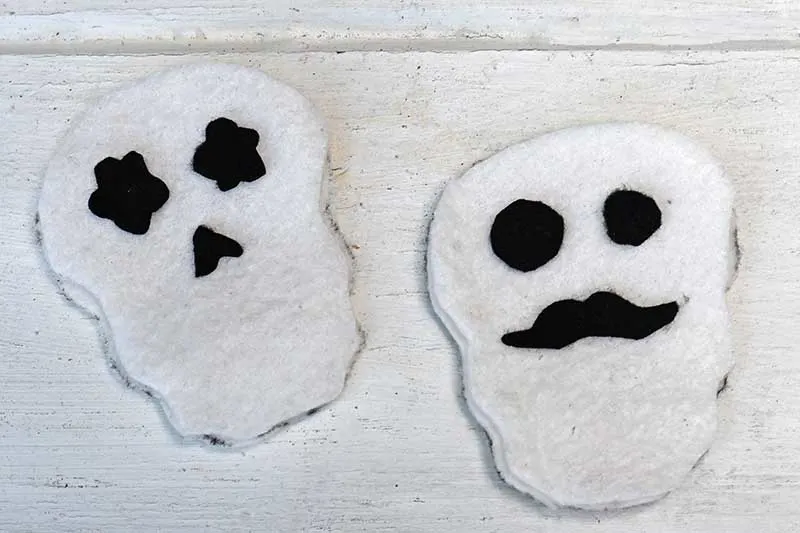
Step 4: Draw the more delicate features on the felt skull face and embroider them. Most embroidery thread comes in six strands; separate this into lengths of thread three strands wide.
Thread this onto the embroidery needle to stitch over the lines. No need to use fancy embroidery stitches; cover the lines with stitches. It’s like doodling with thread. The appeal of this Scandinavian Halloween felt decoration is the simple childlike look of the stitches.
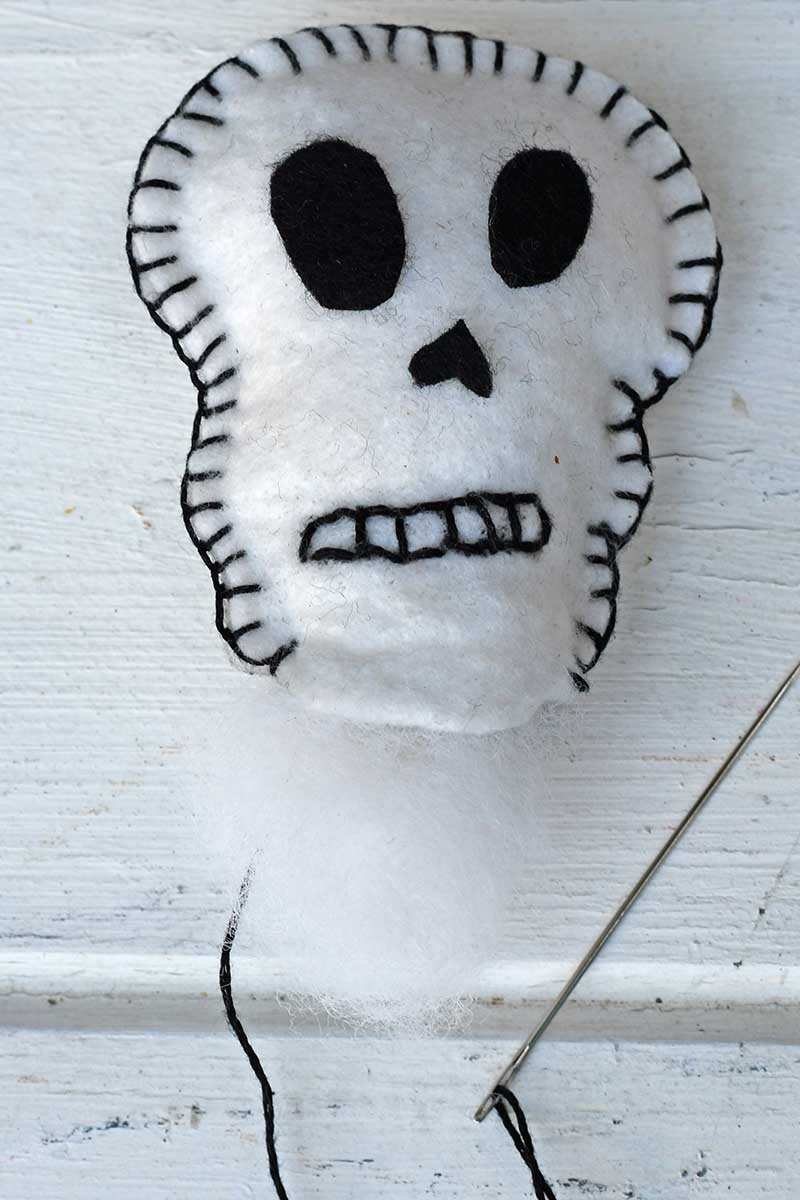
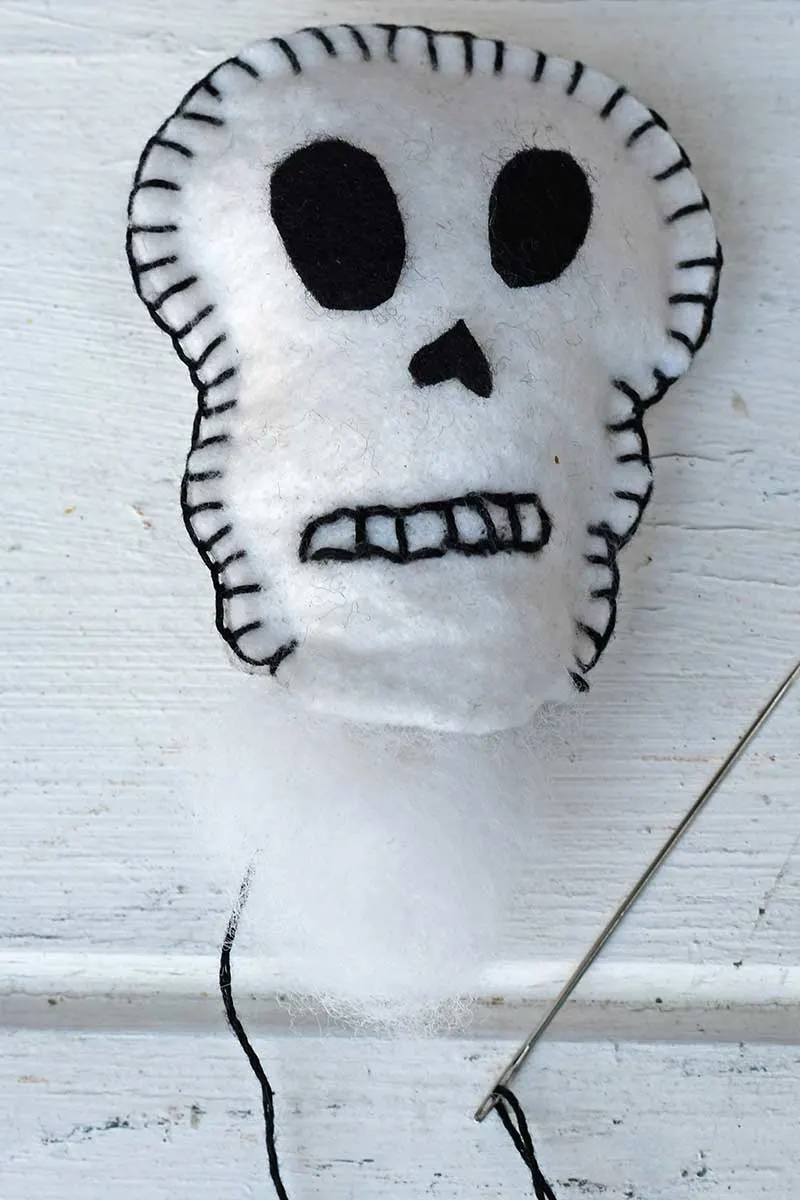
Step 5: Once all the features have been stitched on the front of the faces of the skulls, sew them together with a back piece. Just use a simple blanket stitch (like these giant felt letters).

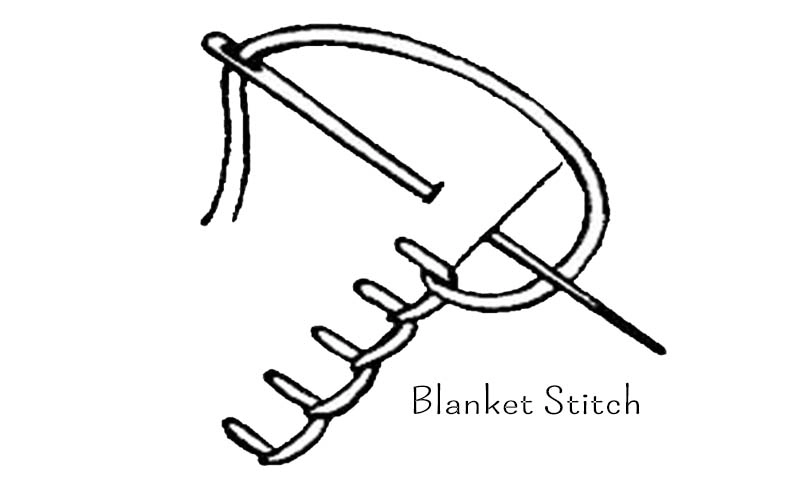
Remember to leave a small gap for stuffing before closing them up.


How To Display The Halloween Felt Decorations
Step 6: Repeat the steps above until you have at least five different embroidered felt skulls.

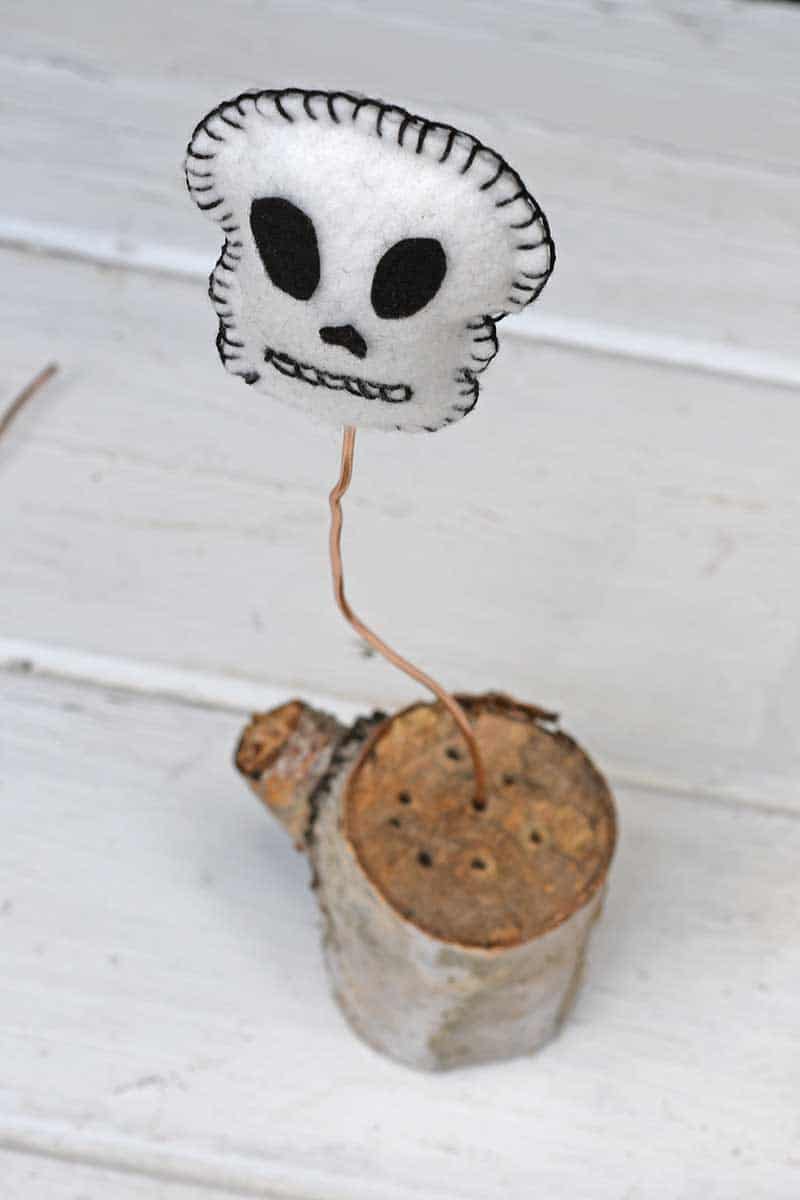
Step 7: Next, stick a length of copper craft wire through the base of each embroidered felt skull. The wire should poke through the felt. It looks best if each strand of wire is a different length.
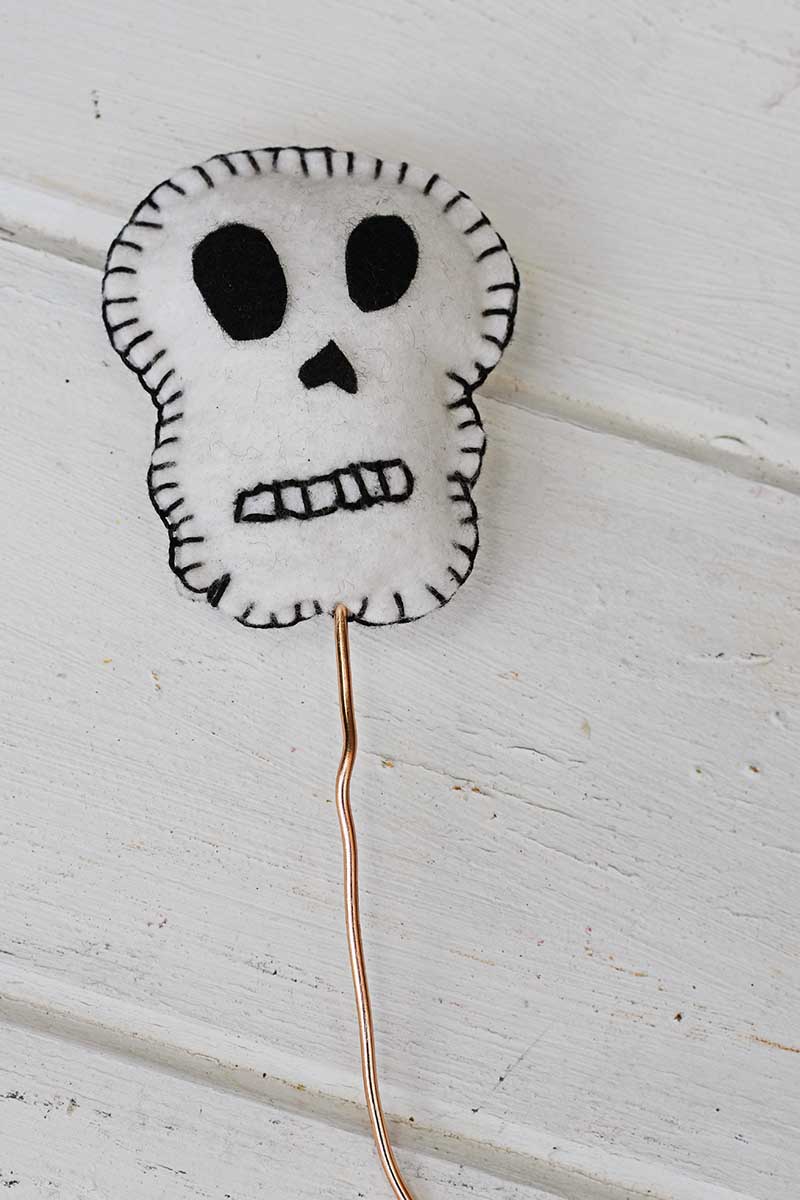
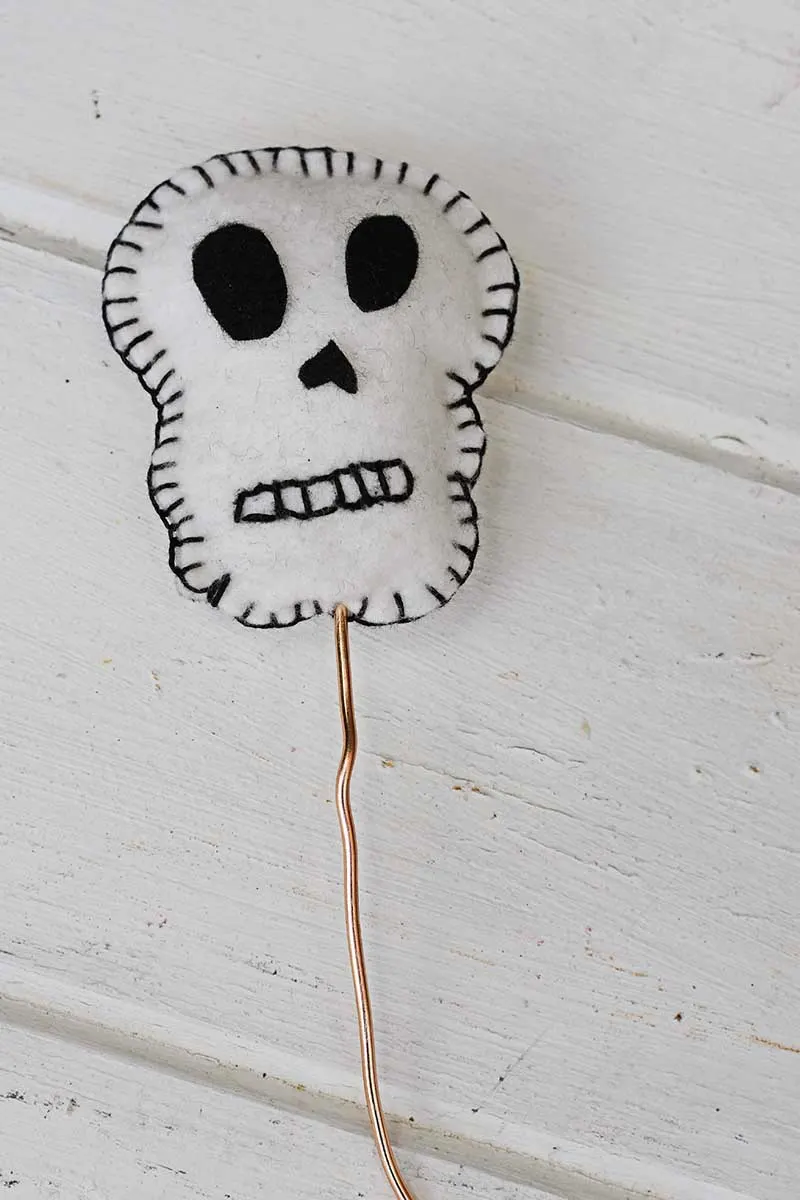
Step 8: To finish off, drill five holes into the top of the small branch stump. Then, stick the wire through the felt skulls into the holes. The copper wire is easy o bend. This makes it easy to arrange the Scandinavian Halloween felt decoration display.


Don’t forget to check out these free Halloween embroidery patterns. And some of my other wonderful Halloween crafts, such as these cute Halloween wine corks, and these illuminated Halloween bottle lights.
Check out this fabulous spooky DIY skull decor and skeleton craft ideas if you want more ideas for skull-themed Halloween decorations. There is also a collection of printable vintage skull drawings here.
For more mantle embroidery ideas, check out these hen and duck embroideries and other hand-sewn projects.
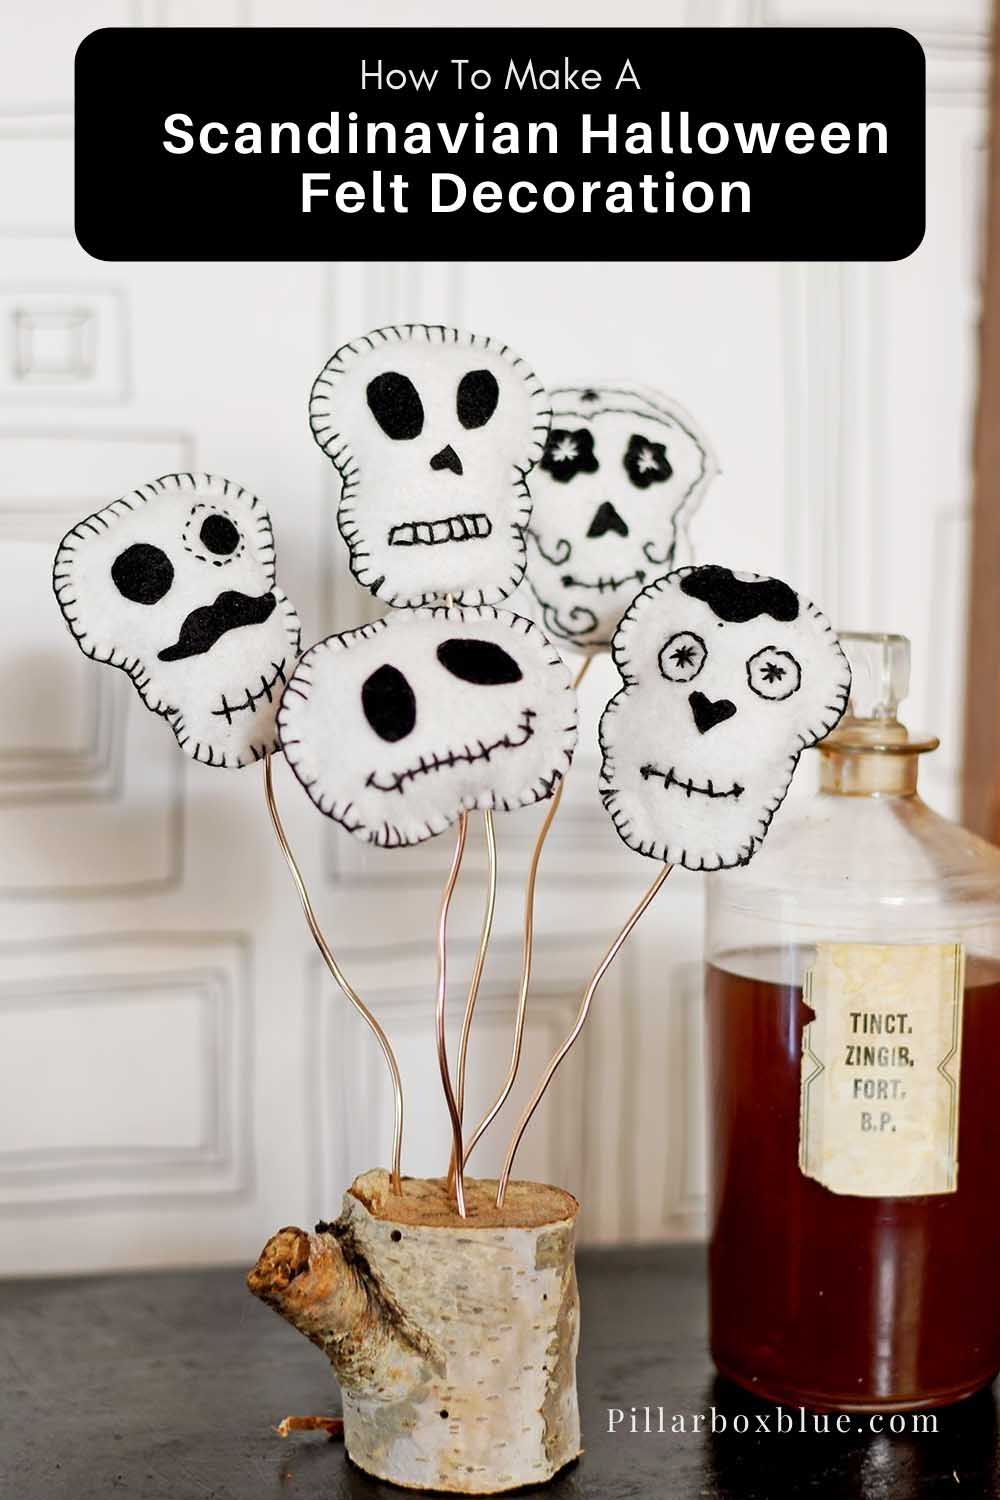
Scandinavian Halloween Felt Decoration

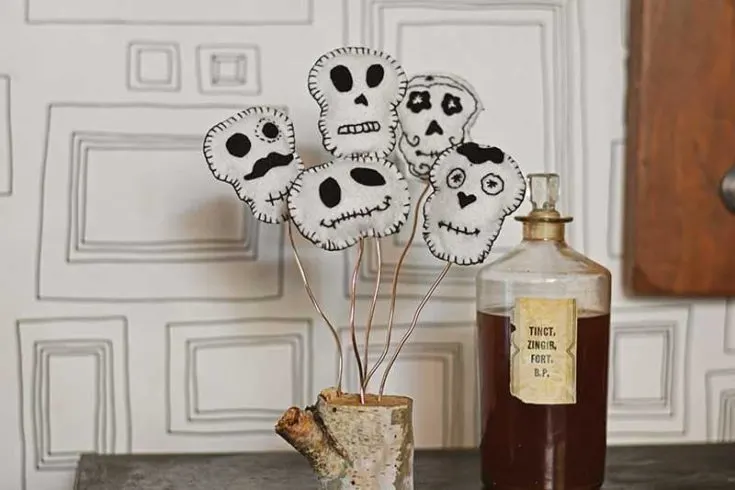
This is a craft tutorial to make a cute Scandinavian style Halloween decoration for your mantle. This consists of a unique display of handmade embroidered felt skulls.
Materials
- Cream and black felt scraps
- Embroidery needle and black and white embroidery thread
- Copper craft wire
- Small branch stump
Tools
- Rotary tool drill
- Scissors
Instructions
- First, download the skull templates for free from the blog. There are five different embroidery skull designs.
- Cut out the basic skull shape and draw around it on the cream felt.
- Next, cut out the skulls from the felt, you will need 2 for each Halloween felt decoration.
- Then, cut out the eyes and noses in black felt for each skull face. Stick these to the faces.
- Next, draw on the finer features to be embroidered with a pen, such as the mouths.
- Split the black embroidery thread into three thread strands thickness. Thread the embroidery needle and embroider the finer features on the skull faces.
- Next, stitch a back to the skull face, using a blanket stitch around the outside. Leave a small hole for stuffing the felt skulls and then close with blanket stitches.
- Carry on until you have five Halloween felt skull decorations in total.
- Stick each skull onto a length of copper craft wire.
- Drill five small holes into the top of the branch stump. Then stick a skull on a wire into each hole.
Kerryanne
Friday 16th of September 2022
Claire, I love this project... quirky and a little bit cute! Thank you for sharing this fun DIY at Create, Bake, Grow & Gather this week. I'm delighted to be featuring it at tonight's party and pinning too. Hugs, Kerryanne
Claire Armstrong
Friday 16th of September 2022
Ah, thank you so much Kerryanne. I look forward to seeing it.
Niki | Life as a LEO Wife
Thursday 15th of September 2022
These are adorable! Thanks for sharing on Happiness is Homemade. I hope that you'll come by & share on Crafty Creators Link Party as well. It's open Thursdays at 6am CST through Mondays at 11:59pm. Hope to see you there. Niki | Life as a LEO Wife
Claire Armstrong
Friday 16th of September 2022
Thank you so much and thanks for the invite.
Allyson @ Southern Sunflowers
Wednesday 14th of September 2022
Love how unique your skelton decor is! I'll be featuring your post this week at the #HomeMattersParty. Thanks for sharing.
Claire Armstrong
Thursday 15th of September 2022
Thank you that's awesome, and I look forward to seeing it.
Beth
Sunday 11th of September 2022
Super cute and kinda spooky, Claire! We will be featuring you this week at the Creative Crafts Linky Party starting on Wednesday. Creatively, Beth
Claire Armstrong
Monday 12th of September 2022
Thank you, Beth. That is awesome.
Gail @Purple Hues and Me
Thursday 8th of September 2022
Too cute and adorable, Claire! And they're quite unique and creative - perfect for Halloween!
Claire Armstrong
Thursday 8th of September 2022
Thank you so much. I did have fun making them.