
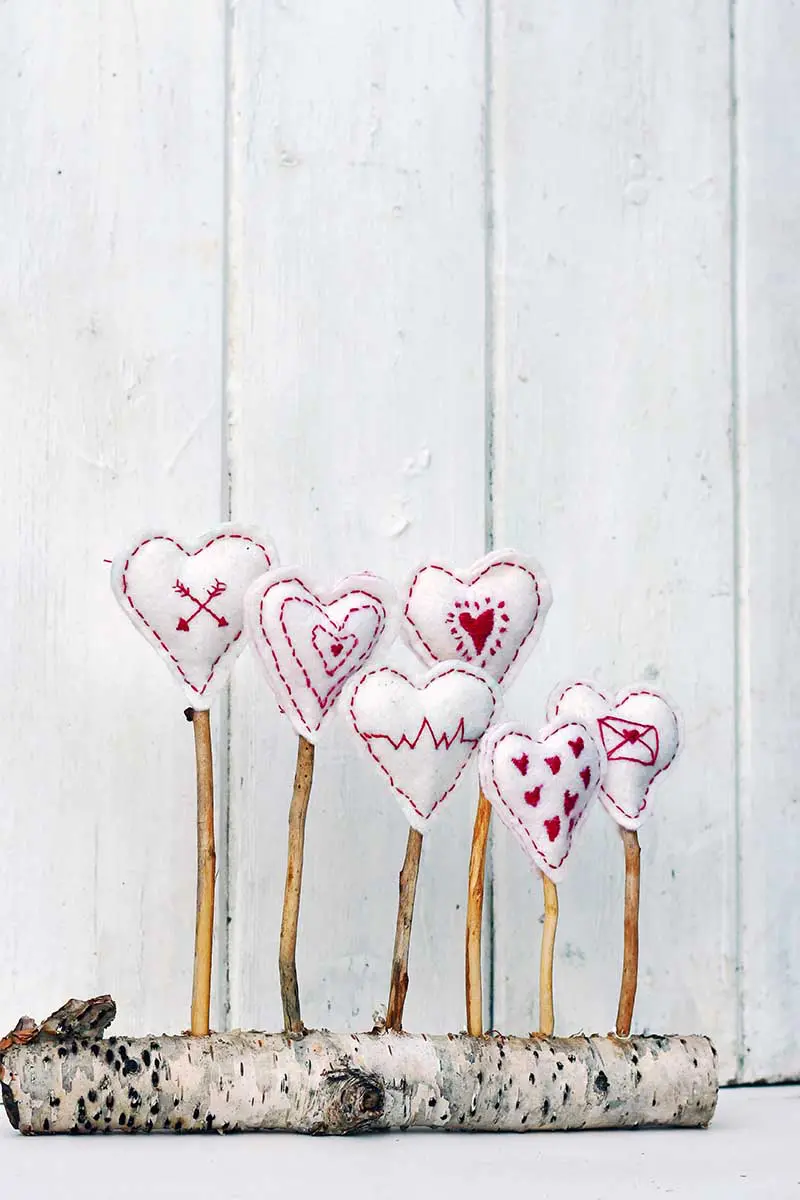
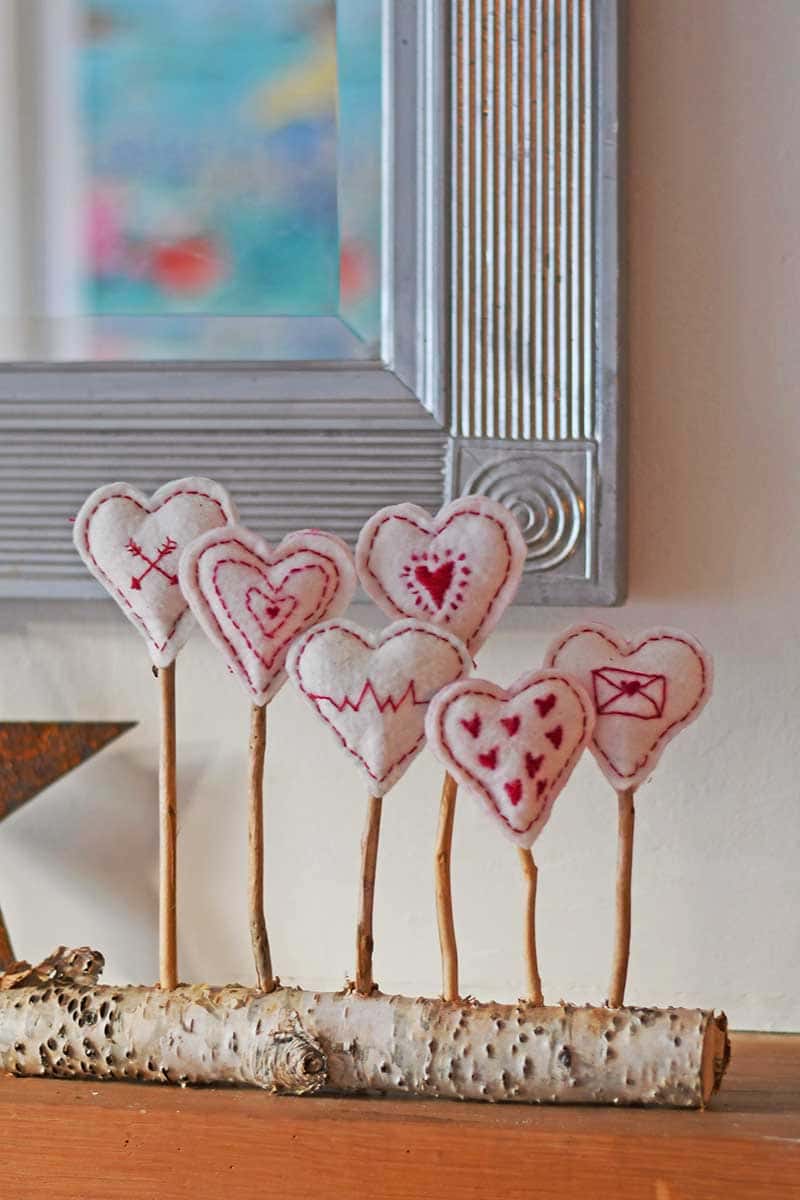
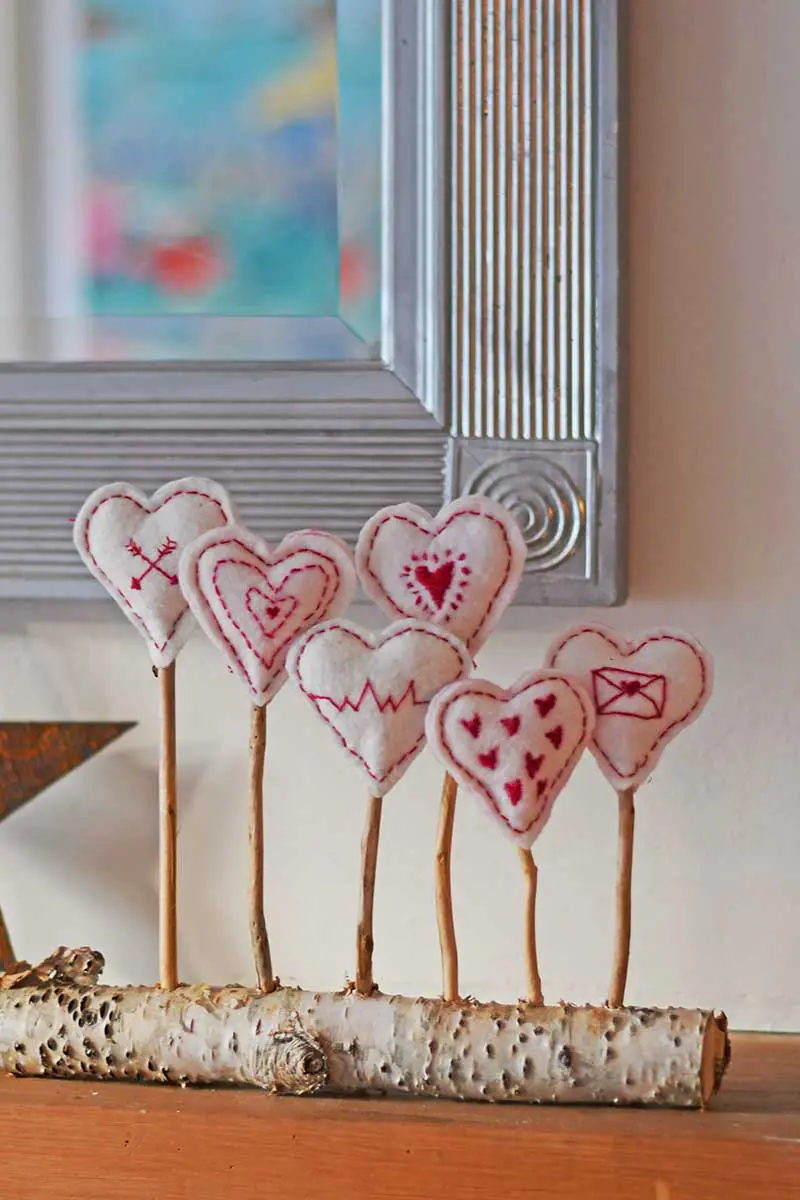
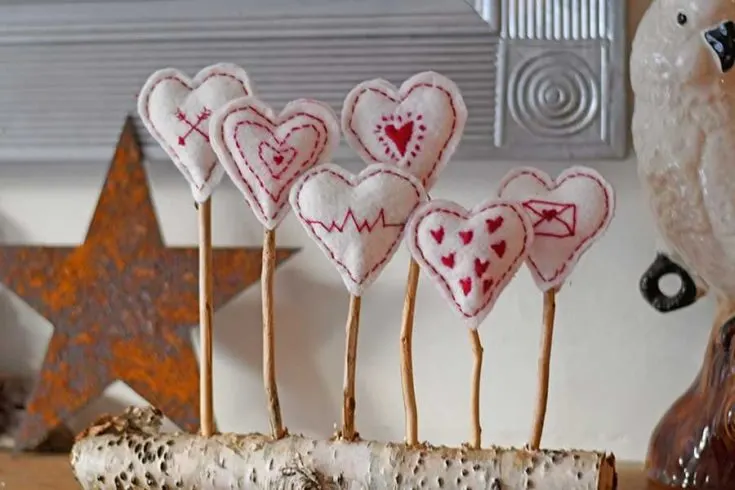
It sometimes feels flat in January once all the Christmas decorations have been put away. To perk me up, I started crafting for Valentine’s Day by decorating my home with many hearts. I’ve just added some Scandinavian embroidered hearts to my mantle.
Hearts aren’t just a Valentine’s Day sewing idea; I display many handmade heart decorations all year round—crafts like my upcycled woven Scandinavian heart garland.
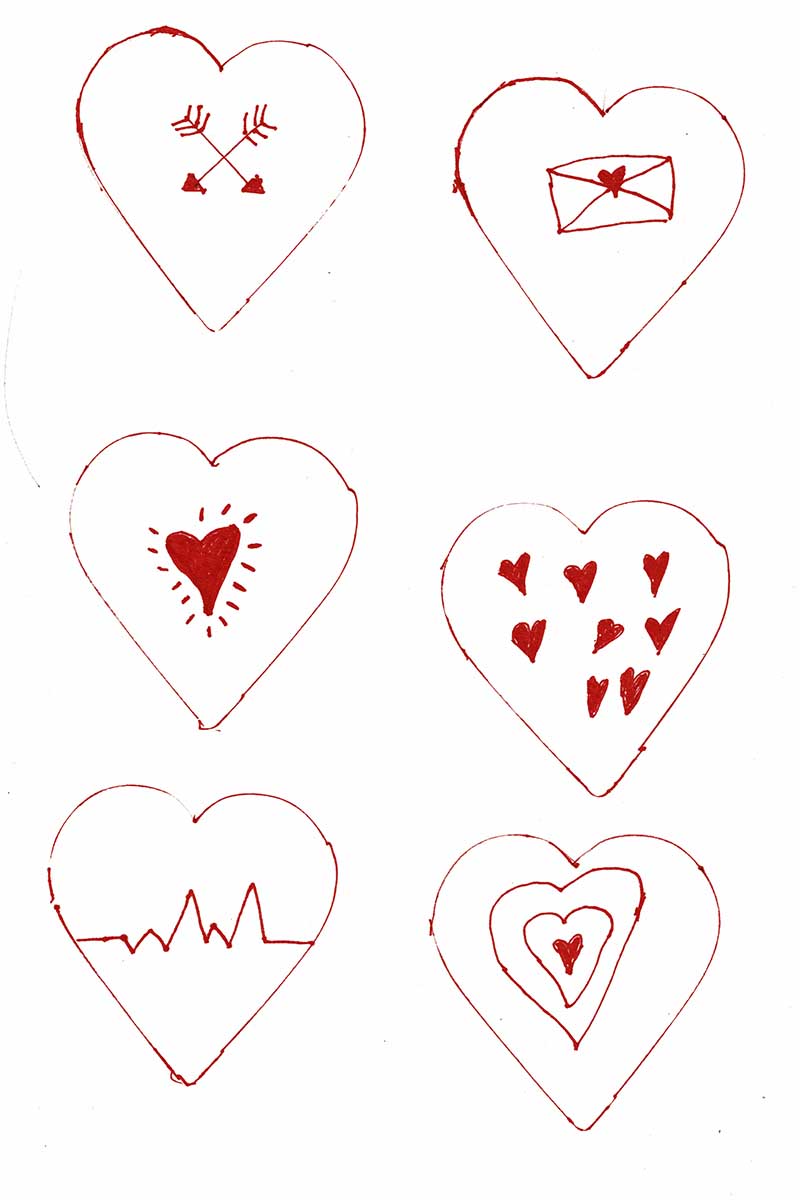
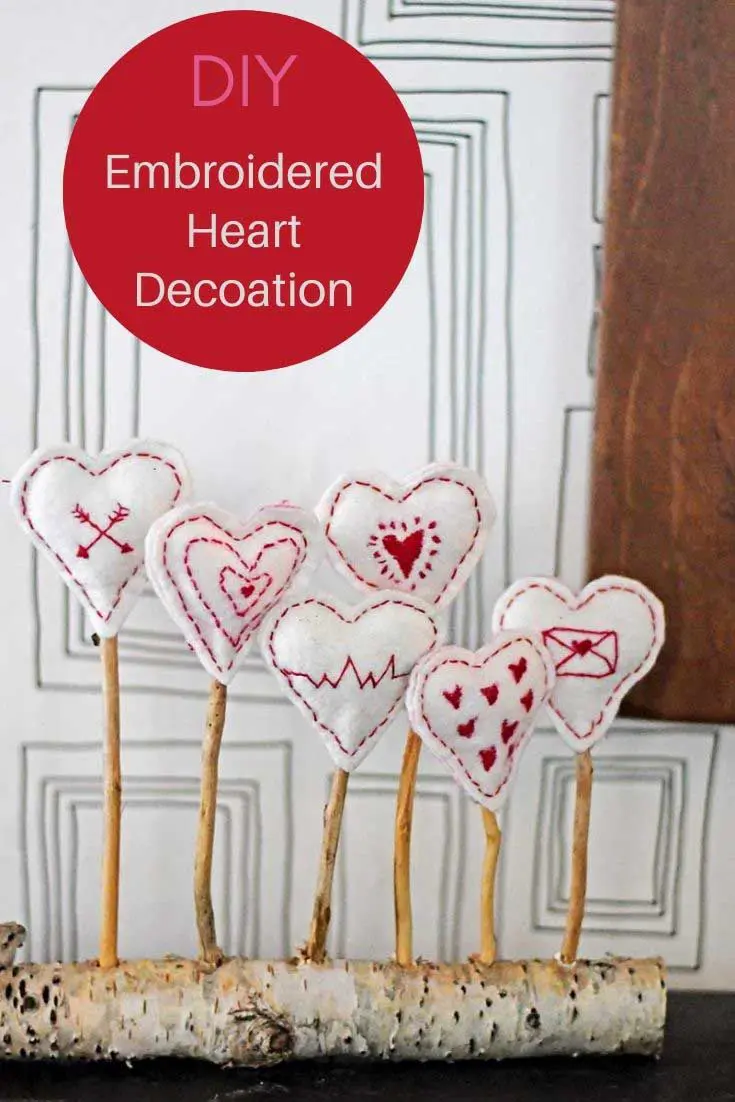
Scandinavian Embroided Hearts Decoration
One of my favourite handmade Christmas decorations is my Scandi felt Christmas trees; they inspired these Scandinavian embroidered heart decorations.
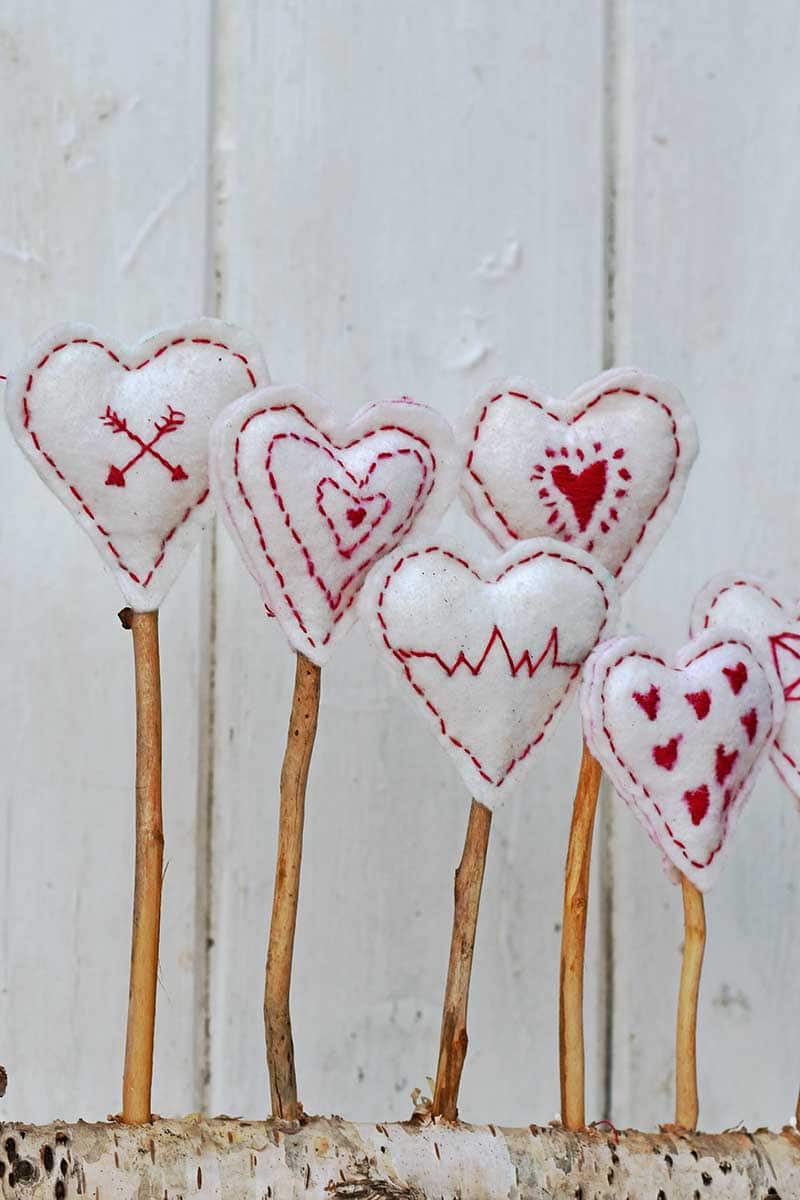
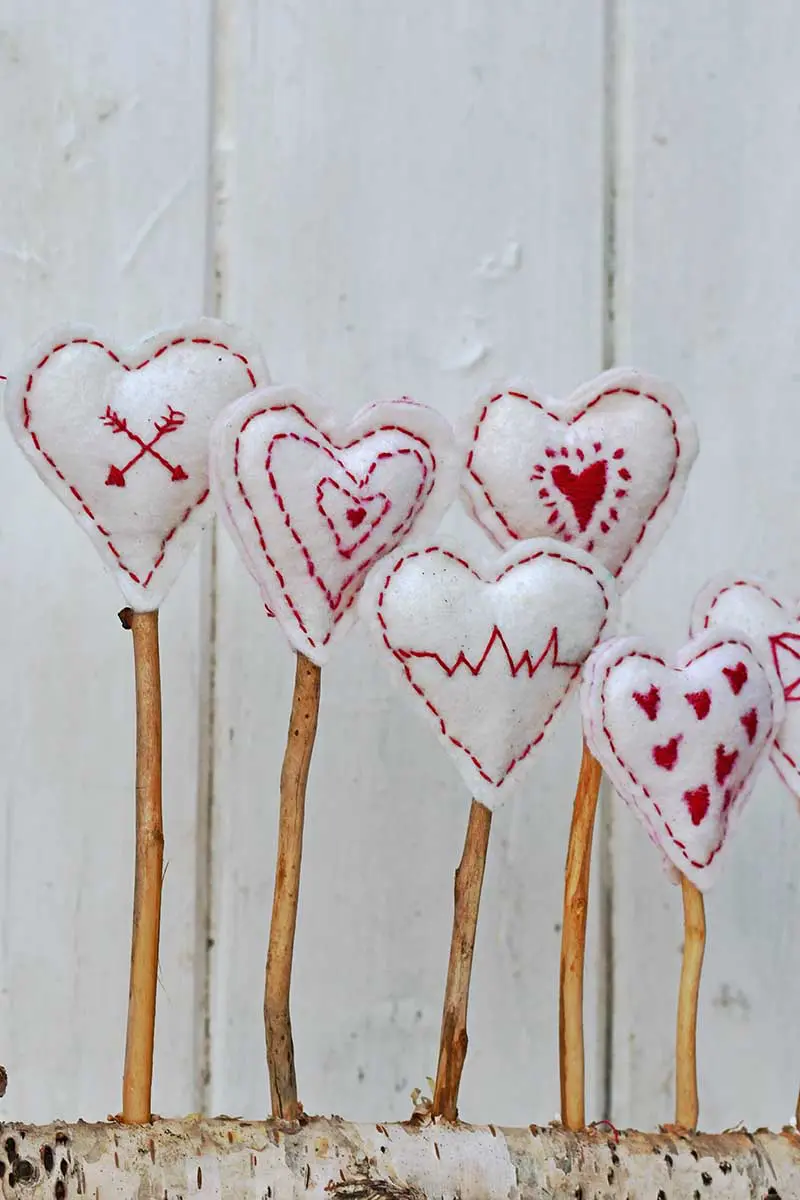
The hearts featured the same simple embroidery as the trees. But this time, with red thread on hearts. The embroidery stitches on these hearts are really basic. There are no complicated stitches to learn.
I made these embroidered hearts out of some leftover felt. But you can use any scrap fabric, such as drop cloth or cotton. Just make sure it is in a white or cream colour and is easy to embroider. The advantage of felt is that it doesn’t fray and is easy to stitch.
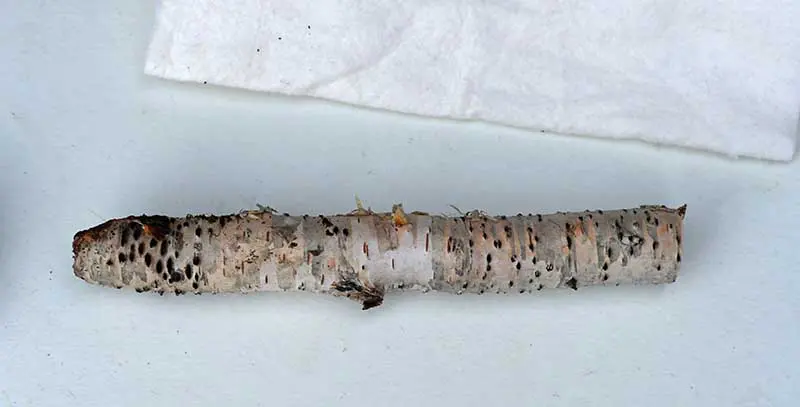
To display the hearts, I used just a branch and some twigs. I love to use natural elements in my Valentine’s crafting. Before, I made a pine cone flower heart and a painted rustic wood slice heart. Both of these decorations feature on my gallery wall all year round.
We’re a participant in the Amazon Services LLC Associates Program, an affiliate advertising program designed to provide a means for us to earn fees by linking to Amazon.com and affiliated sites. As an Amazon Associate, I earn from qualifying purchases.
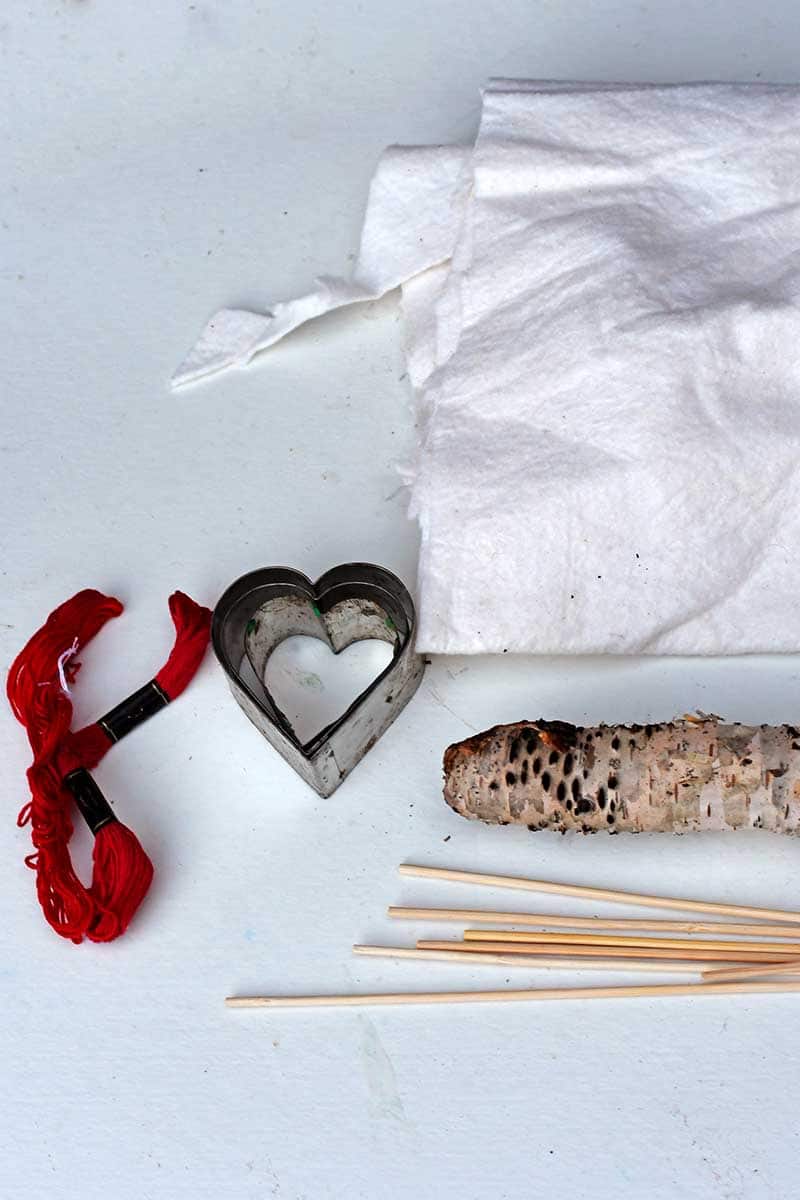
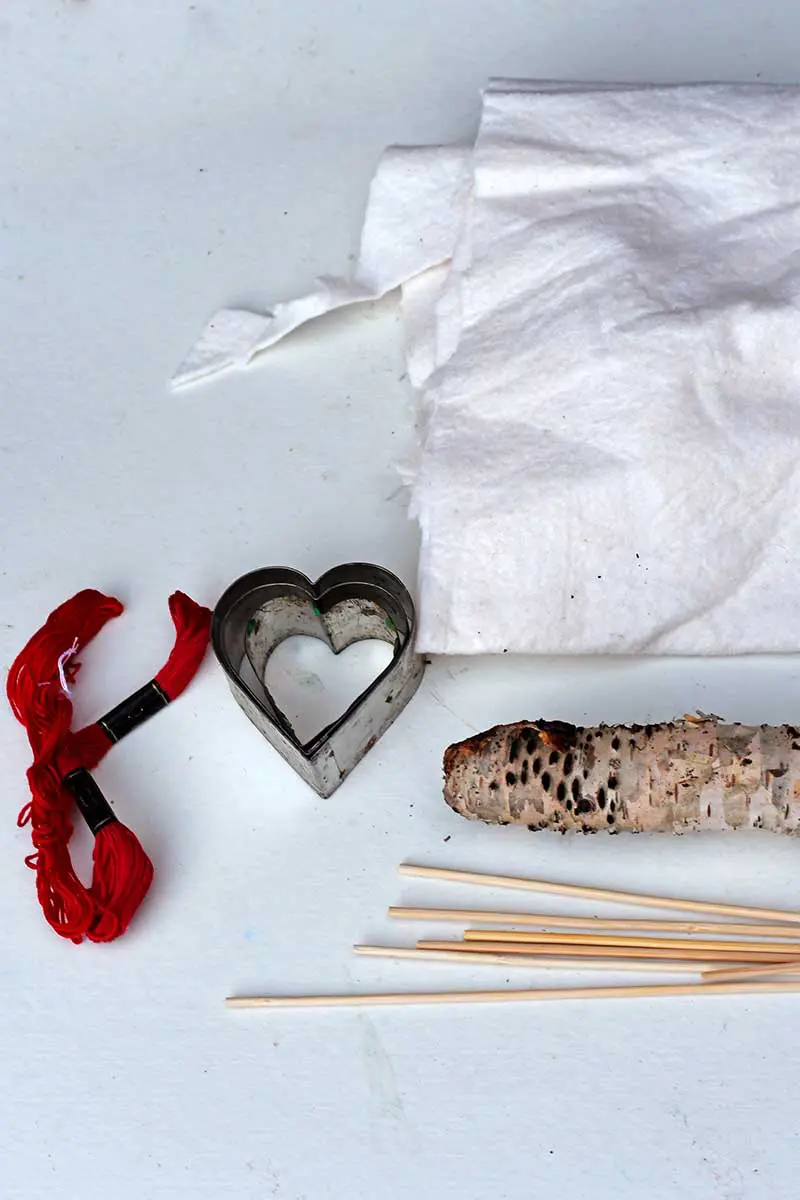
What You Need
- Cream or white-coloured fabric, I used cream craft felt.
- Heart-shaped cookie cutter to use as a template
- Red embroidery thread
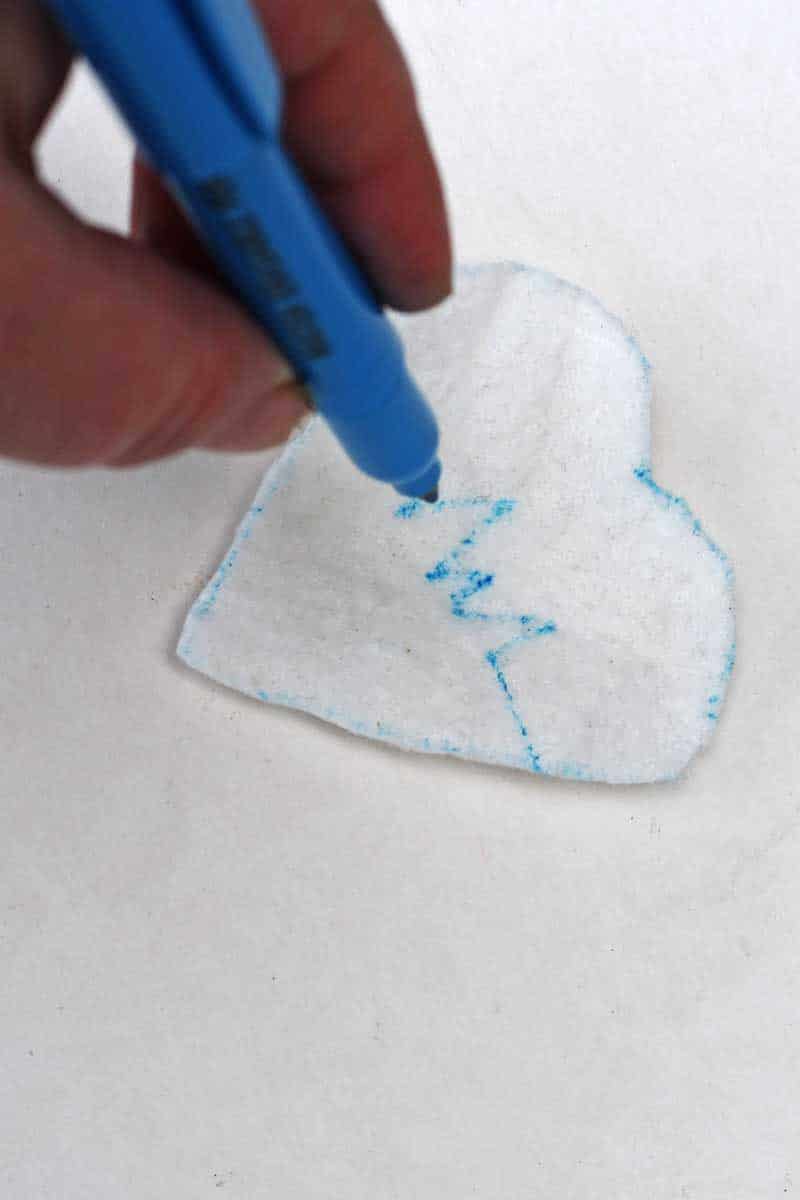
- Water soluble fabric pen
- A small amount of fiberfill – I use the stuffing from old pillows.
- Embroidery needle
- Large branch or wood slice for the display base.
- Twigs or round bamboo skewers
- Drill and wooden drill bit
- White tack

How To Make The Embroidered Hearts
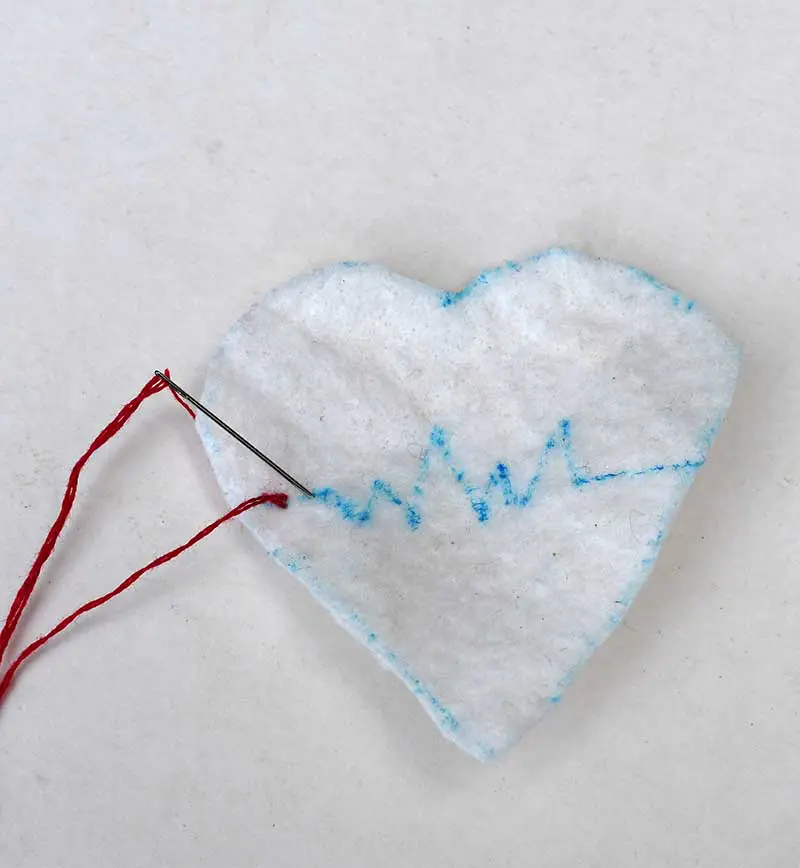
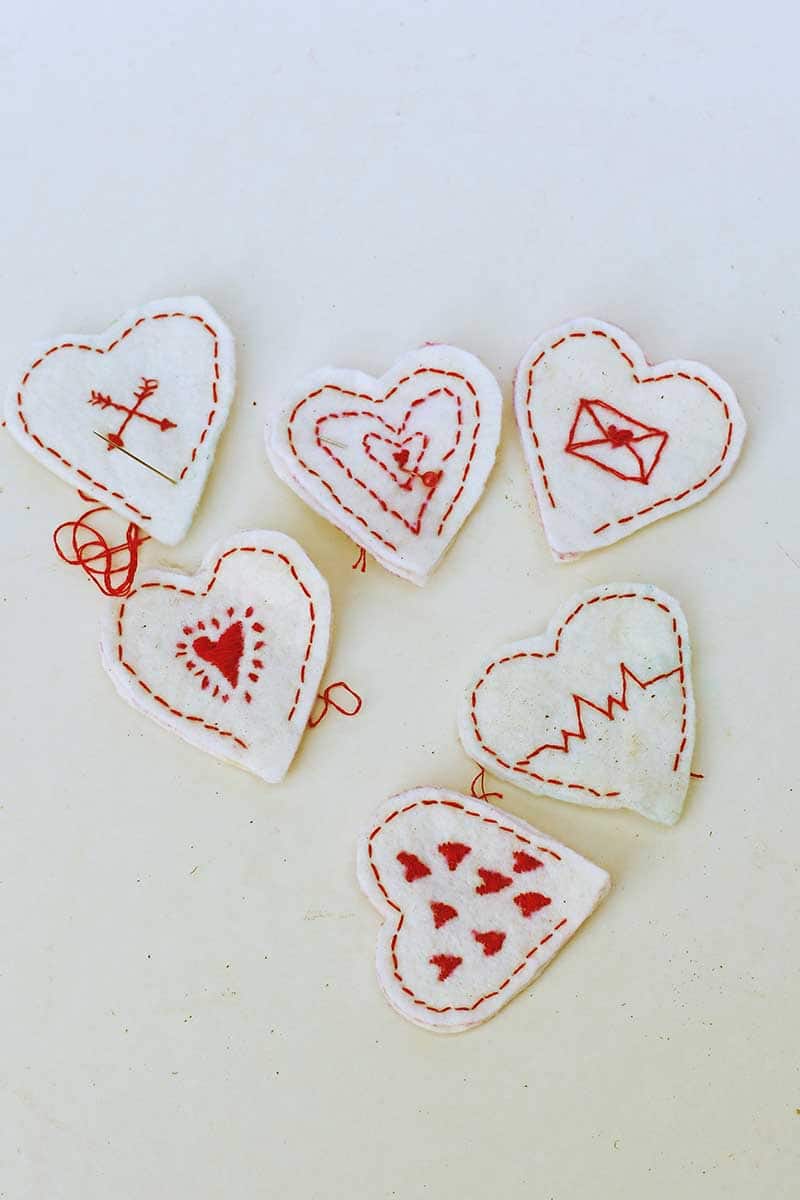
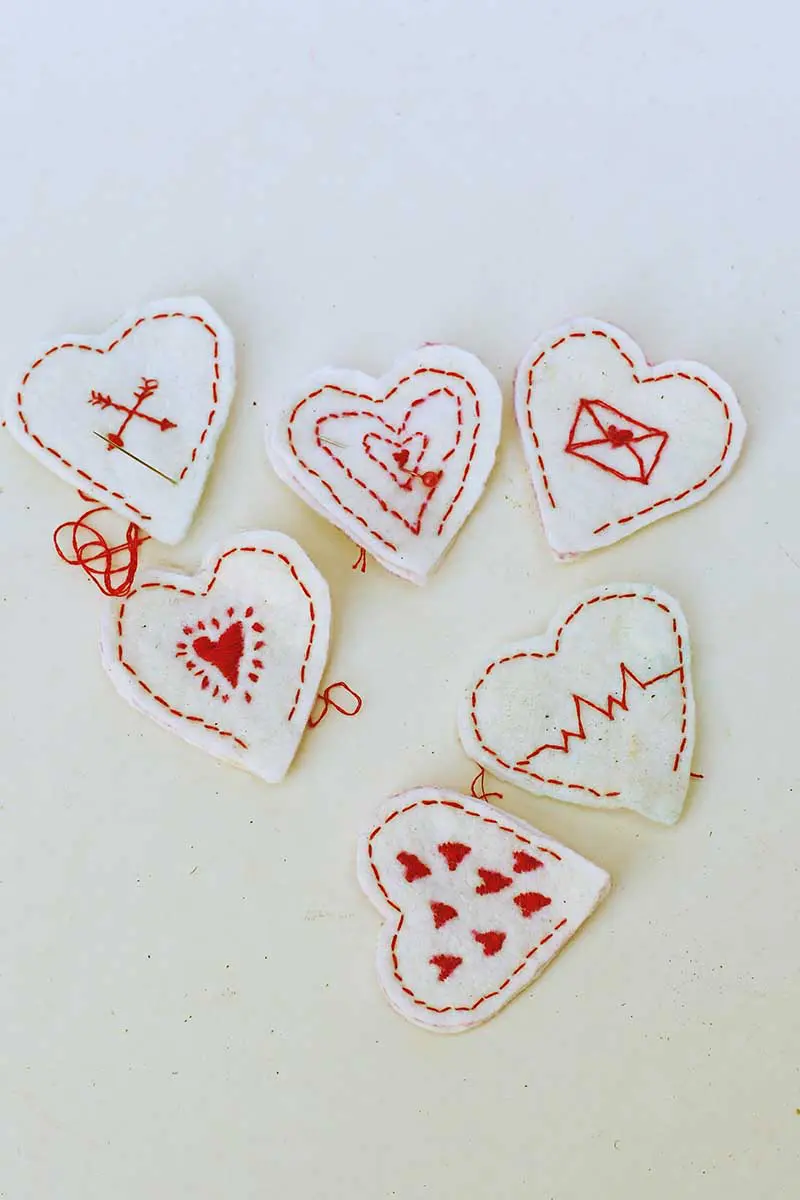
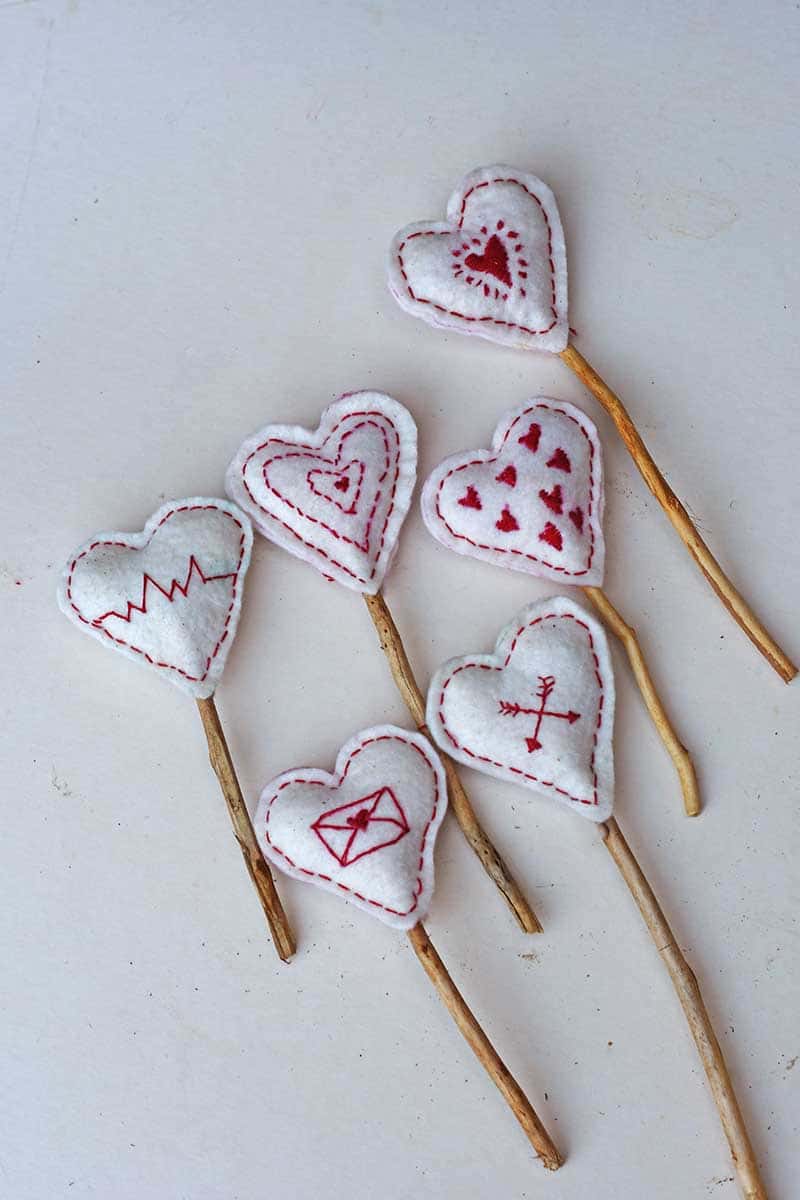
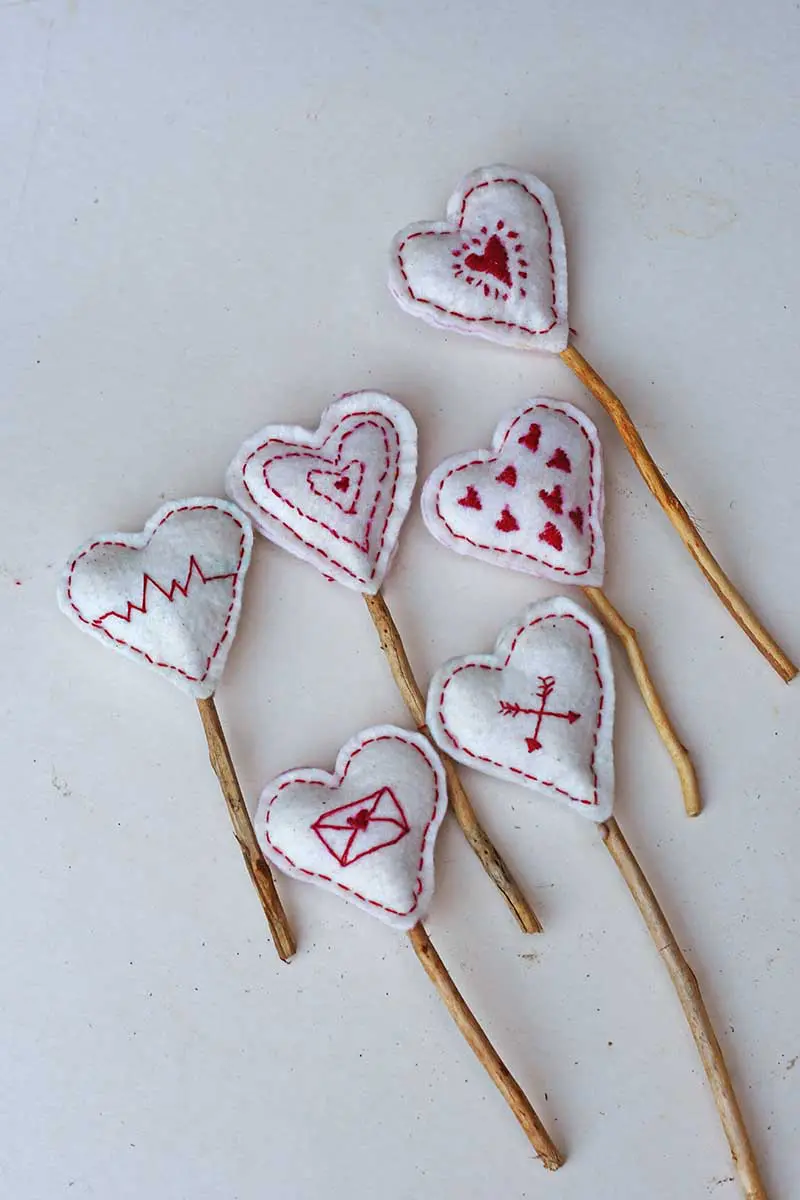
Step 1: First, draw on the felt around the heart cookie cutter using the fabric pen. Then cut out two felt hearts for each Scandi heart. I cut out 12 felt hearts to make six different embroidered hearts.

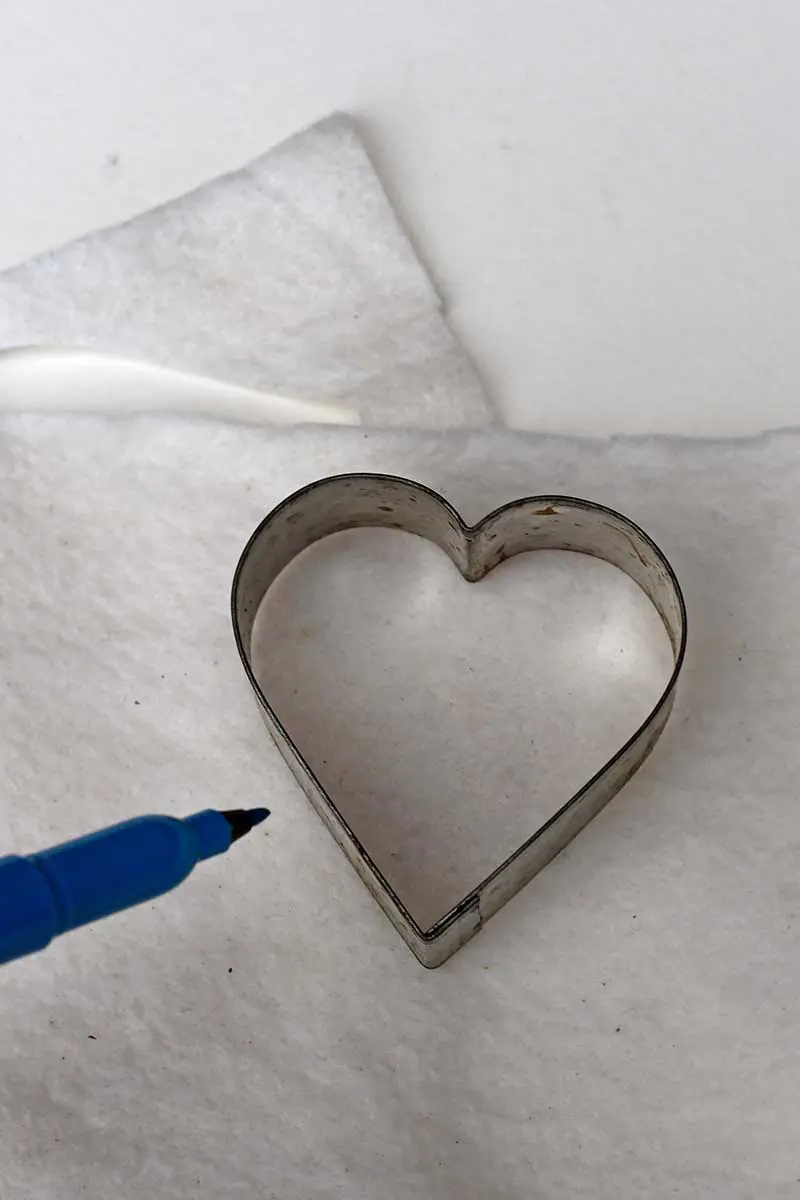
Step 2: Draw an embroidery pattern outline onto one of the felt hearts using the water-soluble fabric pen. I have six different embroidery designs to choose from, which you can download here or for free.
Step 3: Next, thread up the needle with red embroidery thread. I just used an embroidery thread thickness of two threads. Then, using simple running stitches, stitch over the pattern

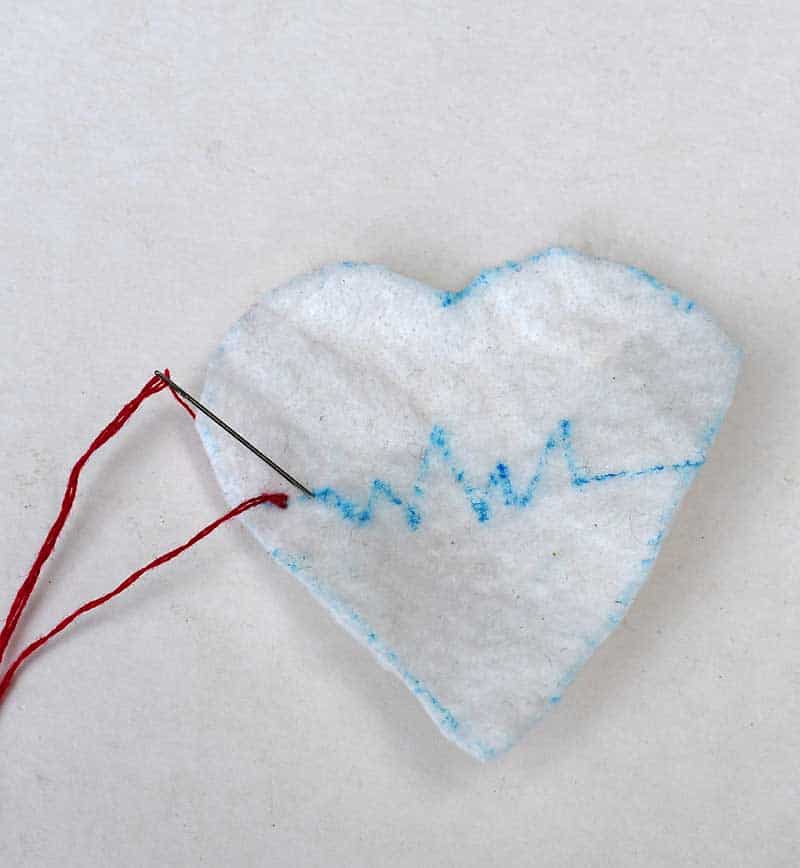
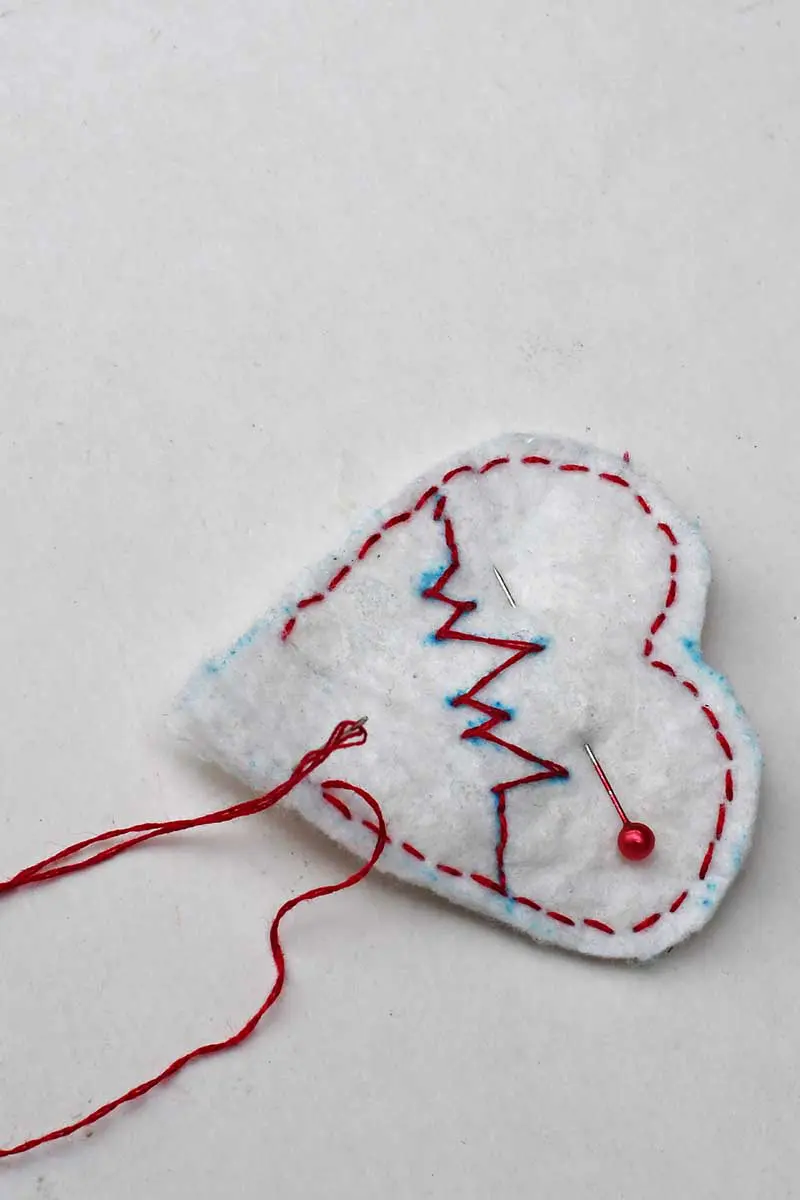
Step 4: Pin the embroidered heart to a blank felt heart. Then, stitch them together around the edge with a running stitch. Leave a gap at the tip of the heart for stuffing.
Top Tip: If some of the pen marks are still visible after stitching, run the heart underwater and leave it to dry. The water should dissolve the ink.

Step 5: Repeat with the other five hearts. Use either my embroidery designs or ones of your own.
Step 6: Next, through the hole in the bottom of the heart, stuff with a small amount of fiberfill. Then place the end of a twig (or bamboo skewer) into the heart and stitch the hole shut around the twig.
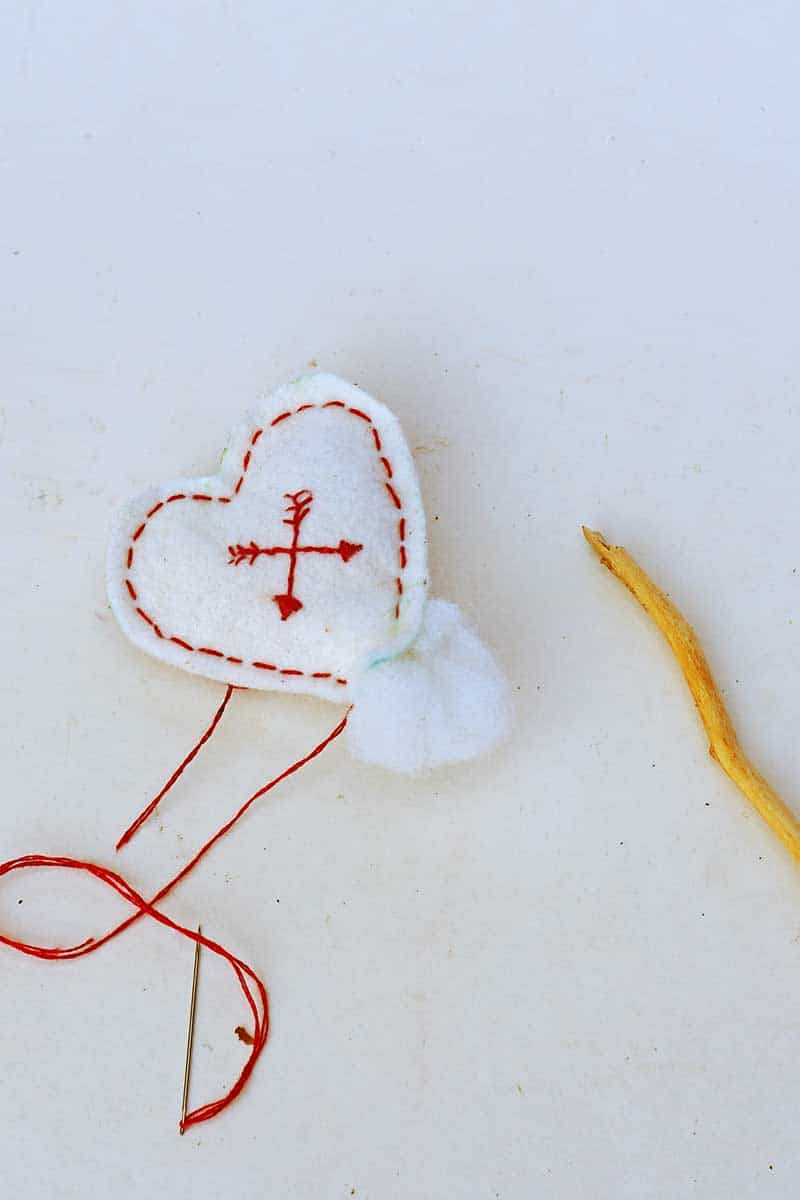
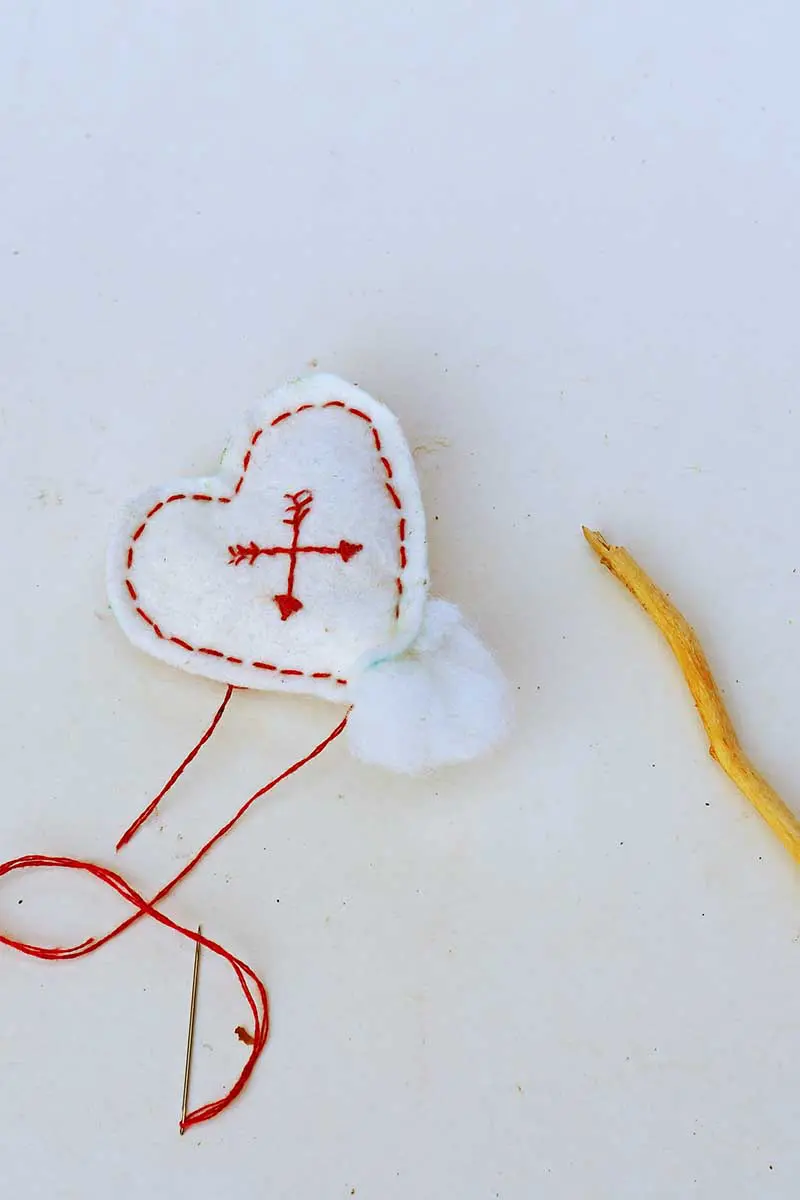
Step 7: I used twigs of various lengths between 8 and 15 cm long, as I didn’t want my embroidered hearts all displayed at the same height.
Making the display base
Step 8: Finally, make a display base for the felt hearts. I used a lovely silver birch branch. A large wood slice would work well, too.
Drill six holes into the branch’s base, one for each heart. Make sure the holes are slightly wider than the twigs. Then, place a small bit of white tack onto the end of the twig and place it in the hole. The white tack will keep them in place.
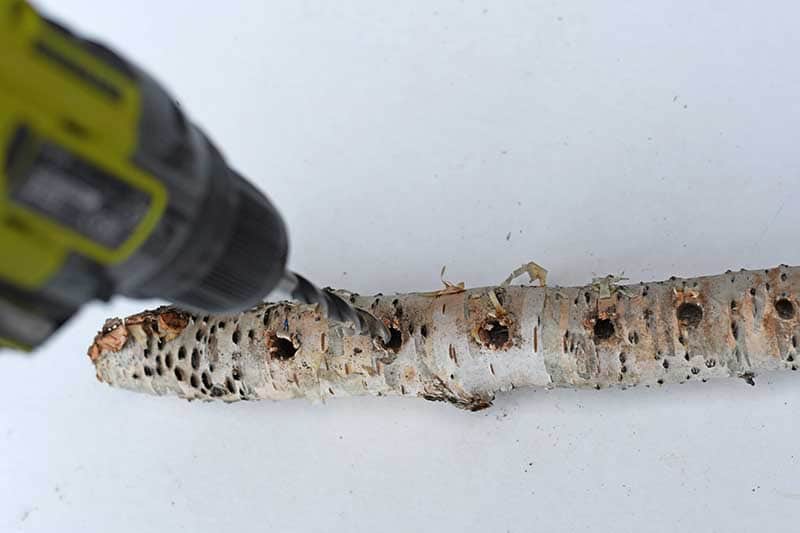

I used white tack rather than hot glue to secure the twigs, allowing me to change the order of the hearts when I wanted to.
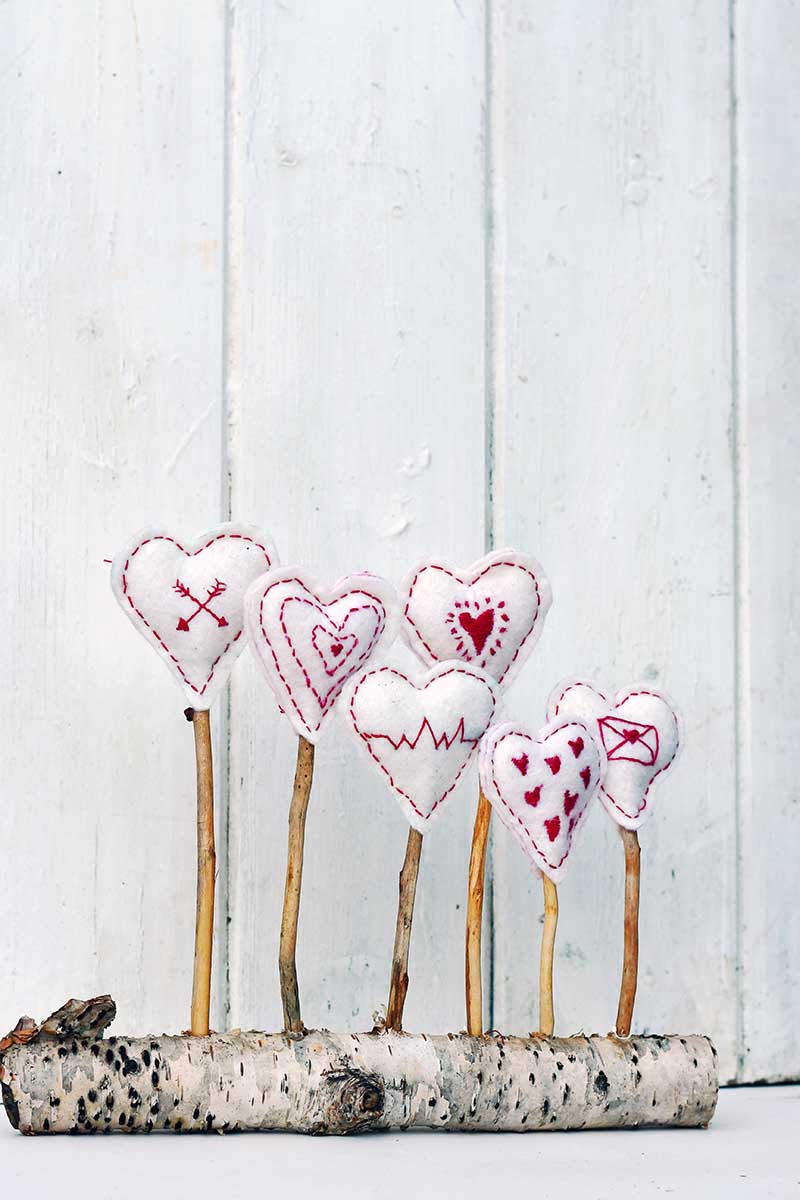
I love how these embroidered hearts look on my mantle, and they go with many more of my Nordic and Scandinavian crafts I have decorated my home. Denim is another great fabric to embroider, like with these hanging denim heart decorations.
You should check out some of my other cool adult craft tutorials and hand sewing projects on the site. I have other felt Valentine’s fabric heart crafts like these heart felt flower brooches and a lovely upcycled sweater felt heart.
I even have a Scandi felt bauble craft, which is probably a bit of a Christmas version of these embroidered hearts but in monochrome. For more mantle embroidery projects, check out these spring embroidery figures.
Embroidered Hearts Decoration

This is a really simple and affordable craft to make cute embroidered hearts for Valentine's day. Includes a tutorial on how to display them in a cool way on your mantle using sticks and branches.
Materials
- Cream or white felt (but can use other fabric scraps such as drop cloth)
- Red embroidery thread and embroidery needles
- Small twigs, six in total between 8 -15 cim in length
- Thick branch about 12 inches long or a wood slice
- Fiberfill
Tools
- Heart shape cookie cutter
- Water soluble fabric marker
- Drill
Instructions
- Using the heart-shaped cookie cutter cut out 12 felt heart shapes Two for each embroidered heart.
- With the fabric pen, draw the embroidery design onto the felt heart (free to download)
- Next, using red embroidery thread stitch the pattern using a simple running stitch.
- Pin a plain heart to the embroidered heart and hand stitch them together. Leave a gap at the tip o the heart.
- Then, stuff the heart with fiberfill at the hole.
- Stick one of the sticks into the hole and then stitch it closed.
- Next, drill six holes into the branch base.
- Finish off by placing a heart on a stick into each of the holes. White tack can be used to hold the sticks in place and preven them from wobbling.

If you want Valentine’s decor for your walls, check out this watercolour heart decoration.
You can find more of my stitch craft projects here.
Jan Adams
Sunday 8th of February 2026
Love this project
Claire Armstrong
Monday 9th of February 2026
Thank you so much, they are easy and fun to make.
Beth
Monday 18th of January 2021
Fabulous project Claire! Thanks for sharing over at the Creative Crafts Linky Party, you are my feature this week! CHEERS!
Claire Armstrong
Tuesday 19th of January 2021
Thank you, that's amazing, I look forward to seeing the feature.
Naush Samama
Monday 18th of January 2021
Claire, these little hearts are adorable. I am inspired to try them out !! Thank you for sharing with us at Meraki Link Party. Have a wonderful week. Naush
Claire Armstrong
Tuesday 19th of January 2021
Thank you, have fun giving them a go.
Kristie
Monday 18th of January 2021
I try not to feature the same blogger twice in one party, but your hearts were so divine I had to! Drop by to the Little Cottage Link Party to see your features.
Claire Armstrong
Monday 18th of January 2021
Thank you so much, that is awesome a double feature, I will be popping in soon.
Lisa
Monday 18th of January 2021
These are absolutely adorable! Lisa
Claire Armstrong
Monday 18th of January 2021
Thank you so much.