
Cute DIY Hanging Tin & Soda Can Planters
Inside: A tutorial on how to make upcycled hanging tin can planters the easy way.
I love repurposing and upcycling the things around me, especially what others consider trash. I have made cute, repurposed tin and soda can planters with my latest project.
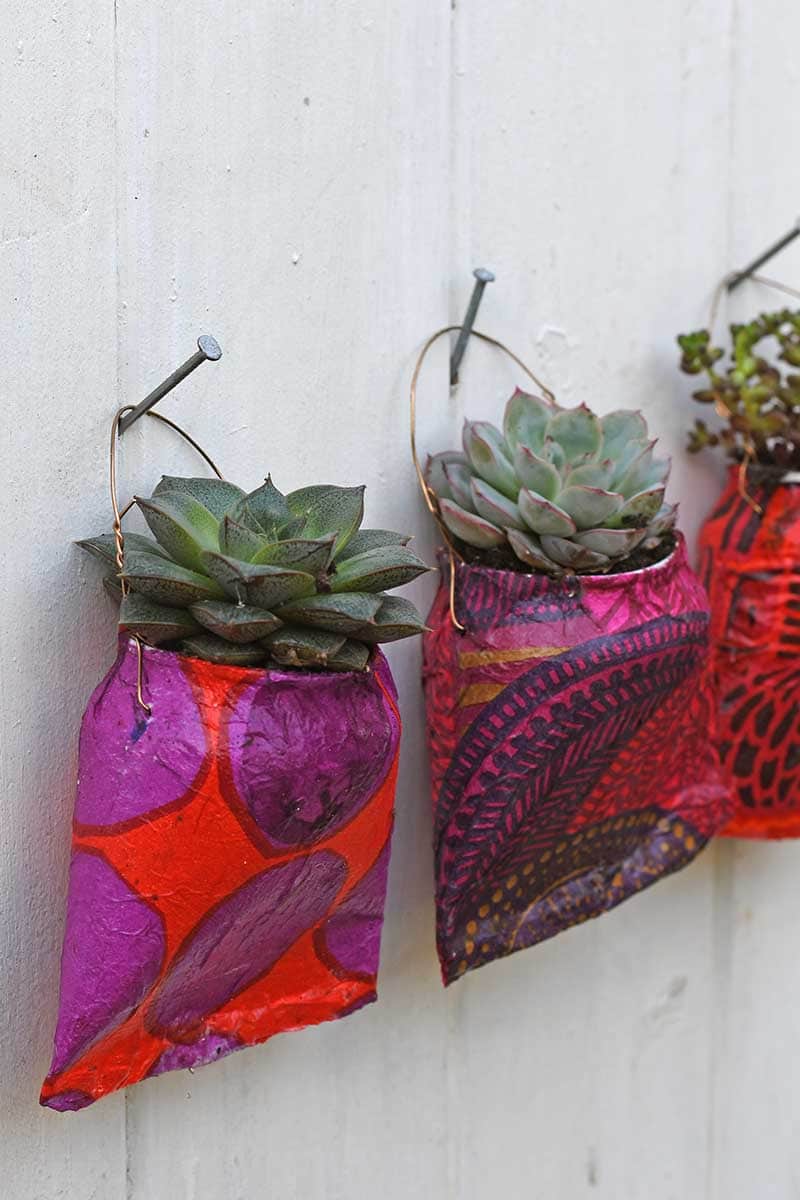
I have made many tin can planters, such as my beautiful Marimekko planters. But these planters are different, as they are hanging planters. Also, the shape of the cans has been altered so that they hang better.
I've made hanging soda can planters and planters out of food cans. Both are made in virtually the same way.
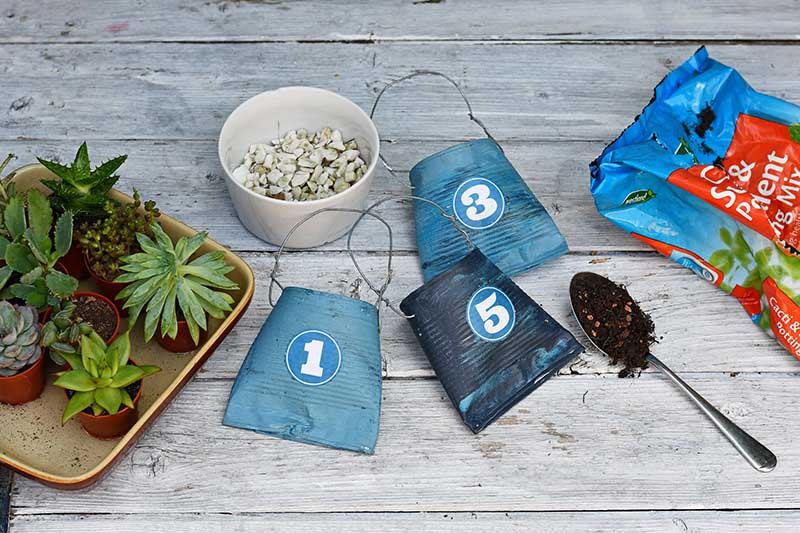
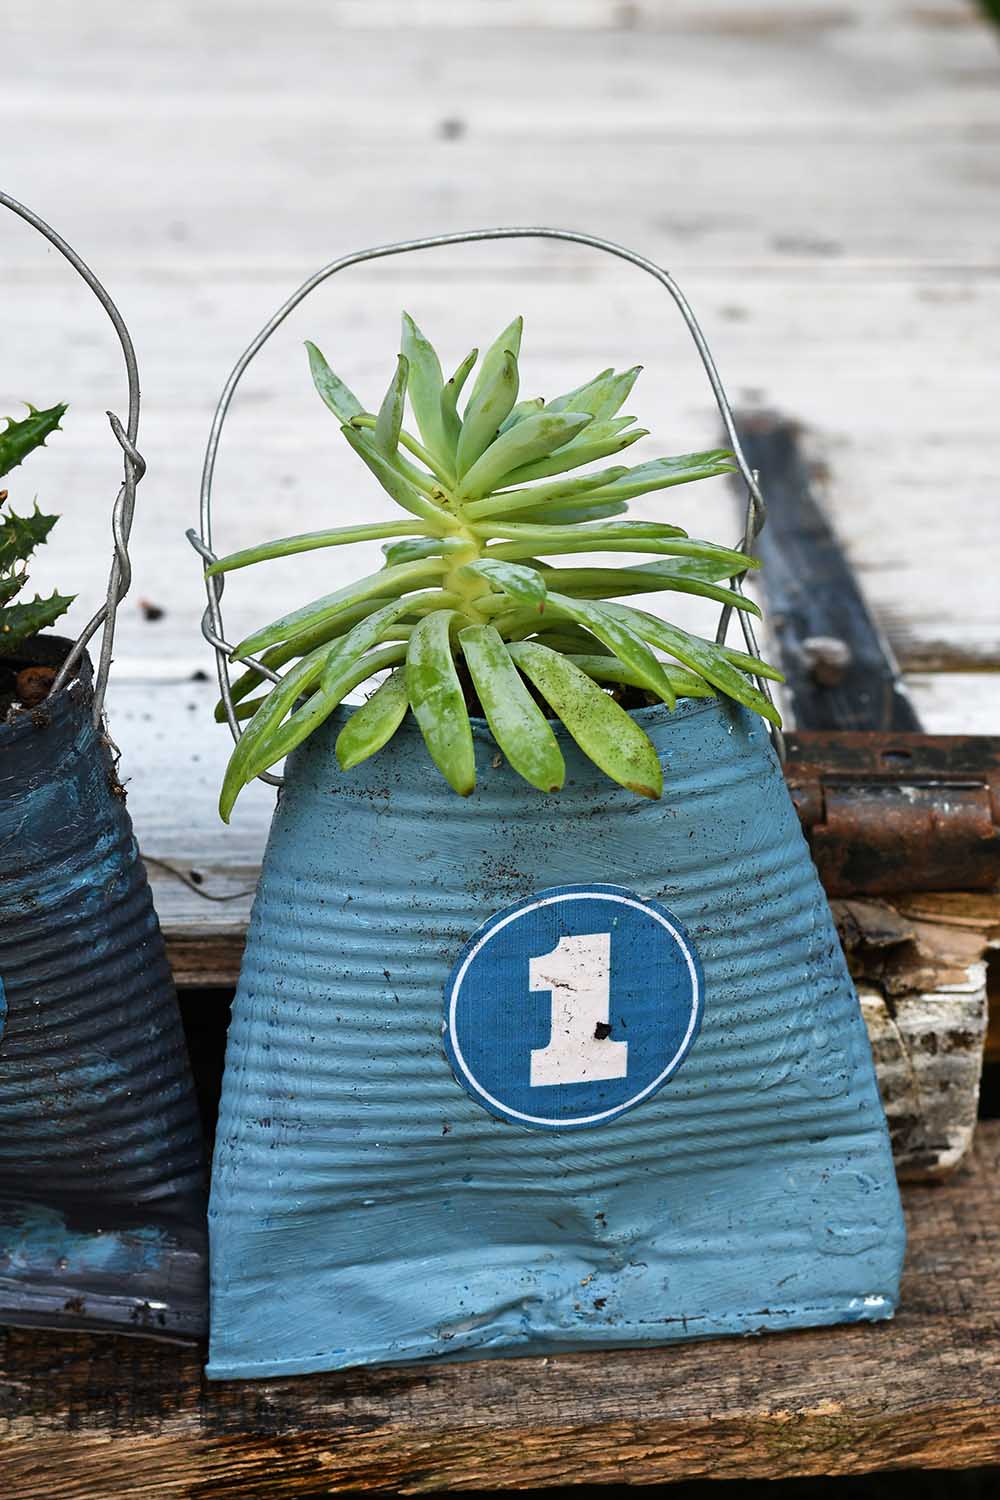
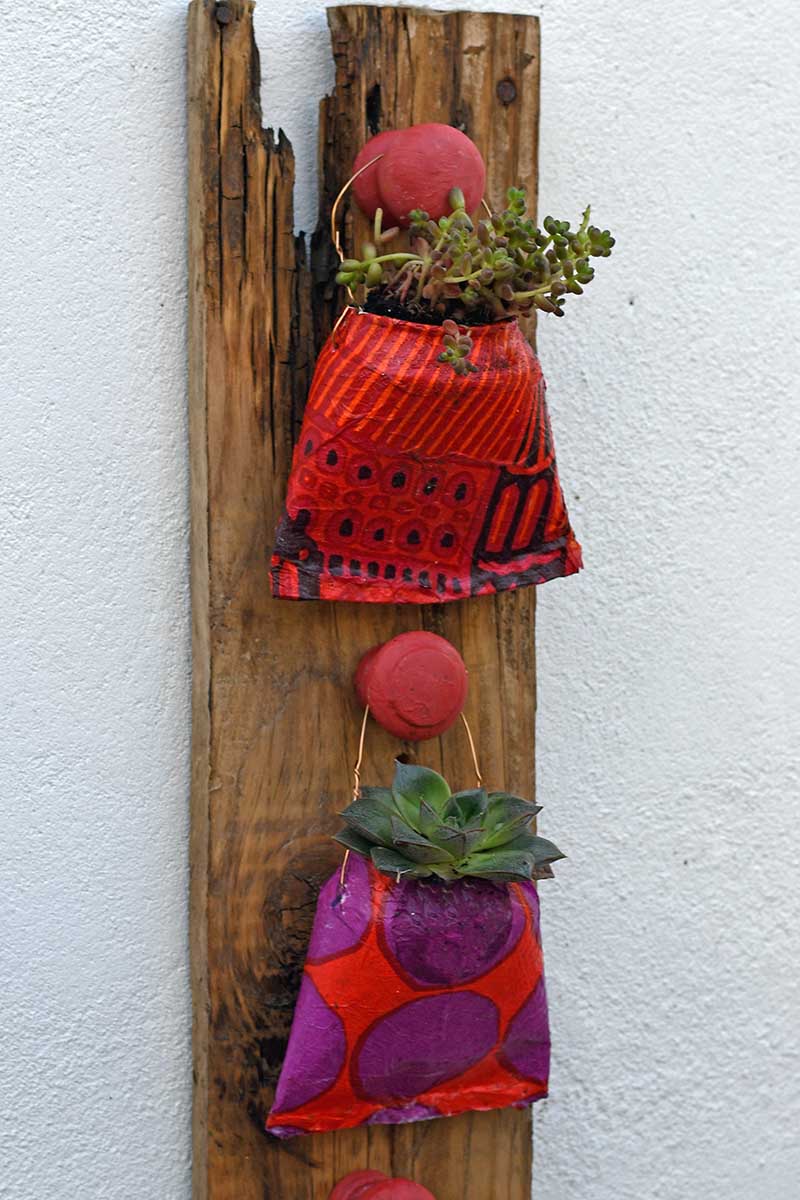
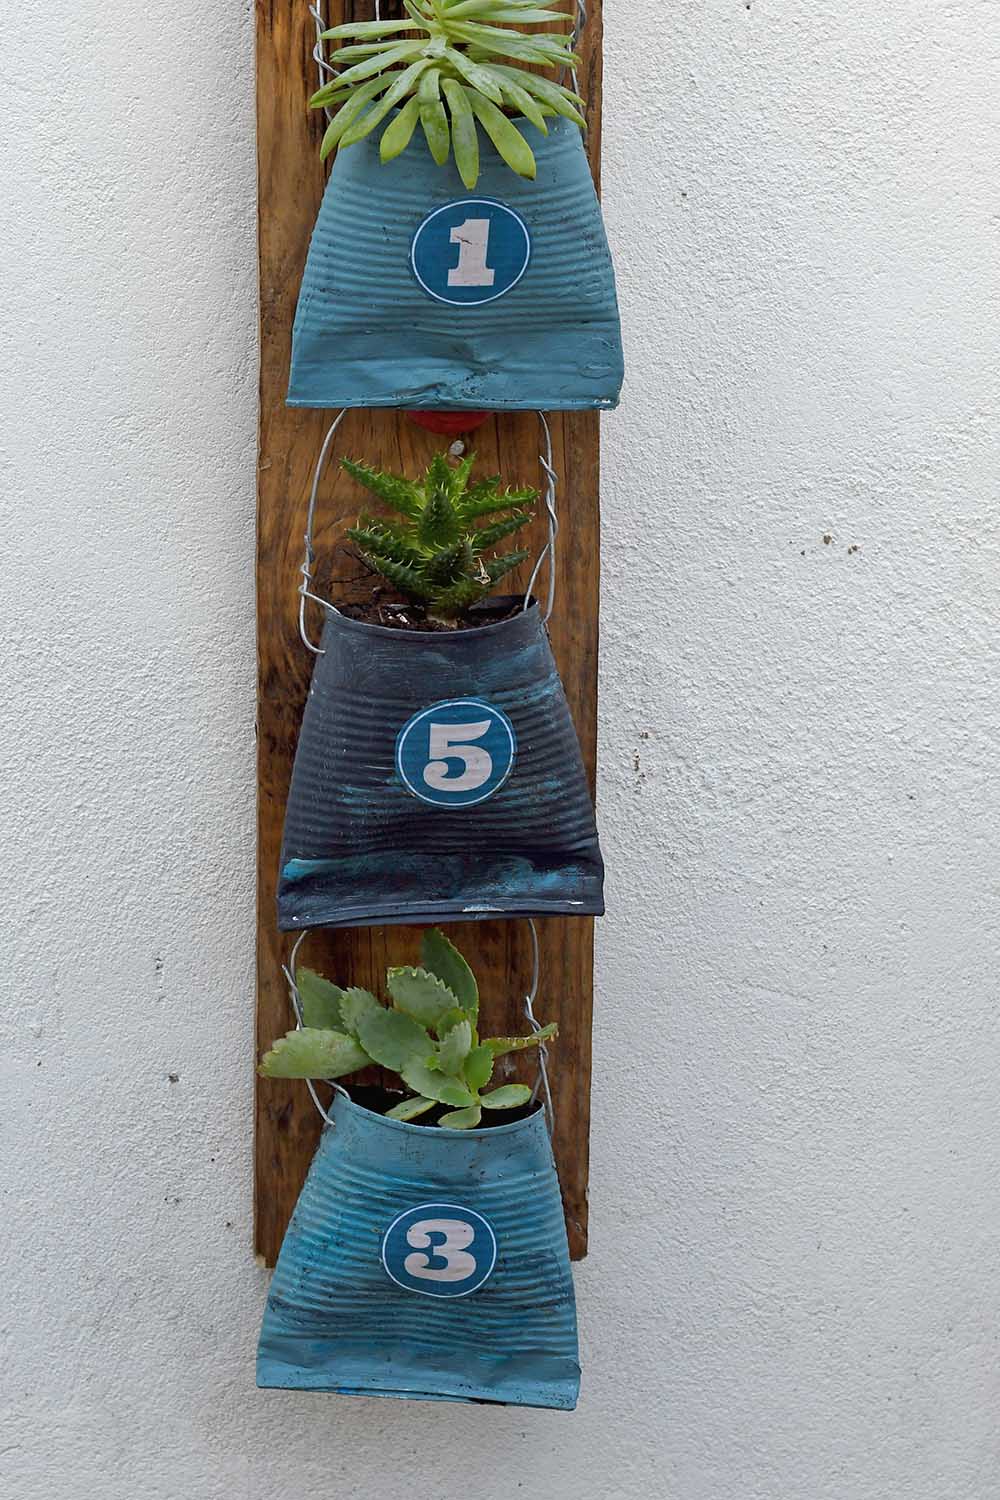
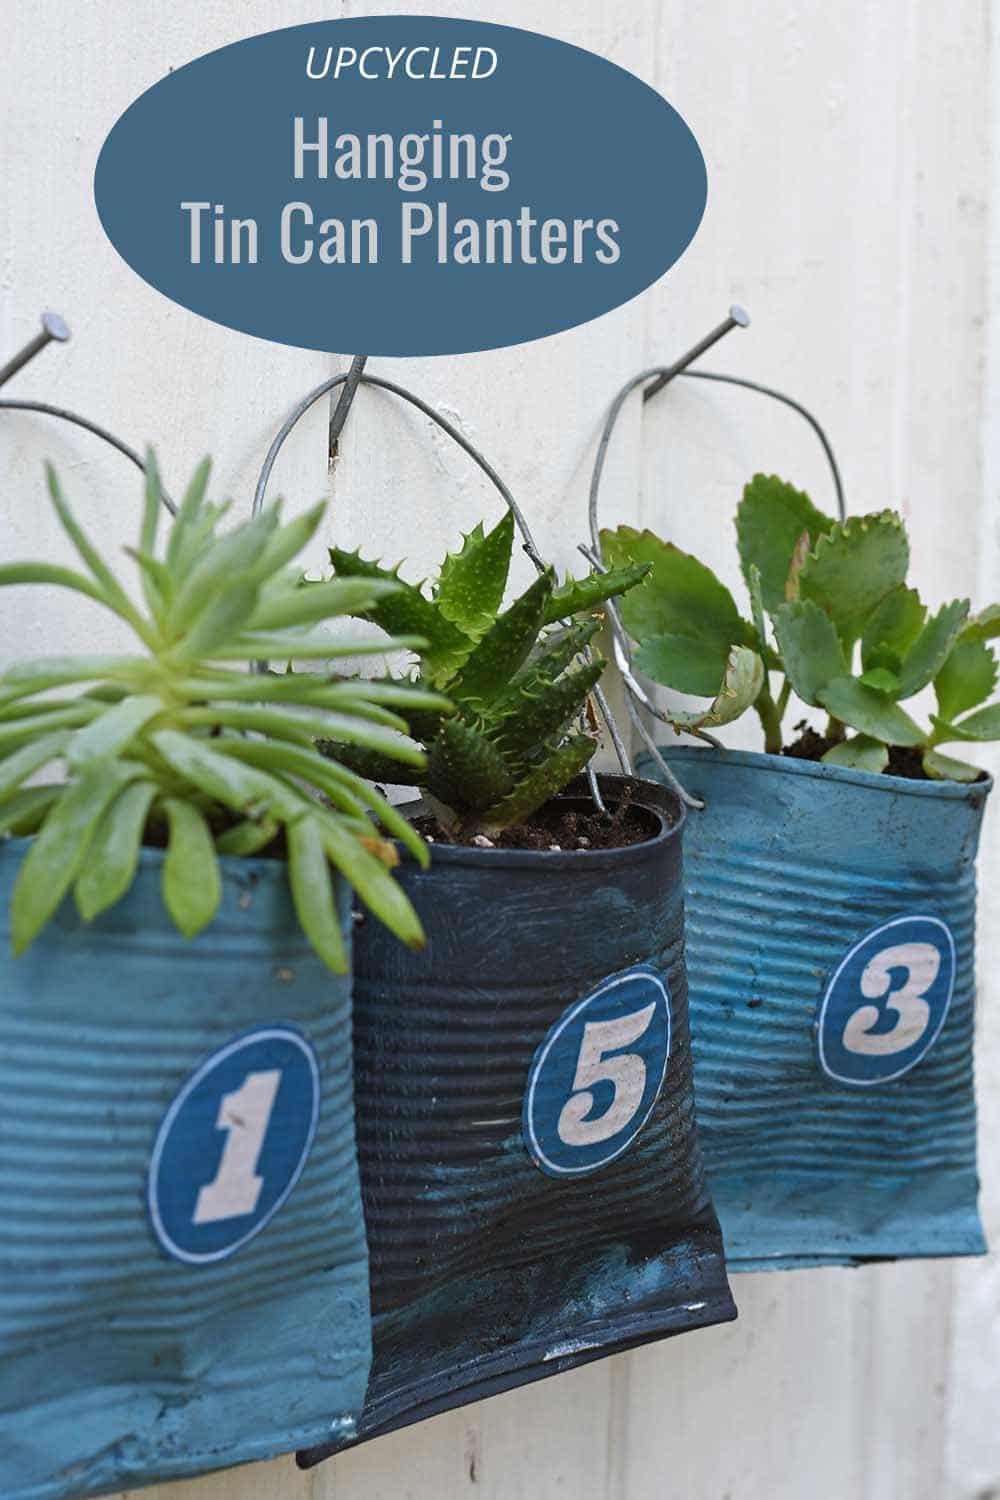
These planters have a wire handle and can be hung from a nail. But I did make a wooden hanger and put my house number on the planters. When planted with succulents, this makes a cute display outside the front of my home.
This is a straightforward and affordable craft. The planters cost almost nothing and don't require any specialist tools.
What You Need To Make Soda Can Planters
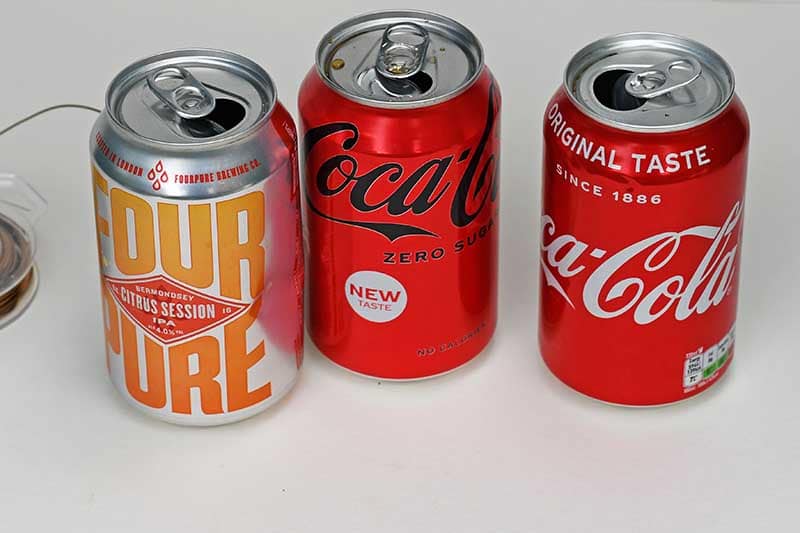
- Empty soda cans or beer cans. I just used standard 330ml coke cans. Use bigger or smaller cans to make bigger or smaller planters.
- Tin can opener, pliers and scissors.
- Old wire or craft wire
- White paint
- Paper napkins
- Mod Podge / decoupage glue
- Acrylic Sealer
How to Cut Up A Soda Can
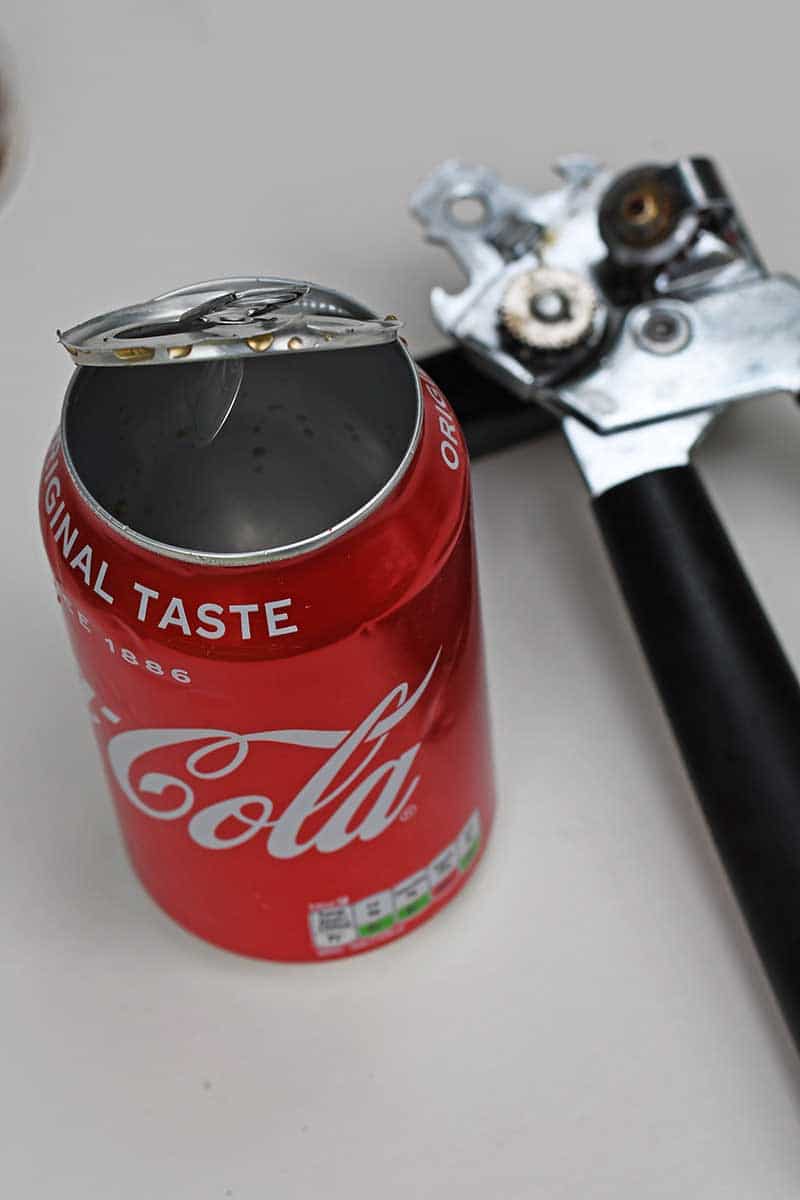
Step 1: First, using a tin opener, take off the top of the soda can. This should be very easy to do with a good standard home tin can opener.
The lid should come off cleanly, but if there are sharp edges, dull them with a file.
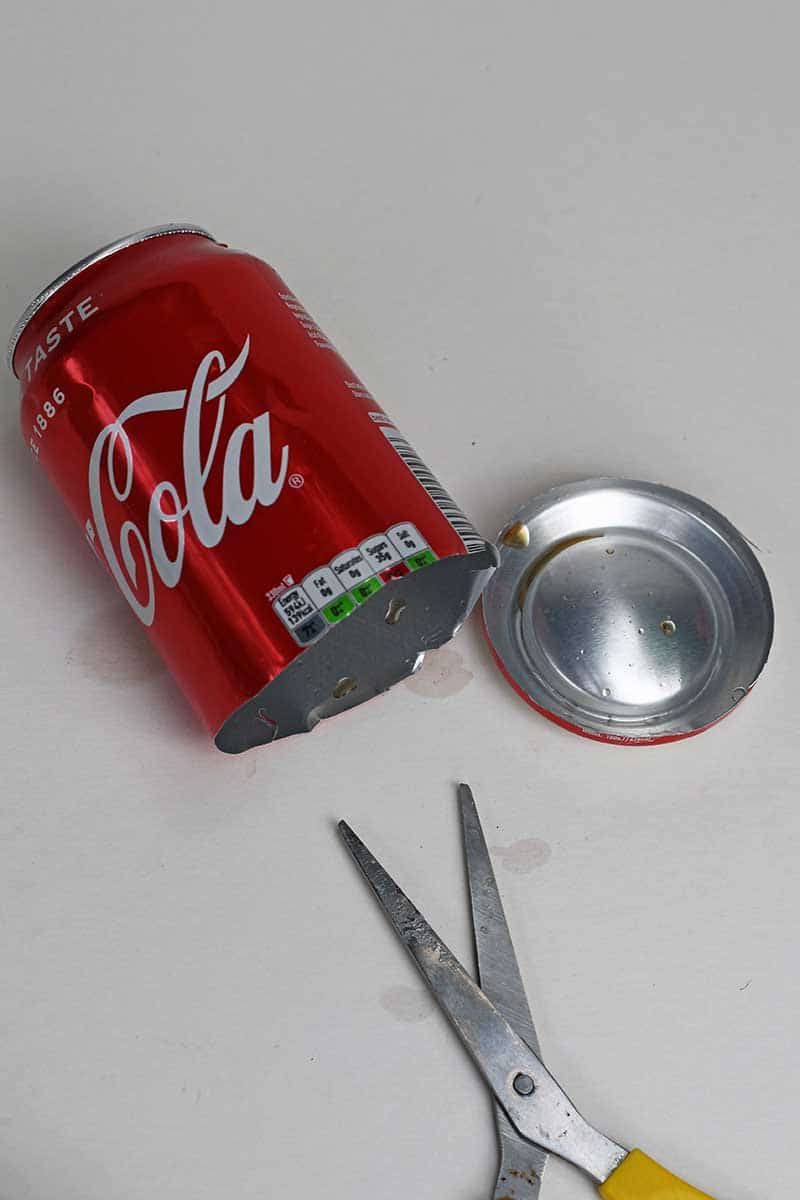
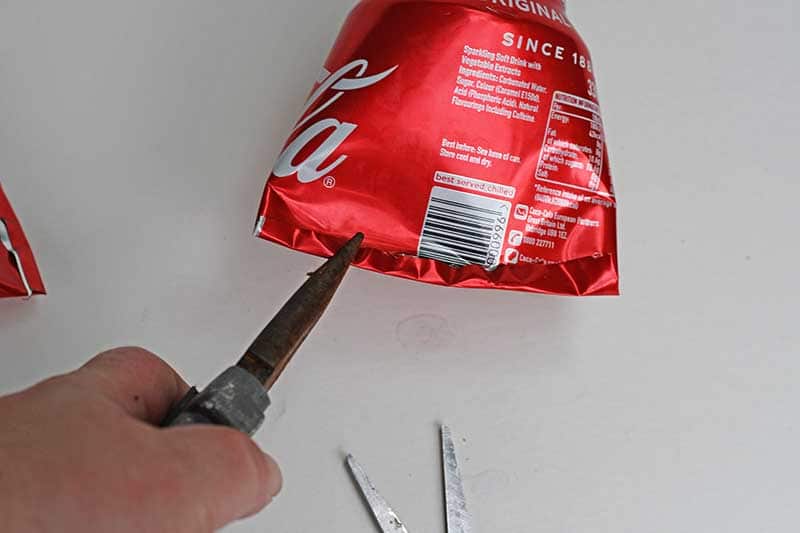
Step 2: Next, with the tip of some sharp scissors, pierce the bottom of the soda can. Go as close to the base as you can. Then cut away the base.
If you haven't cut tin with scissors before, you will be surprised at how easy it is. It's almost as easy as cutting paper. Don't worry about any sharp edges at this stage.
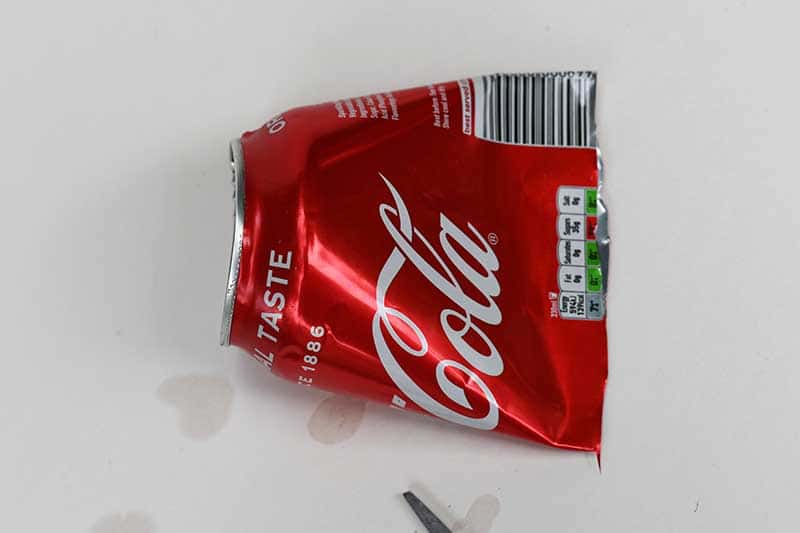
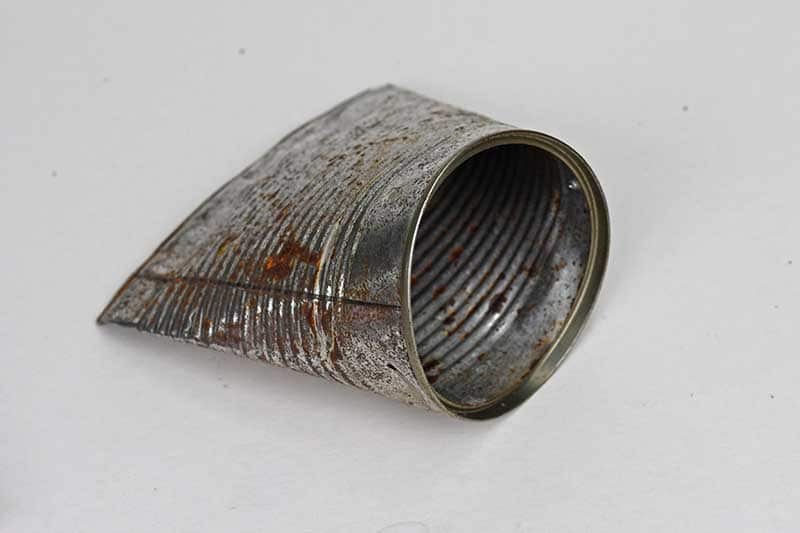
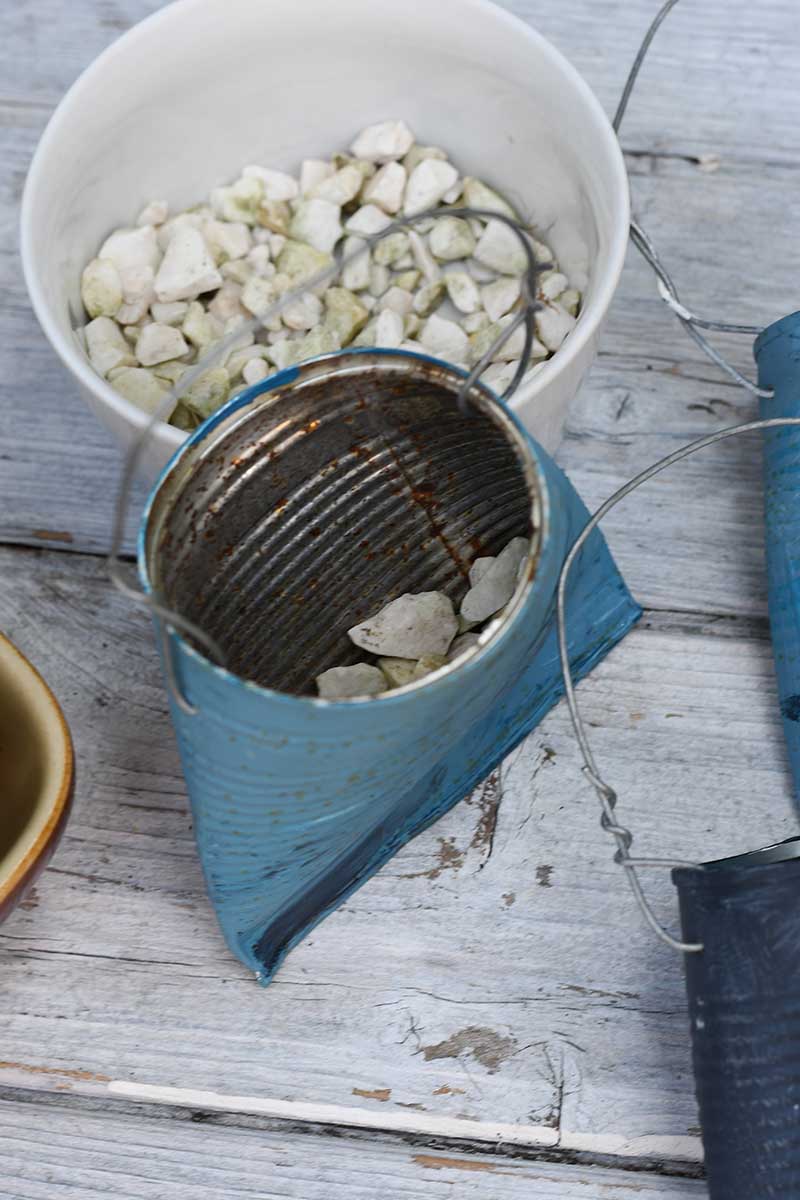
Step 3: Flatten the bottom of the soda can so that the cut edges meet. Then, fold up the squashed edge by about 5mm using a pair of pliers.
Folding the bottom edge can hide any sharp edges. It also makes the bottom of the can more leakproof. It won't make the soda can planter completely watertight, though.
This is good, as it allows for drainage if you overwater your succulents.
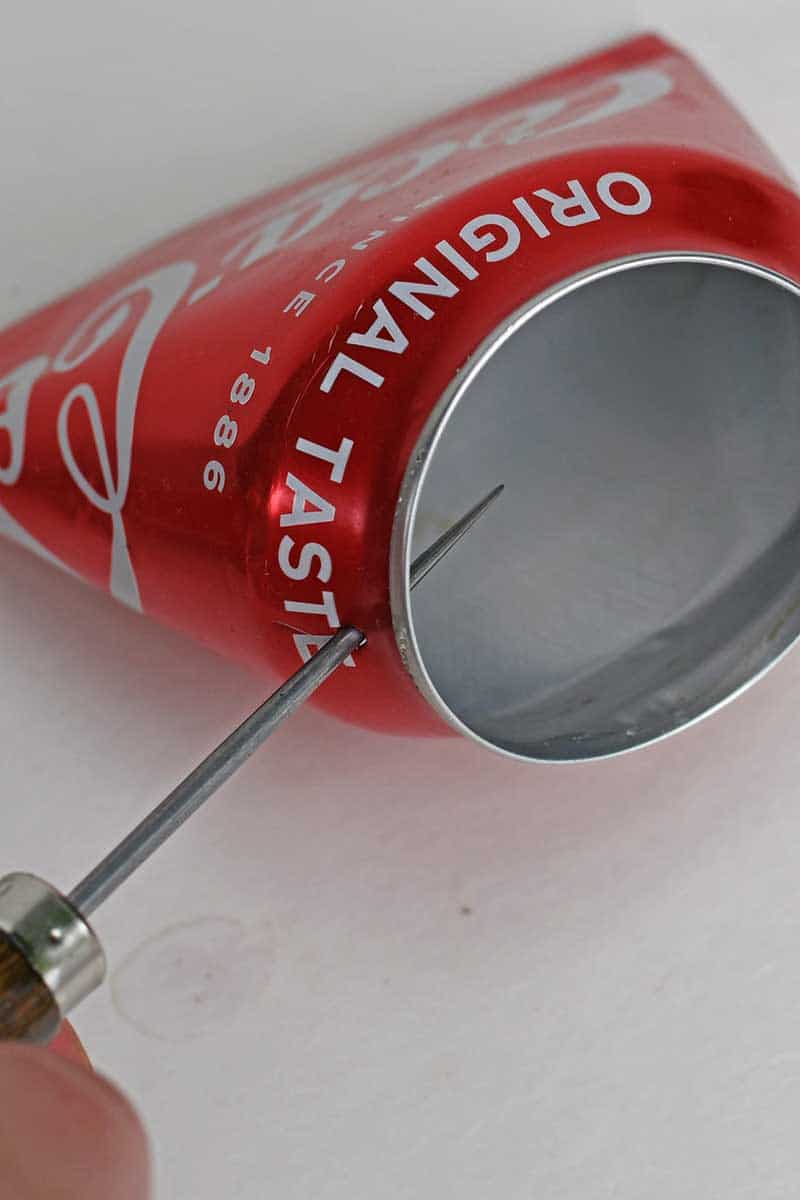
Step 4: Then, using an awl, pierce a hole in the top of the soda can near the lip. Then place another hole directly opposite. After decorating the cans, you can thread a wire through the holes to make a wire handle.
Using Food Cans
Step 5: If using food cans, remove the top and bottom of the food can with a tin opener. Then squash the bottom of the can so the edges meet.
Food cans are harder than soda cans to squash. I recommend using a hammer to flatten the base. There are no sharp edges with the bottom of the food can, so there is no need to fold over the flattened edge.
Decorating the Soda Can Planters
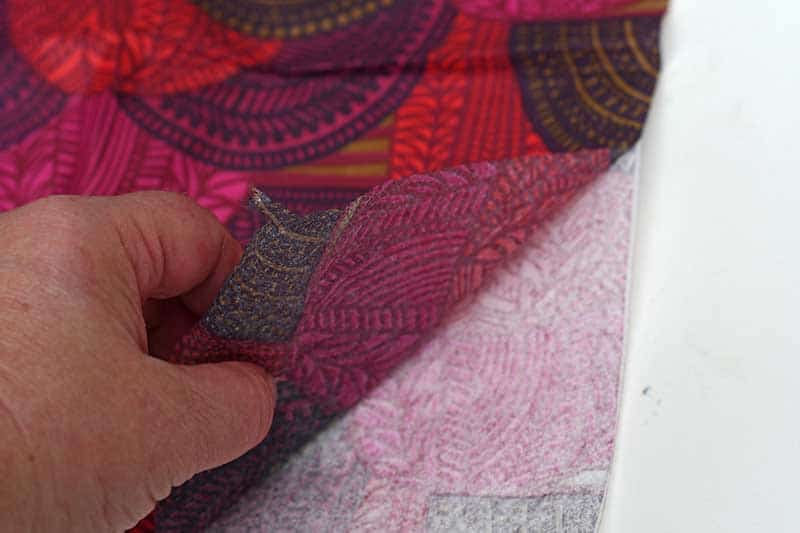
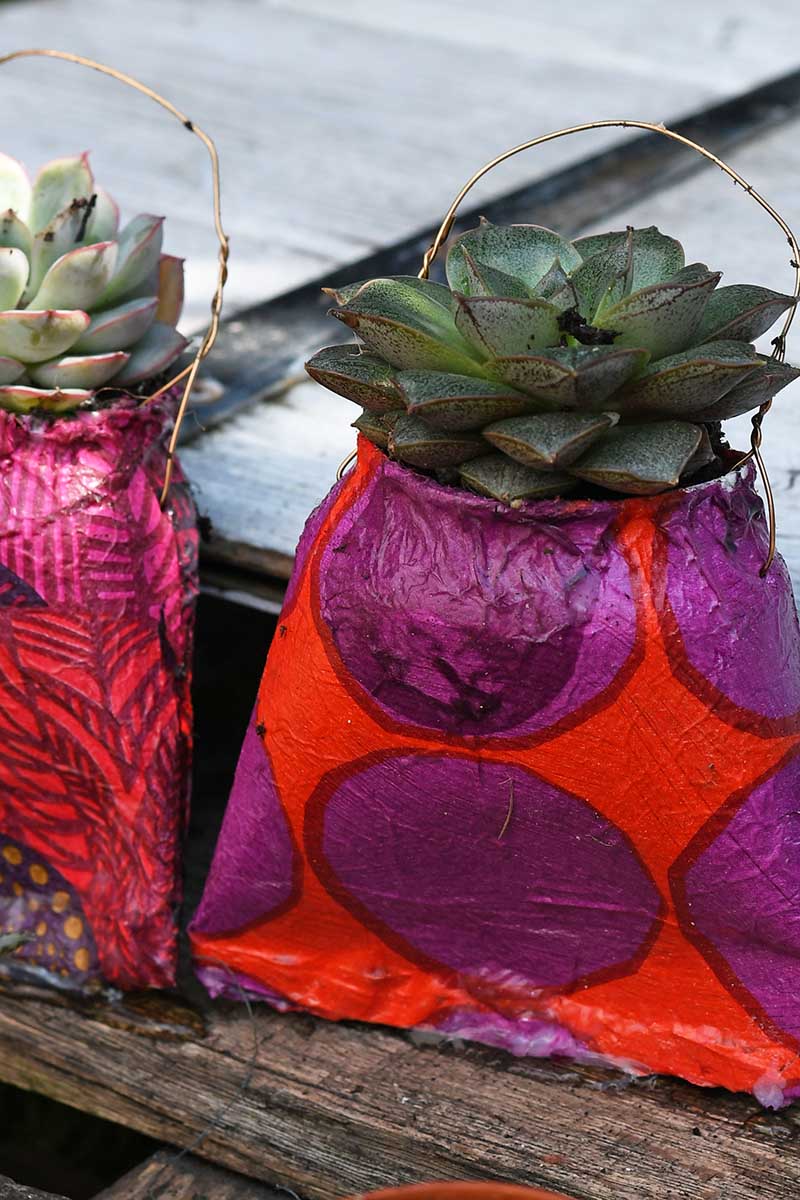
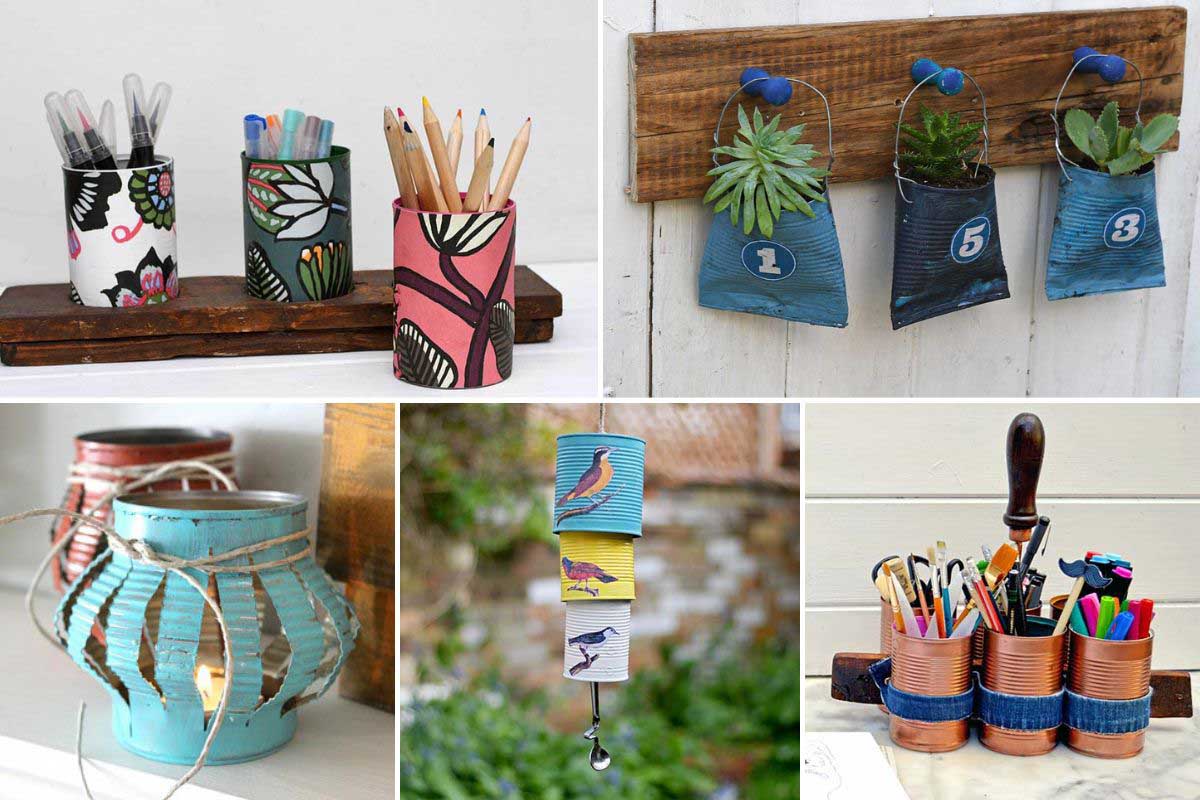
Step 6: The planters can be decorated with paint or decoupage. I decorated the soda can planters with Marimekko paper napkins. I had some leftovers from other Marimekko crafts I'd made. Also, I love their patterns and designs.
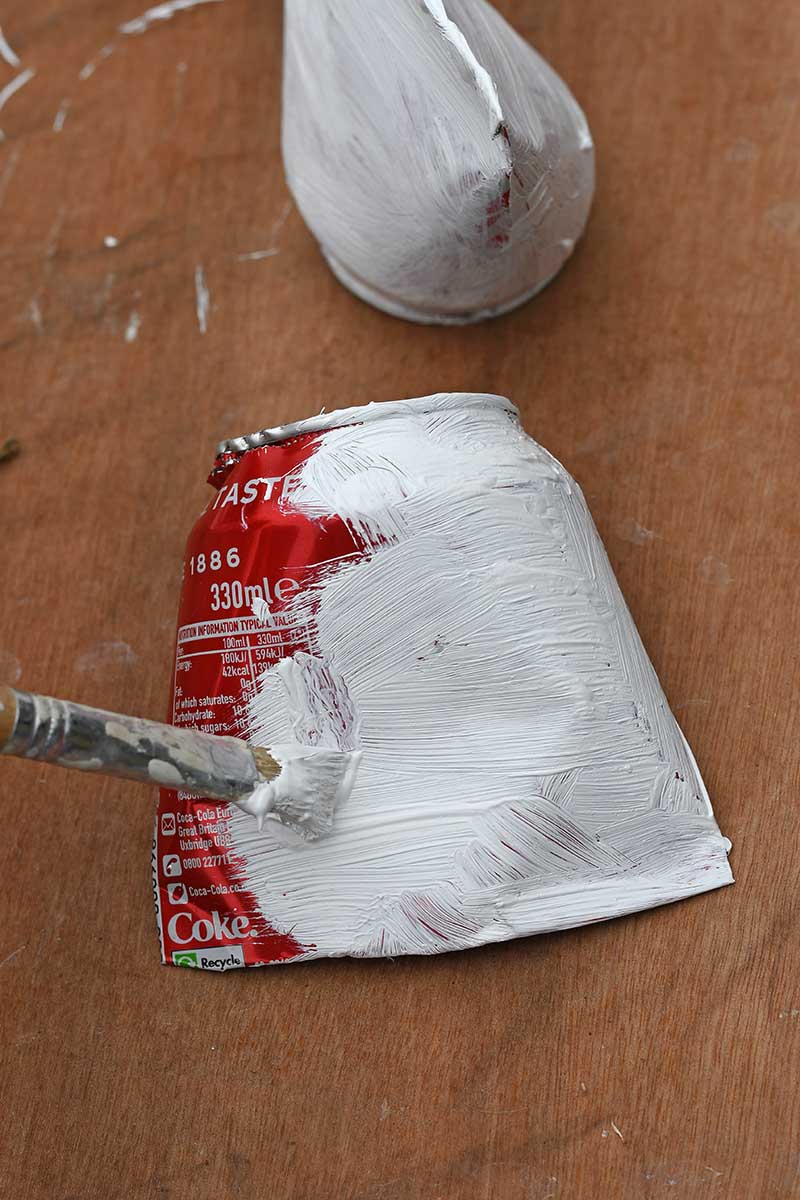
First, I painted the soda cans white so the can logo wouldn't show through.
I then used the paper napkins to decoupage the cans. Cover the can in Mod Podge. I am separating the napkin layers so that only the top layer is used.
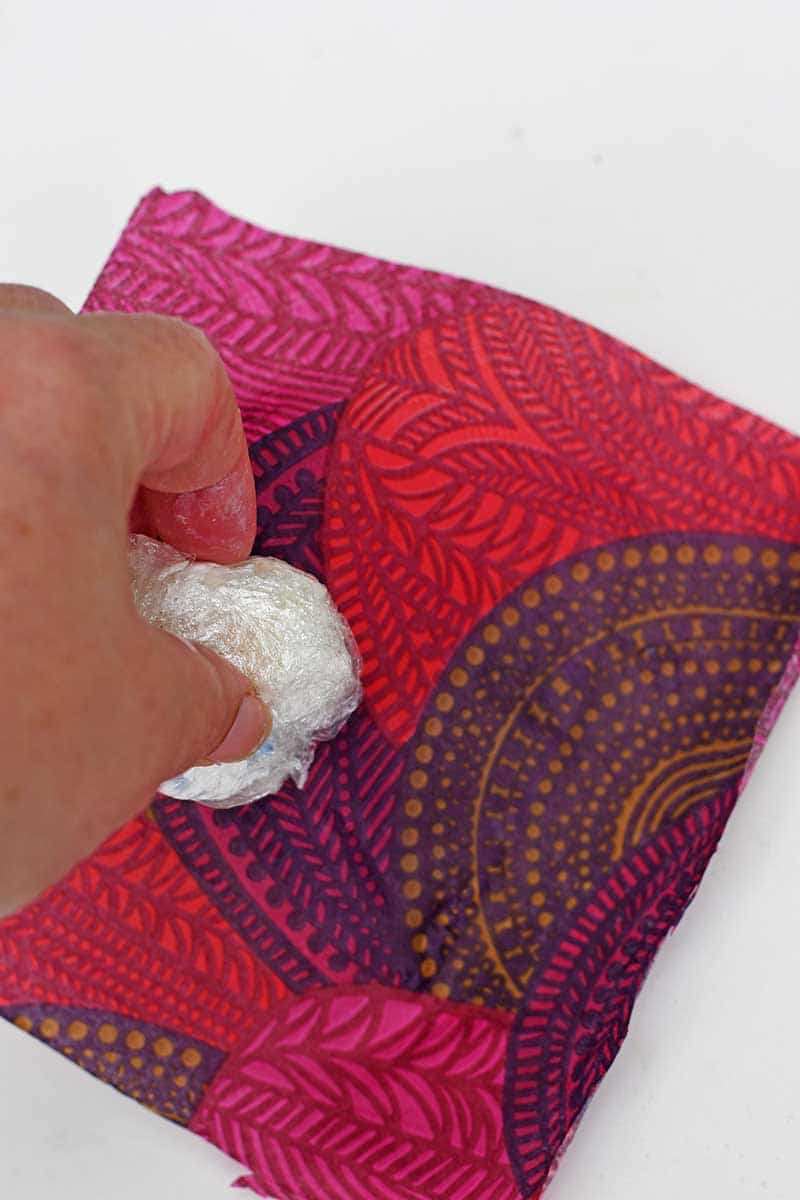
Cover the can in the paper napkin. Use some screwed-up plastic wrap to push the napkin onto the tin.
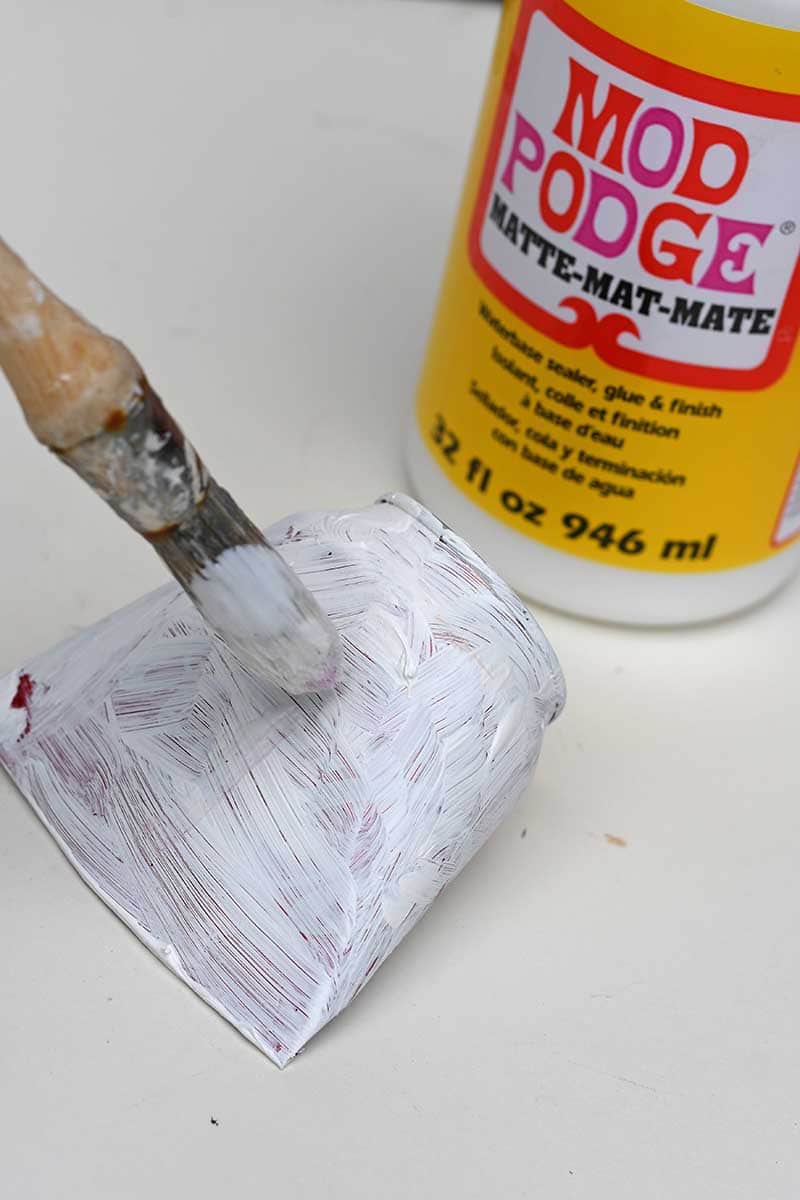
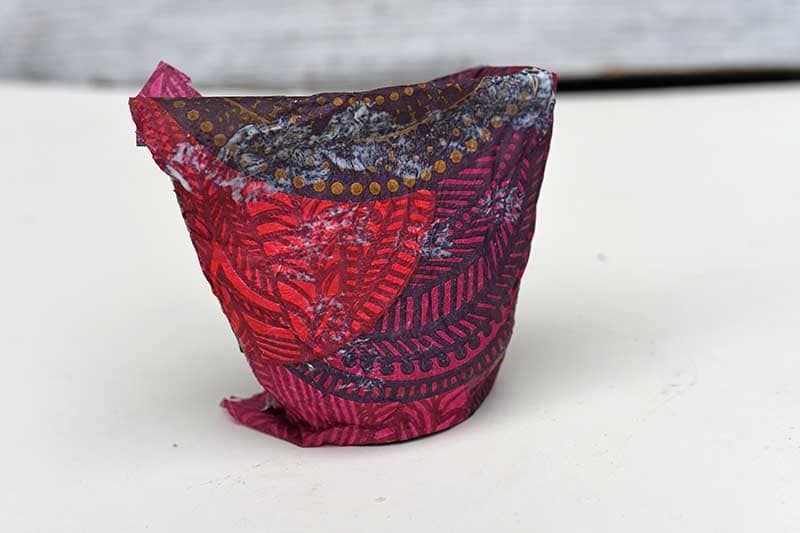
Step 7: When the paper napkin has dried, sand off any overlap. Then cover the outside of the napkins in another layer of Mod Podge to provide protection.
Decorating The Food Can Planters
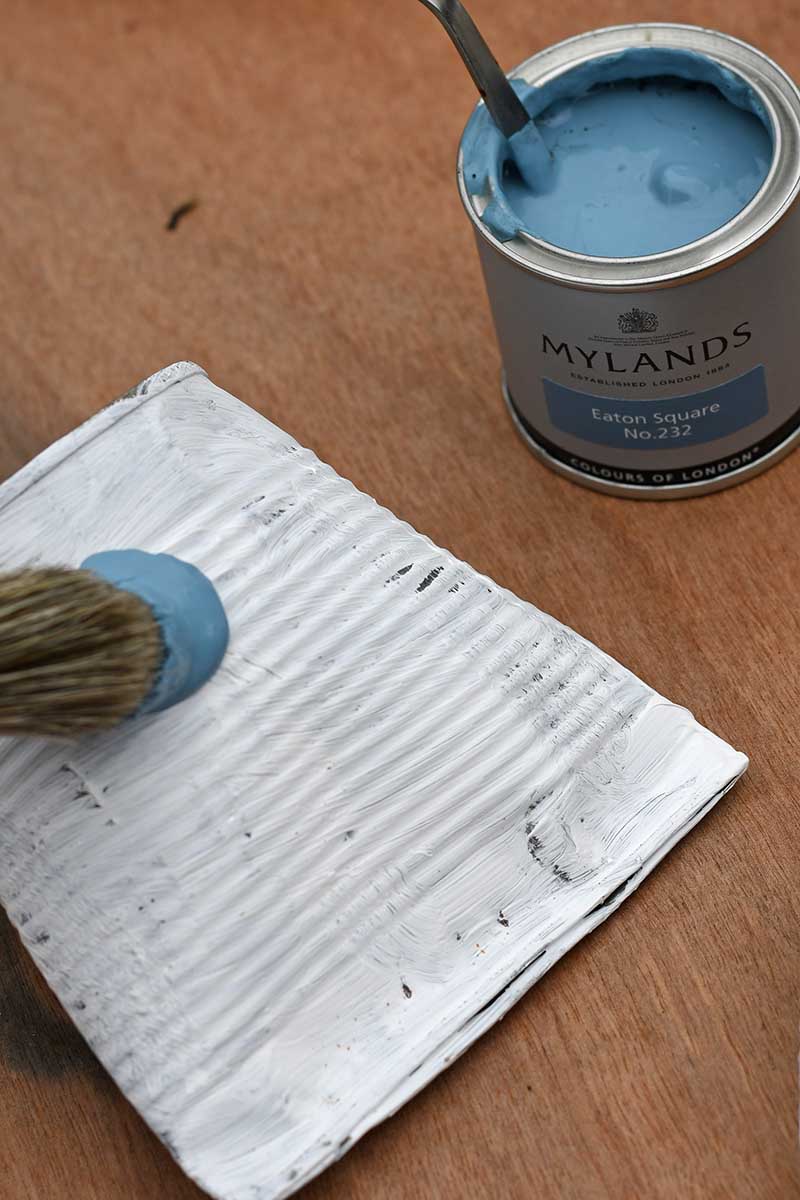
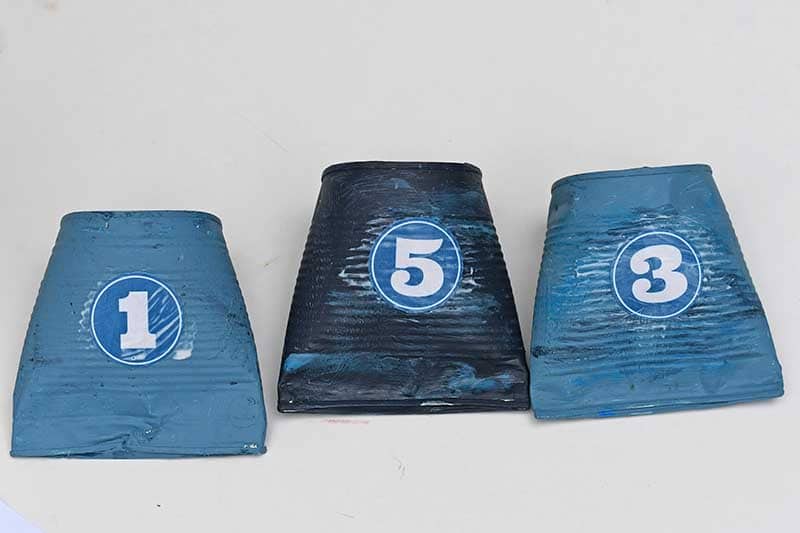
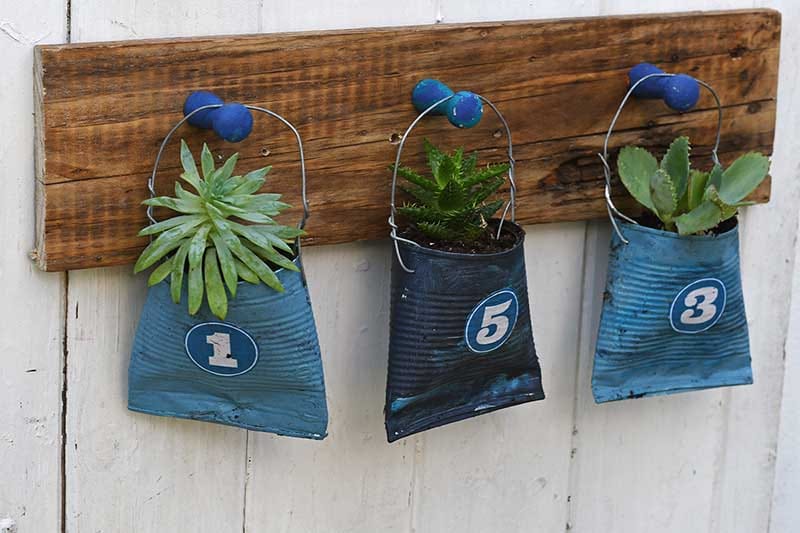
Step 8: I painted the food can with a white undercoat. I then painted them various blue colours using some paint sample pots.
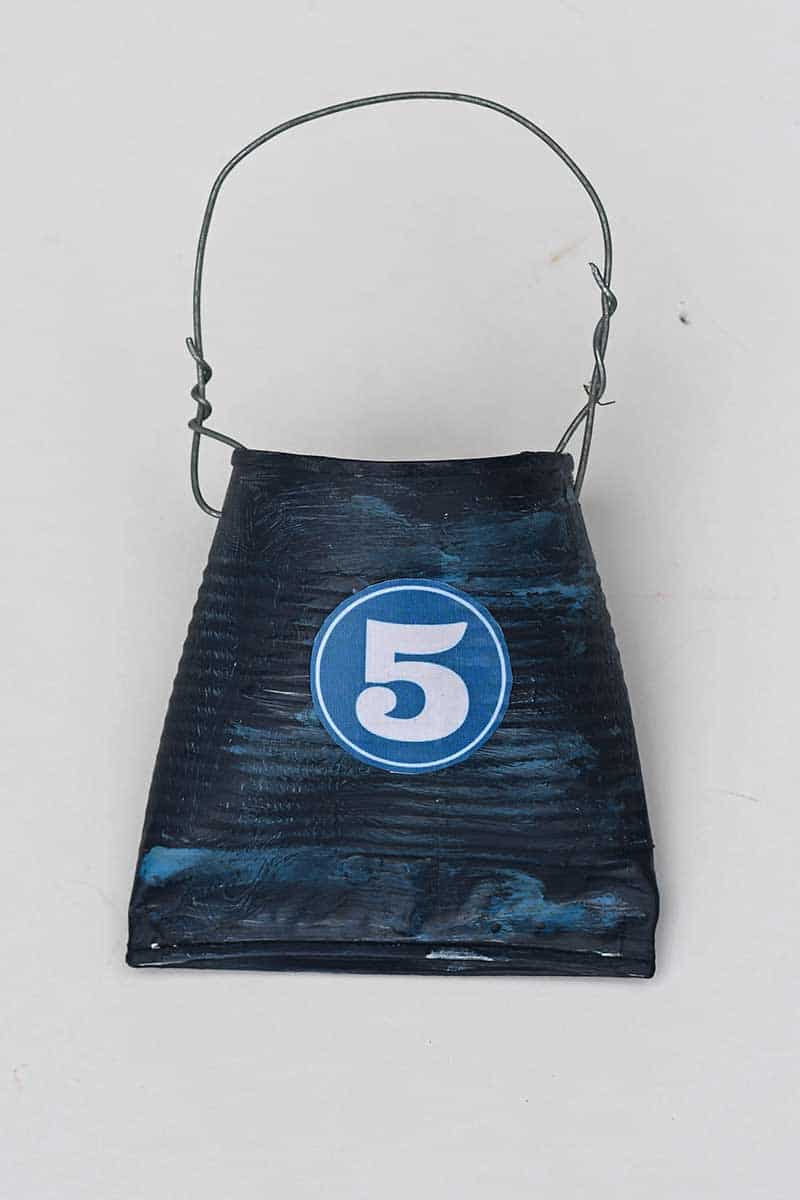
When the paint had dried on the tin cans, I decoupaged a number on the front. My house number is 153, so I painted and decoupaged three planters with the numbers 1, 5 and 3.

You can download the sheet of numbers I used here.
Finishing Off The Tin And Soda Can Planters
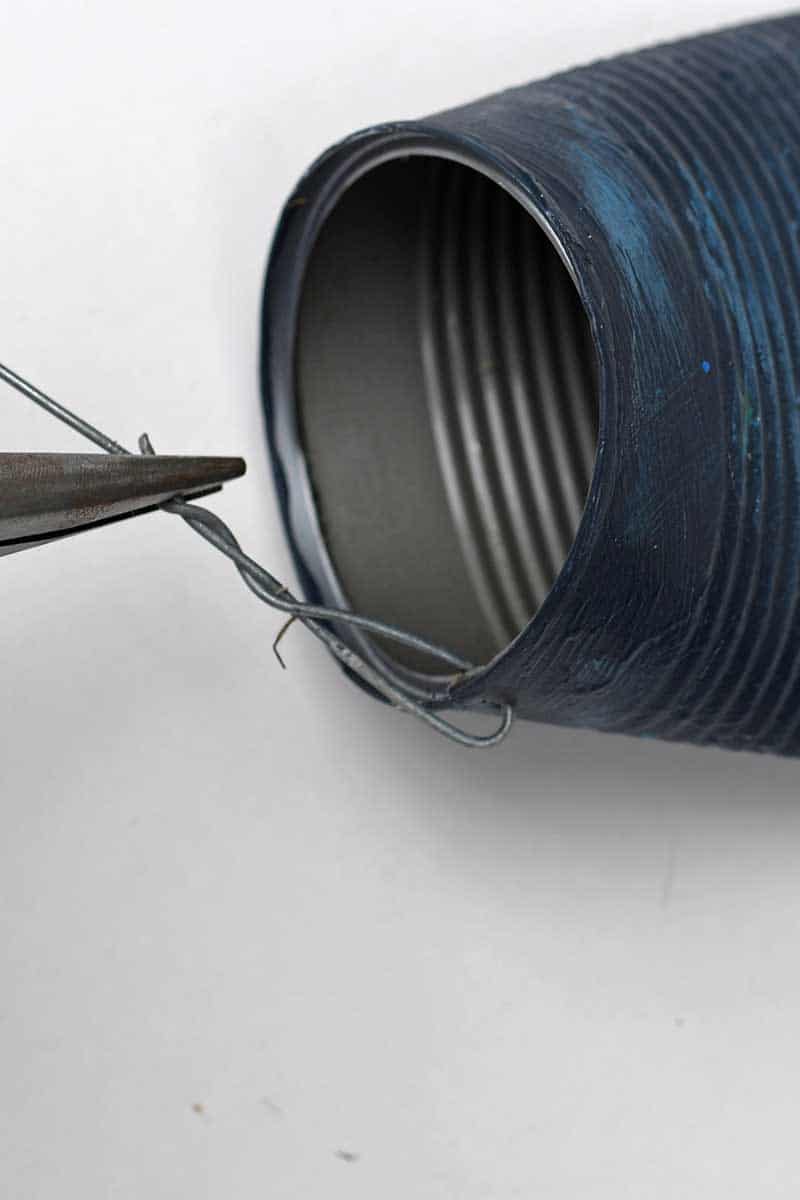
Step 9: Use a length of wire to make a hanging handle for the can planters. Thread the wire through the punched hole in the top of the can. Then secure the wire in place by twisting it with some pliers.
If hanging the planters outside, spray them with acrylic varnish to protect them from the elements.
Planting The Soda Can Planters
Step 10: Finally, plant up your soda can planters with either succulents or flowers. As mentioned before, the base of the planters will let some water through. This is good as it will aid drainage if you overwater your plants.
I also add a layer of small stones in the bottom of the cans to help with water drainage. The stones also give the planters a bit of weight, making them more stable.
I'm no expert in planting succulents, but some great expert tips are here.
Hanging The Planters
All that is left to do is to hang the planters. They can be hung on a nail on the wall or made on a simple wooden hanger using scrap wood and knobs.
I think that the planters look good hung together in groups of three. Depending on your desired space, they can be hung vertically or horizontally. Because the cans have been flattened, they hang better than if left unsquashed.
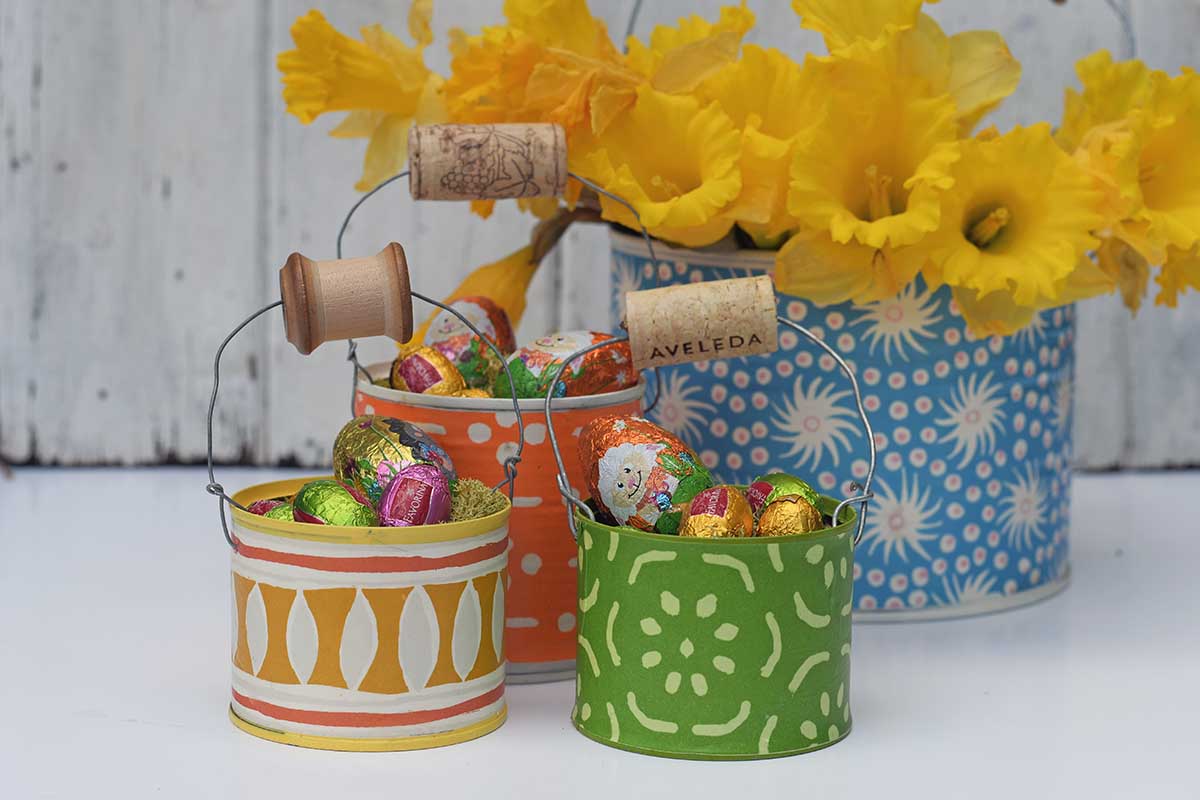
Check out these Easter tin can buckets if you want to see an example of unsquashed hanging planters.
The Numbered Planters
My house number is 153, so I hang the numbered planters in that order. I can't decide which way to hang them.
This is not the first time I have squashed and upcycled tin cans and used them as planters; you should check out these crushed tin can planters made to look like pineapples.
Other tin can planter ideas include these seed packet planters and these colourful planters. Another use for cans is to use them to make wind chimes. You'll find another 52 tin can crafts here.
Hanging Soda Can Planters

A step by step tutorial on how to make hanging soda can planters from upcycled coke and beer cans. The post also includes a tutorial for food can planters that can be used to display the number of your home.
Materials
- Old soda cans, coke cans or beer cans
- Wire for hanging
- Paper napkins for decoration
- Paint
- Decoupage glue such as Mod Podge
- Acrylic spray varnish
Tools
- Tin opener
- Scissors
- Awl or sharp object for punching holes
- Pliers
Instructions
- First, using a tin can opener, take the top off the soda can. File any sharp edges.
- Next, using a pair of scissors cut away the base of the soda can. You should have a soda can tube open at both ends.
- Squash the base of the can so that the bottom edges touch. Then using the pliers, fold over the bottom to hide any sharp edges.

- Using the awl, punch two holes into the top of the soda can. Just below the lip and the same distance apart.
- Next, paint the can with a white undercoat. This is to hide the printed logo on the can.
- Then using Mod Podge and a paper napkin, decoupage the tin can. Once the glue has dried, remove any excess paper napkins by sanding the edges.
- Thread a length of wire through the holes to make a wire handle. Use pliers to secure the wire.
- Spray the soda can planter with acrylic spray varnish to protect it.
- Finally, plant the succulents. Use a base layer of gravel before adding the soil.

You can find many more green craft ideas here.
wow, wow, wow, another amazing project! I don't think you linked to this on craft schooling sunday, but i can't resist sharing it, totally up my alley even if currently my fingers are covered in matte medium and i'm doing paper collage.
Thank you so much Sara. I'm not sure if I linked either sometimes I forget. I love paper collage.
What a fun and clever upcycle Claire.
Thank you for sharing your soda can planters at Create, Bake, Grow & Gather this week. I'm delighted to be featuring this project at tonight's party and pinning too.
Hugs ~ Kerryanne
Thank you so much, and that is awesome about the feature.
Great project - and good for the environment too. Thanks for sharing your ideas with us. #HomeMattersParty
Cheers, thank you so much. They were fun to make.
What a great idea to use the squished can planters as a house number. Love how they turned out, Claire
Thanks, Michelle, I know you like a squished can planter too.
Cute, cute, cute! Thanks for sharing at Vintage Charm--pinned!
Thank you so much.
I can't get over how cute (and easy to do!) these are. I'm so going to try this. Thank you!
I know what you mean. Thank you, they are so easy to make.
Claire, these are really cool succulent planters. I like both the decoupage and the painted ones equally. The numbered markers add a cute detail to those. I can see these mixed and match together on rustic hangers. A great gift idea too!
Thank you so much, Marie. They do look good hanging up as my house number.