
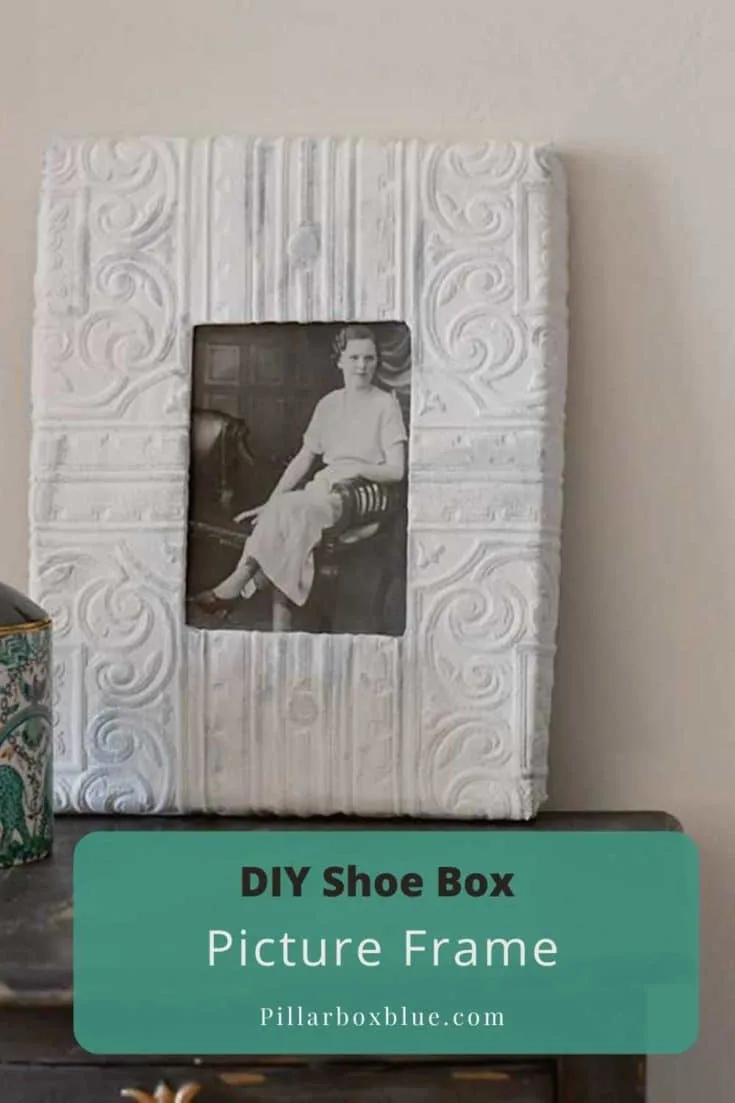
By repurposing shoebox lids, I’ll show you, how you can make a cool upcycled picture frame.
This is a really easy home decor craft that repurposes trash into something useful. Not only does the DIY picture frame look great, but you have the satisfaction of knowing that it is made from upcycled materials.
All you need is a shoebox lid (or another similar cardboard lid) and some wallpaper samples or scraps. I’ve crafted shoeboxes into cool storage boxes before. But this is the first time I’ve used them to make into picture frames.
And it won’t be the last. I have so many ideas for decorating more shoebox lids into homemade picture frames. Materials, such as maps, yarn and fabric could also be used.
We’re a participant in the Amazon Services LLC Associates Program, an affiliate advertising program designed to provide a means for us to earn fees by linking to Amazon.com and affiliated sites. As an Amazon Associate, I earn from qualifying purchases.
What You Need To Make Shoebox Lid Frame
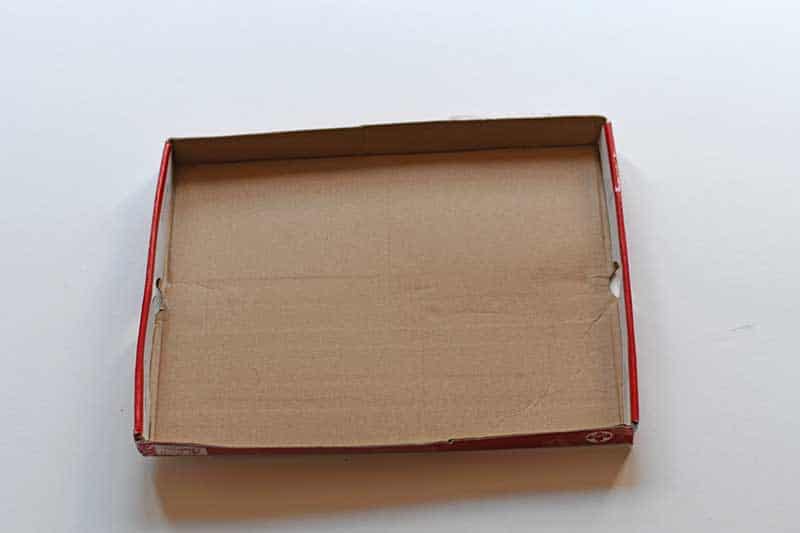
- The lid of a shoe or boot box. Any similar type cardboard box lid would work too. The size of the box lid will determin the size of the picture frame. Boot boxes would be could for larger picture fames and childrens shoe boxes for smaller picture frames.
- Textured/ Anaglypta wallpaper – I had some leftover on a roll, but it is easy to pick up free samples from your home/DIY store. You will only need enough wallpaper to cover the front and sides of the boxlid.
- White chalk paint – I use the small sample pots.
- Glue
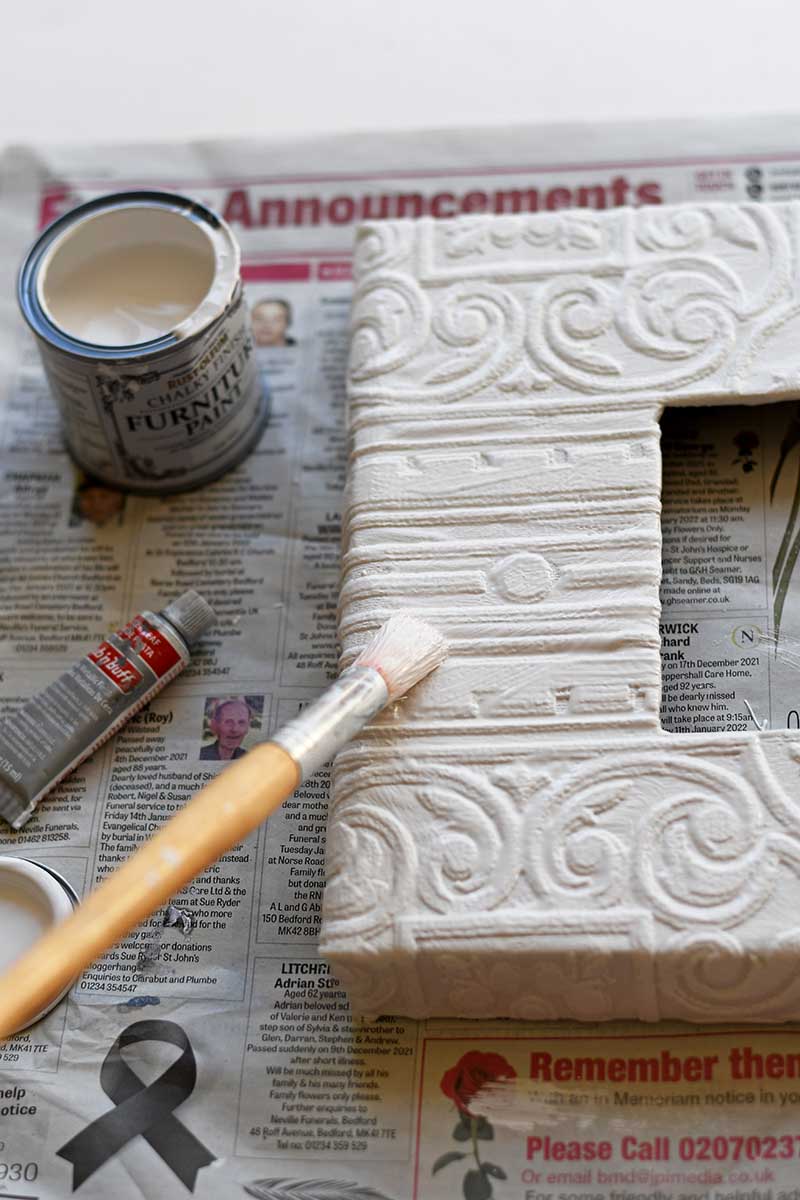
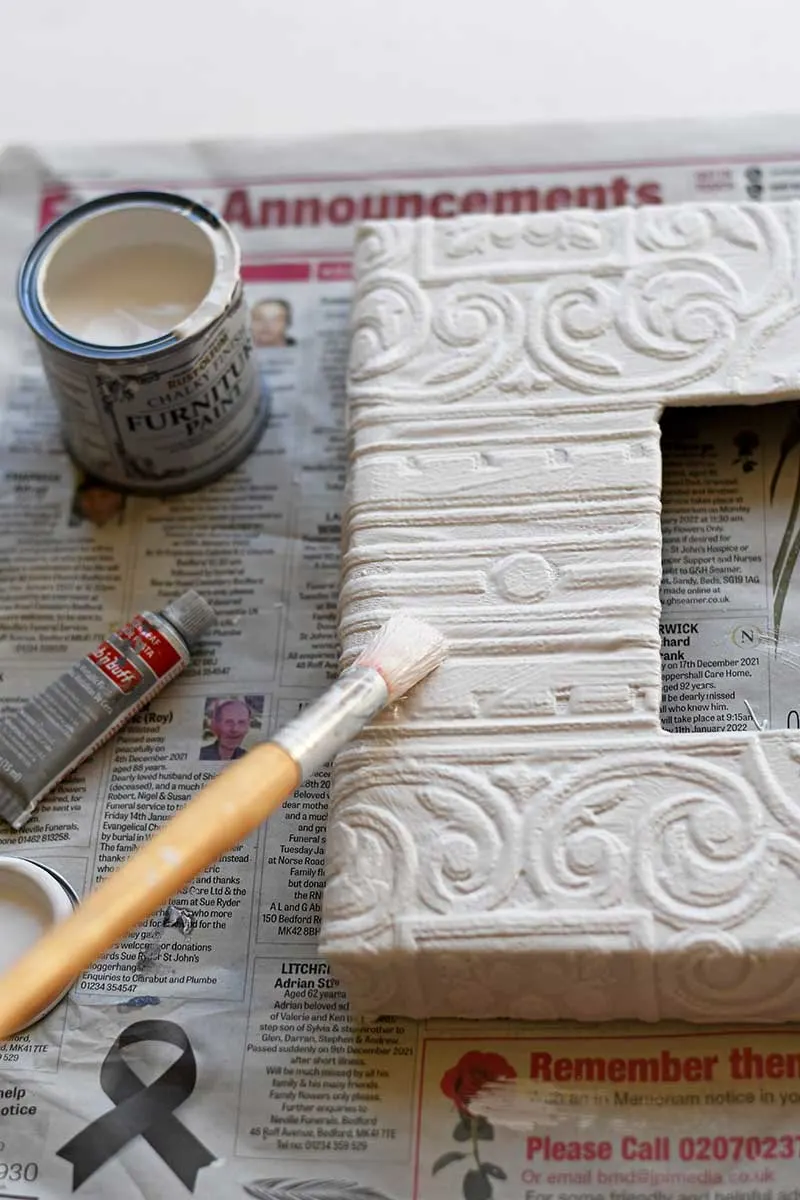
- Silver Rub’n Buff
- Box cutter knife, pen, ruler and scissors.
(There is a printable how-to card for this craft at the end of the post.)
How To Make An Upcycled Picture Frame
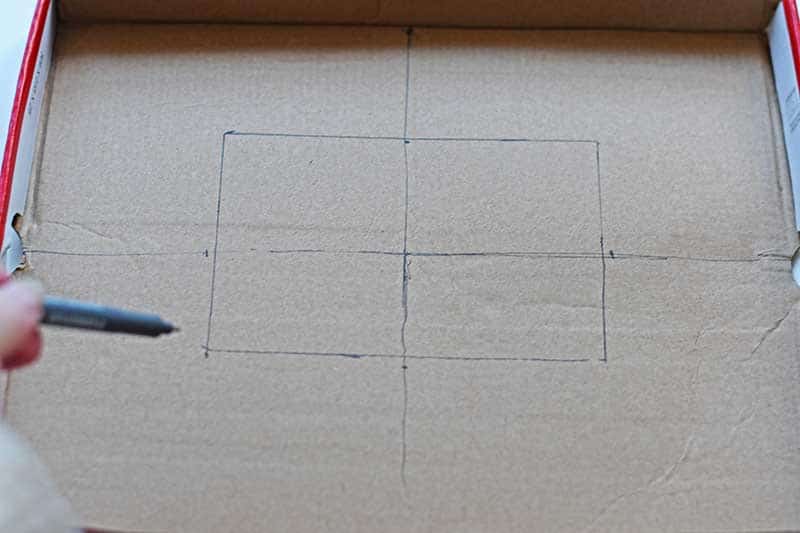
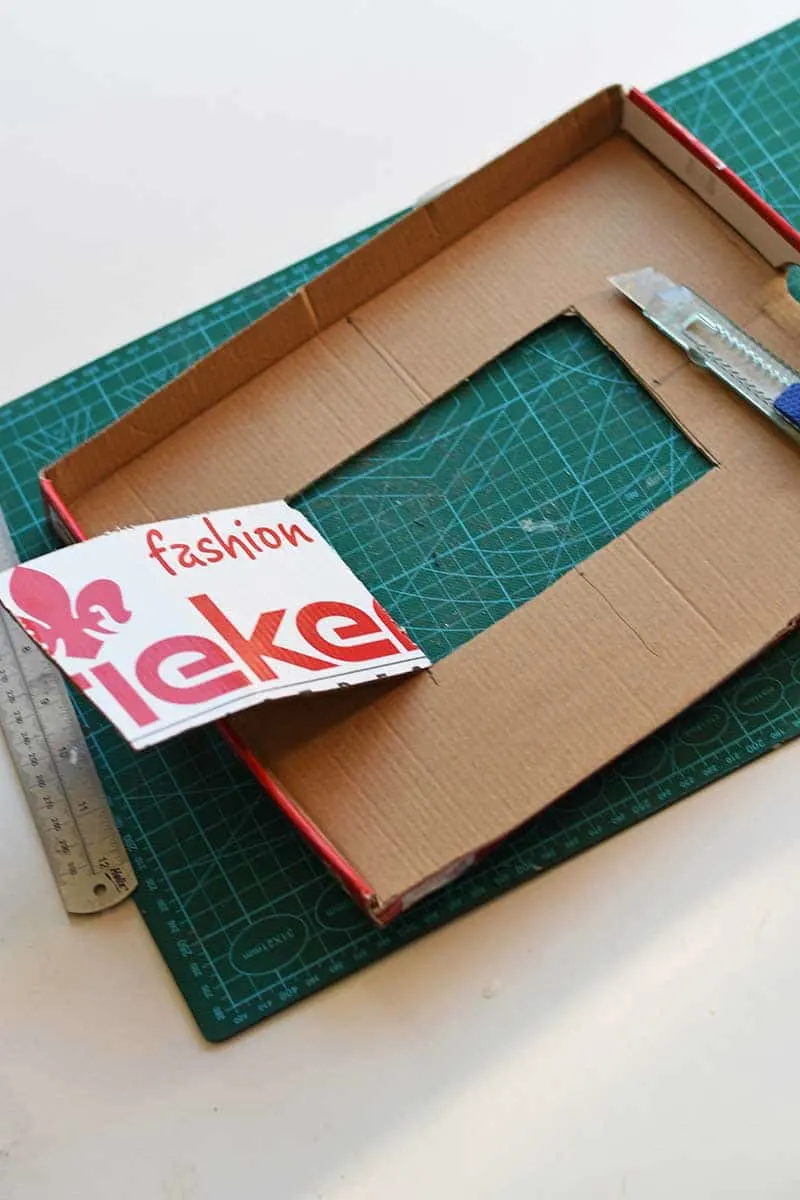
Step1: Using a ruler, work out where the centre of the shoebox lid is. Mark it with a pen. Then, using the centre as a guide, draw the size of the frame you want. My upcycled picture frame was for a 6″ by 4″ photo, so I drew a box this size.

Step 2: Next, using a box cutter knife, cut out the centre of the box lid.
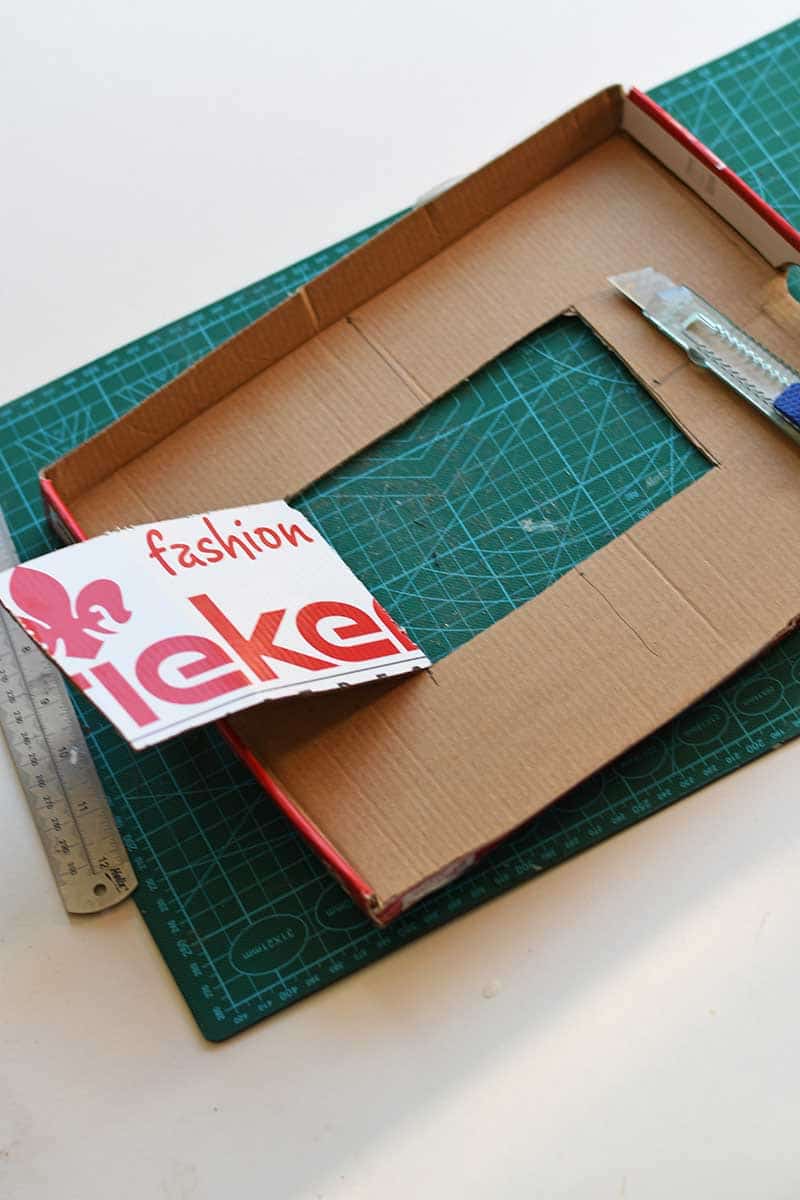
Step 3: Next, place the frame box lid onto the wallpaper sample and cut it to fit. You want enough wallpaper to cover the front of the box lid and the sides. Plus a bit of overhang to secure it to the back of the lid.
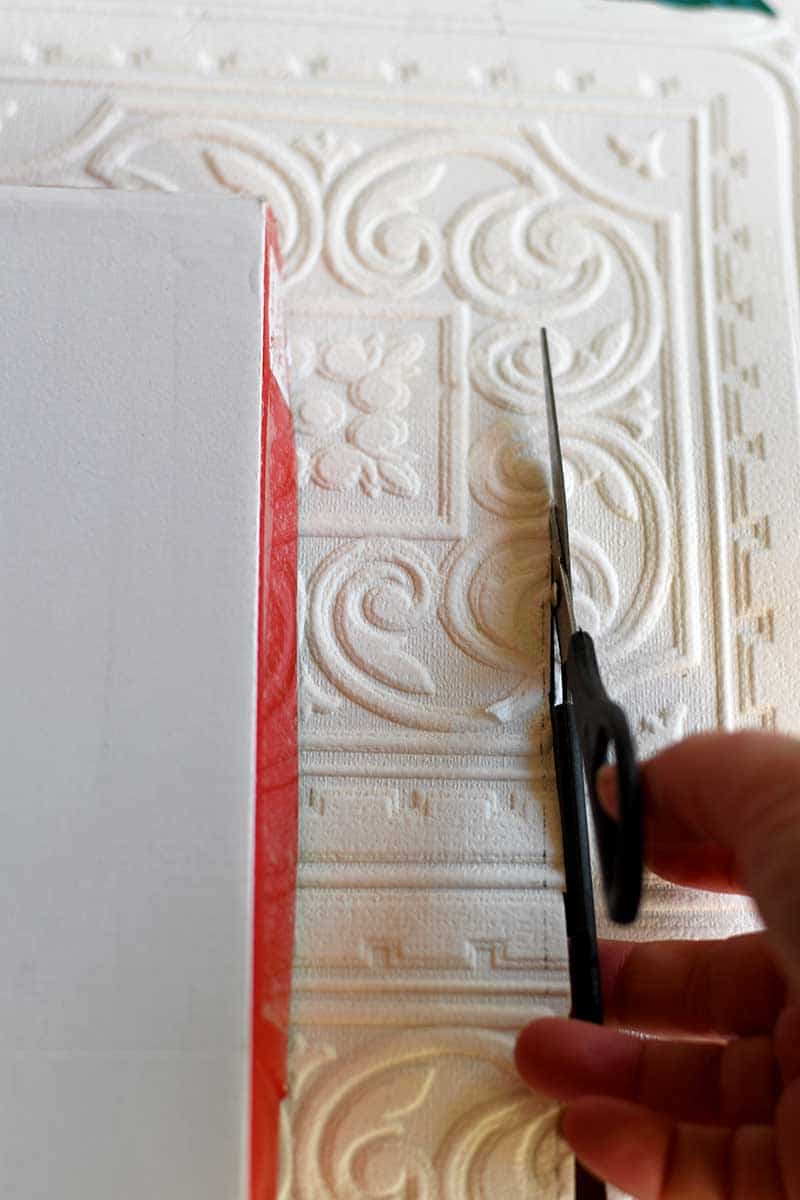

Step 4: Then, paste the front and sides of the box lid with glue. Wrap the wallpaper around the front of the lid. Then, secure it to the back with glue.
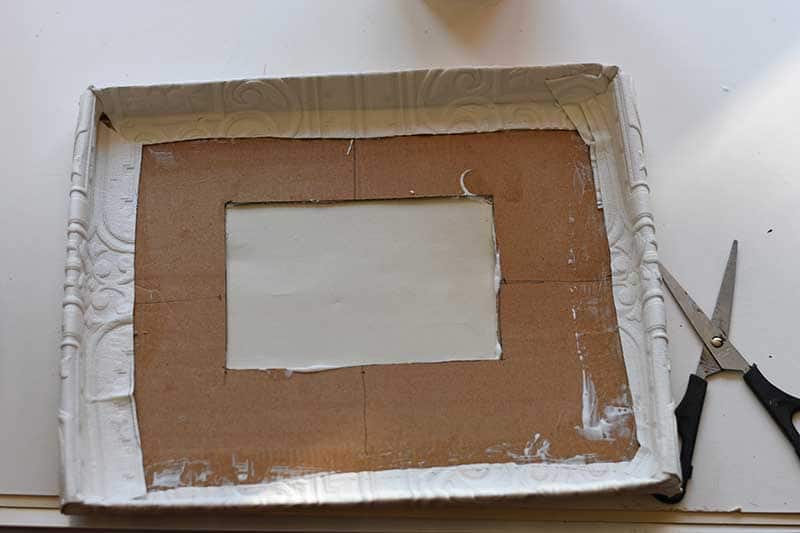

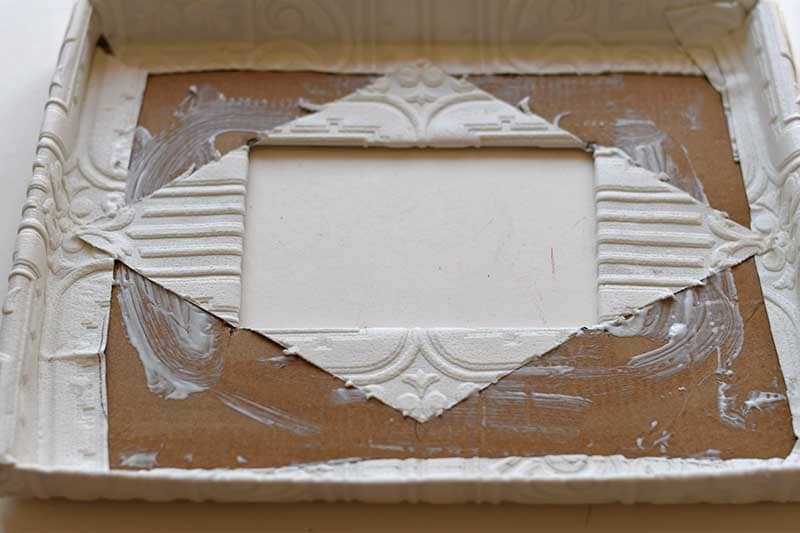
Step 4: Next, using a box cutter, cut the wallpaper in the hole along the diagonal. Cut from the top left corner to the bottom right corner. And then again, from the bottom left corner to the top right corner.


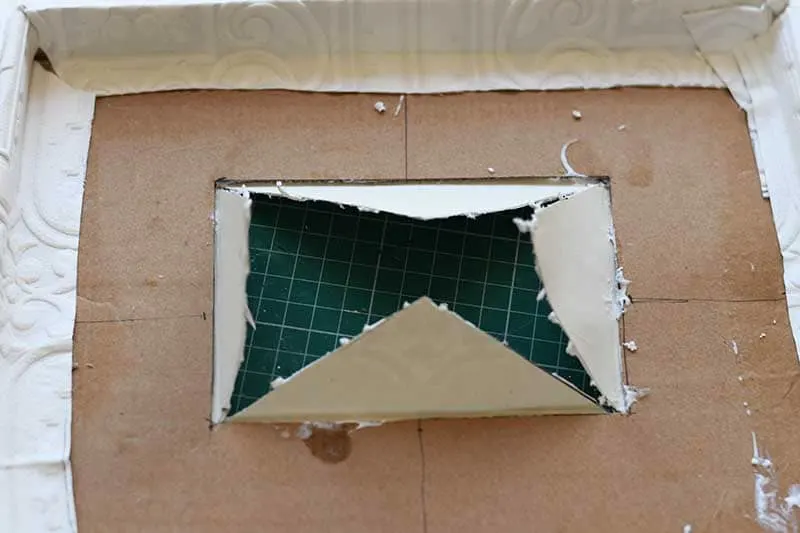
Step 5: Next, fold back the triangle wallpaper flaps. Then, glue them to the box lid.

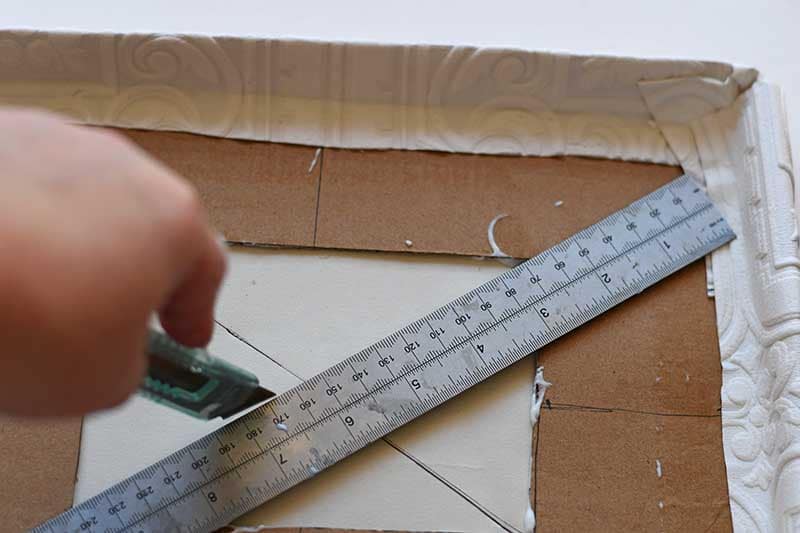
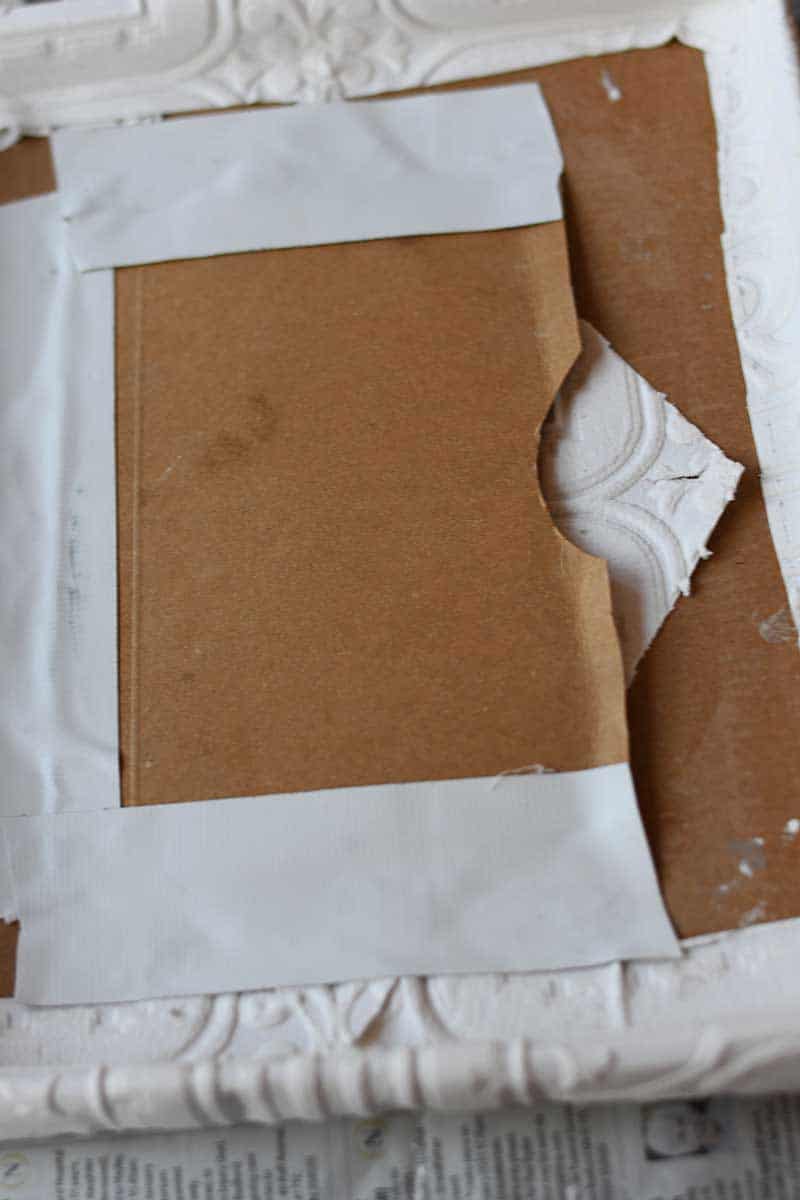
Step 6: Next, to hold your pictures in place, make an envelope pouch for the back. To do this cut a piece of card slightly larger than the picture frame hole. Then tape this card on three sides over the back of the hole. The photo can then easily just slip in and out of the pouch.
If you cut a small semi-circle at the top of the card backing, this will make it easier to remove the photo, when you fancy a change.
Decortating the Photo Frame
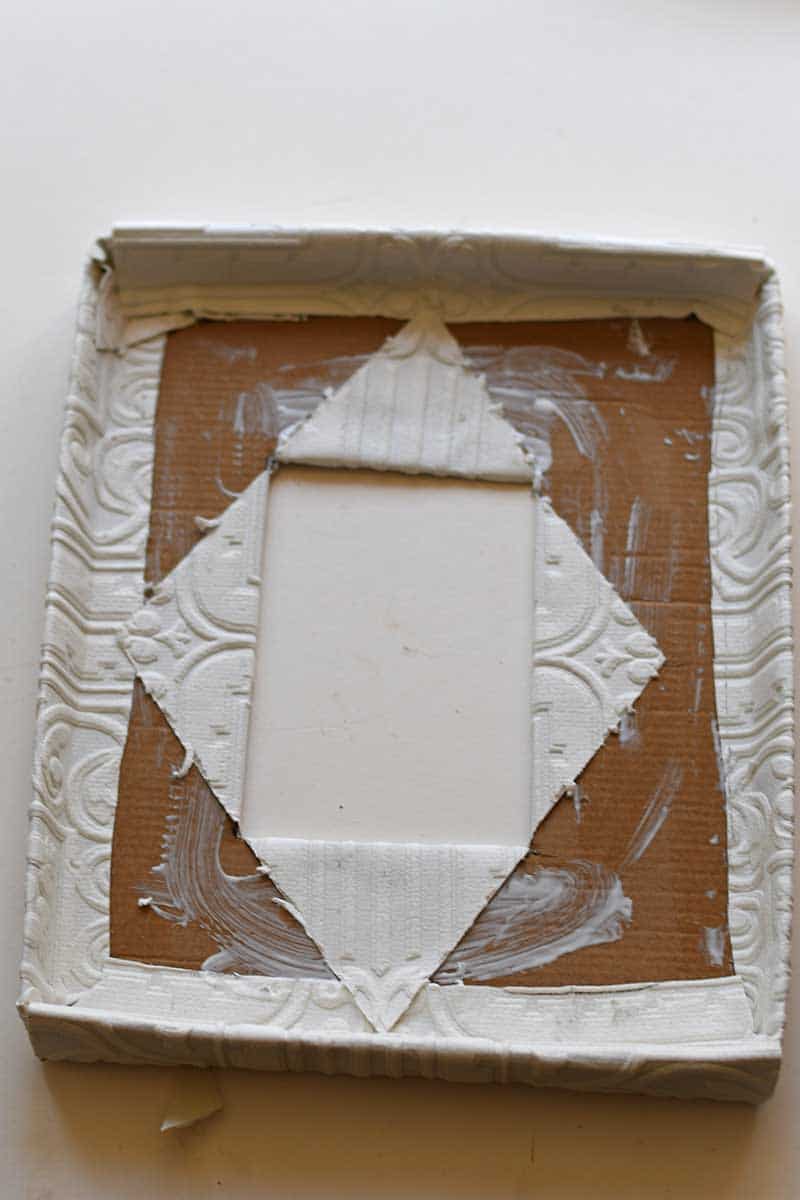
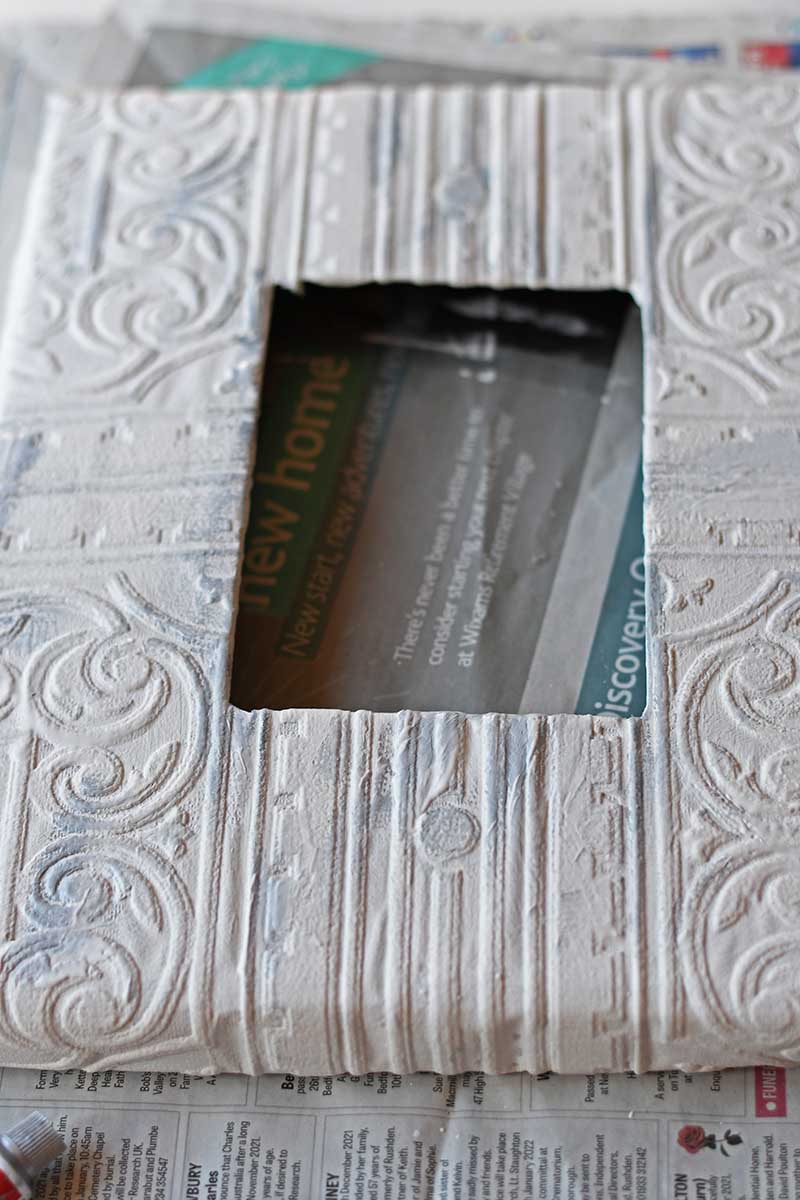
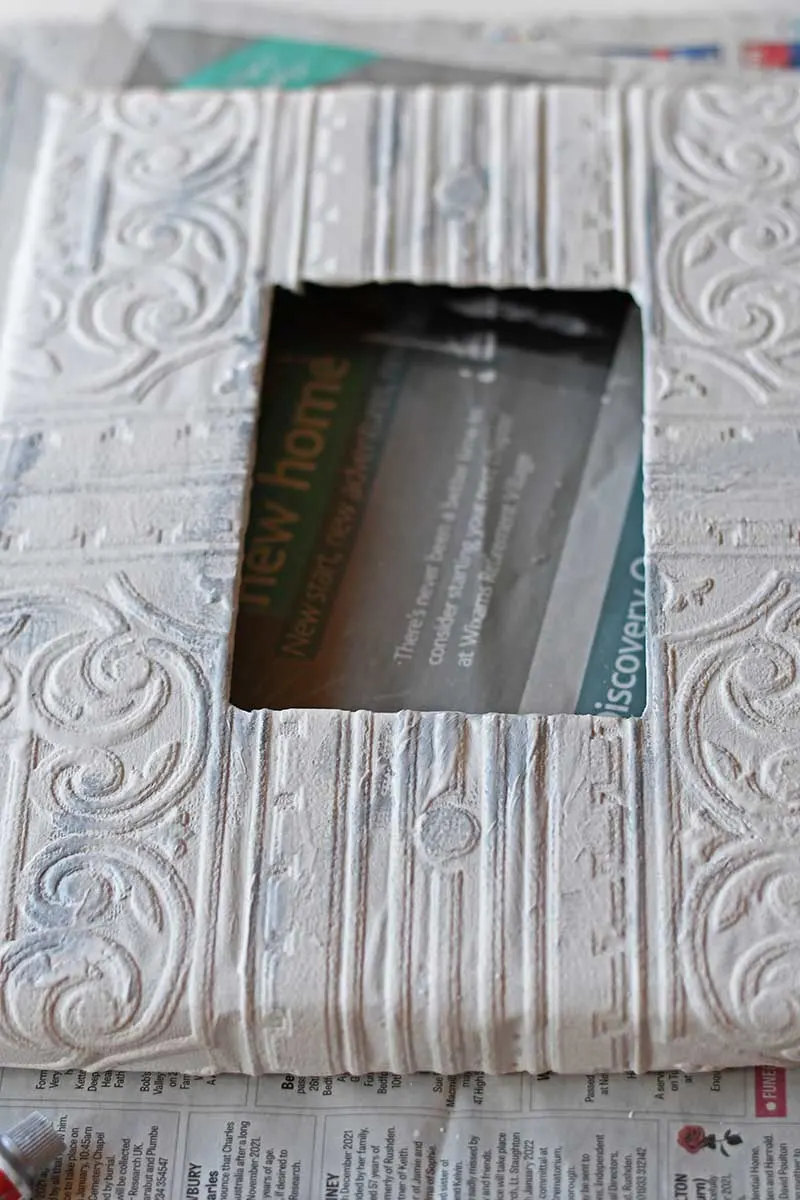
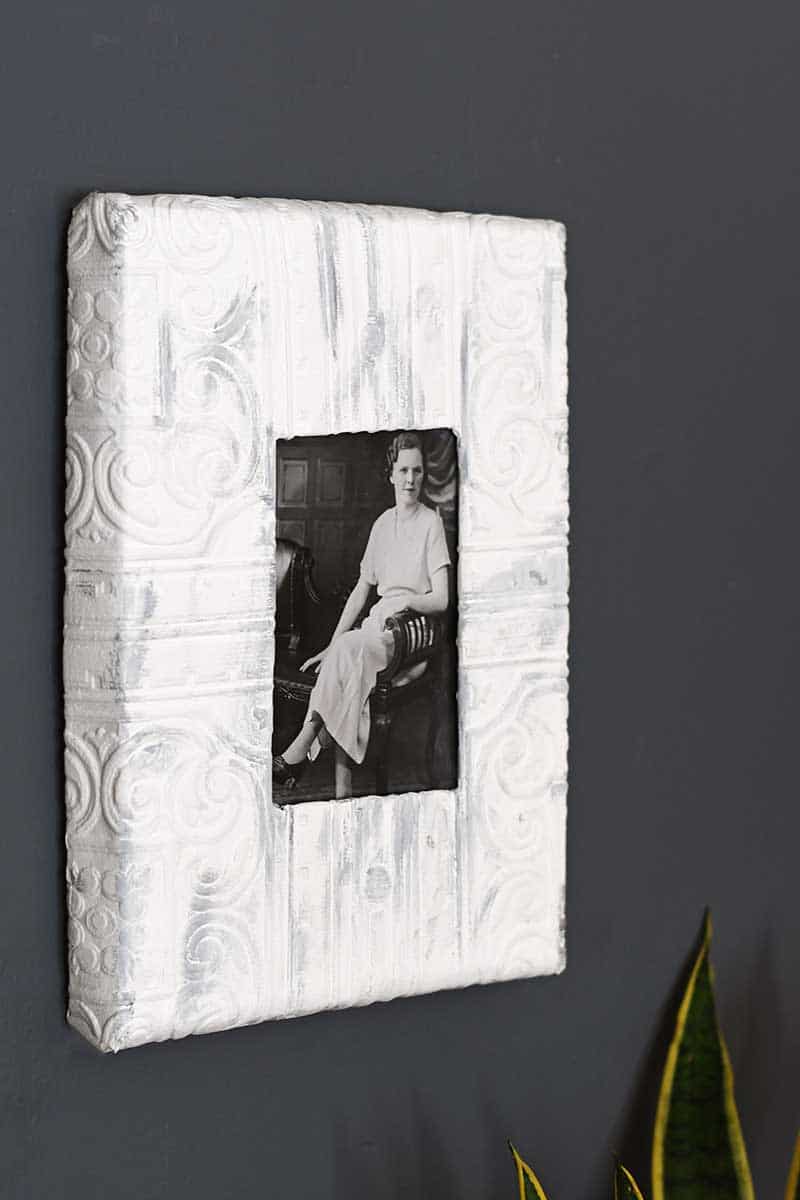
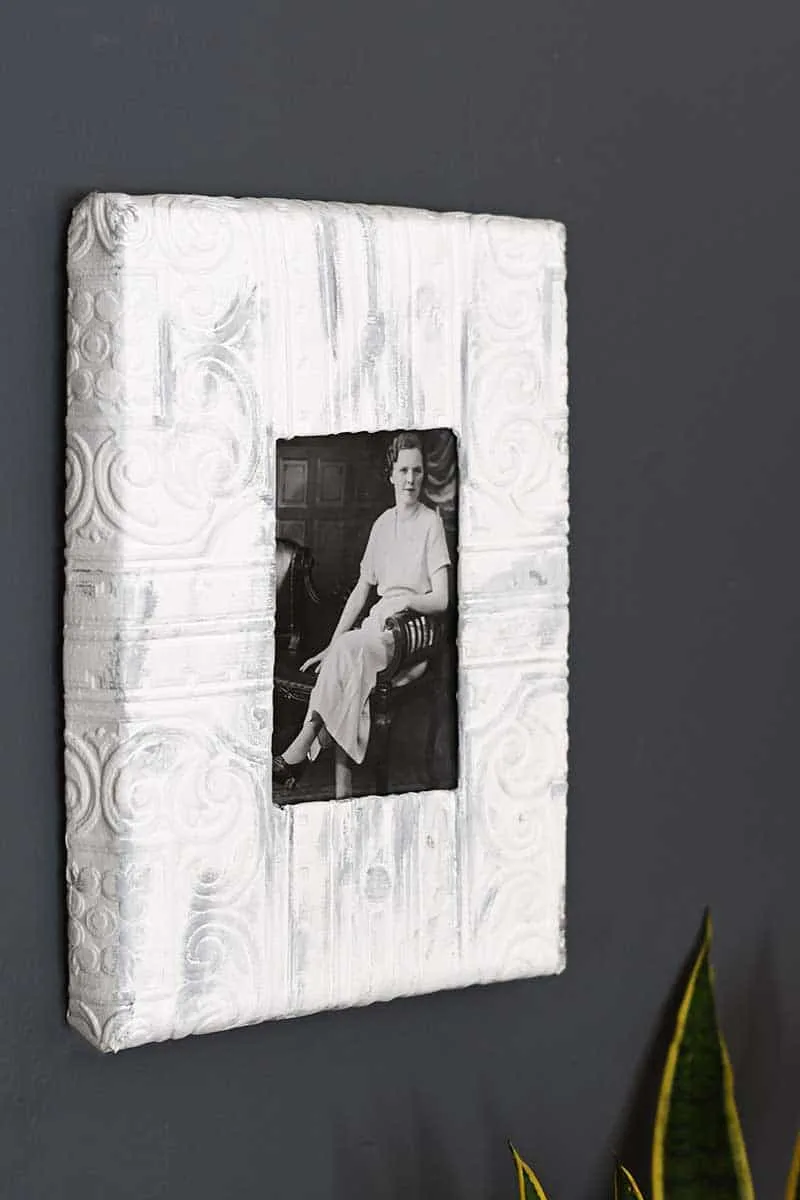
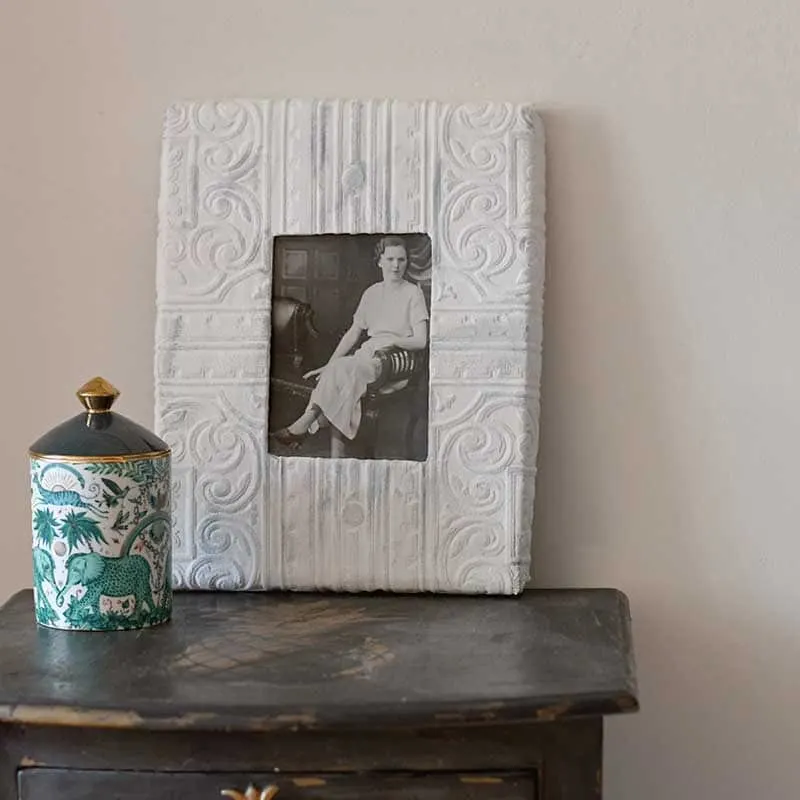
Step 7: I wanted to give the handmade photo frame an aged look. To do this, I first painted the wallpaper with chalk paint, to give it a nice matte finish. I then rubbed a small amount of silver Rub N Buff on some of the raised edges.
All that is left to do is to slip a picture or photo in the back and to hang the DIY picture frame on the wall. One of the advantages of using a shoebox lid to make the picture frame is that it’s very light. You only need the smallest of picture hooks or nails to hang the frame from.
The photo frame can also be displayed on a mantle or console table. By simply propping it up, either with a DIY stand or just simply lent against a wall.
The combination of the 3D effect of the textured wallpaper and the paint finish gives the frame the look of an old tin tile.

You should check out some of my other ideas for DIY and upcycled picture frames. Such as these cool denim photo frames or this fun changeable Lego Minifigure frame. I’ve even made printed map picture frames using old pallets. And there is a tutorial for a cool chalkboard picture display frame.
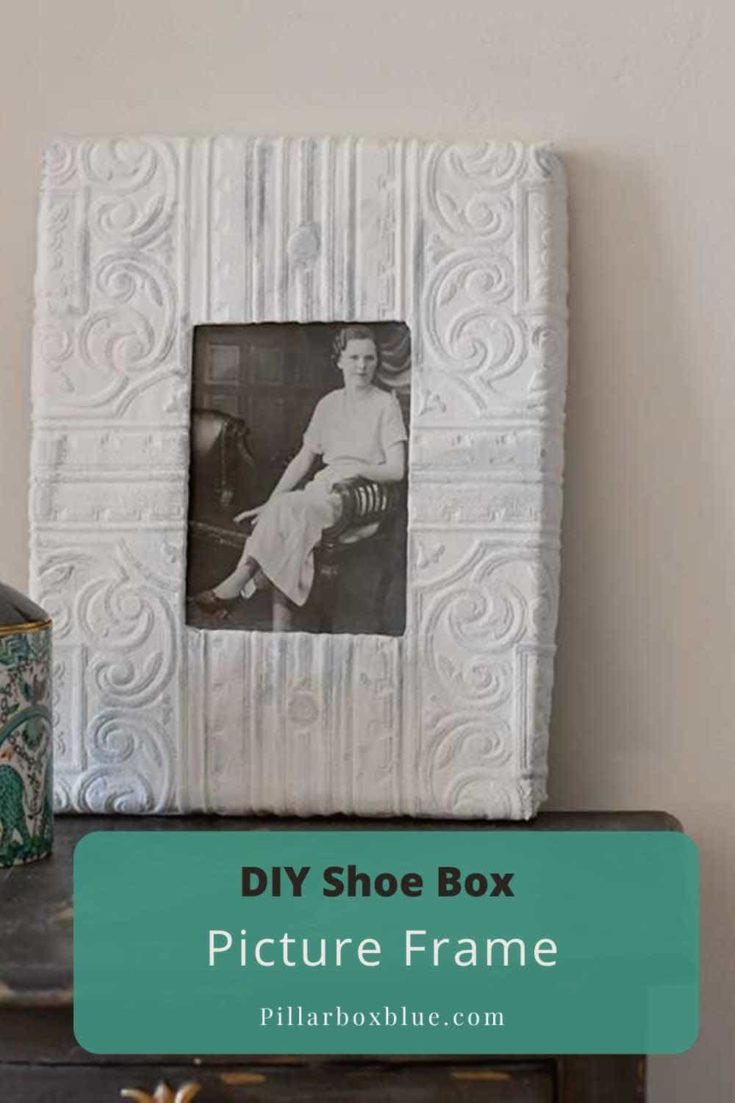
Upcycled Shoebox Lid Picture Frame
This is a very simple and affordable tutorial on how to repurpose an old shoebox lid into a stunning picture frame for either your wall or mantle.
Materials
- Shoebox lid or the equivalent. Any size that you want, the bigger the box the bigger the upcycled picture frame.
- Textured wallpaper sample - pick this up from your local hardware/DIY store
- Glue
- White chalk paint and silver Rub N Buff
Tools
- Box cutter knife
- Pen and ruler
Instructions
- On the inside of the shoebox lid, mark out the picture frame hole. Make sure it is in the centre of the box lid.
- Next, using a box cutter knife cut out this picture frame hole.
- Then, cut a sample of wallpaper large enough to cover the top of the box lid and the sides and a little bit more.
- Paste the top of the box lid and sides with glue. Then cover it with the textured wallpaper.
- Next, cut the wallpaper covering the hole across the diagonal. Bend back these wallpaper flaps and glue them to the inside of the shoebox lid.

- Add a cardboard pouch to slot the photos/pictures into the back of the frame. Tape it on three sides to the box and leave one side open for slotting pictures in and out.
- Finally, paint the front of the upcycled picture frame with white chalk paint. Use small dabs of silver Rub N Buff to give the frame and aged look.
Niki - Life as a LEO Wife
Thursday 27th of January 2022
I love this! Thanks for coming by to share on Crafty Creators! XOXO, Niki
Claire Armstrong
Friday 28th of January 2022
Thank you so much.
Pam
Wednesday 26th of January 2022
Wow, this is amazing. I love how it turned out. I'll be featuring it tomorrow at Thursday Favorite Things. Congrats!
Claire Armstrong
Wednesday 26th of January 2022
Thank you so much, that is awesome I look forward to seeing it.
Donna @ Modern on Monticello
Wednesday 26th of January 2022
Clever idea and a great way to upcycle the box. Thanks for sharing such a creative project. #HomeMattersParty
Claire Armstrong
Wednesday 26th of January 2022
Thank you so much.
Cecilia
Sunday 23rd of January 2022
Great upcycle, Claire--I would never know it was a shoe box lid! Thanks for sharing at Vintage Charm--pinned!
Claire Armstrong
Monday 24th of January 2022
Thank you, that was the aim not to make it look like a shoebox lid ????
Niki - Life as a LEO Wife
Saturday 22nd of January 2022
This is beautiful! I have a ton of boxes from Christmas, and I'm definitely going to give this a try! I found you over on Ducks 'n a Row's link party. I'd love for you to come share on my brand-new link party (in its second week) called Crafty Creators on LifeasaLEOWife.com. It's open Thursdays at 6am CST thru Mondays at 11:59pm. You can share 5 posts, no rigid rules. I think my readers would love this. I have another link party that's been open for years that you can share on as well, Happiness is Homemade, while you're there. Hope to see you. By the way, I love your blue wall paint. Gorgeous! XOXO, Niki ~ Life as a LEO Wife
Claire Armstrong
Monday 24th of January 2022
Thank you so much and think you for the invite to your link party.