
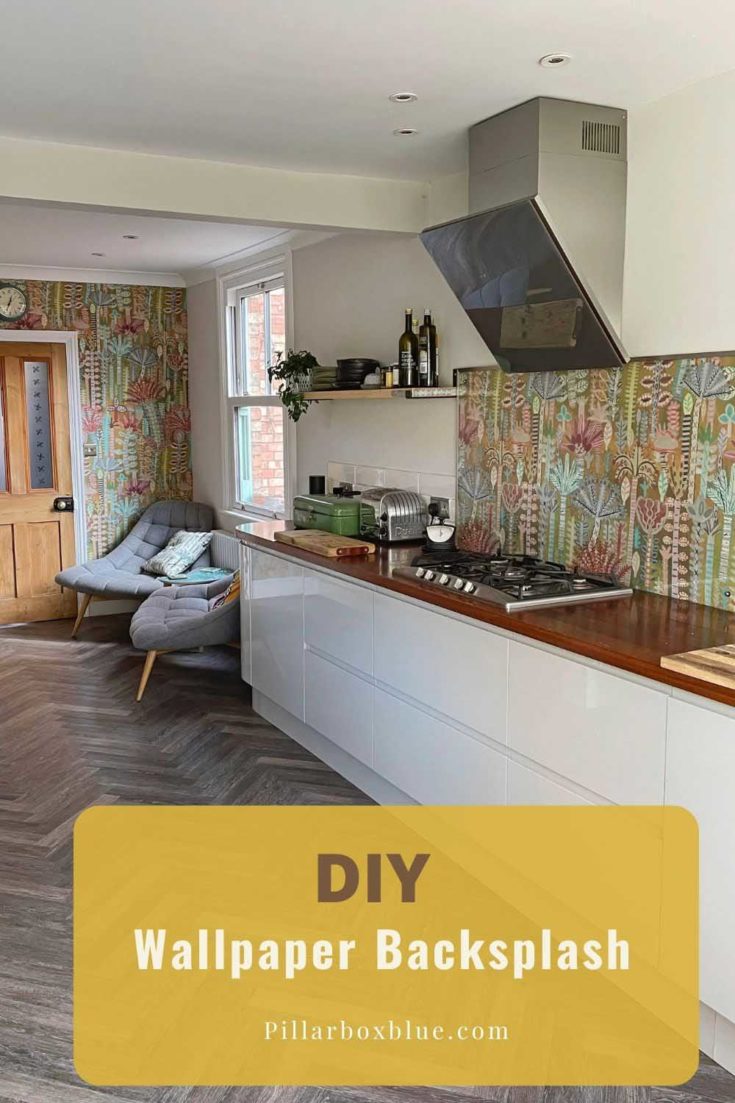
How To Make a Kitchen Wallpaper Backsplash (Splashback)
The original tutorial for this original DIY kitchen wallpaper backsplash has been updated. The instructions for installing a washable wallpaper backsplash are the same, but since the original post, we have updated the backsplash with new wallpaper.
At the end of the DIY, you will see not only how easy this washable backsplash is to install, but also how easy it is to change it when you fancy a new design. There are examples of making waterproof wallpaper splashbacks in the bathroom, plus other wallpaper decorating ideas for the home.
In the UK my friends say the word backsplash, the other way around, splashback. Having been bought up in 2 cultures, I'm happy using the word either way.
I know you can get washable vinyl wallpaper, which is sometimes used as a kitchen backsplash, but they are limited in designs. With this method, we use for making a wallpaper kitchen backsplash you can use any wallpaper. It doesn't have to be waterproof either.
DIY Kitchen Wallpaper Backsplash (splashback) with wallpaper
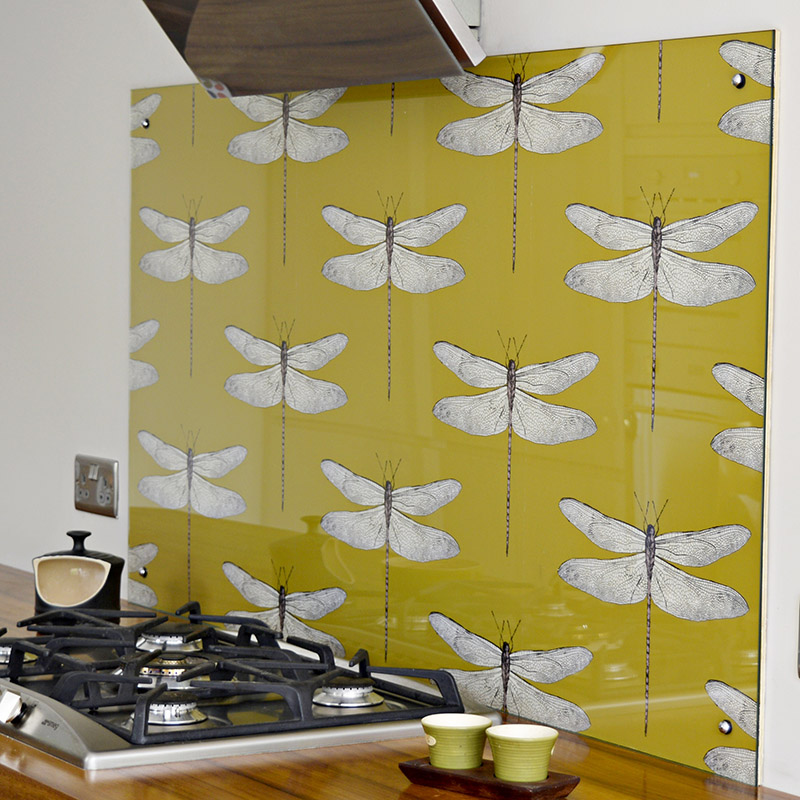
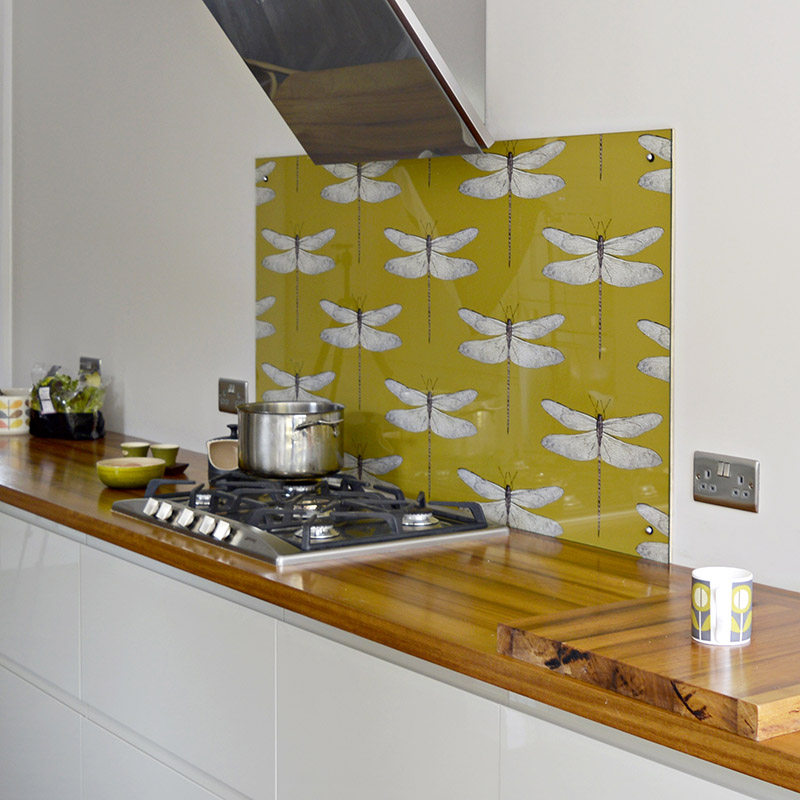
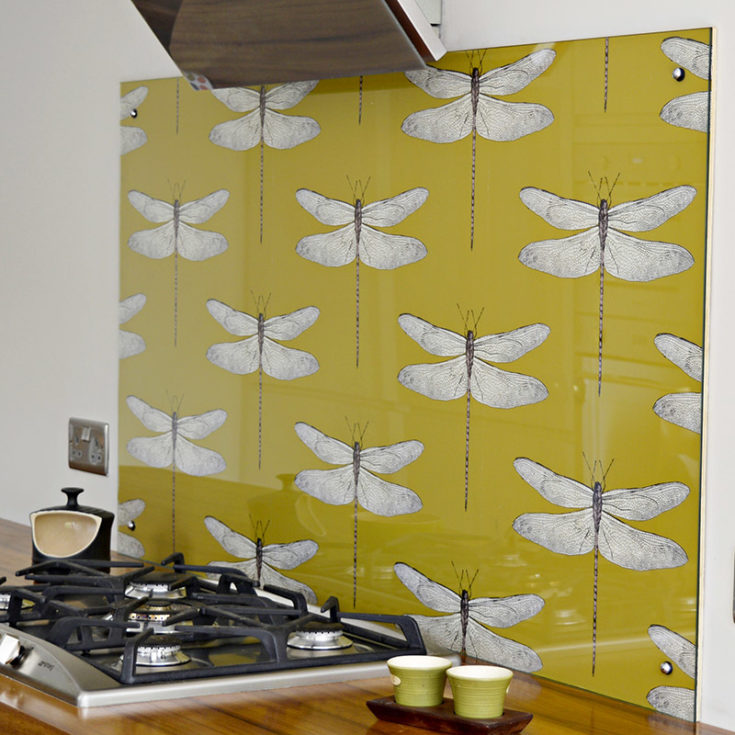
My friend had spotted some gorgeous Dragonfly wallpaper by Harlequin. Even though it wasn't a wallpaper specially designed for kitchens, she was determined to have it. That's when we worked out the best way to make a kitchen wallpaper splashback (backsplash).
The wallpaper is protected by a piece of glass and is screwed to the wall. The really awesome thing about this DIY splashback is that it's really easy to unscrew the glass and change the wallpaper when you feel like something different.
You could even put something other than wallpaper behind the glass, such as a photo collage, or other images printed on paper. I'm a huge fan of decorating and crafting with old maps, so I would be tempted to use an old map for my kitchen backsplash. However, I can see myself getting distracted by the map, instead of concentrating on my cooking.
We're a participant in the Amazon Services LLC Associates Program, an affiliate advertising program designed to provide a means for us to earn fees by linking to Amazon.com and affiliated sites. As an Amazon Associate, I earn from qualifying purchases.
What you need
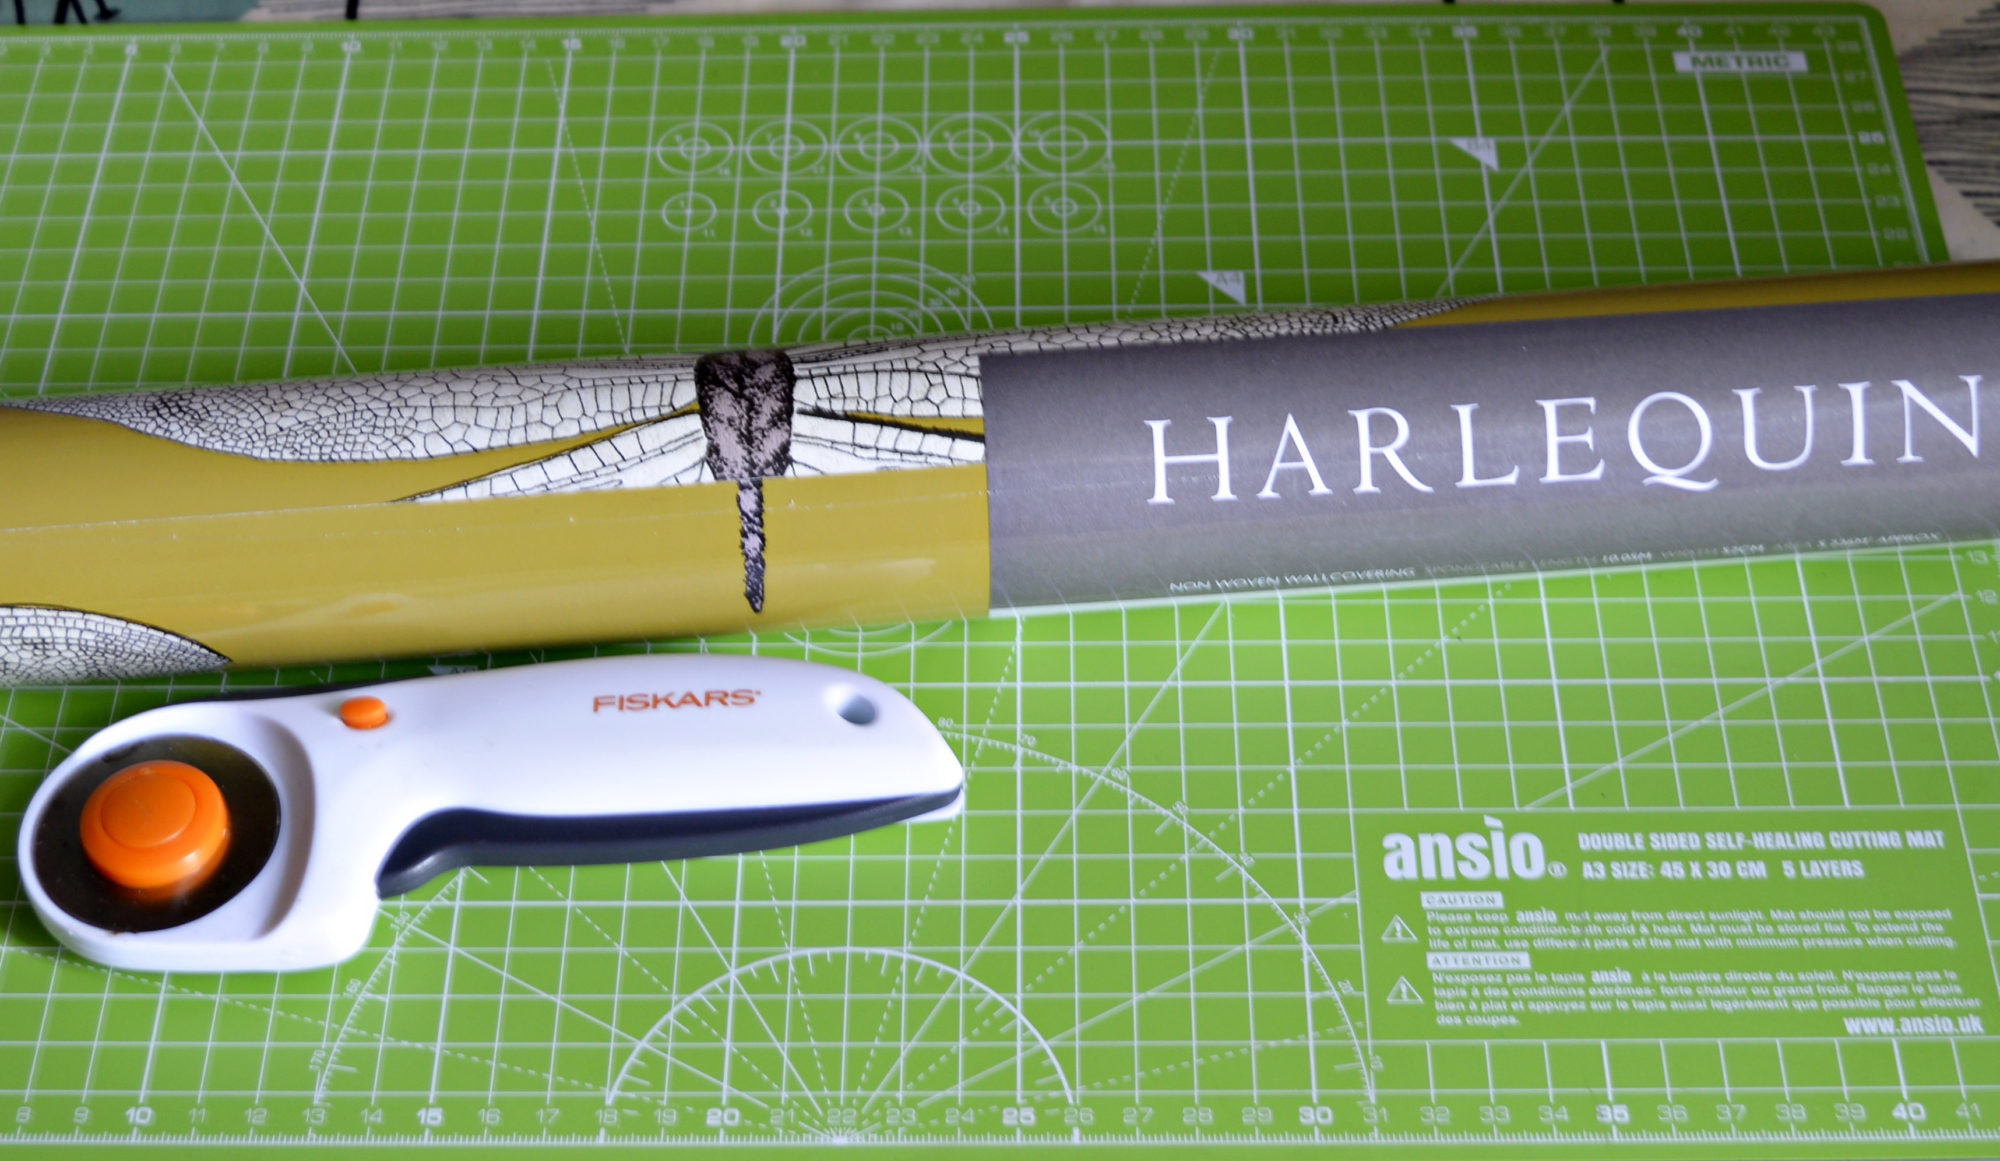
- Wallpaper - Depending on the size of your kitchen splashback (backsplash) and how your wallpaper pattern fits will determine how much wallpaper you use. Usually, you would need no more than a quarter roll. The wallpaper we used was a Harlequin Wallpaper, Palmetto Demoiselle, which comes in several different colorways, eBay is a great place to look for odd or even part rolls of wallpaper.
- Wallpaper paste/adhesive - I recommend using a wallpaper paste that has anti-fungal properties. You can buy an anti-fungal agent to add the adhesive. This will help stop the wallpaper from going moldy with any kitchen condensation.
- Rotary cutter and mat
- Plywood base - This will need to be the size of your DIY splashback. We used a 5.5mm hardwood ply.
- Glass - This again will be the size of your kitchen backsplash. We used a 4mm toughened low iron glass which we got cut to size at the store. We also had 4 screw holes drilled into each corner of the glass at the store. Make sure the glass is heatproof safety glass.
- Domed mirror screws - 4, one for each corner.
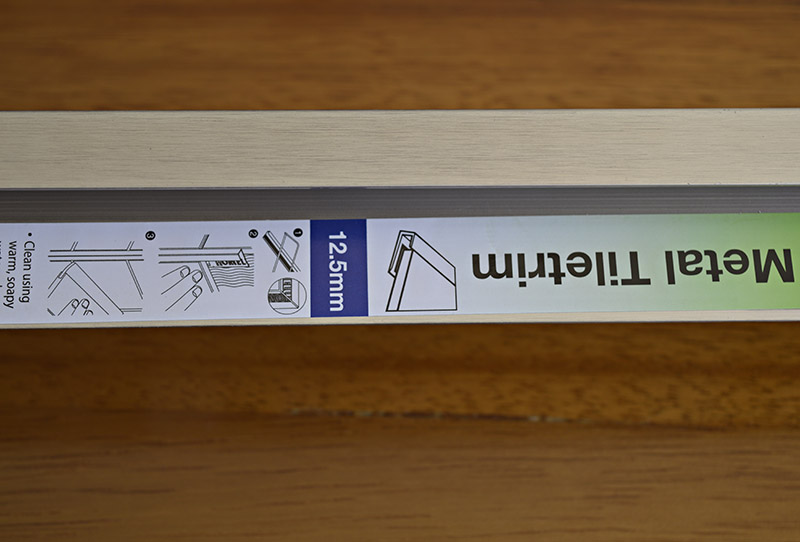
- Tile trim - The size of the trim depends on the thickness of the backsplash. We used a 12mm wrap round trim in chrome. You don't have to have a trim, it's mainly about aesthetics. This can be purchased from your local tiling store.
How to make your DIY Splashback
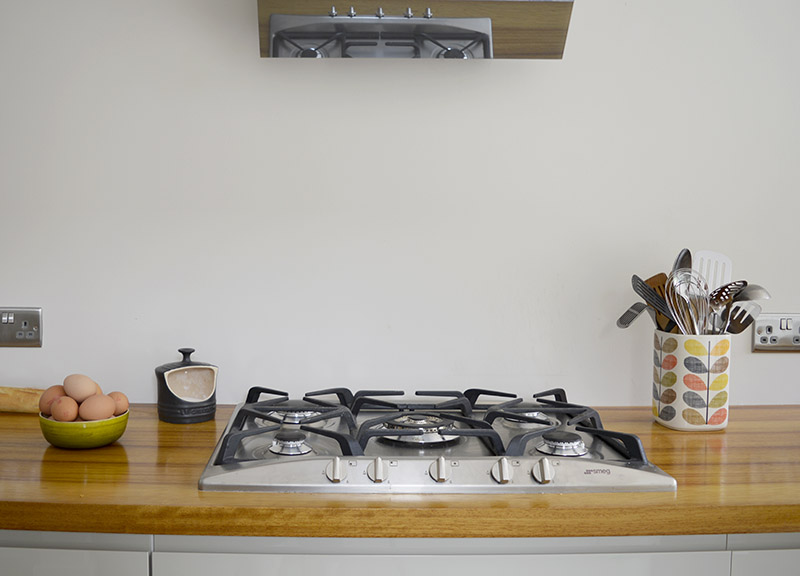
Step1: First, carefully measure the exact area of where you would like the kitchen backsplash to be. Ours was a square just above the cooker hob.
We were installing the wallpapered backsplash on a newly fitted kitchen with a freshly plastered and painted blank wall.
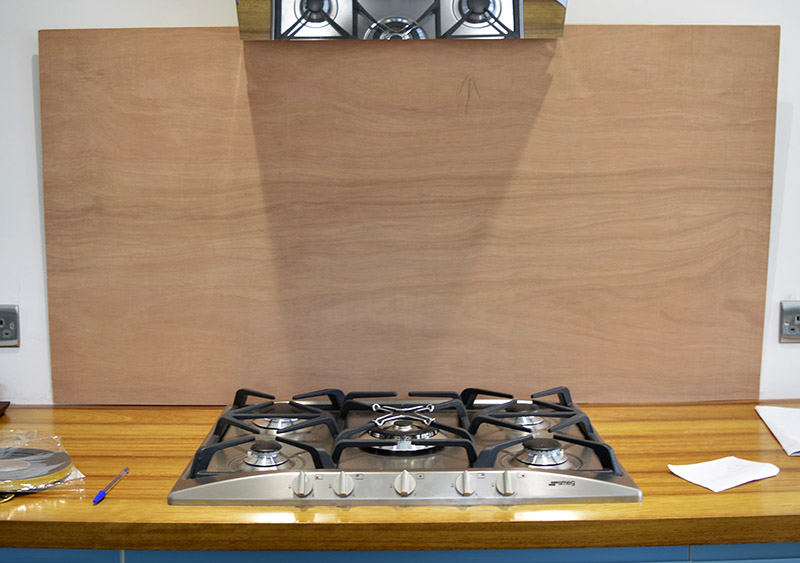
Step 2. Take these measurements to your local DIY/Home store and get the plywood and glass cut to the size. At the same time get them to drill the screw holes into the corner of the glass.
Step 3. Next, carefully think about how your wallpaper pattern design will fit on the backsplash before cutting it to the measurements. With the dragonfly wallpaper design, we wanted whole dragonflies in the middle of the backsplash. Therefore, we ended up with one wallpaper roll width in the middle and two-part widths on either side.
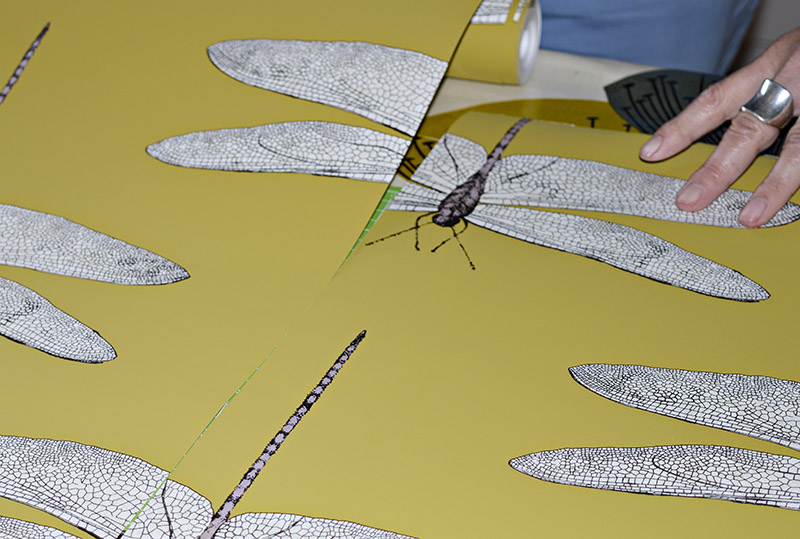
Step 4. Next, to make sure that the wallpaper will stick firmly, key your plywood. Do this by coating the cut plywood with a layer of wallpaper paste and leaving it to dry.
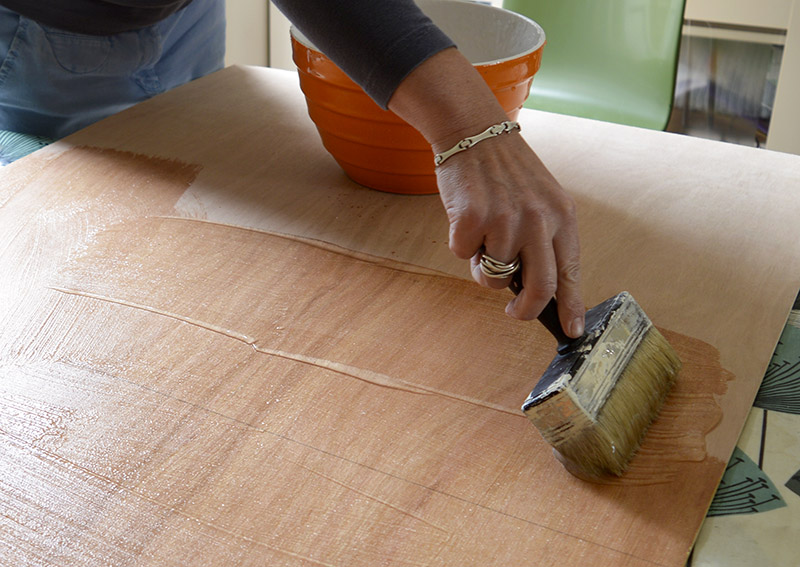
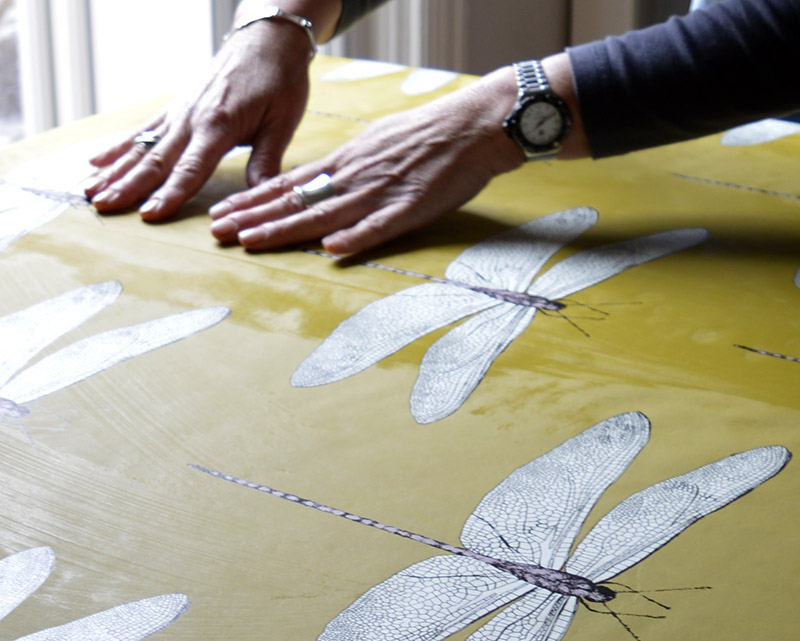
Step 5. Once the key has dried, paste the board again with wallpaper paste. Then stick the wallpaper sheets down one at a time. Make sure the pattern lines up properly. Use a wallpaper roller to squeeze out any air bubbles. Leave the wallpaper to dry thoroughly.
Attaching the backsplash to the wall and making it waterproof
Step 6. Next, comes the tricky bit of attaching the plywood and glass to the wall. You will probably need more than one pair of hands for this stage. Attach the plywood and glass to the wall at the same time using the same mirror screws.
Measure where the screw holes will need to be in the wall and then drill the holes and add the appropriate wall plug. Do the same with the wallpapered plywood.
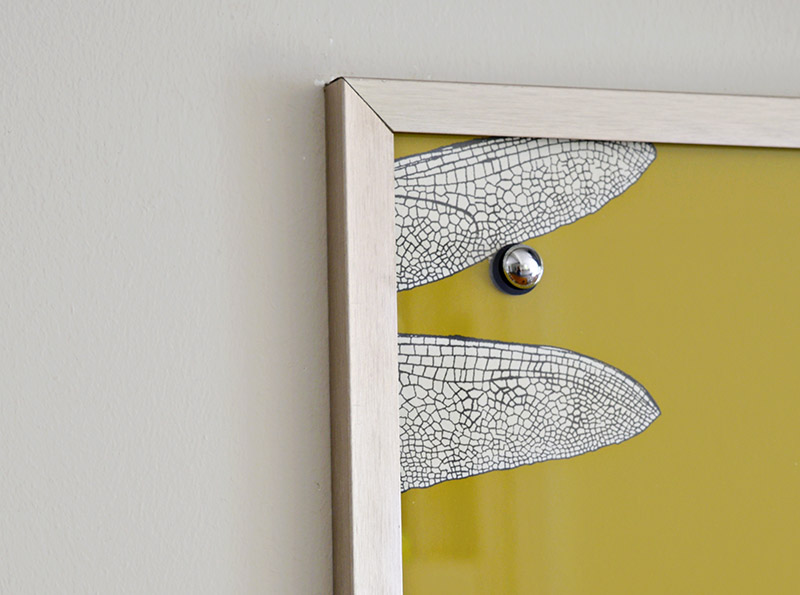
The mirror screws go through the glass and wallpapered plywood and then into the wall at the back. Use a chrome dome cap to finish off the screws.
We used a low iron toughened glass for this splashback, because if it's not low iron the glass can have a green hue to it.
Step 7. Finally, the wallpapered kitchen backsplash has a raw edge, to neaten this up we fitted a chrome tile trim.
How To Change The Wallpaper
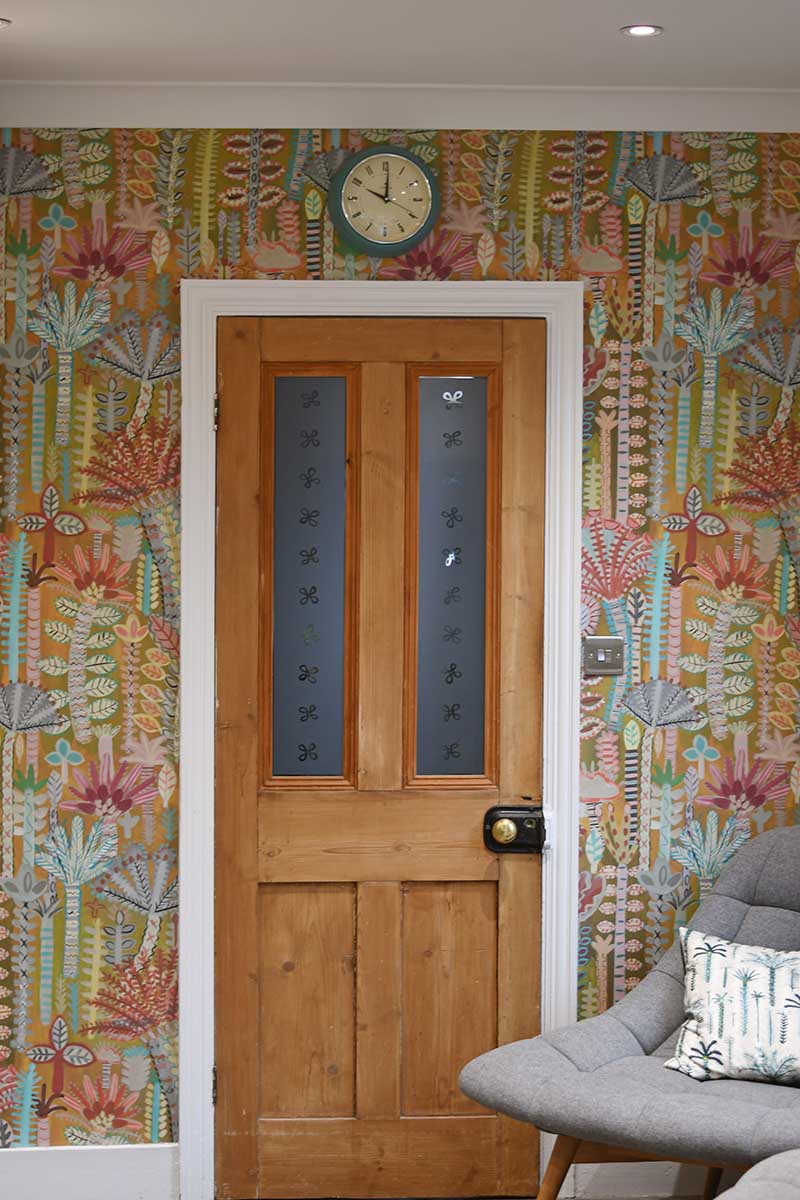
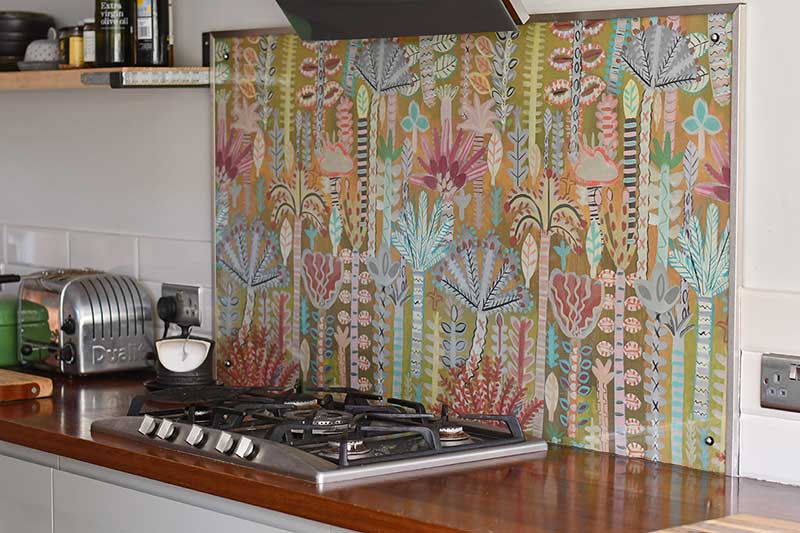
After six years of the dragonfly wallpaper as a backsplash, it was time for a change. The back wall in the kitchen had been wallpapered with a Lucy Tiffney wallpaper and my friend Wendy wanted the backsplash to match.
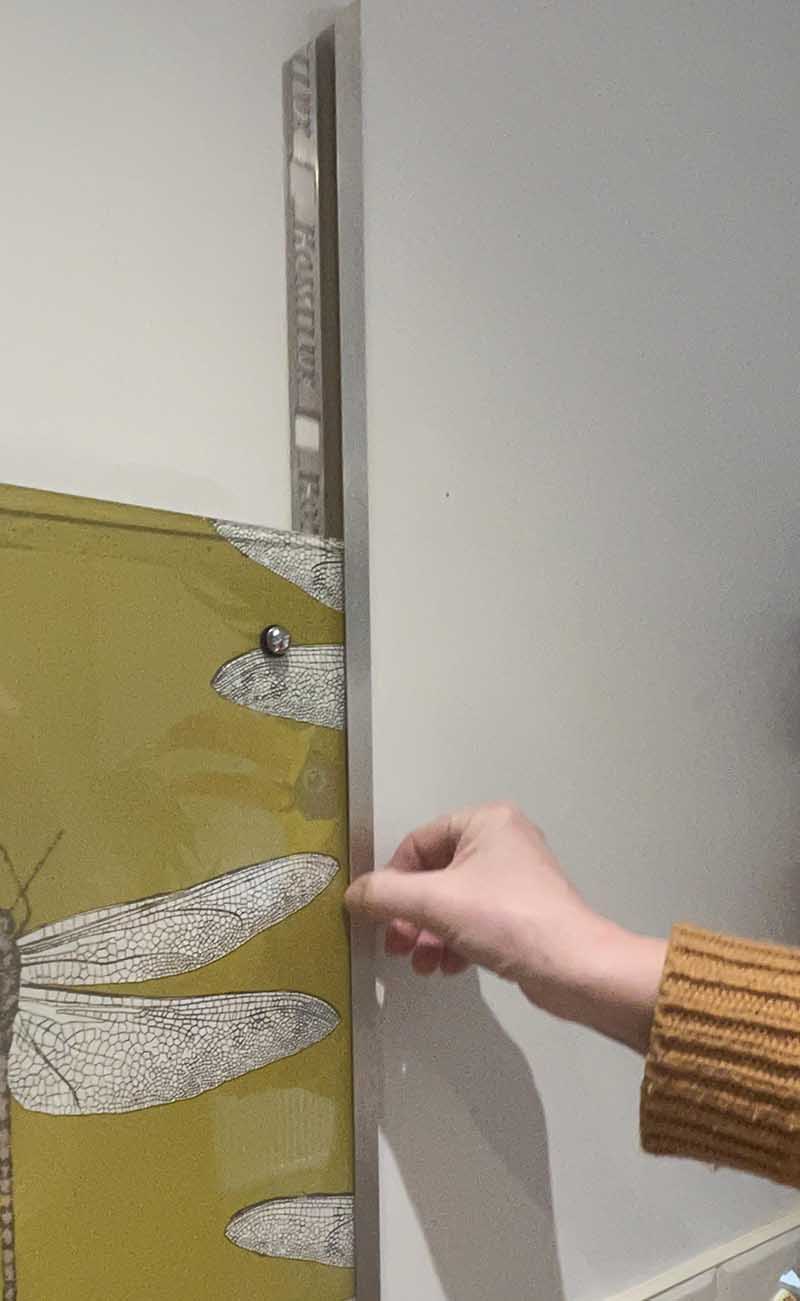
Step 1: The first thing to do was to remove the old backsplash. This only took about 10 minutes. First, the chrome trim was removed from the edges of the glass. They just simply slid out. Next, the four screws were removed from the glass and the glass plate lifted away.
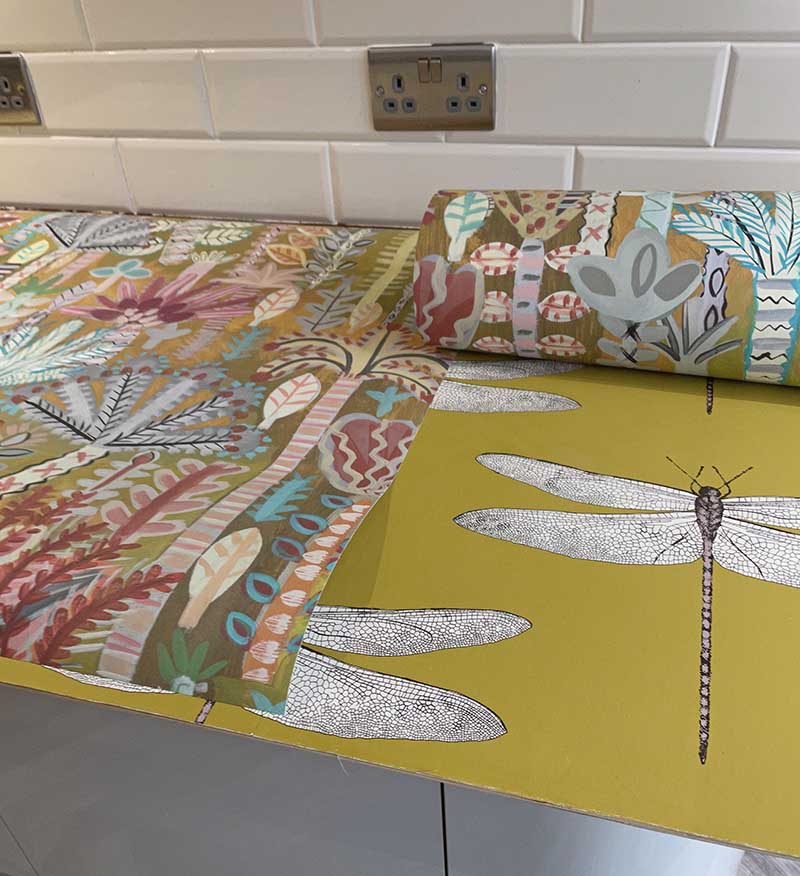
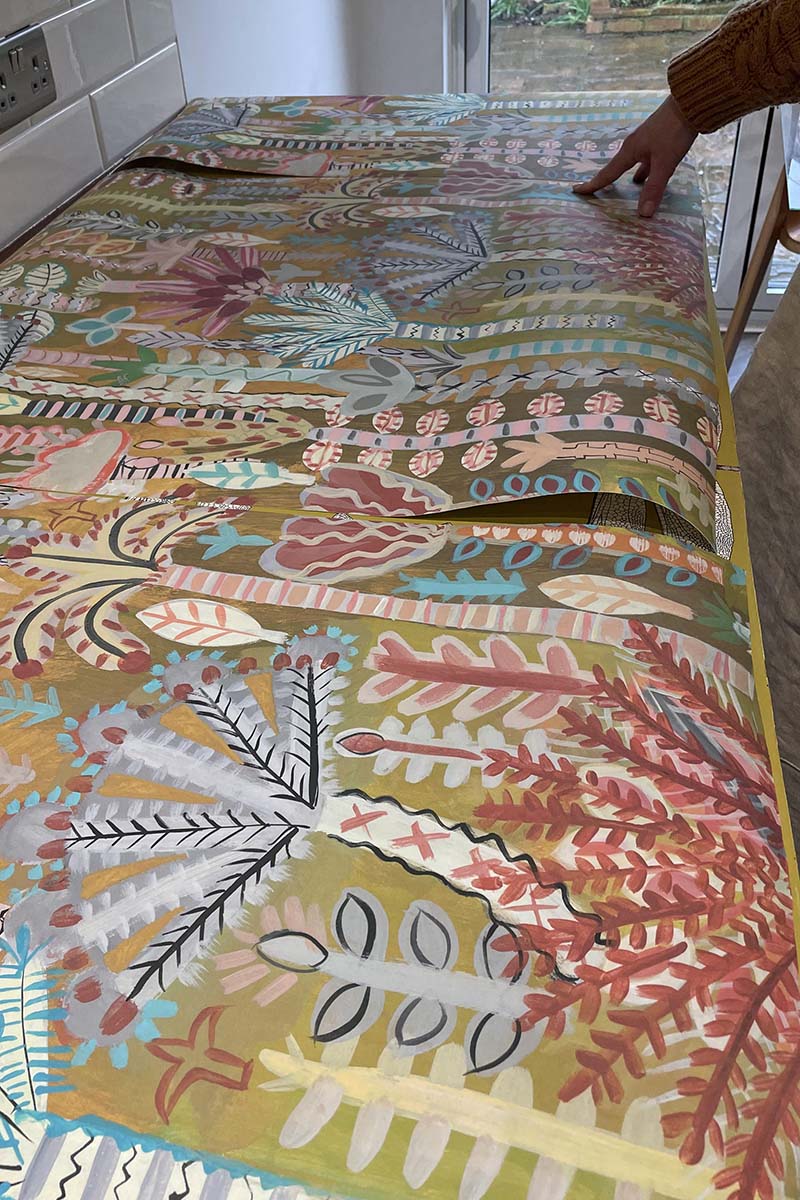
Step 2: The plywood back with the dragonfly wallpaper was laid down on the counter. We didn't bother removing the old wallpaper but just stuck the new design on top of the old. As with the original backsplash, we made sure the pattern matched up. We used the same adhesive and technique as above.
Step 3: Once the new wallpaper has dried, screw it all back into the wall with the same glass front as before. Then slide the chrome trim back into place. It's really that easy and takes less than an hour to change the wallpaper backsplash.
FAQs About This DIY and Kitchen
Why glass instead of plexiglass (plastic)?
Plexiglass scratches very easily, crazes and is much more difficult to clean well. Also, plexiglass will melt with the heat and collect grease. Glass is more heat-resistant and is easy enough to clean. The cost is about on par with the plexiglass. Make sure you use heatproof safety glass.
Do you have to have special heat resistant glass?
It was safety glass and a low iron glass to avoid a green tint.
Where did you get the glass and how much did it cost for a piece that large?
It was from a local builders merchant in the UK and cost about £100 ($140), which included the pre-drilled holes.
How has it held up to the heat from the stove?
The wallpaper has been up for almost five years now and it still looks as good as the day it was installed. The stove has seen a lot of heavy cooking in that time. The glass is actually very easy to keep clean and has protected the wallpaper well.
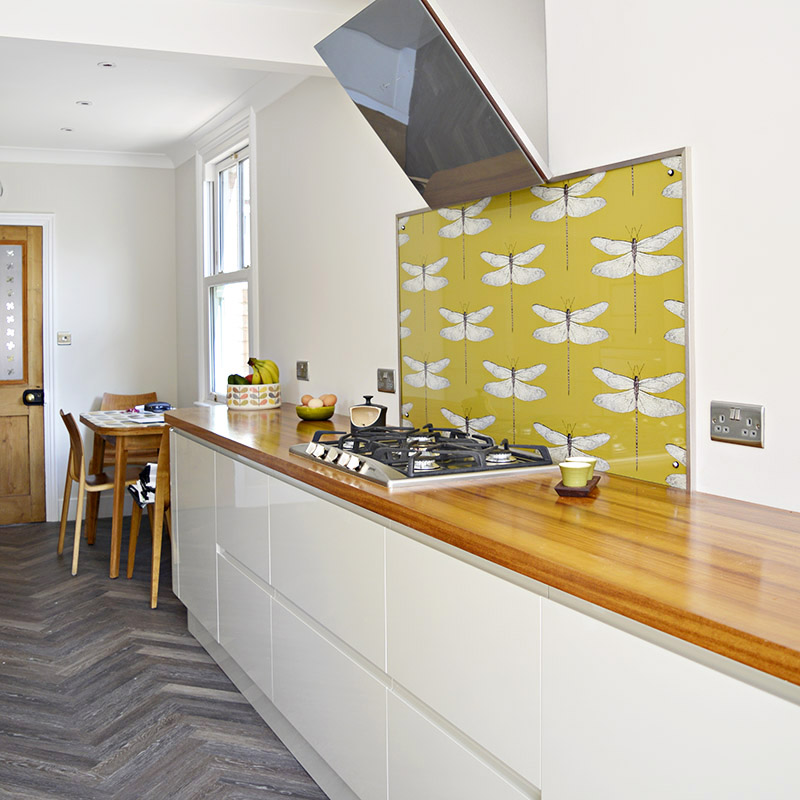
What do you have on the countertops?
They are oiled beechwood countertops.
Is that a TV/ Mirror above the cooker?
No, it is actually the cooker hood and extractor fan.
Where is your refrigerator?
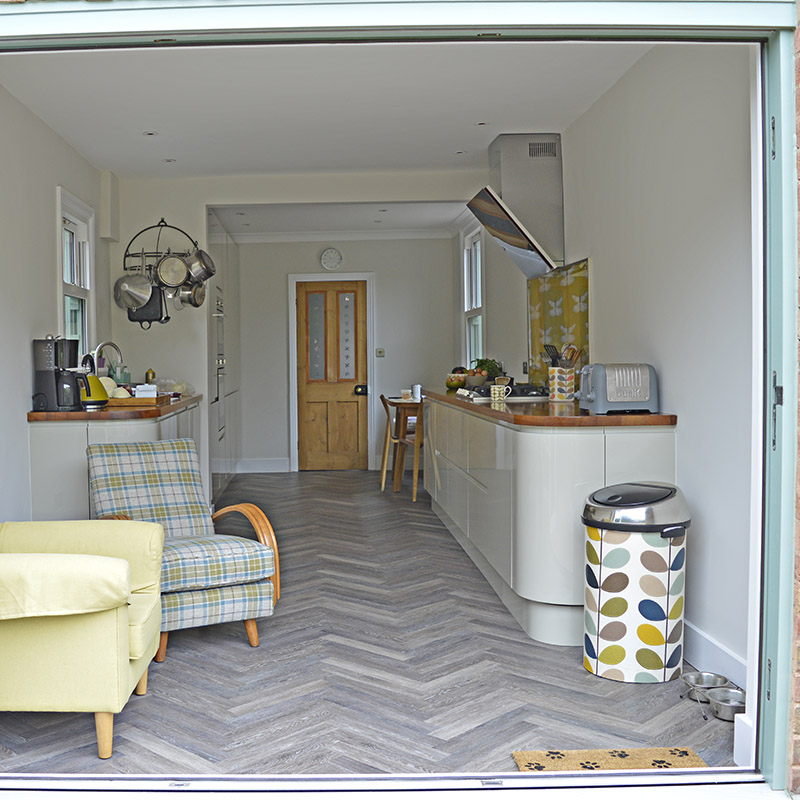
The fridge is integrated into the design of the kitchen. It is behind one of the cupboard doors, at the back of the kitchen.
Where's the apartment? Looks like a studio?
It's actually a Victorian terrace house and the view is looking in from the back yard.
I love the gas cooktop what is the brand?
It's a Smeg cooker hob I got it in the UK.
Would you tell us what your flooring is? Love the colour and the herringbone pattern?
It's a vinyl plank flooring from a company called Project Floors in the UK. The vinyl looks like wood, but it is more water and temperature-resistant. Which makes it better suited for kitchens and bathrooms than real wood.
Other Options
I think the wallpaper kitchen backsplash looks awesome in Wendy's kitchen. With so many fantastic wallpaper designs available, you will easily find something that would look amazing in your kitchen. I know that when I eventually get a new kitchen, I will have a DIY wallpaper splashback. I also love the fact that it's easy to change when you fancy something different.
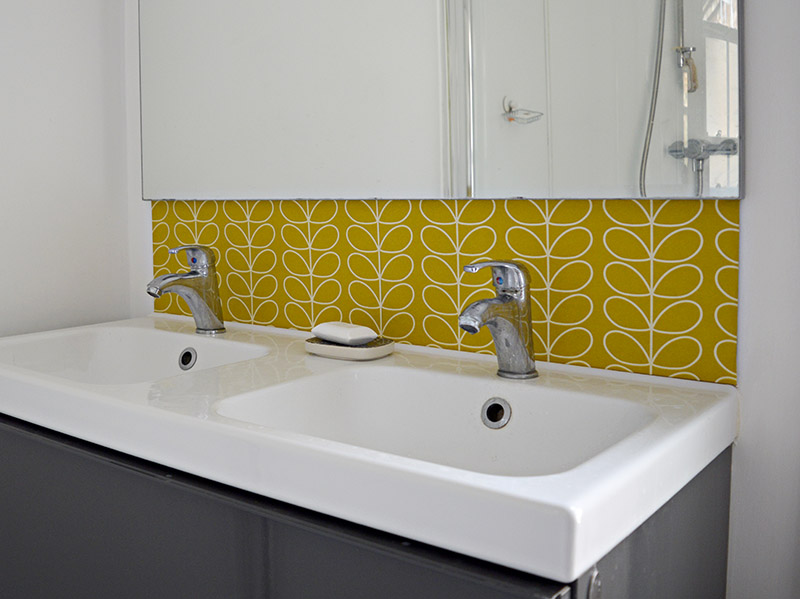
After the success of this DIY wallpaper splashback, we decided to add one to the bathroom. This one was above the bathroom sink. The wallpaper chosen for this design was a Mid-century modern design by Orla Kiely.
The kitchen bin in the picture above was upcycled with an Orla Kiely wallpaper. The tutorial for that bin upcycle and more brilliant wallpaper upcycles are here. There is a tutorial for the table decoupaged with wallpaper here.
I have used wallpaper in many more places around the home as well as the kitchen. I've even wallpapered my stairs with another Mid-Century modern design, this one by Marimekko. I've made many wallpapered lampshades to match the decor in my home and I have also updated mirrors with wallpaper.
Keep any wallpaper scraps leftover from this DIY, there are many things you can craft with them including making pretty paper vases.
For other practical kitchen DIYs check out my post on how to paint kitchen wooden countertops. Also, I how to make storage for the kitchen from a chair back and how to make a hanging indoor kitchen herb garden.
Finally, if you just got attracted to this DIY because of the dragonfly designs, then you might want to check out this free collection of vintage dragon drawings.
How To Make A Wallpaper Kitchen Backsplash (splashback)
This is a tutorial on how to make a unique kitchen backsplash (splashback) using wallpaper. Any design can be used to make this hardwearing and functional backsplash suitable for both kitchens and bathrooms. A real statement piece for the kitchen.
Materials
- Wallpaper of your choice
- Hardwood plywood 5.5mm thick
- Non ironized safety glass 4mm thick
- Dome mirror screws
- Wallpaper paste
- 12.5mm tile trim
Tools
- Rotary cutter and mat
- Drill for the wall
- Screwdrvier
- Wallpaper pasting brush and roller
Instructions
- Carefully measure the exact area where the kitchen backsplash will go.
- Get your local builders' merchant to cut both the glass and plywood to those measurements.
- Key the plywood with some wallpaper paste.
- Carefully cut the wallpaper to fit the plywood. Make sure that the pattern matches up.
- Wallpaper the plywood. Use a roller to remove any air bubbles and leave it to dry.
- Mark where the screw holes in the glass will meet the wall.
- Drill a hole into the wall where the screw marks are and add wall plugs.
- Drill the same matching holes in the corners of the plywood.
- Fix the glass and wallpaper plywood to the wall using the mirror screws.
- Add the dome caps to the mirror screws for a better finish.
- To neaten the edge of the kitchen wallpaper backsplash, add a chrome tile trim around the edges.
I sooooooo need to do this in our small kitchenette. Love the idea.
Thank you, it is so easy to change when you fancy something different.
I love how you have styled your kitchen. It looks like a comfortable room made useful with countertops & stovetop. I think it may become my new dream kitchen
Thank you so much ????
hey, I love this, thanks for sharing. I was looking for an easy way to get a splashback on a tiled wall, this will come in handy.
Thank you so much, good luck with it.
I noticed that you posted the article in 2016. It is now 2020. How has the back splash held up? Is there anything you would do differently now if you were doing it again? I have been toying with doing the same thing, but on a larger scale and behind a kitchen sink. Everyone is against it because they think water will get behind the glass and cause the paper to wrinkle and mildew. Any thoughts about this 4 years later?
Thanks for any feedback you can give.
The backsplash is still in use and just as good as new.
Splashbacks are in trend now a days, and side by you have shared very interesting content!
Recently I have also renovated my interior using colourful and designer splashbacks and the result came out is so mesmerising.
Looking forward to read more of such wonderful contents.
Thank you ?
I cherish the splashback design. Extremely one of a kind and beautiful. Thanks for the great guide!
Thank you ?
This is AWESOME! I love to see new and interesting ideas for kitchen backsplashes. I personally feel that backsplashes should be a focal point in a kitchen and this definitely is!
DIY wins another one!!
Thank you, Mike!
Hi, thanks for posting this, just what I was looking for my bathroom, instead using paint or tiles. I wanted to ask, did you add a sealant where the glass meets the worktop? Also the bathroom splashback you posted doesn't appear to have been screwed like the kitchen one, how did you fix that on the wall?
The final look is amazing btw, hope my one turns out as good!
Thank you. In the kitchen no sealant was used. For the bathroom it was clear acrylic and not glass which was glued to the wall ans sealant was used.
This is amazing and lovely. So many diy projects are just kind of junky. I am doing his in the house we are buying, as long as my husband only sees he final result since he hates handi-work fixes or crafts except the ones he does. Of course!! Lol. Love so much for posting this!! I will follow your blog!!
~Rhea
Thank you so much and good luck with your new house.