
The great thing about upcycling with wallpaper is that it comes in thousands of cool designs and is quite robust and flexible, making it easier to stick to objects than ordinary paper.
Over the last few years, wallpaper has come back in fashion and loads of fantastic designs are out there. Wallpaper is not just for walls; you can decorate with it. As many great design houses produce their wallpapers, it can be cheap to get that designer look.
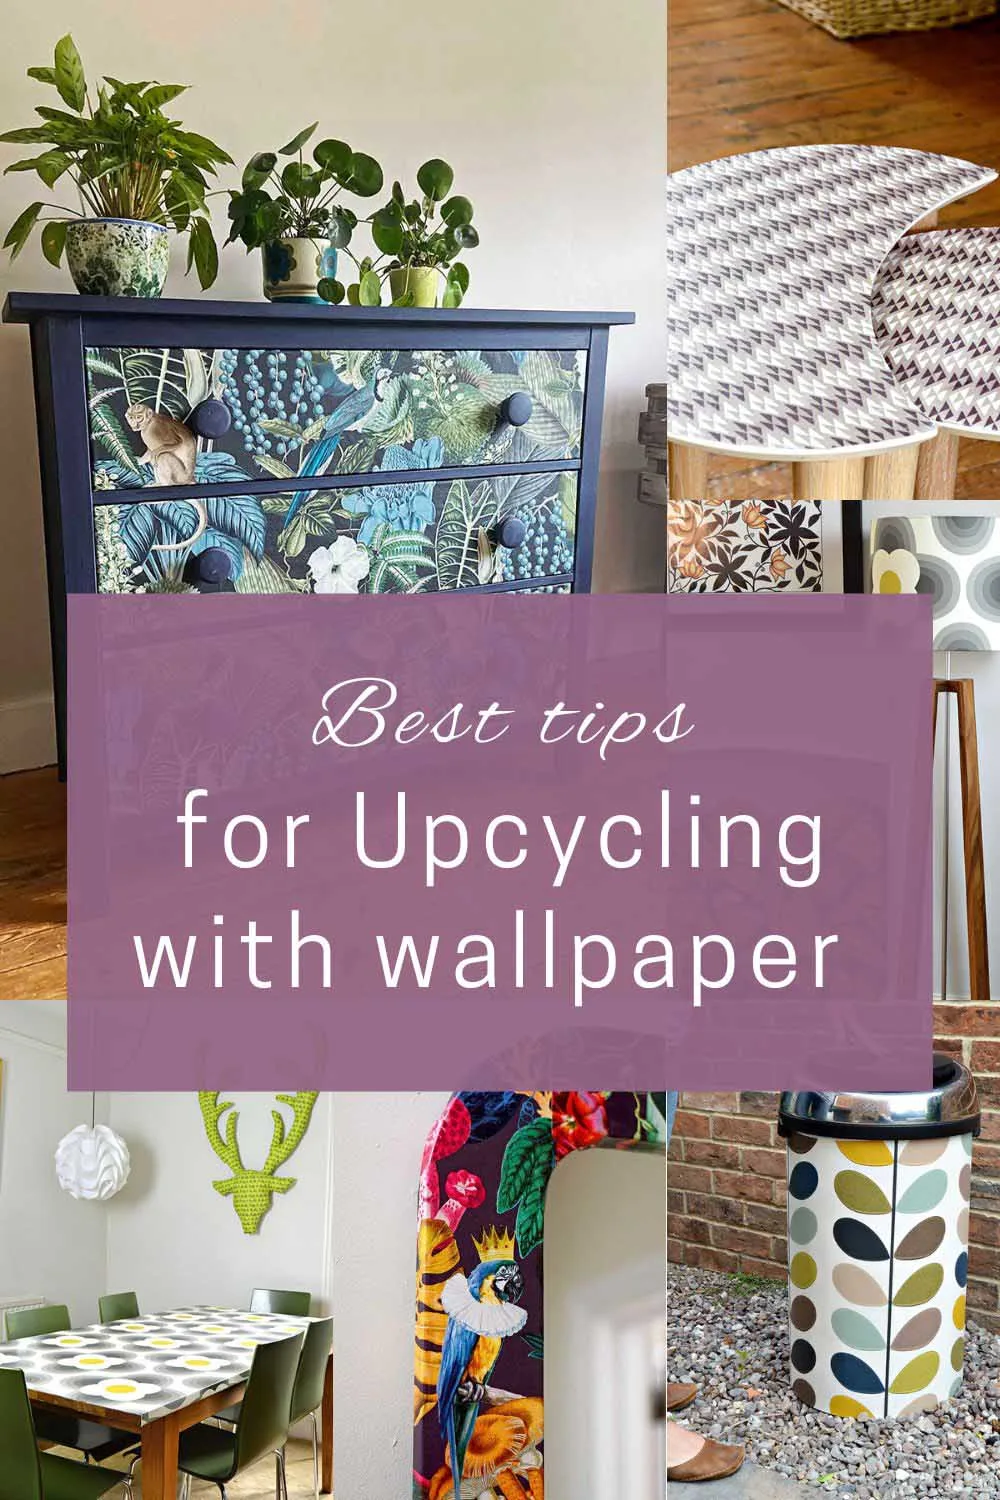
My friend Wendy loves Orla Kiely prints and has found an affordable way to get Orla Kiely into her home by using wallpaper. I’ll show you how wallpaper can transform furniture and fixings in your home.

We’re a participant in the Amazon Services LLC Associates Program, an affiliate advertising program designed to provide a means for us to earn fees by linking to Amazon.com and affiliated sites. As an Amazon Associate, I earn from qualifying purchases.
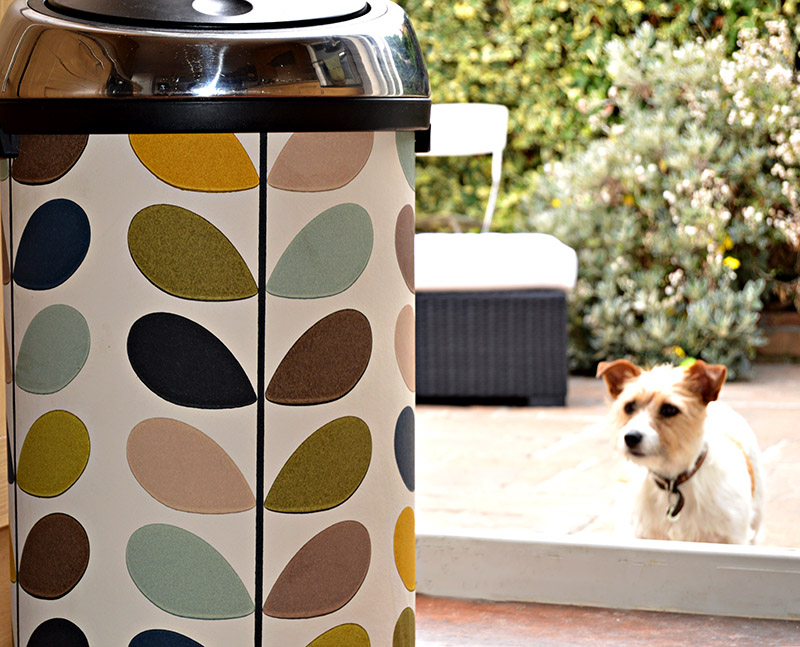
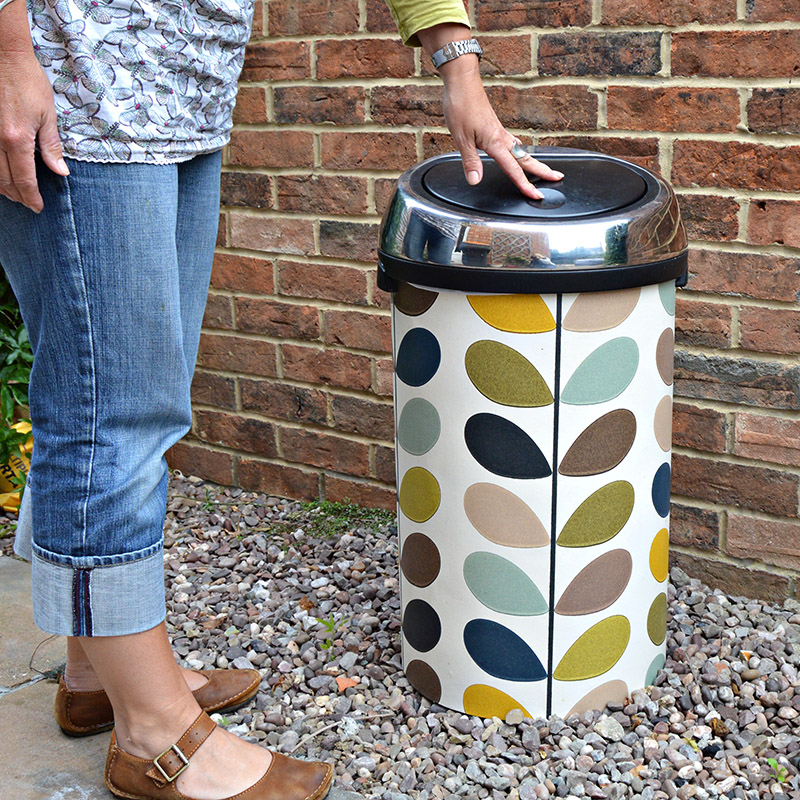
1. Bin (trash can) upcycling with wallpaper
Wallpaper is great for transforming a mundane kitchen bin into something better-looking. For this transformation, all you need is the following:
Quarter roll of wallpaper. Choose your wallpaper carefully. Make sure you have a design pattern that will fit. Remember that a wallpaper roll will likely not be wide enough to go around the bin in one go, and you will be using 2 or 3 pieces, so think about pattern joining.
We used an Orla Kiely Stem pattern for our bin.
What else do you need
- PVA glue
- wallpaper paste
- wallpaper brush
- glue brush
- ruler and scissors
How To Upcycle A Trash Can With Wallpaper
Step 1: Firstly, if you can, remove the handles of your bin. If not, don’t worry; you can work around these.
Step 2: To help the wallpaper paste stick to your bin, you must key it. To do this, mix a solution of 25% PVA (Elmers) glue with 75% water, cover the bin and leave it to dry.
Step 3: Next, measure the height of your bin carefully, and add a couple of mms to ensure. You can always trim the wallpaper later if you need to. Also, measure the circumference of the bin. This will be the width of the wallpaper needed. For the bin in this wallpaper upcycles, the circumference was two and a bit widths of the wallpaper roll.
Step 4: Cut each wallpaper width you need to the bin height. Make sure you cut it where the repeat pattern will match; this may involve cutting the piece further down the roll. One of your pieces is likely to be only part of a roll width.
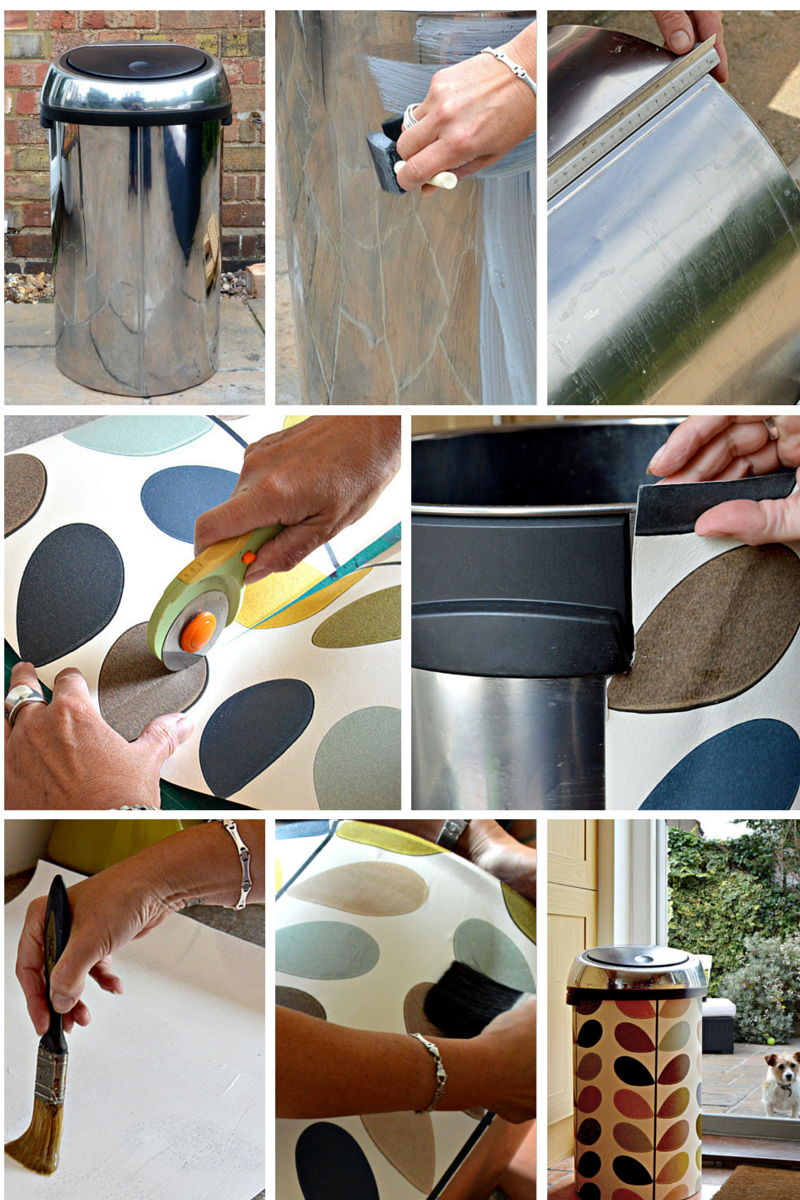
Step 5: Cover your first width of paper liberally with wallpaper paste and place it on the bin. You should be able to move it around quite easily to ensure it is straight ( a spirit level may help with this).
Top tip: When placing your first piece of wallpaper, you may want to consider that there will be a join and ensure that this is at the back of the bin where it will be less visible.
However, I have found that the joint is normally only noticeable if you carefully look. When you are happy with the position of your paper, use the wallpaper brush to remove any bubbles.
Step 6: Cover the next piece in the paste and line it up next to the first piece on the bin. If you cannot take your handles off, you may have to cut around them using wallpaper scissors.
Ensure that the wallpaper is flush with the top and bottom of the bin; if not, trim accordingly. Brush as before and repeat with the third piece if needed.
Step 7: Most wallpaper is wipe-clean, so you can leave the covered bin as it is, but if you want to ensure better protection from spills, I suggest you apply a final coat of waterproof varnish or PVA. When finished, re-attach any handles that were removed.
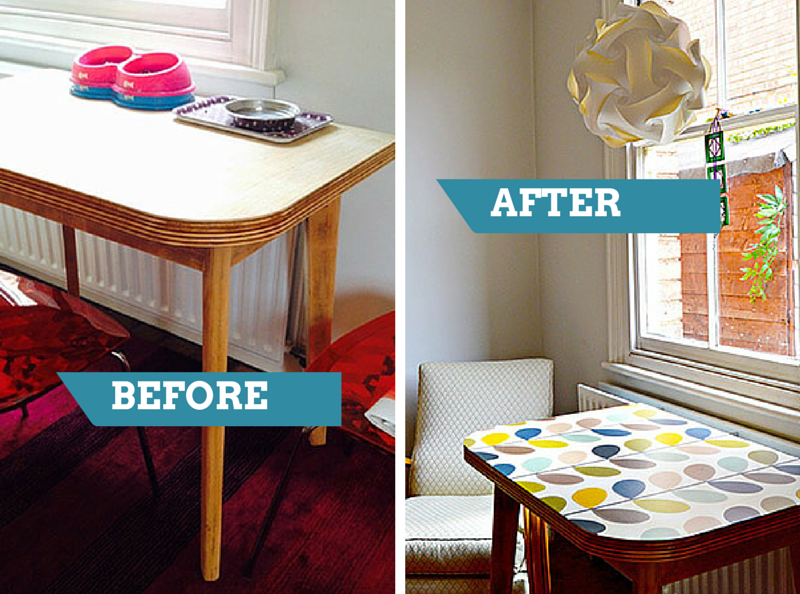
2. Transforming Tables by Upcycling with Wallpaper
You can transform any old table with wallpaper from small side tables to large dining room tables. It is easy to do and can bring a new lease of life into an old table and turn something ordinary into something cool and interesting.
What you need to consider when upcycling tables with wallpaper
There is a full tutorial for decoupaging table tops with wallpaper on Pillarboxblue, but here I will discuss some of the basics you need to consider.
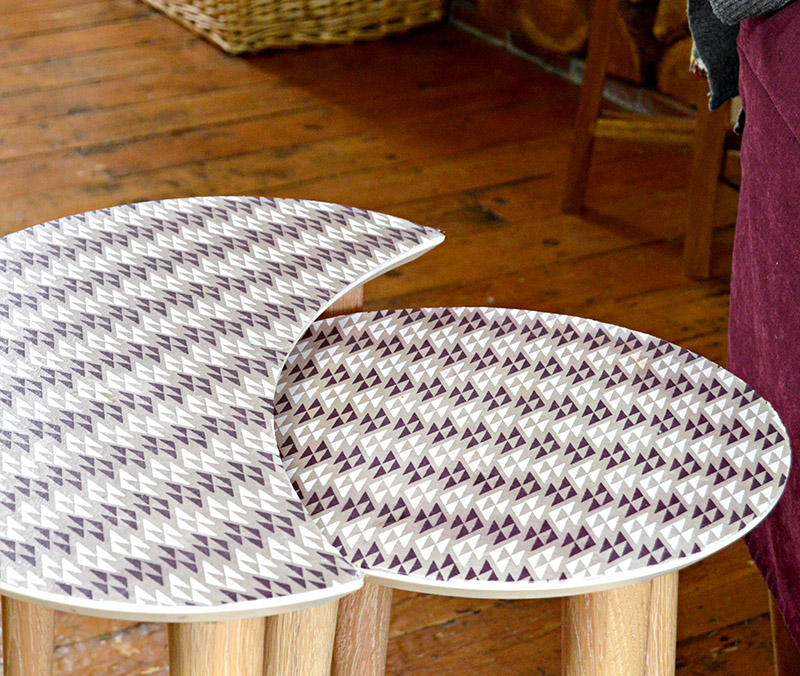
First, lay out your wallpaper to ensure your chosen design will work. In most cases, the wallpaper will not be wide enough to cover the table, so you must ensure that you can match the repeat pattern when laying in strips.
Top tip: Geometric patterns work well with tables, and smaller patterns are easier to match.
- You can use wallpaper paste to stick your paper to the table. However, before you start, ensure the tabletop is clean and sand lightly to establish a key.
- When putting wallpaper on the wall, use a brush to eliminate air bubbles and trim the excess with scissors.
- You will need to protect your table afterwards; I recommend coating it with at least two coats of waterproof varnish.
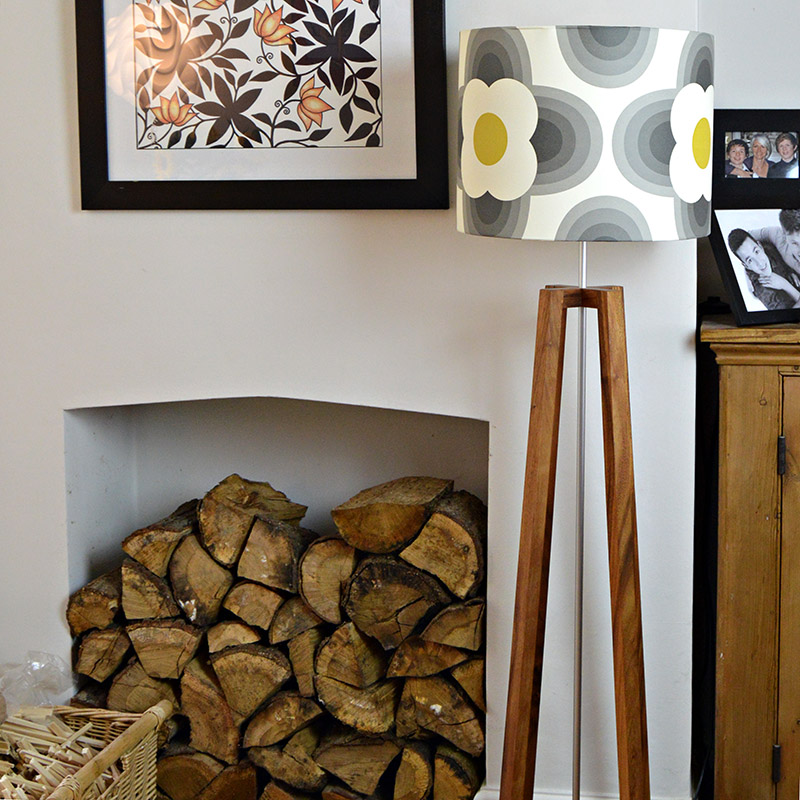
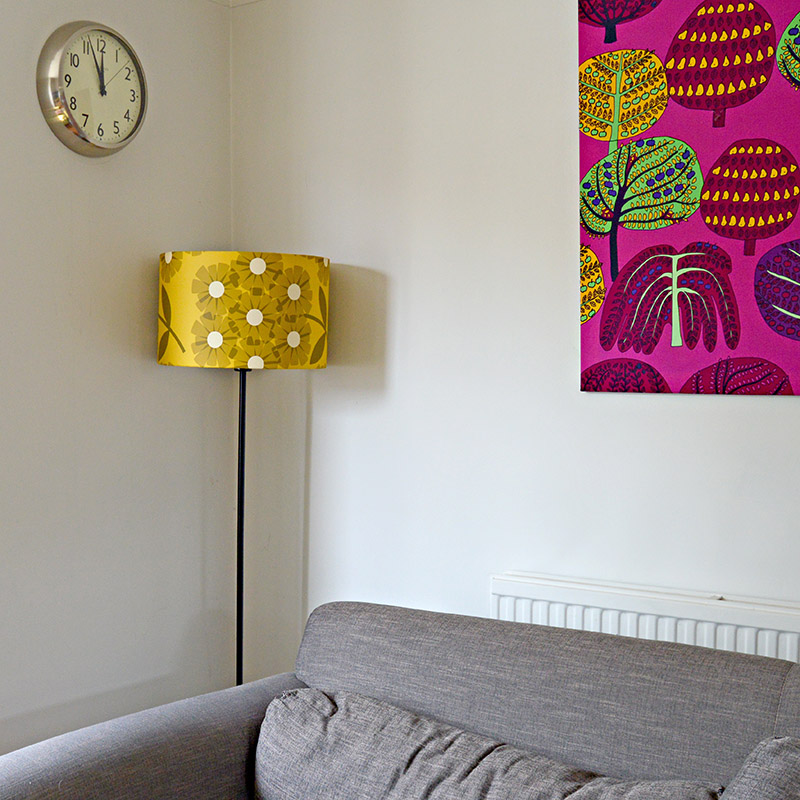
3. Upcycling Lamp Shades With Wallpaper
Would you like a Marimekko or Orla Kiely lampshade? They are so easy to make yourself! You might want to check out my tutorial on wallpaper lampshades to match your decor.
There are loads of affordable lampshade kits in various sizes on the internet, and instead of using fabric, you can use wallpaper to make your lampshade.
These kits are really easy to use, and not only do you get to choose your lampshade design, but you also get to choose the size you want, not limiting you to what’s available in your home decoration store.
As with using wallpaper to cover a table, you will also need to make sure that the design of your wallpaper pattern is suitable for transformation into a lampshade.
4. Upcycling Mirrors and Frames With Wallpaper
I have posted a full tutorial on how to wallpaper furniture and, in particular, an IKEA mirror frame. Upcycling a mirror frame with wallpaper can transform it from something mundane to a piece of art hanging on the wall.
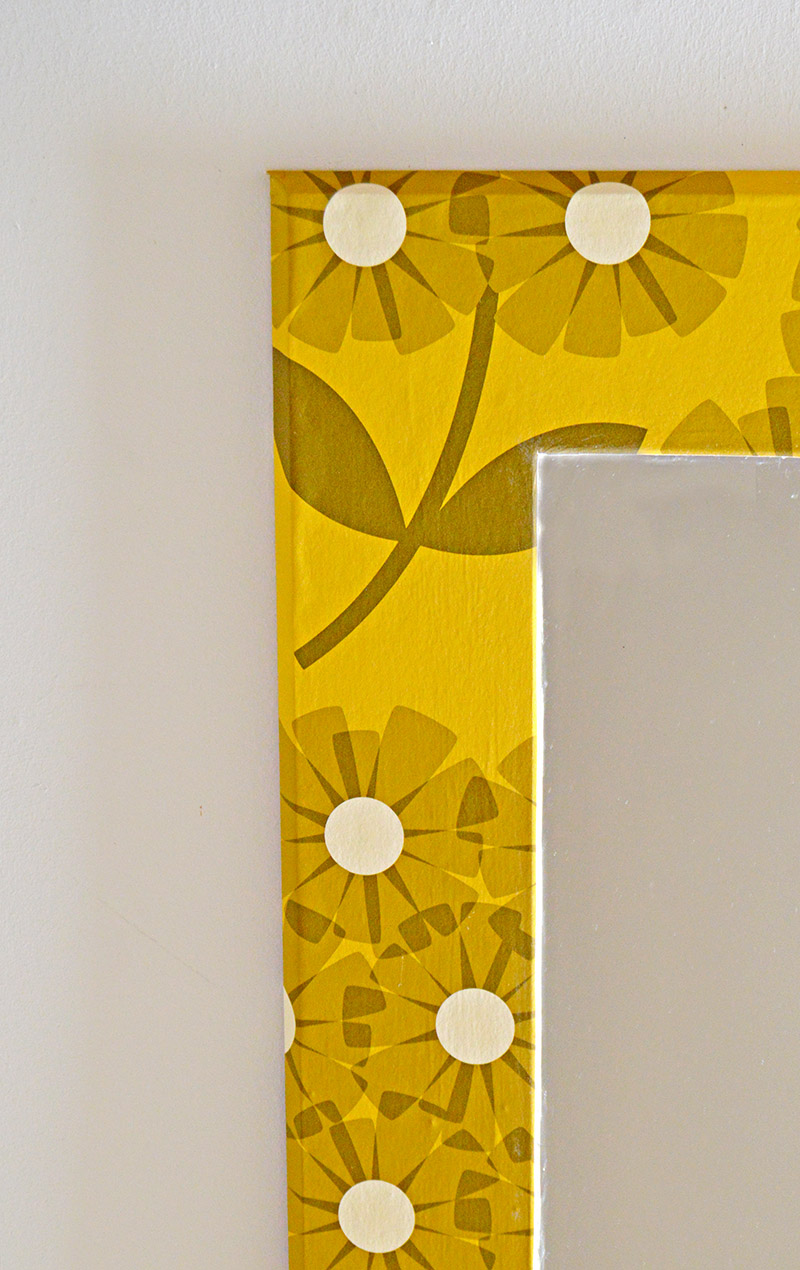
Scraps of wallpaper can transform the frames of mirrors and pictures. I’ve even covered a mirror frame with fabric scraps before. Wallpaper samples can also be used to make cute paper vases.
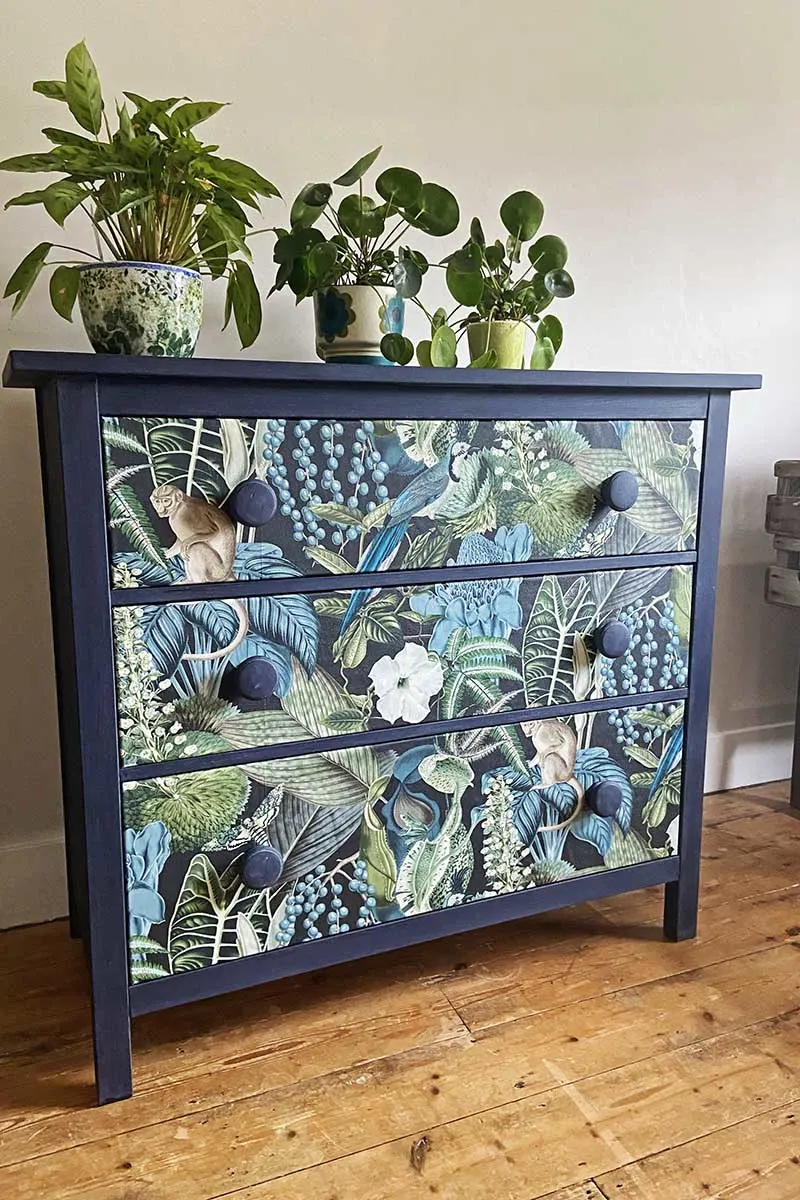
5. Wallpapering Dressers
Part wallpapering furniture can effectively upcycle pieces into something unique, especially IKEA furniture. This IKEA Hemnes hack with wallpaper is a great example. There are more IKEA Hemnes hacks with wallpaper.

Other Upcycling with Wallpaper Ideas
If you use wallpaper for any home decoration crafts, I would also love to hear about them if you have a particular design favourite.
As well as Orla Kiely and Marimekko, I love Designers Guild and Graham & Brown have some great contemporary wallpapers. Some designer wallpapers can be expensive, but often I pick up odd rolls and part rolls cheaply on eBay.
If you like upcycling with wallpaper, you might want to check out my amazing Marimekko Wallpapered Stairs or my DIY splashback (backsplash) using wallpaper.
There are also lots of craft ideas for smaller wallpaper samples.
Liza
Thursday 6th of December 2018
Hello! Fabulous ideas, thank you for sharing! Question: Would this work on fabric lampshades?
Thanks?
Claire Armstrong
Friday 7th of December 2018
Thank you. You can make a Lampshade with wallpaper or fabric by just using the wire frame.
Michelle
Thursday 23rd of August 2018
What a lovely way to go from boring and bleh to wow!!! Love these ideas Claire and it's pretty easy to do too
Claire Armstrong
Thursday 23rd of August 2018
Thank you Michelle, yes very easy.
neen
Saturday 18th of November 2017
I love all your upcycle ideas but you, please, need to learn some rotary cutter safety uses. They are very dangerous instruments.
IFortuna
Wednesday 28th of September 2016
I love the Orla Kiely wallpaper you used for the trash bin. I love her designs. Thanks for sharing instructions for everything. : )
Claire Armstrong
Thursday 29th of September 2016
Thanks your welcome, I do love her simple retro designs.
Cherokee
Thursday 16th of June 2016
I have been looking for a new design for an old table I bought to refurbish for my dining room. Thanks for the great tips and idea to use wallpaper! I had some special paper I did not want to throw out, but didn't know what to do with it. So you have helped me solve two of my problems.
Claire Armstrong
Thursday 16th of June 2016
Thank you ! I'm pleased that I have been able to help.