
AD | This project is in collaboration with Gorilla Glue, but all opinions are my own
We have limited space in our house and even though I love them, real trees take up too much room. I’ve made a fun, flat wood slice Christmas tree as an alternative.
This isn’t my first flat tree, I’ve made a wooden Christmas tree before from wood scraps and old ironmongery. I hang this tree in the kitchen every year. I’ve even painted a large flat Christmas Tree on my wall.
That’s the beauty of a flat upcycled Christmas tree, they take up so little space you can afford to have more than one in the house. There would even be room to hang one on the wall in the narrowest of hallways. It is also a great natural Christmas decoration.
Decorated Wood Slices
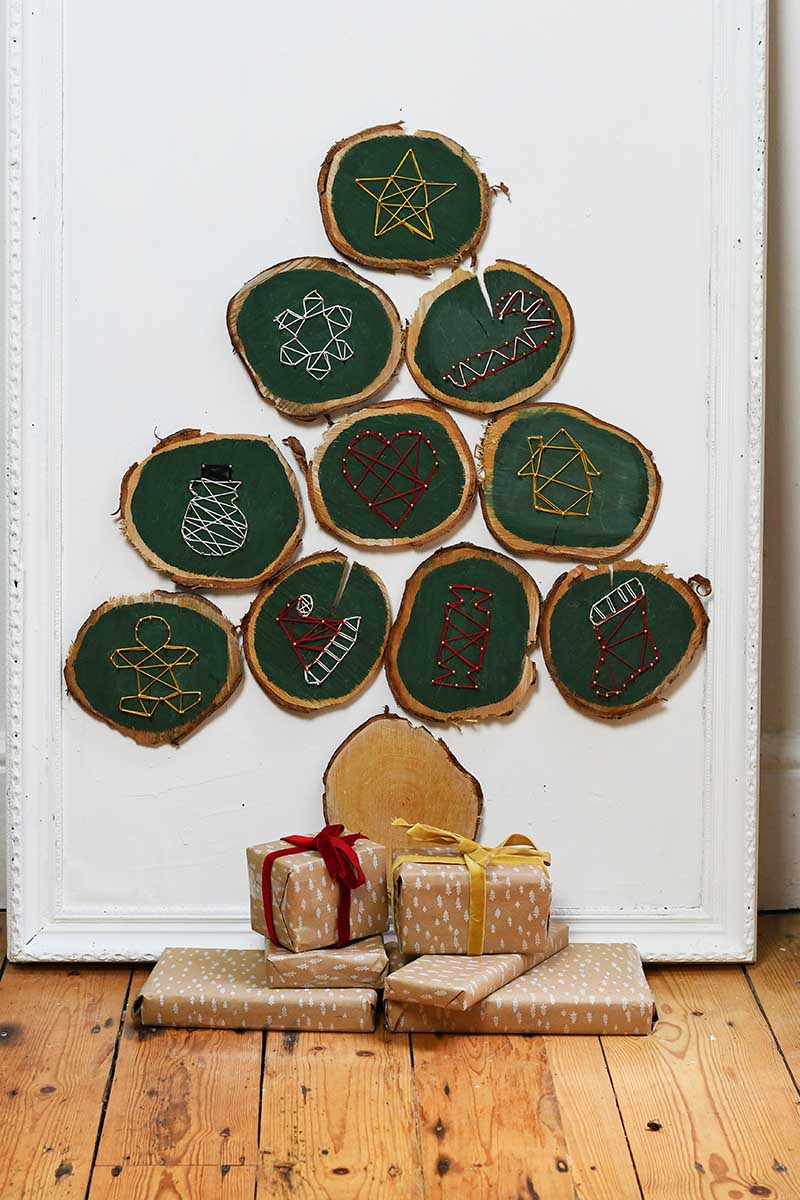
This wood slice tree comes with another advantage in that it’s already pre-decorated. Every wood slice used to make the tree was an ornament in itself.
I love the revival of 70’s boho crafts in homes at the moment. I thought I would reflect this by making every ornament on the wood slice Christmas tree using string art.
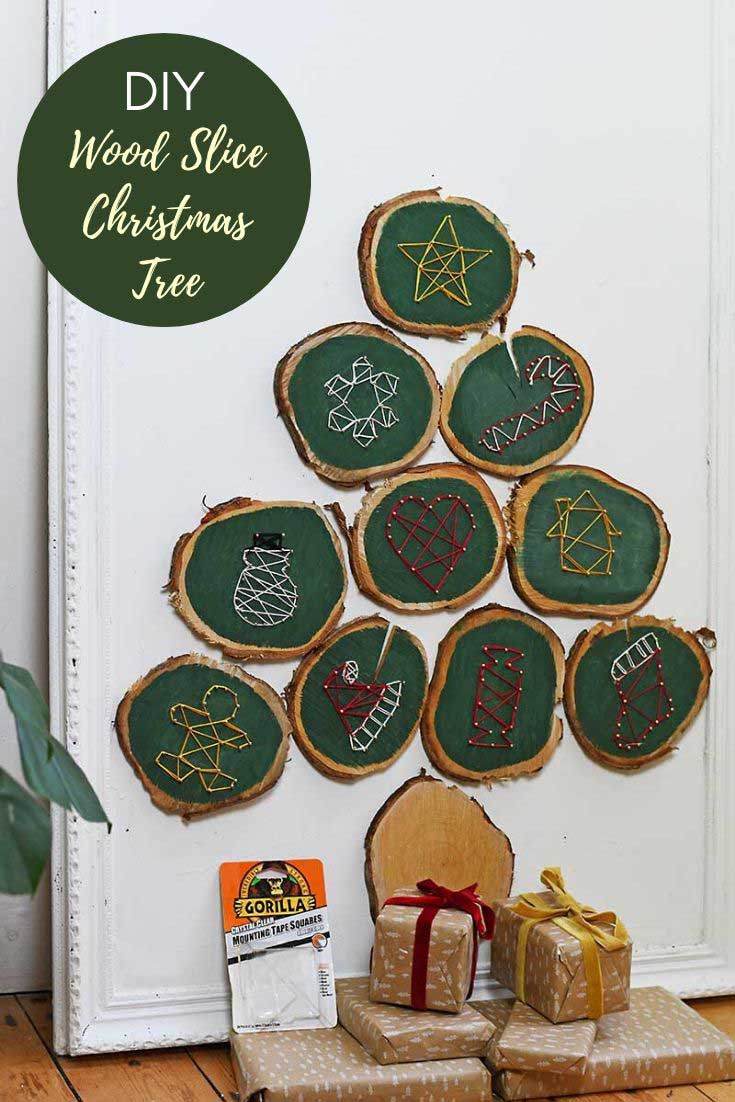
Gorilla Mounting Tape Squares really made this craft easy as they were great for assembling the wood slices into a Christmas tree shape.

We’re a participant in the Amazon Services LLC Associates Program, an affiliate advertising program designed to provide a means for us to earn fees by linking to Amazon.com and affiliated sites. As an Amazon Associate, I earn from qualifying purchases.
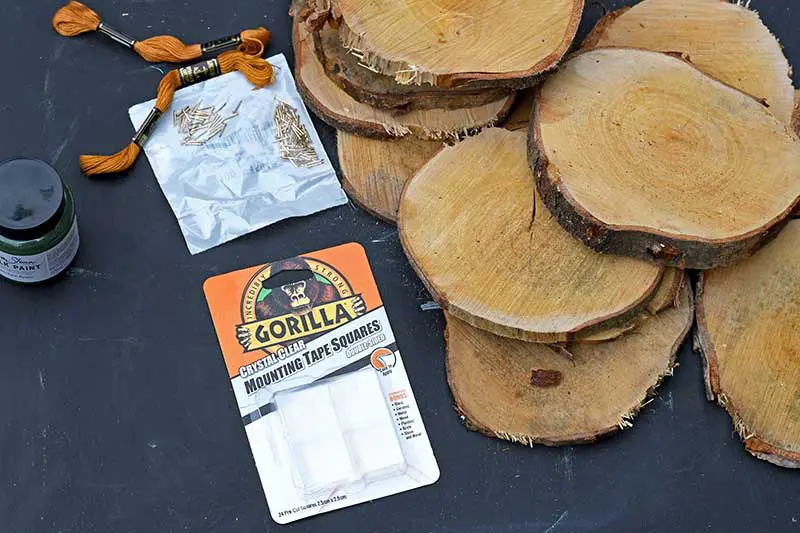
What You Need To Make A Wood Slice Christmas Tree
- 11 Circular Wood slices – I had some I had cut myself with a chain saw. However, you can easily buy them online or in craft stores. They come in various sizes. Just make sure they are all roughly the same size.
- Tester pot of green chalk paint
- Gorilla Mounting Tape Squares
- Brass panel pins
- Embroidery floss in red, white and gold.
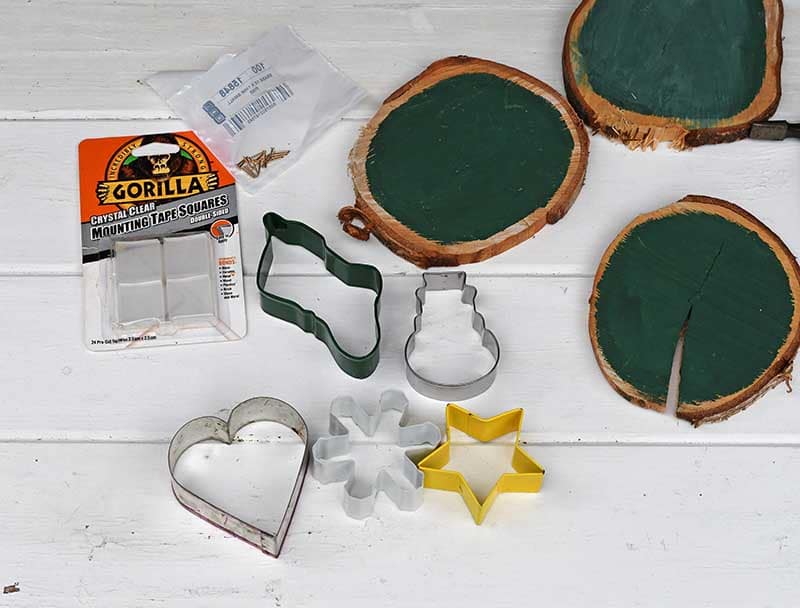
- Christmas cookie cutters (optional)
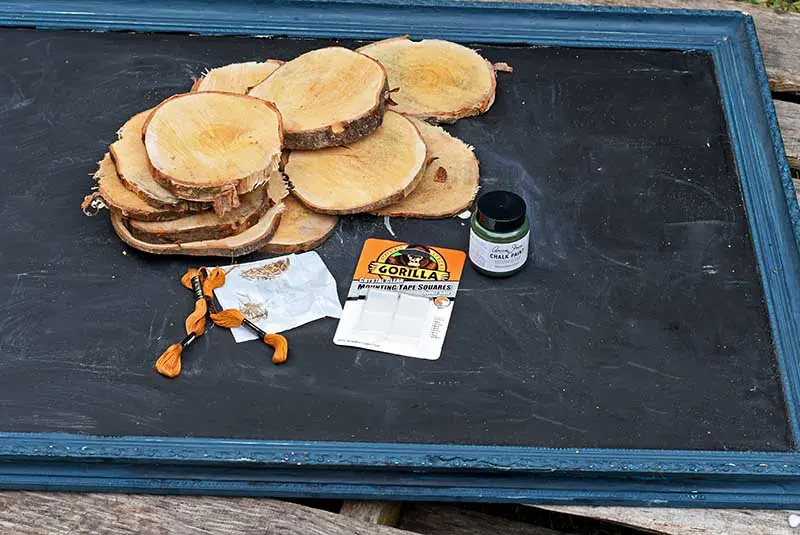
- Large frame to mount the wood slice Christmas tree. I had an old frame I picked up from a charity shop. I painted it white.

How To Make A Wood Slice Christmas Tree
1. First, if you are using your own cut wood slices then sand them smooth. If you’ve bought pre sanded wood slices you can skip this step.

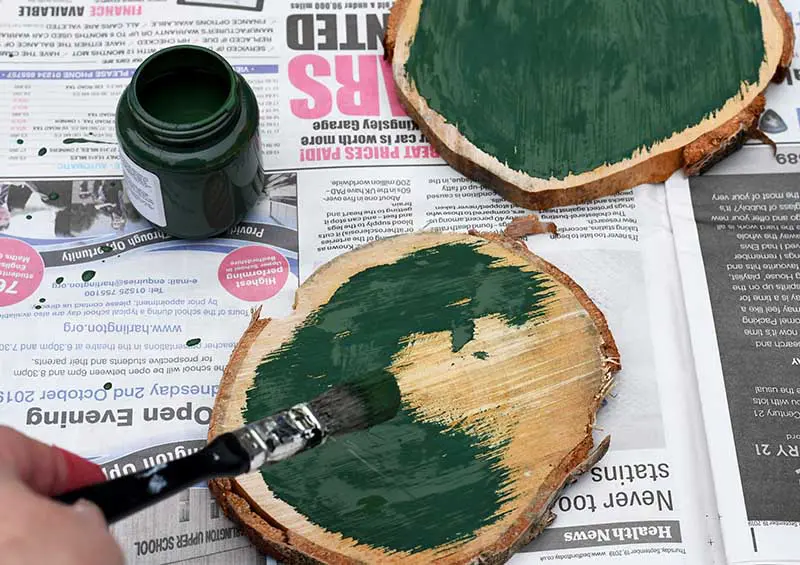
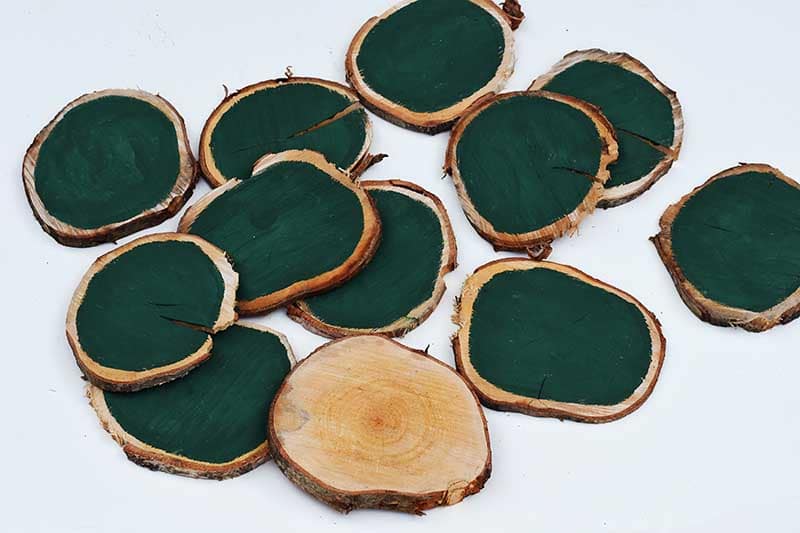
2. Next, paint one side of 10 of the wood slices green. Leave a small unpainted border. Don’t paint the last wood slice.


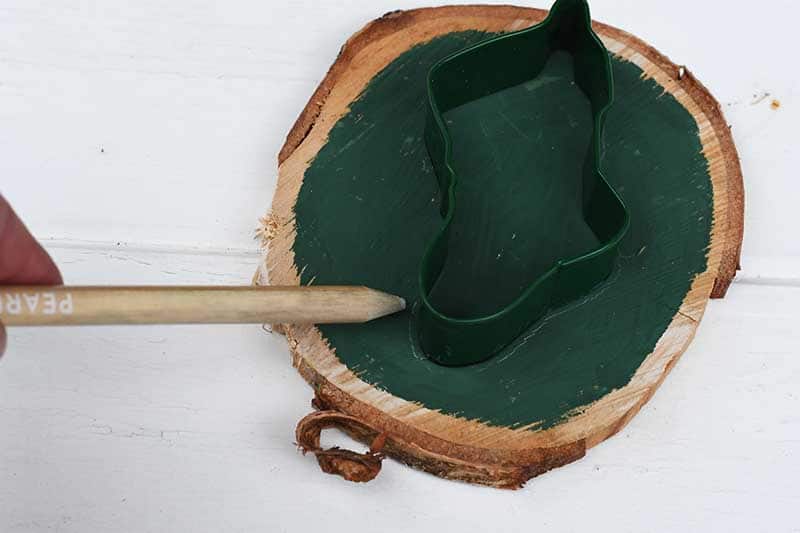
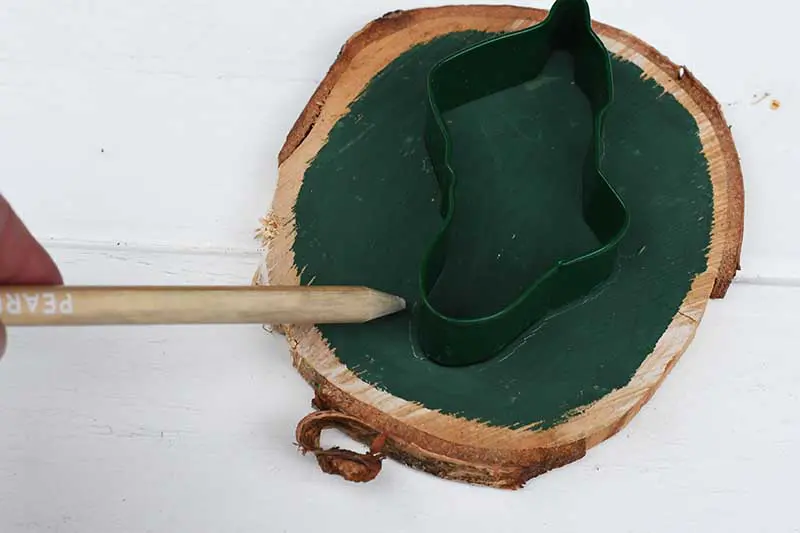
3. For the next stage in making the wood slice Christmas tree, I used cookie cutters as templates. If you don’t have any suitable cutters you can download and use these Christmas templates here.
Place a cookie cutter on top of a painted wood slice and draw around the shape with a white chalk pencil.
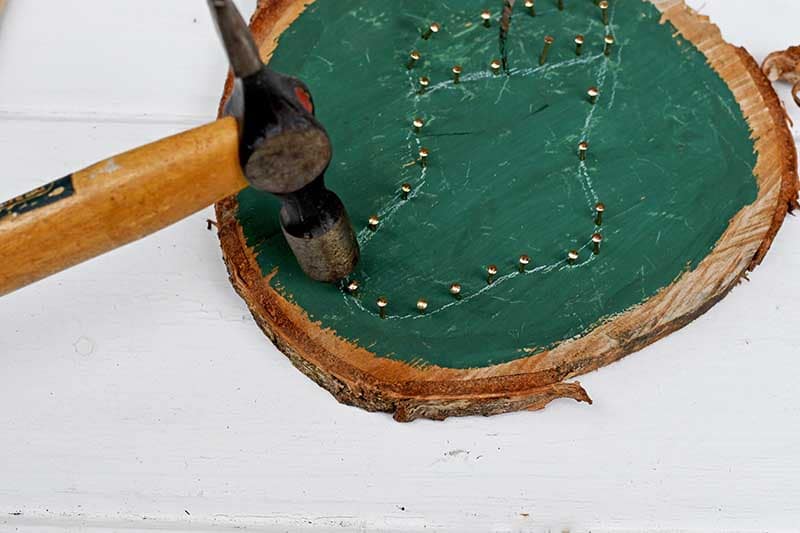
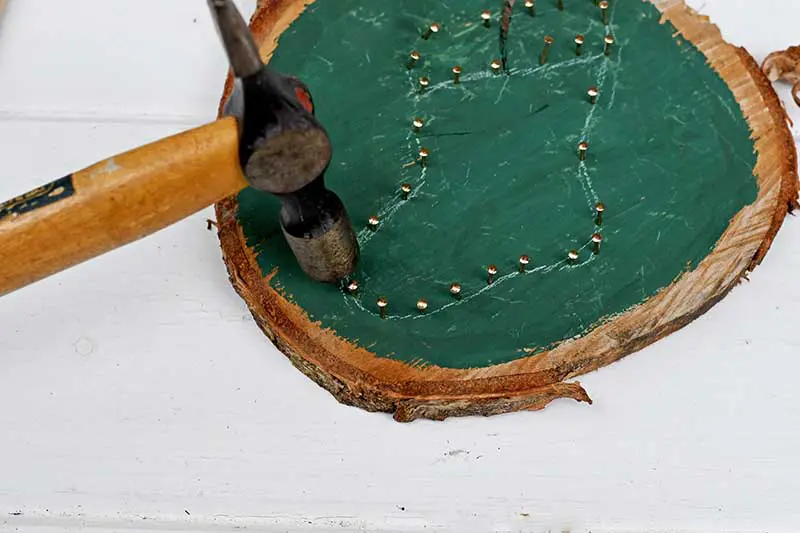
4. Next, tap in panel pins following this outline. The space between the pins will vary from shape to shape.
With curves, it’s best to place panel pins close together. Whereas with straight lines the panel pins can be placed further apart.
5. Next, wrap the embroidery thread around the panel pins to create a string art ornament. I used thread in Christmas colours and a simple geometric pattern with the string art.


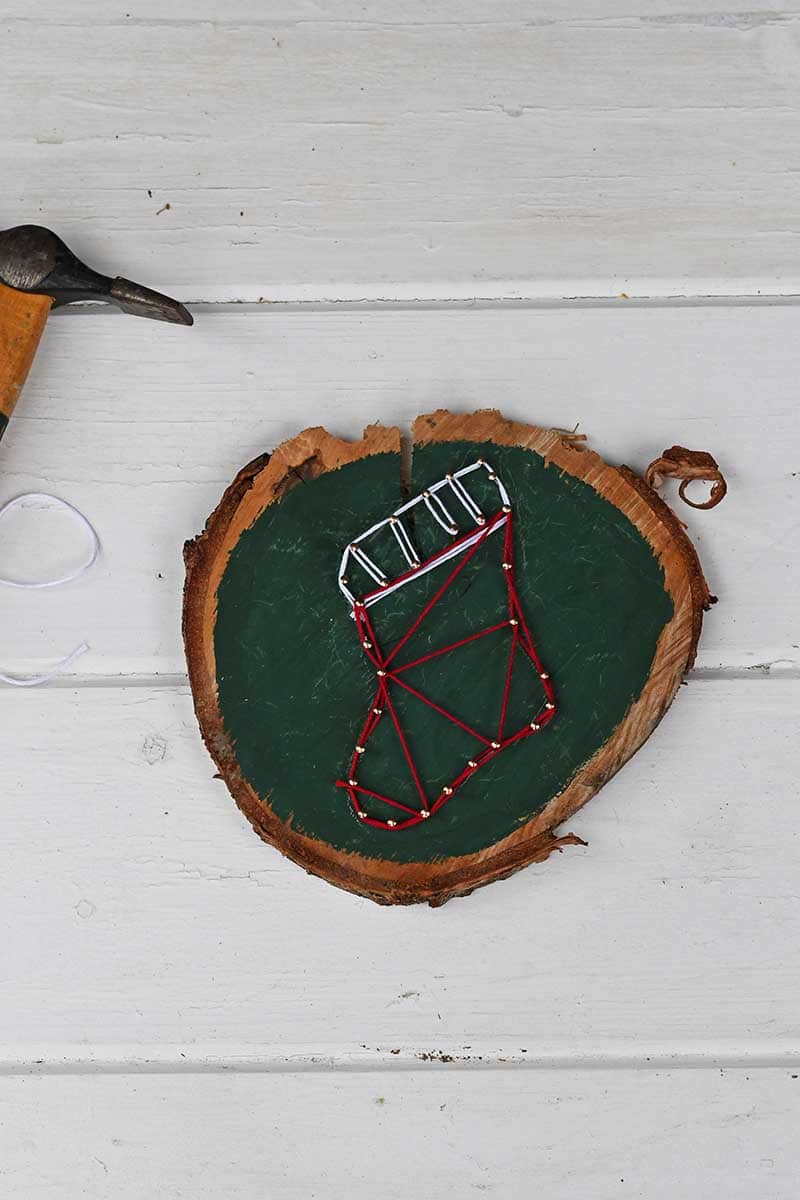
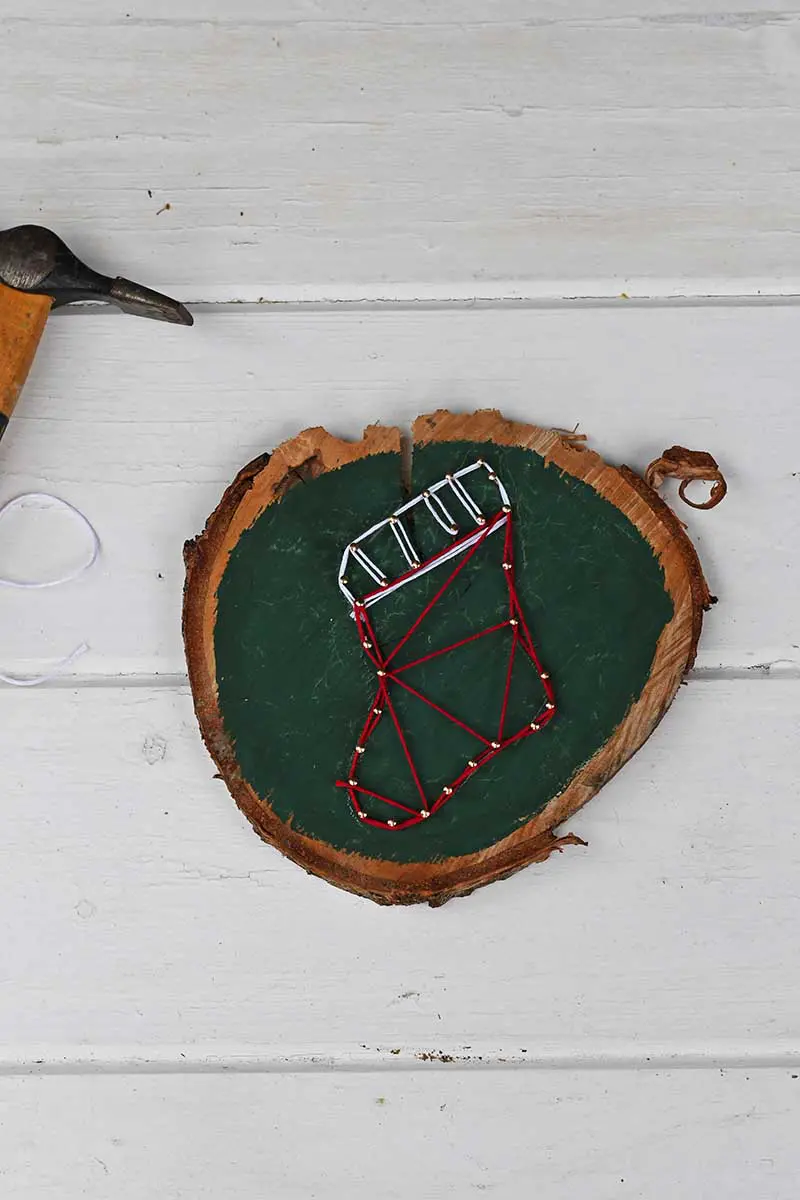
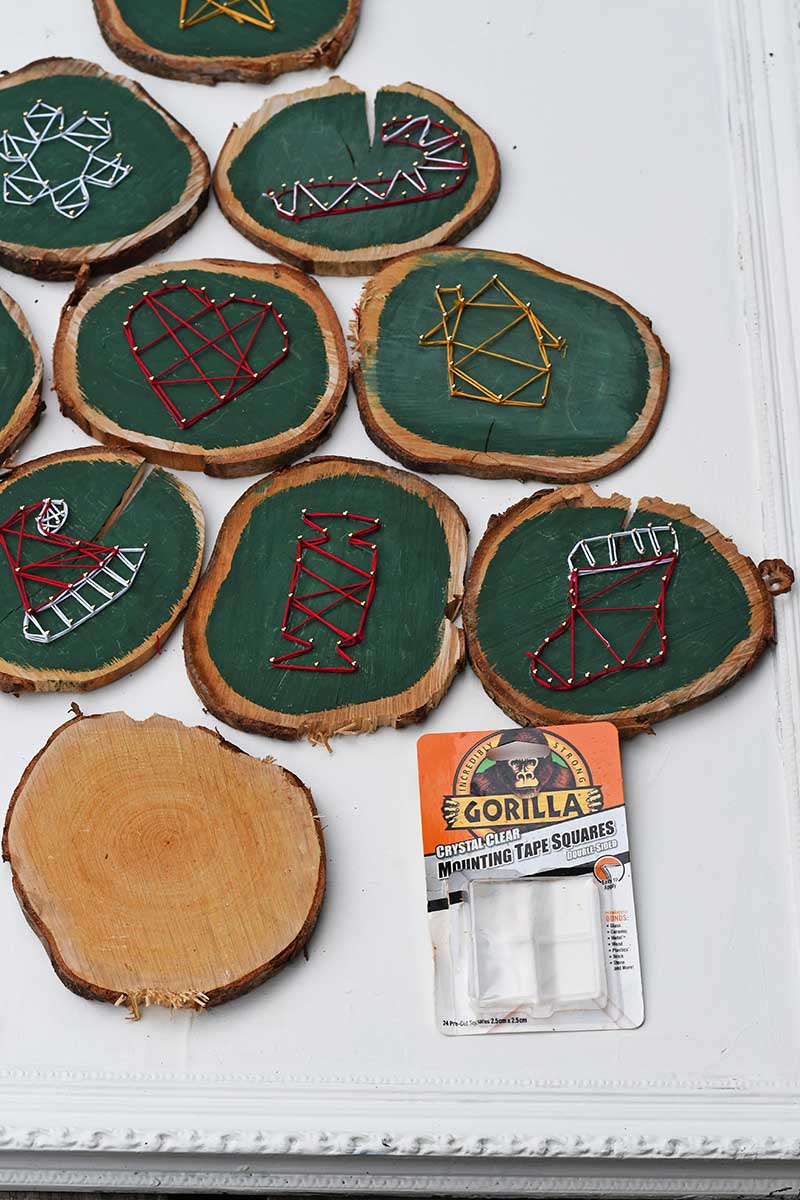
6. Next, carry on making string art for the remaining 9 wood slices. Make sure you make a star ornament for the top of the wood slice Christmas tree.


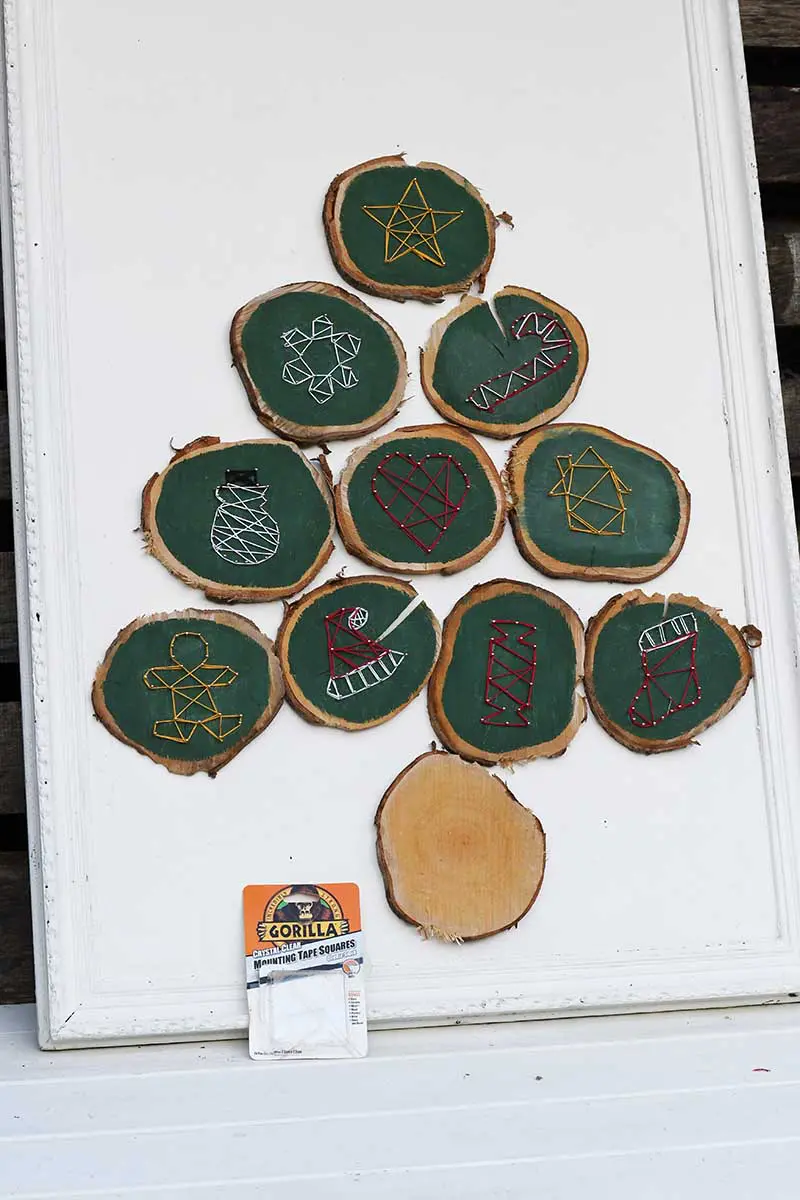
7. Next, arrange the wood slices on the painted frame background. You want to place the wood slices into a Christmas tree shape. Make sure the star ornament is at the top. Place the unpainted wood slice at the base of the tree as a trunk.

Mounting The Wood Slices Into A Christmas Tree
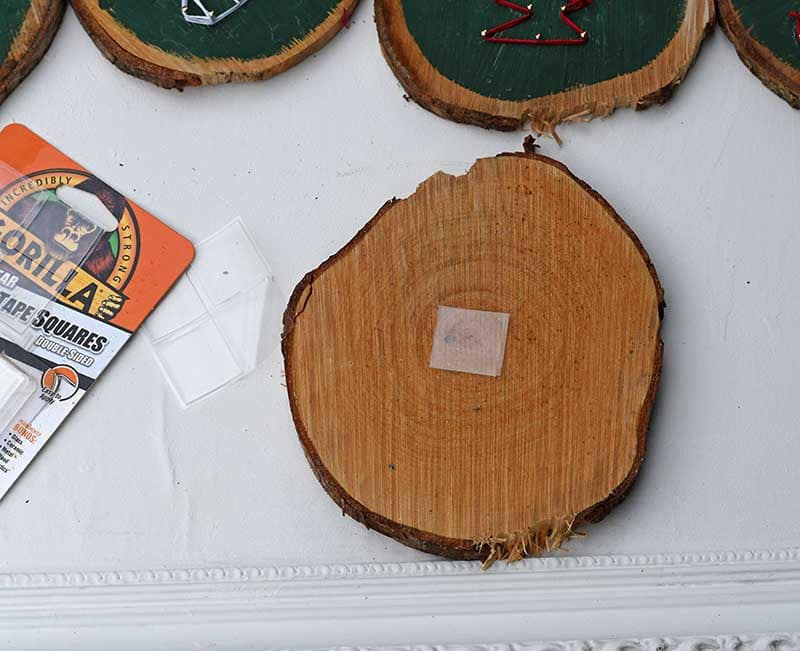
8. Once you are happy with the wood slice design then fix them to the frame using Gorilla Mounting Tape Squares. Make sure the back of the wood slice is smooth and free of dust and oil.
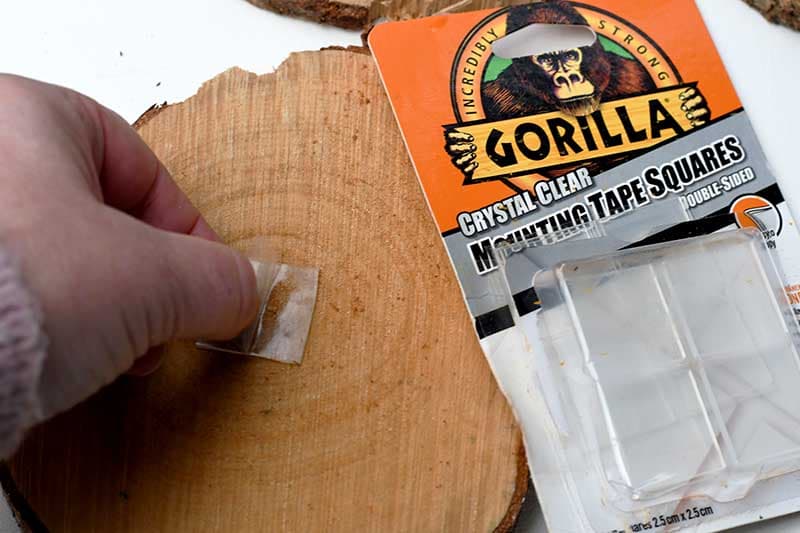
Remove a Gorilla Mounting Tape Square from the sheet and stick it to the back of a wood slice by pressing down firmly. Then peel away the top protective layer from the square.
Make sure that the surface you are sticking the wood slice to, is dry and clean. Then, flip the wood slice over and press it firmly to the frame backing.
If you have large wood slices then I suggest using 2-3 Gorilla Mounting Tape Squares per wood slice. Use one square per 125g of weight.


9. Carry on sticking the wood slices to the frame with the Gorilla Mounting Tape Squares until the Christmas tree is complete. I like to use the Gorilla Mounting Tape Squares as they are not too thick. The wood slice lies nice and flat to the frame.
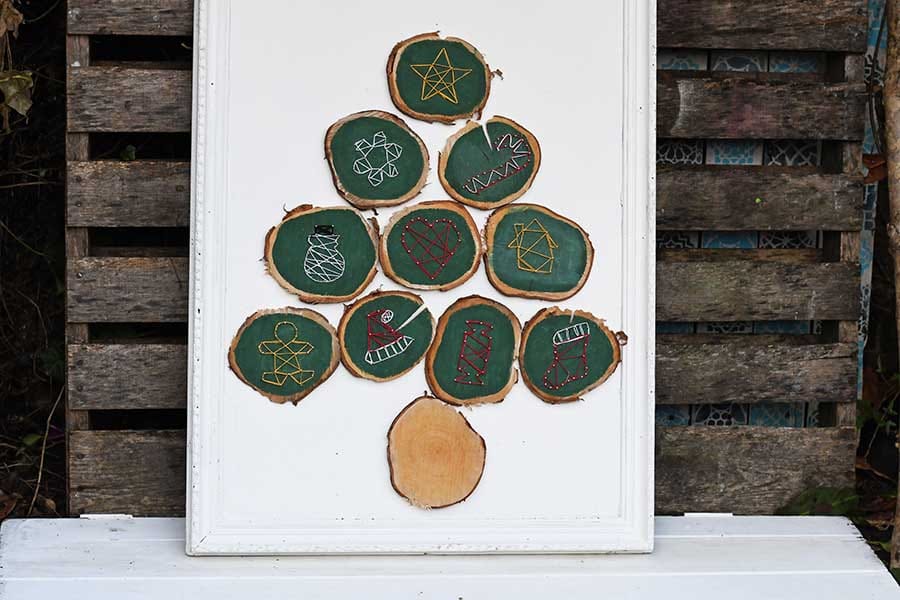


The finished wood slice Christmas tree can be hung on the wall as a festive decoration. Personally, I love to casually lean mine against the wall and place presents around it like you would a real tree.


I love to use wood slices for crafting, check out some of my other wood slice crafts.
- Christmas Pudding Wood Slice Ornament
- Frida Kahlo wood slice
- DIY Picture Frame Stand
- Wood Slice DIY Plant Shelves
Or visit allfreeChristmascrafts for more Christmas wood slice crafts.
Landon "Lumber Master" Edgington
Friday 30th of October 2020
Wow! you have such a brilliant mind that creates this wonderful piece of work. This is great for houses out there.
Claire Armstrong
Saturday 31st of October 2020
Thank you.
Festive Farmhouse Decor Ideas | The How-To Home
Tuesday 19th of November 2019
[…] Wood Slice Christmas Tree from Pillar Box Blue […]
Cecilia
Monday 18th of November 2019
This is so creative, Claire! Thanks for sharing at Vintage Charm!
Claire Armstrong
Monday 18th of November 2019
Thank you, Cecilia.
Julie
Sunday 17th of November 2019
This is very cool, perfect for when space for a big ol' tree is limited or just because 'why not have another tree? ' Trees are my favourite Christmas decoration, we have loads in all shapes and sizes like little forects on every surface!
Claire Armstrong
Sunday 17th of November 2019
Thank you. Me too I love loads of Christmas trees especially flat ones that don’t take up too much space.
Doussie Hardwood Logs
Friday 15th of November 2019
Honestly speaking, I had no idea it could be so easy to make a wood slice Christmas Tree, I really appreciate your information sharing here. Thanks a lot!
Claire Armstrong
Friday 15th of November 2019
Thank you so much.