
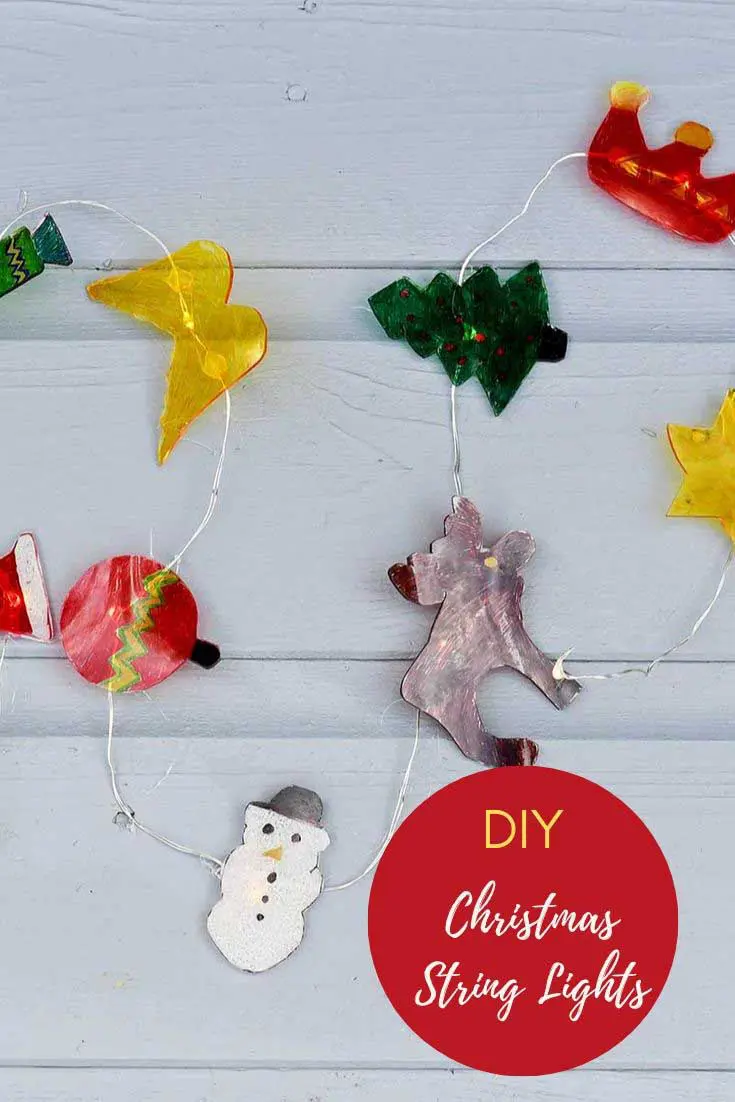
This DIY Christmas garland with lights is definitely a craft for the kids. Mind you I think the adults will love it too.
One of my favourite ways to decorate my home in the dark winter nights is with lights. There is nothing cozier than sitting curled up on the sofa with a hot drink and a magazine surrounded by twinkling soft lights.
Normally I use el wire to make illuminated signs and decorations like with this popular string art neon heart of mine. However, this time I decided to use string lights to make my Christmas garland with lights.
String lights are very affordable to buy these days. You can easily find those lovely copper wire ones very cheaply in pound/dollar stores.
Crafting With Christmas Cookie Cutters
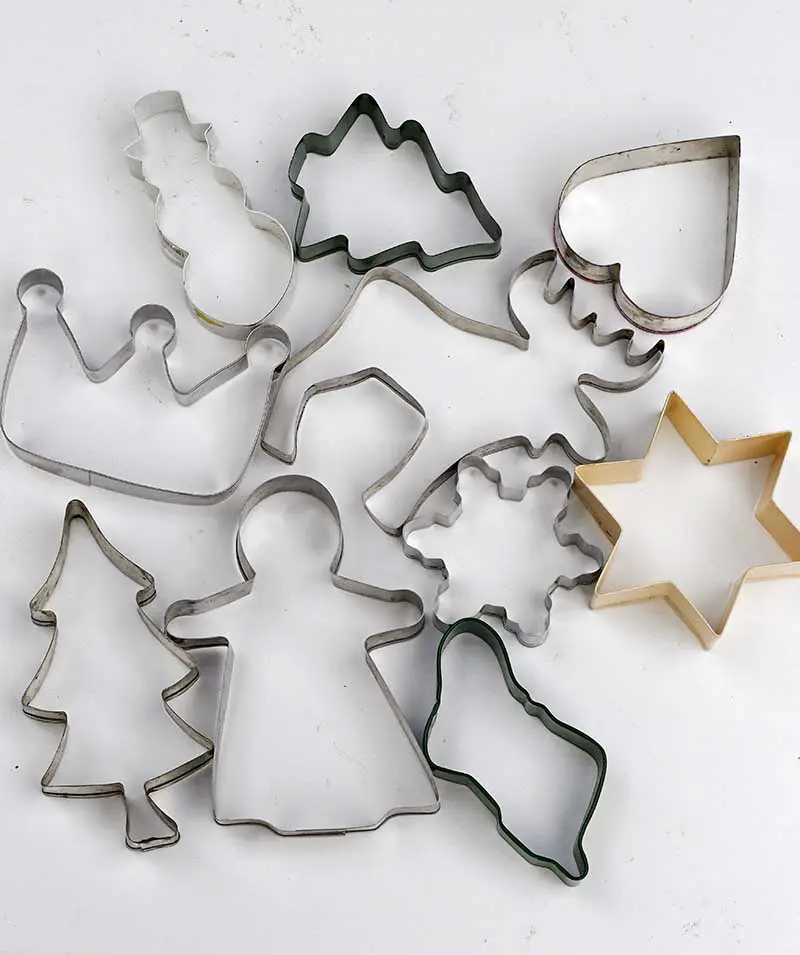
When my boys were younger one of our favourite activities to do together was to bake Christmas shaped cookies. They used to make a big batch just before Christmas and then bag them up to give as gifts to the family.
Now that they are young adults they have no interest in baking. The cookie cutters haven’t gone to waste though. Every year I use them in some way with my Christmas crafting.
The collection of simple shapes are perfect templates for Christmas crafts, I’ve used them in the past to make sweater upcycled Christmas ornaments and with this years repurposed paper bag advent calendar.
The cutters came in handy again with this DIY Christmas garland with lights. I have a few more Christmas cookie cutter crafts I’m working on so watch this space.

Using Shrink Plastic
These lights are made with shrink plastic. I remember discovering Shrinky Dinks (shrink plastic) as an 8-year-old around a friend’s house.
From the first shrink, I was hooked. I thought it was magic! The most amazing thing I’d ever seen.
I made so many little plastic trinkets, necklaces badges, etc. It was the 1970’s the days before computers, tablets and mobile phones. It didn’t take much to impress me.
My awe of shrink plastic is still there. I got excited about using it again for this post. All those childhood memories and excitement came flooding back.
I think kids today even with all the distractions still like playing with shrink plastic.
We’re a participant in the Amazon Services LLC Associates Program, an affiliate advertising program designed to provide a means for us to earn fees by linking to Amazon.com and affiliated sites. As an Amazon Associate, I earn from qualifying purchases.
What You Need To Make A DIY Christmas Garland with Lights
- An assortment of Christmas cookie cutters – If you don’t have any cutters don’t worry you can draw your own or download some cutter templates from this post.

- Shrink plastic clear sheets – I called these Shrinky Dinks as a child but I think that was a brand name. I used no more than 3 A4 sized sheets of shrink plastic for one set of Christmas garland lights.
- Sharpies in lots of colours, especially Christmas ones such as red, green and yellow.
- String lights – a small battery-operated string would be fine.
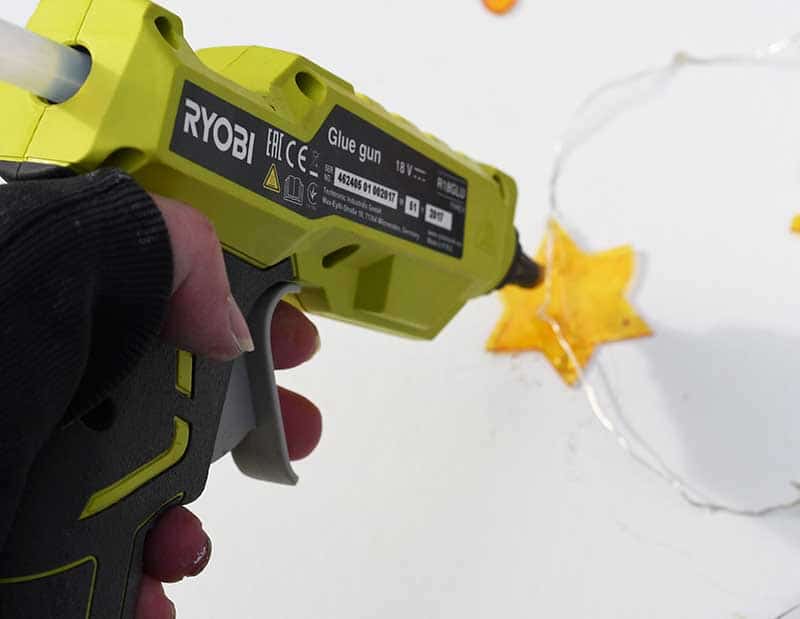
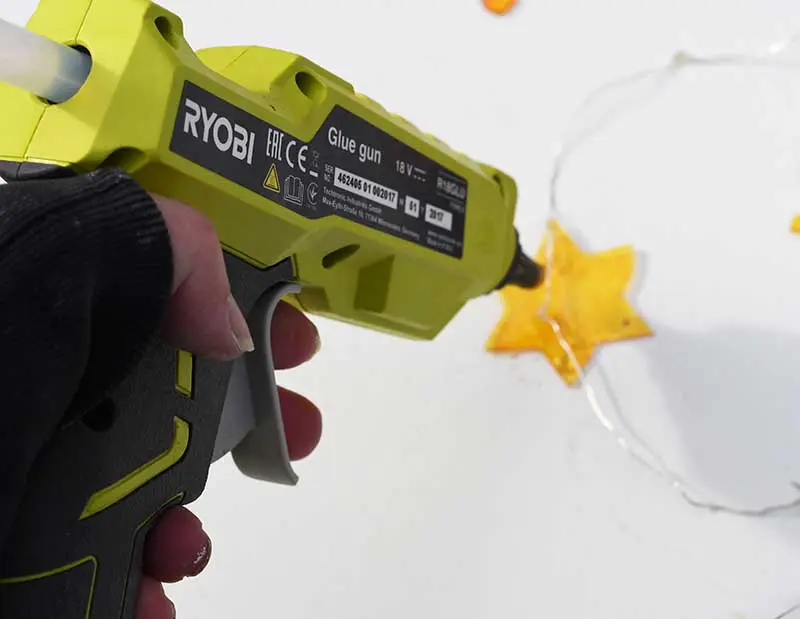
- Hot glue gun and glue sticks.
How To Make A DIY Christmas Garland With Lights
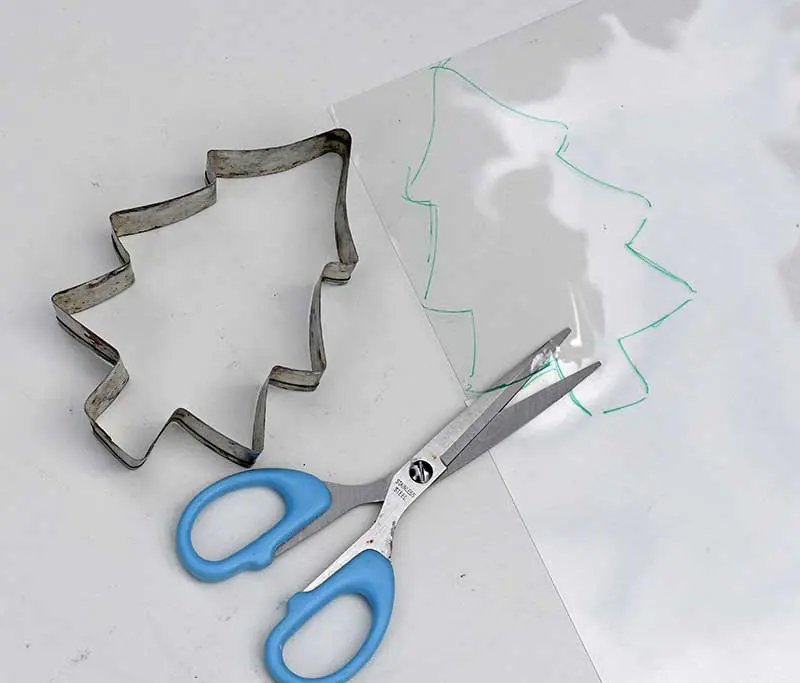
1. First, take a Christmas cookie cutter and draw around it on the sheet of shrink plastic. Then cut out the Christmas shape.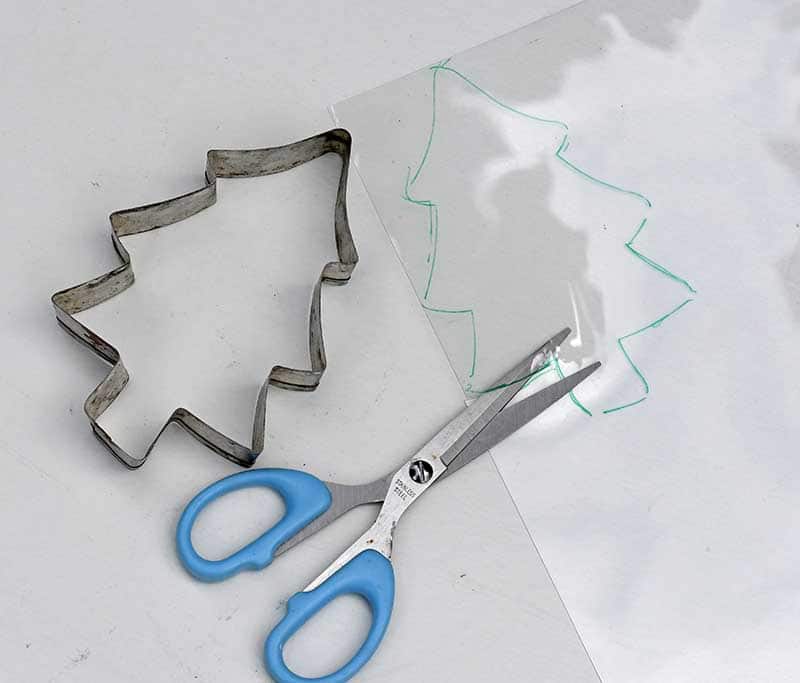
2. Next, colour in the plastic shape with Sharpies. This was my favourite part. I love colouring in and never get the chance to do it very often. This will also keep the kids occupied for a while too.
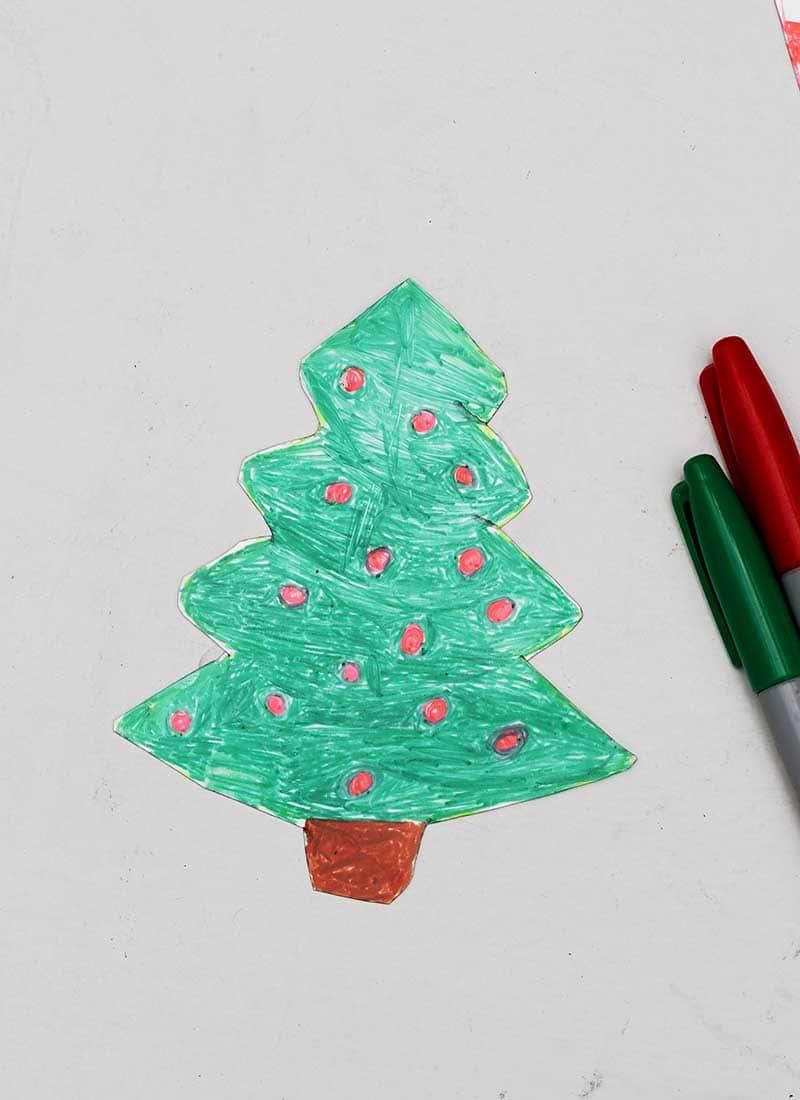

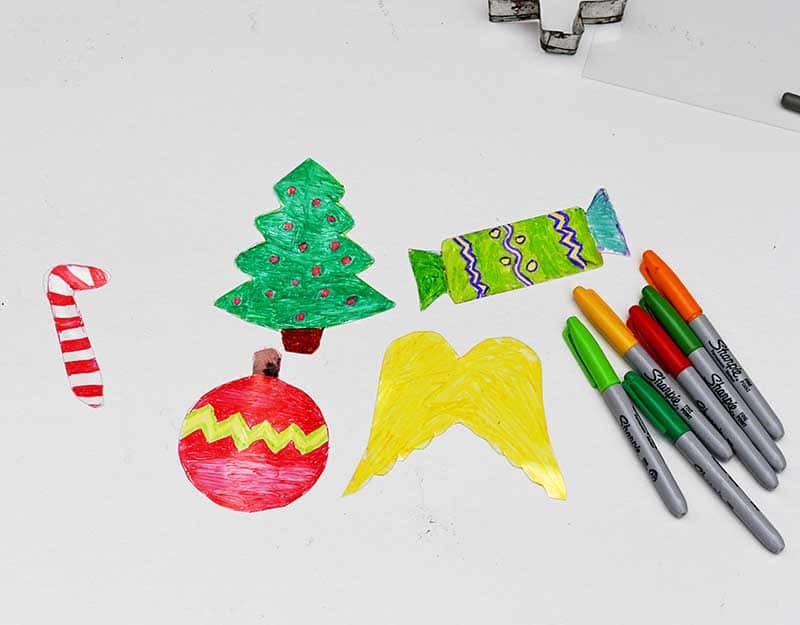
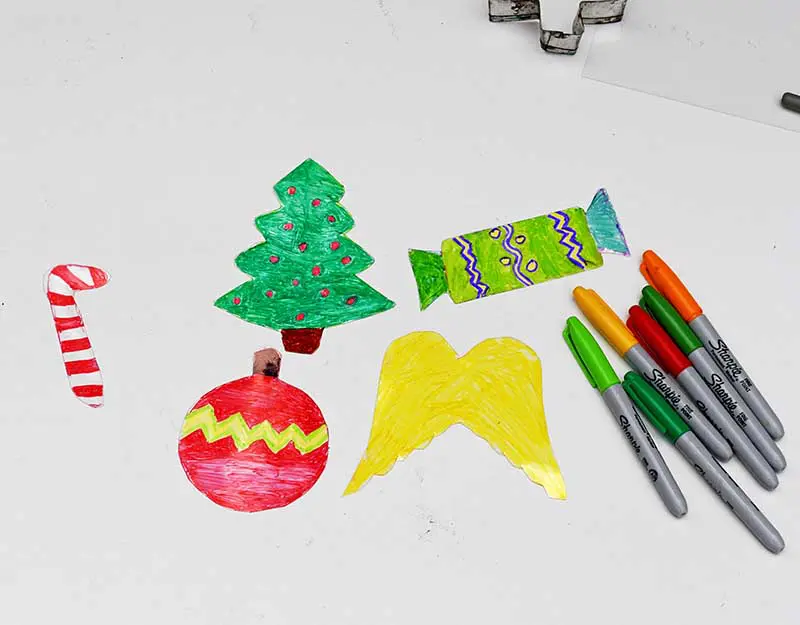
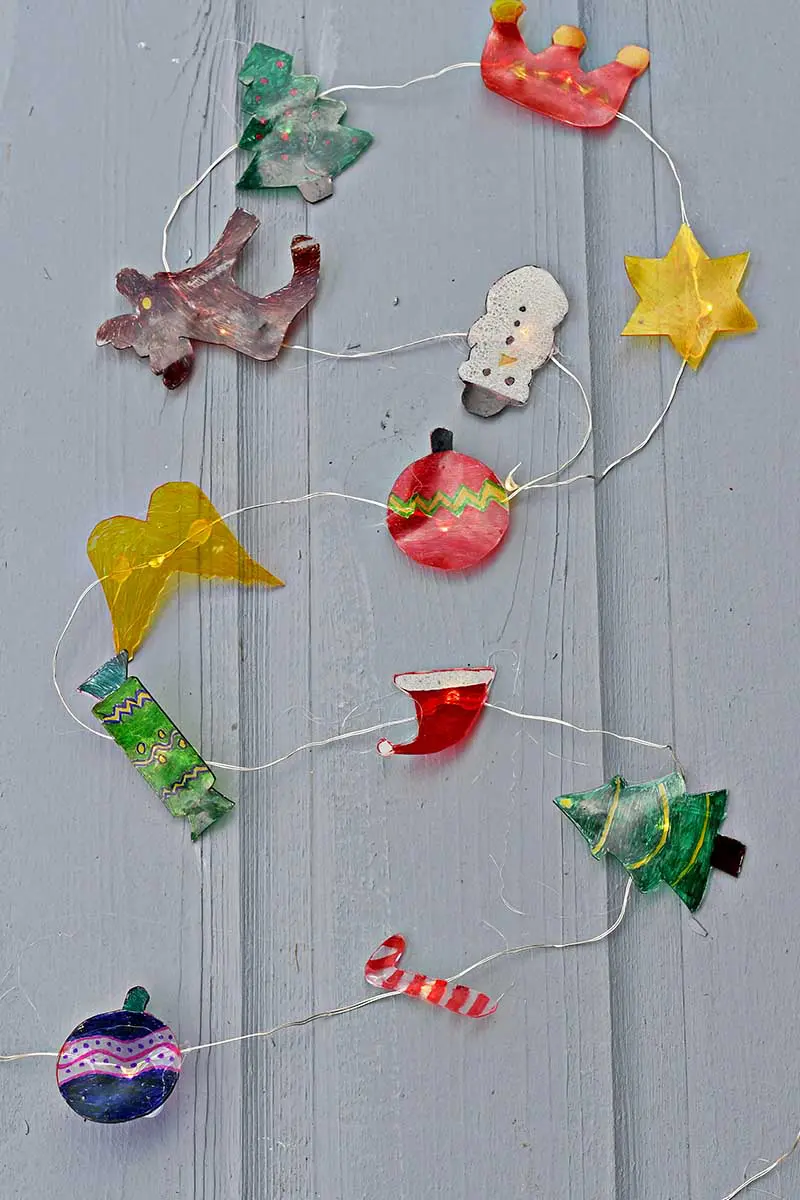
3. Carry on cutting out and colouring Christmas shapes. I used a variety of Christmas shapes for my DIY Christmas garland with lights. I think it would also look just as good with one shape repeated many times.
If you have a thing about Christmas trees you could just use Christmas tree shapes and then colour each one differently. The same goes for bauble shapes or cracker shapes.
4. Next, this is when the magic bit happens. Place all the plastic shapes on a non-stick oven tray and then stick them in the oven to shrink.
If you look through the glass in the oven door you will see the plastic shapes curl up and then straighten out again. Once the shapes are flat again they are done.
Check the instructions that came with the shrink plastic to see how long you need to put them in the oven and at what temperature. With the sheets, I used the oven temperature was 160c and they took about 2 mins to shrink.


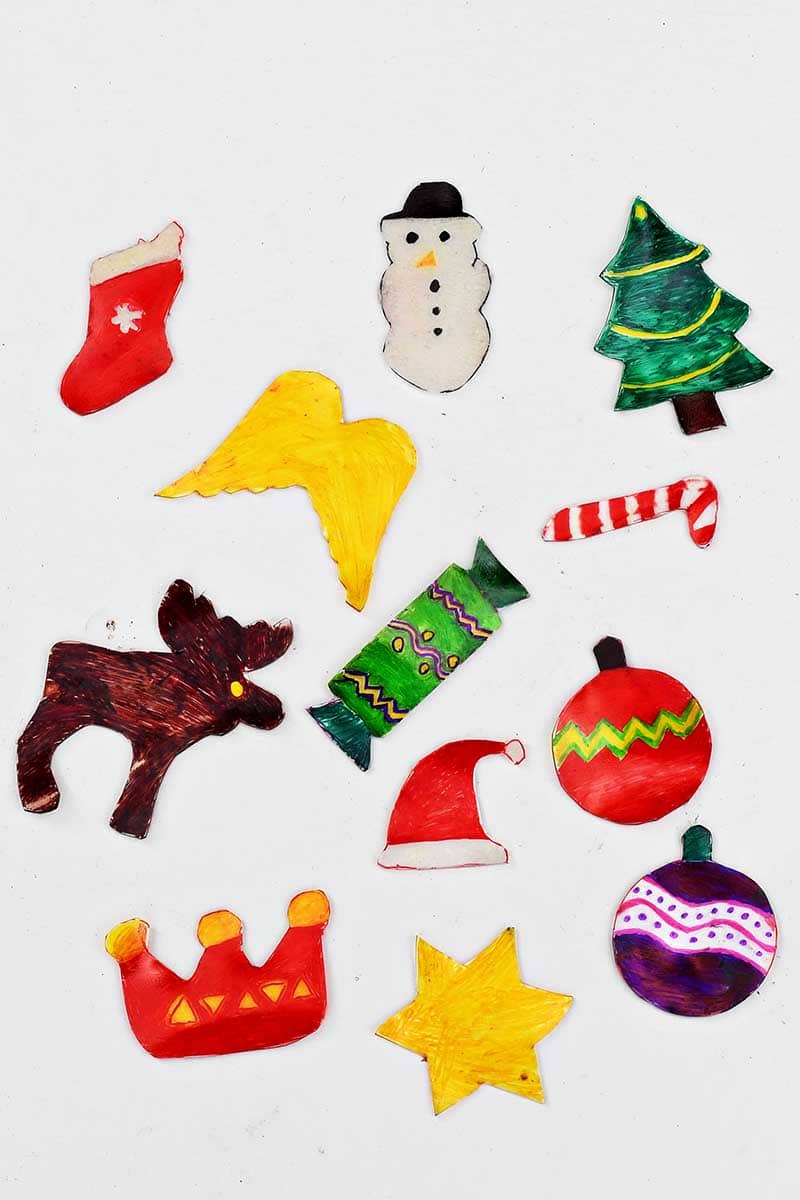
5. The shrunk cookie-cutter Christmas shapes will be thicker and sturdier than the original plastic sheets. Also, you will notice the colour is more intense after shrinking.
The shapes would make cute ornaments in themselves for a kid’s Christmas tree. If you wanted to do this I suggest punching a hole in the plastic before shrinking. This hole can then be used to add some hanging threads.

6. Finally, all that is left to finish off this DIY Christmas garland with lights is to glue the shapes to the string lights. I used a hot glue gun for this. I stuck one Christmas shape onto each light bulb on the string of lights.

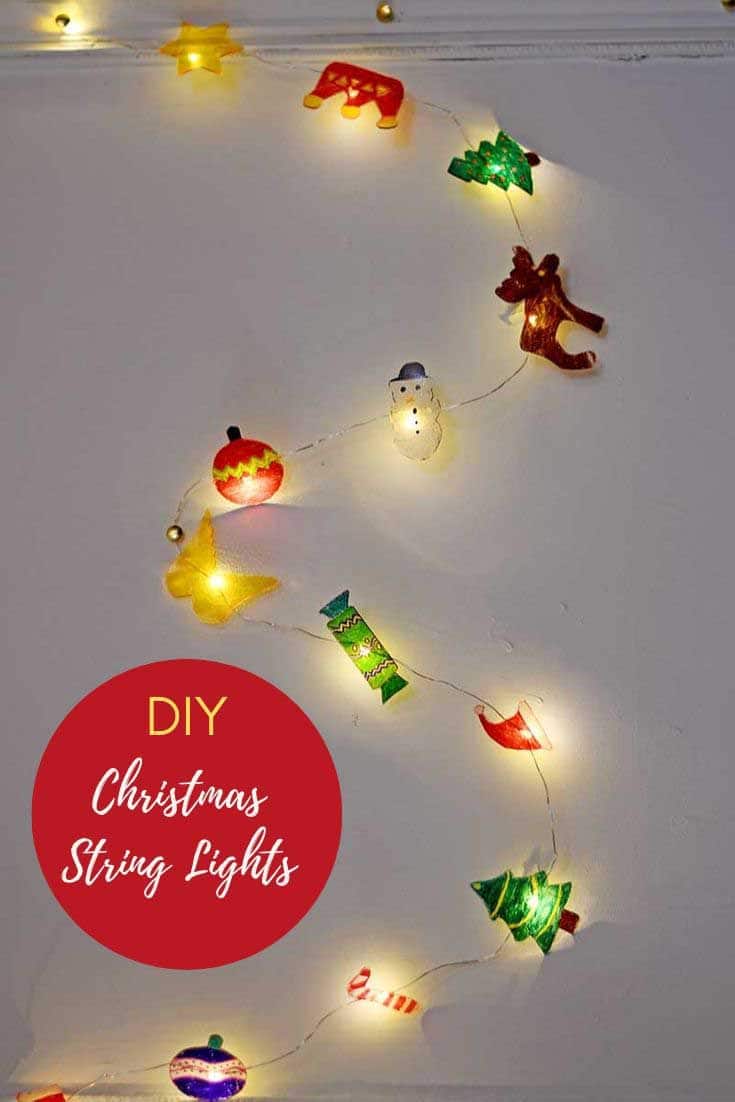

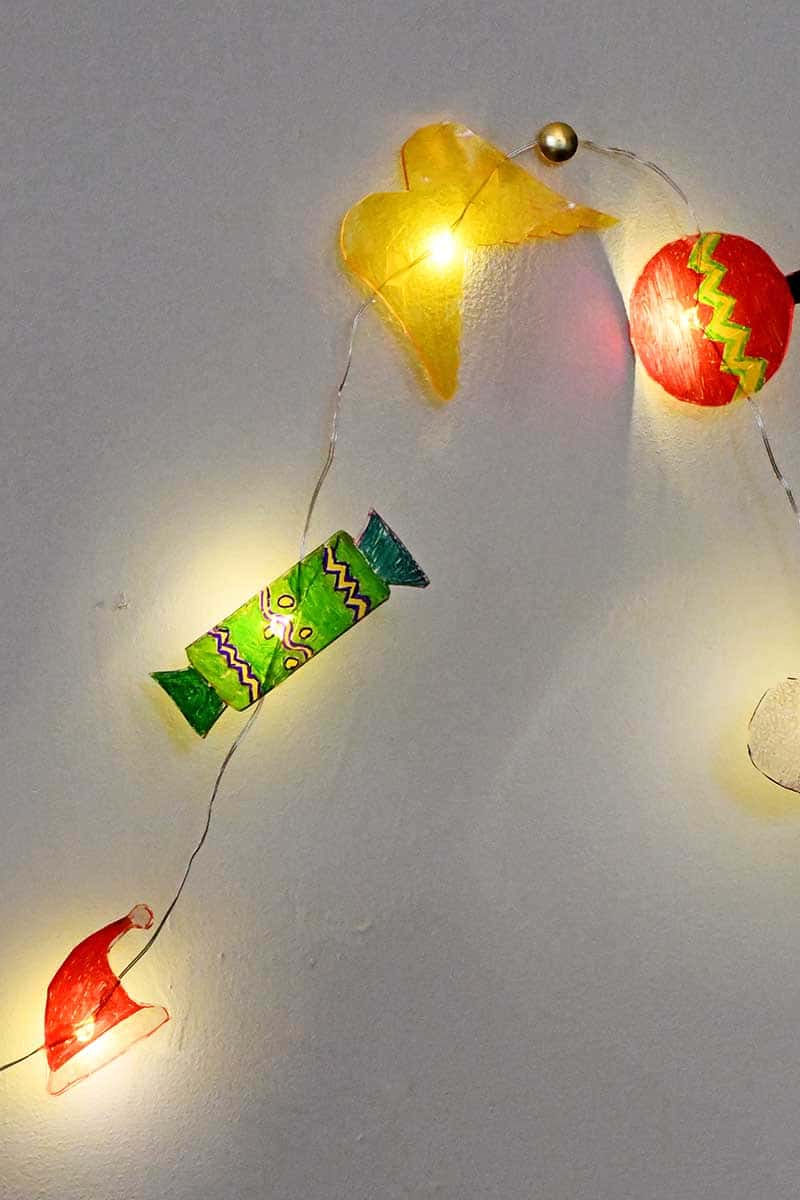
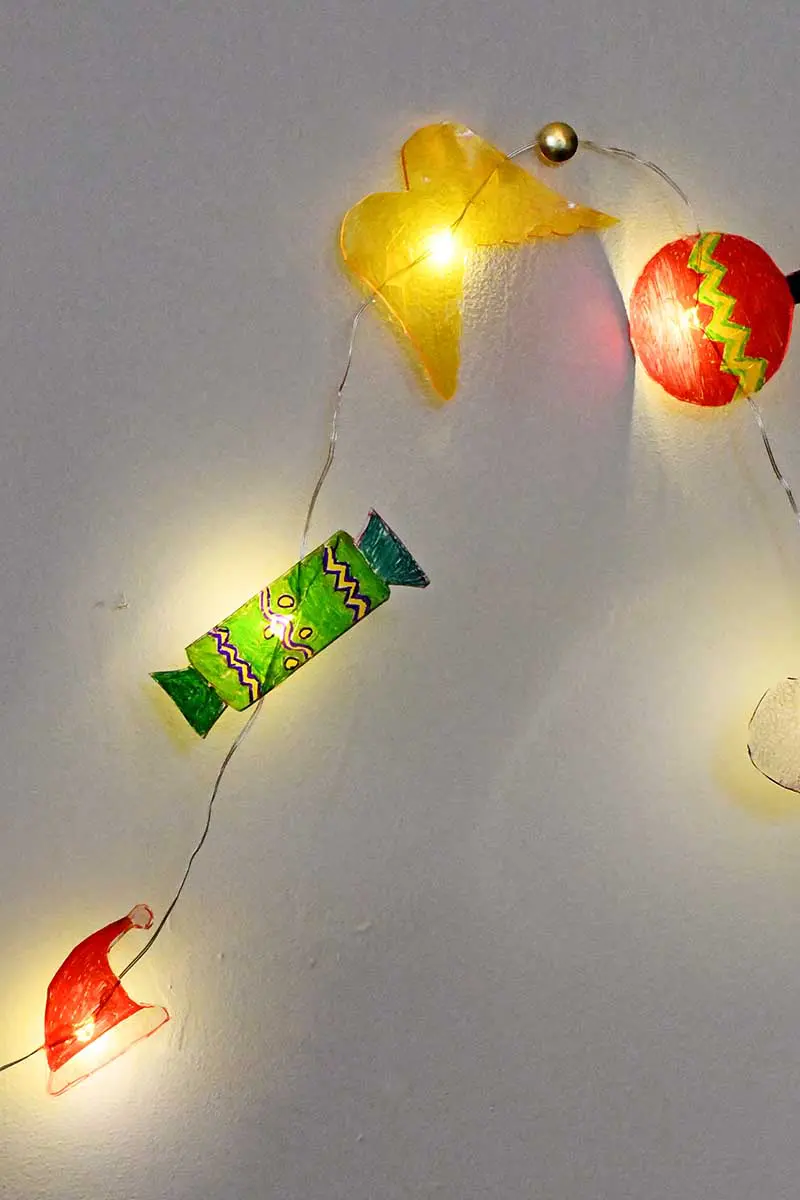
This DIY Christmas garland with lights obviously looks its best at night. I was going to hang mine above my desk in the study as a fun decoration but my son wants them for his room.
I’ve made a Valentine’s version of the shrink plastic string lights with hearts. I also have a great tutorial on how to make Shrinky Dink earrings.
If you liked this fun illuminated Christmas garland, then you should check out some of my other crafts involving lights.
You can also find some more fabulous Christmas crafts here.
Cecilia
Wednesday 16th of October 2019
Fabulous tutorial, Claire. Thanks for sharing at Vintage Charm!
Claire Armstrong
Thursday 17th of October 2019
Thank you so much ?
Michelle
Wednesday 16th of October 2019
These are so cute! I remember playing with Shrinky Dinks as a child and loved it. My daughter would really enjoy making this, too!
Claire Armstrong
Thursday 17th of October 2019
Thank you. They are fun to play with my kids enjoyed shrinks dinks too.
Felicity Frankish
Tuesday 15th of October 2019
This is an awesome idea, my girls would just love it!
Claire Armstrong
Tuesday 15th of October 2019
Thank you, yes I think most kids love crafting with shrink plastic.