
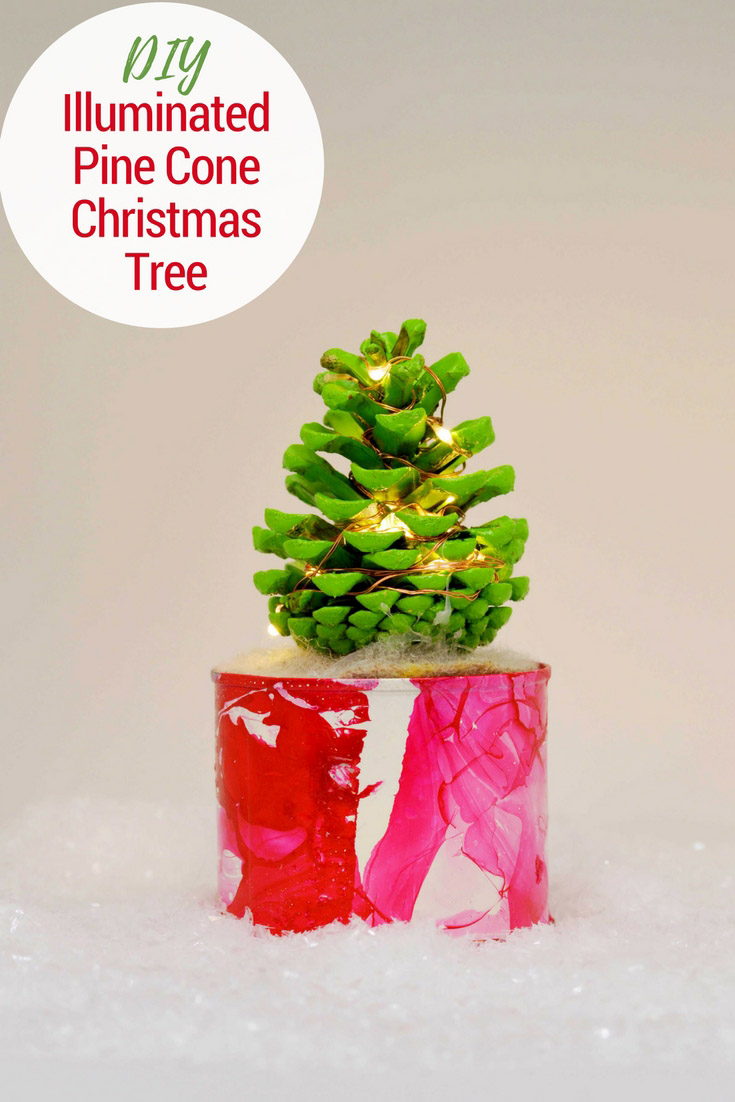
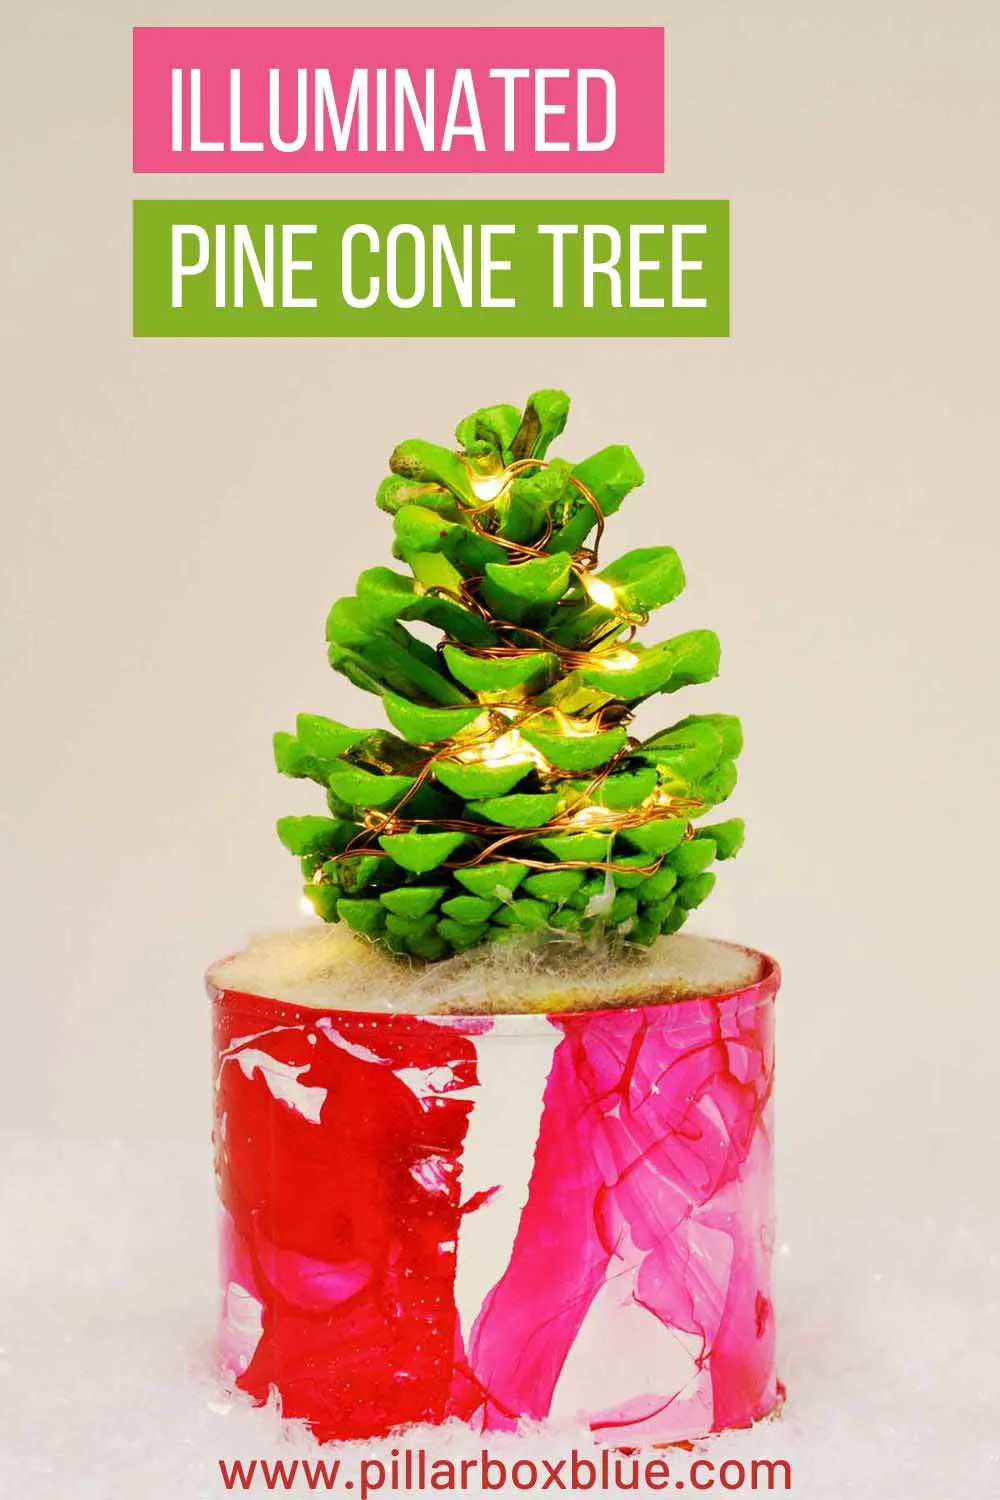
Inside: A tutorial to make a cute pine cone Christmas tree and illuminate it with fairy lights.
Every day, I walk the dog down our local park, and the ground is covered with lovely pine cones. Sometimes I can’t help myself; I pick a couple up and bring them home to create something with them.
They sit in a bucket in the fireplace.
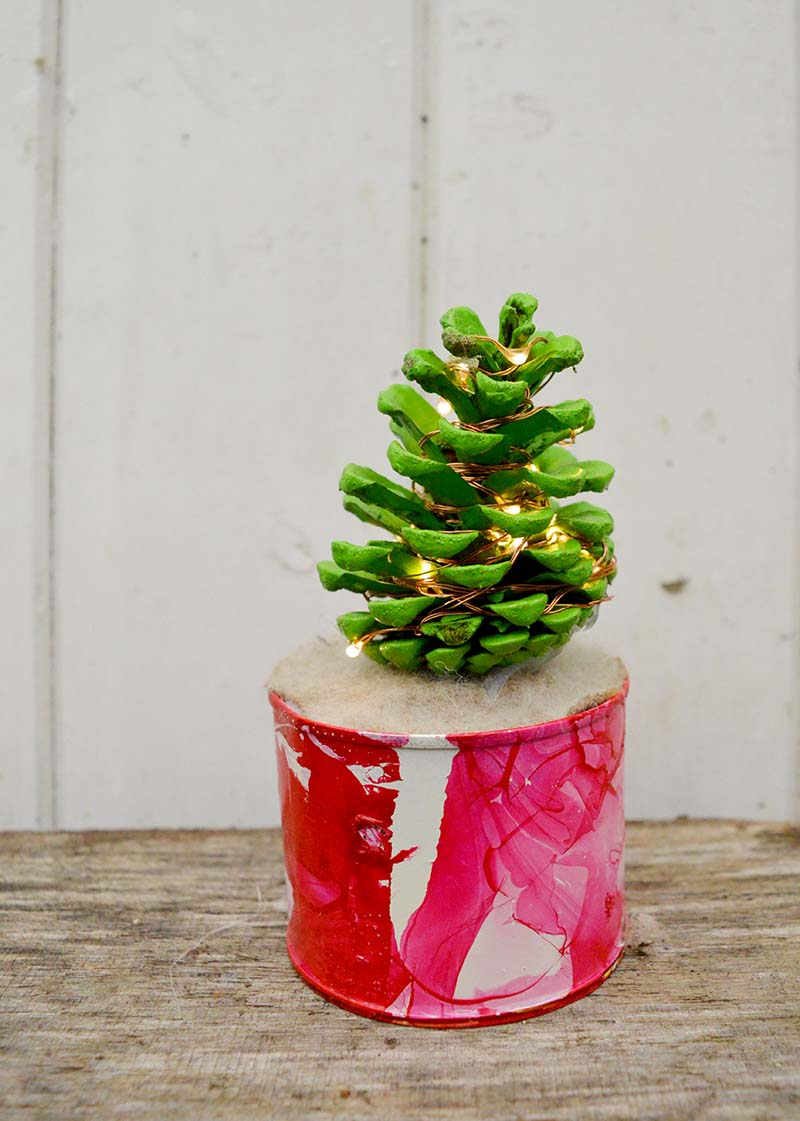
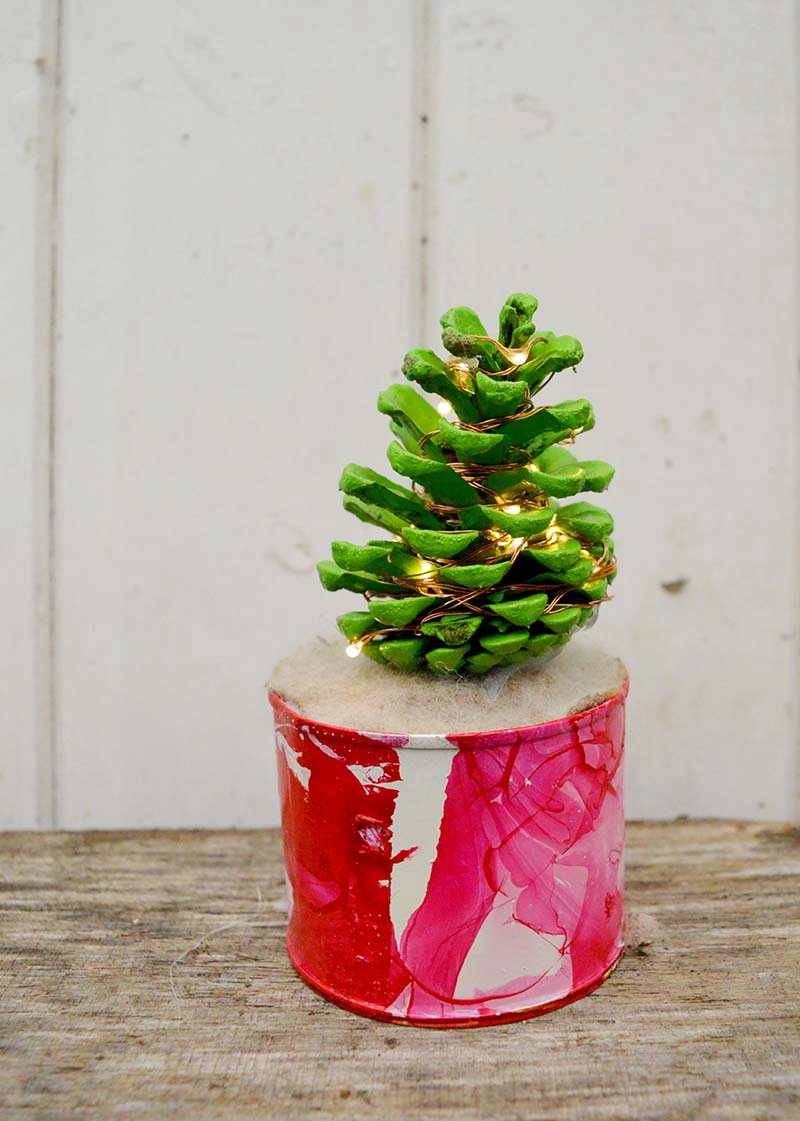
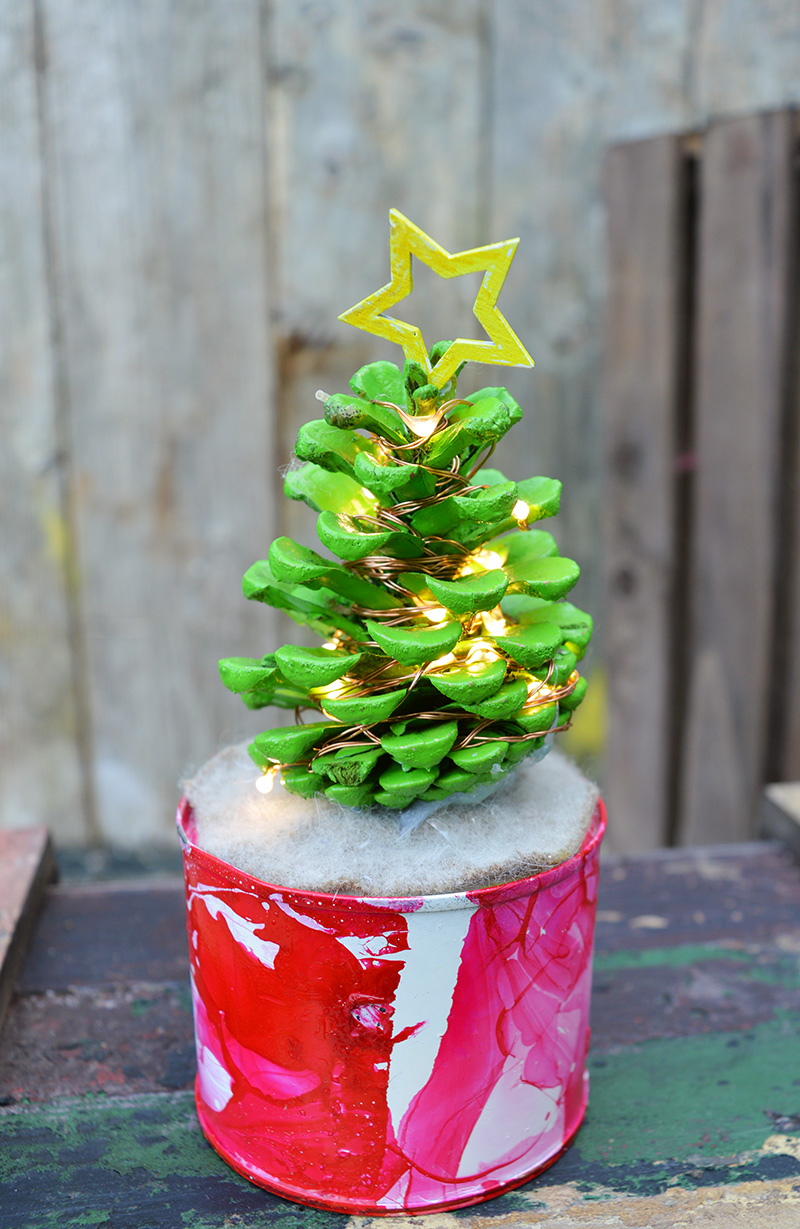
However, the other day I was looking at the pine cones, and it struck me that they looked like a mini Christmas tree. That’s when I got the idea to make my mini pine cone Christmas tree with light ornaments.
DIY Cute & Colourful LED Pine Cone Christmas Tree
One of my favourite things to recycle is tin cans. So I decided to use a tin can as my Christmas tree pot and add colour to it by painting the can with a marbled effect.
Also, what Christmas tree is complete without lights? I think these colourful mini pine cone Christmas tree looks cute and make a lovely desktop Christmas decoration.
My kids want me to make them one each for their rooms, which I will do as I have a plentiful supply of pine cones. There are many more Christmas nature crafts here.

We’re a participant in the Amazon Services LLC Associates Program, an affiliate advertising program designed to provide a means for us to earn fees by linking to Amazon.com and affiliated sites. As an Amazon Associate, I earn from qualifying purchases.
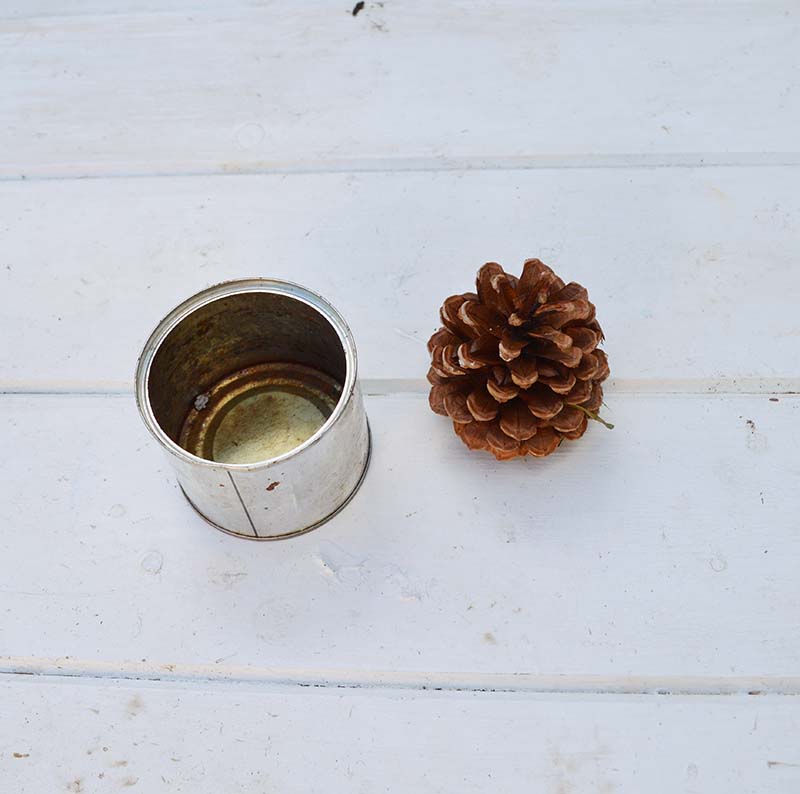
What you need to make a Pine Cone Christmas Tree with Lights
- Pine cone – Medium-sized is best
- Small tin can – the ones that are half the size of the standard tin cans
- Hot glue gun
- Stiff cardboard or foam
- Small piece of brown felt
- Green spray paint
- Cream spray paint
- Scissors
- Red nail polish – not the fast-drying kind
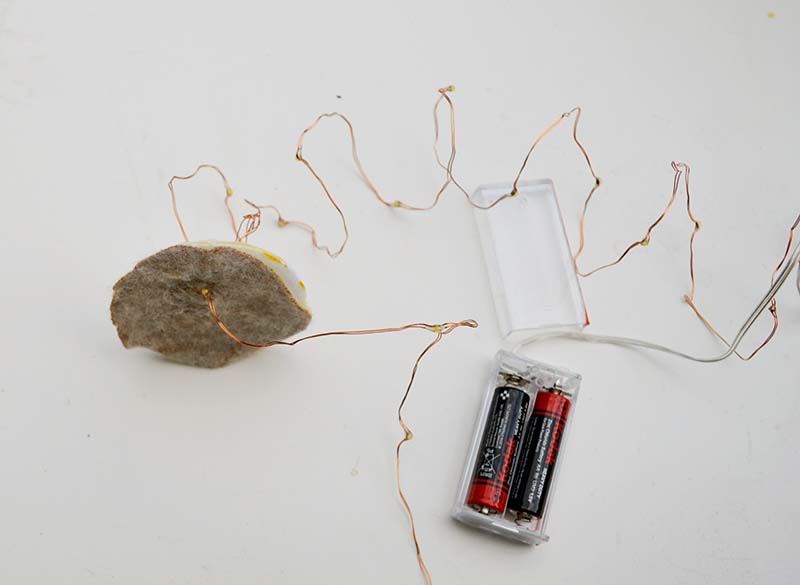
- Battery-operated copper string lights – You want the ones with a small 2-battery pack or micro battery operated.
How to make a mini pine cone Christmas tree
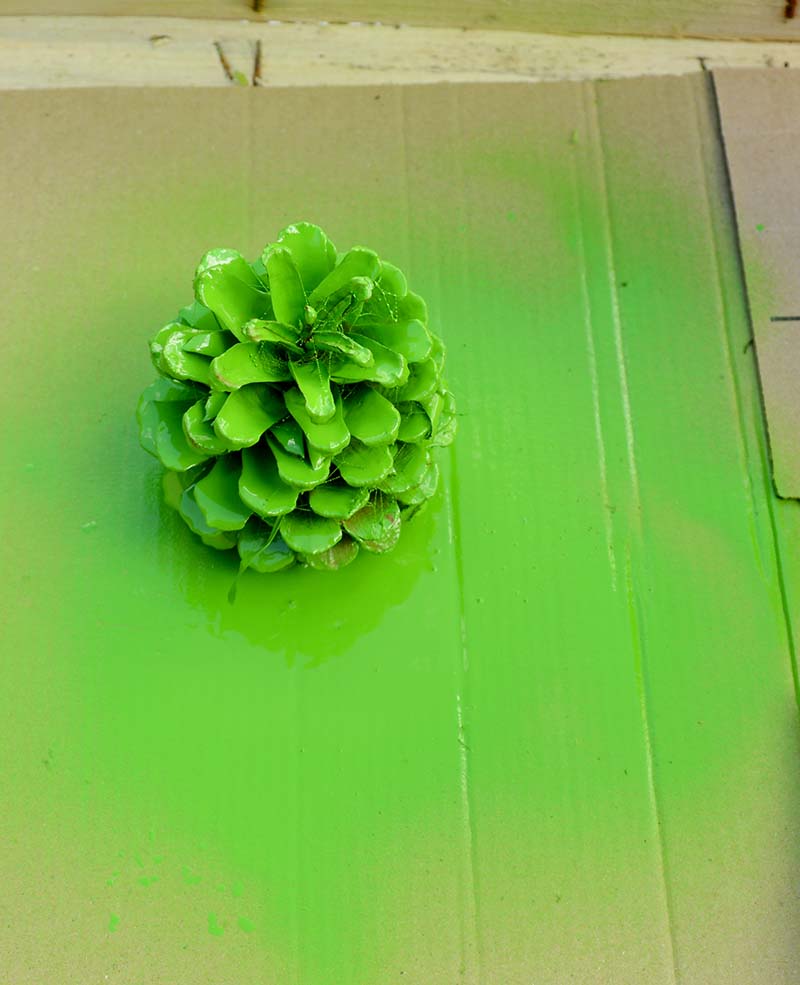
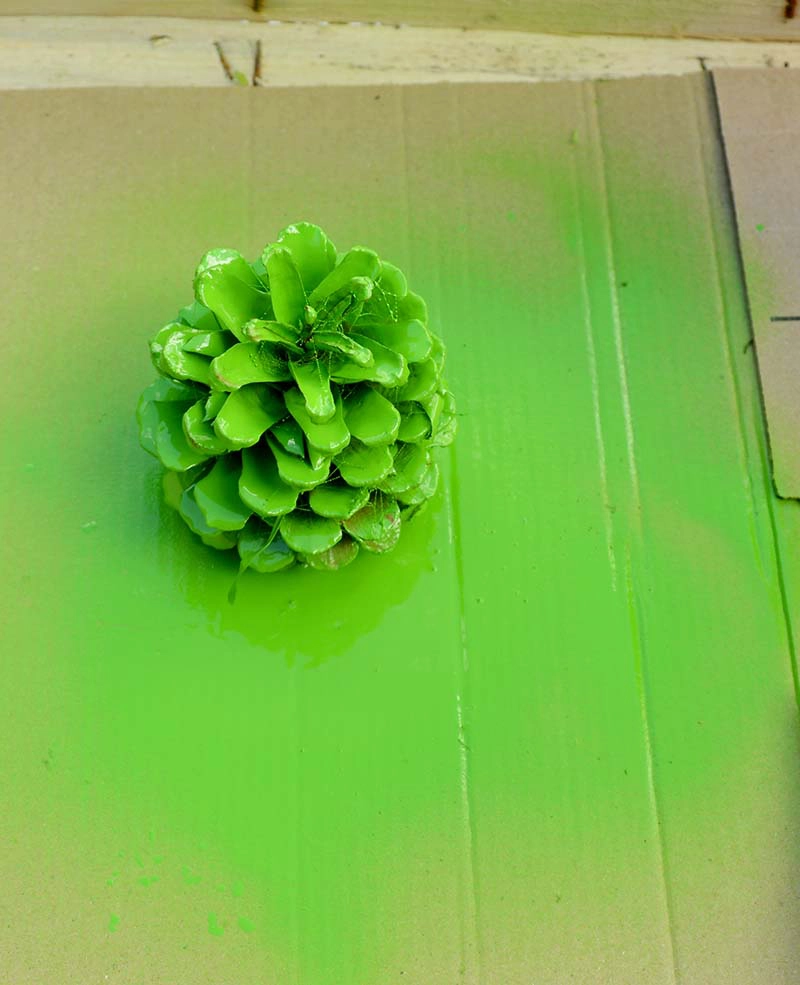
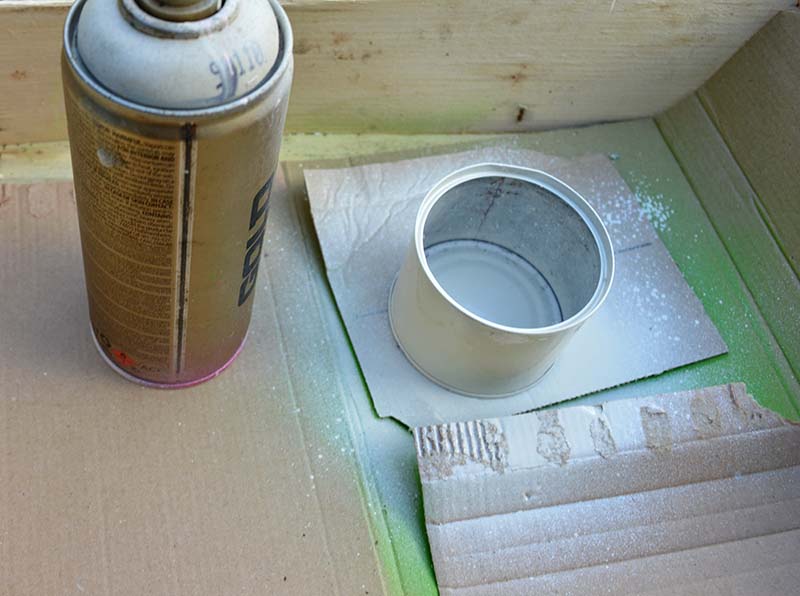
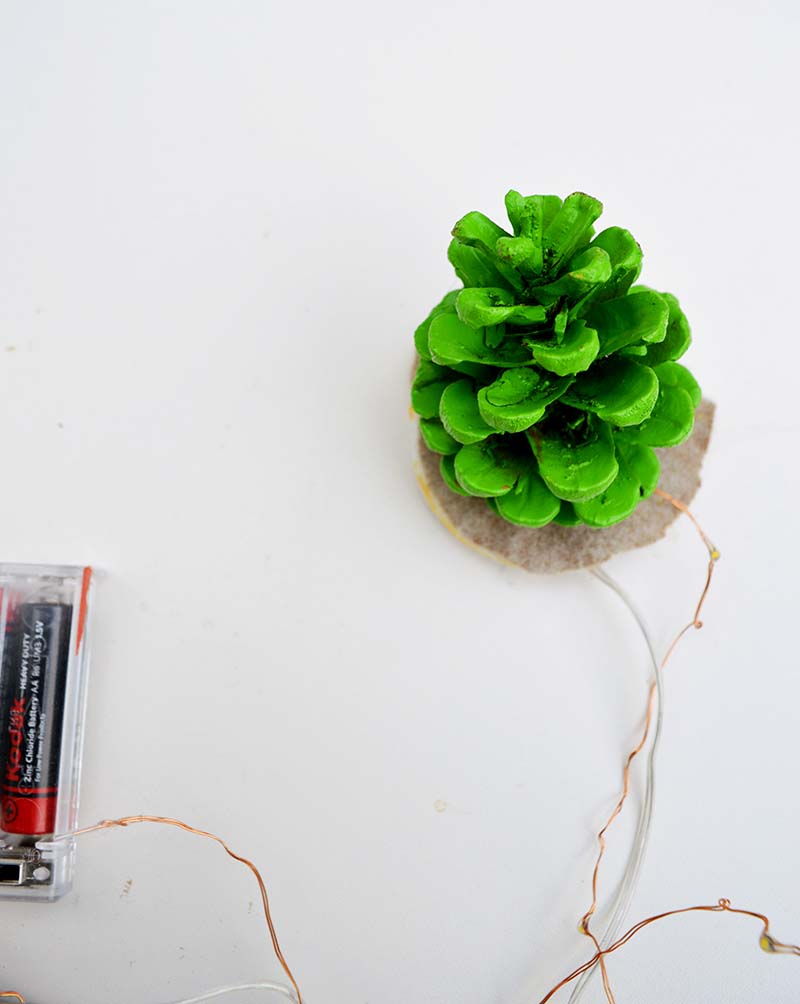
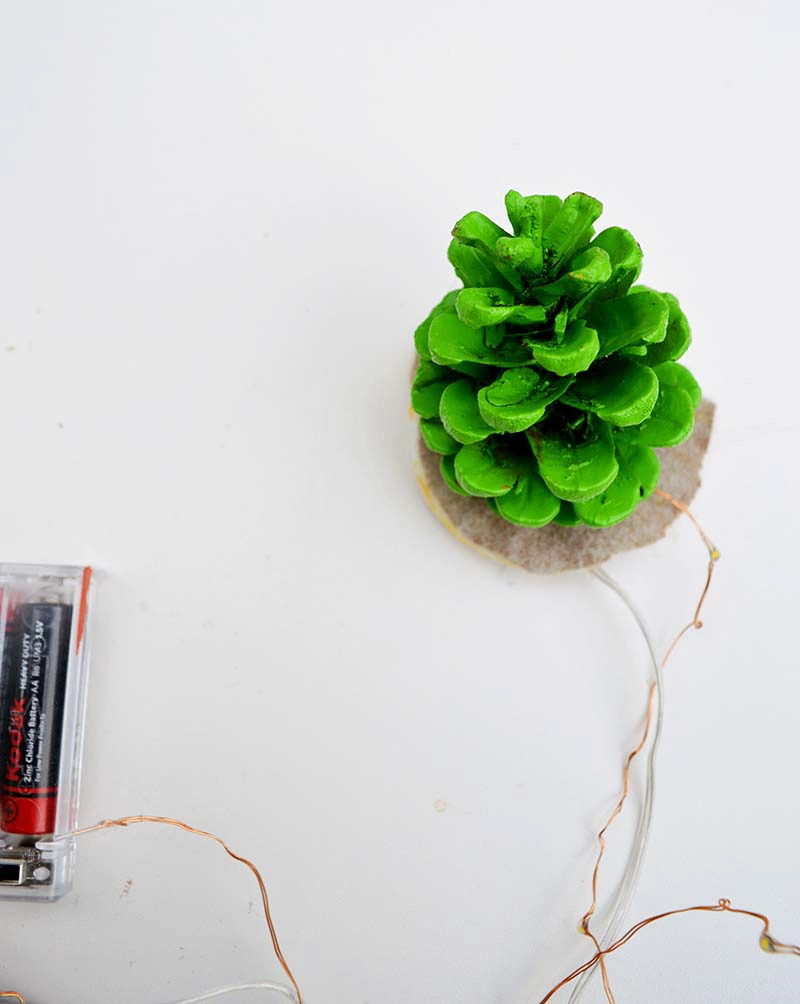
Step 1: Firstly, wash and carefully dry the pine cone and then spray paint it green.
Step 2: Spray paint the tin can cream. Then leave it to dry thoroughly.

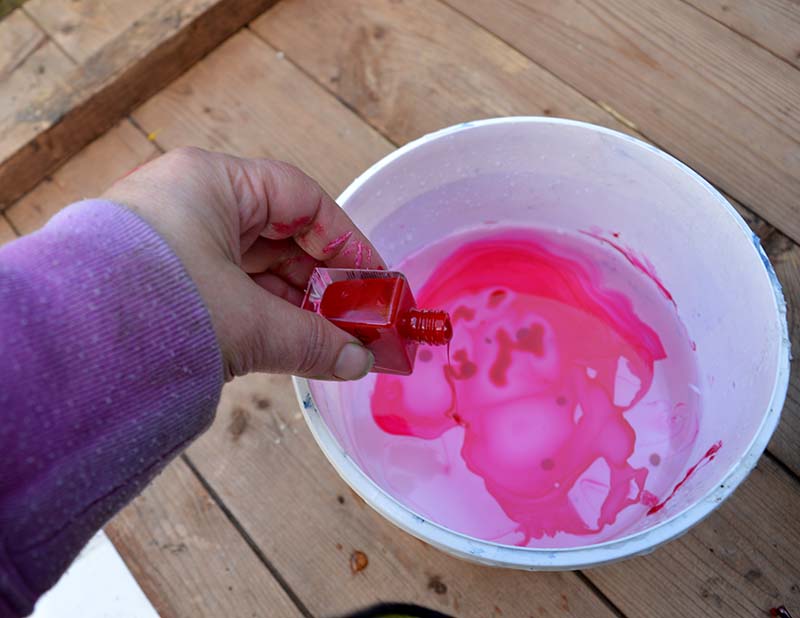
Step 3: When the paint has dried on the tin can, it is ready for marbling. To do this, in a tub of warm water, add a few drops of nail varnish to form a film on the surface of the water. If the varnish doesn’t spread out, you can use a cocktail stick to help it spread across the water’s surface.

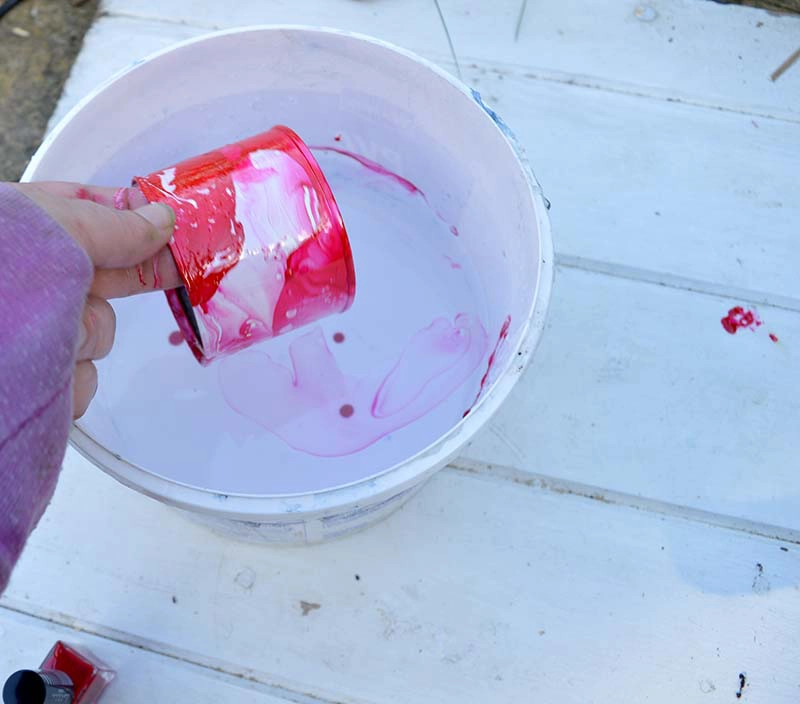
Step 4: Then, carefully dip the outside edge of the tin can into the water. The varnish will cling to the tin can, and as you roll the can, it covers it completely, just like I made these faux marble cookie tins.

Assembling the pine cone Christmas tree
Step 5: Draw around the tin can onto the cardboard and felt and cut out a disc of each material to fit the top of the tin can. Glue the discs together and pierce a small hole through the disc to one side. Thread the copper string lights through this hole.

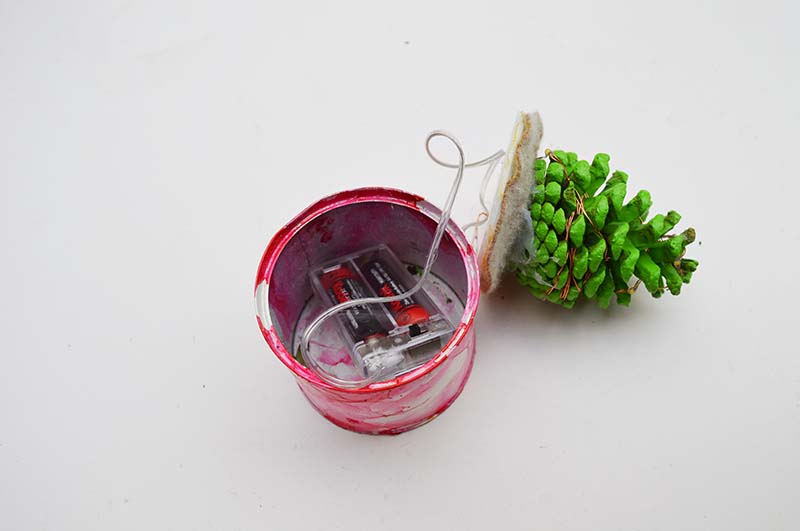
Step 6: Using a hot glue gun, glue the pine cone to the centre of the felt disc. Then wrap the string lights around the pine cone Christmas tree.
Step 7: Place the battery pack inside the marble tin can and then place the tree on top as a lid.

All that is left to do is to switch on the lights. My son loves having his own personal Christmas tree on his desk. It’s just a little fun festive touch he was looking for.
To make the Pine cone Christmas tree feel even more festive then, add a small star to the top of the tree.


I’ve upcycled more of these small tin cans to make my sons some personalized snow globe Christmas ornaments for their desks. You’ll find more things to make from tin cans for Christmas here.
There are many more painted pine cone ideas here.
You might want to check out some of my other popular DIY Christmas decorations posts.
Tin Can Upcycled Advent Calendar
Upcycled Shuttlecock Angel
Upcycled Sweater Felt Garland
Sweater Upcycled Christmas Ornaments

Dottie
Tuesday 4th of February 2025
Claire I have only just discovered you!!!! After following numerous American sites, there you are and you are in the UK. Fantastic recycling sewing etc, keep up the excellent projects.
Claire Armstrong
Wednesday 5th of February 2025
Thank you so much, that's lovely to hear.
CardioGod
Wednesday 20th of December 2017
Interesting idea! I'd decorate the pot in a more Christmas related style.
Claire Armstrong
Wednesday 20th of December 2017
Thank you ?
Easy To Make Super Cute Christmas Cloche - Pillar Box Blue
Friday 1st of December 2017
[…] thought it would be lovely to make a cute mini Christmas cloche scene. In the past, I’ve made painted pine cone Christmas trees. And I’d spotted tiny pine cones in the park that would be perfect for this. Rather […]
moazzam sultan
Wednesday 29th of November 2017
very nice and cool.
Claire Armstrong
Wednesday 29th of November 2017
Thank you!
Mother of 3
Wednesday 22nd of November 2017
What a cute idea! We've used pine cones to make ornaments before but never to make the actual tree. Thanks for sharing this fun craft idea with us at the Virtual Refrigerator. Pinned.
Claire Armstrong
Wednesday 22nd of November 2017
Pine cones are great for so many crafts.