


Create a whimsical fabric mushroom display with our free printable mushroom pictures. This DIY guide offers a fun, easy way to bring enchanted forest vibes into your home. Perfect for crafters of all levels.
This cute fabric mushroom display ticks so many craft boxes for me: upcycling, vintage images, whimsical, inspired by nature and colourful.
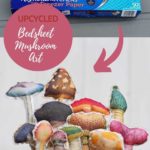
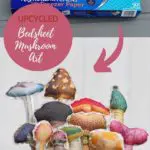
During the lockdown, I decided to tackle my overflowing linen cupboard. I had several old and worn sheets, many of which I repurposed into dust sheets (drop cloths) for when we paint. However, I did use one to upcycle for this craft. A pillowcase would also provide enough material for these fabric mushrooms.
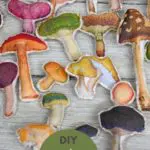
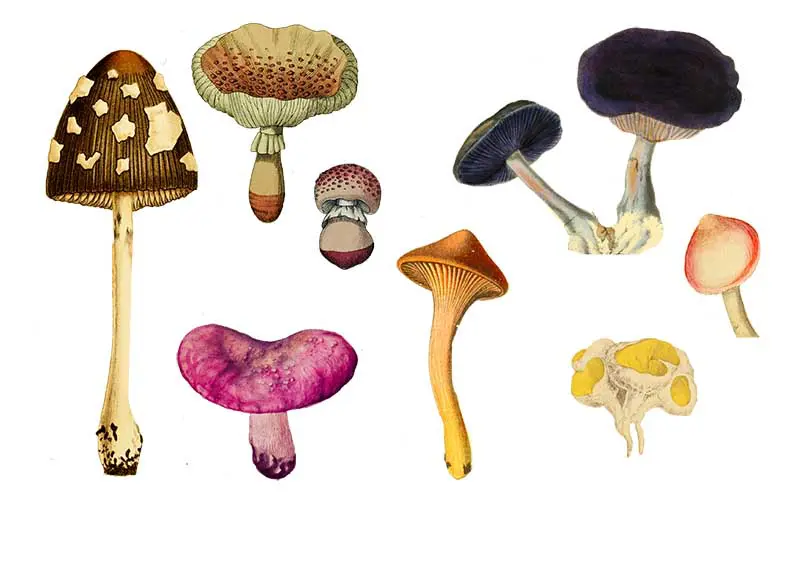
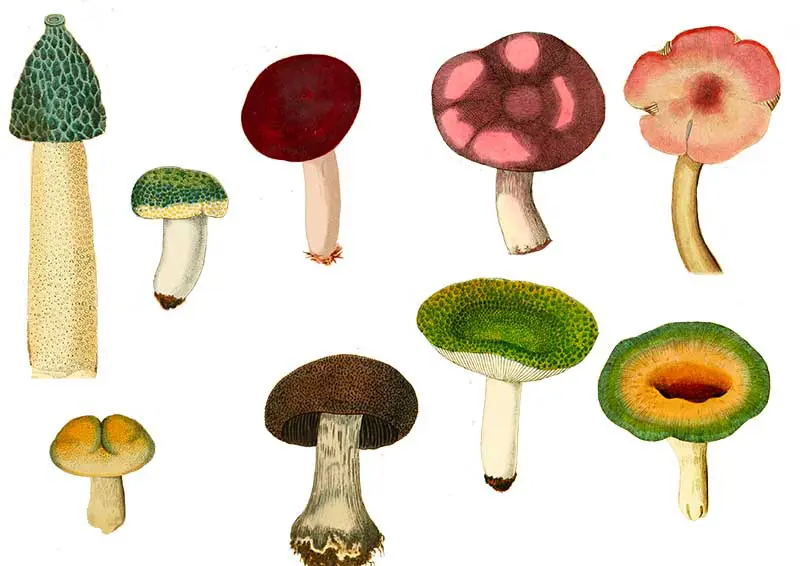
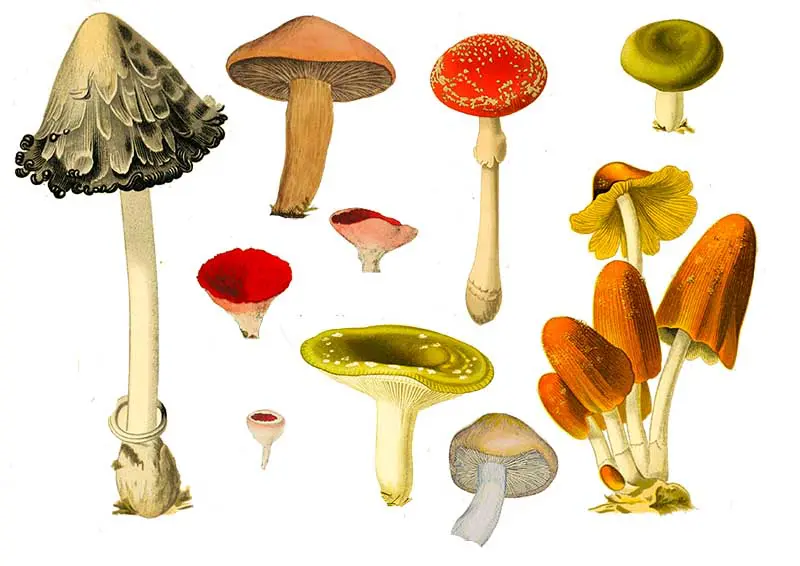
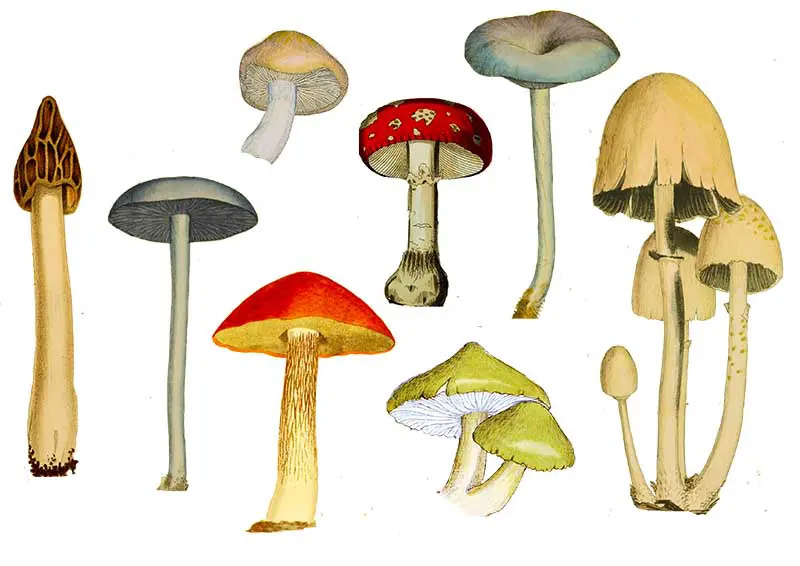
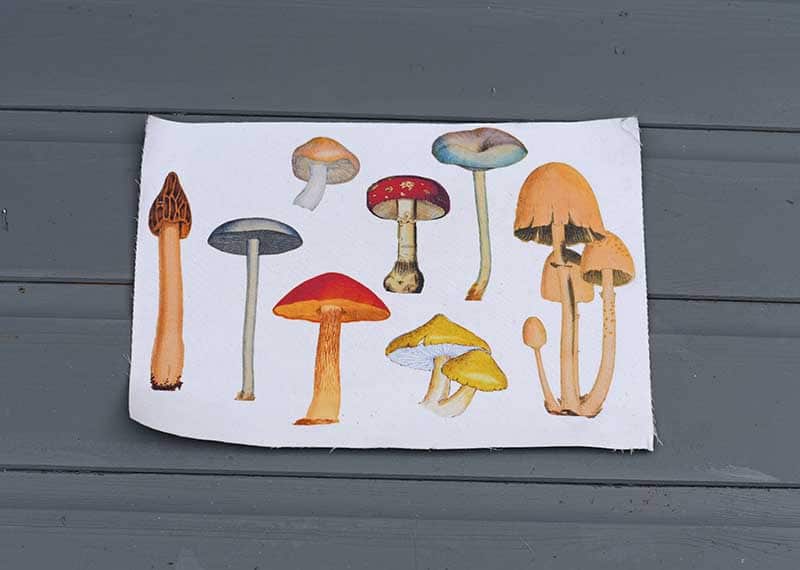
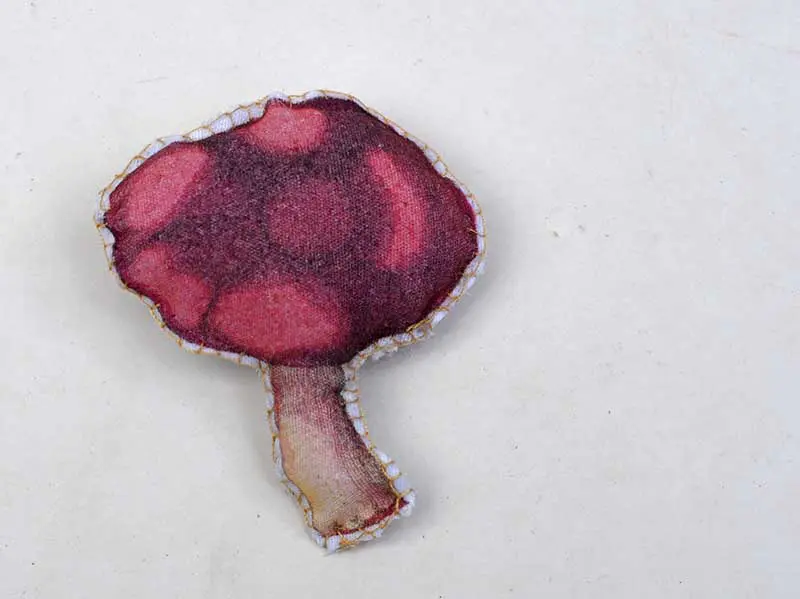
The mushroom and fungi images were sourced from vintage natural history books. Many of the mushroom paintings were by James Sowerby, an 18th Century British Naturalist. The work of the French artist Lyndie Dourthe also inspired me.
I love the whimsical nature of this craft and the colourfulness of the mushrooms and fungi on display. It fits my other nature-themed upcycled crafts, such as the denim faux moth taxidermy and my repurposed felt succulent garden.
Mushrooms are very on trend with interiors; check out all these mushroom crafts.
I warn you, these mushrooms and fungi are so cute that they can become addictive making them. I made far more fabric mushrooms than needed, so I made a second display for a friend.
Hand-stitching the little mushrooms can be therapeutic once the vintage images have been printed. As the stitch is simple, the craft doesn’t require much concentration. I made most of the mushrooms whilst getting watching Netflix.
As well as being a straightforward craft, it was also very affordable as I used mainly repurposed materials.
We’re a participant in the Amazon Services LLC Associates Program, an affiliate advertising program designed to provide a means for us to earn fees by linking to Amazon.com and affiliated sites. As an Amazon Associate, I earn from qualifying purchases.
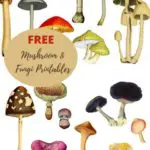
Free Printable Mushroom Pictures/Clip Art
The vintage mushroom fungi images. I have prepared four different collections of images you can use. Just click on the title of the collection you want to download the pictures.


The Materials Needed
- Fabric for printing – I used an old cotton sheet. The main thing is that the material needs to be thin enough to go through a home printer.
- Freezer paper – plastic-coated paper
- Iron
- Inkjet printer
- Fabric Mod Podge
- Needle and thread
- Fiberfill – I use the filling from old pillows.
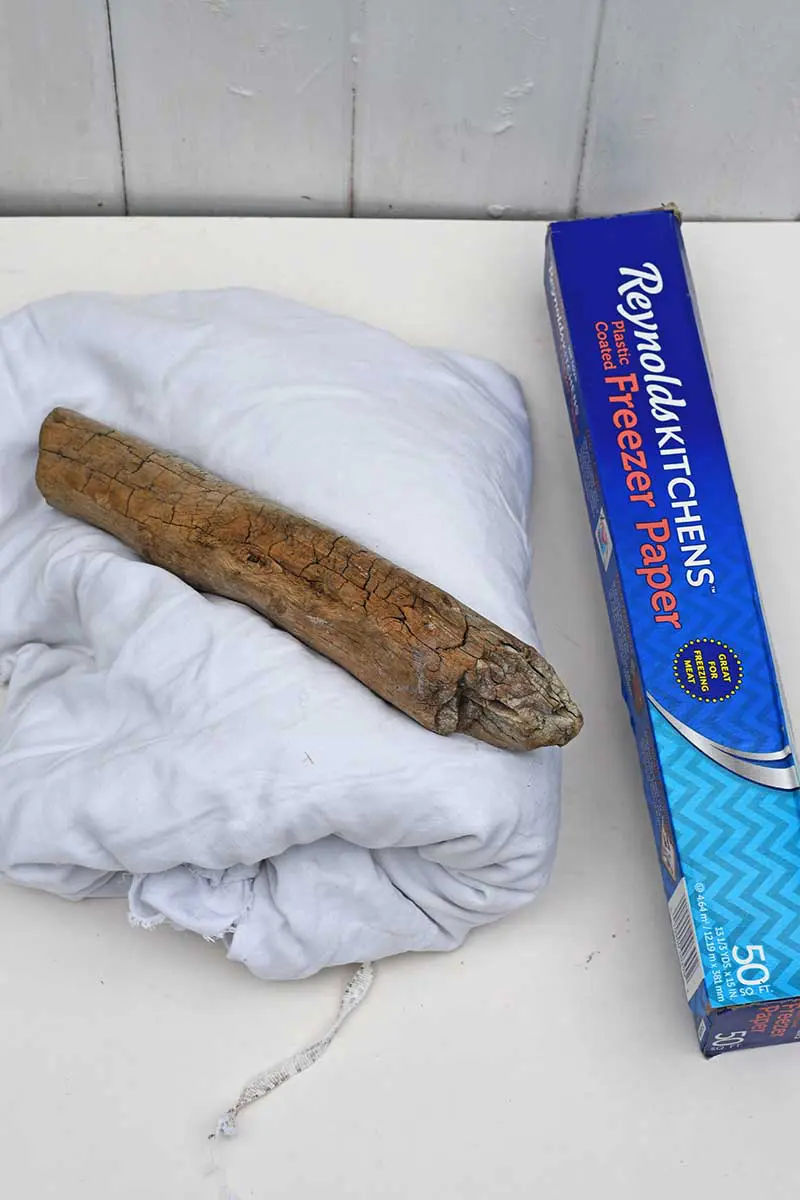
- Cork strip
- Wood slice or driftwood
- Specimen pins
- Hot glue gun

How To Make Fabric Mushrooms
The first thing you need to do is to print the mushroom/fungi images onto fabric. There are different ways that this can be done; I choose the freezer paper method. This is very similar to how I print onto paper napkins and tissue paper, the main difference being freezer paper.
Printing The Images Onto The Fabric
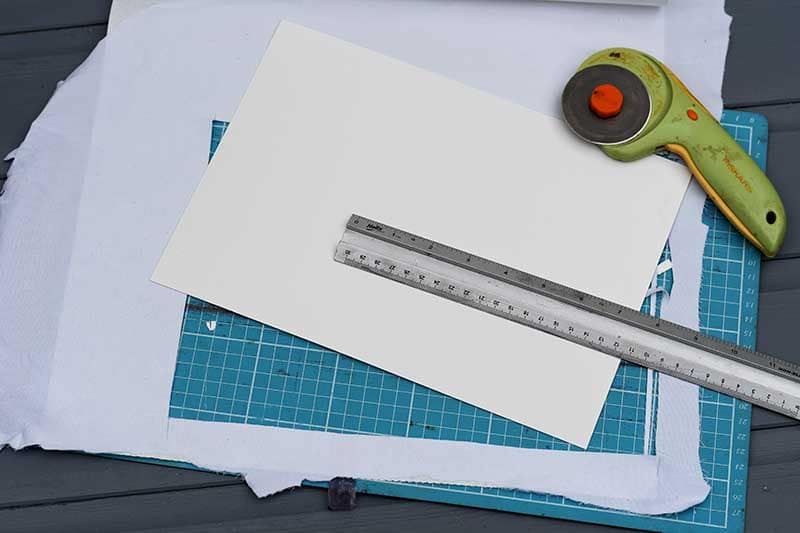
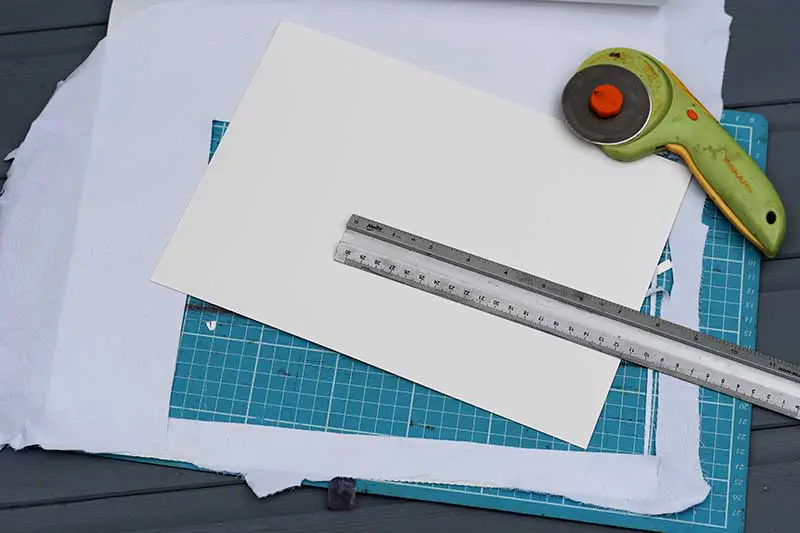
Step 1: Firstly, using an iron on a hot setting with the steam turned off, iron freezer paper to the cotton fabric. Make sure the plastic-coated side of the paper is in contact with the material. Iron until the paper has stuck to the fabric.
Step 2: Using a rotary cutter and mat, cut out the paperbacked fabric to be the same size as standard computer paper (A4).
(If you want to avoid using freezer paper, you can buy cotton sheets already prepared for printing. But you don’t get to choose the fabric.)
Step 3: Place the freezer-backed paper into your inkjet printer’s paper feeder. Ensure the paper is placed so the fabric side will be printed on (and not the freezer paper).
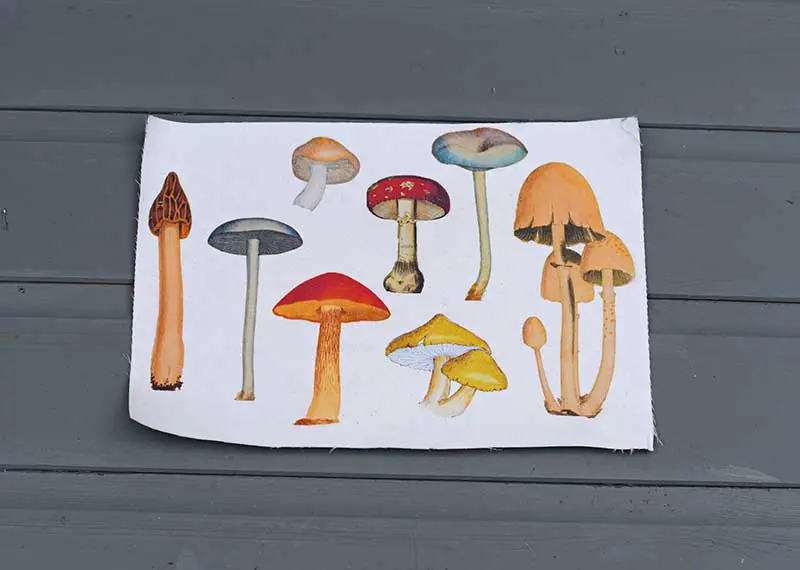
Print the mushroom collection you have chosen onto the fabric sheet. Make sure you choose the best-quality print option in the printer settings menu.
Step 4: The printed fabric can be removed from the freezer paper backing by gently pulling it apart.


Making The Fabric Mushrooms
Step 5: Cut out the individual mushrooms with backing fabric the same size. I cut around the images so that there is a small border. Pin the pieces of fabric wrong sides together.
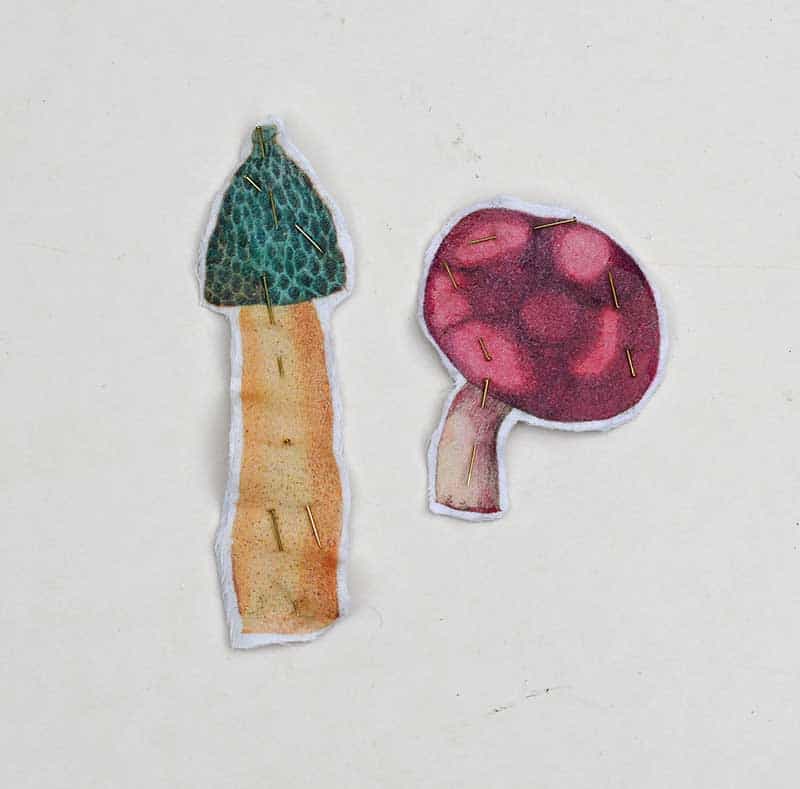

Step 6: To stop the fabric from fraying, brush the raw edges of the mushrooms with fabric glue.
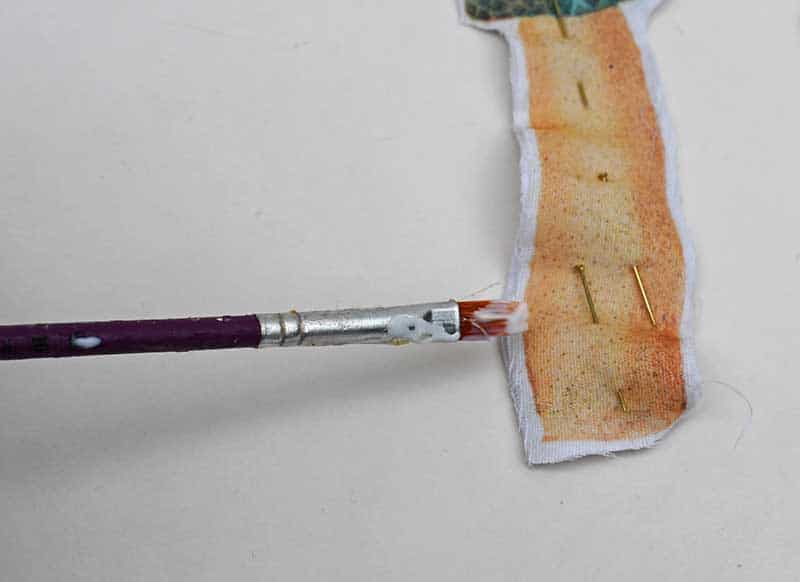
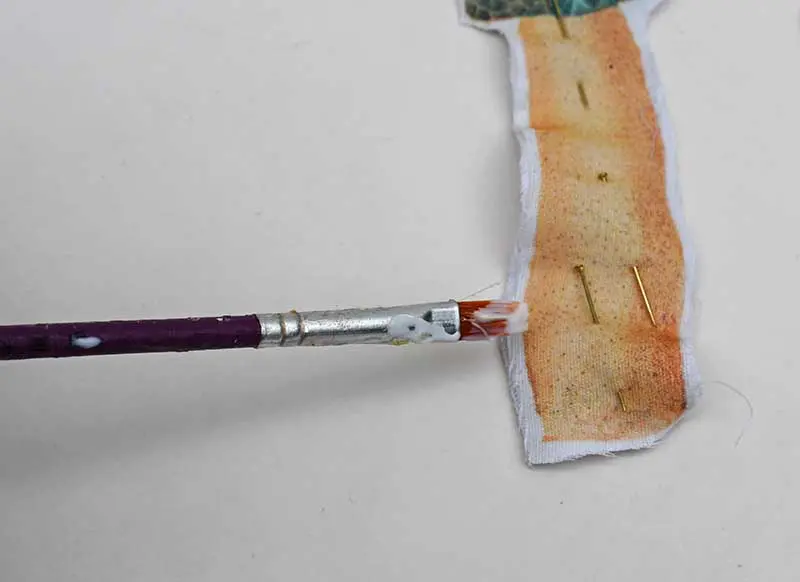
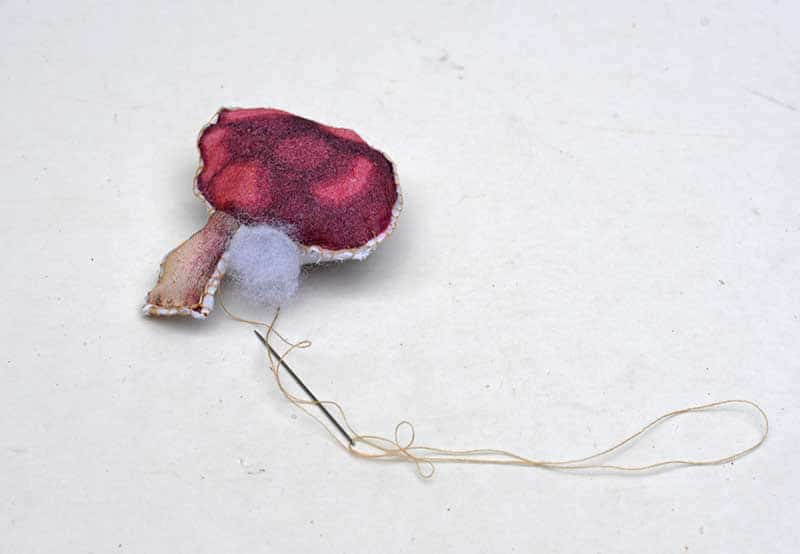
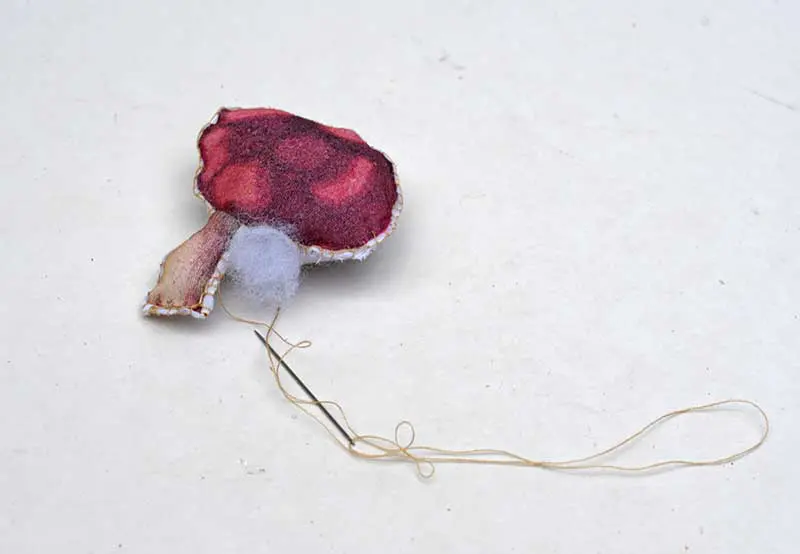
Step 7: Stitch the two pieces of fabric together using a simple blanket stitch. Blanket stitch is a handy decorative stitch that can be used on materials that don’t fray, like with my giant felt letters.
Leave a small hole to stuff with fiberfill. When stuffed then, stitch the hole closed.

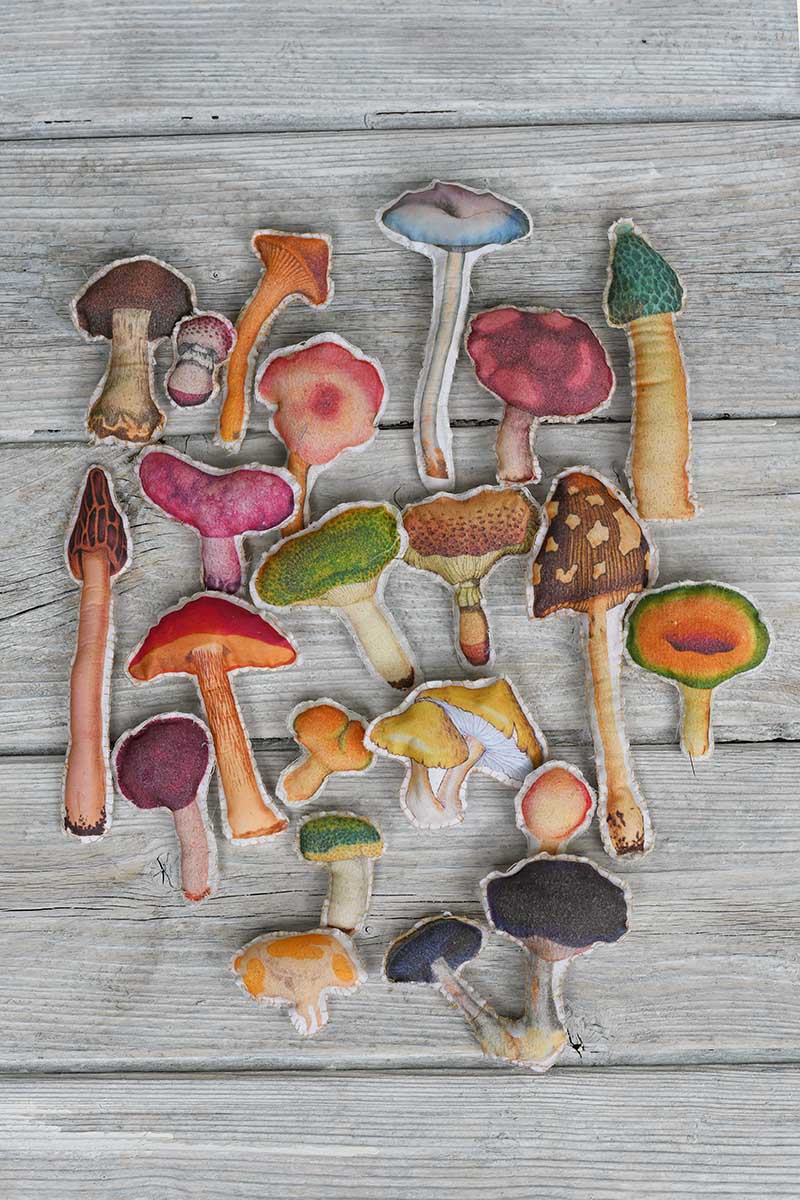
Step 8: Carry on cutting out and making fabric mushrooms and fungi. It is good to have them in various sizes for the final display. I enjoyed making the fabric mushrooms so much that I got carried away and made far more than I needed.
However, this did give me more choices when arranging my mushroom art. I also had enough to make a second display to gift a friend.
How To Display The Fabric Mushrooms
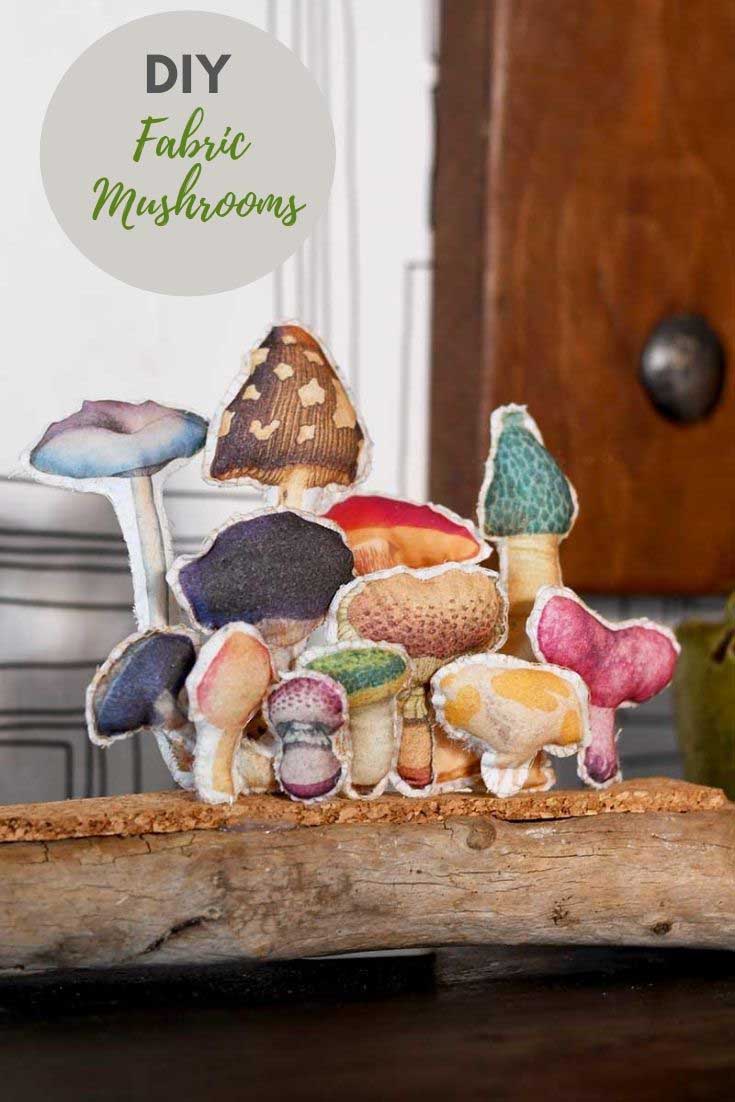
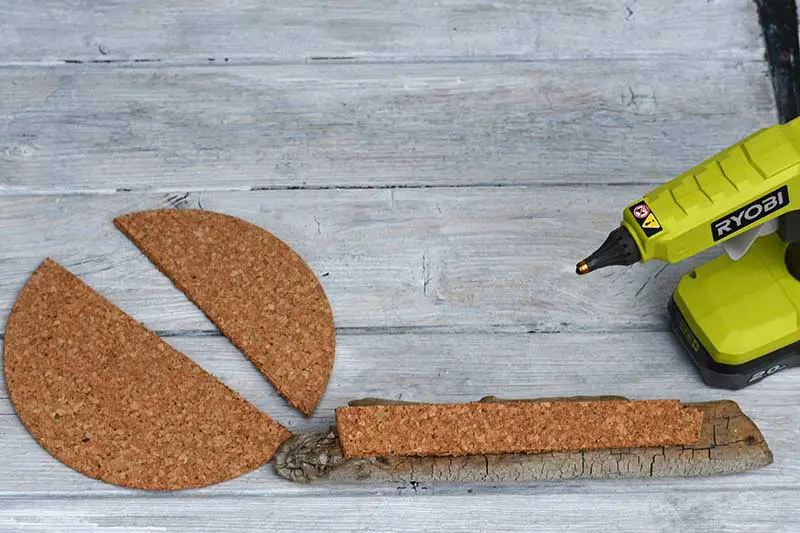
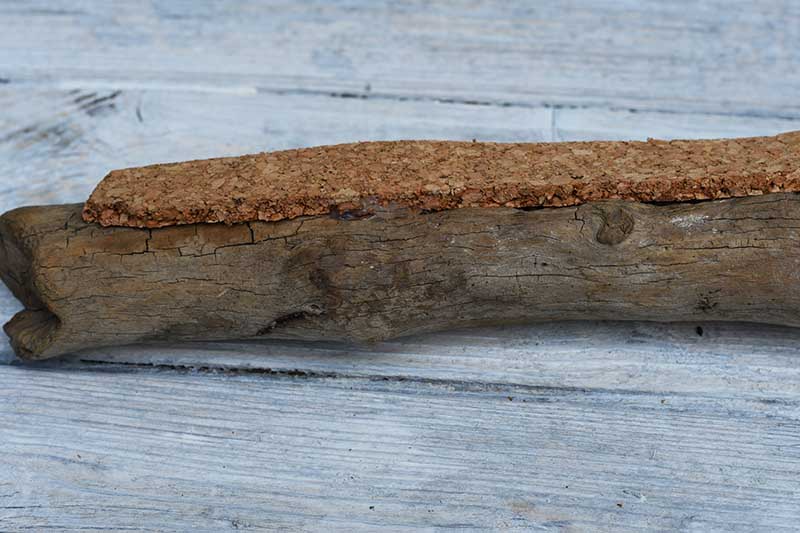
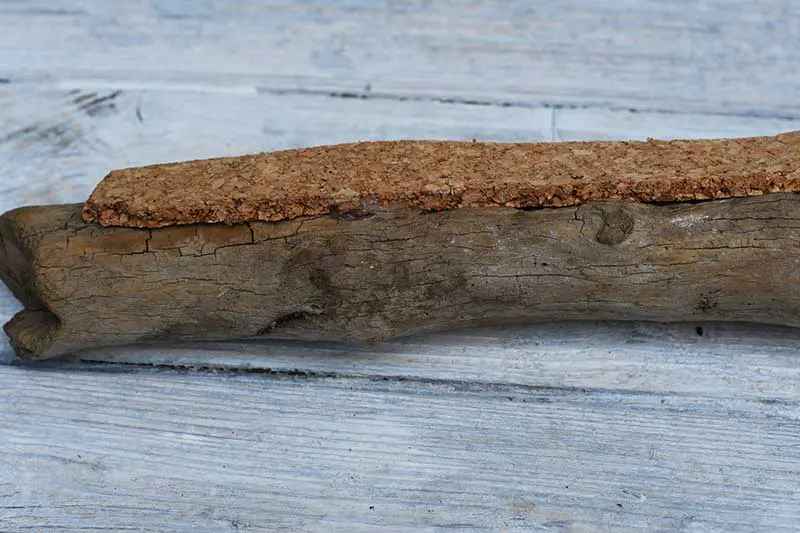
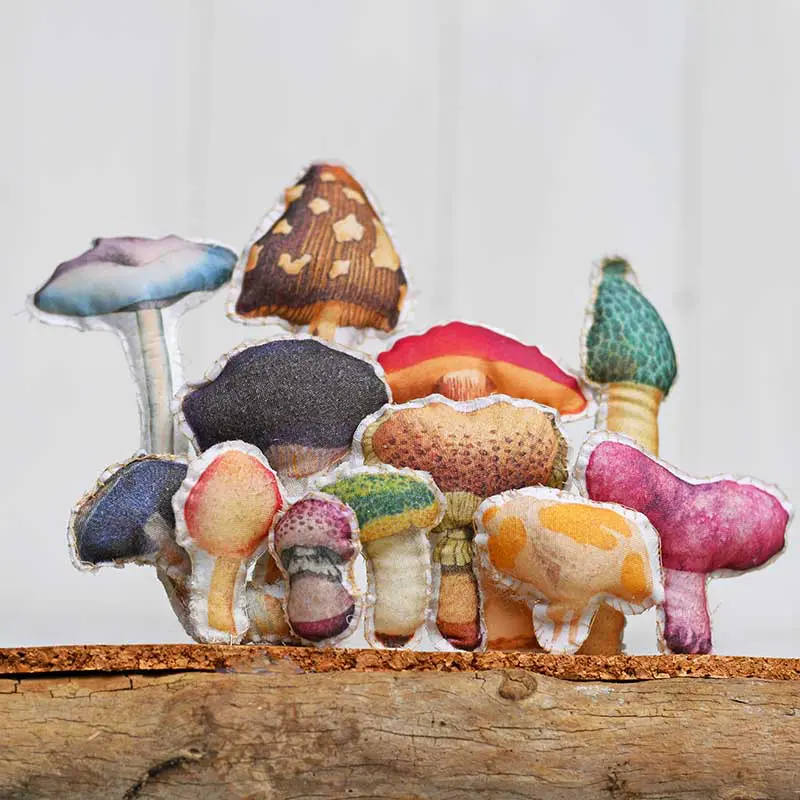
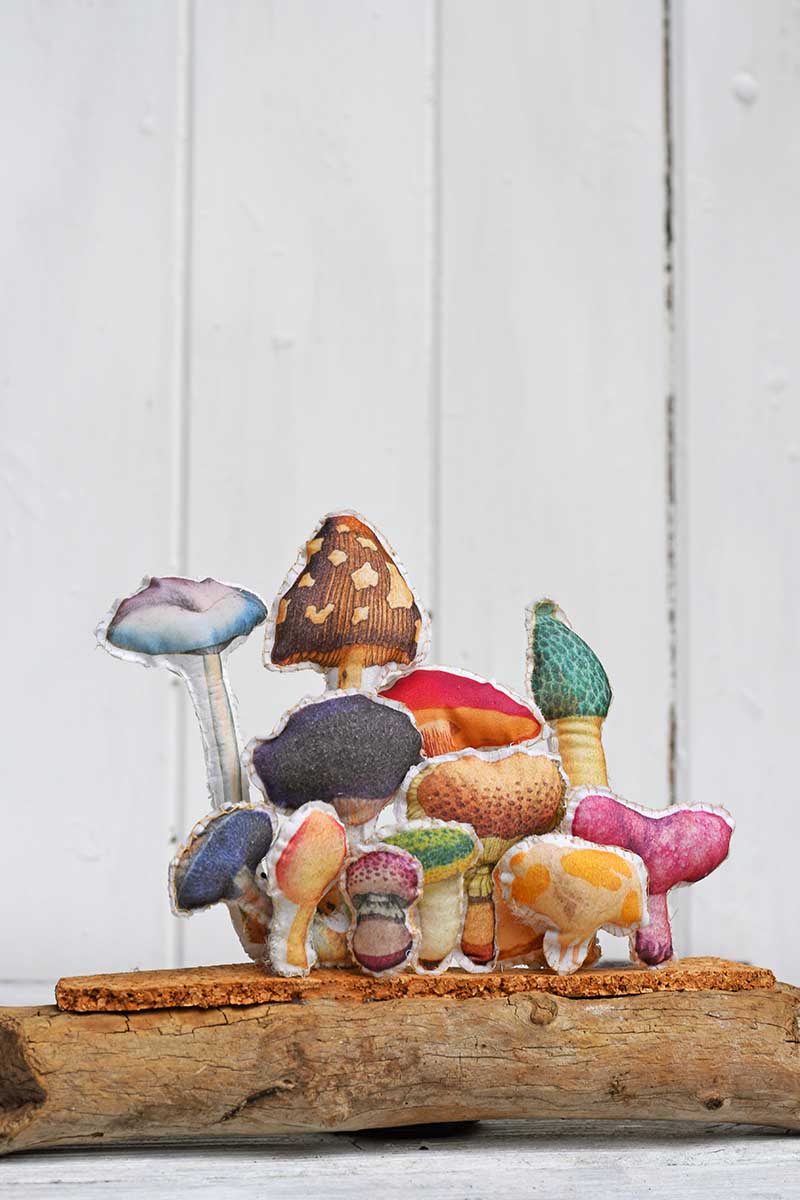
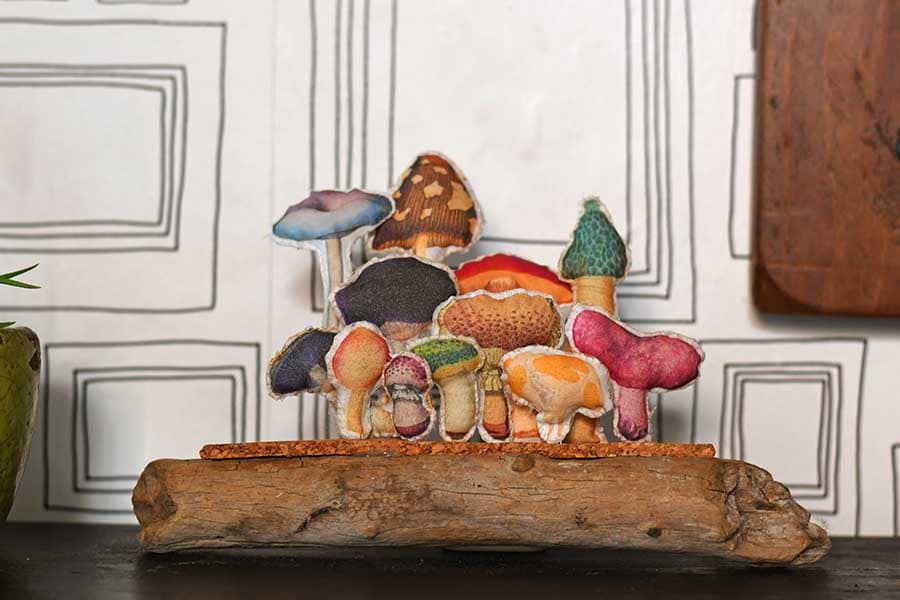
Step 10: In keeping with the natural theme of this upcycled craft, I used a piece of old driftwood to display the fungi on. To make it easy for the specimen pins to stick the mushrooms to the wood, I stuck a strip of cork to the top of the wood.
I just cut up an old cork mat to size and used a hot glue gun to attach it to the log.

Step 11: Finally, use specimen pins to stick the fabric fungi to the log. With the cork, it is easy to rearrange the fabric mushrooms until you are happy with the display.
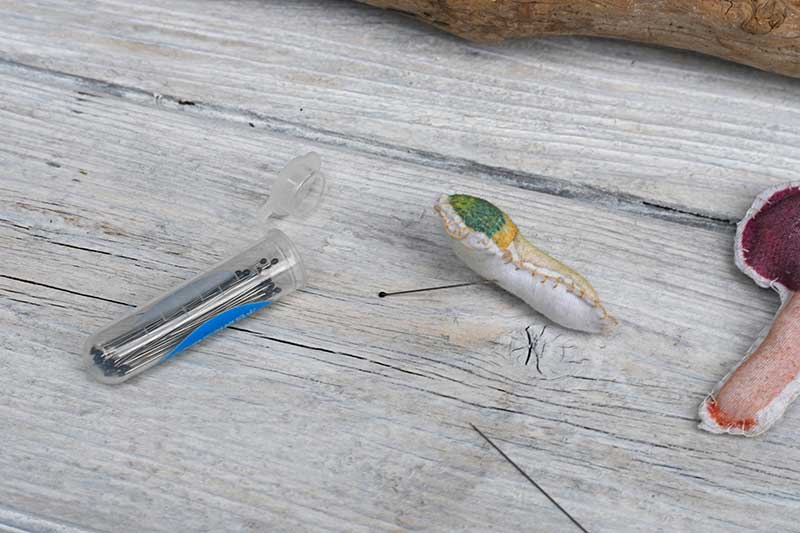
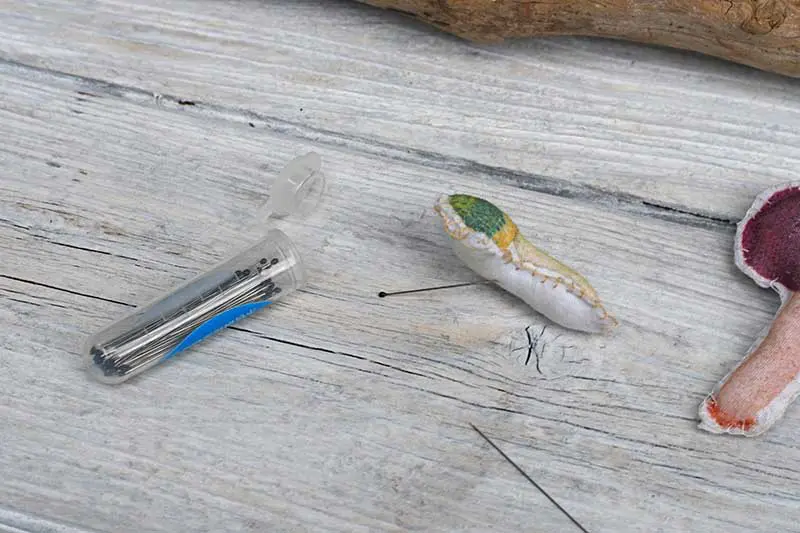
As you can see, I placed the smaller mushrooms at the front and the larger ones at the back.


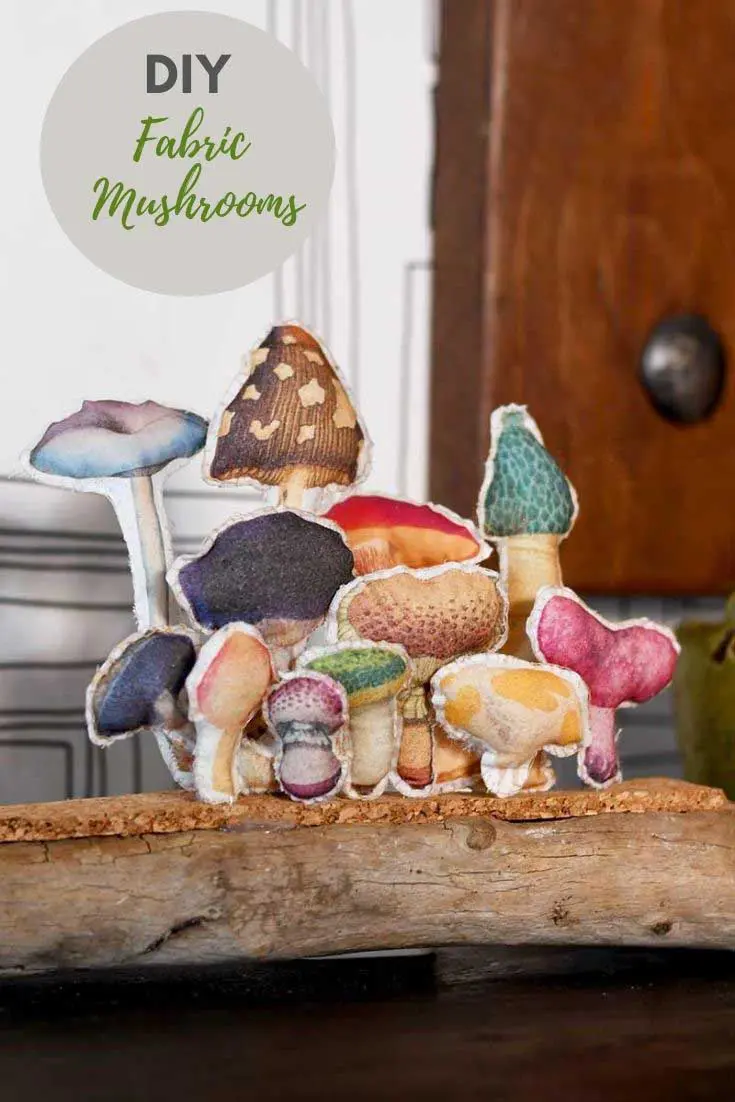
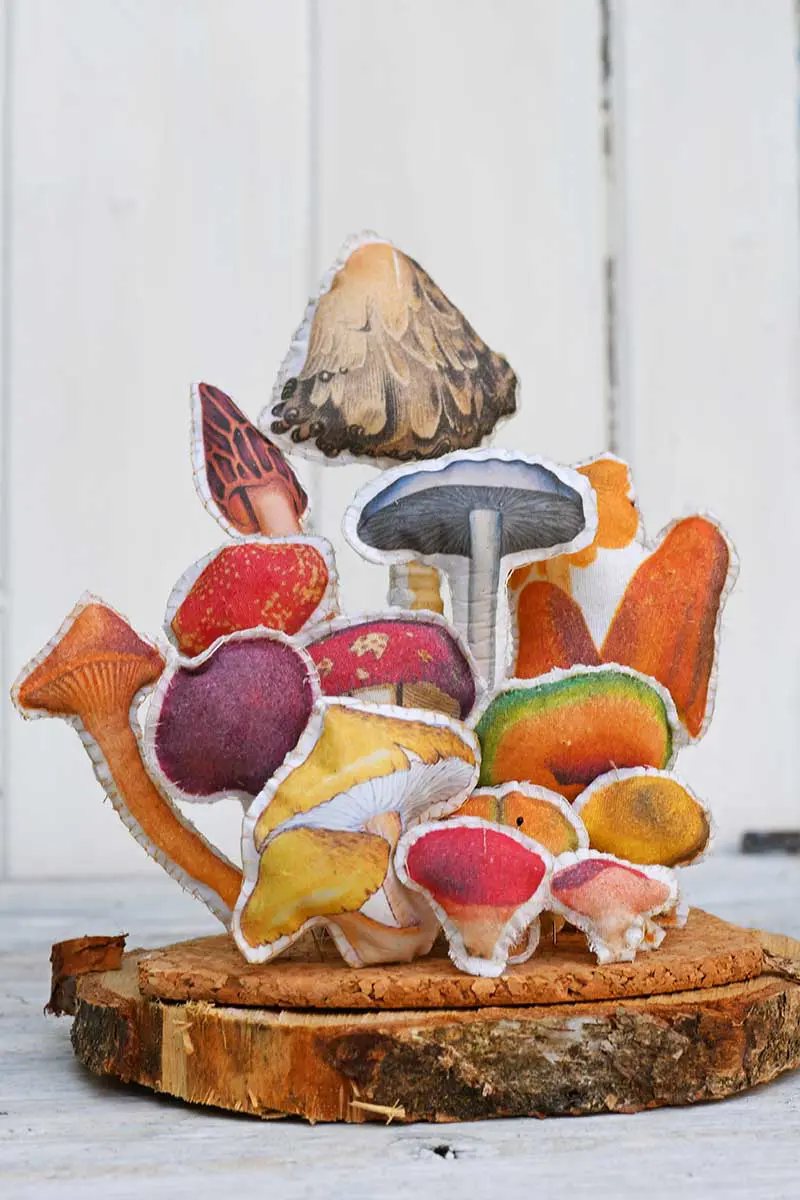
As I already mentioned, I made far more fabric fungi than I needed for this upcycled art piece. But lucky for me, when my friend saw it, she requested one for her birthday. So I made another art arrangement with the spare mushrooms. I used a wood slice instead of a log for the display this time.

Other Related Ideas
As well as the freezer paper method used for this craft, there are another three ways you could have printed the mushrooms onto fabric at home. All those methods are described in this how-to print onto fabric tutorial.
I have a thing about mushrooms at the moment, and since making this mushroom display, I have made a mushroom garland. But this time, I made DIY fabric mushrooms out of old fabric swatches. Also, check out these mushroom-painted denim pockets.
These fabric mushrooms are featured under the letter f for fabric in the alphabet of clever upcycling ideas.
If you liked this fun upcycled craft, check out some of my other cool adult crafts for lockdown. If the whimsical nature appeals to you, you will probably like these Scandi-Felt Christmas trees displayed on a wood slice. Or, if it’s the use of vintage natural history images, check out this parrot decor.
I’ve also upcycled bedsheets into fun fabric flowers. There are many more ideas on upcycling fabrics and adult spring crafts here.
Linda Nelson
Sunday 23rd of January 2022
So cute!!!! What a fabulous idea.
Claire Armstrong
Monday 24th of January 2022
Aww, thank you, they are kind of an addictive craft.
Kaz
Thursday 13th of August 2020
Ohhh my goodness...these are so very very cool. So clever and fun. Thanku so much. Just wish I had a inkjet printer 😯 hahaha. Damn!
Claire Armstrong
Thursday 13th of August 2020
Thank you Kaz, maybe a friend could print them for you.
Ann Butler
Wednesday 12th of August 2020
What a great and fun combination of things!
Claire Armstrong
Thursday 13th of August 2020
Thank you, it was fun to make too.
Meg Daves
Wednesday 12th of August 2020
How cute to use in a centerpiece
Claire Armstrong
Thursday 13th of August 2020
Thank you, I have it on my mantle.
Beth Watson
Wednesday 12th of August 2020
Adorable! I love!
Claire Armstrong
Wednesday 12th of August 2020
Thank you so much 😊