

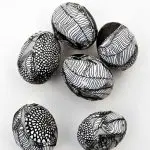
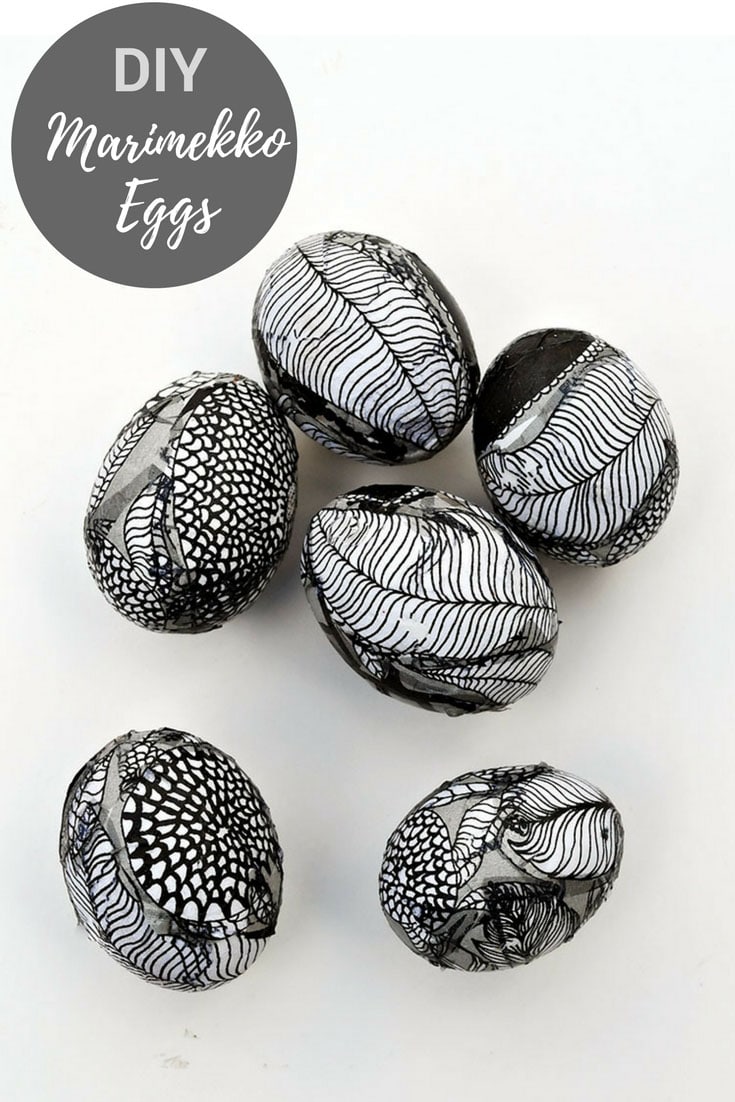
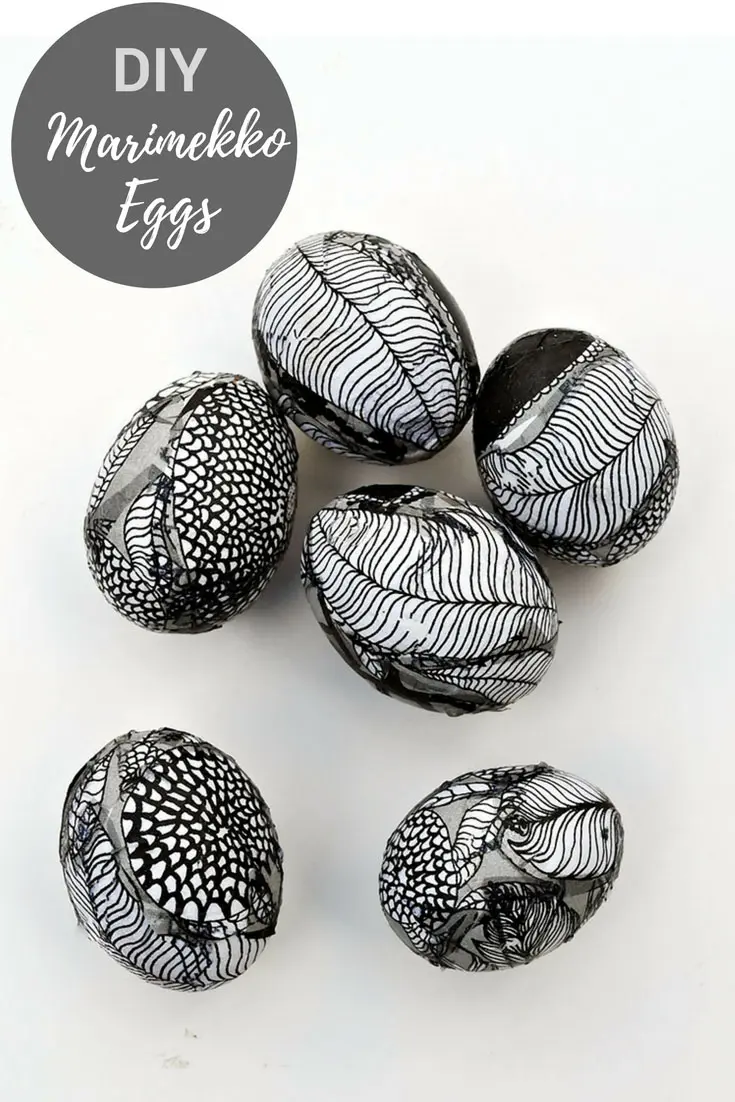
Love decorating eggs for Easter, but want something a little different? Try these colourful decoupage Easter eggs made with Marimekko napkins. This easy craft turns ordinary eggshells into bright Scandinavian-style decorations using simple paper napkin decoupage and glue. They’re surprisingly easy to make and look gorgeous displayed in a bowl, wreath, or spring table setting.
Every year, I love to do a bit of Easter egg decorating. Last year, I made rustic upcycled denim eggs and the year before, no-sew patchwork fabric Easter eggs. This year, I decided to go with one of my favourite obsessions, Marimekko.
I’ve decoupaged lots of things with Marimekko napkins, from a garden bench to large Christmas wall art, and I even made some DIY Marimekko shoes. So why not some Marimekko Easter eggs?
How To Do Easter Egg Decoupage
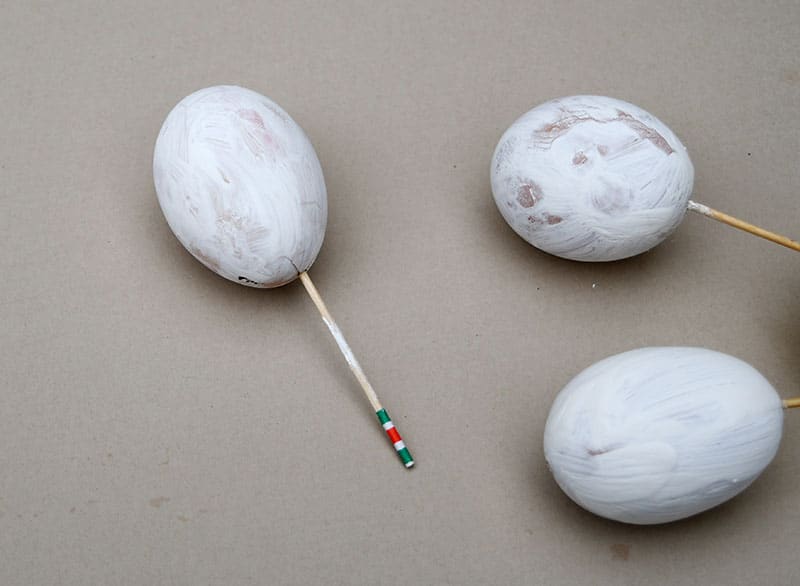
I always use real eggs for my Easter egg decorating, as I often have scrambled eggs for breakfast, so they are readily available and cost me nothing. You can use craft eggs if you can’t be faffed with blowing your eggs.
The only problem with using real eggs is that I struggle to get hold of white eggs. In the UK, all the eggs in the supermarket are brown. So, I had to paint my eggshells white for my Easter egg decorating.
I know in a lot of other countries, chicken eggs are white. I used to think that was because they were bleached white. That’s what my dad told me. As it turns out, he was wrong! It’s all to do with the breed of chickens.
We’re a participant in the Amazon Services LLC Associates Program, an affiliate advertising program designed to provide a means for us to earn fees by linking to Amazon.com and affiliated sites. As an Amazon Associate, I earn from qualifying purchases.
What You Need For Decoupage
- I used real eggs, which I blew (you can see how here), and then painted them white. If you can get white eggs to start with, paint is unnecessary. Or you can buy some white craft eggs.
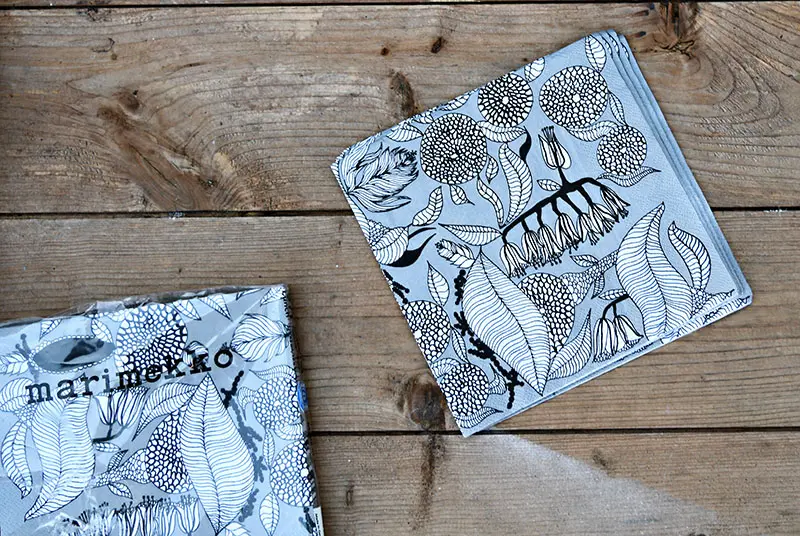
- Marimekko Paper Napkins – I used the KAINO print. There are loads of wonderful Marimekko prints available as paper napkins on eBay. I used about two paper napkins to cover half a dozen eggs.

DIY Marimekko Eggs
Step 1: If your eggs aren’t white, paint them white.
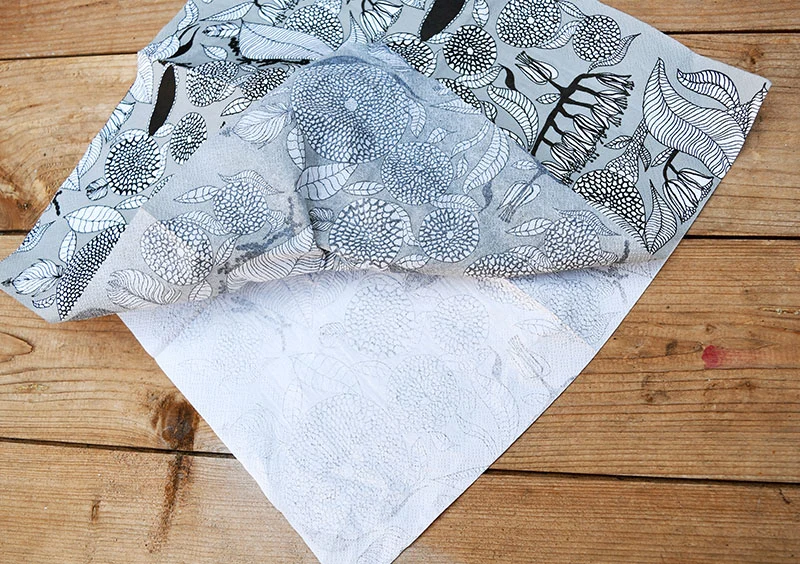
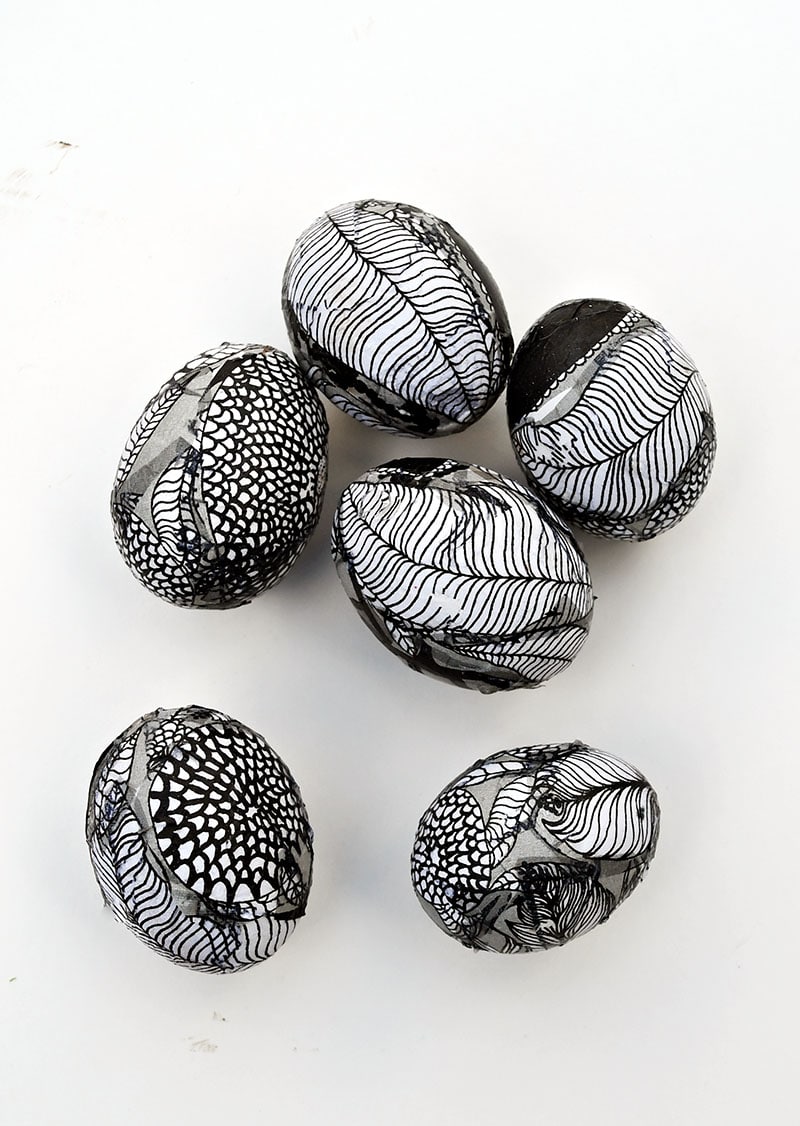
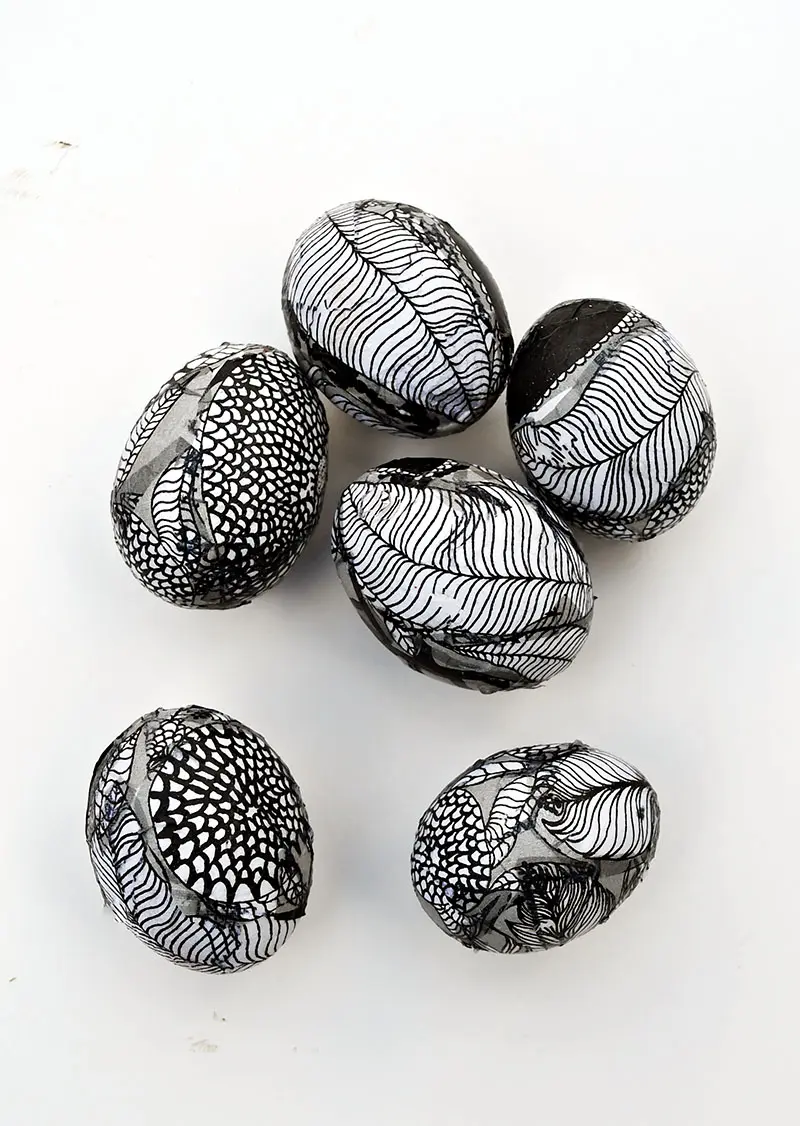
Step 2: Next, Marimekko paper napkins are three-ply. You will only be using the top printed ply, so carefully separate it from the rest of the paper napkin.

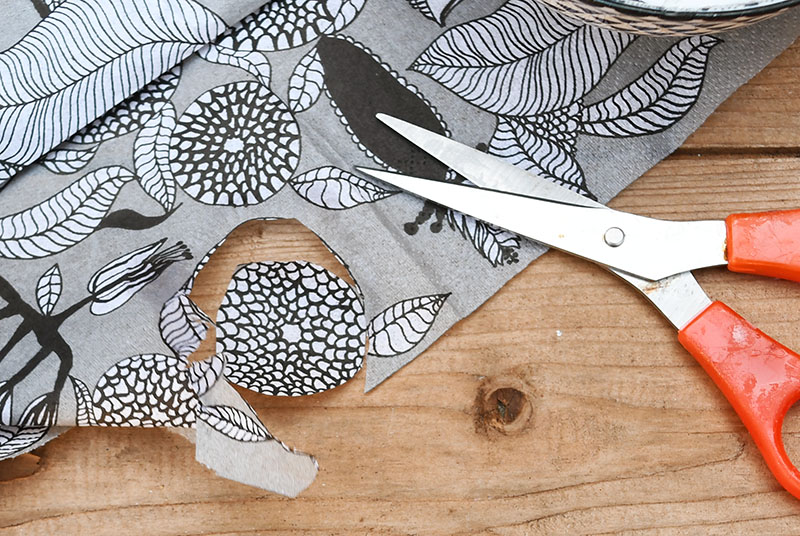
Step 3: Cut away small flowers and design elements from the napkins.

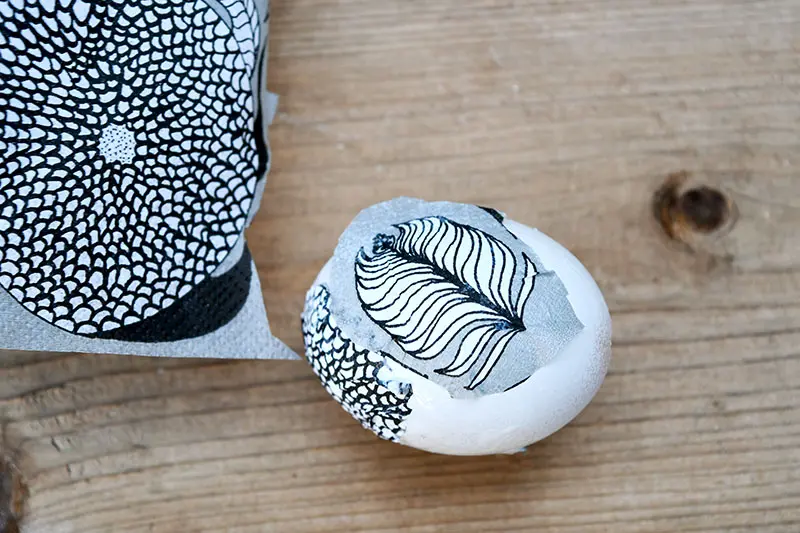
Step 4: Cover the egg with a 50/50 water-and-Mod Podge mixture, then carefully stick the paper napkin cutout to the egg.
Use a clean foam brush to push the napkin down onto the eggshell.


Step 5: Cover the eggs with bits of paper napkins until they are covered. Fill in any gaps with tiny pieces of paper napkins.

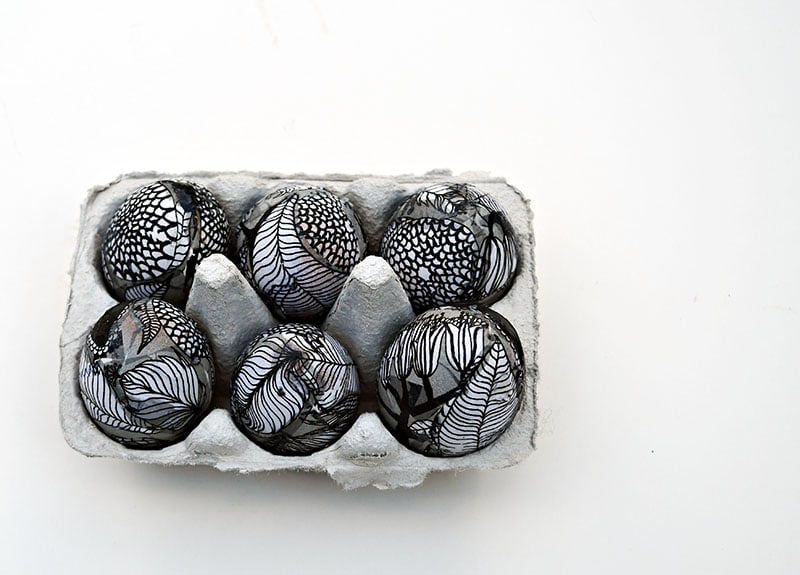
Step 6: Finally, cover the eggs completely with two coats of Mod Podge to act as a protective varnish. Let the first coat dry before adding the second.
I found that resting the eggs on a wire frame made this easier.


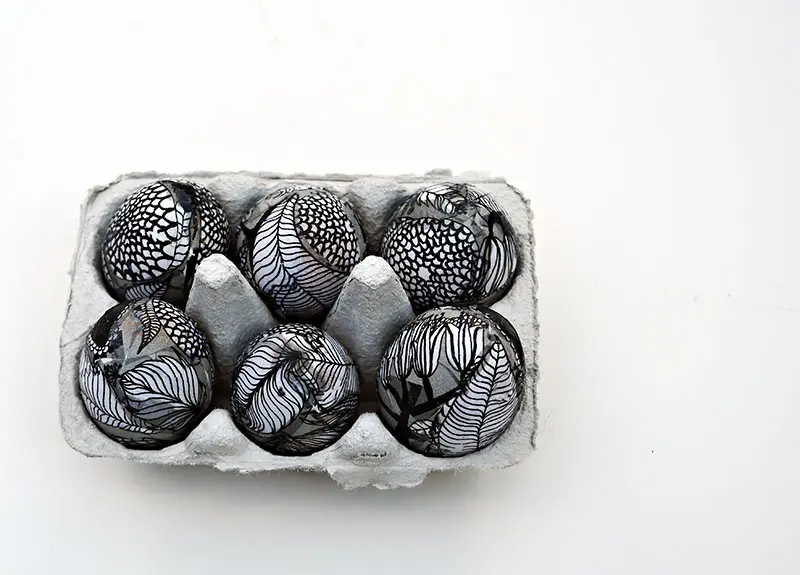

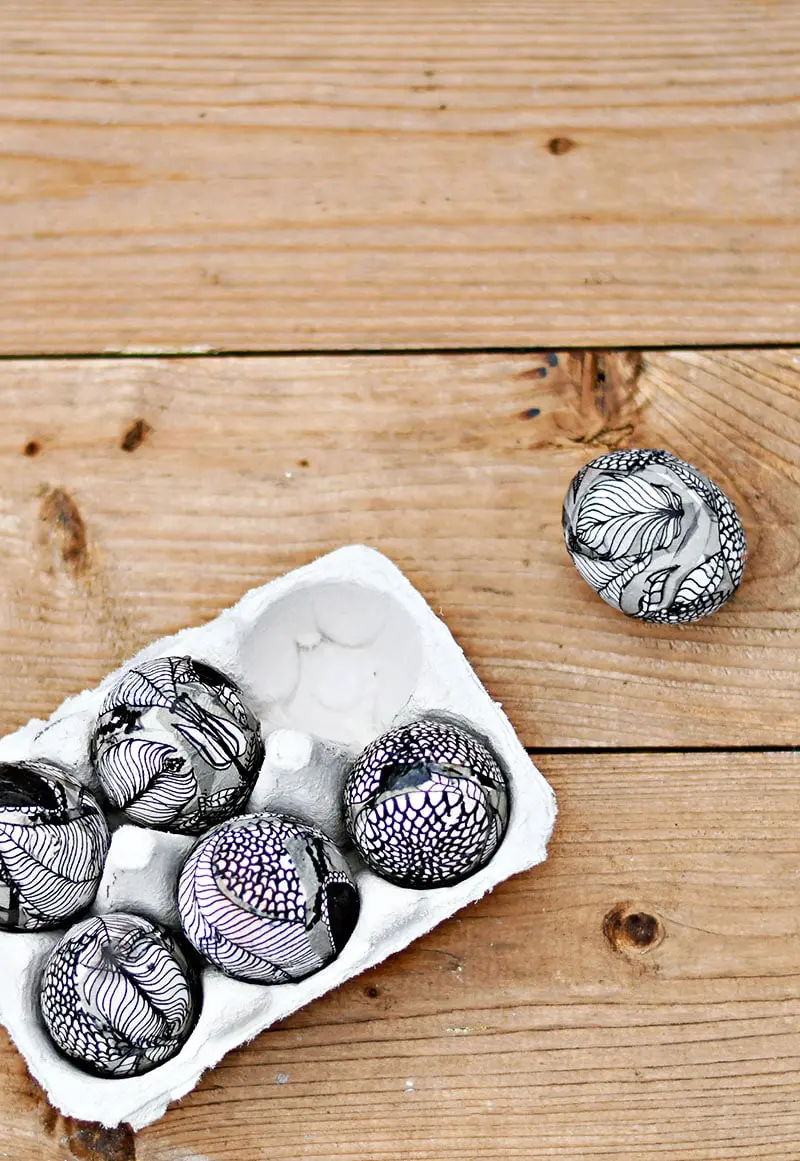
I habitually buy a pack of Marimekko paper napkins whenever I visit a Scandi shop. And now I have quite a collection, so I will decorate some more eggs with Marimekko, as I did with this spring egg box craft.
You’ll find more detailed instructions for paper napkin decoupage here, along with more Easter crafts for adults.
Other egg crafts on Pillarboxblue include,
Maisy
Wednesday 21st of March 2018
Oh wow, these look beautiful! Great idea to decorate those Easter eggs :)
Claire Armstrong
Wednesday 21st of March 2018
Thank you,so much.
Teresa
Tuesday 20th of March 2018
These are so pretty! I enjoyed seeing the previous years as well. Thank you for sharing them with us at Party in Your PJ's. Pinned!
Claire Armstrong
Tuesday 20th of March 2018
Thank you, Teresa. I like to think of a new way to decorate eggs every year.
20 Cool And Unique Ways To Decorate Easter Eggs - Smart Fun DIY
Monday 19th of March 2018
[…] Marimekko Easter Egg Decorating – Pillar Box Blue […]
Easy DIY Easter Egg Decorating Ideas - DIY Adulation
Monday 19th of March 2018
[…] How to Do Marimekko Easter Egg Decorating (Pillar Box Blue) […]
Easter Egg Projects - Our Southern Home
Sunday 18th of March 2018
[…] DIY Marimekko Easter Eggs via Pillar Box Blue Be sure to follow us on social media, as we love to feature your links there: I Should Be Mopping the Floor | Scattered Thoughts of a Crafty Mom Refresh Restyle| What Meegan Makes Our Southern home | Inspiration for Moms Please keep in mind: […]