
Heart String Lights - Make Your Own For Valentine's
Brighten your home with these easy DIY heart string lights.
One of the things I don't like about living in the UK is the gloomy, grey winter days. To brighten up my home, I made some fun heart string lights to go with the neon string heart decoration I made.
When I was eight years old, I discovered Shrink plastic. I thought it was a fantastic craft and made endless key chains, badges, and bracelets from the stuff. I even experimented with shrinking everyday plastic packaging into fun trinkets.
This used to be great fun with the old-style crisp packets, but unfortunately, it doesn't work with the new foil packets.
DIY Shrink Plastic Colourful Heart-Shaped Lights
Even many decades later, I still haven't grown out of my love of crafting with shrink plastic. I have used it recently to make some fun luggage tag pins for a travel-themed map magnetic board. I've also used them to make some Christmas illuminated garlands.
Keeping with this theme, I used shrink plastic to make colourful heart shapes for these Valentine's string light decorations.
This craft is also a great way to find a good use for the copper string lights, you have leftover from your Christmas decorations.
We're a participant in the Amazon Services LLC Associates Program, an affiliate advertising program designed to provide a means for us to earn fees by linking to Amazon.com and affiliated sites. As an Amazon Associate, I earn from qualifying purchases.
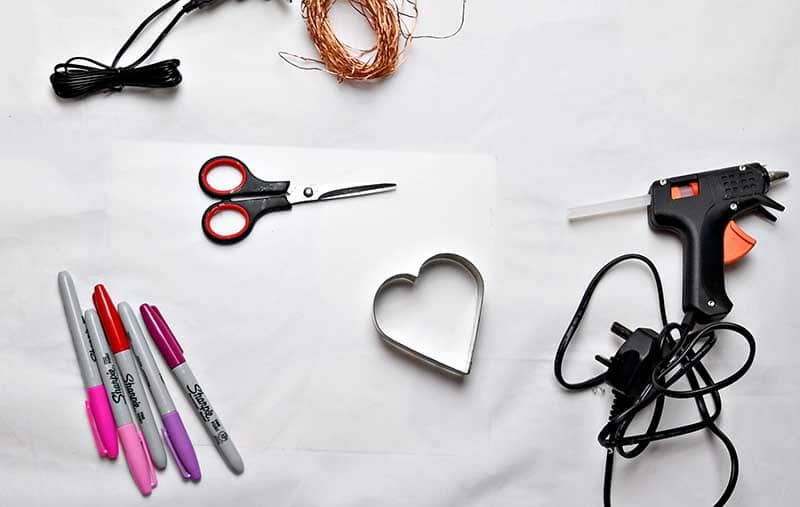
What you need to make heart string lights.
- Clear Shrink plastic - I used two sheets.
- Heart-shaped cookie cutter
- Sharpies or felt tips in pinks, reds & purples
- Copper string lights
- Hot glue gun
- Scissors
How to make heart string lights.
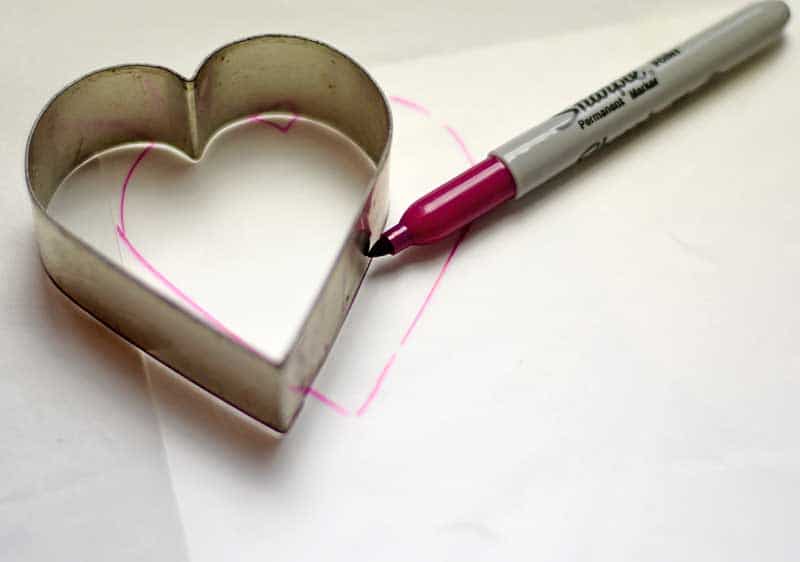
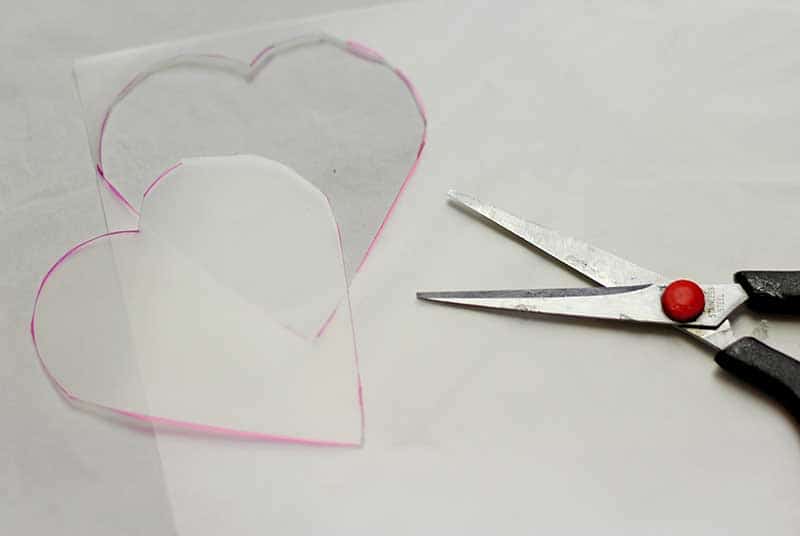
Step 1: First, place the heart-shaped cookie cutter onto a sheet of shrink plastic and draw around it. Then cut out the heart shape.
Cut out as many heart shapes as you want on the string of heart lights.
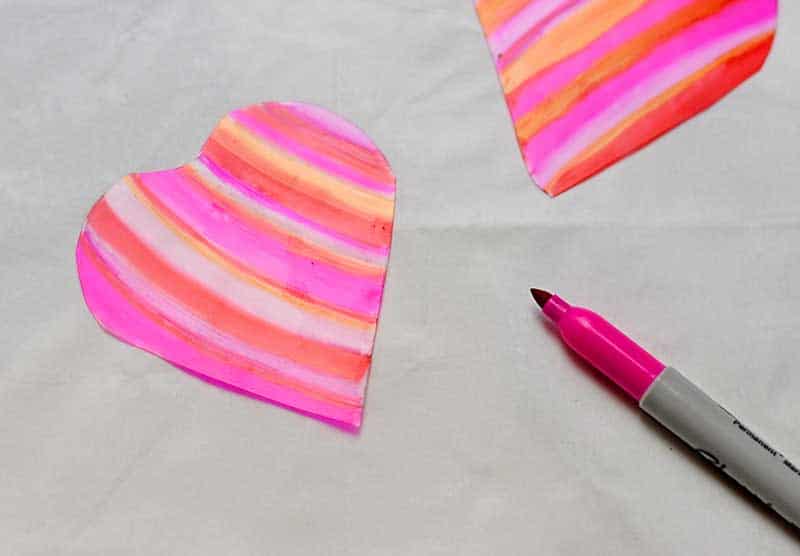
Step 2: Next, colour your hearts using sharpies in various pinks, reds, and oranges.
For these string lights, I just went for a simple striped design. However, if you want to be more creative decorate your hearts with different designs. You might want to check out my embroidered hearts for more ideas for heart designs and patterns.
Step 3: Next, place the heart shapes on an oven tray and shrink them according to the instructions with your shrink plastic. Mine was at 150c for about 3 mins.
The plastic, as it heats, will curl and then uncurl as it shrinks to about ⅓ of its original size and becomes 6-9 times thicker.
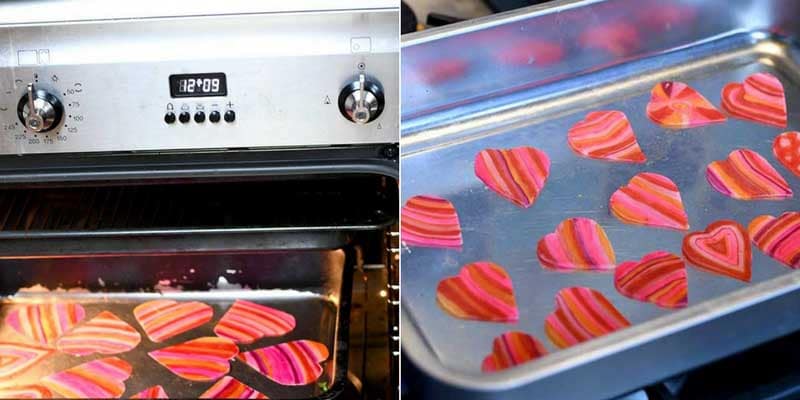
Step 4: Using a glue gun, glue the plastic hearts to the copper wire lights. I twisted the copper wire, so three lights were stuck to the back of each heart.
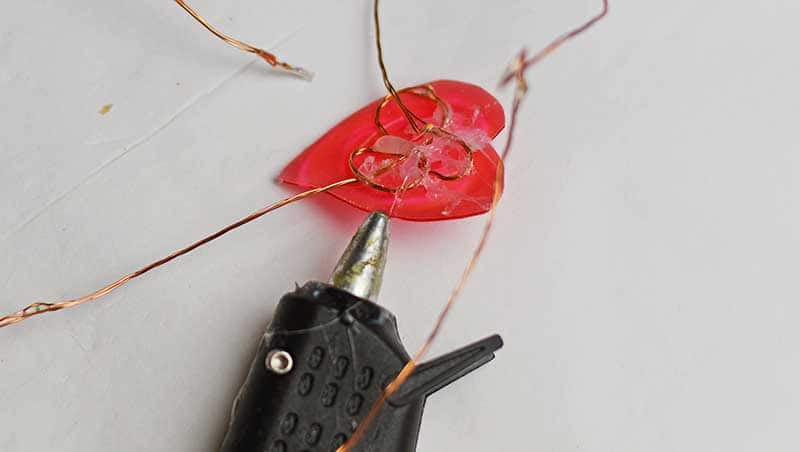
Step 5: Continue sticking the heart shapes to the copper wire until they are all stuck down. There were about 20 plastic hearts on my string of lights.
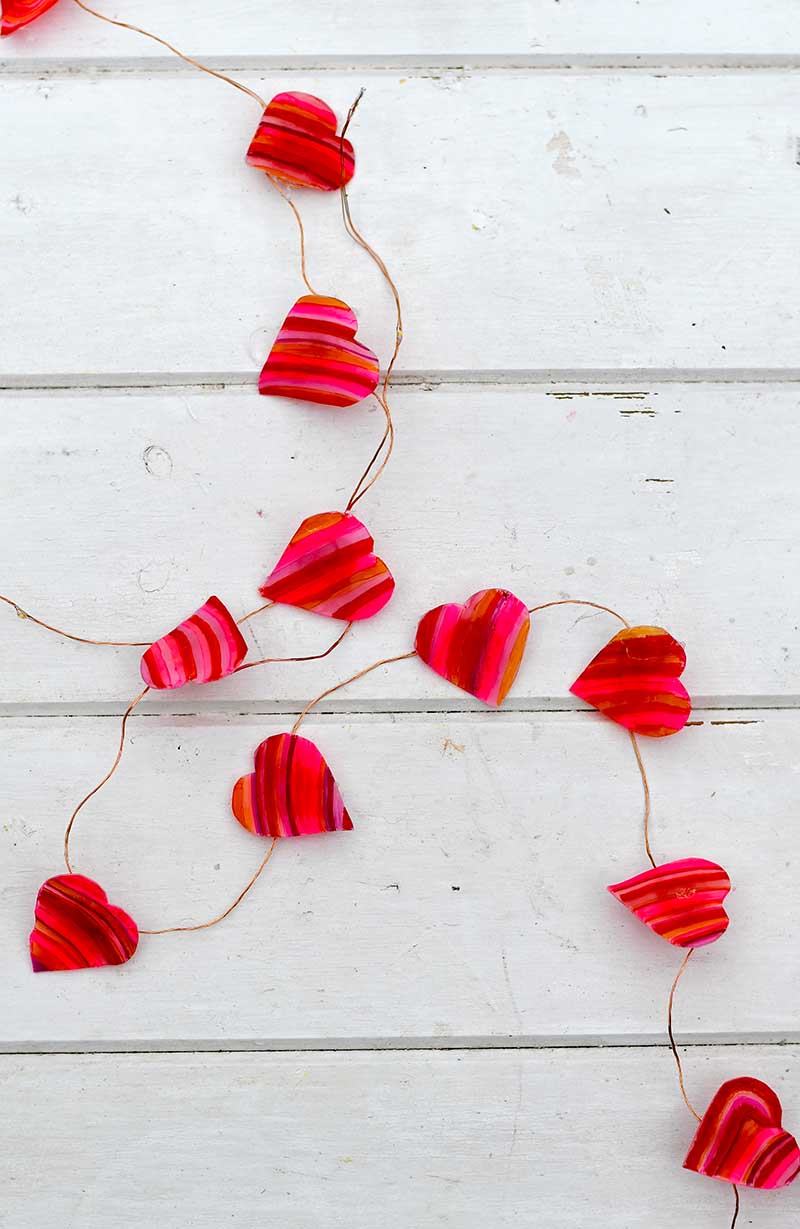
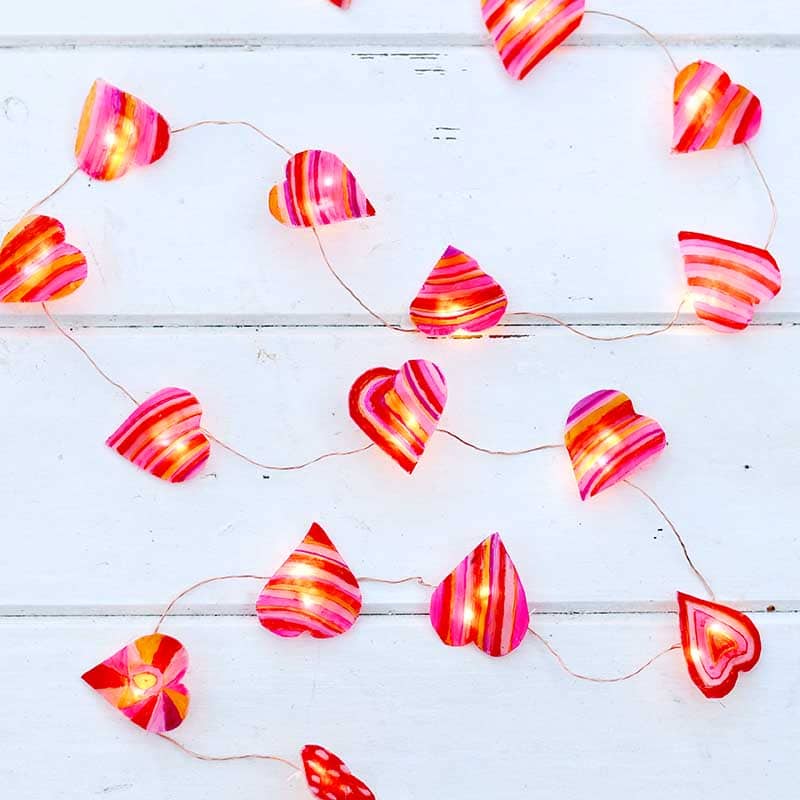
Now all you need to do is decide where to hang the string heart lights and plug them in.
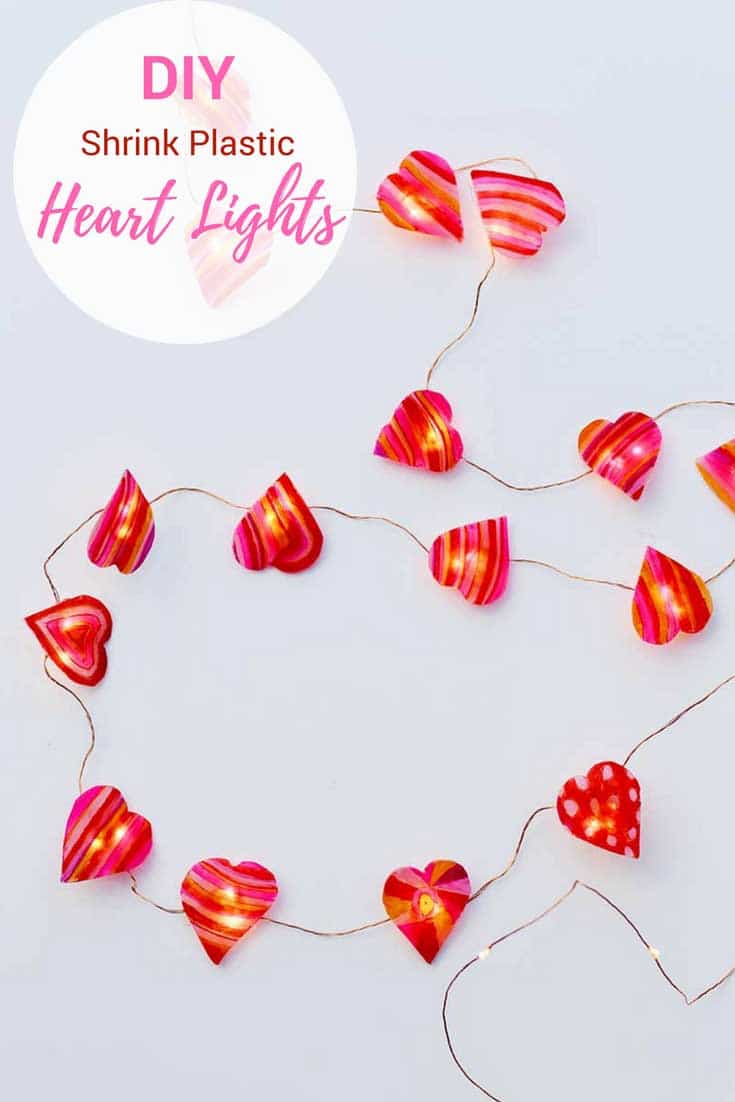
These lights make for a lovely, fun Valentine's decoration. However, you could use different-shaped cookie cutters to make other-shaped string lights.
Also, some plastic packaging can be shrunk like the shrink plastic sheets, so you might want to play around with some of your plastic waste and use that instead for a more eco-friendly craft. I have a great tutorial on how to make shrink plastic earrings and many more Shrinky dink ideas.
If you like Valentine's light decorations, you may want to check out the ones I made from actual string last year. I have many more Valentine's crafts on the site, many of which are upcycled that you should check out. These include more illuminated ones, such as the upcycled Valentine bottle lights.

What a great craft project! I'd love for you to share over at a new party called Let's Party https://themarkandjanshow.com/2018/01/02/lets-party-5/... look forward to seeing you there!
Thank you and thanks for the invite.
What a lovely idea and a great decoration for St. Vallentines! Thankk you for sharing this with us.
Thank you ?
Thank you ?
What a lovely idea!!! 🙂
Thank you so much.
Such a great idea for those lights. So many possibilities. Thanks for sharing at our link party!
Thank you, yes I've got ideas for other shaped lights.
I have to make these now. Thx for the DIY idea.
Thank you, and good luck with them.
These are so fun & festive! Thanks for sharing at Vintage Charm!
Thank you, Cecilia.
Oh, I like this. My granddaughter would like to make this.
Thank you, kids love shrink plastic.
Your lights are fabulous, so pretty. I'd forgotten all about shrink plastic, it's a few years since I played with mine. Btw I gave you a 'shout out' on my blog.
Thank you, and thanks for the shout out.
What a great idea! I have one spear copper string lights that hangs in our patio, but it would be great to bring it in and add some plastic shapes. I have never used shrink plastic before so that's my chance to give it a go :).
Shrink plastic is great fun. Thank you.
fantastic as always! so just to be clear, since you didn't state it, you did shrink the plastic? Thanks so much for sharing on craft schooling Sunday!
Thank you. Yes I put them in the oven their was a formatting error in the post so that step didn't show up, I have corrected it now though. If it wasn't for your comment I wouldn't have spotted the error.
I’ve never made anything like this before - pretty clever. Thanks for sharing!
Thank you, it's so easy and fun to do.
Oooh this is such a cute and fun idea! Love it. #homeetc
Thank you, Becky. They were fun to make.
How cool are these? Not only do they add some much needed light to these dark and dank winter days, but I adore the pop of colour. Lush! Sue x
Thank you, Sue. I do like a bit of colour.
This is so cool, Claire! I used to do this too when I was little! Oh the memories!! They are so pretty with the lights behind them!
Thank you Sam, I'd forgotten what fun shrinks dinks were.
This is such a clever idea - and I love the different patterns! Looks fab 🙂 #HomeEtc
Thank you, Kerry. They were fun to make as I enjoy the odd bit of colouring in, it's very therapeutic.