
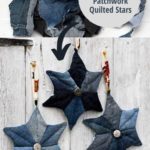
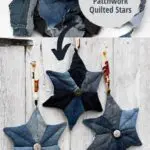
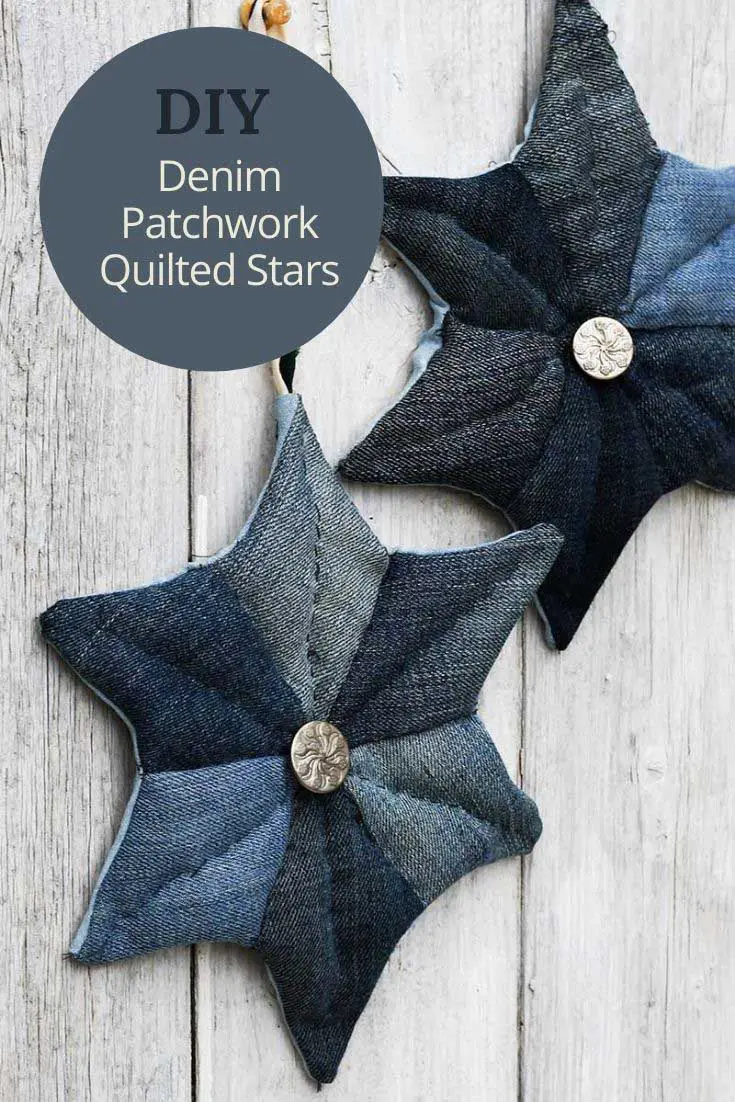
I made these patchwork denim quilted stars as an upcycled Christmas decoration, but I think they would look great all year round. Don’t worry if you have never done patchwork; this upcycle is an accessible introduction.
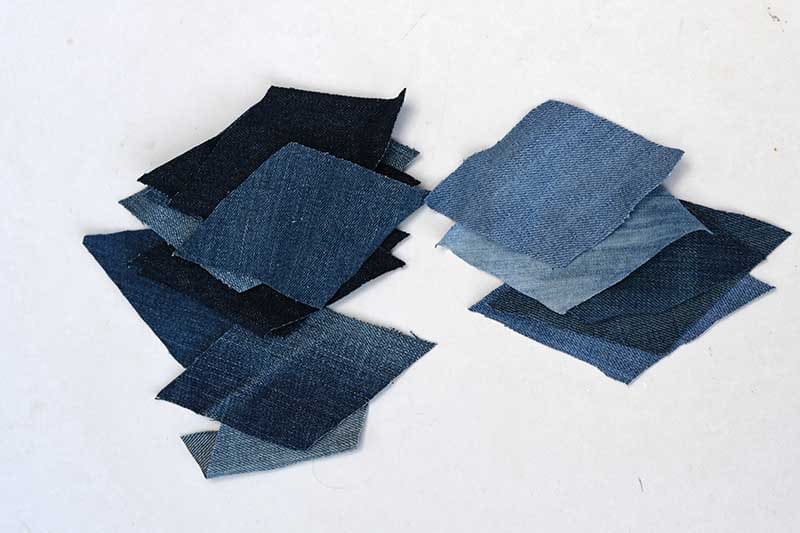
Also, you use upcycled fabric from old jeans, making it a free craft. I used the denim scraps left over from all my other denim upcycles.
It may not be traditional, but I love adding upcycled denim to my Christmas decorations. These patchwork denim stars are just one of my many Christmas decorations from my old jeans. I’ve made denim Christmas trees, Scandi woven heart garlands and scrap denim angels.
If you make these patchwork quilted stars a bit bigger (which is easy), they would also make good table mats to protect the dining table from hot dishes.


These denim stars are featured in the A to Z of denim crafts.
What You Need To Make Patchwork Quilted Stars
- Scraps of denim from old jeans. Having denim in various shades of indigo is good, as this will only add to the project.
- A metal button from a pair of old jeans.
- Needle and thread, this project can be done either by hand or by a mixture of hand and machine sewing.
- Fiberfill – I use the filling from old pillows.
- A bit of ribbon to hang the star from – I like to make my ribbon from shredding old scarves.
- Scrap a piece of cardboard.
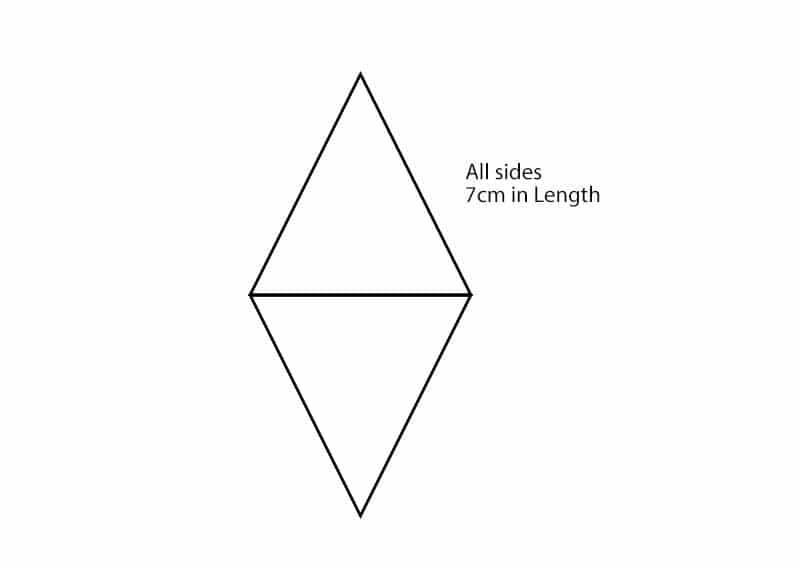
- Diamond Template – The star shape for this denim patchwork star is made up of diamonds. The diamond is made from 2 equilateral triangles where all sides are 7cm in length. (see below).

How To Make The Stars
Step 1: Draw or print out the diamond shape and make a template from scrap cardboard.
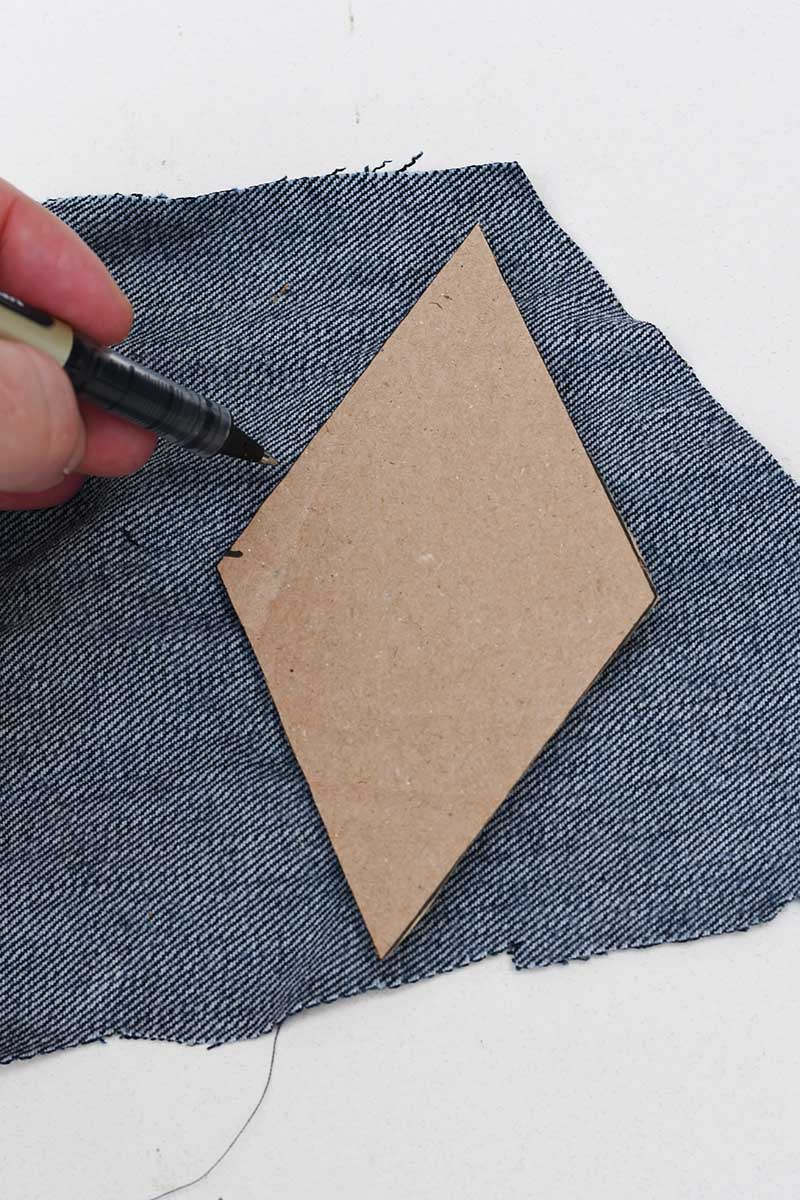
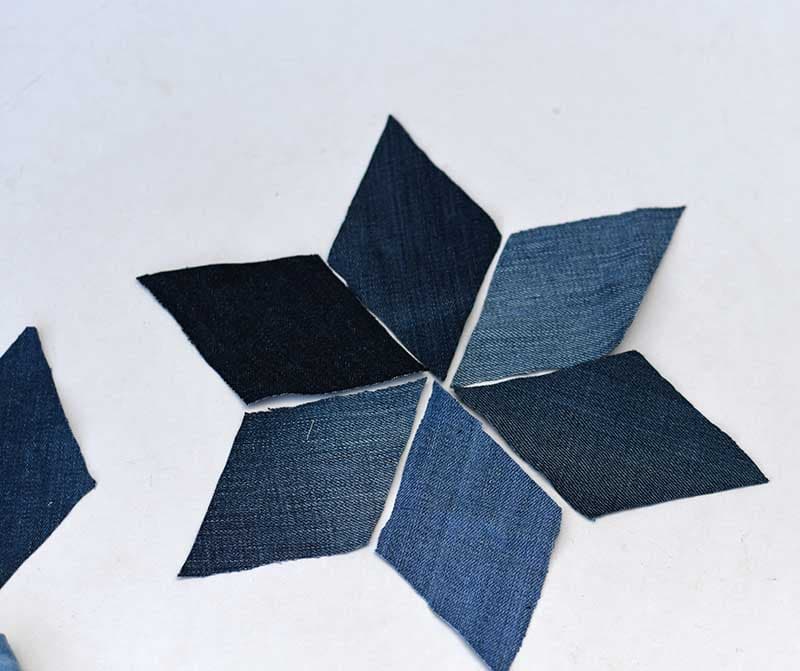
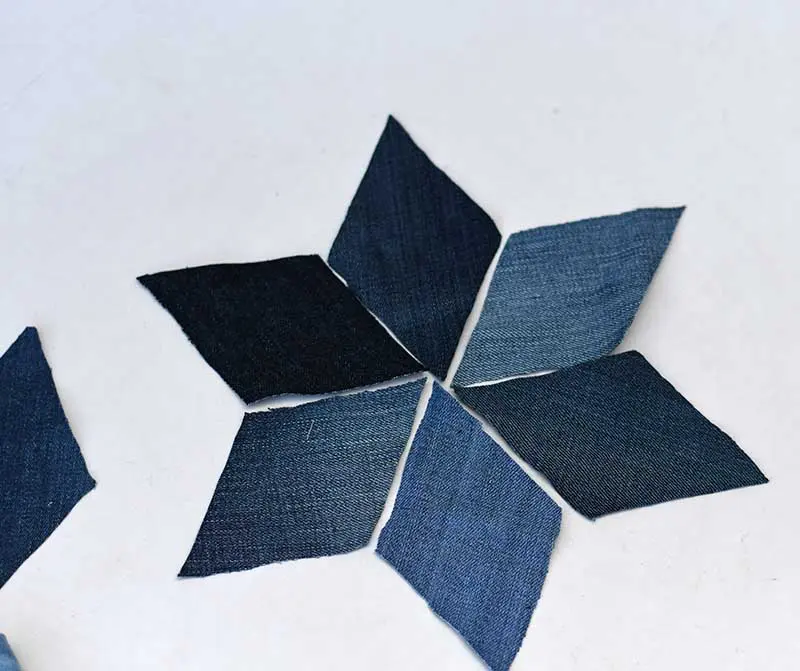
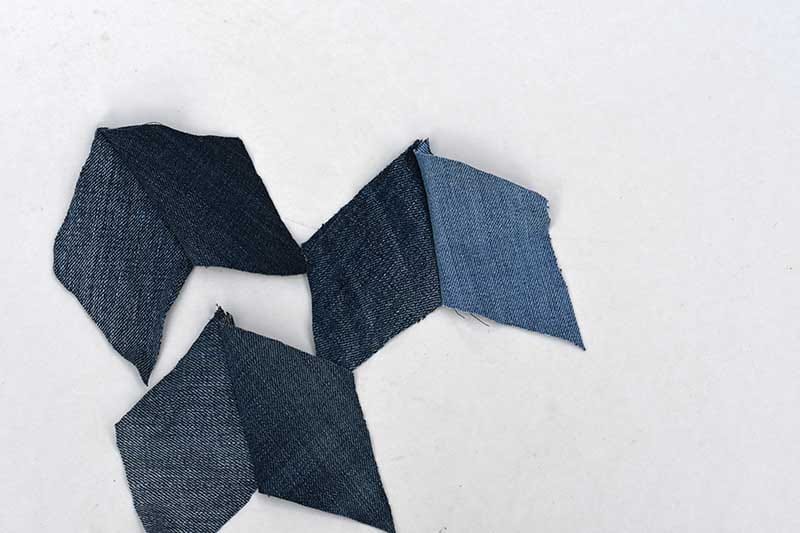
Step 2: Place the diamond cardboard on the wrong side of a piece of scrap denim and draw around it. Cut out the diamond denim and repeat it five more times. You will need six denim diamonds for each quilted star.
It is best to use denim in shades of indigo blue.


Step 3: Play around with the denim diamonds before starting to sew. Place them together to make a star shape. You can rearrange the shapes until you get the indigo colour pattern you want for the patchwork quilted stars.
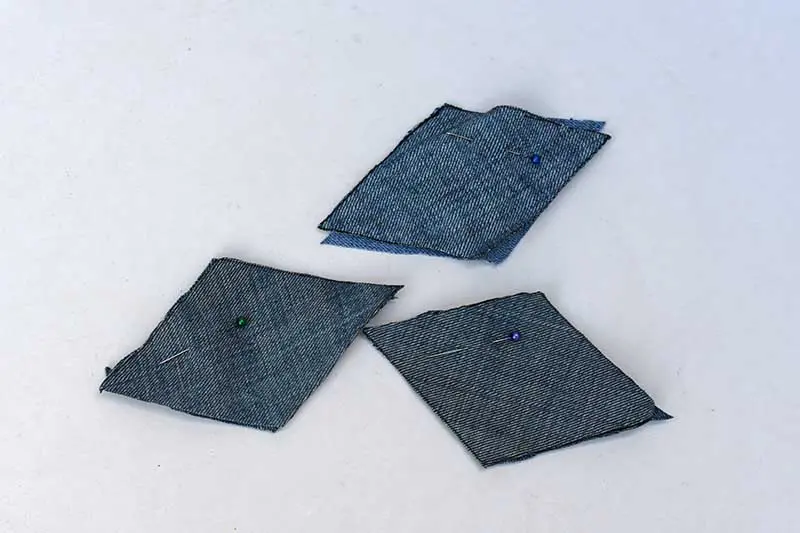
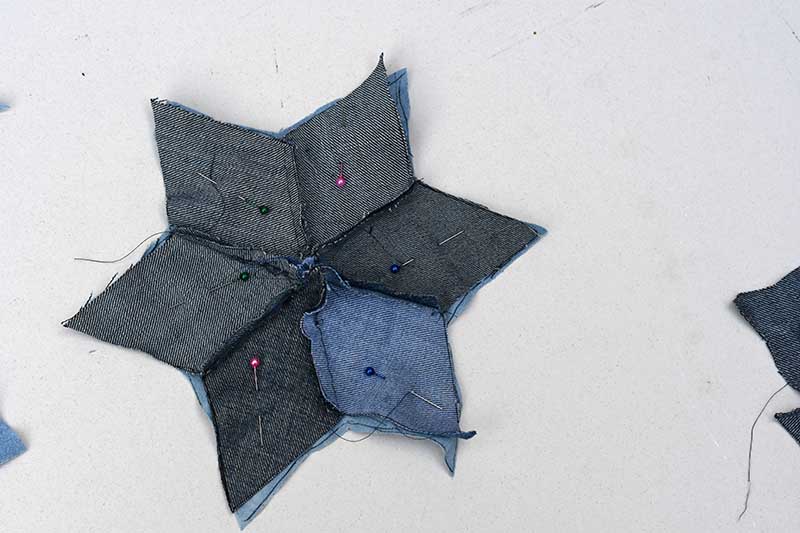
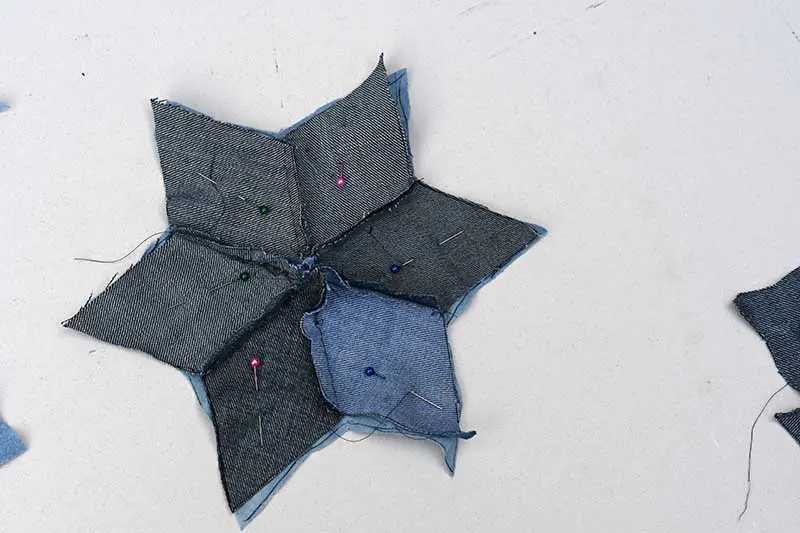
Step 4: Next, pair the six denim diamonds into three pairs. Pin each pair of diamonds right sides together.

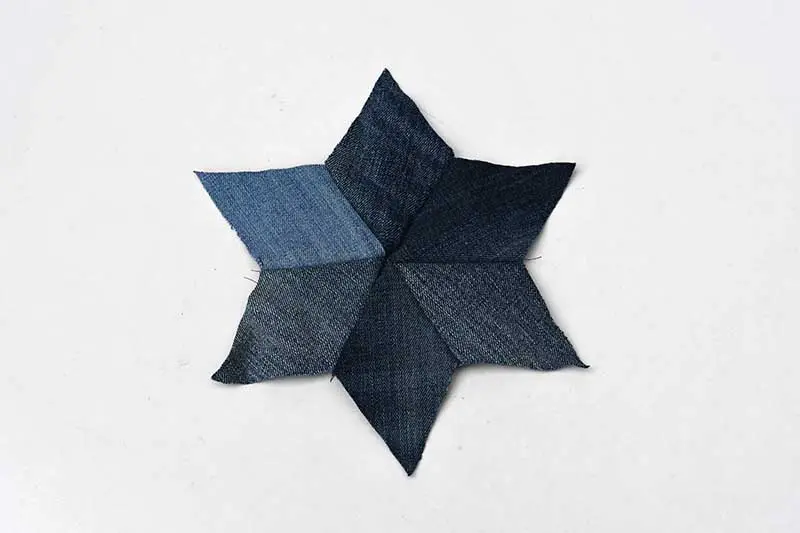
Step 5: Next, sew each pair of denim diamonds together along just one edge. Use a 5mm seam allowance.

Step 6: Pin these three denim arrows together along one edge (right sides). You should be able to make a six-pointed star shape. Again stitch along the side with a 5 mm seam allowance.

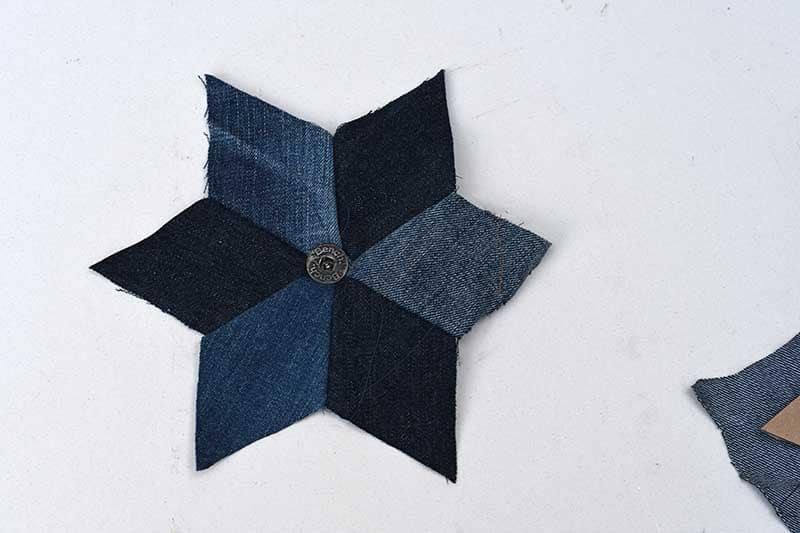
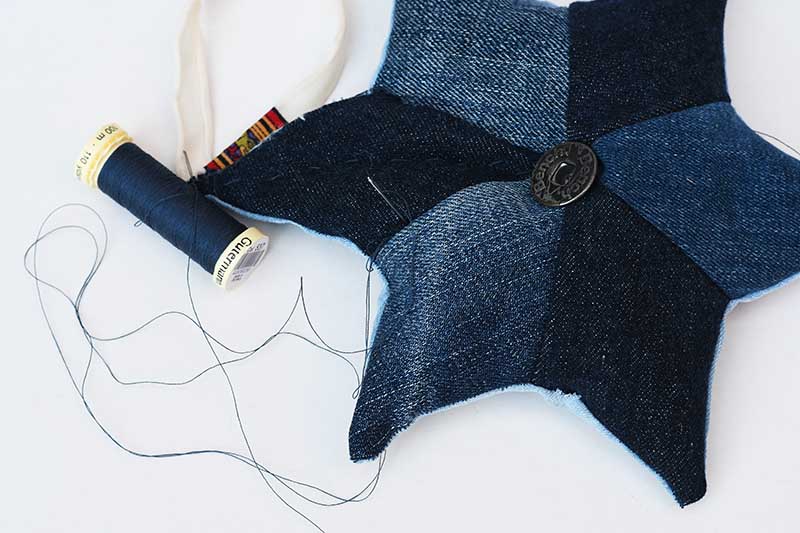
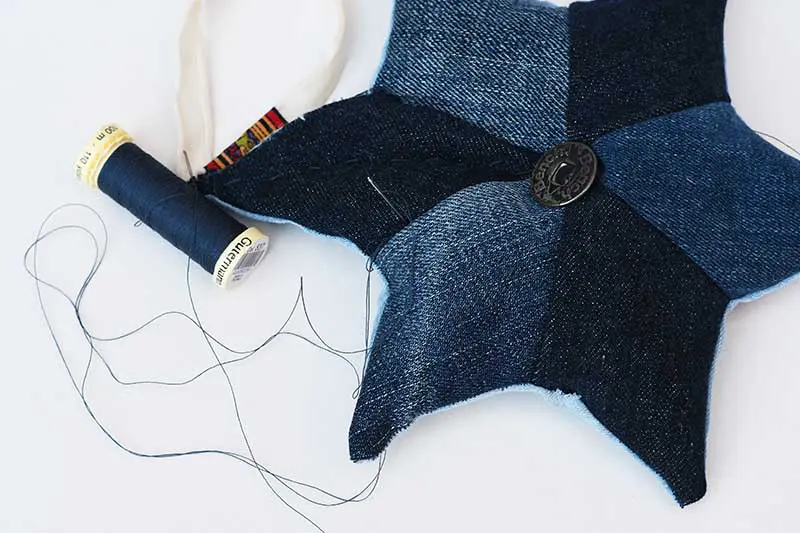
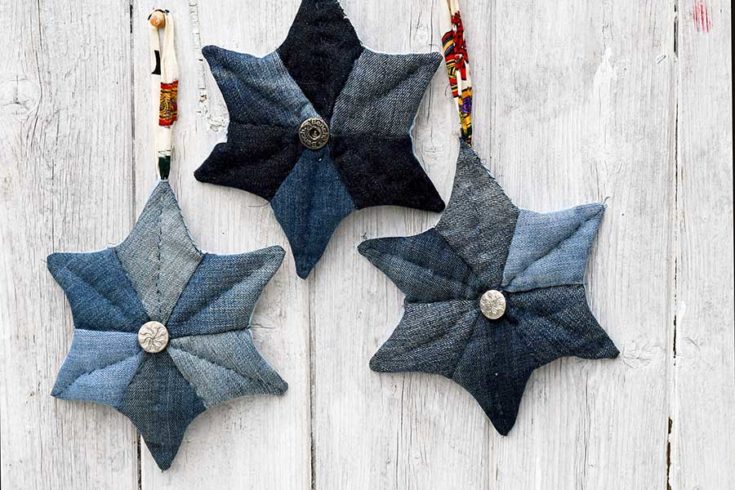
Step 7: To add interest to the patchwork quilt stars, I added a button to the centre, where all the diamond points met. For this project, I used a jeans button to use upcycled denim from old jeans. However, a red button would be a good choice to make your stars more festive.

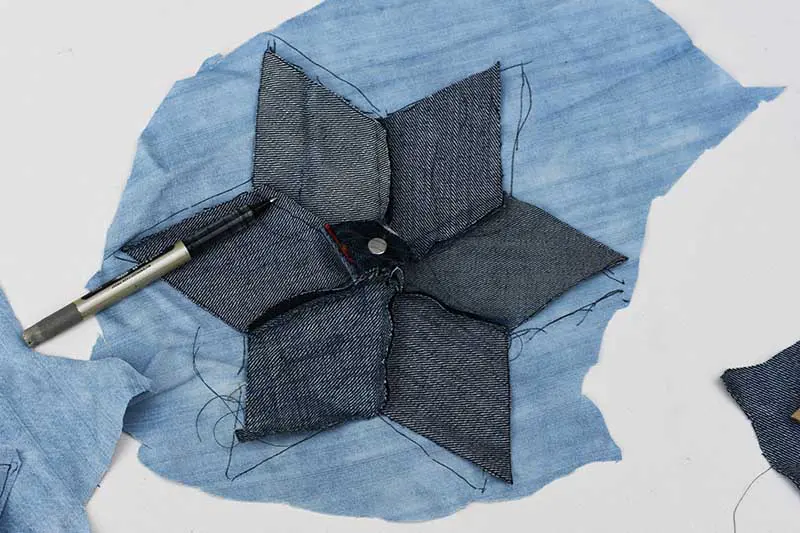
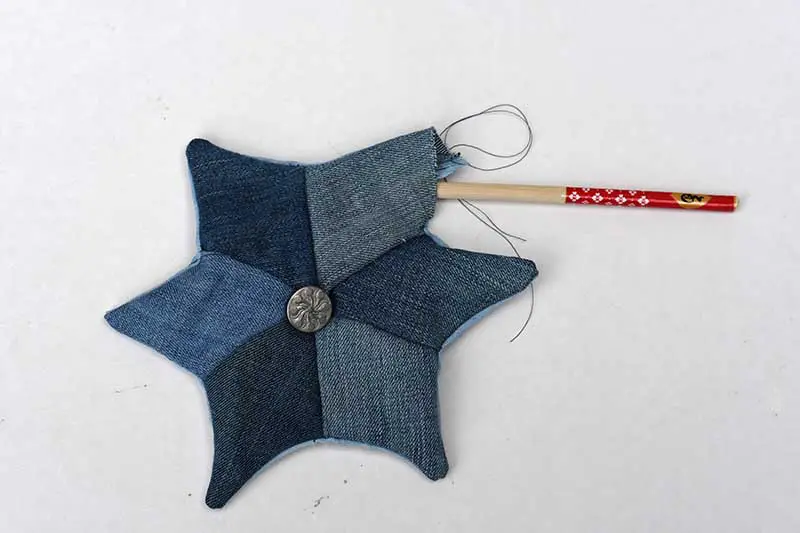
Step 8: Lay the patchwork star onto a scrap of fabric to support the stars. You can use denim for the backing, or if you want something more festive, maybe try material with a Christmas pattern.
Draw around the star shape and then cut it out.

Step 9: Next, pin the patchwork star and the fabric backing right sides together and stitch them (with a 5mm seam). Leave one side of the star open for stuffing.
Step 10: Trim any excess fabric from the star, especially at the points. Then, turn the star right side out through the gap left. Use something like a chopstick to poke out the denim star points.

Quilting the Denim Patchwork Stars
Step 11: Stuff the star with fiberfill and stitch up the hole. Do not overfill the star; fill it with a small amount of fibre.

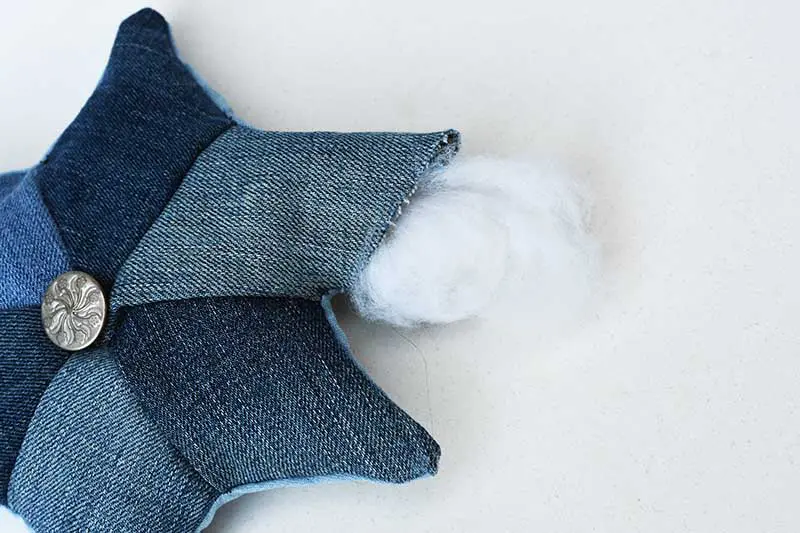
Step 12: Finally, hand stitch along each star seam to give the denim stars a quilted look. Also, the stitch from the tip of each star point to the centre. Just use a simple running stitch.
Don’t forget to stitch a ribbon loop onto one of the star points. This is for hanging the stars.

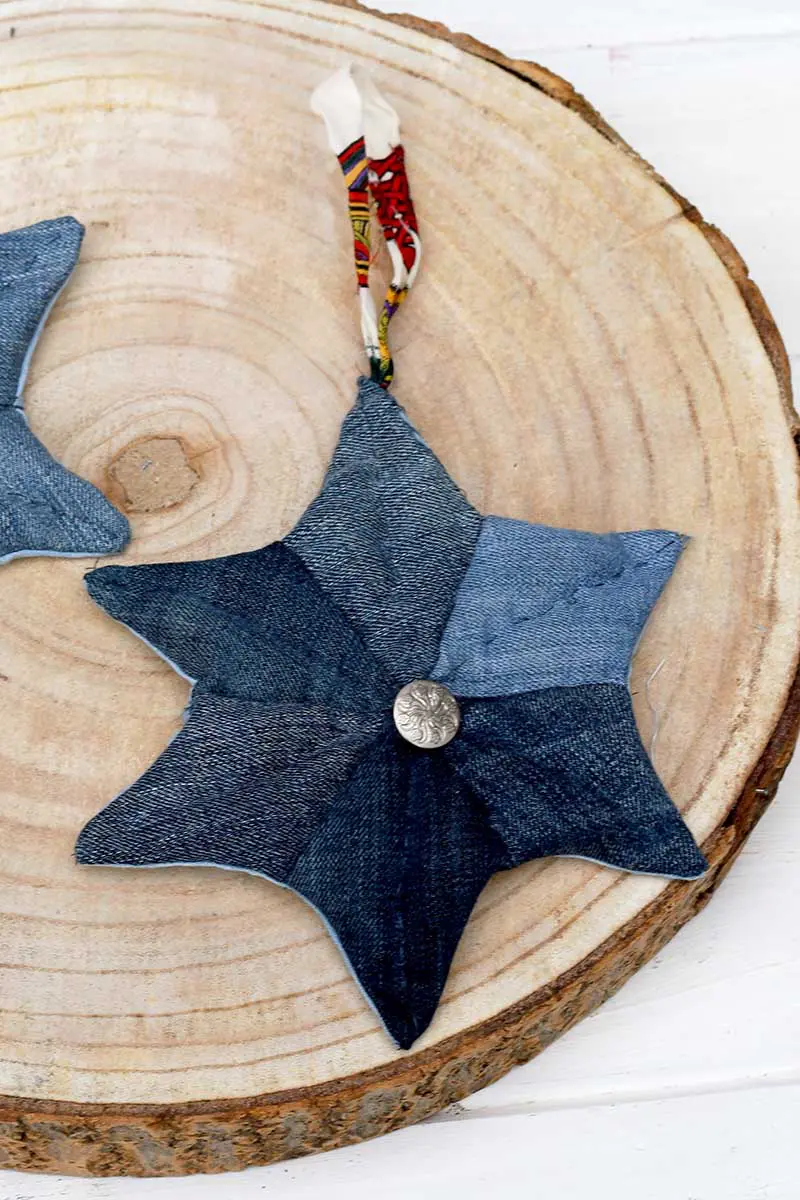
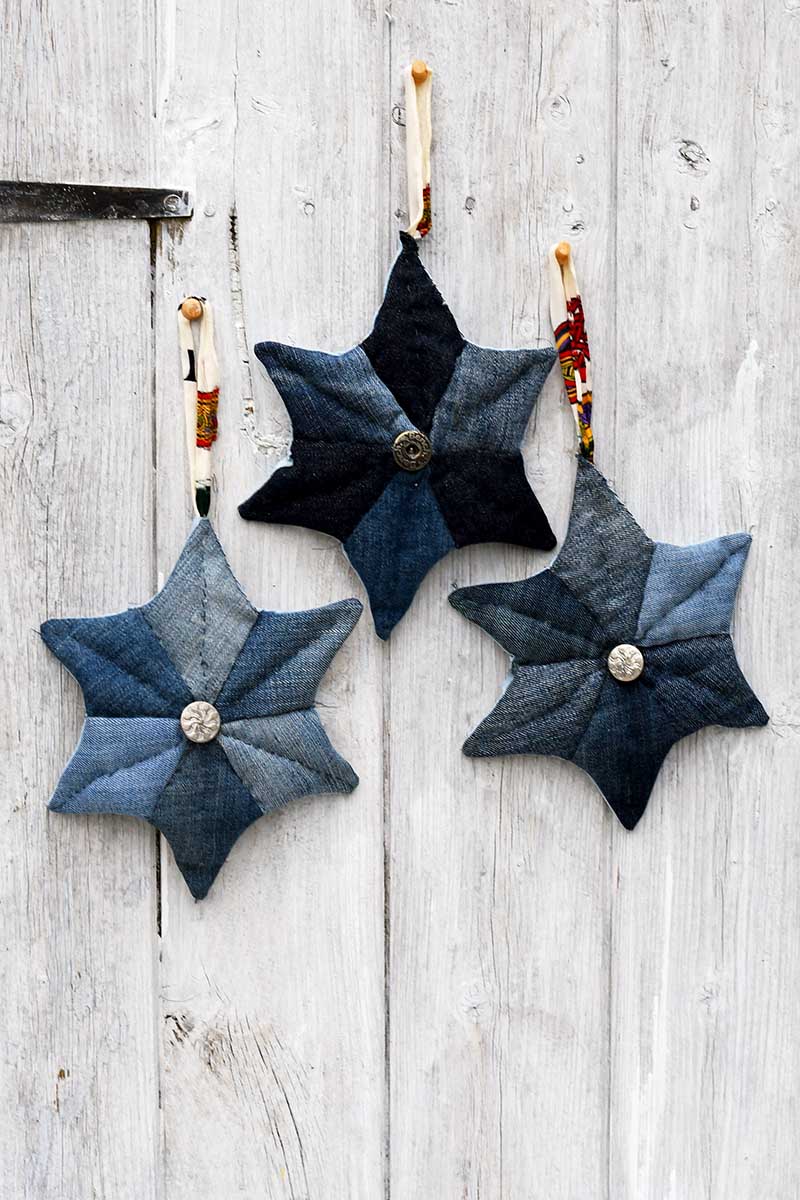
I enjoyed making these patchwork quilted stars, so I made three. Often when making decorations, I make three as I find displaying decorations in odd numbers as I find it more appealing.

Other craft ideas
I like the idea of making larger ones to use as quilted heat mats for the dining table at Christmas. They would go with the patchwork denim table mats, mug rugs, and fabric bowls. Check out these other easy Christmas sewing projects, including these hanging denim fabric star ornaments.
A tutorial for more rustic denim stars on Pictureboxblue, also made with denim scraps. I have also upholstered some chairs with denim hexagon patchwork.

Denim Patchwork Quilted Stars

These hanging denim stars are a lovely unique alternative Christmas decoration. You can even make larger quilted stars to use as heat mats on the dining table.
Materials
- Assortment of denim scraps in different colours of indigo blue
- Diamond template on blog
- Scrap cardboard
- Ribbon
- Fiberfill
- Needle and thread
- Button off a pair of old jeans,
Tools
- Scissors
- Sewing machine (optional)
Instructions
- Out of the cardboard make a diamond-shaped template where all the sides are 7cm long.
- Draw around the template on scraps of denim. Cut out the diamond shape. You will need six for each star. Make sure you have diamonds in different shades of denim.
- Pair up the denim diamonds and pin them right sides together.
- Stiched each pair of diamonds together along one side.
- Then stitch all three pairs together to make one six-pointed star.
- Sew the jeans button into the middle of the star where all the points meet.
- Next. place the star onto a larger scrap of material and draw around it. Then cut out the large star shape.
- Pin both stars right sides together and stitch. Leave one of the star sides open for filling.
- Using the gap, turn the star right sides out. Use a chopstick to poke out the star points.
- Next, loosely fill the star with fiberfill and then stitch it shut.
- Thread a needle and quilt the star by stitching up each seam with a running stitch. Complete the quilting by then stitching from the middle of each star point to the center of the star.
- Finish off the quilted stars by adding a ribbon to hang it from.
You’ll find more Christmas star crafts here.
See more of my sewing crafts here, including these hand-sewn ideas.
Ann
Monday 2nd of November 2020
These are wonderful, Claire. Thank you for sharing at Party In Your PJ's, you are being featured on my blog Tuesday evening!
Claire Armstrong
Monday 2nd of November 2020
Thank you so much and that's awesome, I look forward to seeing the feature.
Our Hopeful Home
Sunday 1st of November 2020
These are absolutely adorable! Place mats would be great as well. Thanks for sharing at Vintage Charm. xo Kathleen
Claire Armstrong
Monday 2nd of November 2020
Thank you, Kathleen. Yes I plan to make some bigger placemats.
Ann Butler
Saturday 31st of October 2020
Great upcycled project! Thanks for sharing on our Linky Party!
Claire Armstrong
Saturday 31st of October 2020
Thank you so much! They were fun to make.
Naush Samama
Saturday 31st of October 2020
Oh How I wish, I could sew like you !! These ornaments are fabulous. I love them. Thank you so much for joining us at Meraki Link Party. Much love Naush
Claire Armstrong
Saturday 31st of October 2020
Thank you, Naush. They are a very easy sewing project, I'm no seamstress but still managed to make them easily enough.
Cherelle | The Inspired Prairie
Tuesday 27th of October 2020
These are so cute! I love denim!
Thanks for linking up and sharing with us on the Embracing Home and Family Link-up party!
-Cherelle
Claire Armstrong
Thursday 29th of October 2020
Me too! That’s why I have so many denim crafts. Thank you ????