
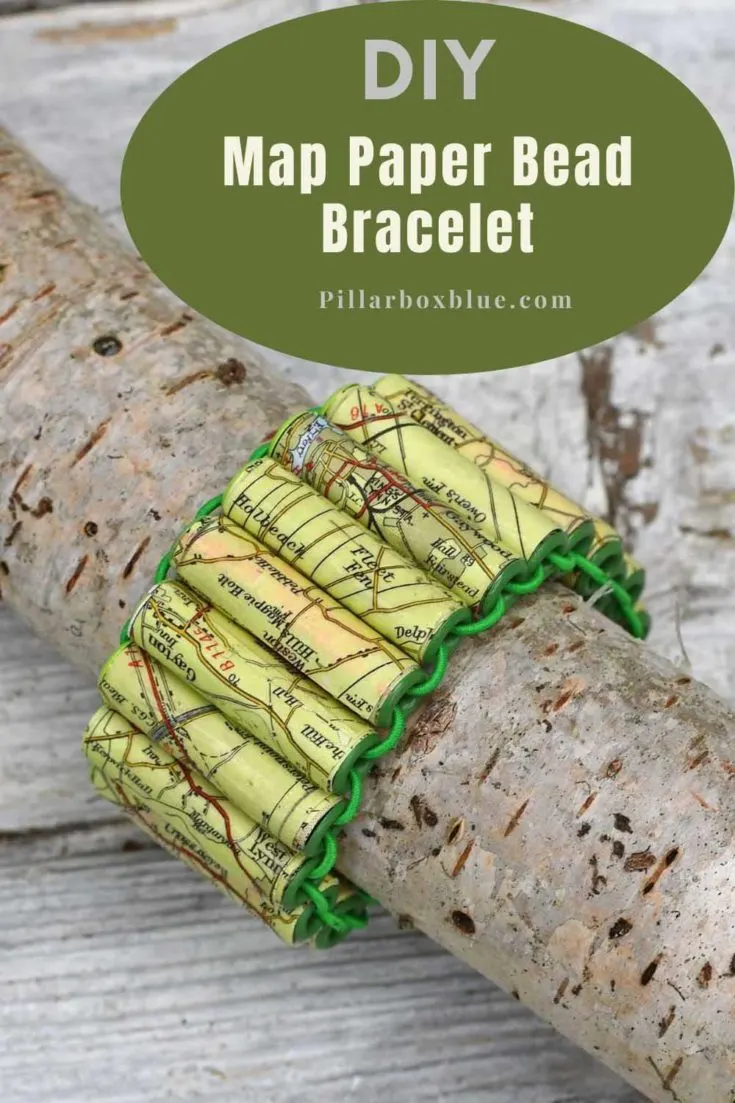
Discover how to make paper beads from repurposed maps and create unique bracelets and necklaces. An upcycling project that’s easy, fun, and eco-friendly!
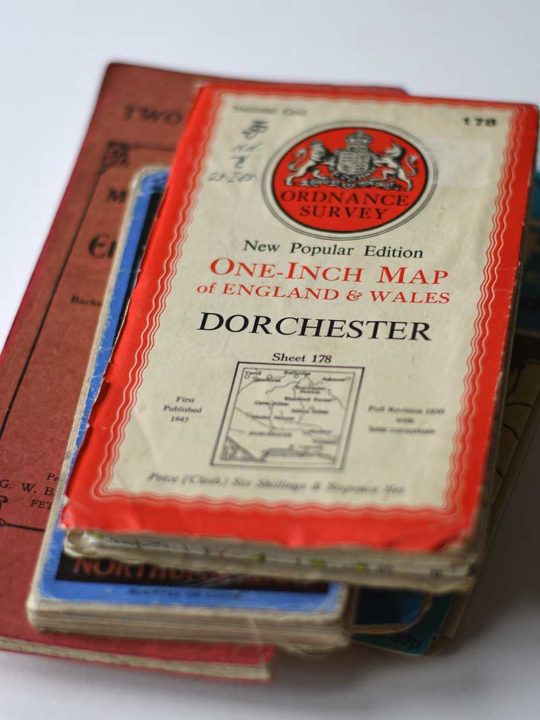
Old road maps are one of my favourite things to upcycle and repurpose. I often repurpose maps for home decor crafts but occasionally use them to make jewellery.
In the past, I’ve made world map necklaces using broken eyeglasses. This time I’ve used old maps to make a personalized bracelet.
Using Road Maps To Make Paper Beads
Old road maps are great for making paper bead jewellery for several reasons.
- Firstly, the maps make the jewellery more interesting and personal. If you use a road map of somewhere special, this instantly gives the item sentimental value.
- Secondly, old road maps look great; they come in many colours. The road patterns on the old maps translate into interesting patterns on the paper beads.
- Thirdly, old road maps are a very affordable and environmentally friendly source of craft paper. Most of my old road maps are from elderly relatives, but they can also be found cheaply in thrift stores. Road maps go out of date, and most people use sat navs these days, so there is a plentiful supply to repurpose.
- Finally, road maps are often printed on high-quality paper and on large sheets. Making them perfect for so many paper crafts, including bead making.

We’re a participant in the Amazon Services LLC Associates Program, an affiliate advertising program designed to provide a means for us to earn fees by linking to Amazon.com and affiliated sites. As an Amazon Associate, I earn from qualifying purchases.
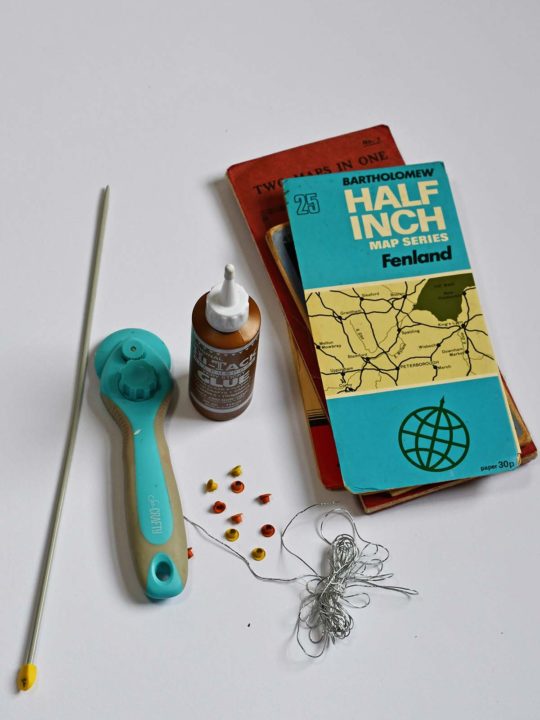
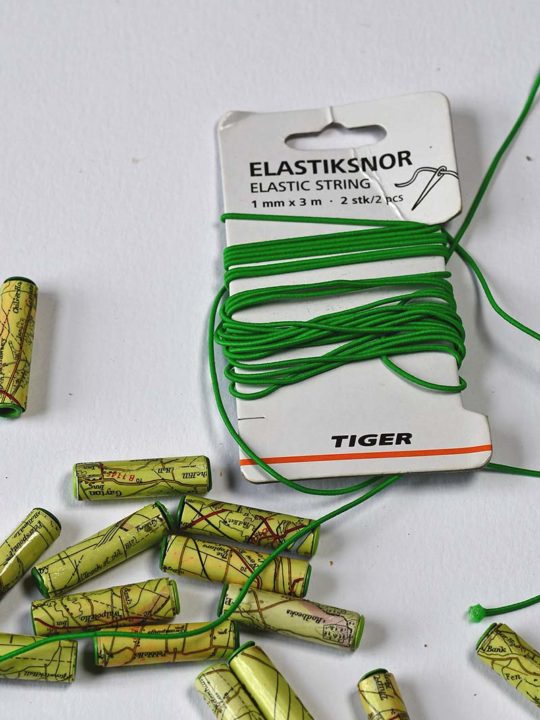
What You Need
- Old road maps – You will be able to make a lot of beads out of one road map. This will be enough for a few bracelets and necklaces. Choose a map for the colour and patterns or use a special map.
- High tack glue
- Rotary cutter and mat
- Size 4mm knitting needle or something similar
- 4mm coloured eyelets/grommets
- Elastic string and darning or upholstery needles (with a large eyelet).
- Crystal clear lacquer
- Wooden skewers

How To Make Map Paper Beads
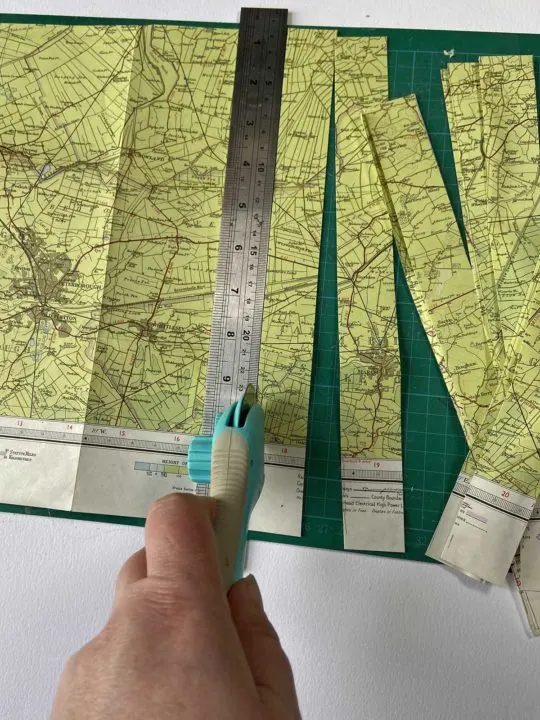
The cut of the paper strips determines the shape of handmade beads. The paper is cut into long triangle-shaped strips to make more rounded beads. For this tutorial, I made simple cylindrical paper beads.
Step 1: Cut the road map into strips. Once you have chosen, I used a rotary cutter and mat. I cut 20 strips of paper, each 2.5cm (1″) wide and 30cm (12″) long.

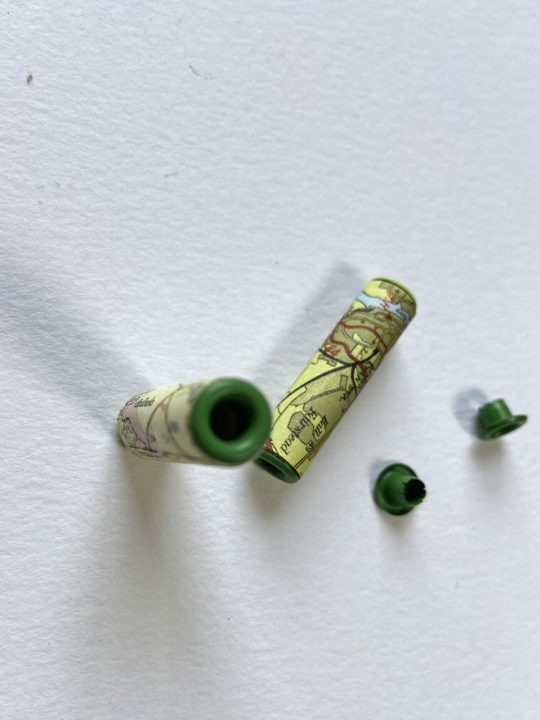
Step 2: Next, take one strip of map paper then wrap it tightly around the knitting needle. The knitting needle’s size determines the hole’s size in the paper bead’s centre. I used a 4mm knitting needle to fit the 4mm eyelets.
Secure the end of the paper strip with high-tack glue.
If you don’t have high-tack glue, you might need to clip the paper with a bulldog clip until the glue dries.
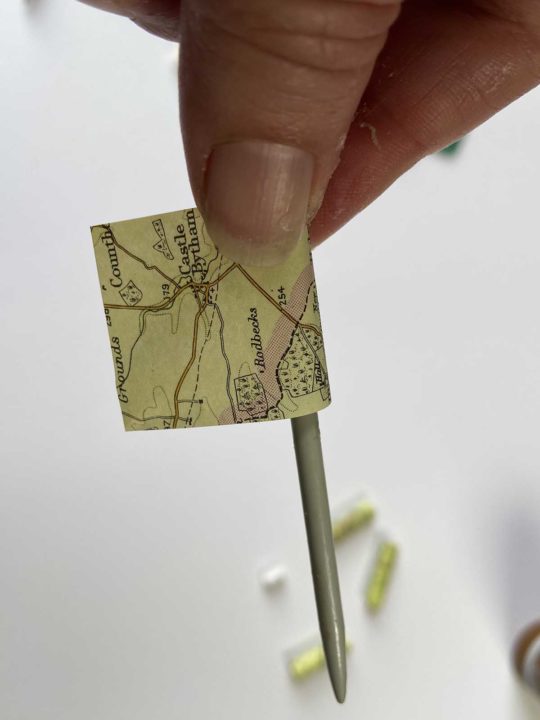

Step 3: Carry making map paper cylinders; each bracelet will need about 20 paper beads. Then stick a 4mm coloured eyelet/grommet into each end of the bead.

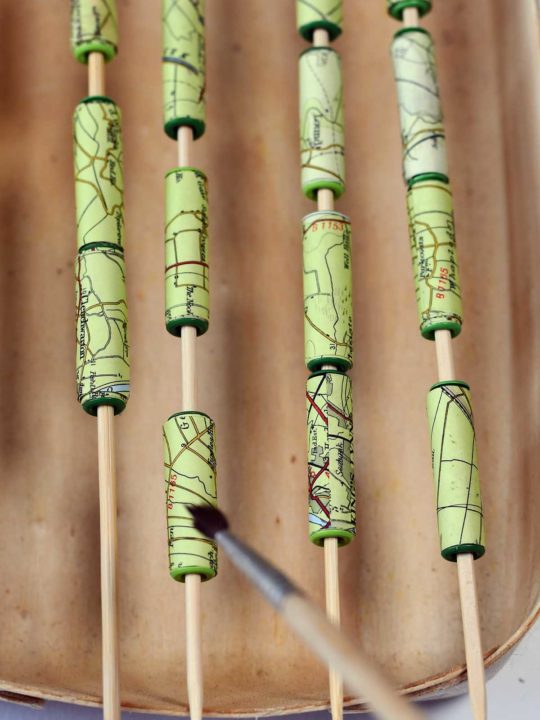
Step 4: To give the paper beads a glossy finish, brush them with crystal clear lacquer. The quickest and less messy way is to place the beads on a wooden skewer. Then rest the skewer on a tray. Use a brush to apply the lacquer.
Other varnishes can be used to coat the beads, such as Mod Podge.

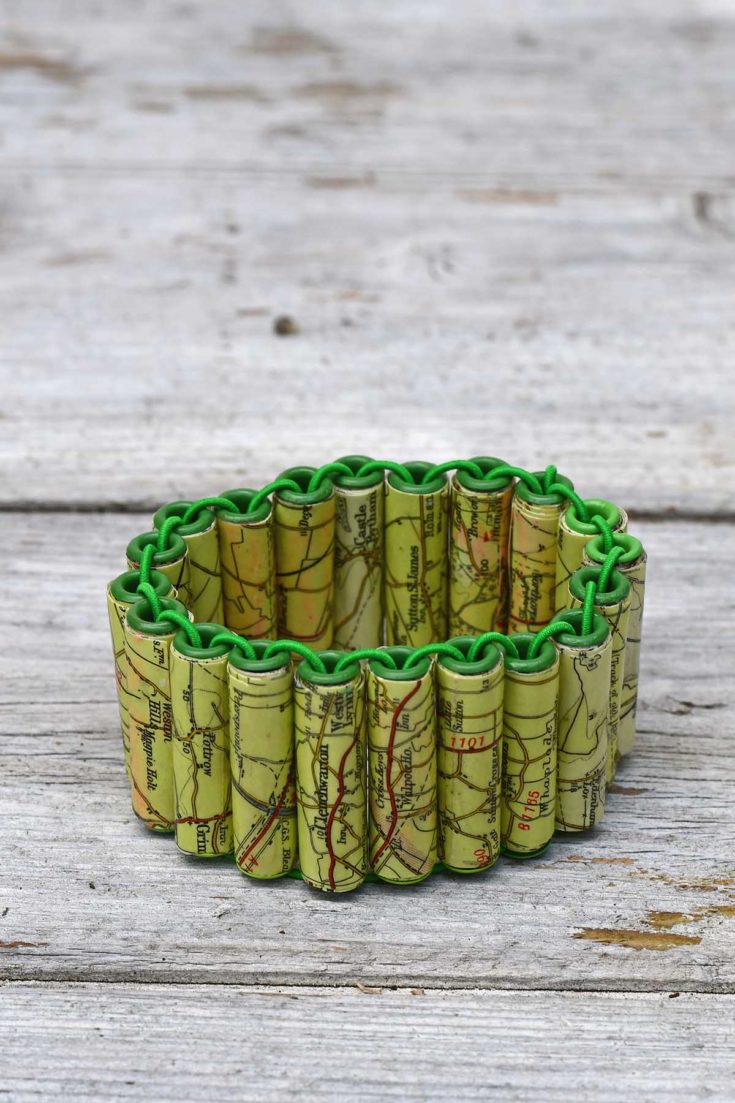
How To Make The Map Bracelet
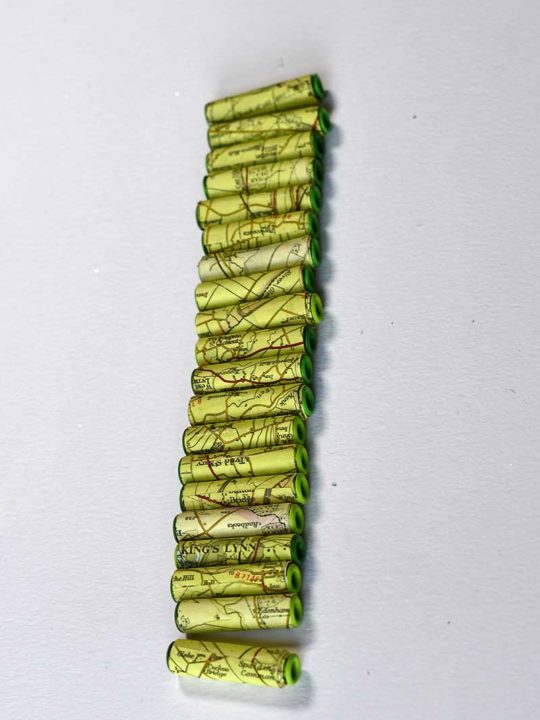
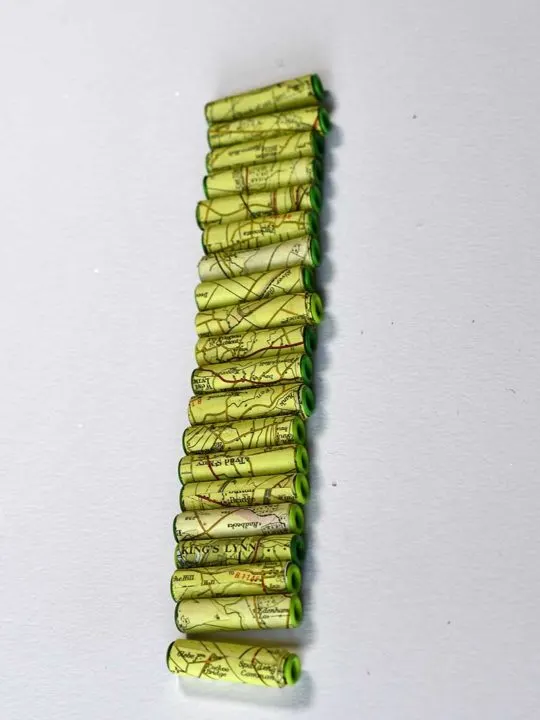
Step 5: Next, measure the circumference of your wrist. Then lay out all the map paper beads and measure them. You want the strip of paper beads to be the same size as your wrist.
My medium-sized wrist needed 20 map paper beads for my bracelet.

Step 6: Next, cut a length of elastic string about 1 meter long. Thread both ends of the string onto large-eyed needles. Using elastic string makes taking the paper bead bracelet on and off easier.
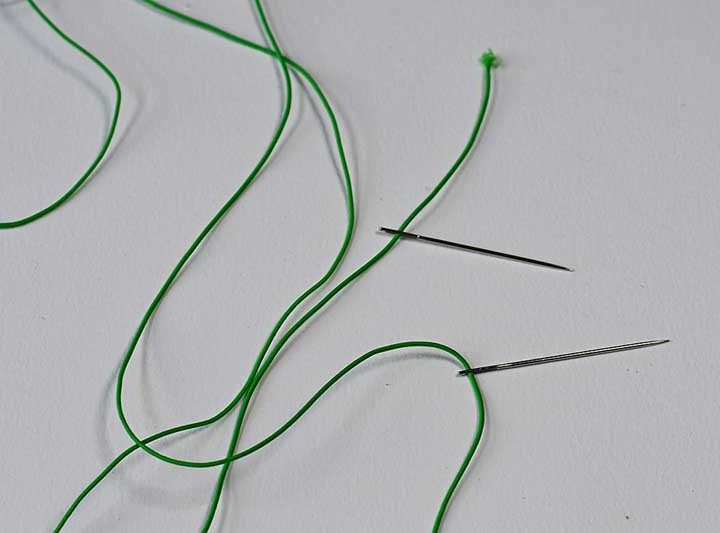

Step 7: Secure one of the map paper beads to a flat surface with some white tack. Then thread it with the elastic string. Make sure that the bead sits in the middle of the elastic.
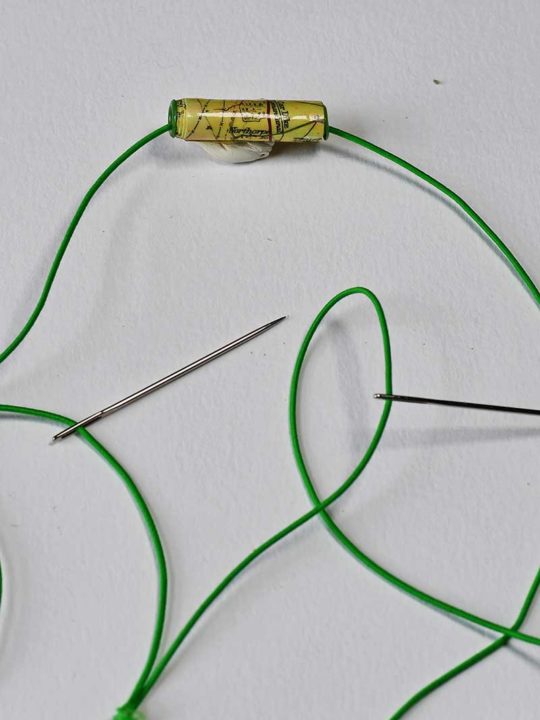
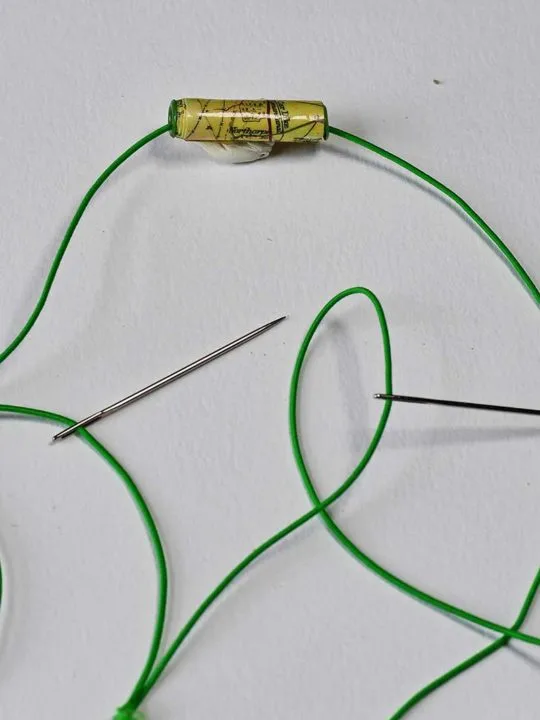
Step 8: Next, thread the needle on the right-hand side through the bead to the left-hand side. Then, thread the needle on the left-hand side through the bead to the right. Then, pull the elastic string tight so that the threaded beads butt up next to each other.
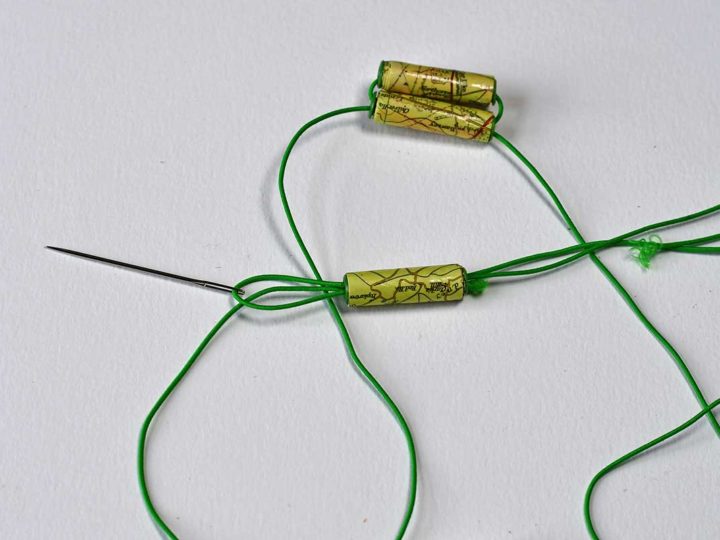
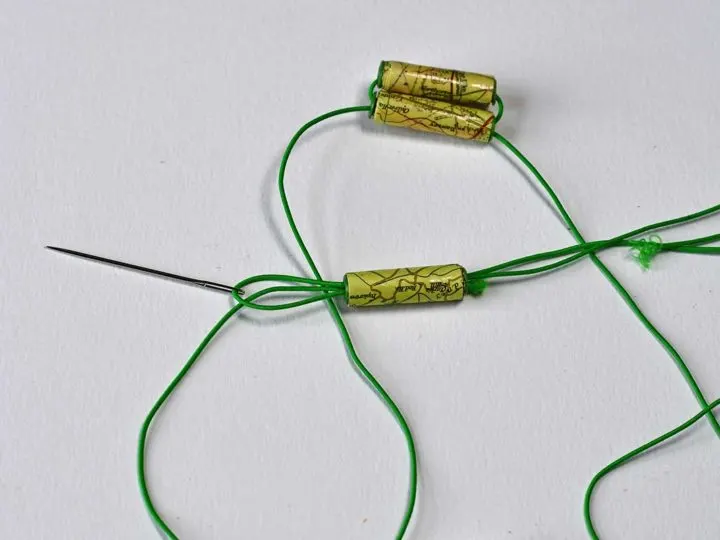
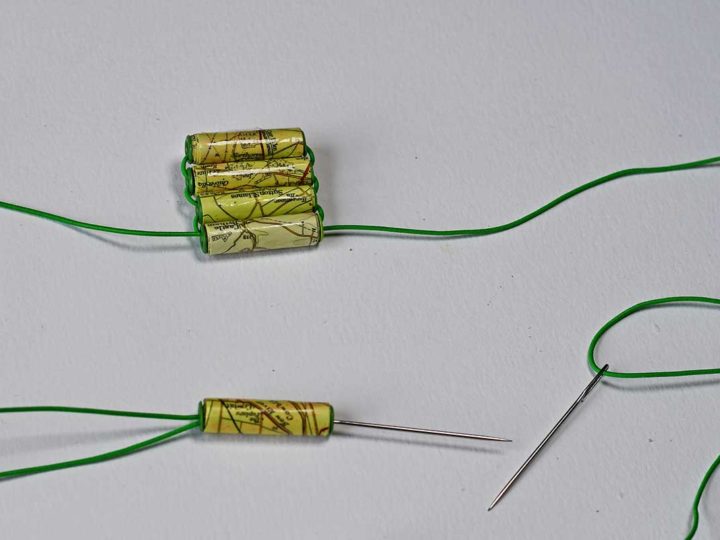

Step 9: Carry on adding the map paper beads one by one.

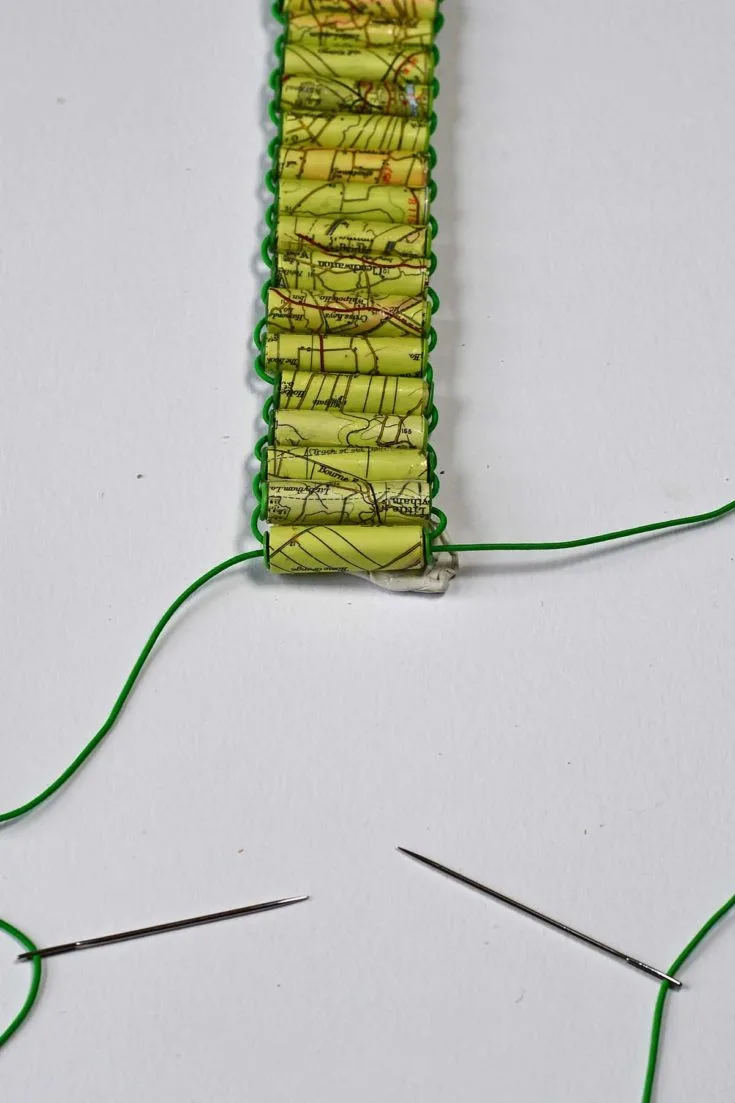
Step 10: After adding all the map paper beads, thread the needles through the first bead again. This will turn the strip of beads into a cuff. Simply tie off the string and cut away any excess.
Tuck the string knot into the bead hole for a neater look.

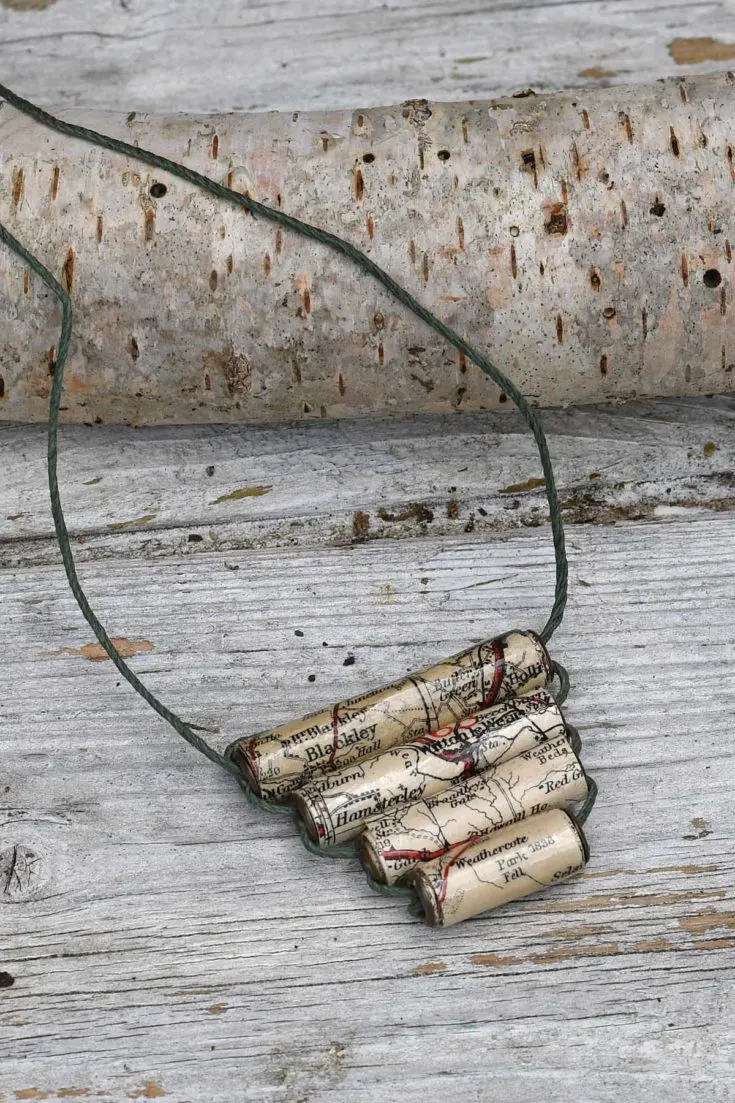
How To Make A Paper Bead Necklace
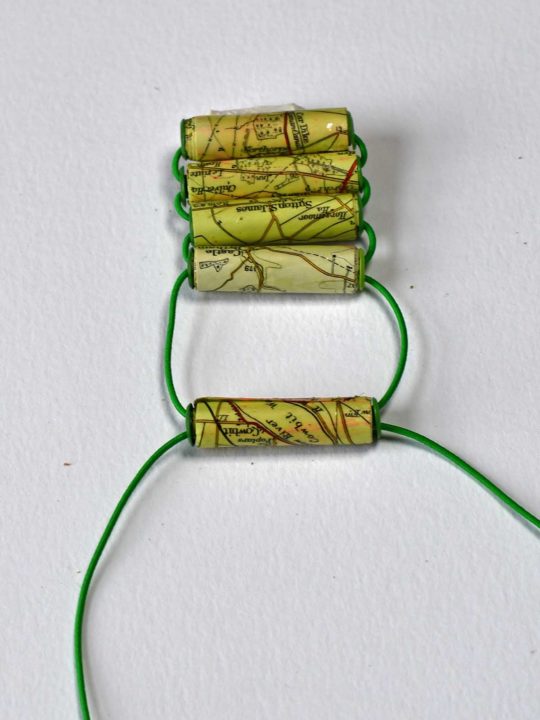
The same paper bead method can make a cool map necklace. To make a necklace pendant, make four paper beads in decreasing sizes from 4cm to 1cm in width.
Then thread the beads together in the same way as the map cuff above. But this time I use a nice coloured twine. The twine is part of the necklace, and the threaded beads are pendants.

Both the map bracelet and necklace would make a lovely gift, especially if you use a map somewhere special.

These beads would also look great made out of old book pages and music sheets.
Road maps are great for upcycling into personalised map-themed gift ideas. I’ve repurposed my old maps into beautiful map roses and cool faux map paper moths. Maps have also been sewn into fun heart treat bags and used to make cool map rock keychains.
I’ve even used my road maps to make personalized map wall art, including a pet portrait and map angel wings.
For more upcycled jewellery ideas, check out these avocado pit button jewellery, denim bracelet, denim earrings and scarf necklace. The scarf necklace upcycle includes a tutorial for denim beads.
You’ll find more DIY bracelet ideas here.
I also used paper beads with this paper lantern tutorial.
How To Make Map Paper Bead Bracelets and Necklace
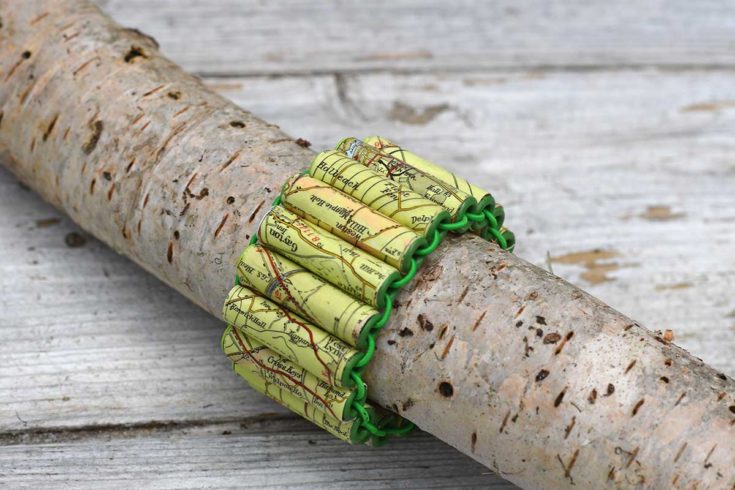

Upcycle your old road maps into paper beads to make a fun bracelet or even necklace. This handmade jewellery would make a lovely gift, especially if you use maps of special places.
Materials
- Old road map
- High tack glue
- Coloured eyelets grommets 4mm
- Elastic string
- Crystal clear lacquer
Tools
- Rotary cutter and mat
- Knitting needle
- 2 x darning/upholstery needles
Instructions
- Using a rotary cutter and mat, cut up the road map into strips approximately 2.5 cm wide. Cut enough strips to make 20 paper beads.
- Roll a strip of map paper around a 4mm knitting needle. Secure the end of the paper with glue. Make 20 of these paper rolls.
- Stick an eyelet/grommet into each end of the paper beads.
- Thread the paper beads onto wooden skewers over a tray. Brush them with a protective varnish, such as crystal clear varnish.
- When all the beads are dried make up the bracelet. Cut about 1-meter length of elastic string and thread a needle on each end of the string.
- Next, thread the first need into the middle of the string. Secure the bead to a flat surface with white tack.
- Then, add the next bead, by threading the right needle through the middle of the bead and the left need through to the right. Then, pull the elastic string tight so that the beads butt up next to each other.
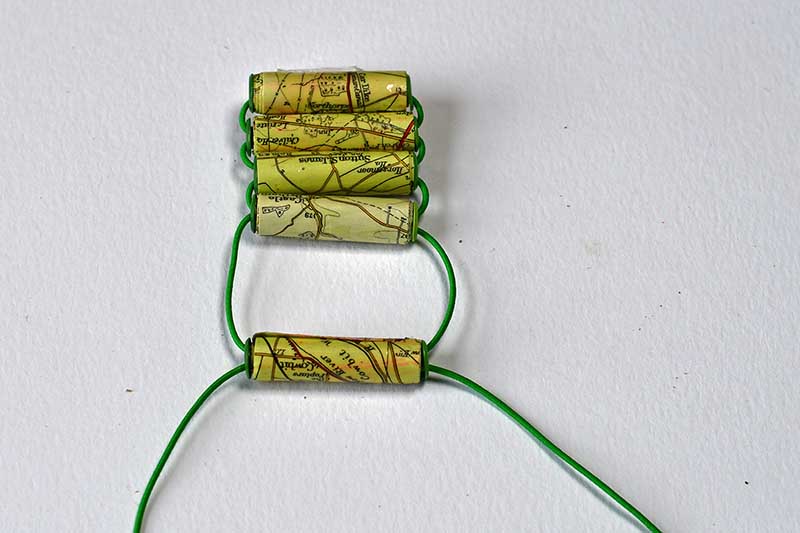
- Carry on until all the beads have been added. Then thread back through to the first bead to create a bracelet loop.
- Tie off the elastic string and cut away the excess. Hide the knot by poking it into the centre of a bead.
- To make a necklace pendant make four paper beads of decreasing length 4cm to 1 cm. Then secure these together in the same way as the paper bead bracelet. However, this time make the excess twine part of the necklace.
kristie
Saturday 14th of May 2022
Very nice! I like the necklace too.
Claire Armstrong
Sunday 15th of May 2022
Thank you so much. You could even make matching earrings with them too.
Pam
Thursday 12th of May 2022
This is a beautiful project. I've seen paper beads before, but I've not seen these with the eyelets. Love it! I'll be featuring it today at the TFT party. Thanks for sharing with us!
Claire Armstrong
Thursday 12th of May 2022
Thank you so much, I look forward to seeing the feature.
Beth
Monday 9th of May 2022
Awesome tutorial, Claire! We will be featuring you this week on the Creative Crafts Linky Party starting on Wednesday! Have a great week! Creatively, Beth
Claire Armstrong
Monday 9th of May 2022
That's awesome, I look forward to seeing it.
creativejewishmom/sara
Thursday 5th of May 2022
Wonderful! Great to see you on craft schooling sunday, thanks for sharing, and love the embroidered wall art too!
Claire Armstrong
Friday 6th of May 2022
Thank you, Sara. Thanks for hosting.
Marie B.
Wednesday 4th of May 2022
This looks like the perfect craft to do with my grandson. He's big into handmade keychains to hang from his backpack so perhaps we can convert map beads like this into a keychain instead.
Claire Armstrong
Wednesday 4th of May 2022
That sounds like a lovely idea and a fun thing to do with your grandson.