
How To Make Handy Upcycled Hanging Bucket Storage
I'm so excited that I now have my designer painted shed for storing my craft supplies. I made upcycled hanging bucket storage from old yoghurt pots to match the paint job on the outside.
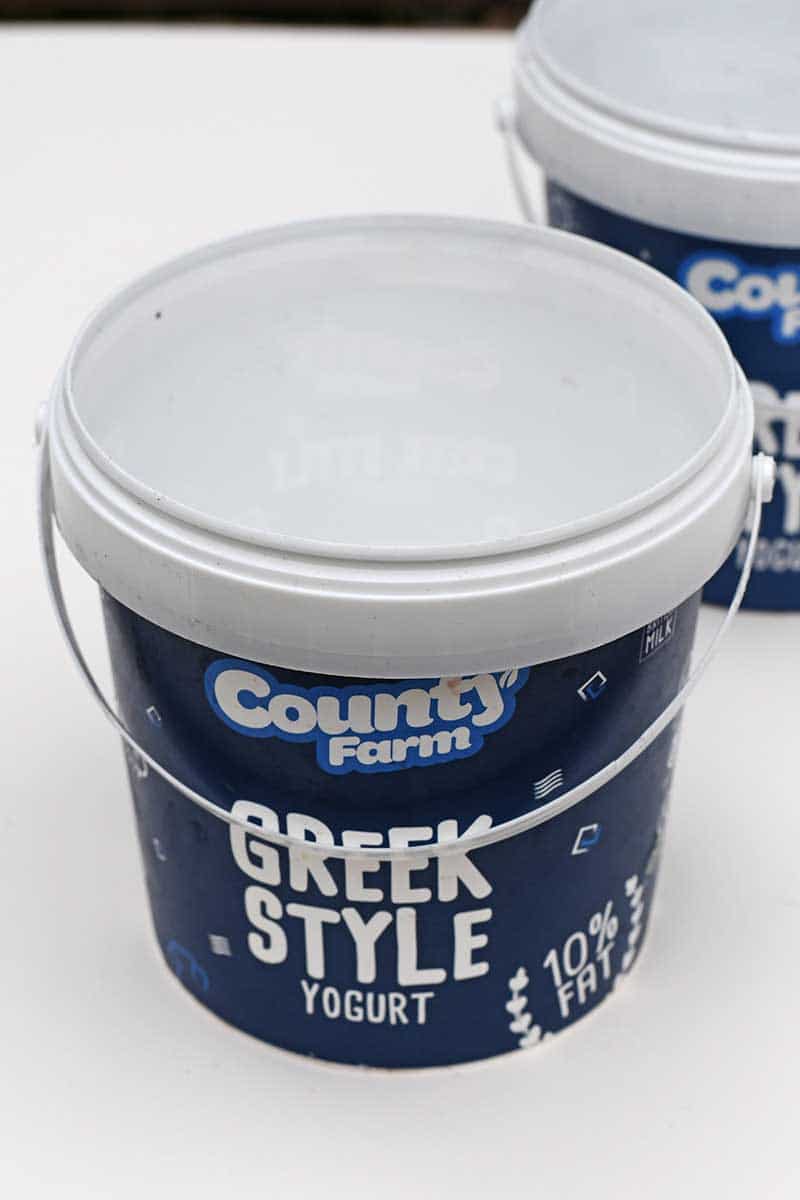
Most mornings, my breakfast consists of Greek yoghurt, berries and nuts. Subsequently, I get through many Greek yoghurts, so I buy them in large containers that look like small buckets.
Even though they are recyclable, these containers seem such a waste. So I try and reuse them whenever possible; that's when I thought of using them for hanging DIY tub storage.
DIY Tub Storage Using Old Yogurt Containers
The only thing is that even though these old yoghurt tubs are perfect for making hanging bucket storage, they aren't beautiful.
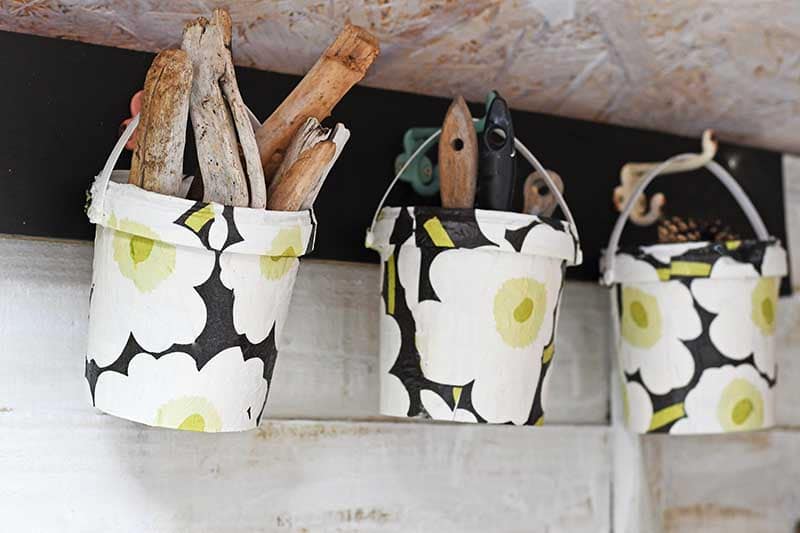
As I love the Marimekko design I printed on my shed, I decoupaged the Greek yoghurt tubs to match the shed.
I now have Marimekko designer hanging bucket storage inside my shed, which looks fab!

We're a participant in the Amazon Services LLC Associates Program, an affiliate advertising program designed to provide a means for us to earn fees by linking to Amazon.com and affiliated sites. As an Amazon Associate, I earn from qualifying purchases.
What You Need To Make Marimekko Hanging Bucket Storage
- 3 Large food plastic buckets. Mine was Greek yoghurt containers from Aldi. However, I've seen other foods, like popcorn, sold in similar containers.
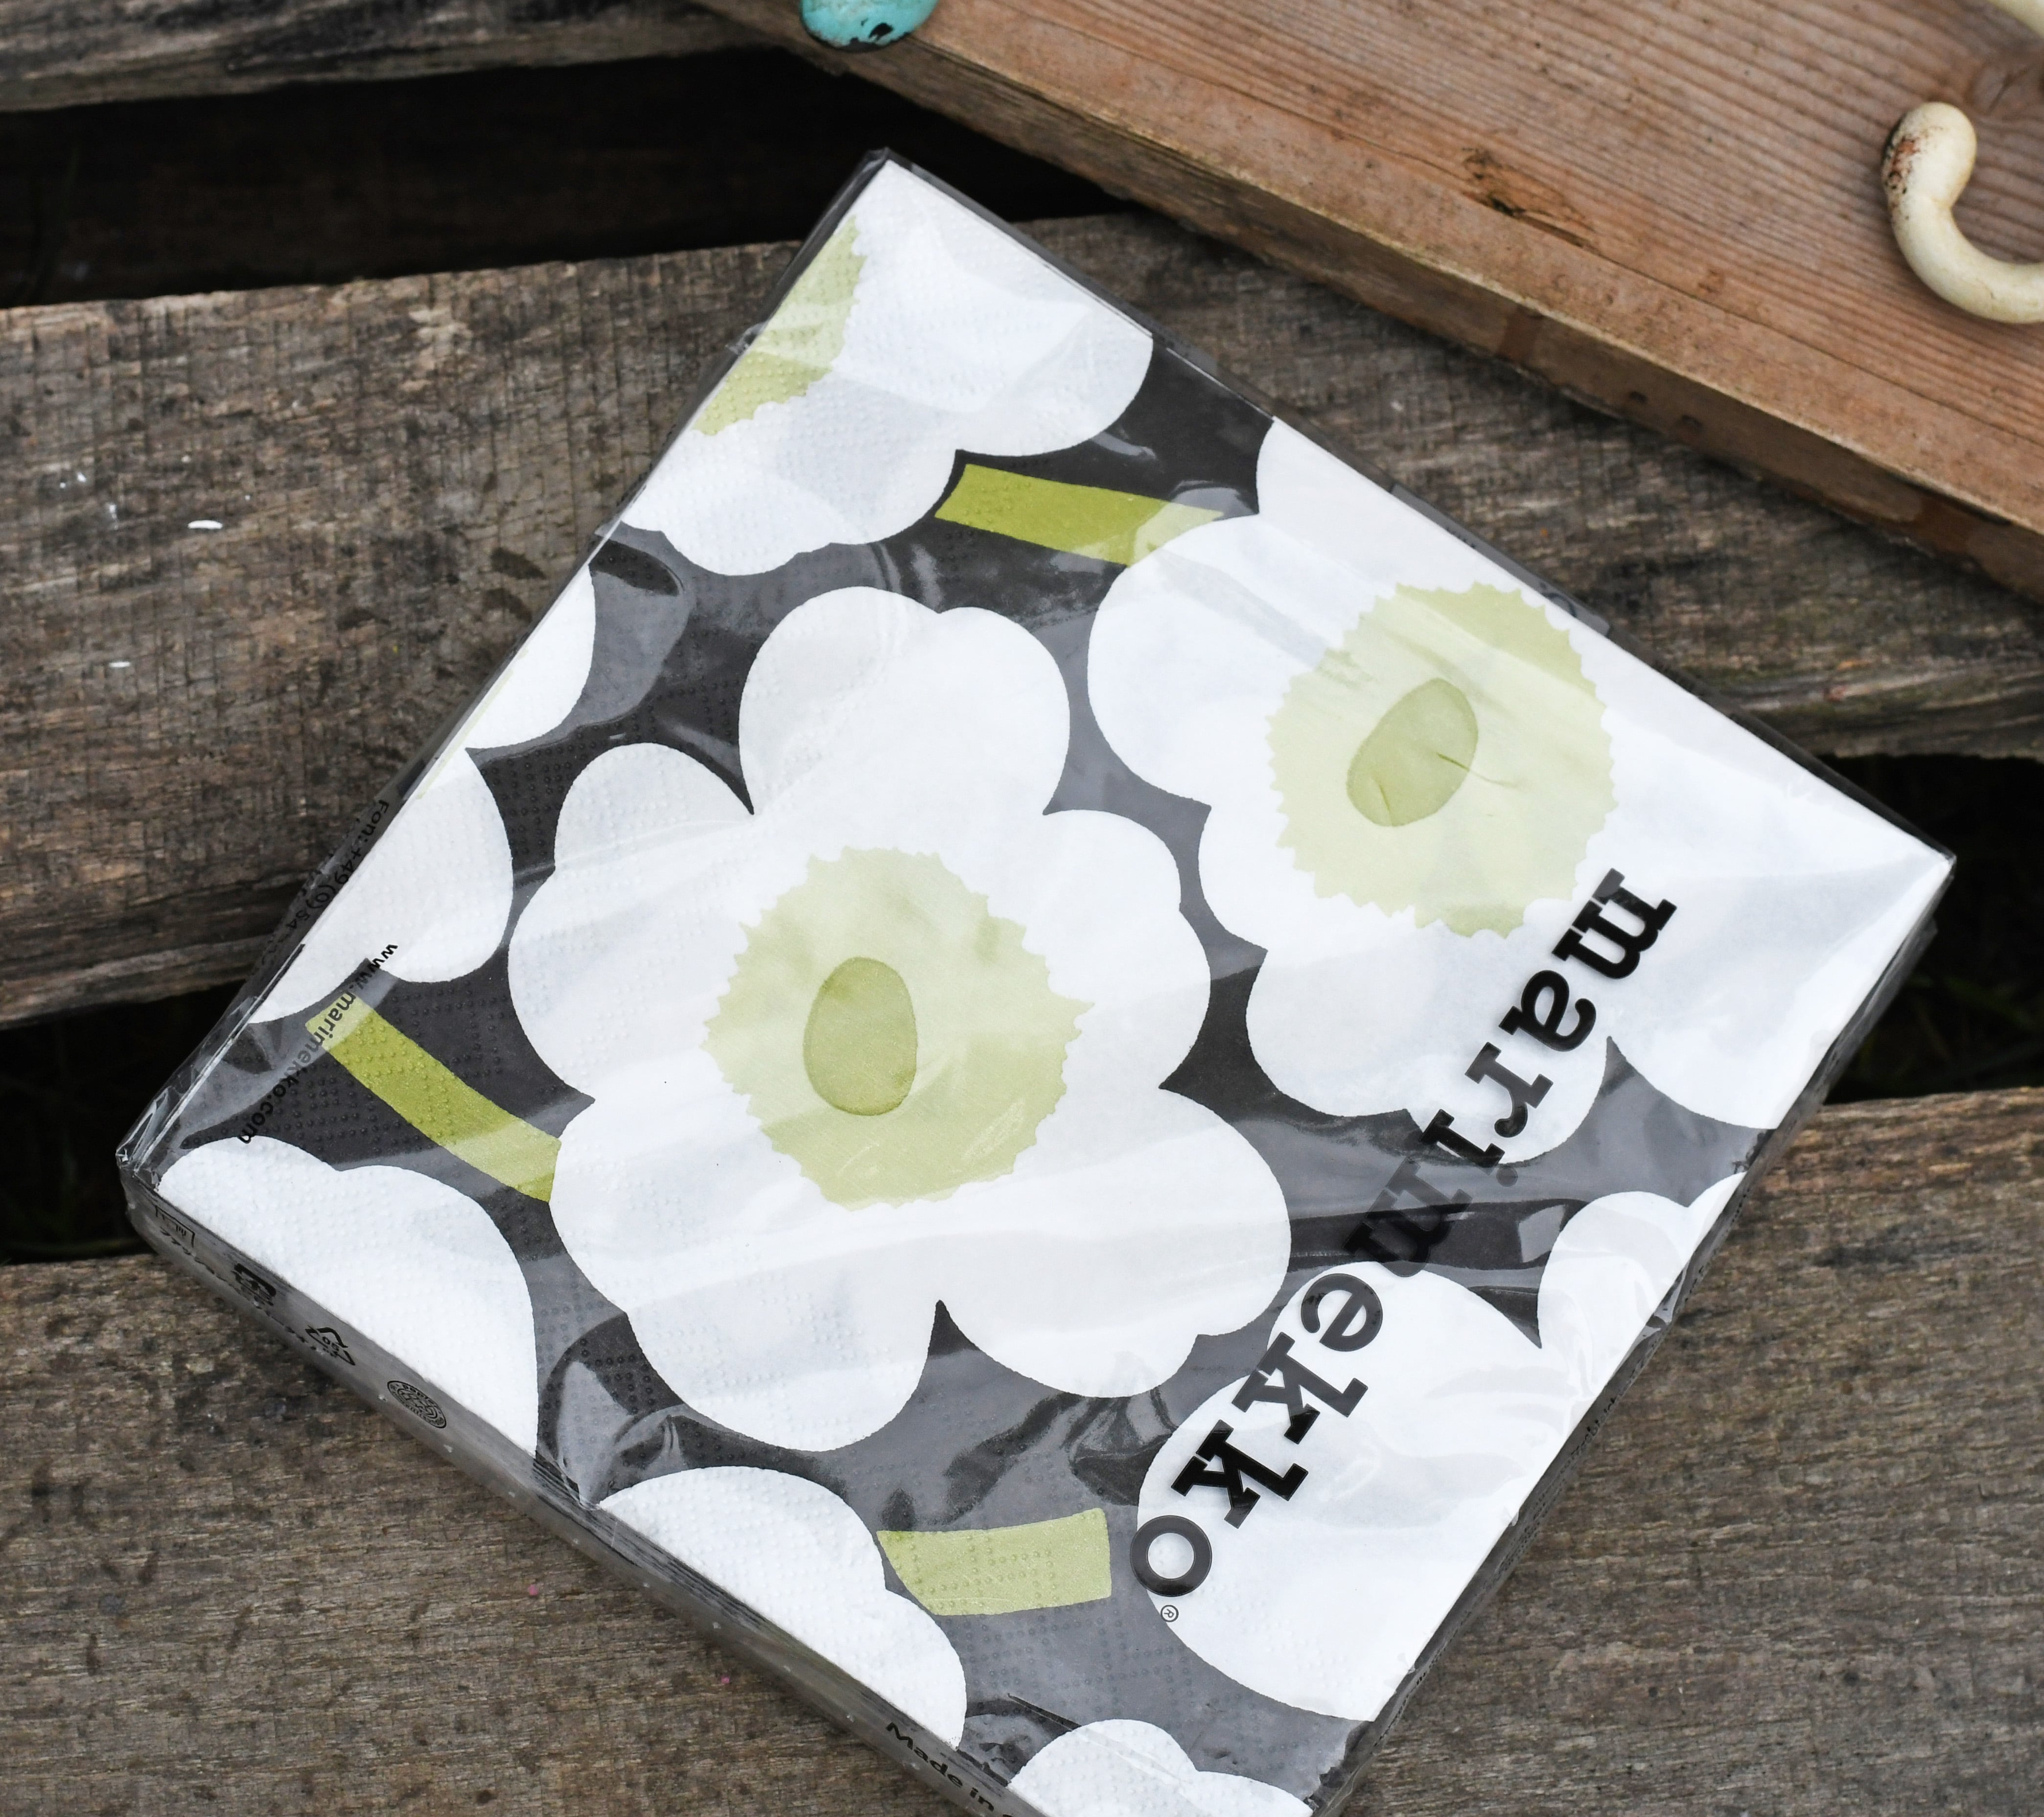
- Marimekko paper napkins, or paper napkins of your own choice.
- White paint
- Mod podge or other decoupage glue
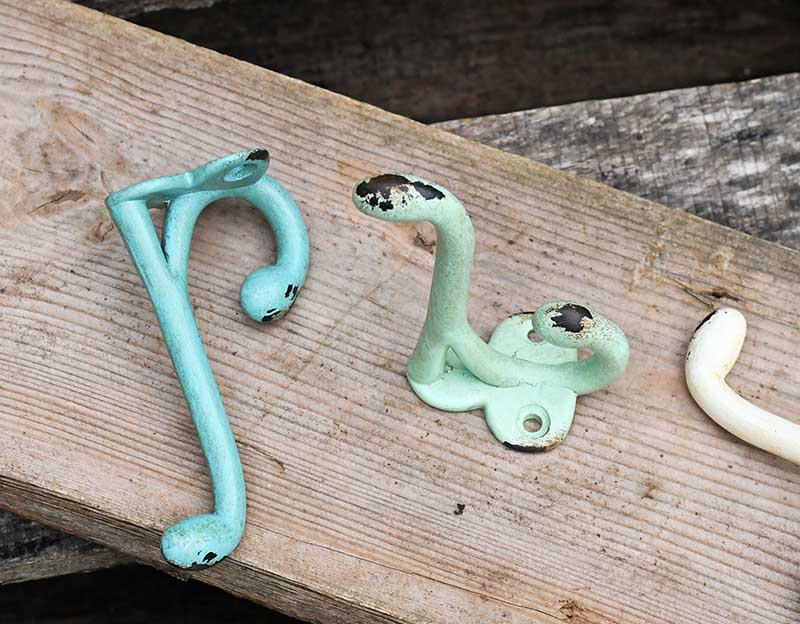
- Hooks for hanging bucket storage. Coat hooks with a long arm are best.
- Scrap piece of wood, I used a bit of an old pine floorboard.
- Black paint
Decoupaging The Hanging Buckets
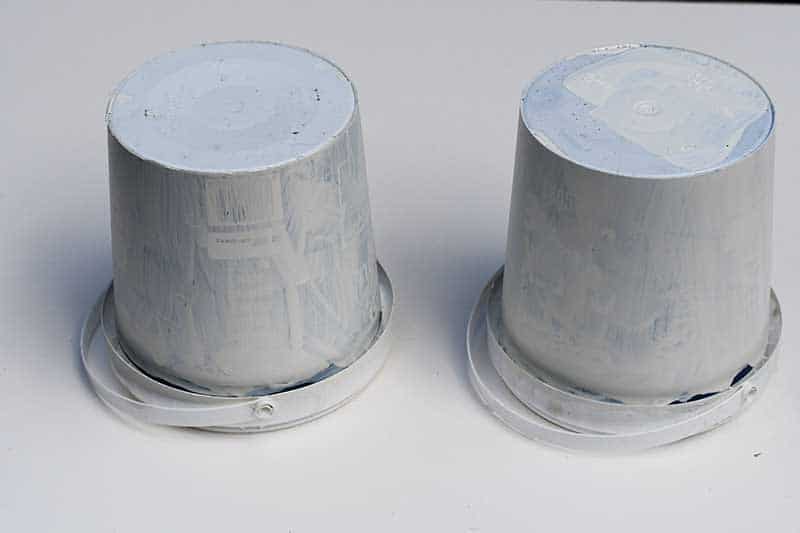
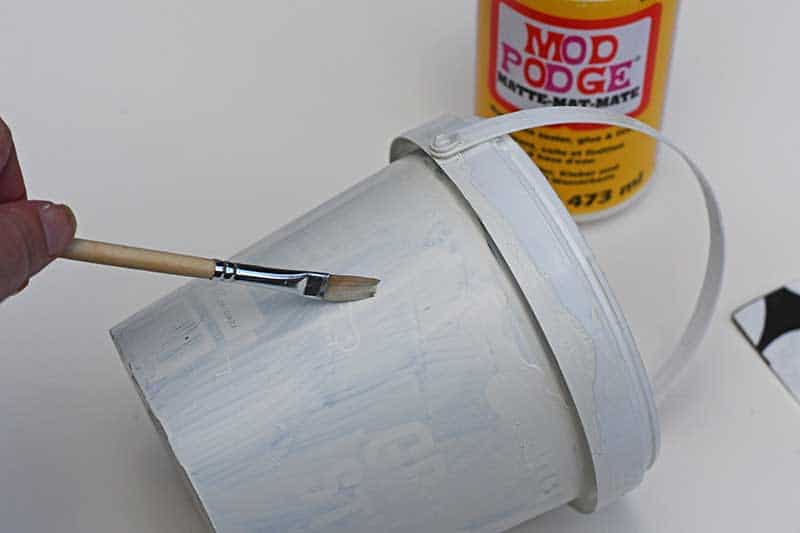
Step 1: The first thing to do is to paint the buckets white. This is to stop the print from showing through the decoupage. I actually painted 2 coats with some paint I had leftover from painting the shed.
Don't worry too much about what kind of paint you will use as it will be covered.
When decoupaging with paper napkins, the paper is very thin. This means that the design on the storage tubs can show through. That is why it is best to paint over the tubs before decoupage.
Step 2: Next, remove one paper napkin from the packet and cut it into 4-5 cm wide strips.
With round tapered objects, it is much easier to decoupage them in strips. I successfully used this method before when making the map mason jar banks.
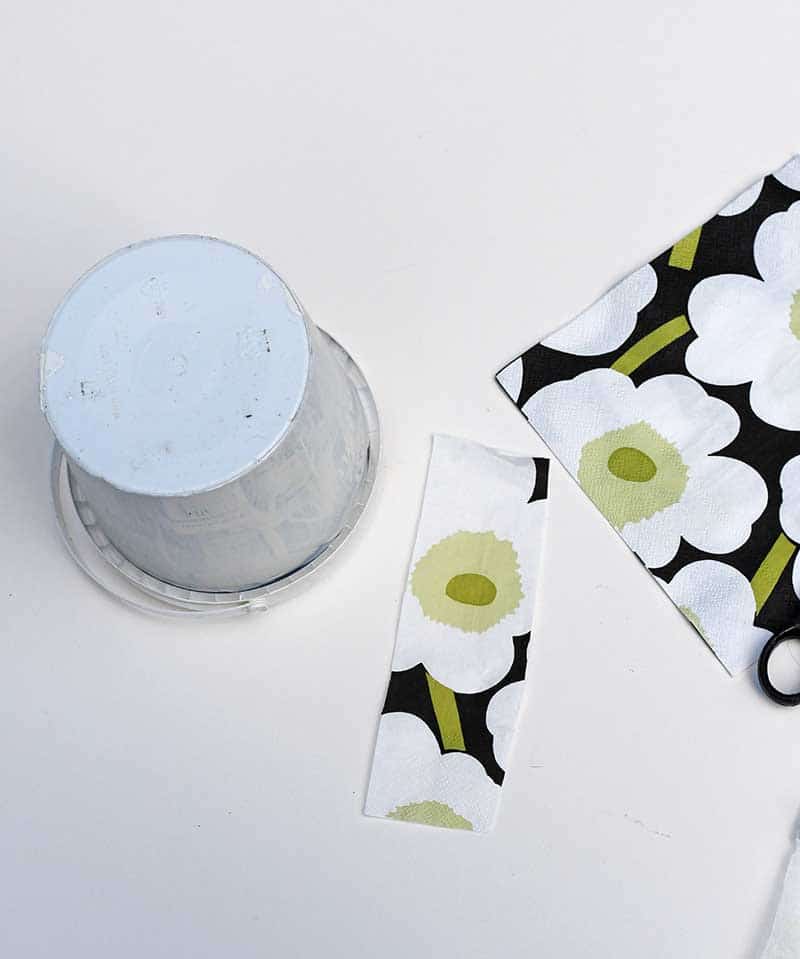
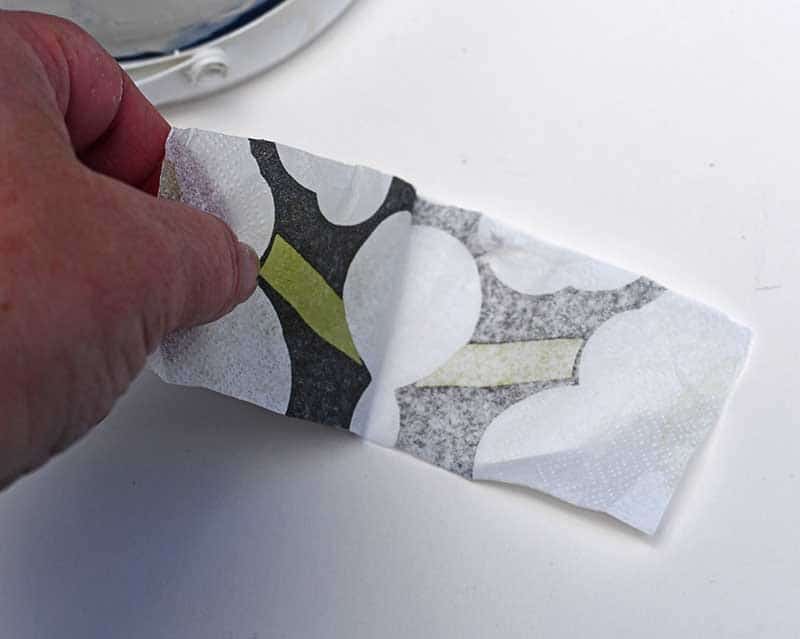
Step 3: Most paper napkins are 3ply. For decoupage, you only use the top printed layer of the napkin.
Carefully remove the top printed ply of the printed napkins. Discard the other two napkin layers.
Step 4: Next, using a brush apply Mod Podge to the side of the hanging storage bucket. Then carefully stick down the strip of the paper napkin.
Use a clean brush to brush out any air bubbles gently.
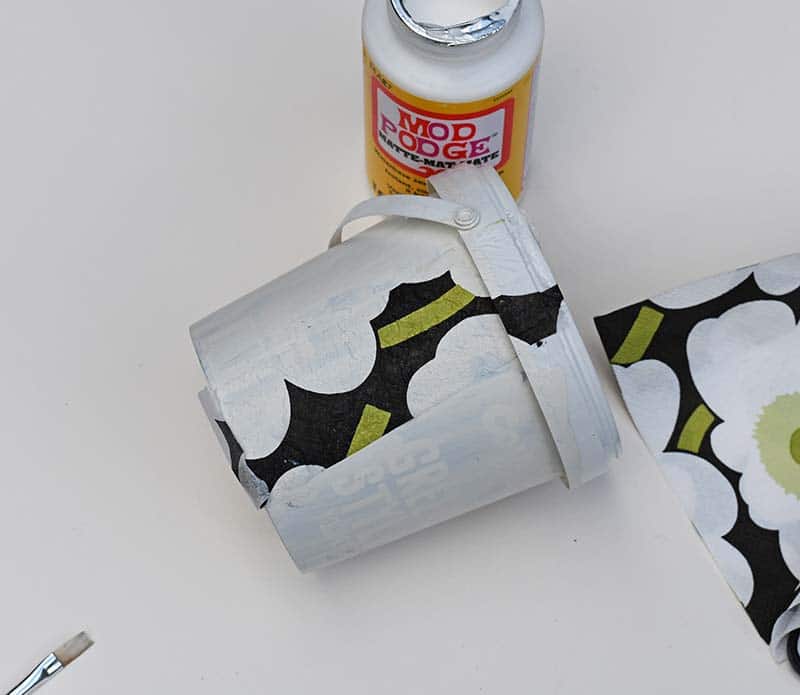
Step 5: Add strips of paper napkins until the whole storage bucket is covered.
Make sure you line up the pattern with every new strip of paper napkin you stick down.
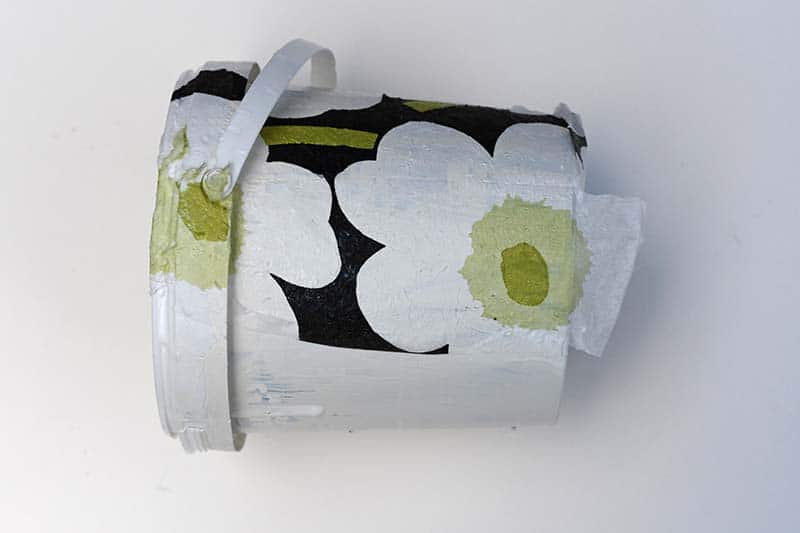
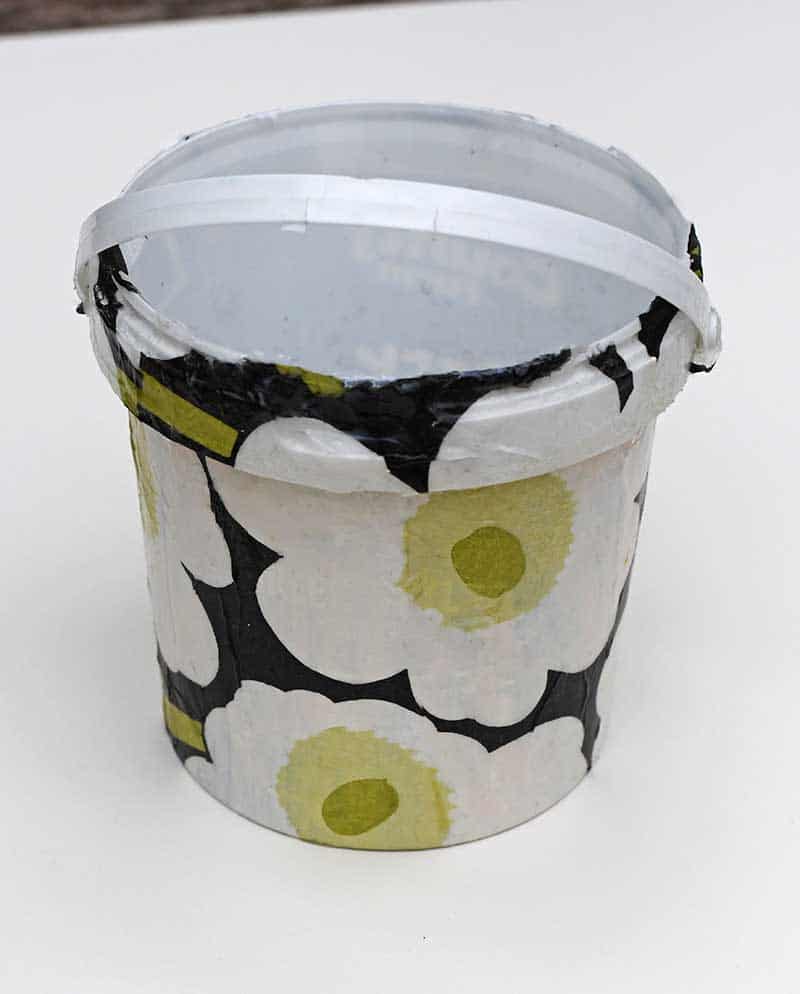
Step 6: Once the paper napkins have dried. Cut away any bits of napkin overlapping the edges.
Then, cover the outside of the DIY storage tubs with another layer of Mod Podge. When this dries, it will act as a protective varnish.
Finishing Off The Hanging Storage
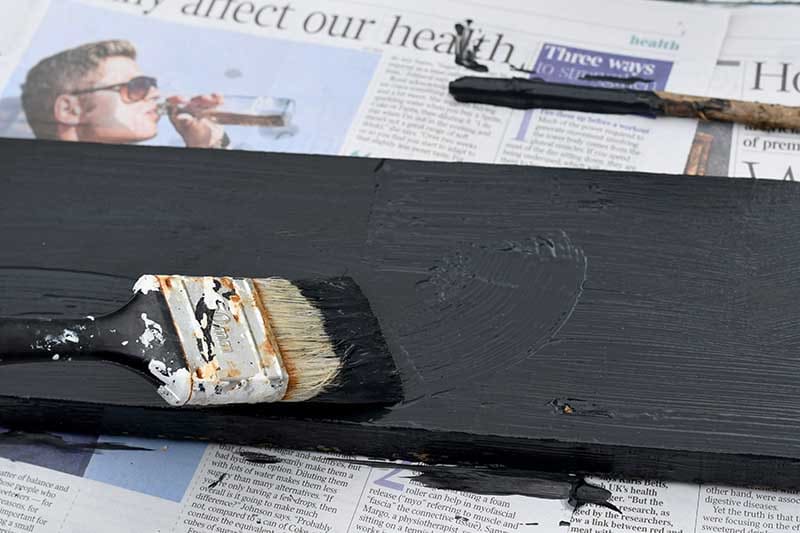
Step 7: Measure and cut the hanging backboard to fit the space designed for your shed or craft room.
Then paint the board to match the colour of the paper napkins. With the Marimekko napkins I used, black was the dominant colour. So I painted my backboard black. (Also, I just happened to have some leftover black paint).
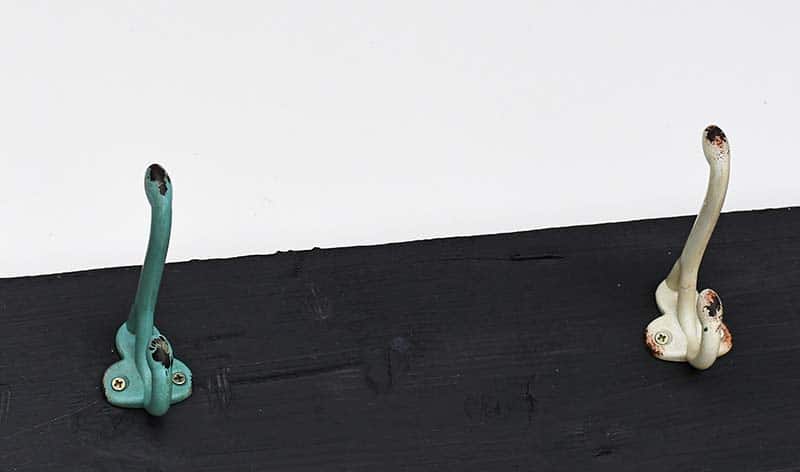
Step 8: Finally, screw in the coat hooks to the board. Make sure they are spread wide enough for the hanging storage buckets to sit side by side comfortably.
Now that all that is left is to hang the DIY storage tubs, whether in a craft room or, in my case, a craft shed.
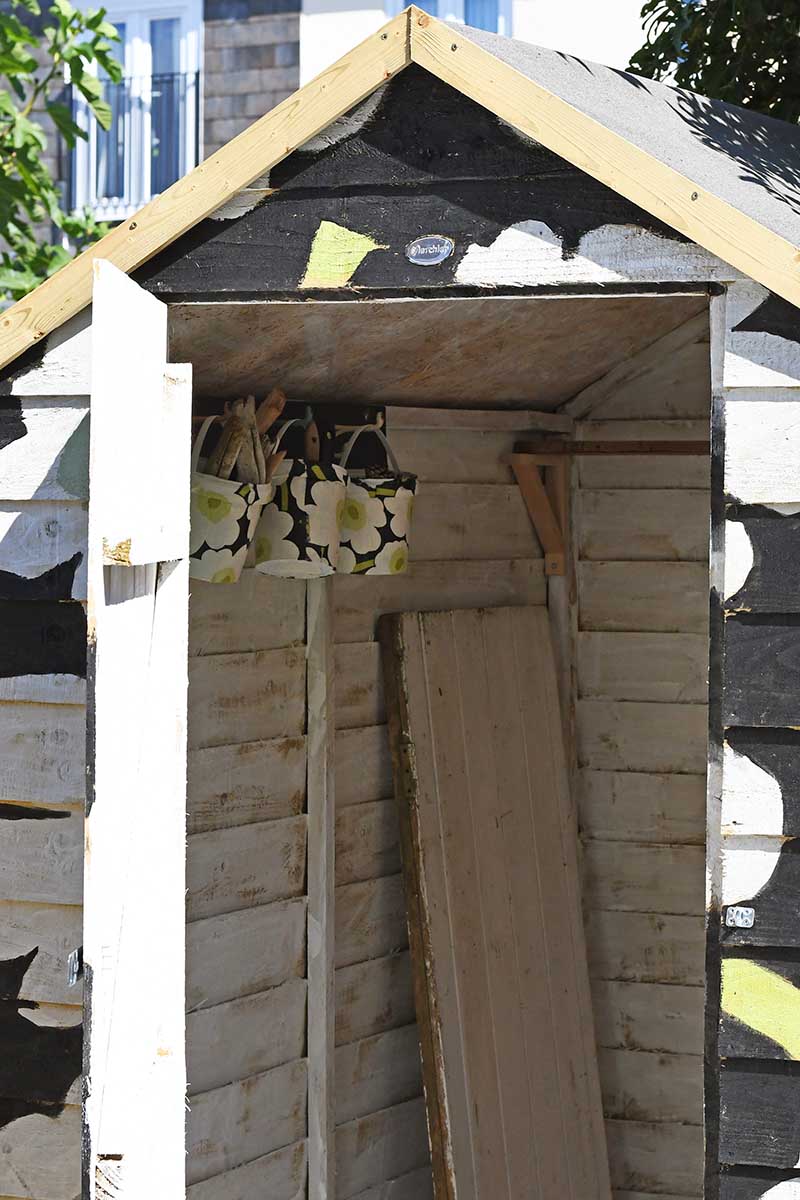
These buckets are really handy for storing the little things. I have one bucket full of small pieces of driftwood, another pinecone and the third paintbrushes.
I need to make more hanging storage buckets for all the other bits and pieces I collect for my upcycling projects, such as shells and broken pieces of ceramics, old screws and hooks, etc. The collection is endless; I'm a bit of a magpie.
They would be good for storing essential craft supplies in a craft room and hanging them from a pegboard.

This yoghurt pot upcycle is featured in the A to Z of clever upcycles and resources.
These storage buckets would also make handy pen and pencil pots for craft room storage.
If you liked these hanging storage buckets, you might want to check out some of my other upcycled DIY craft storage organization ideas. And my collection of Marimekko inspired crafts.
- Denim DIY Storage Box
- Craft Caddy With Copper and Denim
- Washi Tape Holder
- Shoe Box Craft Storage
- Brilliant Upcycled Denim Storage Ideas
- What Is Upcycling
For more storage ideas visit here.
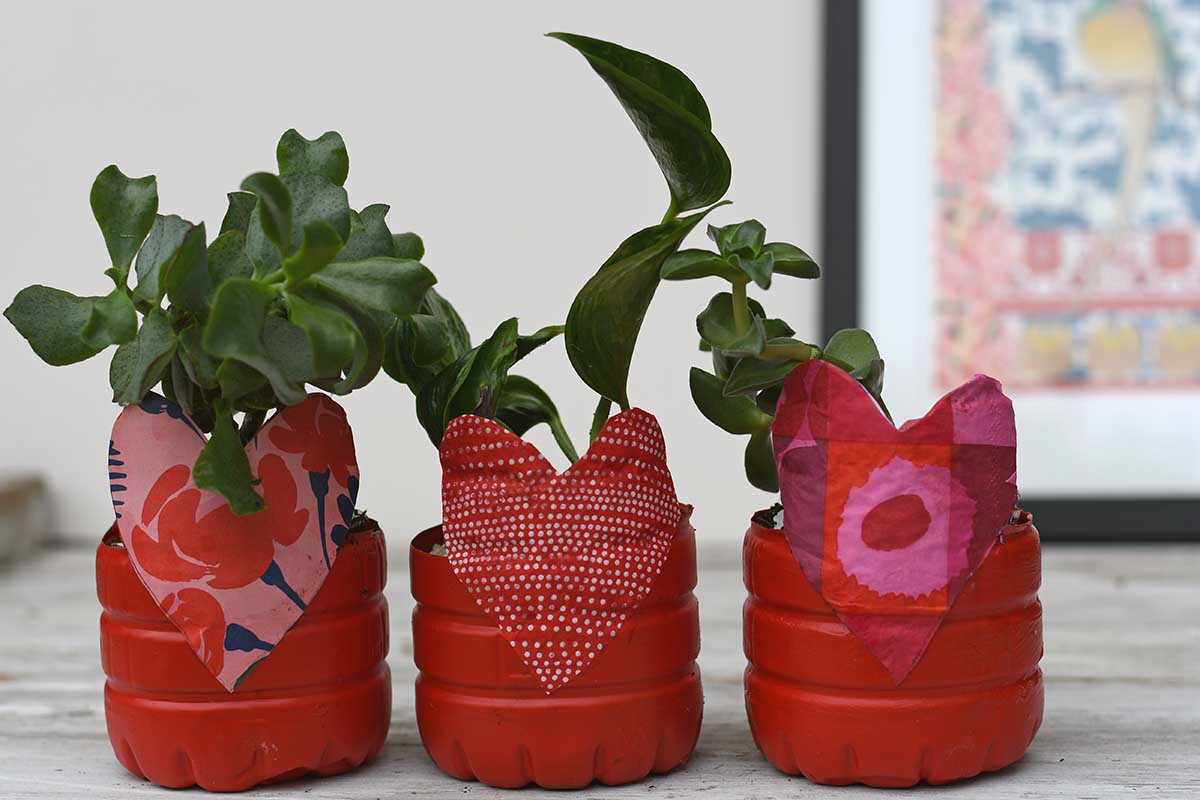
Love this Claire! I think these would be great plant pots too, either as holders for pots of why not make some holes in the bottom and use them with a plate underneath? Of course you have so many to use they'd be great gift baskets as well! thanks so much for sharing on craft schooling Sunday!
Thank you, I do like the plant pot idea. Maybe in the spring.
They fit right in Claire. I'm still hunting high and low here in South Africa for some of those gorgeous serviettes. Love that pattern
Thank you, Michelle. I find mine in the kitchen and gift shops, I'm surprised that they aren't so common in South Africa.
I'm a massive Marimekko fan. Love what you've created here. They're fab!
Thank you, Lucy. I must be one of their biggest fans ?
These are cute! It is always great to be able to upcylce into something beautiful. Glad to have found your post at #homematterslinkparty!
Thank you, I love to use the things around me when crafting.
They're so darling. Nice job. 🙂
#creativeinspirationslinky
Thank you, they do look good in the shed.
I love these and so simple really. Thanks for sharing!
Thank you, simple and affordable.