
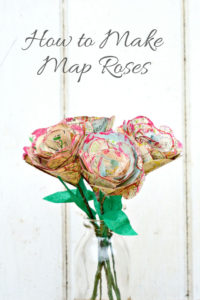
Turn your old road maps into beautiful, everlasting paper roses. With just a few simple supplies,old maps, floristry wire, tape, glue and scissors, you can craft stunning map-paper roses that add a personal, handmade touch to your home décor or make a thoughtful upcycled gift. This easy tutorial is perfect for unique home decorating, travel-themed crafts, Valentine’s Day, or eco-friendly DIY projects.
Who doesn’t like receiving a bunch of flowers? Sorry to put a damper on things, but eventually, they wilt and die. The flowers go from smelling lovely and sweet to stinking something rotten! So I made some paper map
I’d love to have a regular supply of fresh flowers, but I can’t afford it, and I can’t remember the last time someone gave me a bunch of flowers (Paul, if you’re reading this, that’s a hint). I thought it would be fun to make some everlasting paper flowers.
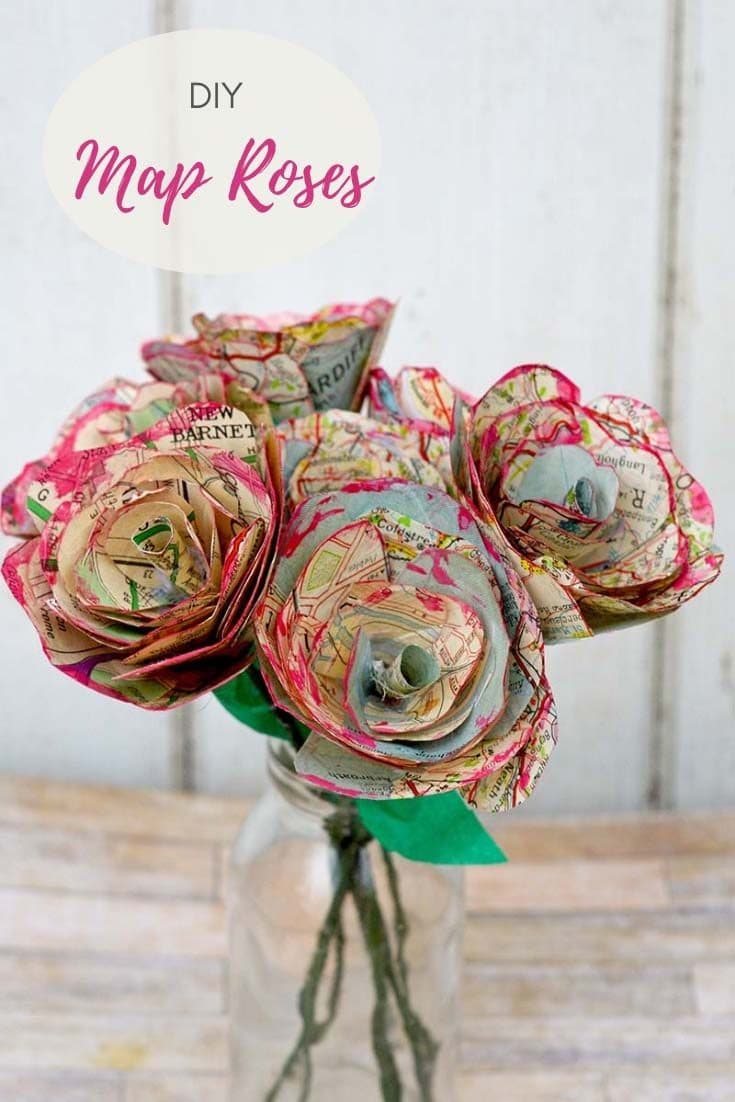
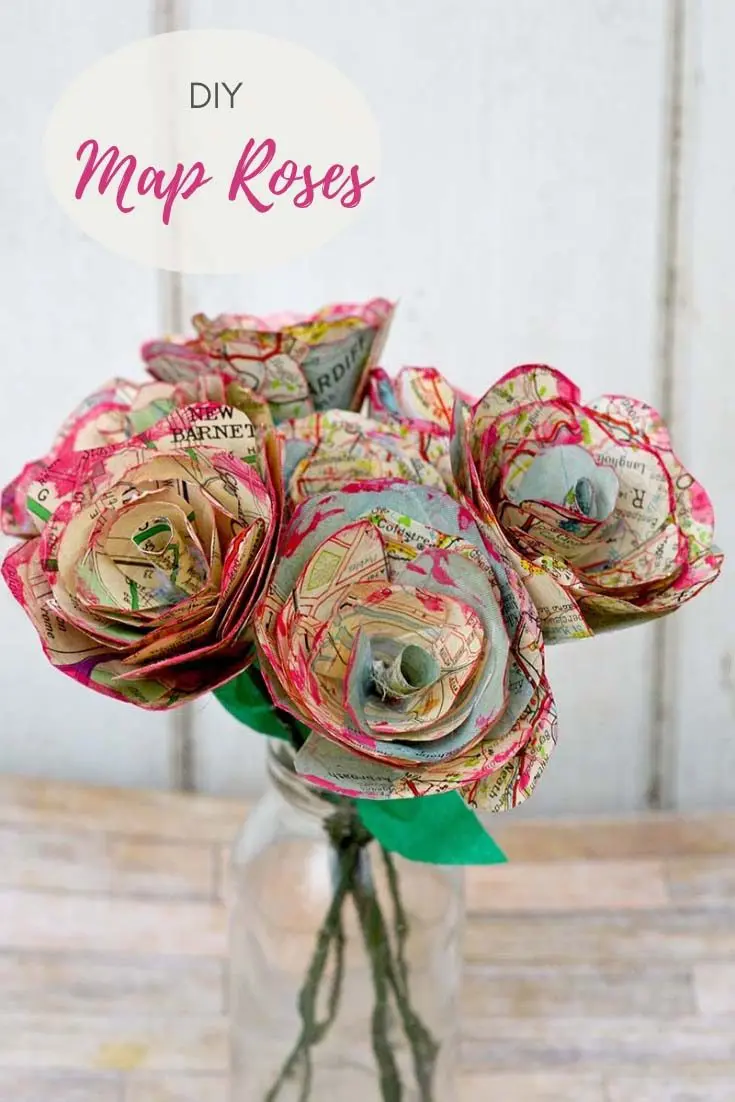
How to Make Paper Roses With Old Maps
Paper flowers may not compare to real life, but they still add colour and glamour to a home and make me smile when I spot them.
This is an upcycling blog, and because I am obsessed with using old maps in my crafting, I chose to use them to make these paper flowers.
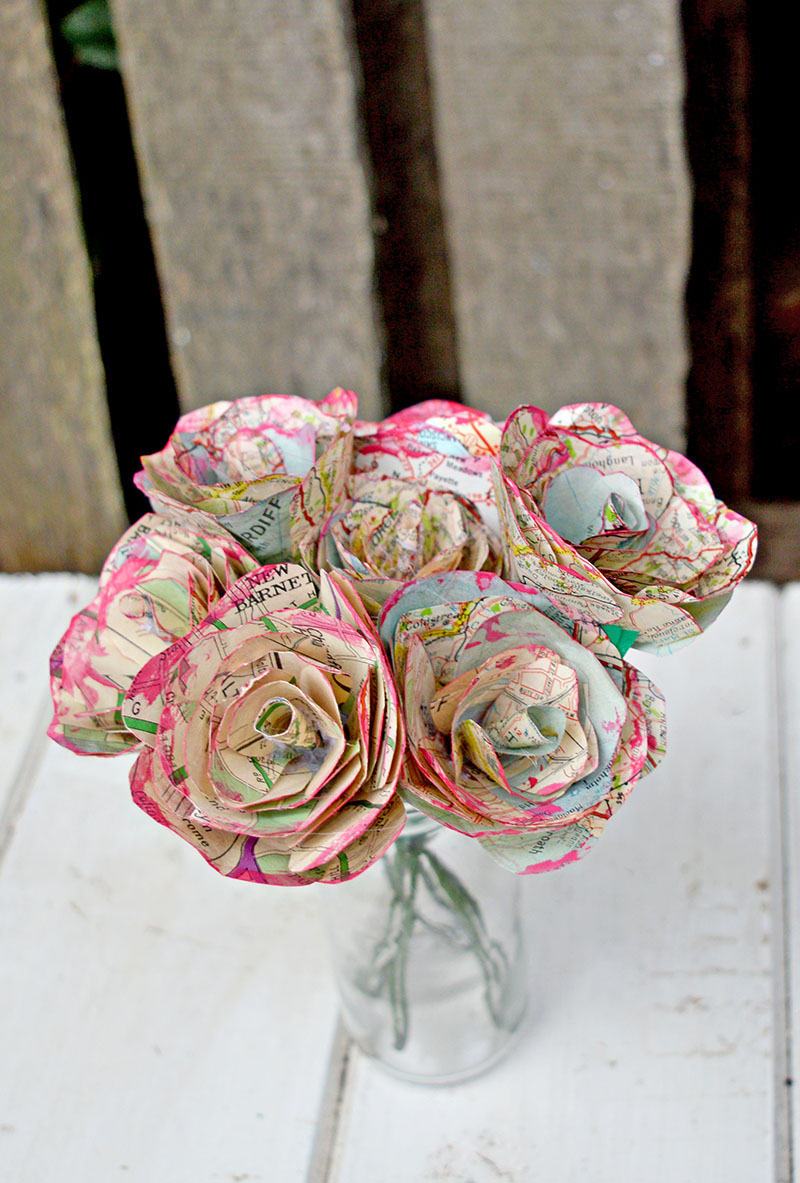
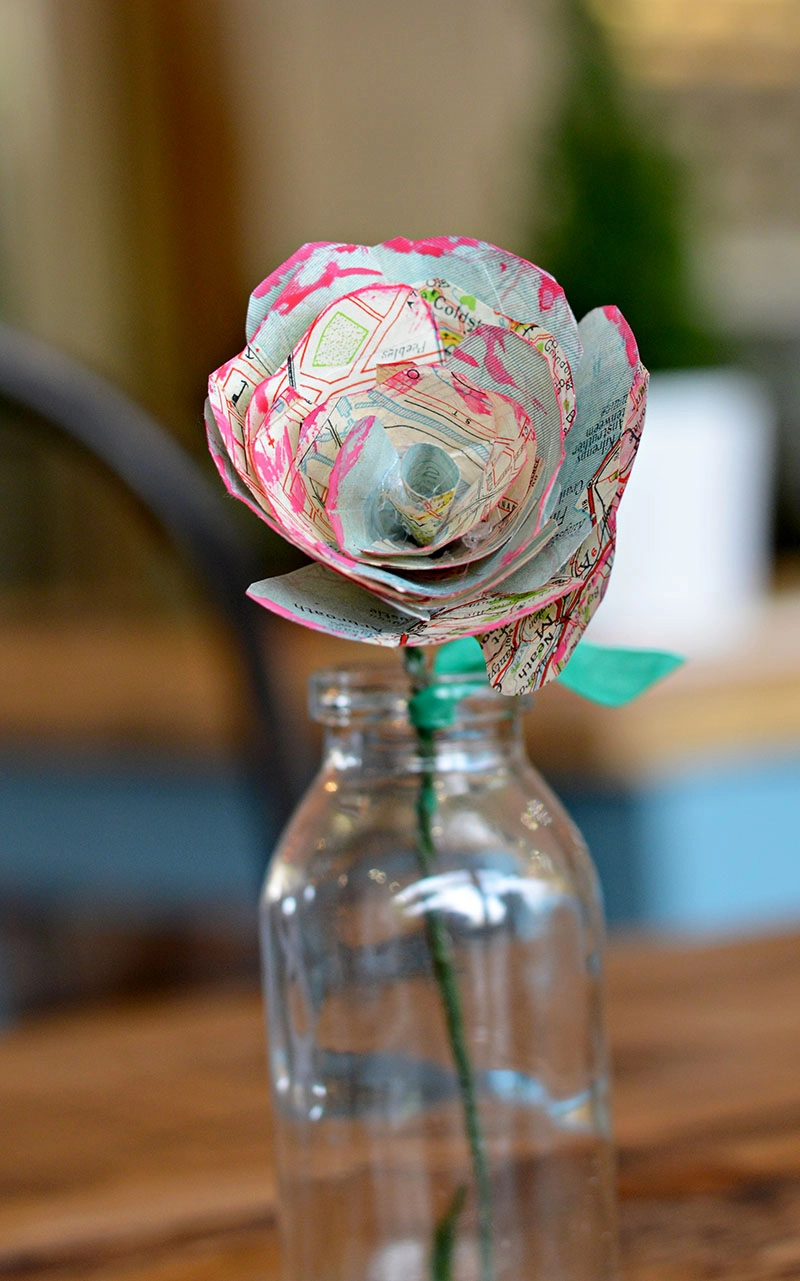
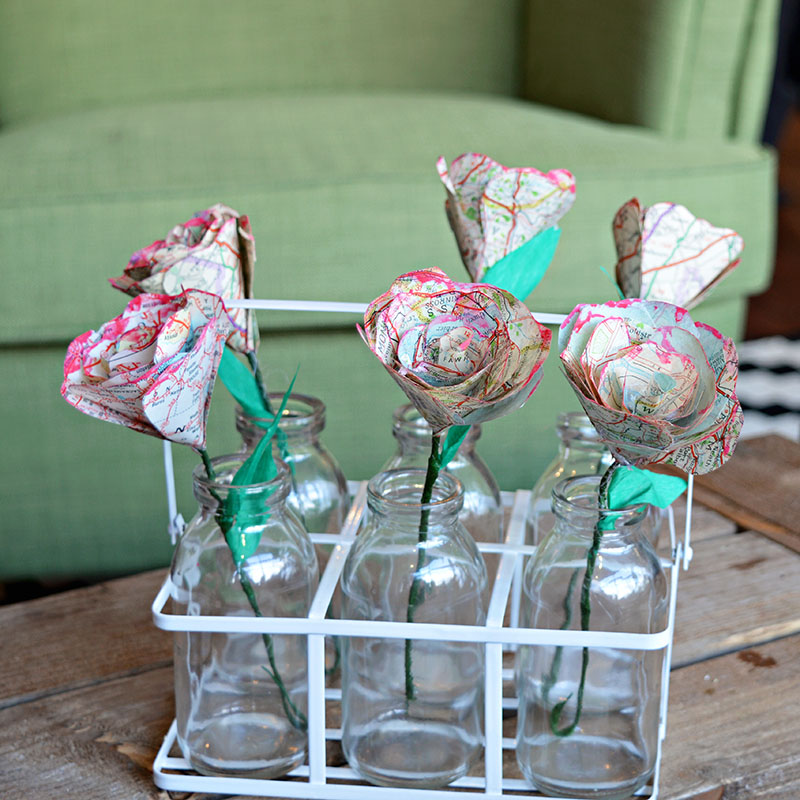
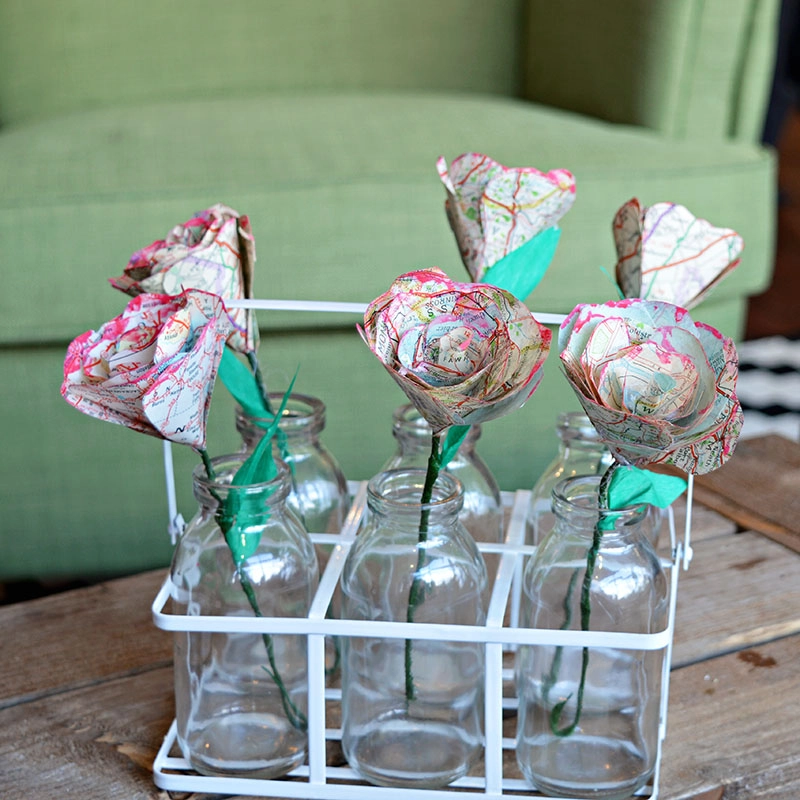
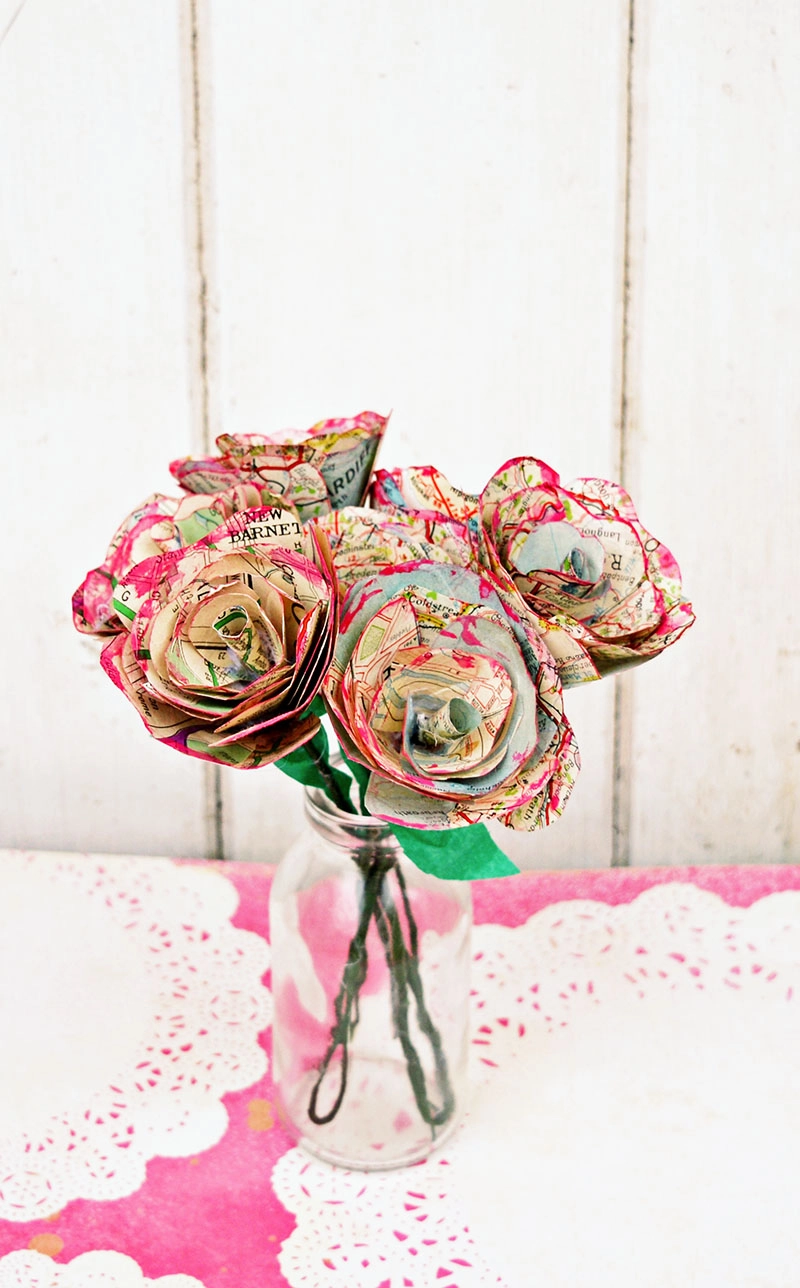
The map roses are simple to create, and I think they look gorgeous. You can show them all together in a bunch or stick one in a milk bottle.
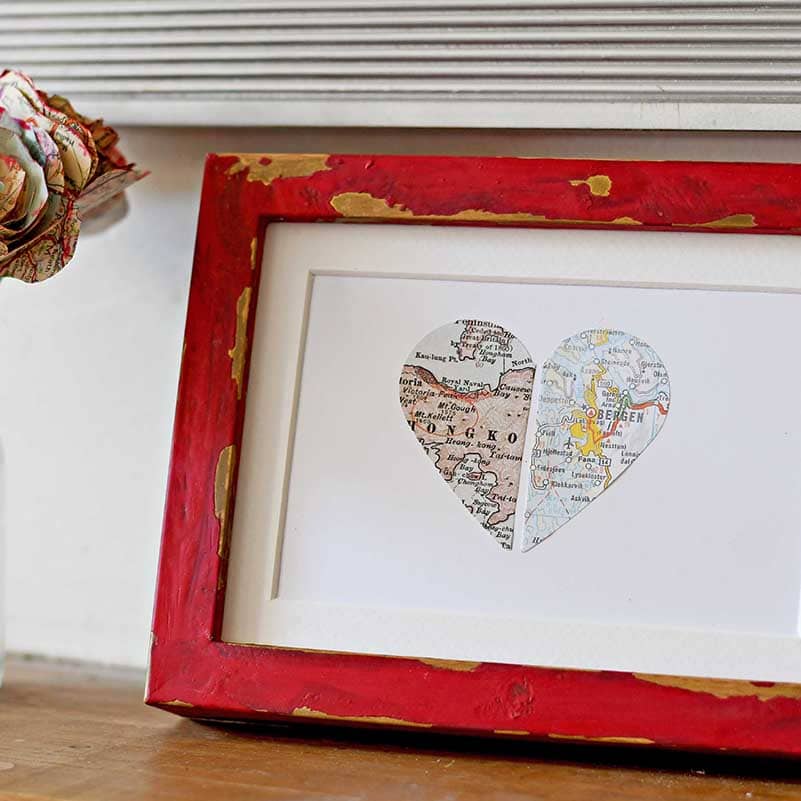
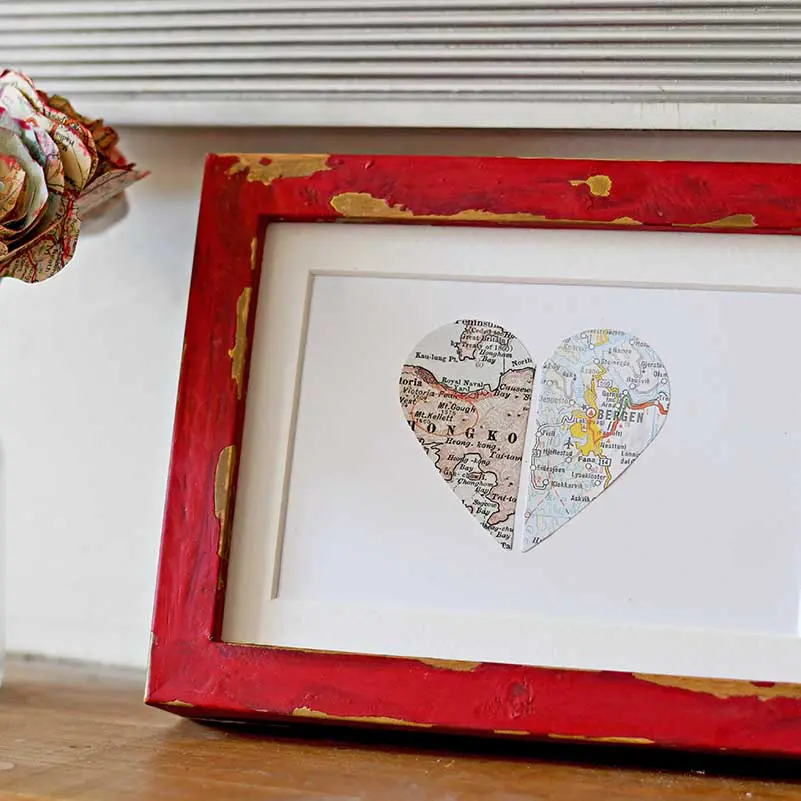
As roses are Valentine’s symbol, these map roses would make a lovely alternative Valentine’s gift. They look fantastic as a gift topper. Last year I used maps to make some Valentine’s treat map hearts.

We’re a participant in the Amazon Services LLC Associates Program, an affiliate advertising program designed to provide a means for us to earn fees by linking to Amazon.com and affiliated sites. As an Amazon Associate, I earn from qualifying purchases.
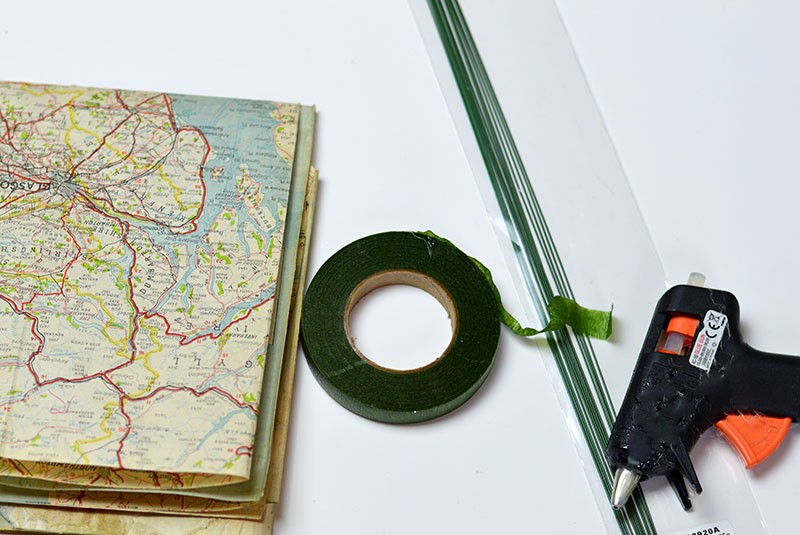
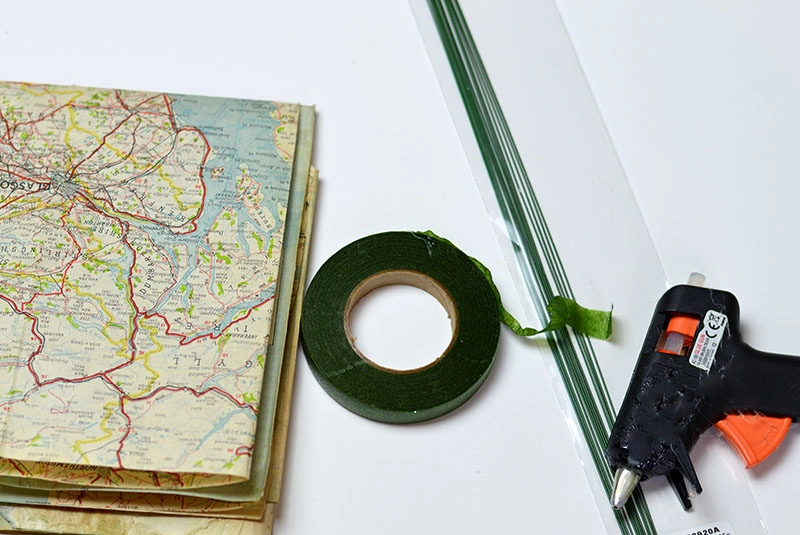
What you need to make map roses
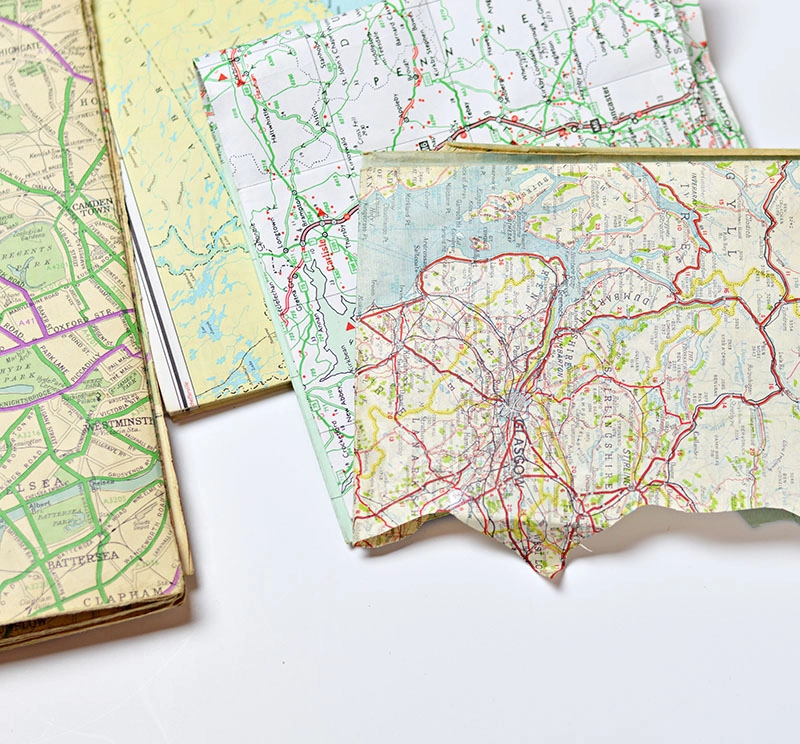
- You can get old maps, atlas, etc., and superb map wrapping paper; however, I prefer to use maps printed on both sides. If that’s not possible one-sided maps will still work but look slightly different.
- Green Floristry wire and Green floristry tape
- Scissors and Pen
- Glue gun and glue sticks
- Red watercolour paint and brush (optional)

How to Make Map Roses
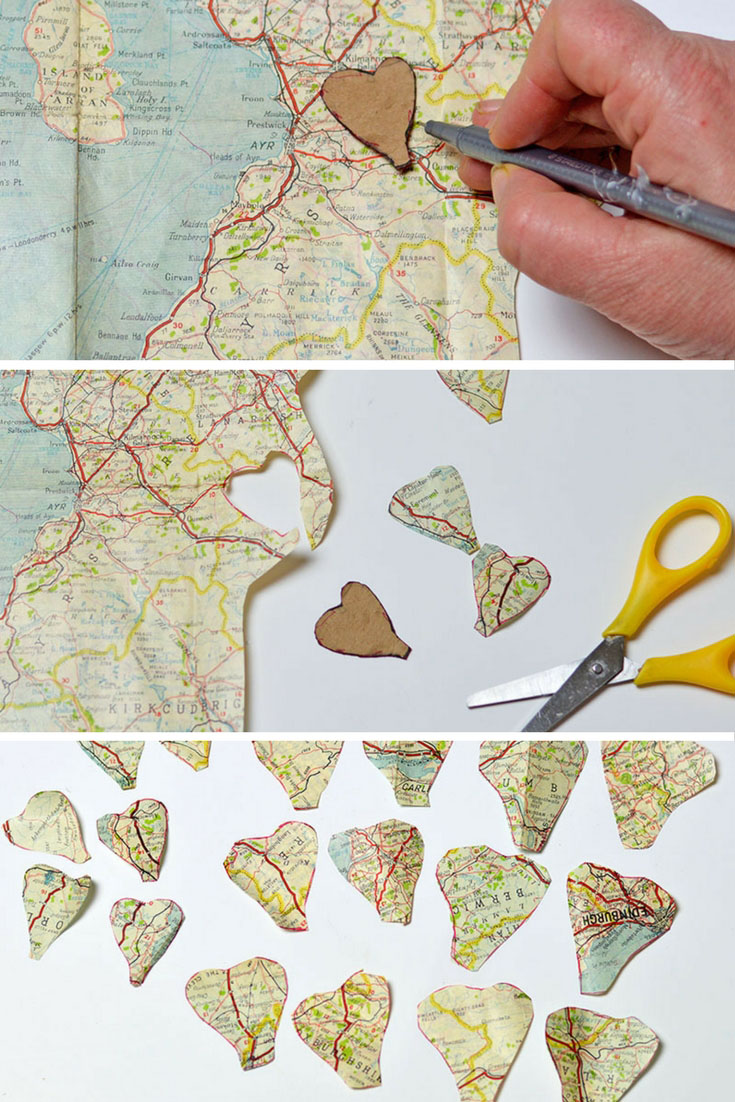
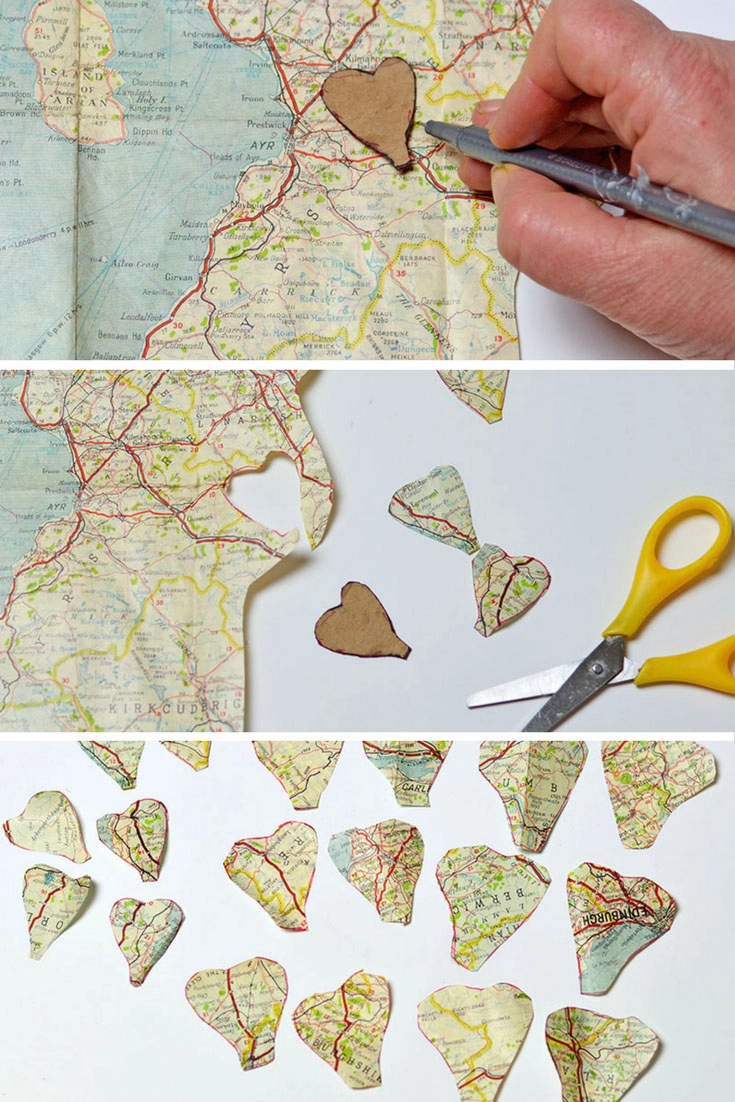
Step 1: First, you must cut out your map-shaped petals. I used a template like this one for three different shaped petals, small, medium and large.
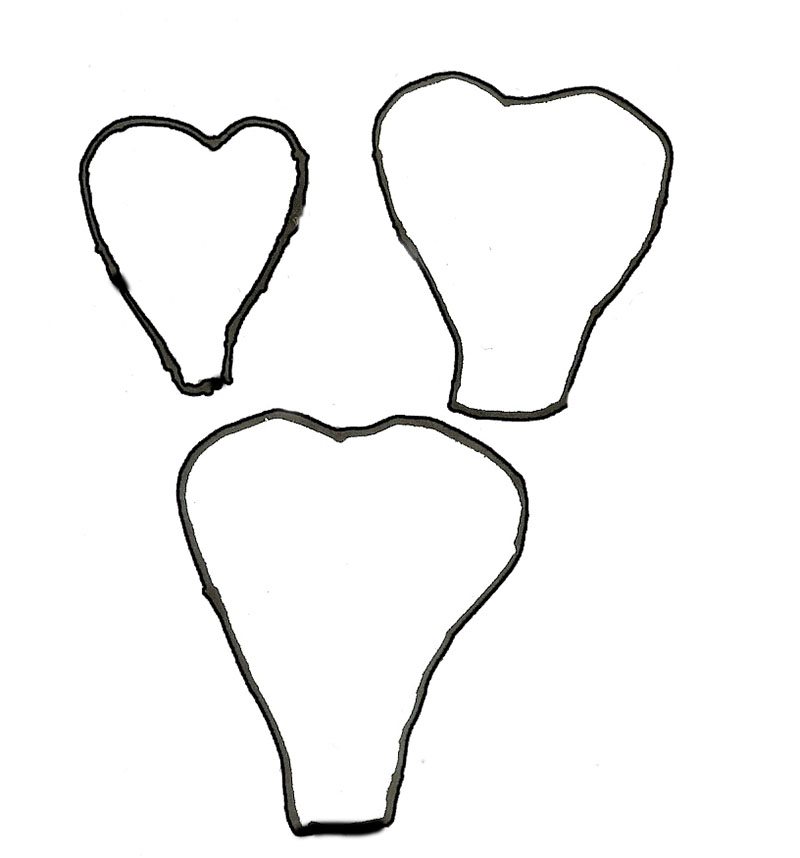
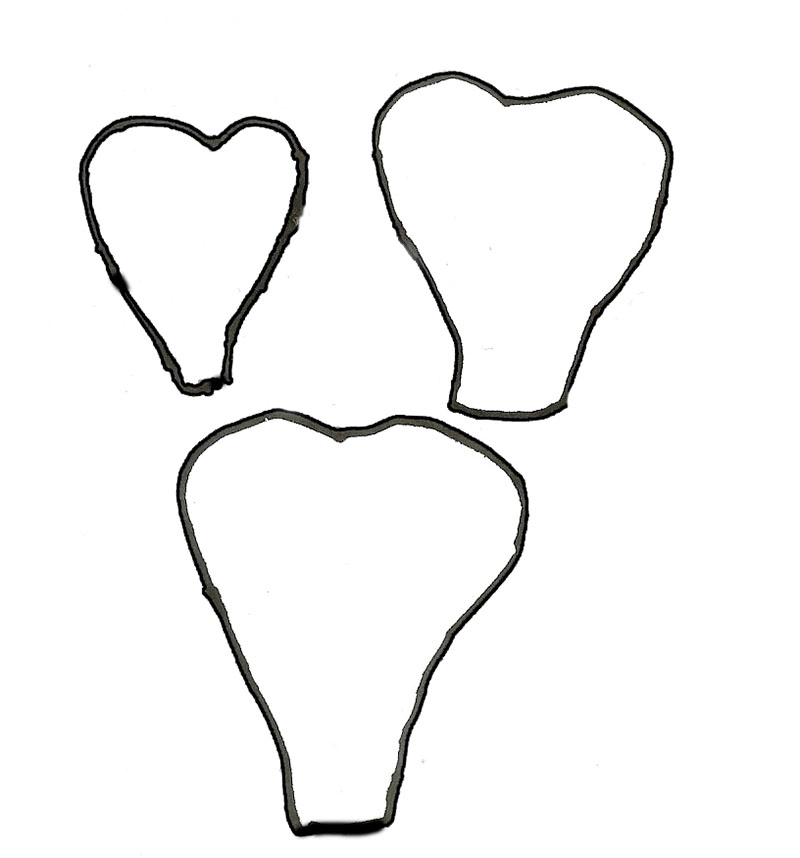
Step 2: Place your petal template on top of the map, draw around it and then cut out the petal shape. For each map rose, you will need six small petals, six medium petals, and six large petals.
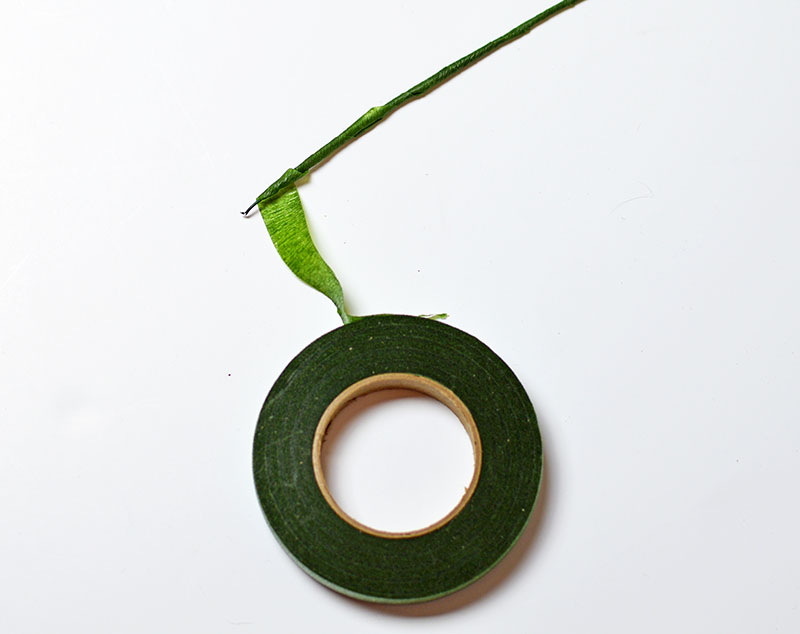
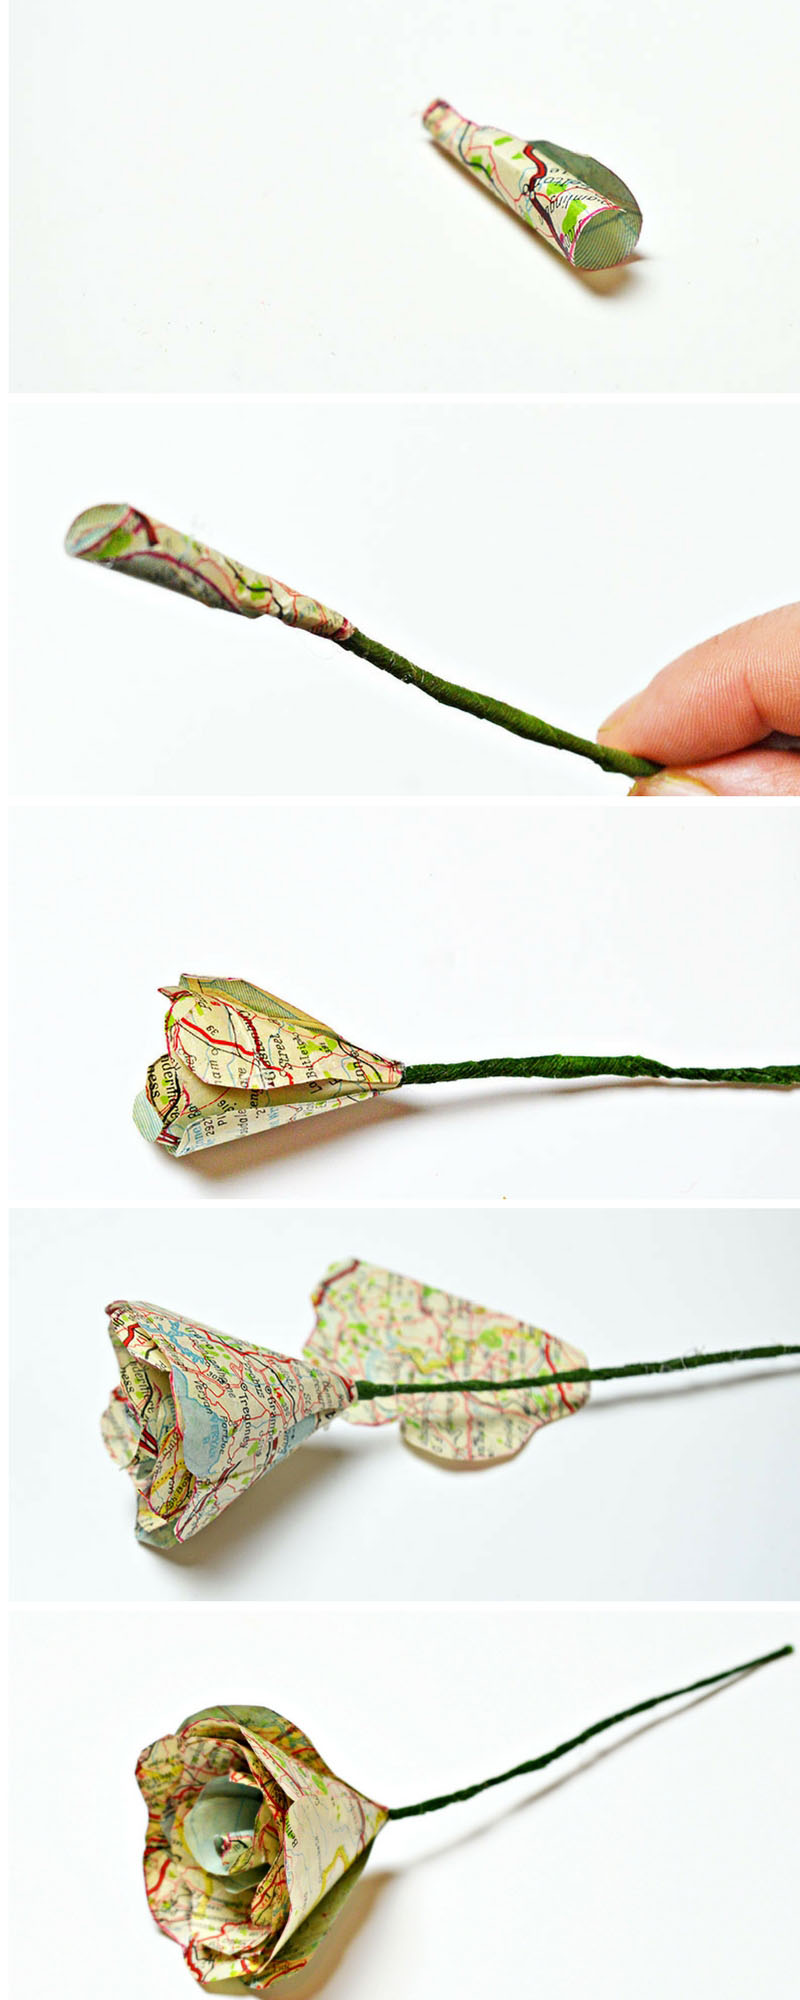
Step 3: Cut your floristry wire to the length you want your rose stem to be. Then wrap this wire with the green floristry tape.

Step 4: Adding the petals to your map roses
- First, roll a small map petal up tight; stick it to the end of your green stem using a glue gun.
- Take another small petal and gently roll it in your hand to shape it into a slight curve. Dab a small amount of hot glue onto the base of the petal and stick this to your stem.
- Continue with the remaining four small petals overlapping them slightly as you go around.
- Next, glue your medium-sized petals one by one to the outside of the small petals, overlapping as you go around.
- Repeat with the six remaining large petals.
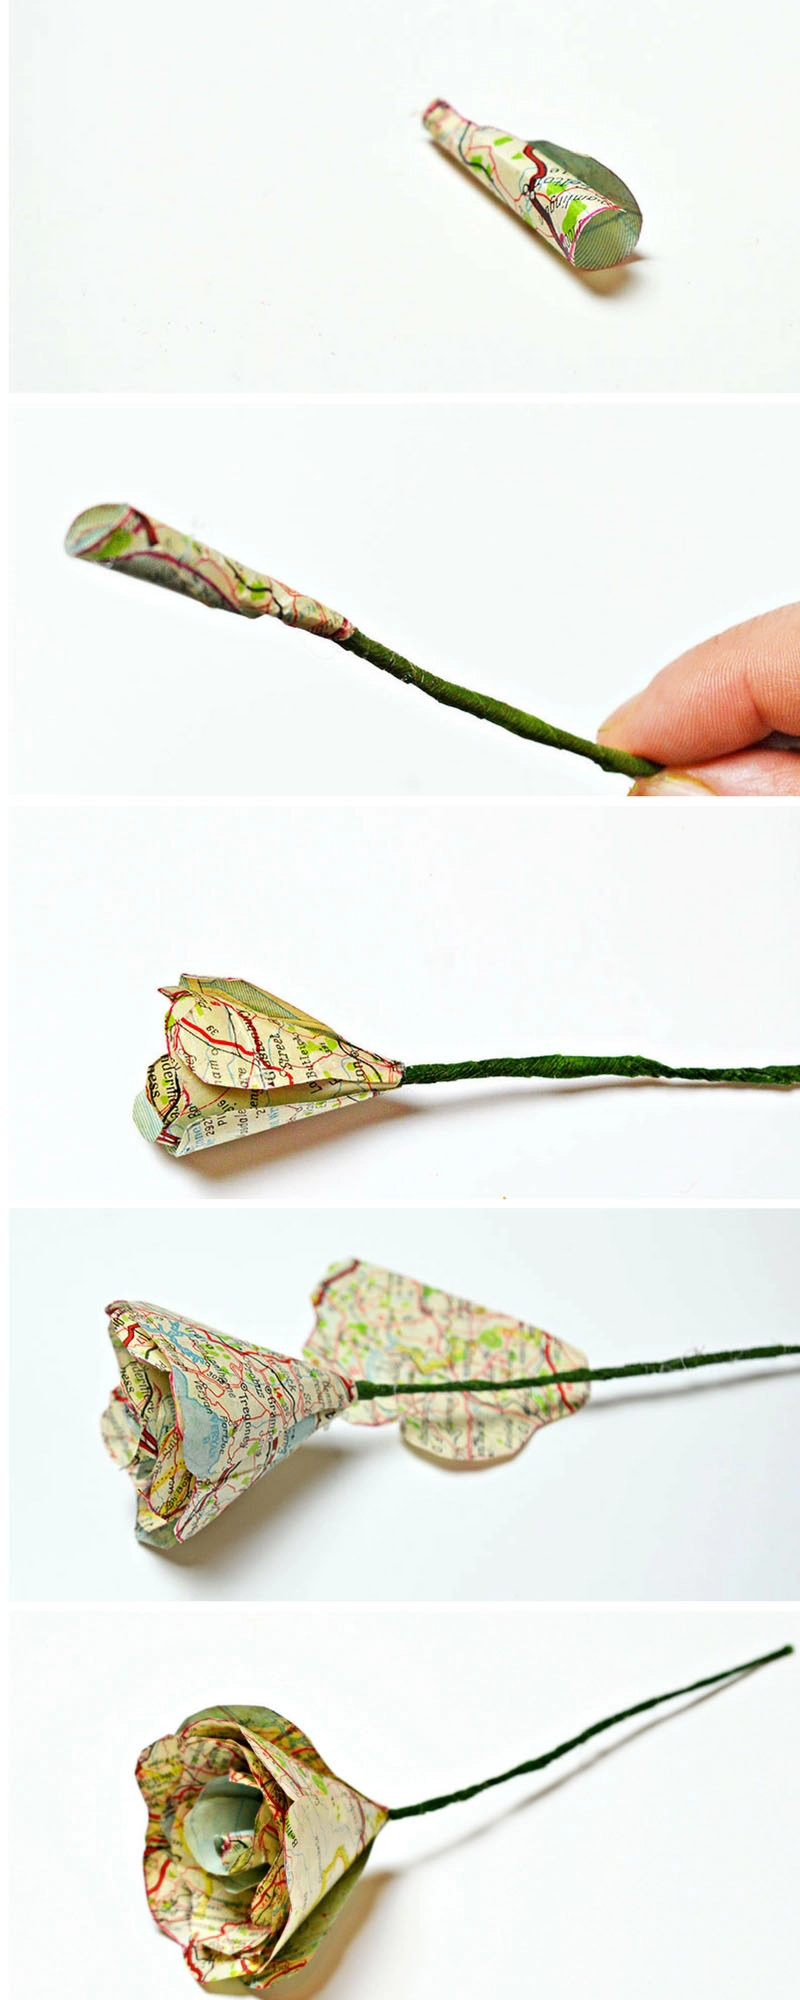
Step 5: Finishing off your map roses
You can stick a small leaf cut from green paper to the stem to finish your map roses. I also painted the edges of my rose petals with a small amount of red watercolour to add more red to the maps.

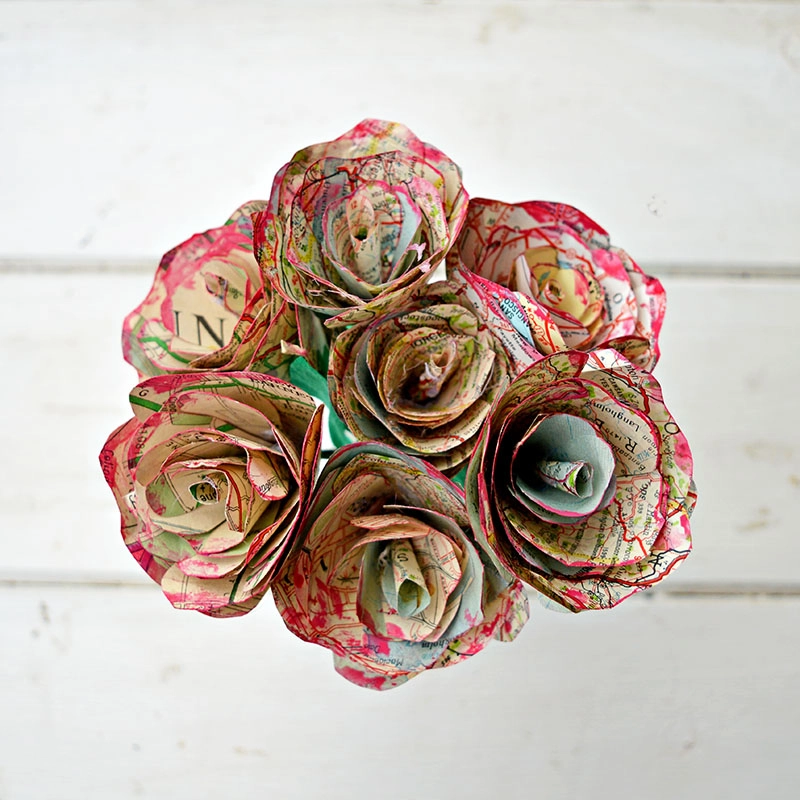
Several map roses together create a lovely decoration. You can display them individually in small bottles. They also look imposing together in a bunch. A single map rose makes a gorgeous gift topper, especially if you use maps of meaningful places.


Map Roses
Use old road maps to make everlasting beautiful map roses.
Materials
- Old road maps
- Floristry wire
- Floristry tape
- Glue
Tools
- scissors
- glue gun
Instructions
- Download petal template from blog
- Draw around the petal templates onto maps and cut them out.
- Cover wire in tape
- Curl up first petal and glue to wire
- Add the other petals gluing one by one
Notes
Free maps available to download too.
These roses would also look great made with old book pages.
Using this method, I’ve also made gorgeous upcycled denim flower bouquets and other fabric flowers. You’ll also find more paper flower tutorials in this collection of paper crafts for home decor.
You can also make Chrysanthemum flowers out of paper with this free pattern and tutorial.
If you liked this, you would probably like some of my other popular map-themed gifts and crafts, such as these doodle flower decorations and gorgeous map paper bead bracelets.
Map heart garland
Treat map hearts for Valentine’s
Vintage map suitcase
Map heart ornament
If you are making map roses for someone because they love maps, you may want to check out my other personalized map gift idea.
This map upcycle is featured in the A to Z of upcycling ideas and resources and with these adult Valentine craft ideas.
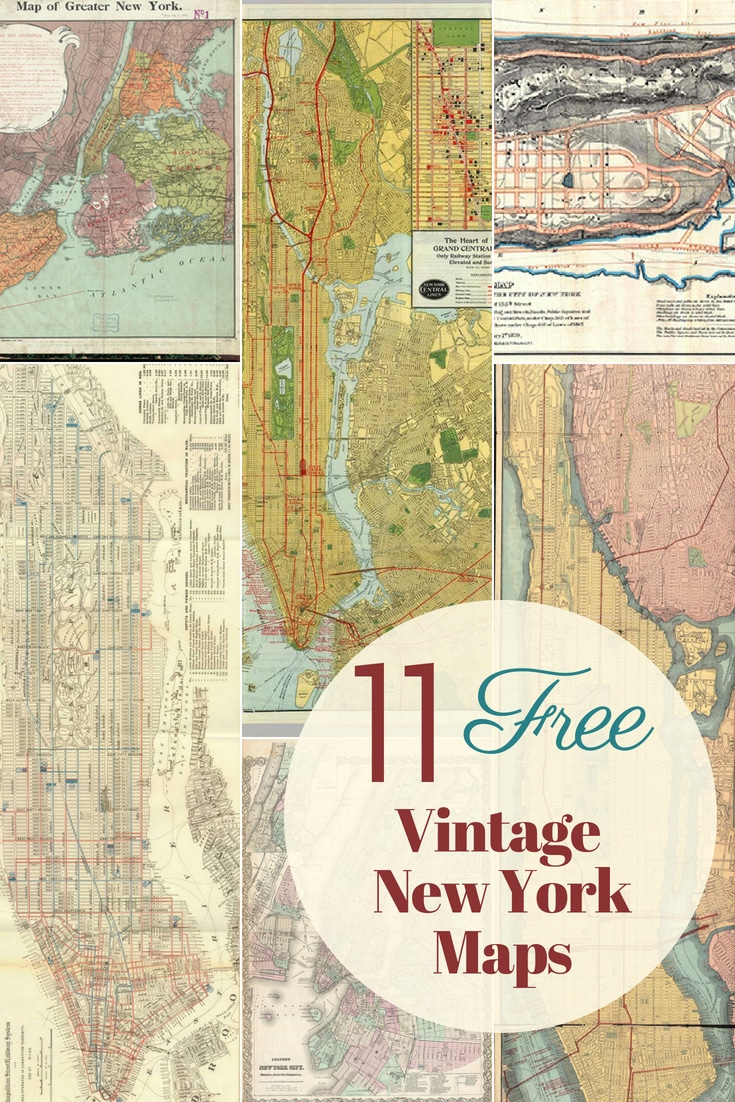
Free Vintage Maps to Download


Maria
Wednesday 5th of February 2020
These are sweet flowers
Claire Armstrong
Wednesday 5th of February 2020
Thank you so much Maria
Mike
Thursday 5th of December 2019
i never thought the map could be so beautiful, Always consider them as boring stuff.
Claire Armstrong
Thursday 5th of December 2019
Thank you. I love maps especially old ones I think they add interest to ordinary things.
36 coole DIYs mit Karten zu machen 2020 - Bastel Ideen 2020
Wednesday 7th of August 2019
[…] pillarboxblue […]
Dane
Tuesday 23rd of April 2019
woua comme c' est beau j' adore c' est magnifique très vintage un beau pas a pas je me suis abonnée a ton blog a bientôt
Claire Armstrong
Tuesday 23rd of April 2019
Thank you, I'm glad you liked it and thank you for subscribing.
Jennifer Wise
Thursday 31st of May 2018
These are so beautiful! I love roses AND I love maps. This is an excellent tutorial, too. Pinning! :) #embracingchangelinky
Claire Armstrong
Thursday 31st of May 2018
Thank you so much and thanks for the share.