
Inside: An easy tutorial for a DIY angel wing ornament from an upcycled doily.
Angel wings Christmas ornaments seem to be the Christmas decoration of the year. Or maybe it’s just me noticing them because I love the trend! I thought I’d join in with my own repurposed version of angel wings.
They are a lovely theme for Christmas decorations, often subtle and strangely peaceful and calming. They are a common theme in my home decor and I especially love to make them out of upcycled materials.
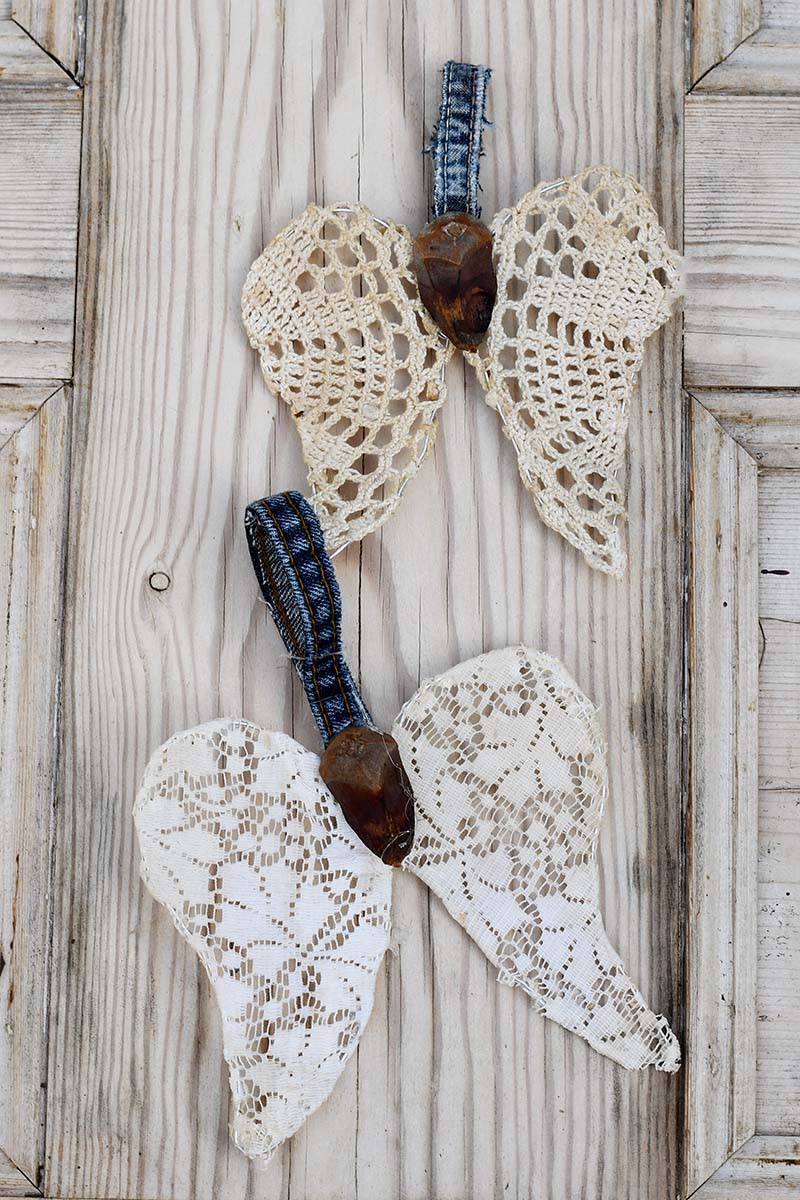
Repurposed Doily Angel Wings Ornament
I love the feathers on the wings and have made them in the past by repurposing badminton shuttlecocks. I’ve even made paper feathers out of old maps for a particularly impressive set of map wings wall decor.
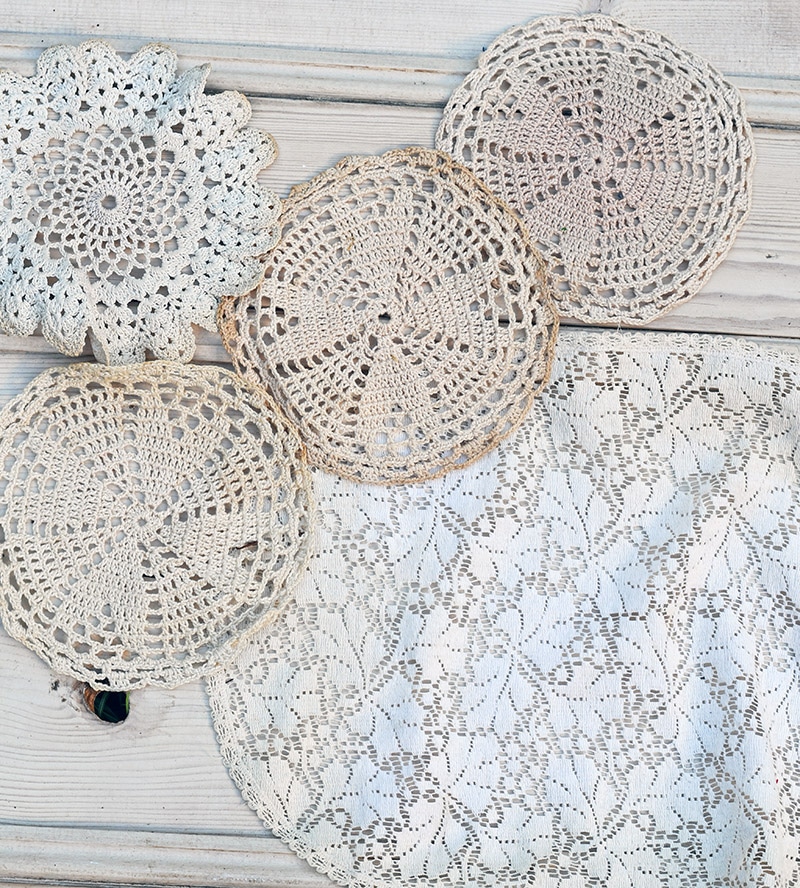
However, these DIY angel wing ornaments are much smaller, which makes them perfect for hanging on the Christmas tree. If you have a drawer of random old doilies that you have collected over the years but don’t really use anymore, then this is the craft for you.
I got the idea for these repurposed angel wings from the fabric flowers I made in the spring. The method for both crafts is very similar, stretching fabric over a wireframe.

We’re a participant in the Amazon Services LLC Associates Program, an affiliate advertising program designed to provide a means for us to earn fees by linking to Amazon.com and affiliated sites. As an Amazon Associate, I earn from qualifying purchases.
What You need
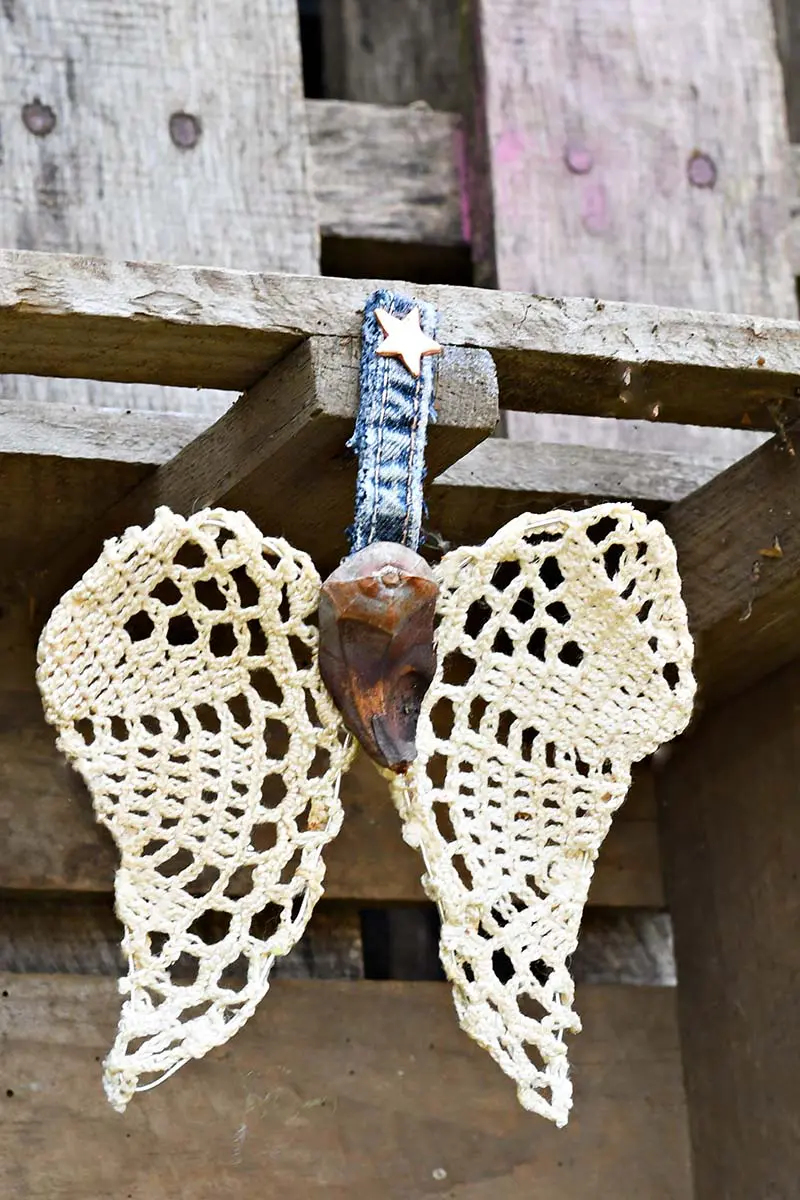
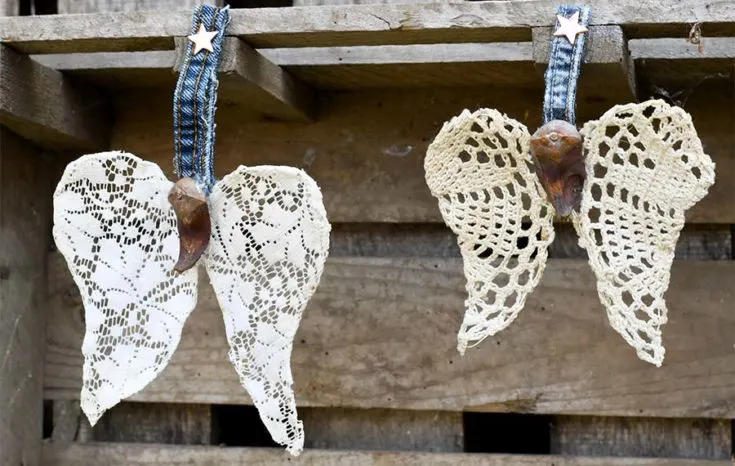
- Cloth lace doilies – If you don’t have any, these can normally be picked up very cheaply at thrift/charity stores. (A paper doily could also easily be crafted into a set of angel wings.)
- Silver craft wire– You want a wire that is easy to bend but still holds its shape well.
- Corkboard/tile, small nails/tacks, small wooden craft pegs
- Strong craft glue and hot glue gun
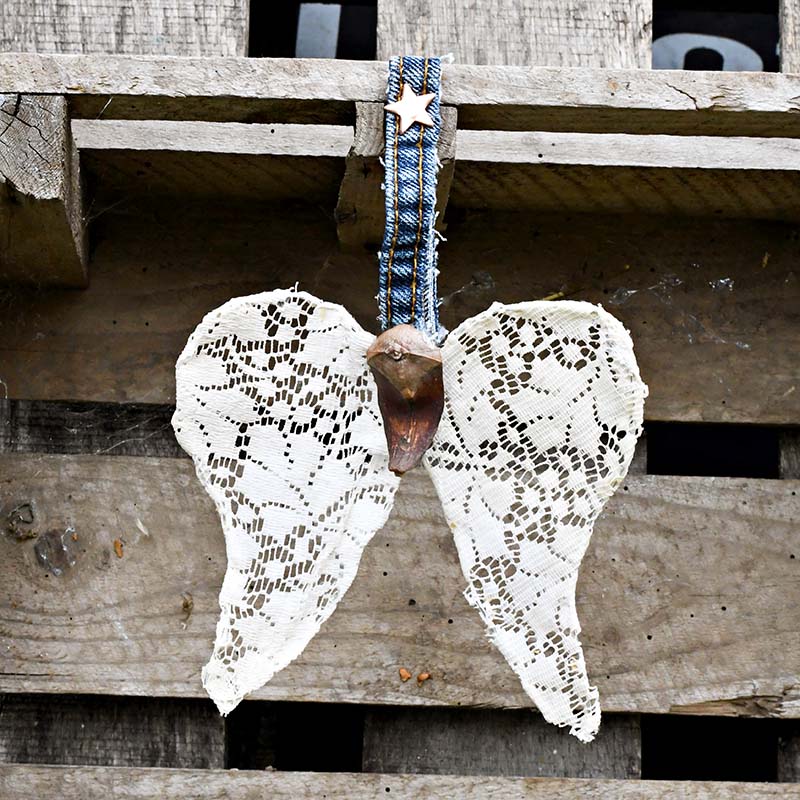
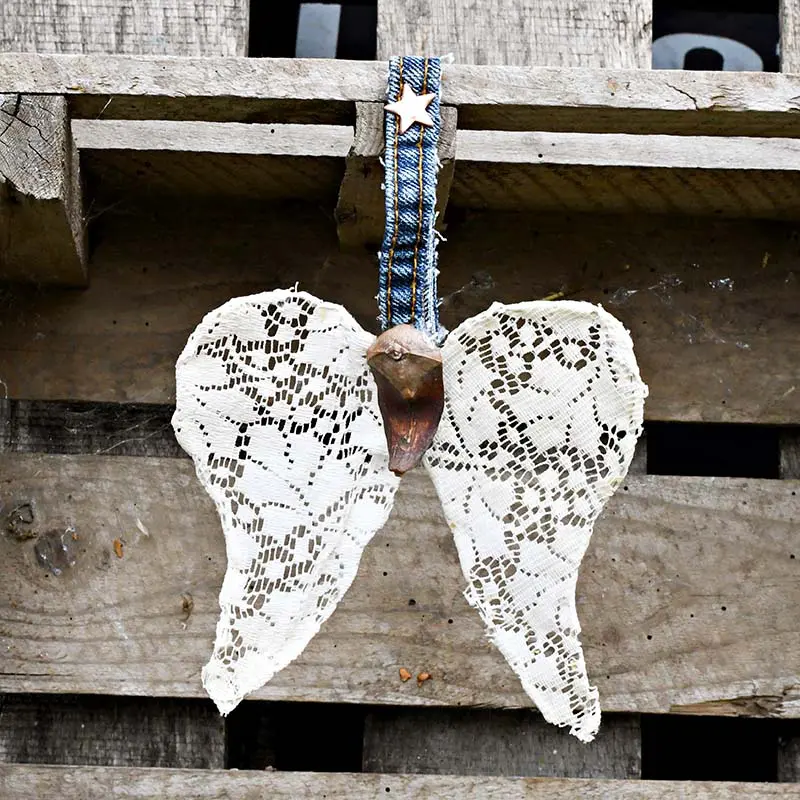
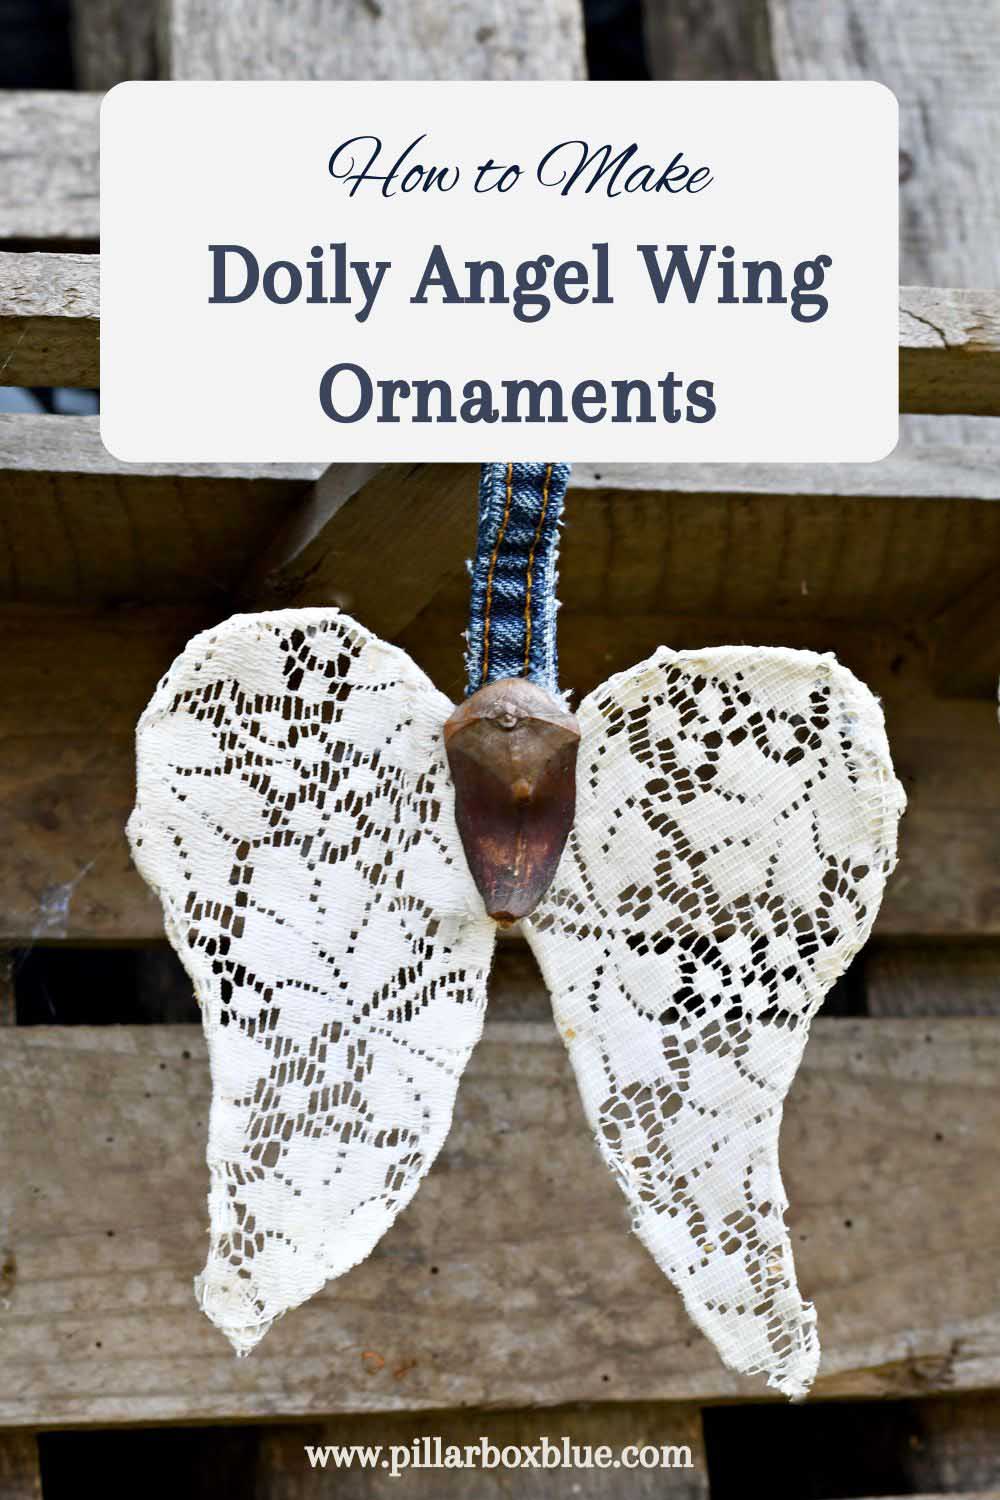
- Wooden bead or bark about 2cm and something to form a hanging loop (twine or denim seam)
How to make an Angel Wing Ornament
- First, draw 2 angel wings the size you want for the DIY ornament. You can download my wing template here.
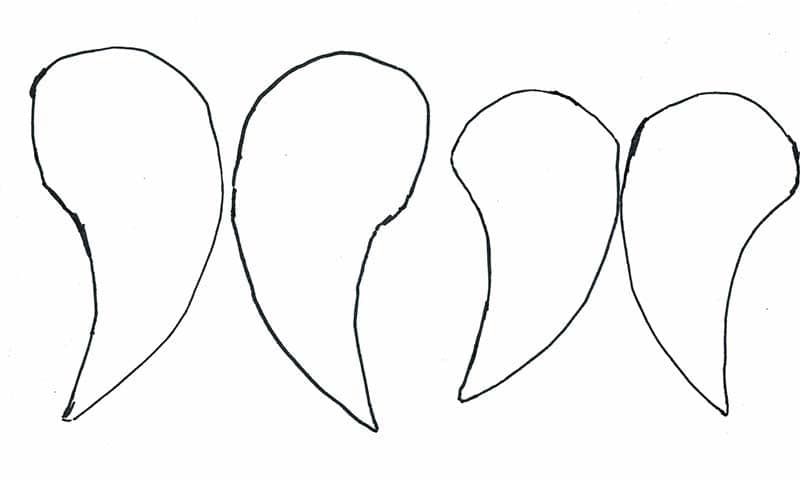
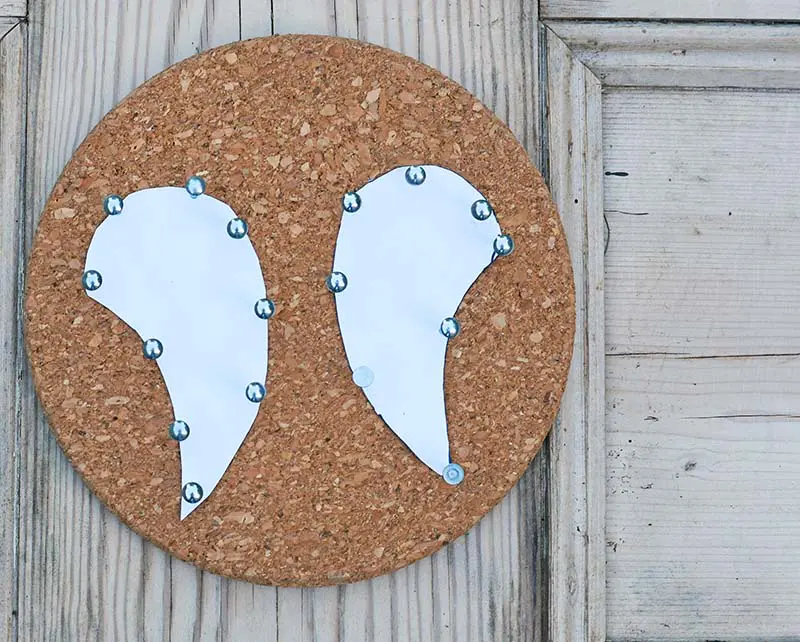
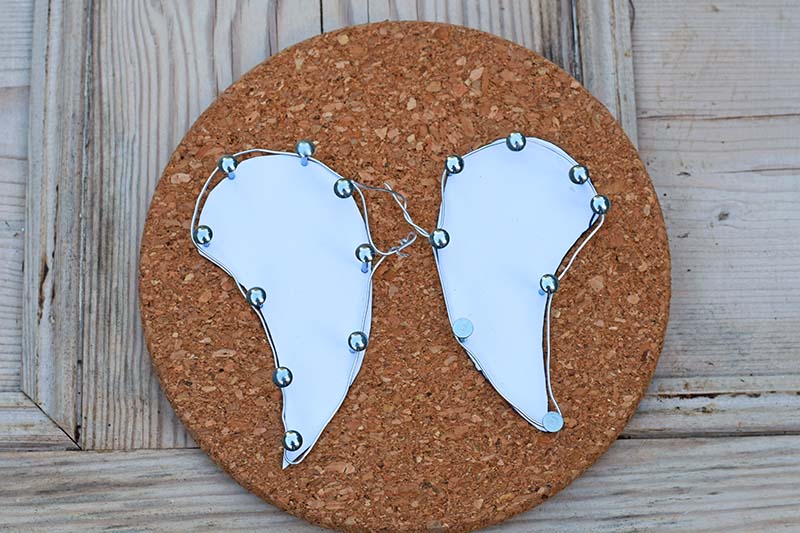
Step 1: Cut out the wings template and nail them to the corkboard to make a frame for the craft wire. Starting where the wings will join, wrap the craft wire around the frame. Leave a little excess wire at the join, this will be used to fix the wings together.


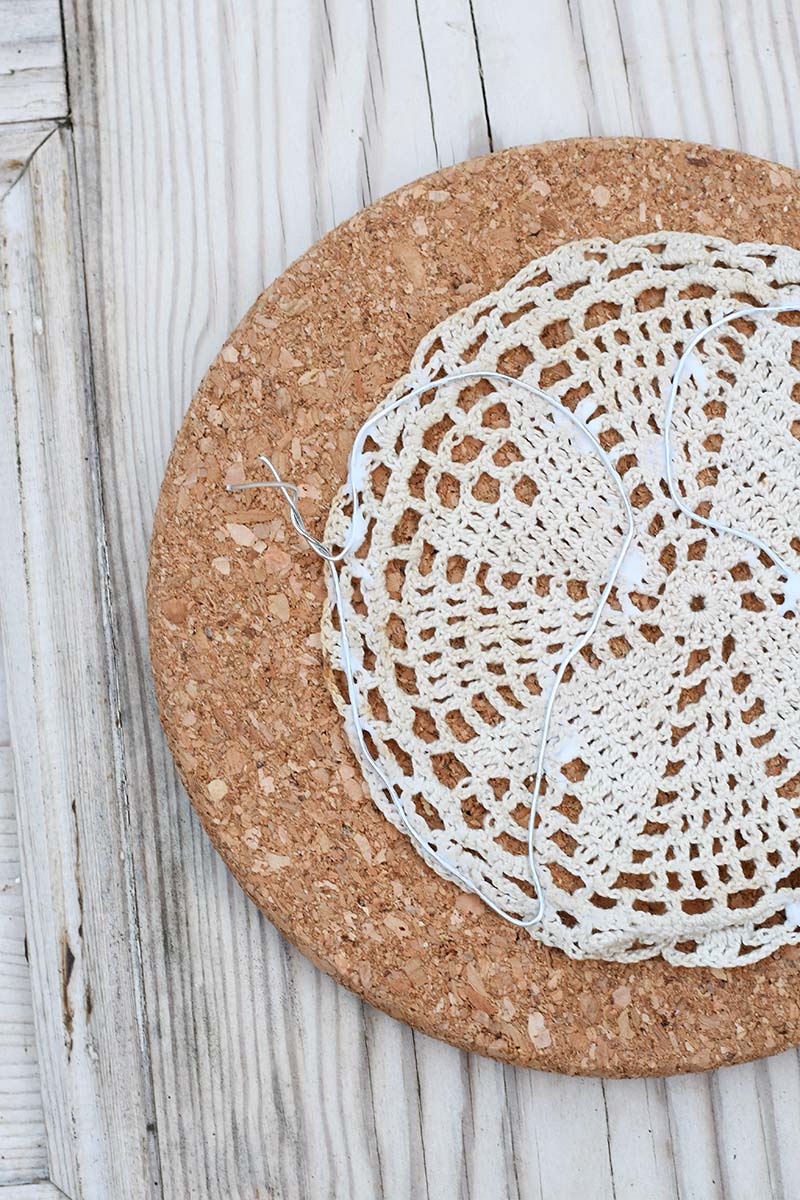
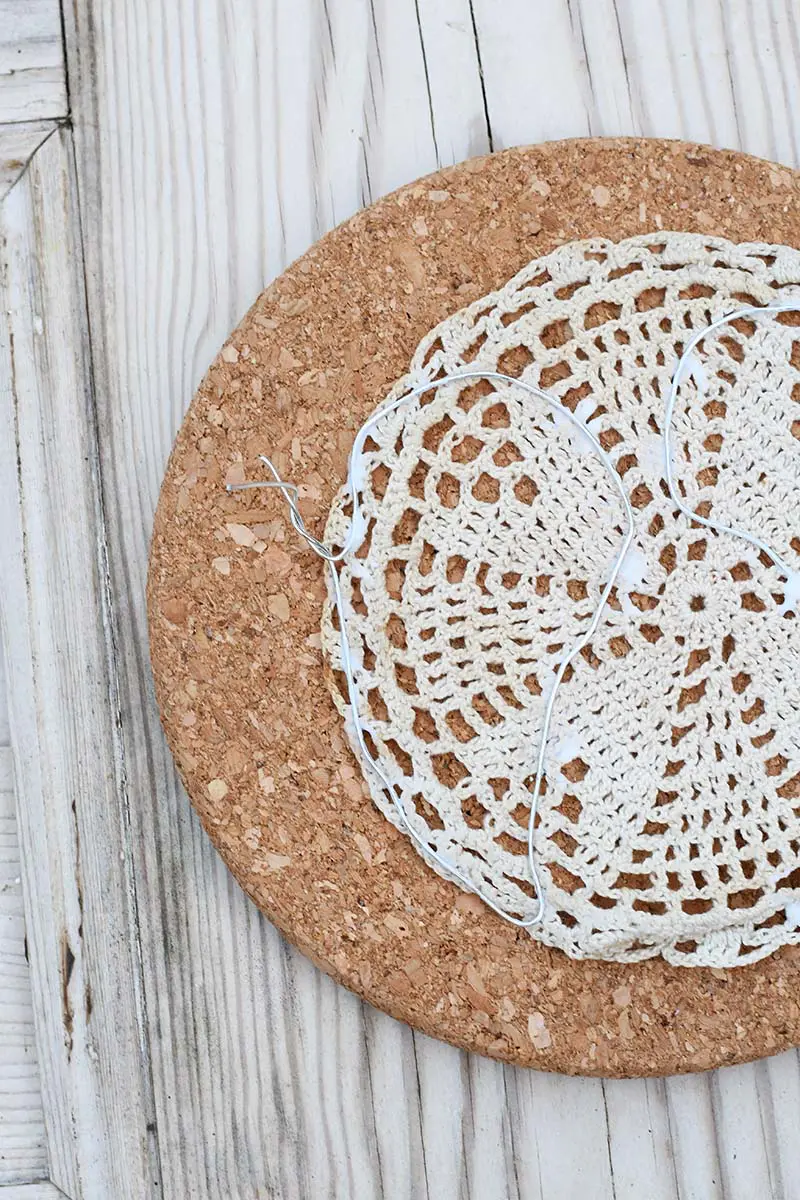
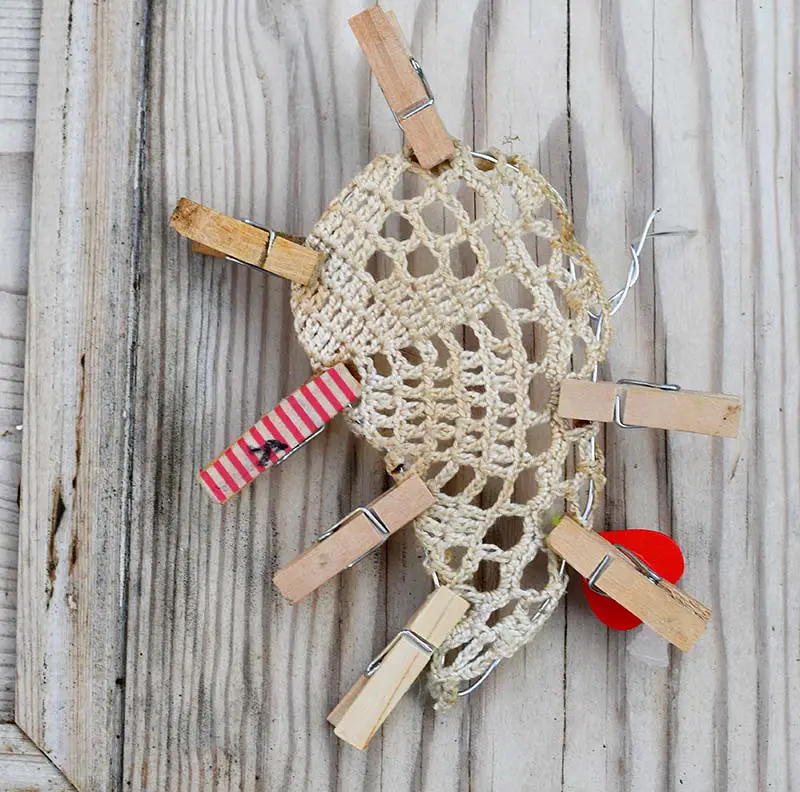
Step 2: Next, carefully remove the wire wing from the frame and cover it with glue and stick it to the doily. Leave the wire on the doily until the glue dries.
Once dry, using scissors trim the doily to about 5mm around the frame. Apply more glue to the wire and wrap the edge of the doily around the wireframe. Hold the doily in place with small craft pegs, until the glue has set.
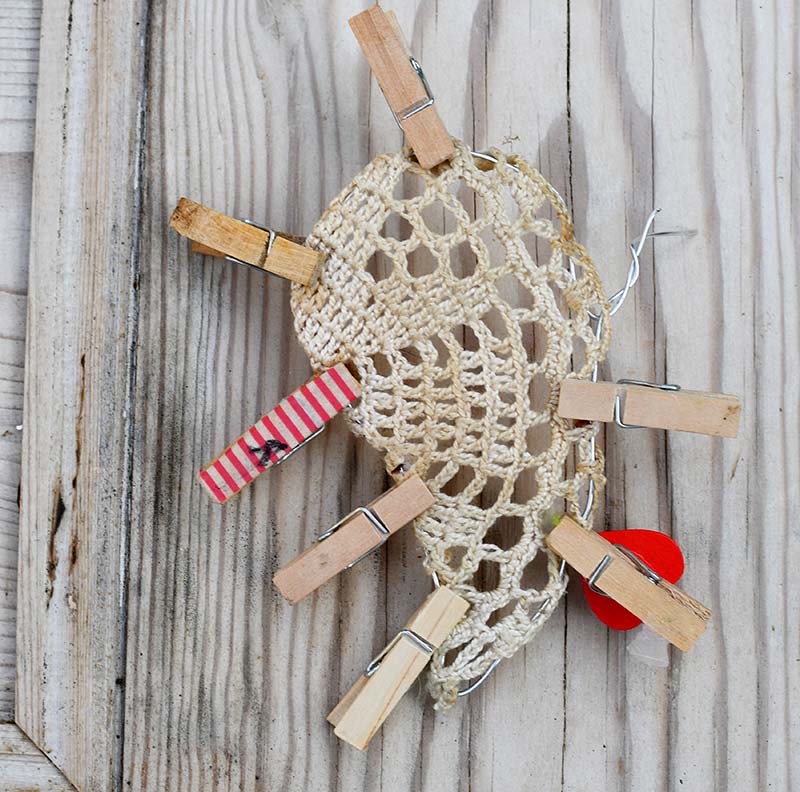
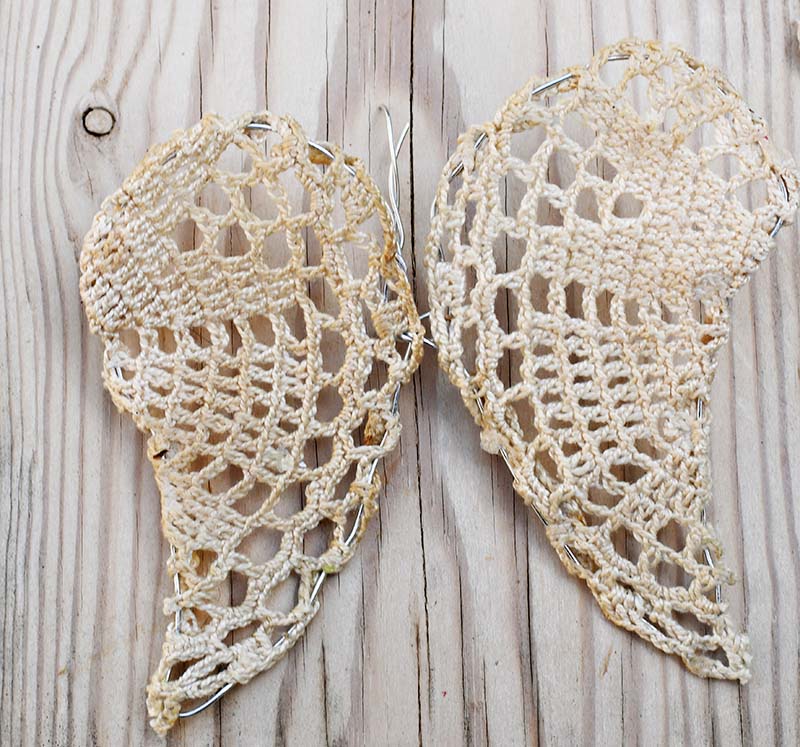
Step 3: Once the glue has dried remove the craft pegs. Fix the angel wings Christmas ornament together as a pair by twisting the exposed wires together.
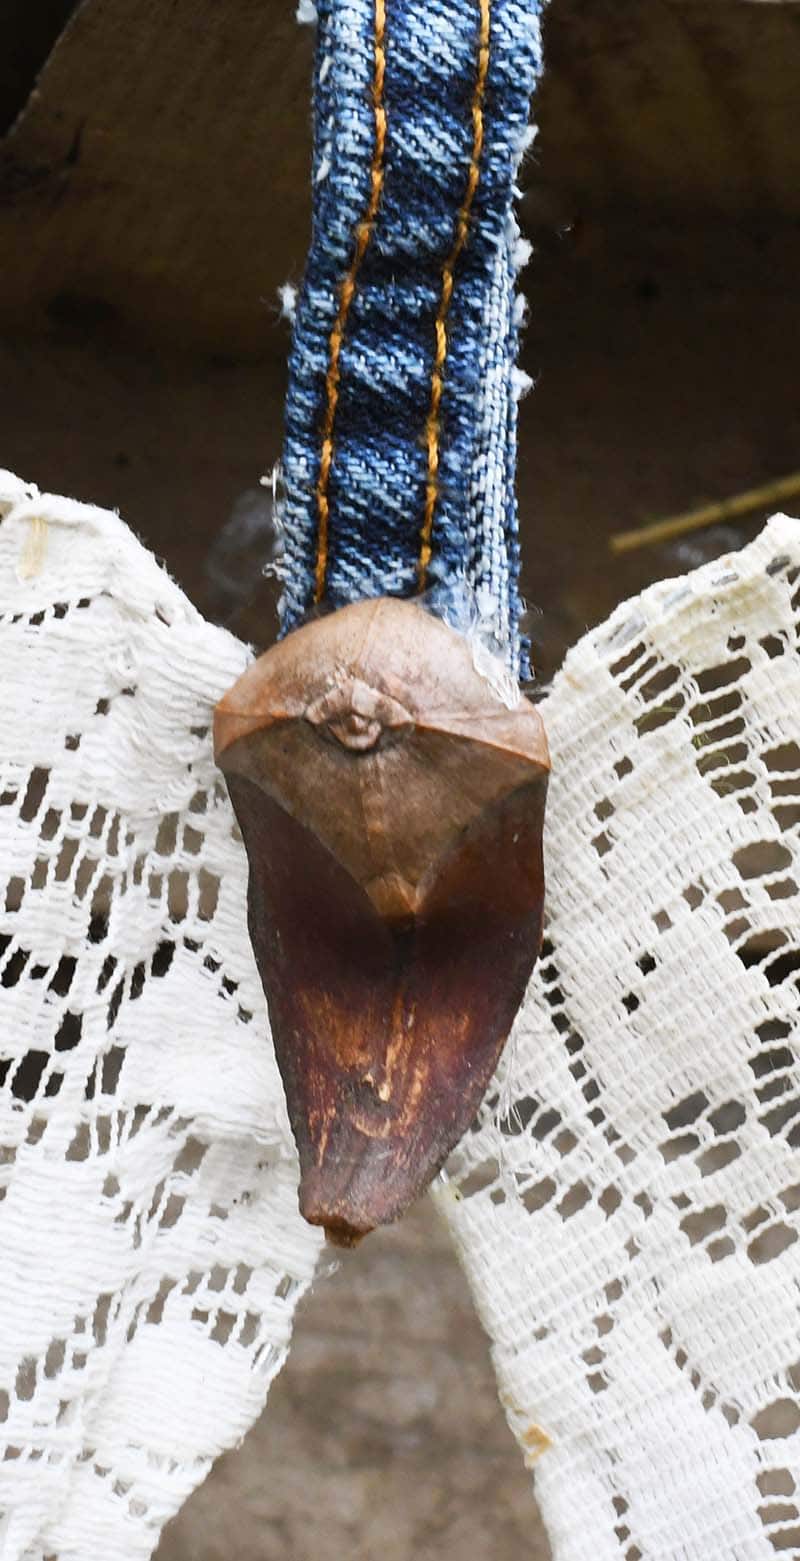
To hide the wire join, stick either a piece of bark or the petal from a large pine cone to the front of the join. I used a hot glue gun for this. I also glued a denim loop onto the back of the angel wings Christmas ornament for hanging.


I can’t wait to hang these repurposed doily angel wings Christmas ornaments on the tree. Along with all my denim Christmas ornaments which you can check out here.

My appetite for angel wing decor doesn’t seem to be going away, I’ve just made more DIY angel wing ornaments for my tree this time from wallpaper.
How To Make Crafty Angels From Wallpaper

There are more angel-themed crafts here. I think my denim feathers would make a beautiful pair of angel wings, perhaps that’s my next project.
If you like the lace patterns of doilies then check out these upcycled painted plates. And you will find more scrap fabric craft ideas here.
DIY Angel Wing Ornament

Upcycle and repurpose vintage cloth and crocheted doilies into a beautiful DIY angel wing ornament for your tree.
Materials
- Cloth crocheted cotton lace doilies (but can also be made with paper doilies)
- Silver craft wire
- Cork place mat
- Thumb tacks and mini wooden pegs
- Angel wings template
- Craft glue and a hot glue gun
- Jeans seam and wooden bead or pine cone kernel
Instructions
- Draw out a set of matching angel wings or download my free template.
- Cut out the template and pin it to the cork board with the thumb tacks. Then wrap the craft wire around the thumb tacks to make a wire frame.
- Next, carefully remove the wire wing shapes from the cork.
- Using a good craft glue stick the wings to a cloth doily and leave to dry.
- Then trim the doily around the wire, leaving a 5mm margin.
- Then, wrap this excess doily over the edge of the wire with more glue. Use small pegs to hold the cloth to the wire until the glue drys.
- Join the wings together by twisting the excess wire.
- Stick a wooden bead or a pine kernel over the wire join.
- Finish off by glueing a denim seam loop to the back of the angel to act as a hanging loop.
Christina Woodcock
Friday 8th of November 2019
These are so pretty Claire! I love the way you incorporated the denim ?
Claire Armstrong
Friday 8th of November 2019
Thank you so much, if there is a way to use denim then I will find it.
Rosie (@greenrosielife)
Saturday 15th of December 2018
These are adorable and really very different. Love them! #GoingGreen
Claire Armstrong
Sunday 16th of December 2018
Thank you ?❤️
Bri Adams
Monday 19th of November 2018
This is beyond creative.Wow!
Claire Armstrong
Monday 19th of November 2018
Aww, thank you so much, that’s a very kind thing to say.