
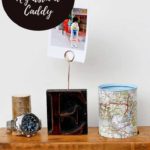
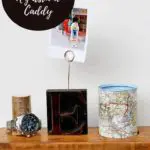

Initially, when I started making this nightstand caddy, it was supposed to be an upcycled Father’s day gift.
Then my middle son Elliot was home for a holiday and was curious about what I was making. When I explained that it was a nightstand organizer for a watch and pocket change, he said I could make it for him instead.
As I had already had a lovely “E” (for Elliot) letterpress block in my collection, I changed my plans and made it for him instead. However, this repurposed nightstand organizer would still make a lovely Father’s Day or Birthday gift, especially as its a personalized.
Also, this nightstand caddy looks excellent on the DIY nightstand I made for him from an old wine crate.
How To Make A Personalized Upcycled Nightstand Organizer
The upcycled Father’s day gift is made from mainly scraps, so it costs almost nothing. It is also straightforward and relatively quick to make.
I used to print with a letterpress printer a few years ago as a hobby. However, I found it a bit too time-consuming and needed a dedicated space.
So the hobby is on the back burner for now, but I may return to it in a few years. That is why I have a rather large collection of wooden letterpress blocks.
I realize that you might not be lucky enough to have a selection of letterpress letter blocks to choose from for this upcycle. However, you can pick up individual letters at flea markets and on eBay for this DIY nightstand caddy.
There is an excellent tutorial on how to make your own faux letterpress printing blocks at Makeanddocrew.com.
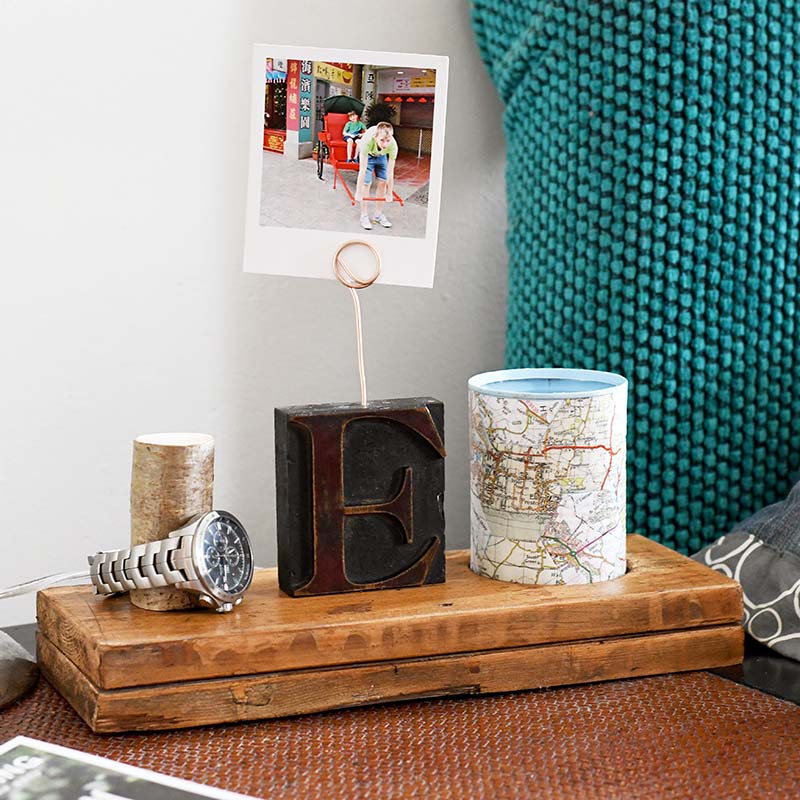
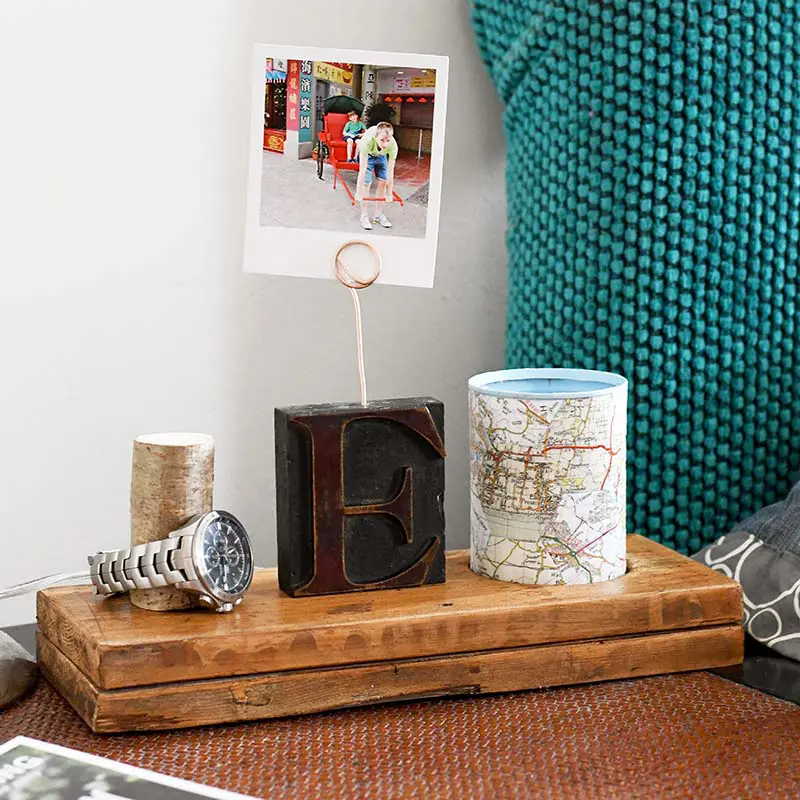
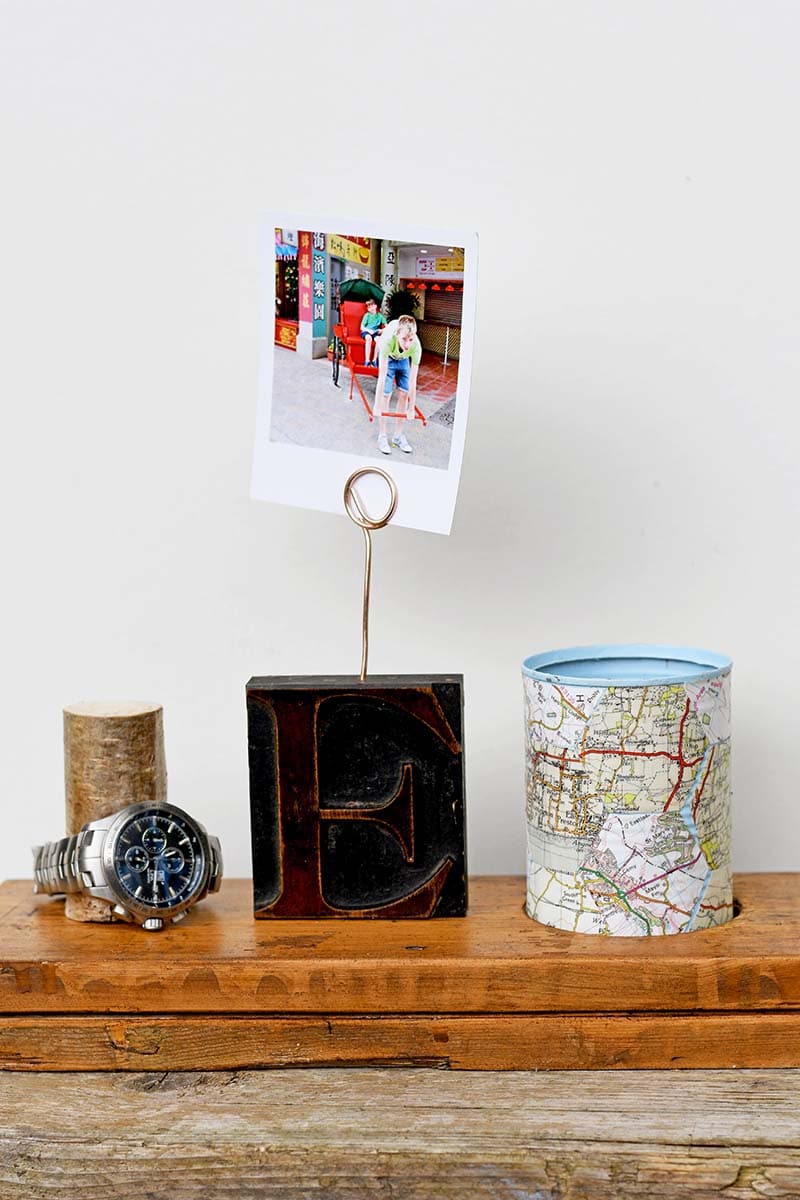
This nightstand caddy is personalized in three ways—one with the letter block. Secondly, with the map covered, tin can coin caddy by using maps of places special to that person. Finally, this DIY Father’s day gift can be personalized by placing a photo of their children in the holder.

We’re a participant in the Amazon Services LLC Associates Program, an affiliate advertising program designed to provide a means for us to earn fees by linking to Amazon.com and affiliated sites. As an Amazon Associate, I earn from qualifying purchases.
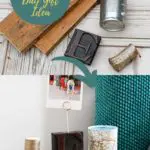
What you need to make a personalized nightstand caddy
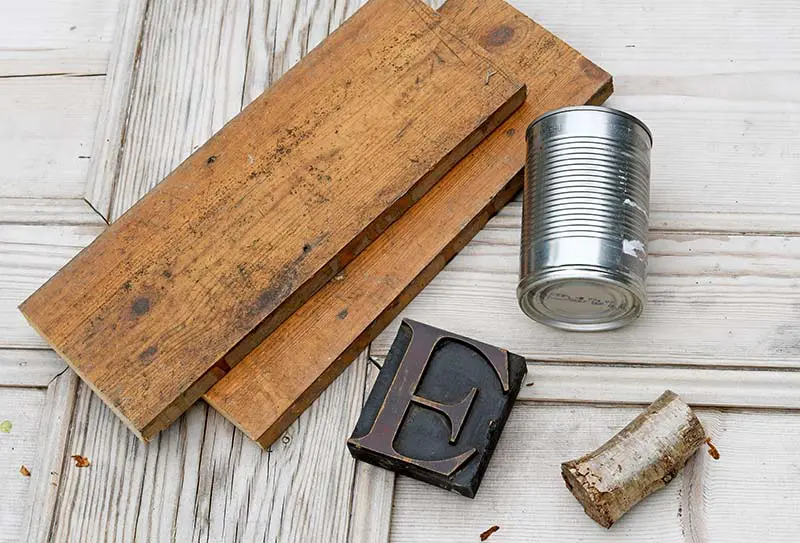
- Two pieces of scrap wood approximately 30 cm long, 12 cm wide and 1.5 cm thick. The measurements don’t need to be exact. I used an old pine floorboard 12 cm wide and 1.5 cm thick. All I had to do was saw 2 x 30 cm lengths. Pallet wood would also work well with this DIY nightstand organizer.
- Wooden letterpress block in the initial of whom this DIY Father’s day gift is for.
- Small piece of copper craft wire
- A piece of a thick branch about 6 cm high
- Wood glue
- Gorilla gripper tape
- Gorilla glue contact adhesive
- Sander and dark wood wax
- Electric drill with saw cutter the width of the tin can (optional)

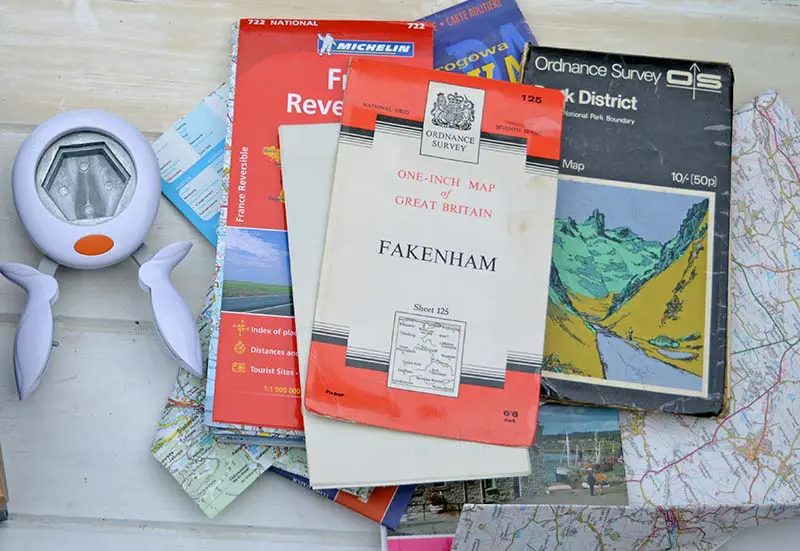
What’s needed for Map Coin Caddy
- Tin can
- Old maps of favourite places, road maps or downloaded maps
- Hexagon paper puncher
- Mod Podge
- Spray paint pale blue

How To Make A Personalized Nightstand Organizer
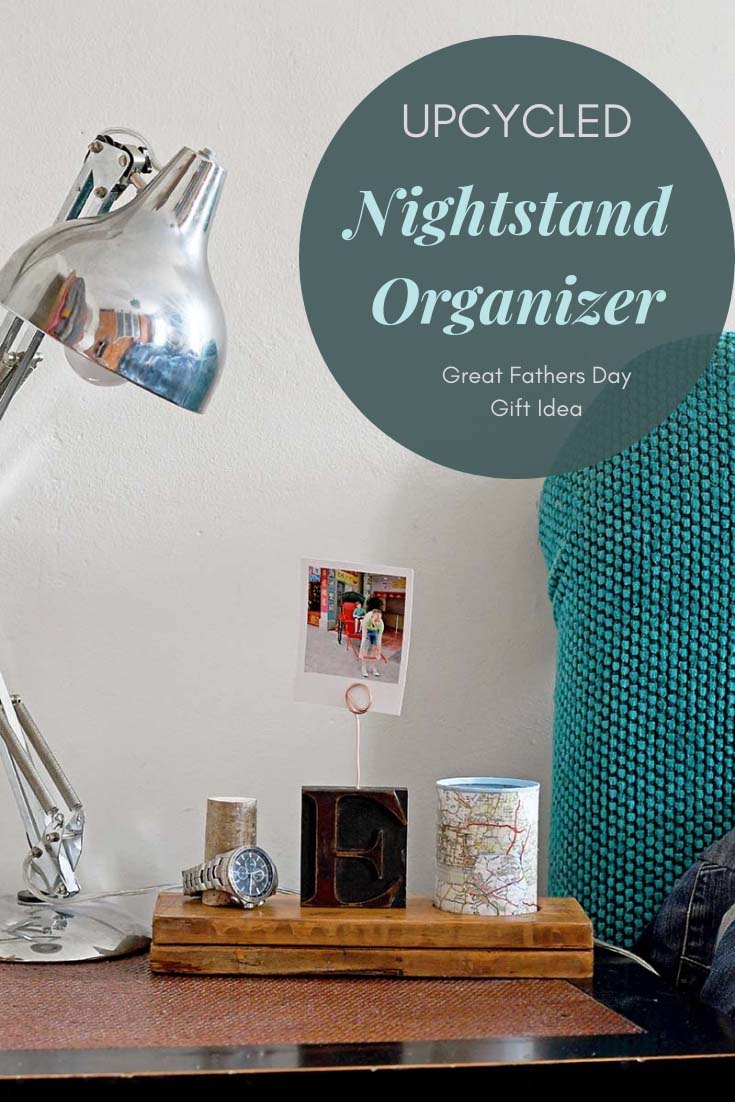
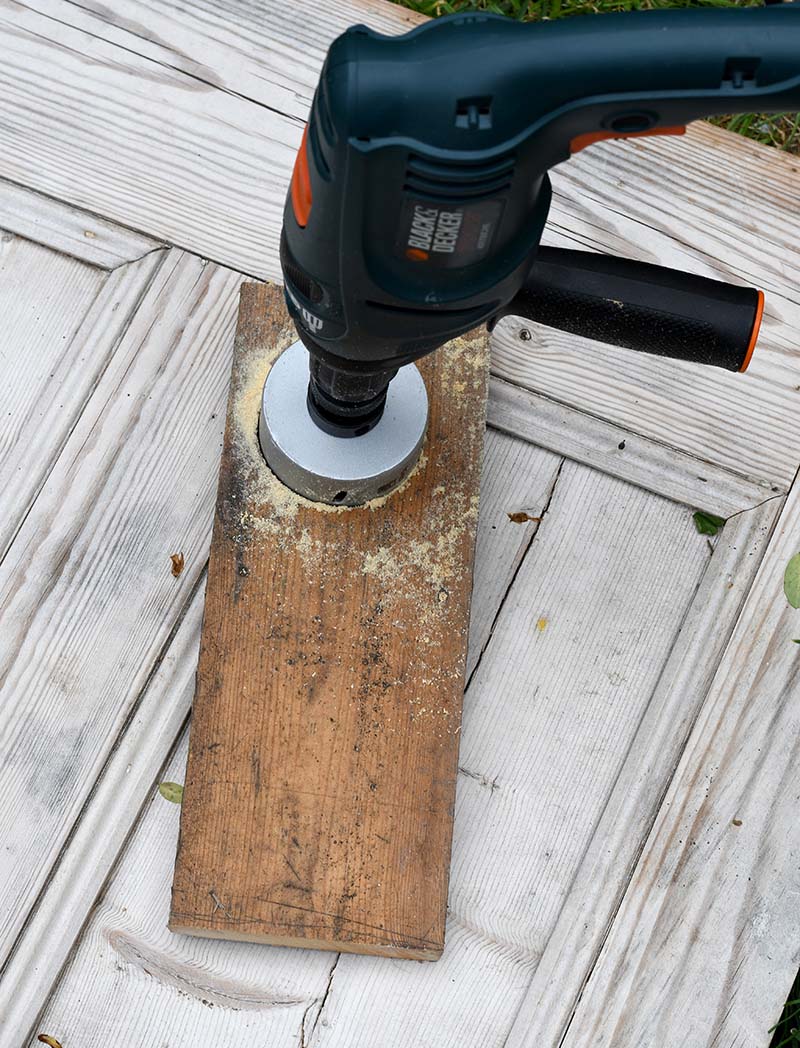
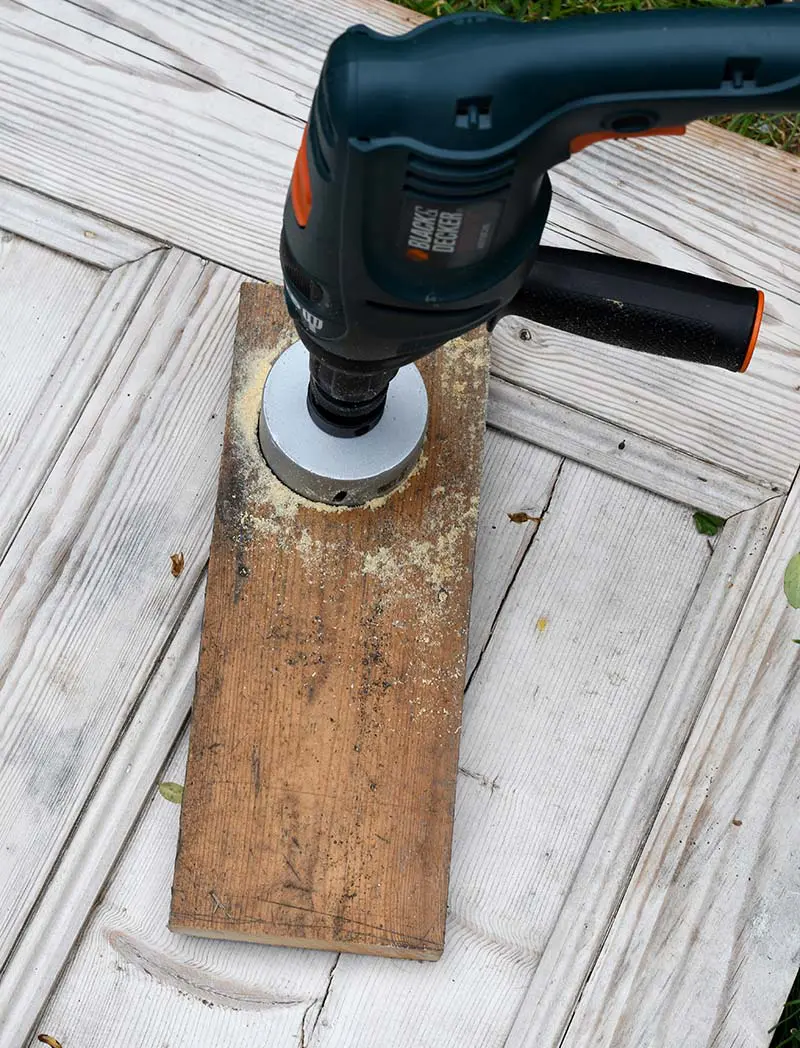
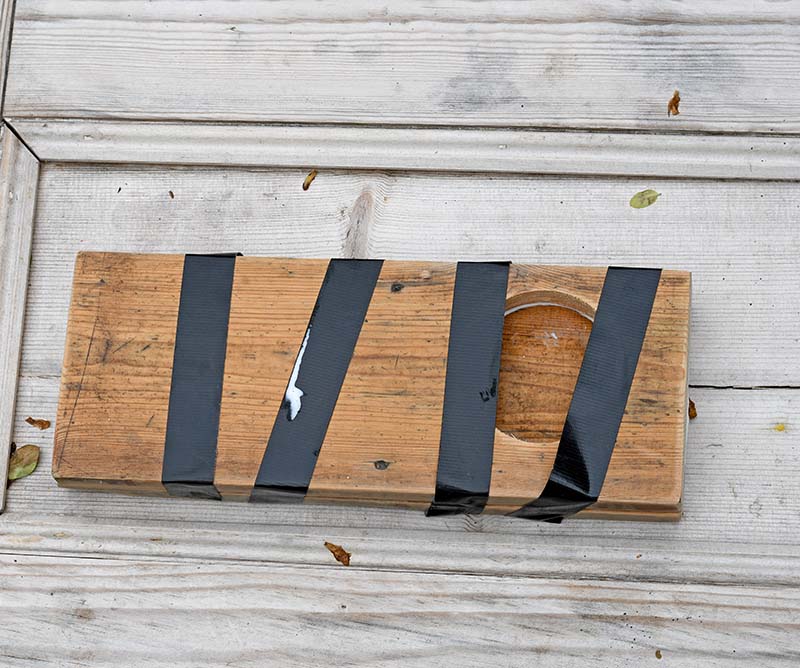
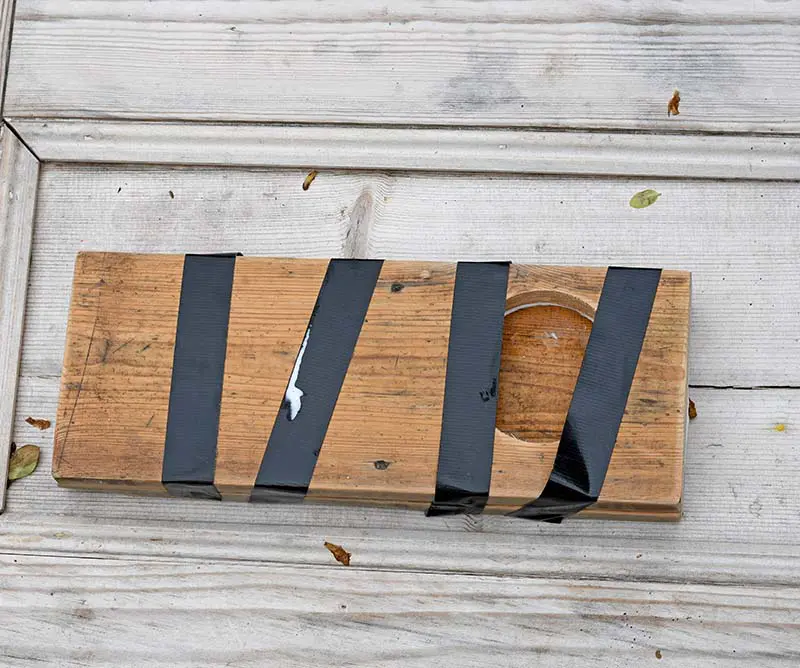
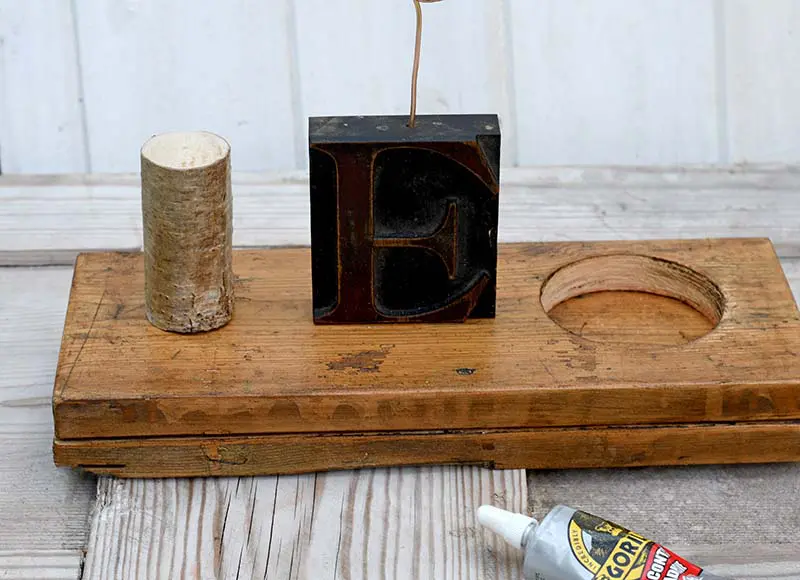
STEP 1: I made the base of the nightstand organizer fairly similar to the glass bud vase holder. I first made the holder for all three elements of the nightstand caddy (watch holder, photo holder, and coin pot). Using a drill saw, I cut a hole in one of the floorboard pieces wide enough to fit a tin can coin pot.
Step 2: Next, I glued the two pieces of wood together using wood glue and grip tape. I left this overnight, so the bond had plenty of time to dry. Once dried, I removed the gripper tape and sanded the wood.
When sanding, I paid particular attention to the corners and edges. I sanded them so that they were nice and curved and not sharp. Once sanded, I applied a dark wood wax to the nightstand organizer base.


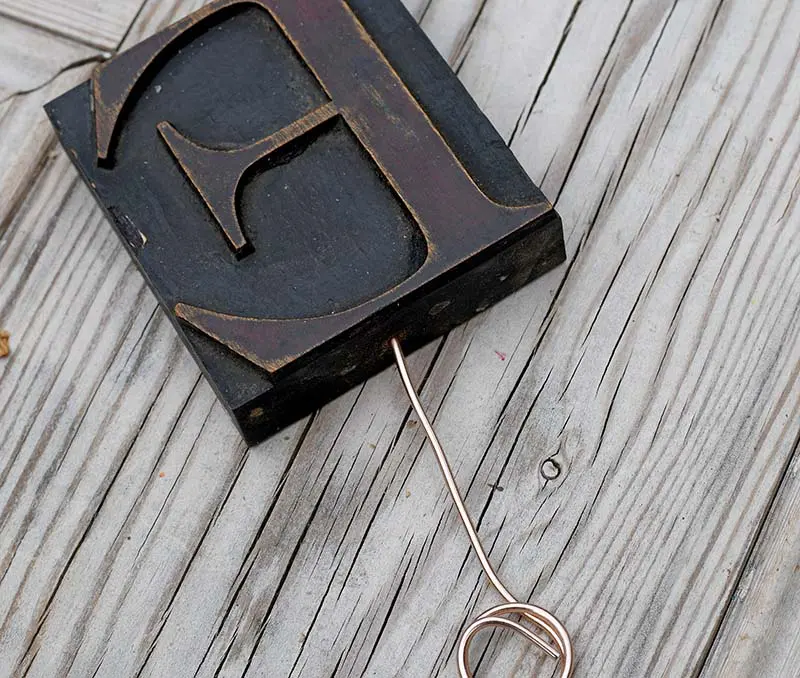
STEP 3: I turned the wooden letterpress block into a photo holder. Firstly, I made a small spring photo holder out of copper wire. I then drilled a small hole into the top of the wooden block. The end of the wire was then glued into this hole.

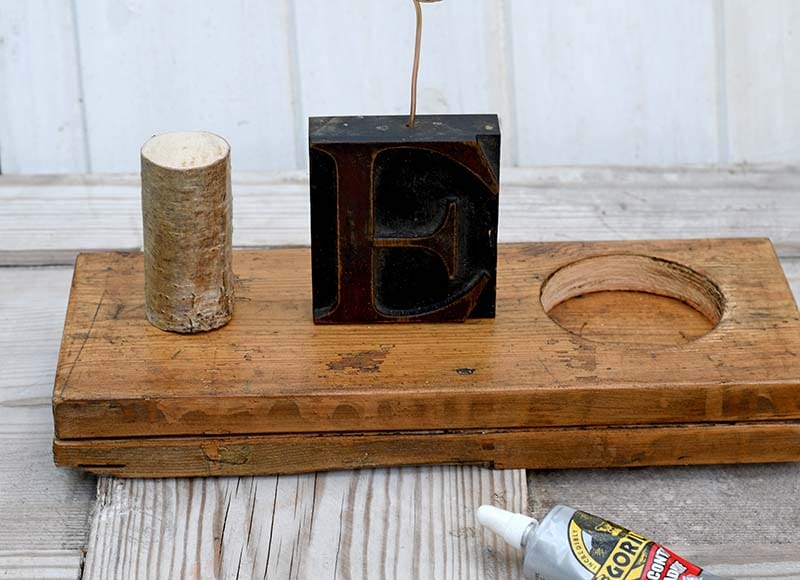
Step 4: This letterpress photo holder and the branch watch holder were glued to the nightstand caddy base. I used contact adhesive glue to do this.
How To Make The Map Coin Pot
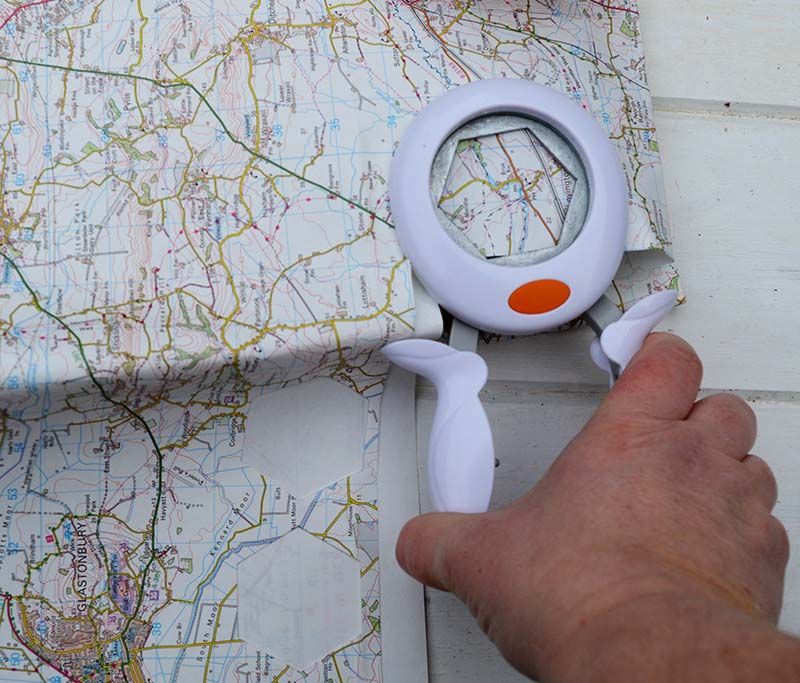
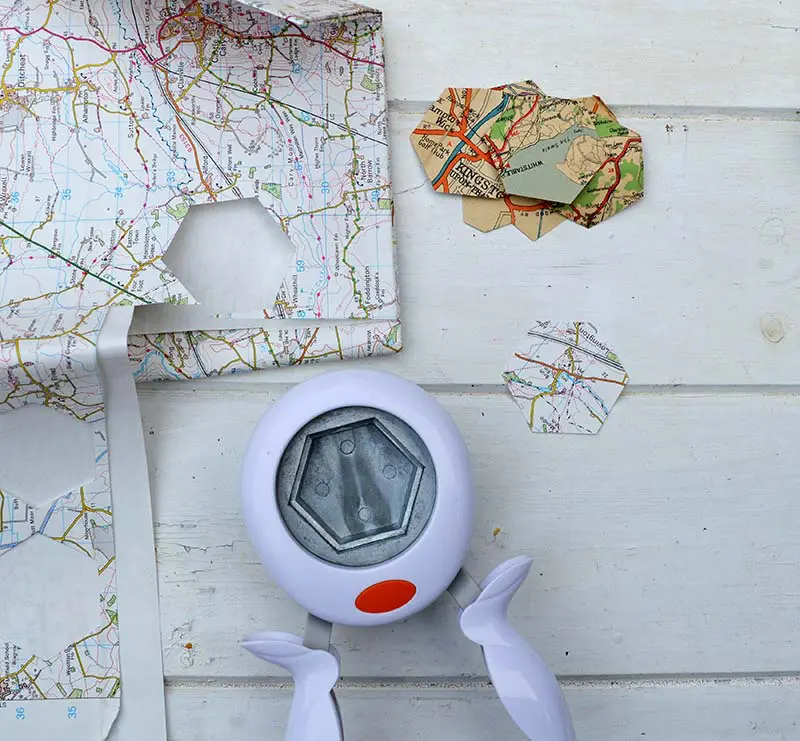
STEP 5: I used a tin can to make the map coin pot for the nightstand organizer. The first thing I did was spray paint the tin can inside and outside. Then, I cut out the shapes from the old maps using a hexagon paper punch.

STEP 6: I used hexagon map-shaped pieces because it was an excellent way to decoupage the tin can with various places from different maps. The map pot I made for Elliot had map snippets from lots of his favourite spots.
Each hexagon was decoupaged onto the tin can using Mod Podge. A layer of Mod Podge was then applied to the top of the maps as a sealer and varnish.

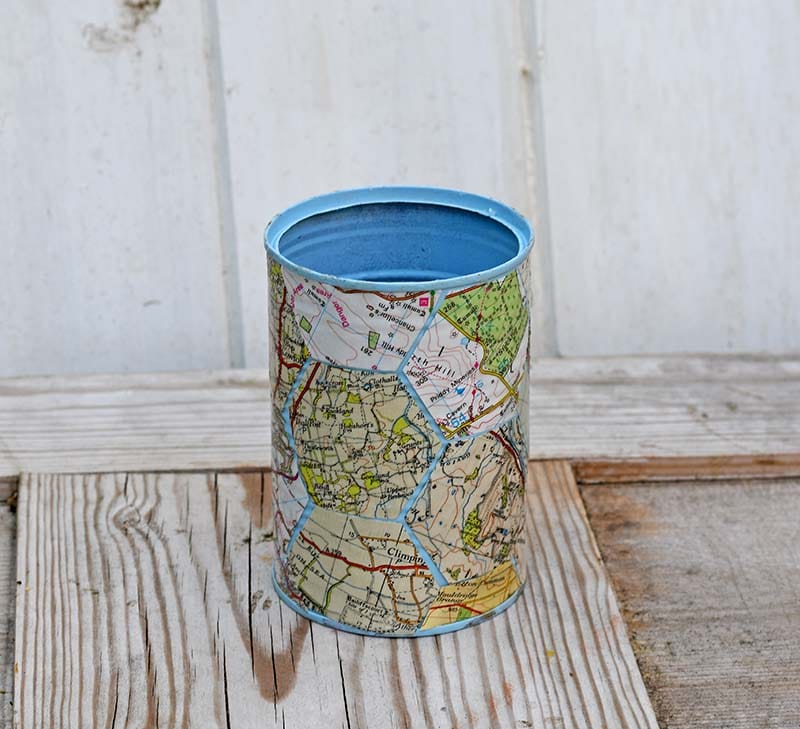

STEP 7: Finally, all left to do to complete this DIY Father’s day gift is to place the map tin can coin pot in the pre-cut hole in the base of the nightstand caddy. Then, choose a family picture for the photo holder.

I have many other ideas for upcycled Father’s Day gifts on Pillarboxblue. If you’re looking for more bedside organization ideas, there are the personalized map decoupaged glass tray or the unique map mason jar banks.
Maps also feature with my personalized map rock keychains or just some simple repurposed wood map ornaments.
If you are looking for something more challenging that would look great in a den, there is a DIY personalized nifty denim ottoman or even a denim world map floor cushion. A custom DIY lightbox sign would also look great in the den.
Younger kids could make their dad a simple but fun lego Minifigure photo frame. There are many more map-themed gift ideas here.
I have since made my son some craft beer candles, which he loves!
For more woodworking project ideas, visit DIYideacenter.com.
Maria
Wednesday 27th of May 2020
Looks great l love that it’s functional
Claire Armstrong
Wednesday 27th of May 2020
Thank you, my son loves it and uses it every night.
Kim @Serving Up Southern
Wednesday 22nd of May 2019
Hi Claire! I'm stopping back by to let you know that you're one of my features this week at Homestyle Gathering! Thanks for joining in and linking up at HG!
Claire Armstrong
Wednesday 22nd of May 2019
Thank you so much, that’s awesome.
Ann
Tuesday 21st of May 2019
Great project! I'm sure any Dad would love this. You are being featured on my blog tonight. Thank you for sharing at Party In Your PJs!
Claire Armstrong
Wednesday 22nd of May 2019
Thank you so much ?
Homestyle Gathering 19 | Your Homekeeping Destination - my wee abode
Tuesday 21st of May 2019
[…] from Pillar Box Blue recently shared this DIY nightstand caddy. She shares a great tutorial on how you can make one […]
Amber
Monday 20th of May 2019
This is so creative! I featured this post at TFT this week: https://followtheyellowbrickhome.com/inspiring-diys-how-tos-and-makeovers-at-tft/
Hope to see you again at the party on Thursday. Have a great week ahead!
Claire Armstrong
Monday 20th of May 2019
Thank you so much I look forward to seeing it.