
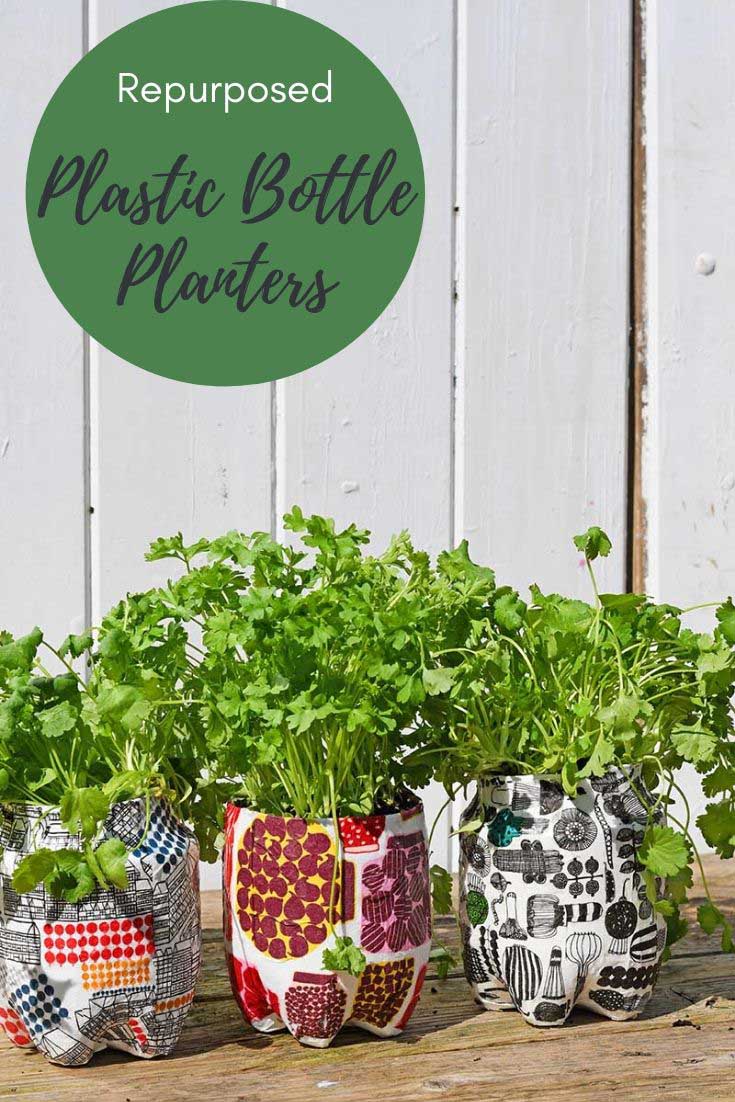
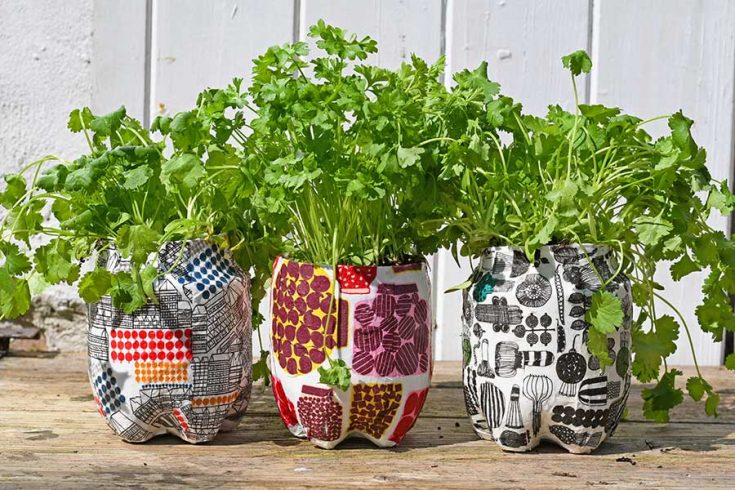
How To Make Cool Marimekko Plastic Bottle Planters
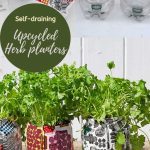
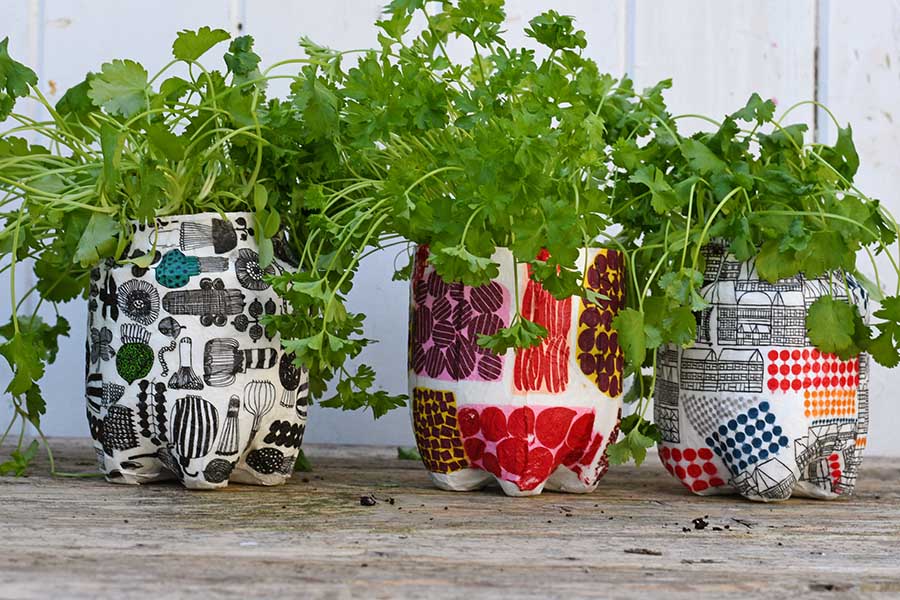
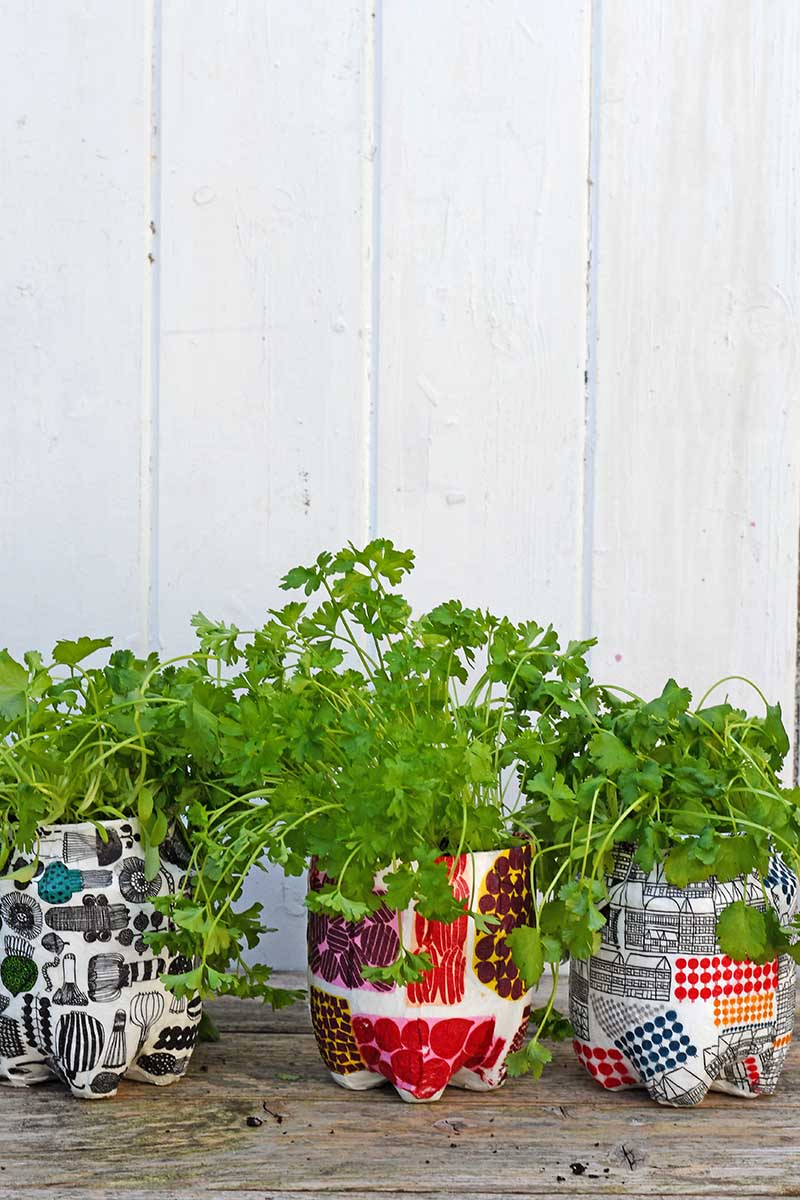
Not only do these upcycled plastic bottle planters look cool with their Marimekko patterns, but they are self-draining planters.
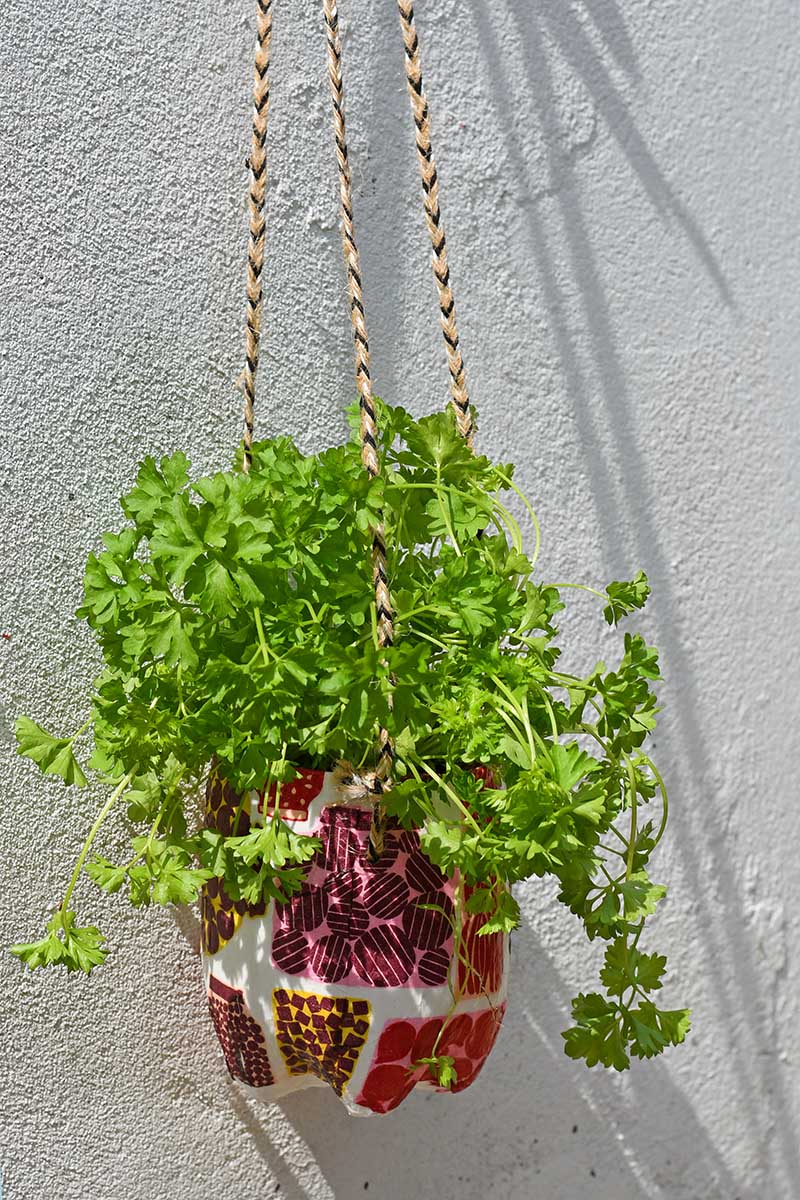
I use these planters in the kitchen as herb gardens. Because of their clever drainage system, the herbs last longer than in other planters as there is less risk of over or underwatering them.
Marimekko Planters
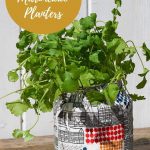
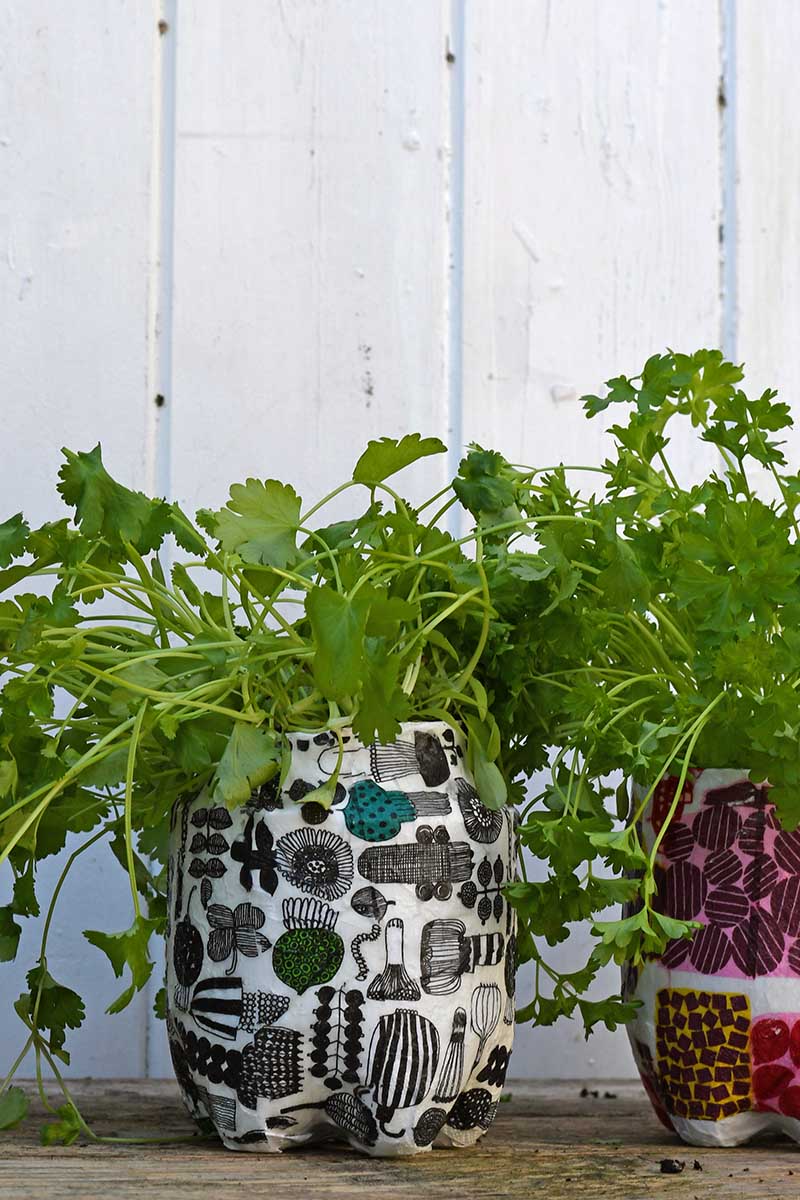
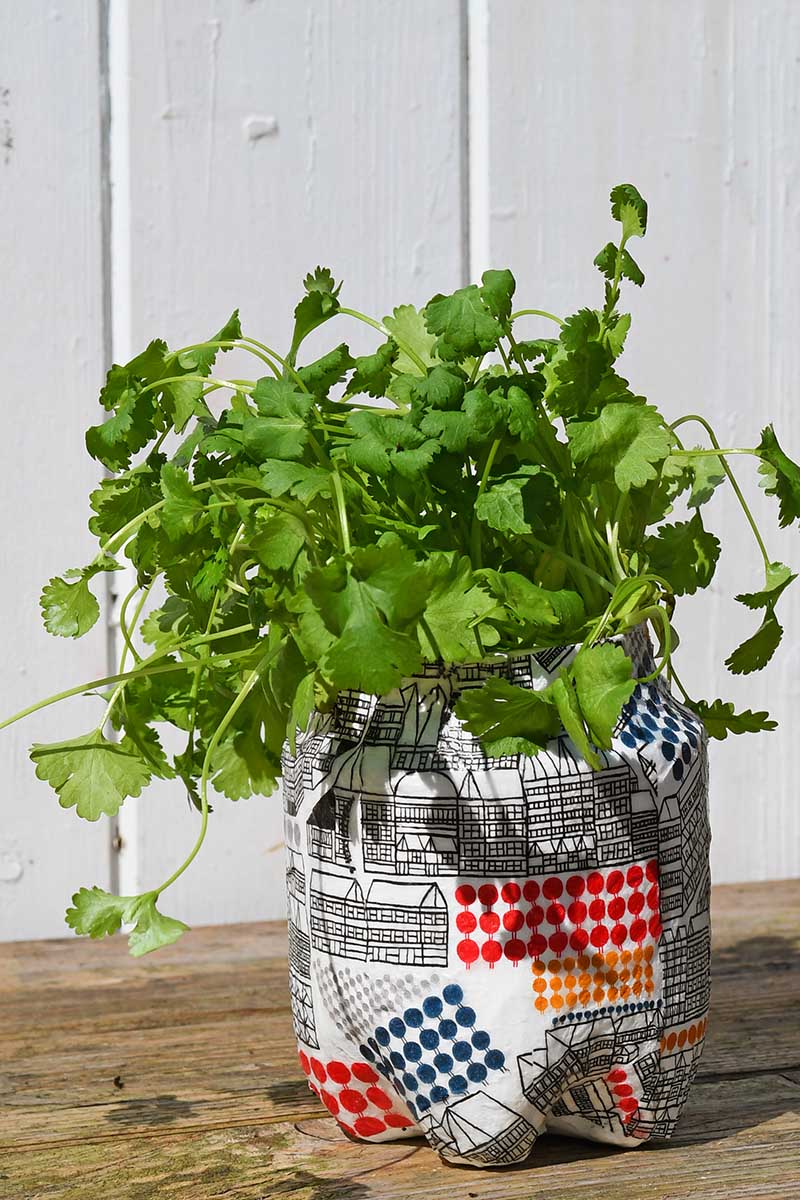
The upcycled plastic bottle planters have been decoupaged with Marimekko napkins to give them a cool, contemporary look.
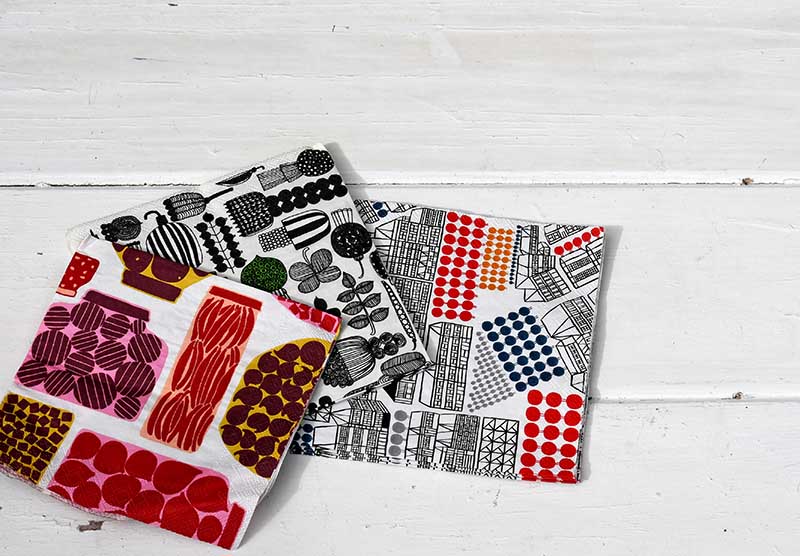
I'm a huge fan of Marimekko designs and have used their napkins in many of my upcycles. Including the very colourful Marimekko decorative tin can planters in my garden and even my upcycled garden bench.
I've used these repurposed plastic bottle planters as a herb garden for my kitchen window. They could be used as repurposed succulent planters or even for flowering plants.
This is a fun, affordable upcycle craft with stuff you will likely have at home, such as plastic bottles and newspapers.
I've used Marimekko paper napkins because I love their designs and have a huge stash of their napkins at home. Every time I visit an interior or kitchen store, and they have a collection of Marimekko paper napkins, I can't stop myself from buying a packet.
Any other paper napkins can be used, or if you don't have any, then paint the plastic bottle planters.
We're a participant in the Amazon Services LLC Associates Program, an affiliate advertising program designed to provide a means for us to earn fees by linking to Amazon.com and affiliated sites. As an Amazon Associate, I earn from qualifying purchases.
What You Need For Plastic Bottle Planters
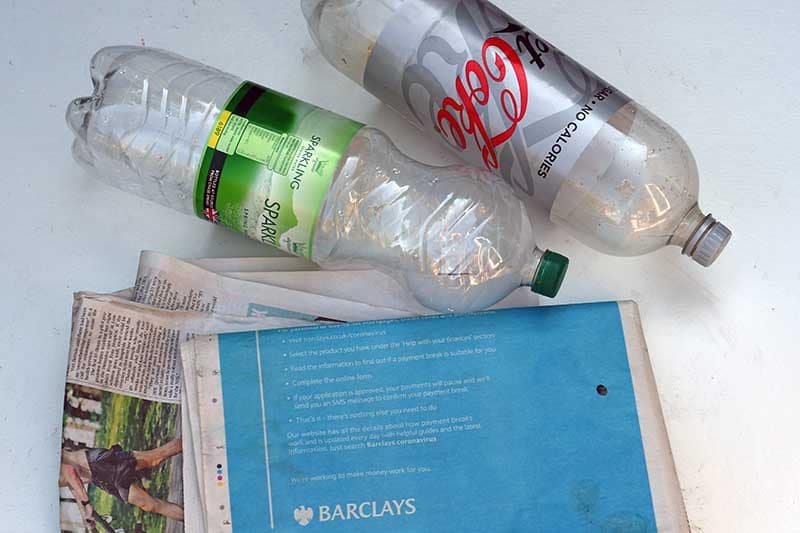
- Empty soda bottles - large 1.5 - 2-litre plastic bottles
- Newspaper for the paper mache
- Flour or glue for paper mache
- White paint
- Marimekko paper napkins
- Mod Podge decoupage glue
How To Make The Upcycled Plastic Bottle Planters
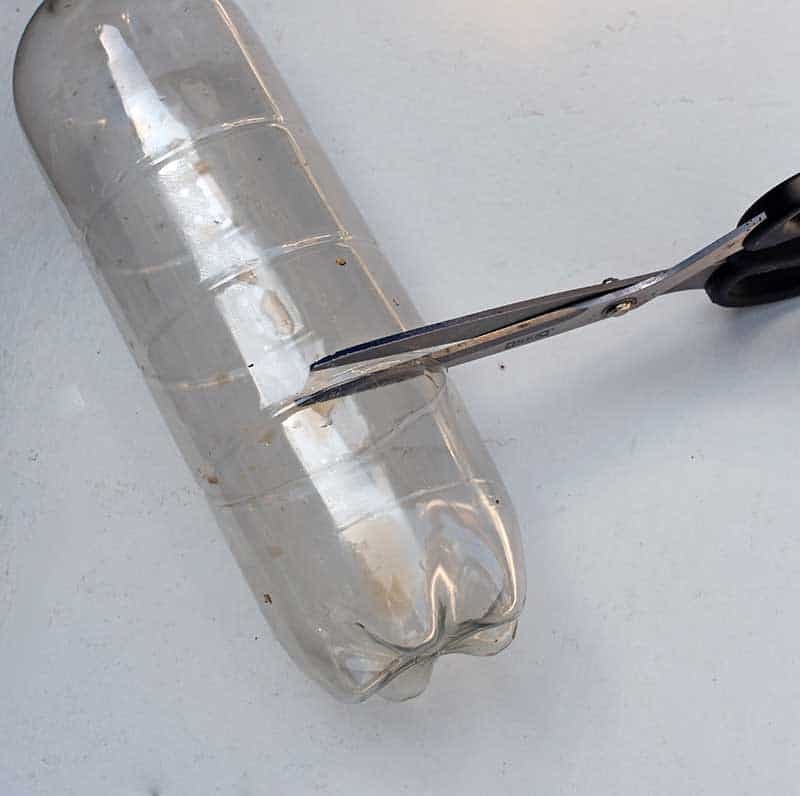
Step 1: The first thing to do is to cut the plastic soda bottles into three roughly equal parts. This is easily done with either a pair of scissors or a knife.

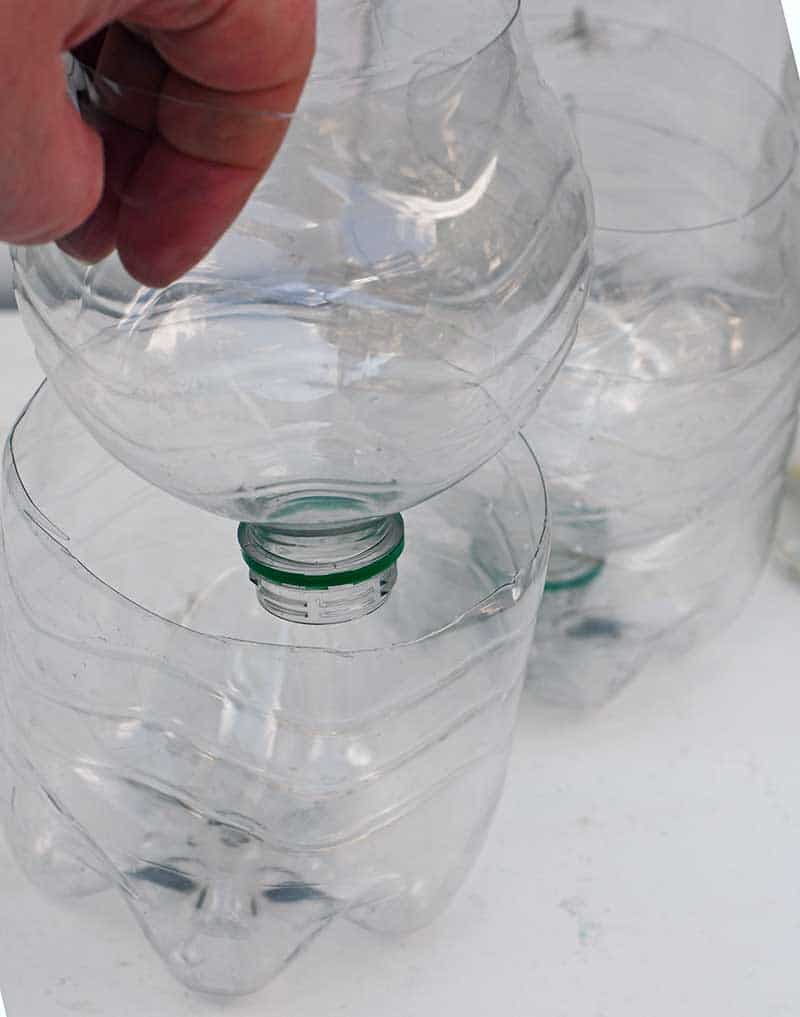
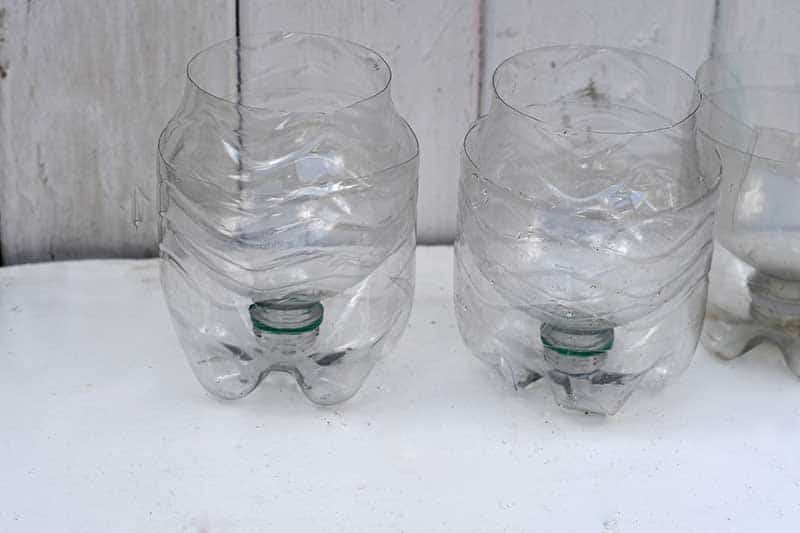
Step 2: Next is the clever bit of these planters, which makes them draining planters. First, discard the middle bit of the cut plastic bottle. (If you used a green bottle, you could use the middle bit to make plastic faux succulents).
Then, remove the lid from the top of the bottle and place it upside down inside the bottom part of the bottle.
This feature will allow any excess water to drain away while providing a reservoir for the plant's needs.
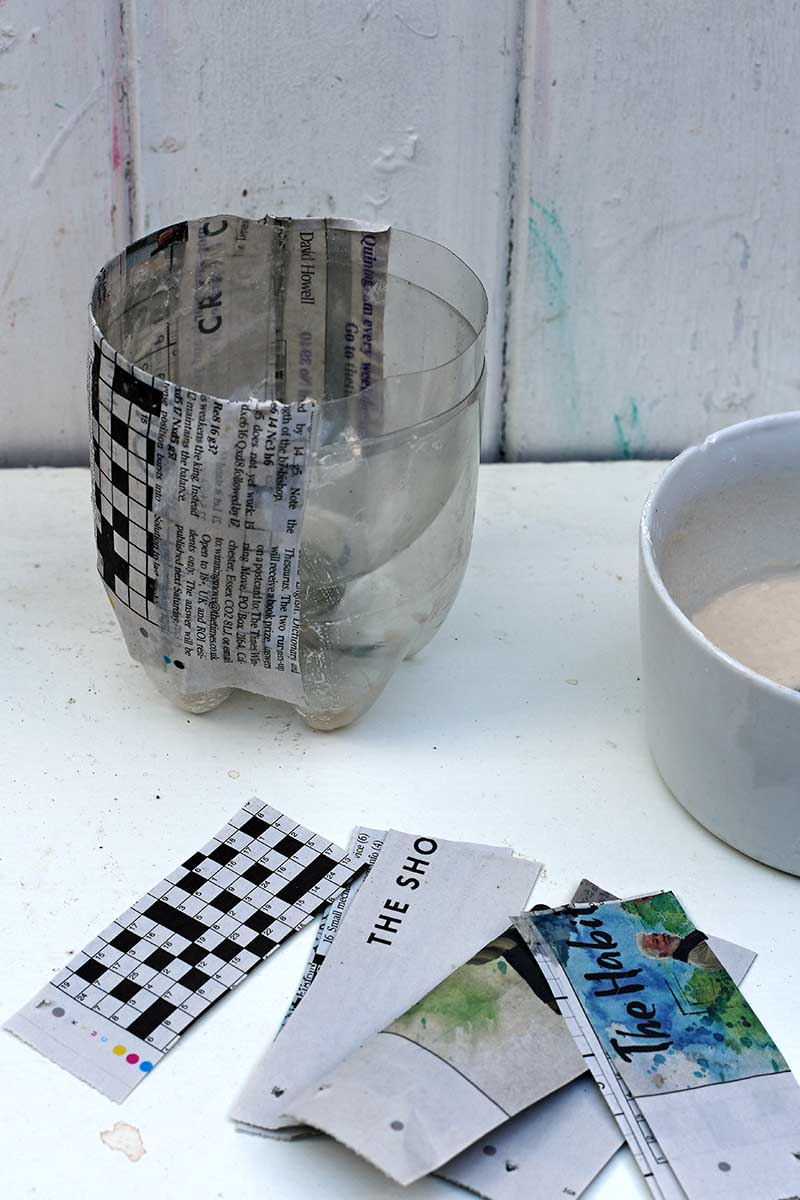
Step 3: Next, paper mache the plastic bottle planters. Cut up newspaper strips and glue them to the bottles using a flour and water mixture as glue. The flour and water mixture should be the consistency of cream.
The bottle planters were covered in two layers of paper mache.
Top tip: You can use glue with the paper mache as I did with my giant paper mache cactus. But I find that with the flour mixture, my fingers get less sticky, so the craft is less messy.
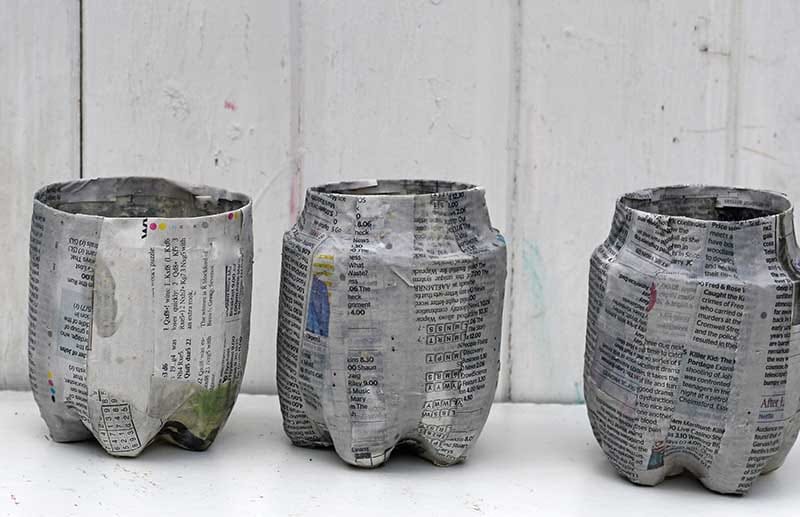
Step 4: Paint the planters white once the paper mache has dried. This will make sure the newspaper print doesn't show through the decoupage.

The Marimekko Decoupage
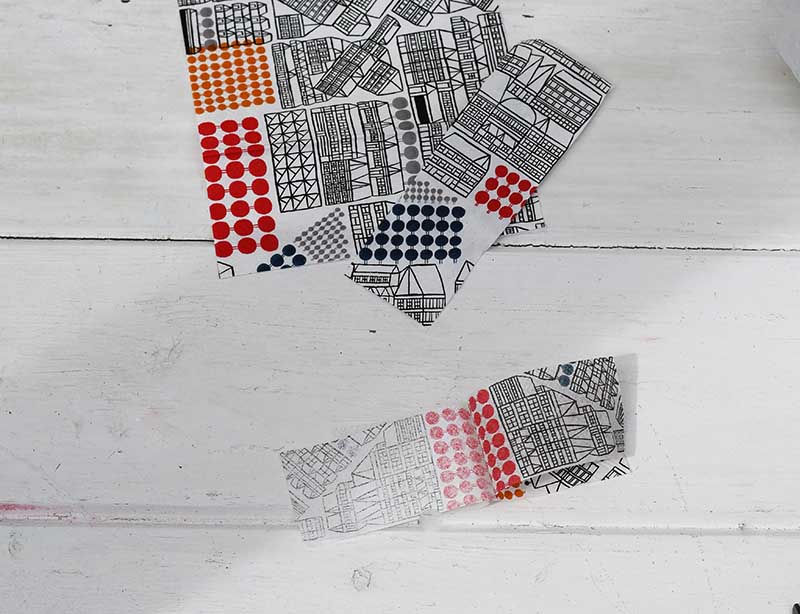
Step 5: Next, decoupage the plastic bottle planters with the Marimekko paper napkins. As the planters are round, it is best to cut the napkins into strips of about 1" (just like with my map mason jar banks).
The napkins are three-ply; you only need to use the top ply. So carefully separate the full printed ply from the others.
Top Tip: Separating the layers of the napkin can be tricky. Folding the napkin in a corner and gently rubbing it between your thumb and forefinger should help loosen the ply layers.
Step 6: Cover the planter in Mod Podge before adding the strips of printed napkins. The single-ply napkin is delicate, so gently dab it in place on the bottle with a foam brush.
Keep on adding the paper napkin strips until the whole planter is covered.
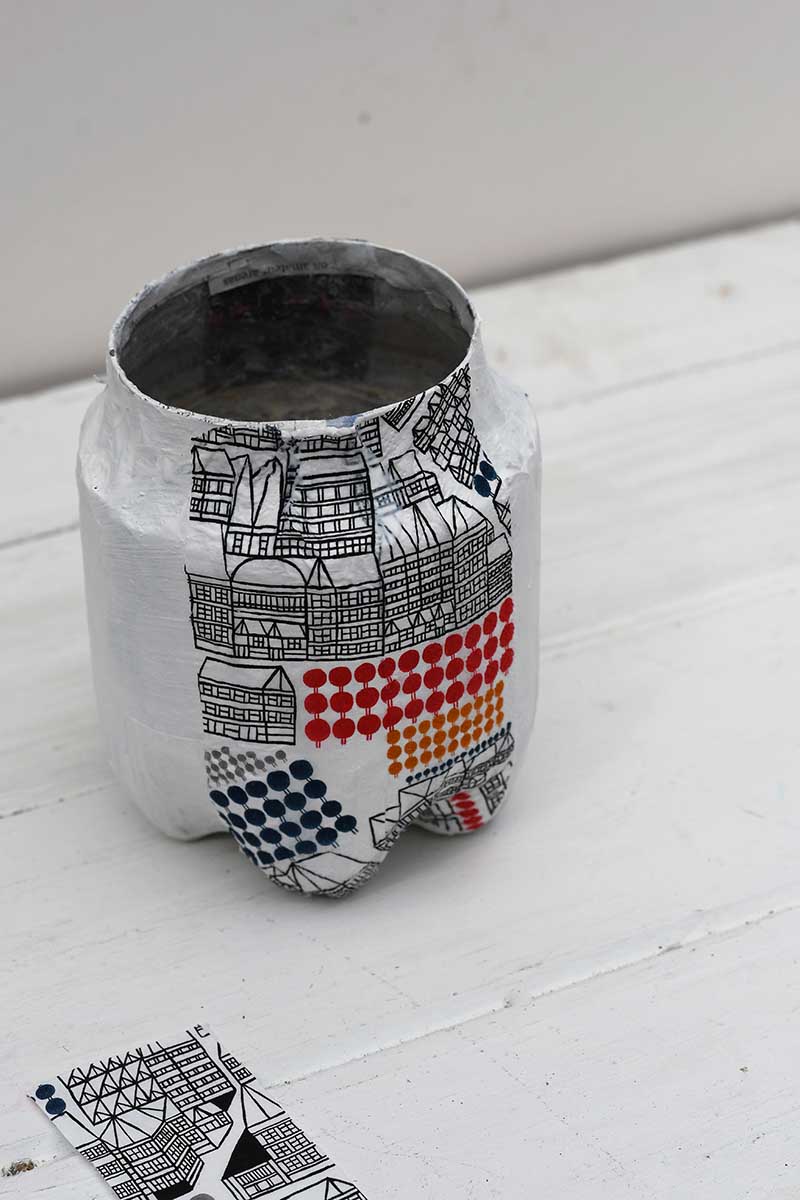
Step 7: Once the whole planter is covered in paper napkins and the glue has dried. Apply a layer of Mod Podge over the top of the napkins; this will act as a protective varnish.
Applying the Mod Podge will look milky, but don't worry; the glue dries clear.
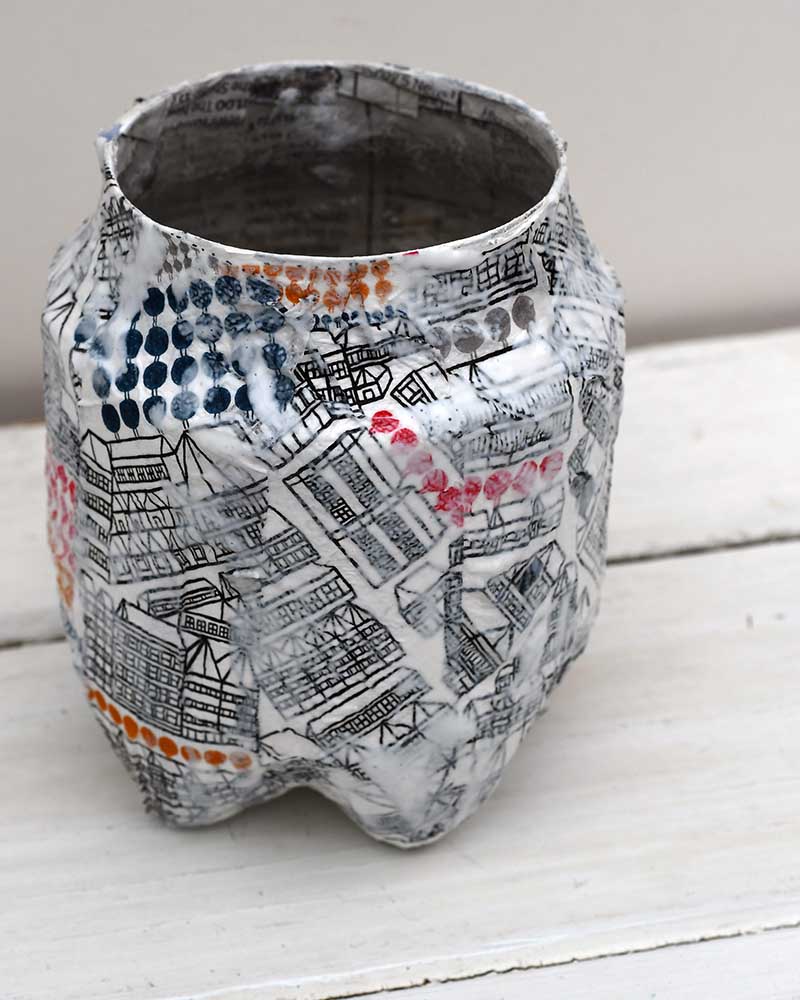
Step 8: Now, all left to do is add plants. I planted herbs in my upcycled Marimekko bottle garden. They sit on the window sill in my kitchen, ready for use.
It is very easy to turn these repurposed bottle planters into hanging planters. Make a recycled plant hanger for them, or punch three holes in the sides and use twine to hang them.
Other Upcycled Planter Ideas
I have a load of tin can planter ideas if you want more upcycled ideas. Check out these hanging denim indoor herb gardens or my outdoor upcycled window herb planter for DIY herb gardens.
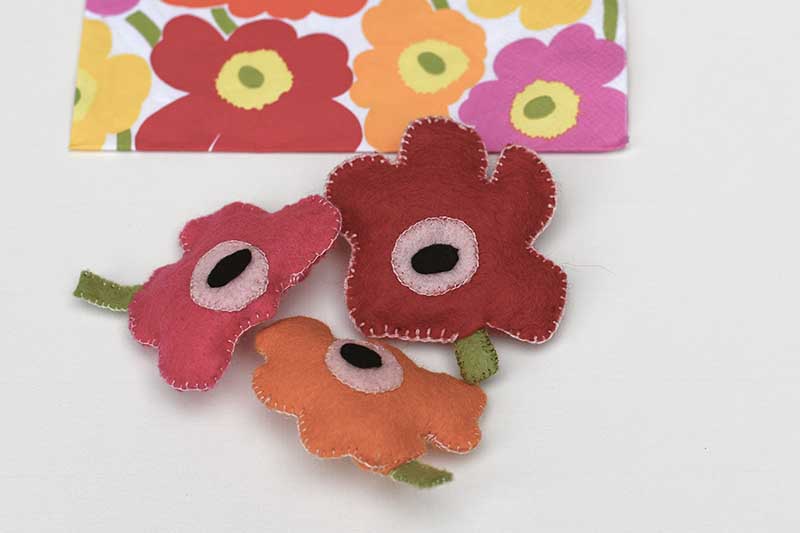
Any leftover paper napkins can be used to make other crafts, even fun stuff like cool Marimekko decoupage shoes or fabulous decoupage craft ideas. The napkins would also be great for decorating these paper mache teacups.
Marimekko Plastic Bottle Planters
Brighten up your kitchen with these Marimekko designer herb planters made from repurposed plastic bottles. These aren't ordinary planters they have a clever self-draining water system to help keep your herbs healthy.
Materials
- Large soda bottle
- Newspaper
- Marimekko paper napkins
- Mod Podge
- Flour
Tools
- Scissors
- Foam brush
Instructions
- Cut the soda bottles into three equal parts and discard the middle plastic.
- Next, remove the lid from the top of the bottle and place it inside the bottom of the plastic bottle.
- Paper mache the outside of the plastic bottle planter with 2 layers of newspaper. Use a mixture of flour and water to stick the paper to the bottle.
- Paint the paper mache bottles white.
- Cut the Marimekko napkin into 1" strips and remove the printed top ply of the napkins.
- Decoupage the strips of napkin onto the painted bottle. Use Mod Podge to stick them down one at a time until the whole planter is covered.
- Apply a layer of Mod Podge to the outside of the planters to act as a protective varnish.
- Fill the planters with soil and herbs or other plants such as succulents.
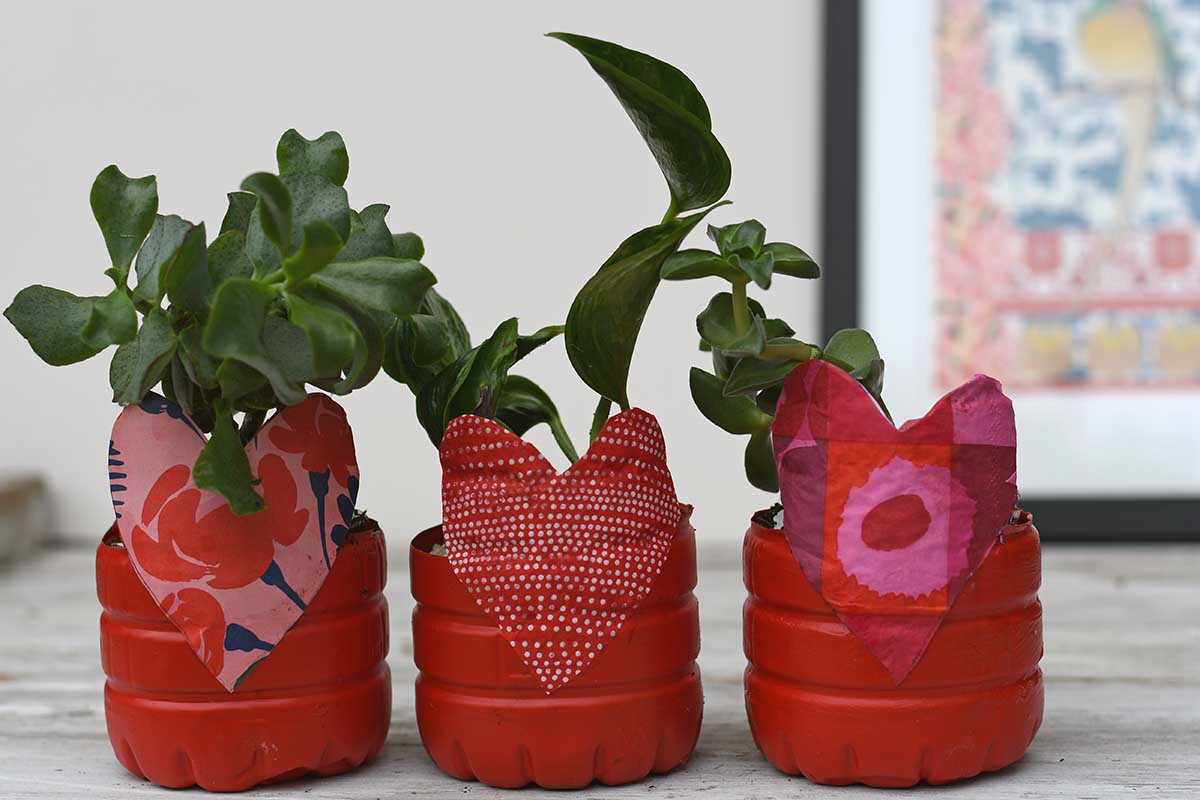
You should check out these Marimekko Valentine planters, which are also made from plastic bottles.
I'm always looking for things to upcycle into planters, and recently, I have even managed to make some excellent plant pot covers out of old maps. Check out these other fabulous adult spring craft ideas.
SO inventive! And the results are so effective! Love the whole Marimekko thing and I can't wait to try this one out at home.
Thank you, I'm a huge Marimekko fan.
Wow, what a great idea. Just bought a restored Victorian and needed a cheap solution for my plants that I could customize and didn't look like it came from Dollar tree
Yes, they are very easy to make and you can use any design you want to create a specific look.
I love, love, love these planters! They are absolutely darling -- and so clever! (But then everything that you make seems to be so darling and clever!)
I'm going to feature this at my link party at Grandma Ideas http://grandmaideas.com that starts tonight. Thanks so much for sharing your wonderful ideas!
Thank you so much, that is very kind of you to say so. I look forward to seeing them.
I love the way you used decoupage and paper mache to upcycle those bottles! My husband would probably love it if I created more economical projects like that! You're one of my features this morning on Little Cottage Link party #54! https://lovemylittlecottage.com/little-cottage-link-party-54/
Thank you so much Kristie, I look forward to seeing the feature.
Brilliant! Wow, so much fun and love the self draining/watering feature. I would worry that there is too much water stuck in the bottom though, any thoughts on that? I guess you really need to know exactly how much to water? thanks so much for sharing on craft schooling Sunday!
I always check how damp the soil is before watering. The reservoir is designed to catch any small extra overwatering. Thank you!
what a great idea to teach recycling as well as an art project for the kids thanks for sharing
come see us at http://shopannies.blogspot.com
Thank you, I'm glad you enjoyed it.
So clever and perfect timing! I ran out of pots for my tomato plants on the deck so want to try this with an empty gallon milk jug. If the jug is already white can I skip the newspaper step or does that help the napkin adhere better? Thanks!!
Thanks Bridget. I think the milk jugs would work well, you can skip the newspaper step if you want to.
I loved your idea, its amazing. I just have a doubt that while watering coriander plants do that paper will not come out? Can you please tell, I really want to make this to decor my small garden
Thank you, if you coat the pots with a protective varnish then that should protect them from water splashes.
LOVE these clever recycled plastic bottle planters, especially with the pretty Marimekko patterns! Pinned
Thank you, I do love my Marimekko prints.